3D scanning.
this week assignements are:
- Test the design rules for your printer(s) (group project)
- Design and 3D print an object (small, few cm) that could not be made subtractively
- 3D scan an object (and optionally print it)
design a object
For this week assignment, we had to design a small object,
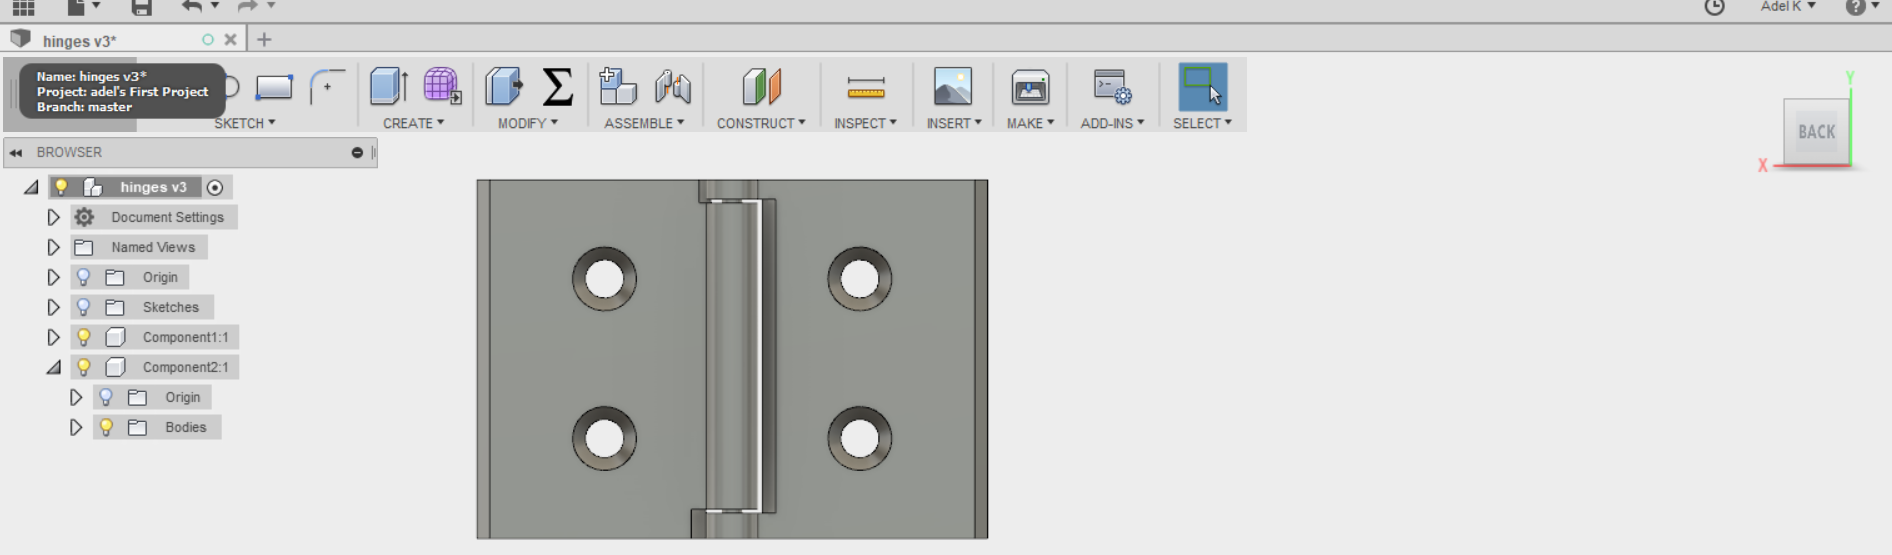
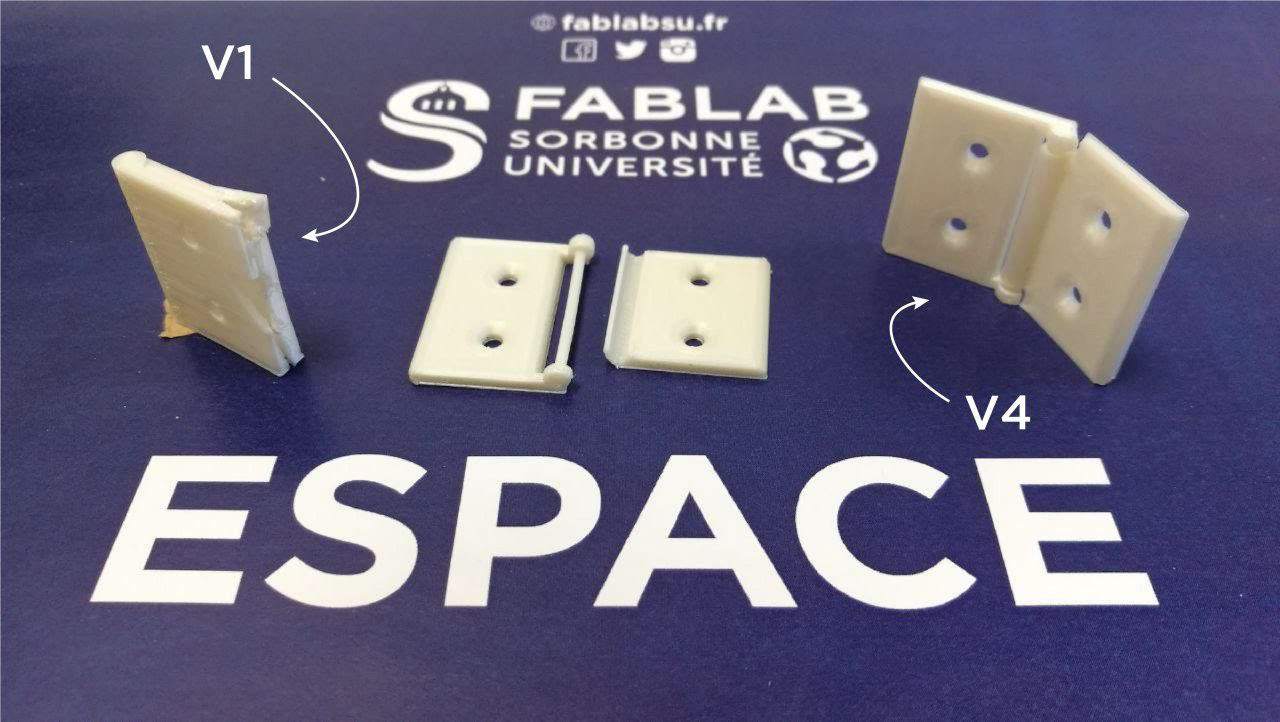
it'a good thing that in my final project i have to make some hinges, for beeing able to close and open the blinder.
so i decide to make them in one print, and learn how to make moving part in one print.
Pretty interessting thing to do. The first thing was to know what is the clearance i need between the two piece. for that the Group project made us clear about what are the value. after knowing that i decide to go on fusion and start modelisation for making the hinge. SO i started by designed some 2D view, really easily. with the dimension i had in mind
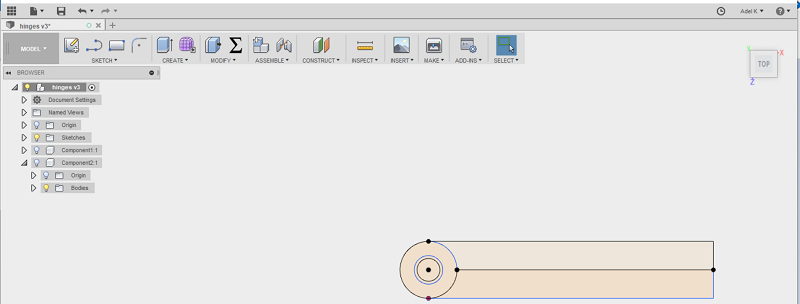 after that i extrude everything and see if it was working.
Workflow
The workflow for using a 3Dprinter is pretty simple, First you take you file from your favorite 3D design software
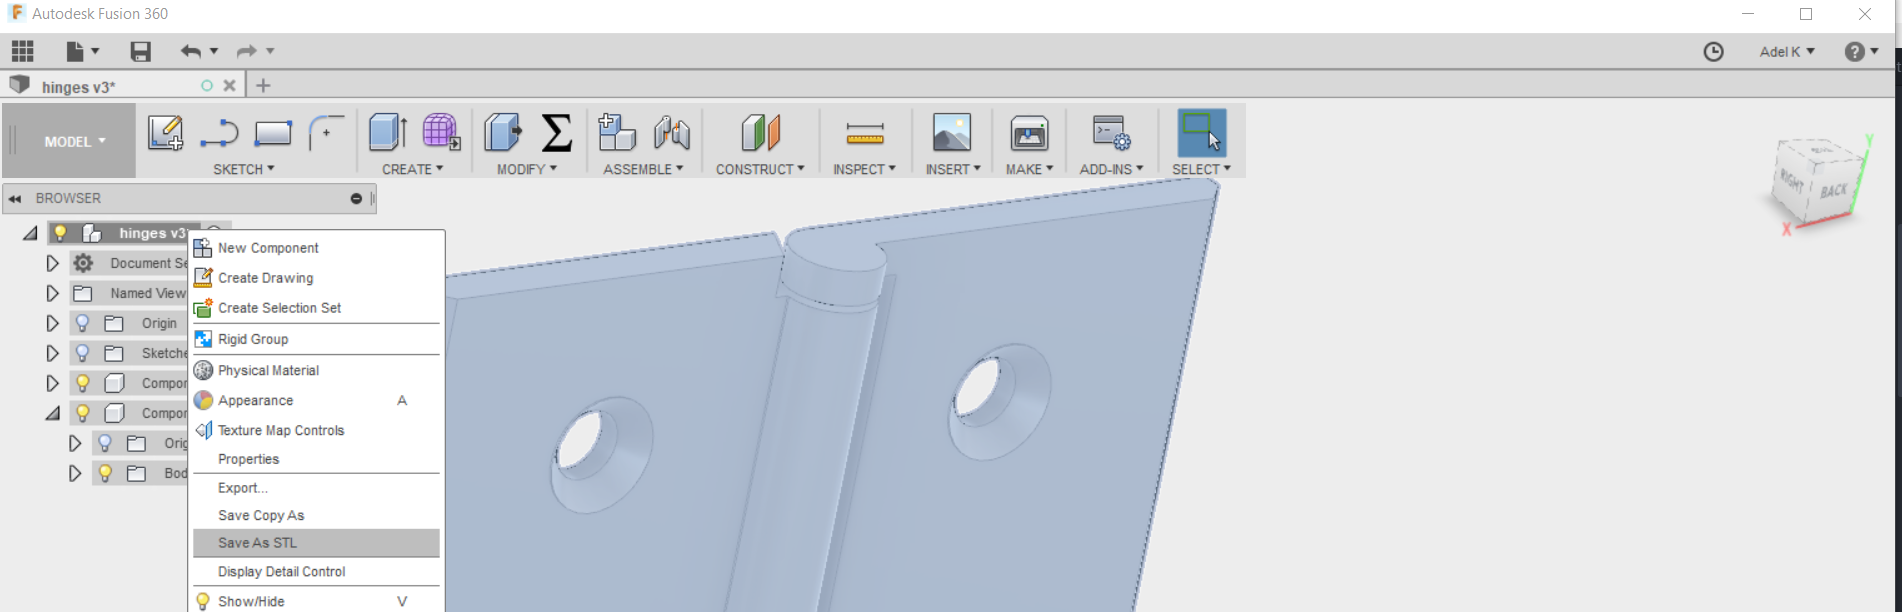 then you export a .STL (stereolithography) file, this step transform your complex file with lot of data on a polygonal face file who can be read by any software you have
the second step is to open to
>
then you export a .STL (stereolithography) file, this step transform your complex file with lot of data on a polygonal face file who can be read by any software you have
the second step is to open to
>transform this file on GCODE
The Gcode is command line for 3D printers, when we are talking about making gcode the commons used is talke about slicing the object.Here in sorbonne university we a using the ultimaker 3 so the Software for Slicing our STL file is Cura.
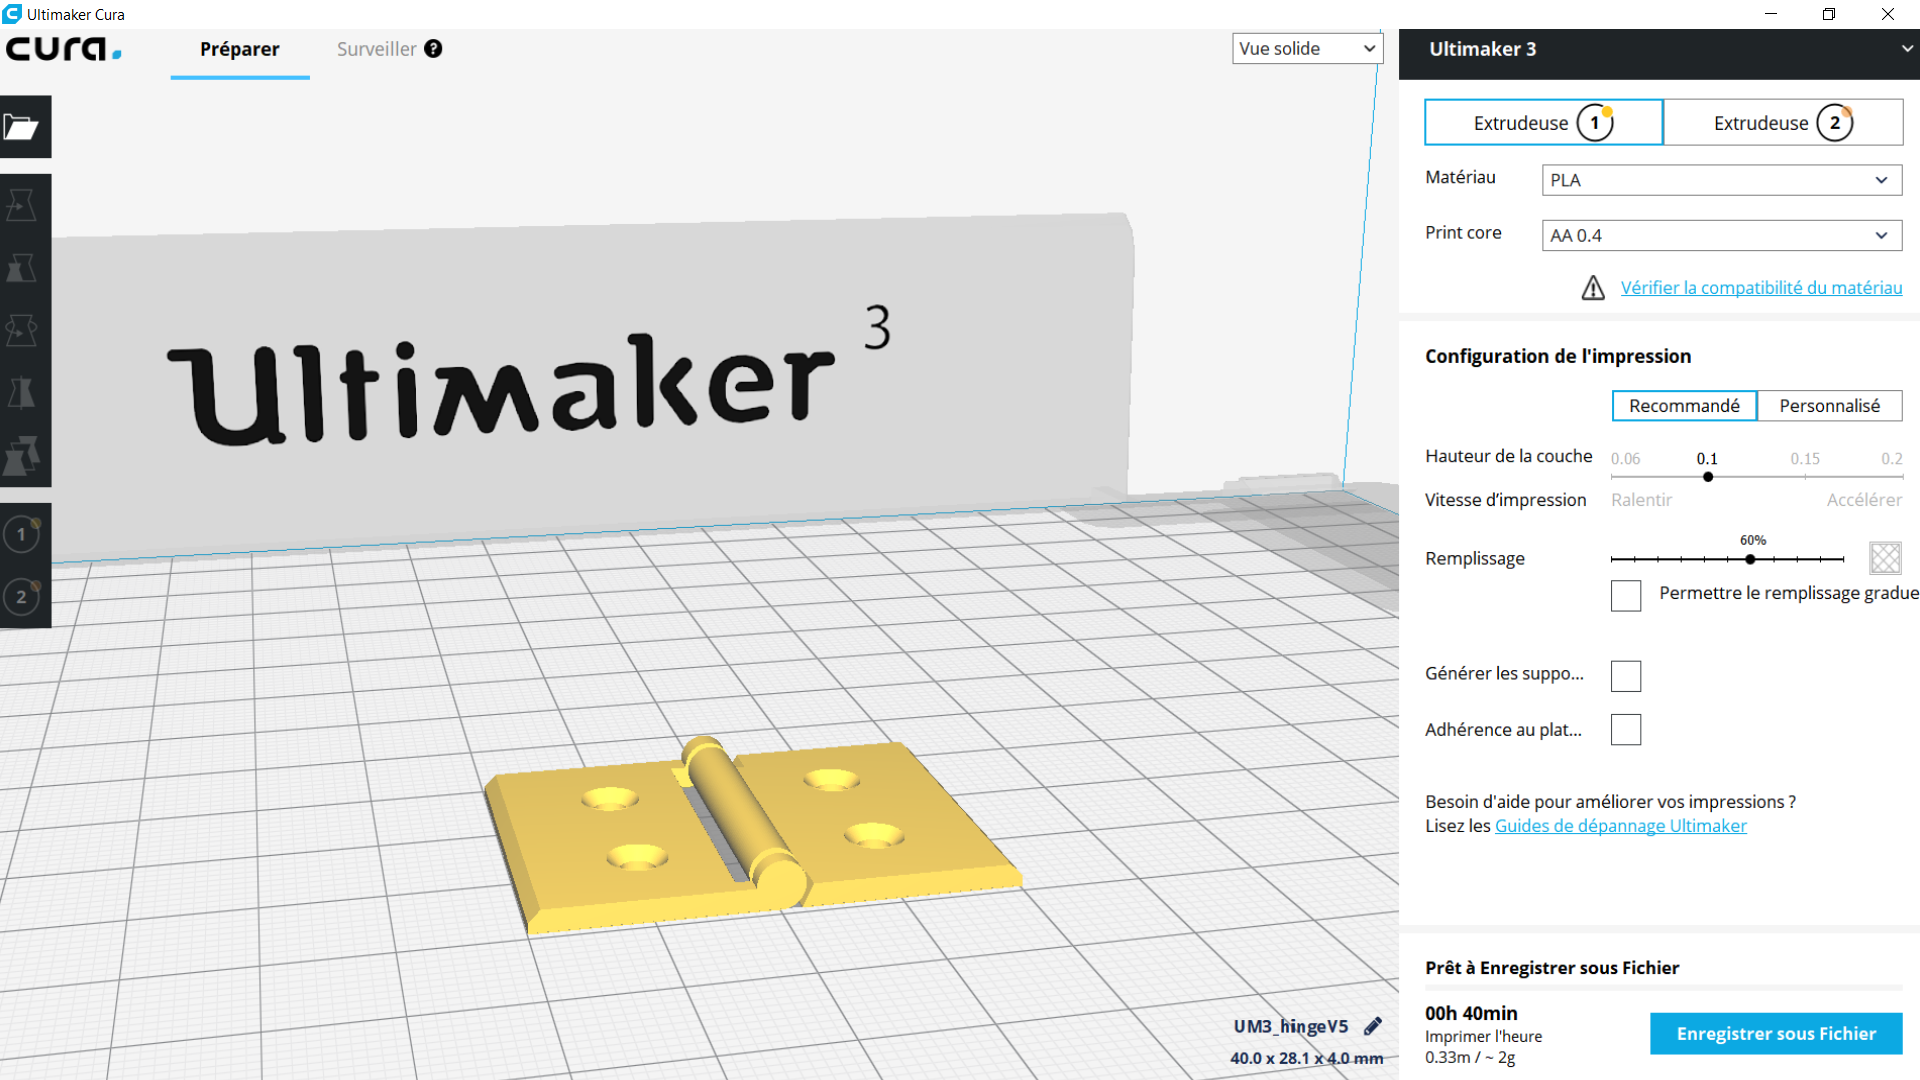 Cura. is a great and an easy software to use, and pretty complete too. it's open source so you can use it with other 3Dprinter if you want to.
In cura you have to give to the printer some basic value for starting:
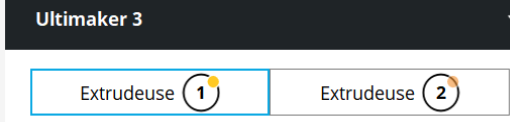
With our ULTIMAKER 3 we having two extruder, so the first thing to do is choose witch one we want to use.
Cura. is a great and an easy software to use, and pretty complete too. it's open source so you can use it with other 3Dprinter if you want to.
In cura you have to give to the printer some basic value for starting:
With our ULTIMAKER 3 we having two extruder, so the first thing to do is choose witch one we want to use.
 Then we have to choose the material we want to use.
Commons material
PLA & ABS are the commons materials we use on fablabs, it's pretty standard and easy to use. they have different propreties, but PLA is more easy to print, you have almost any warping probleme with PLA (not the case with ABS)
Layer height
the third parameter is the height of every layer. More the layer is heigh, more the extruder will push material from the buse. quicker the print will finish, but the downside is: less finish your print will look.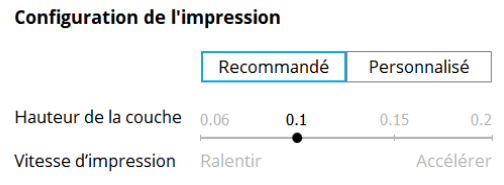
Infill
The fourth parameter is the Infill, More the percentage of infill is high more solid your print will be. but two downside. the print will be longer to print. and the warping effect have more chance to happen.
Support & brim
When you printing something with FDM machine you need to keep in mind that some print need to have support if they at more than 45 degres angle. ONE of the best documentation on 3D printing is 3Dhubs website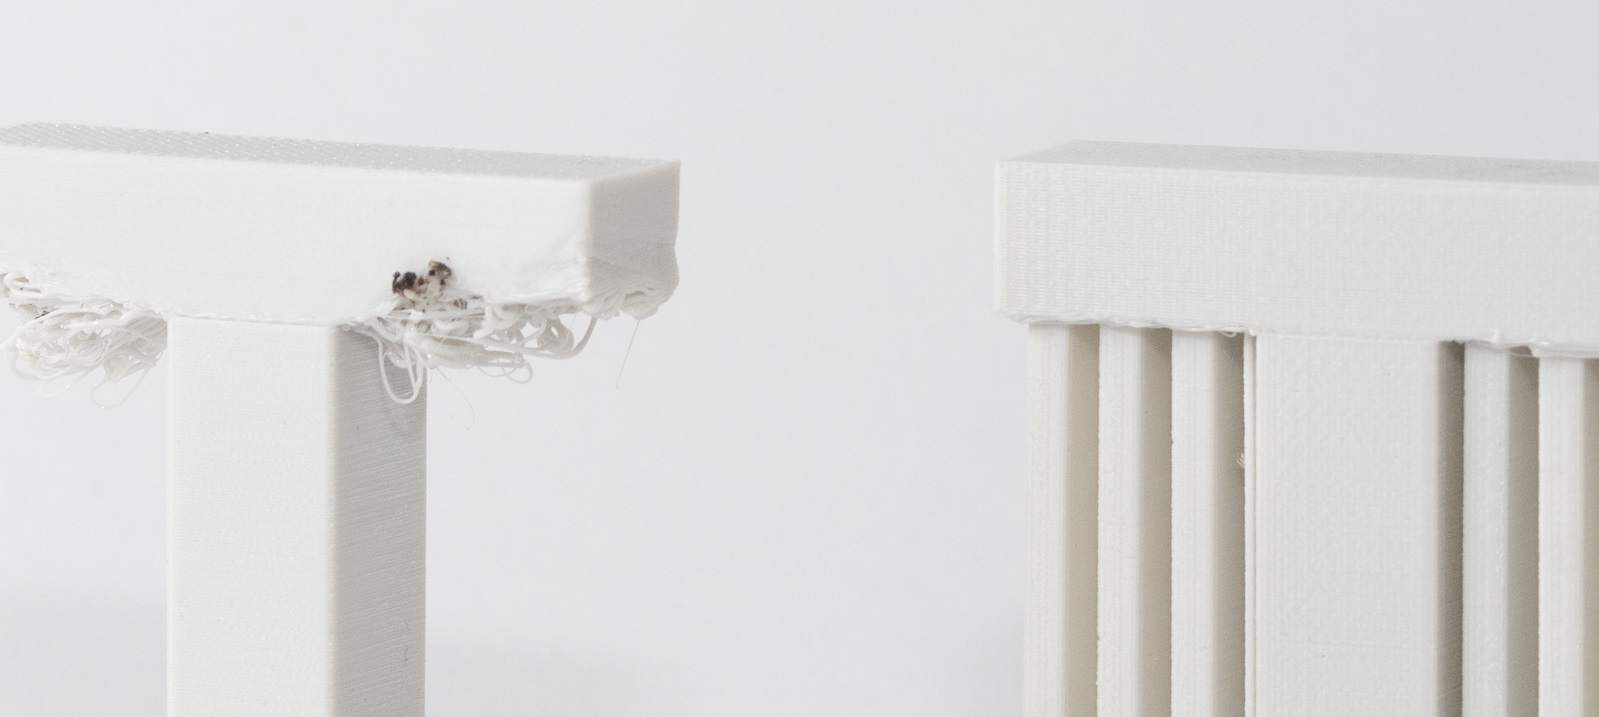 After that you save your GCODE into an usb key, and insert the usb key on the Ultimaker, choose the good file and press print.
VOILA.
After that you save your GCODE into an usb key, and insert the usb key on the Ultimaker, choose the good file and press print.
VOILA.
SCANNING
Scanning a file is pretty simple.
here in fablab Sorbone university we have 4 scanner, The makerbot digitizer (vincent dupuis documentation) DAVID SCANNERS, hand cheap scanners, and finaly
the eiscan pro
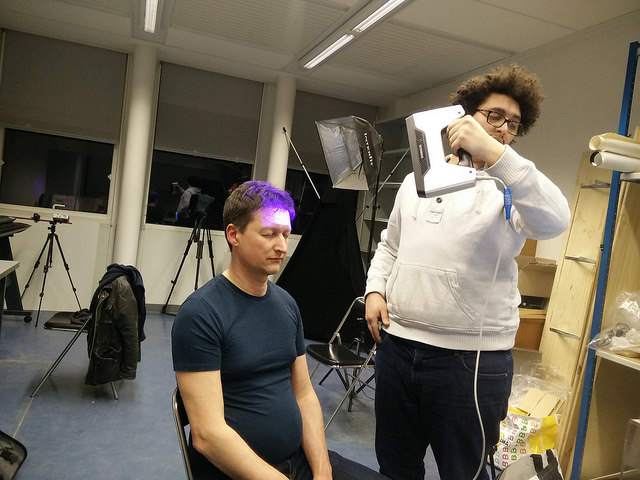
WE will focus on the einscein pro:
3d Scanning workflow
calibration
before scanning anything we need to calibrate the scanner for that we are using the calbration plate . step by step the software guide us for making the calibration.
Scanning
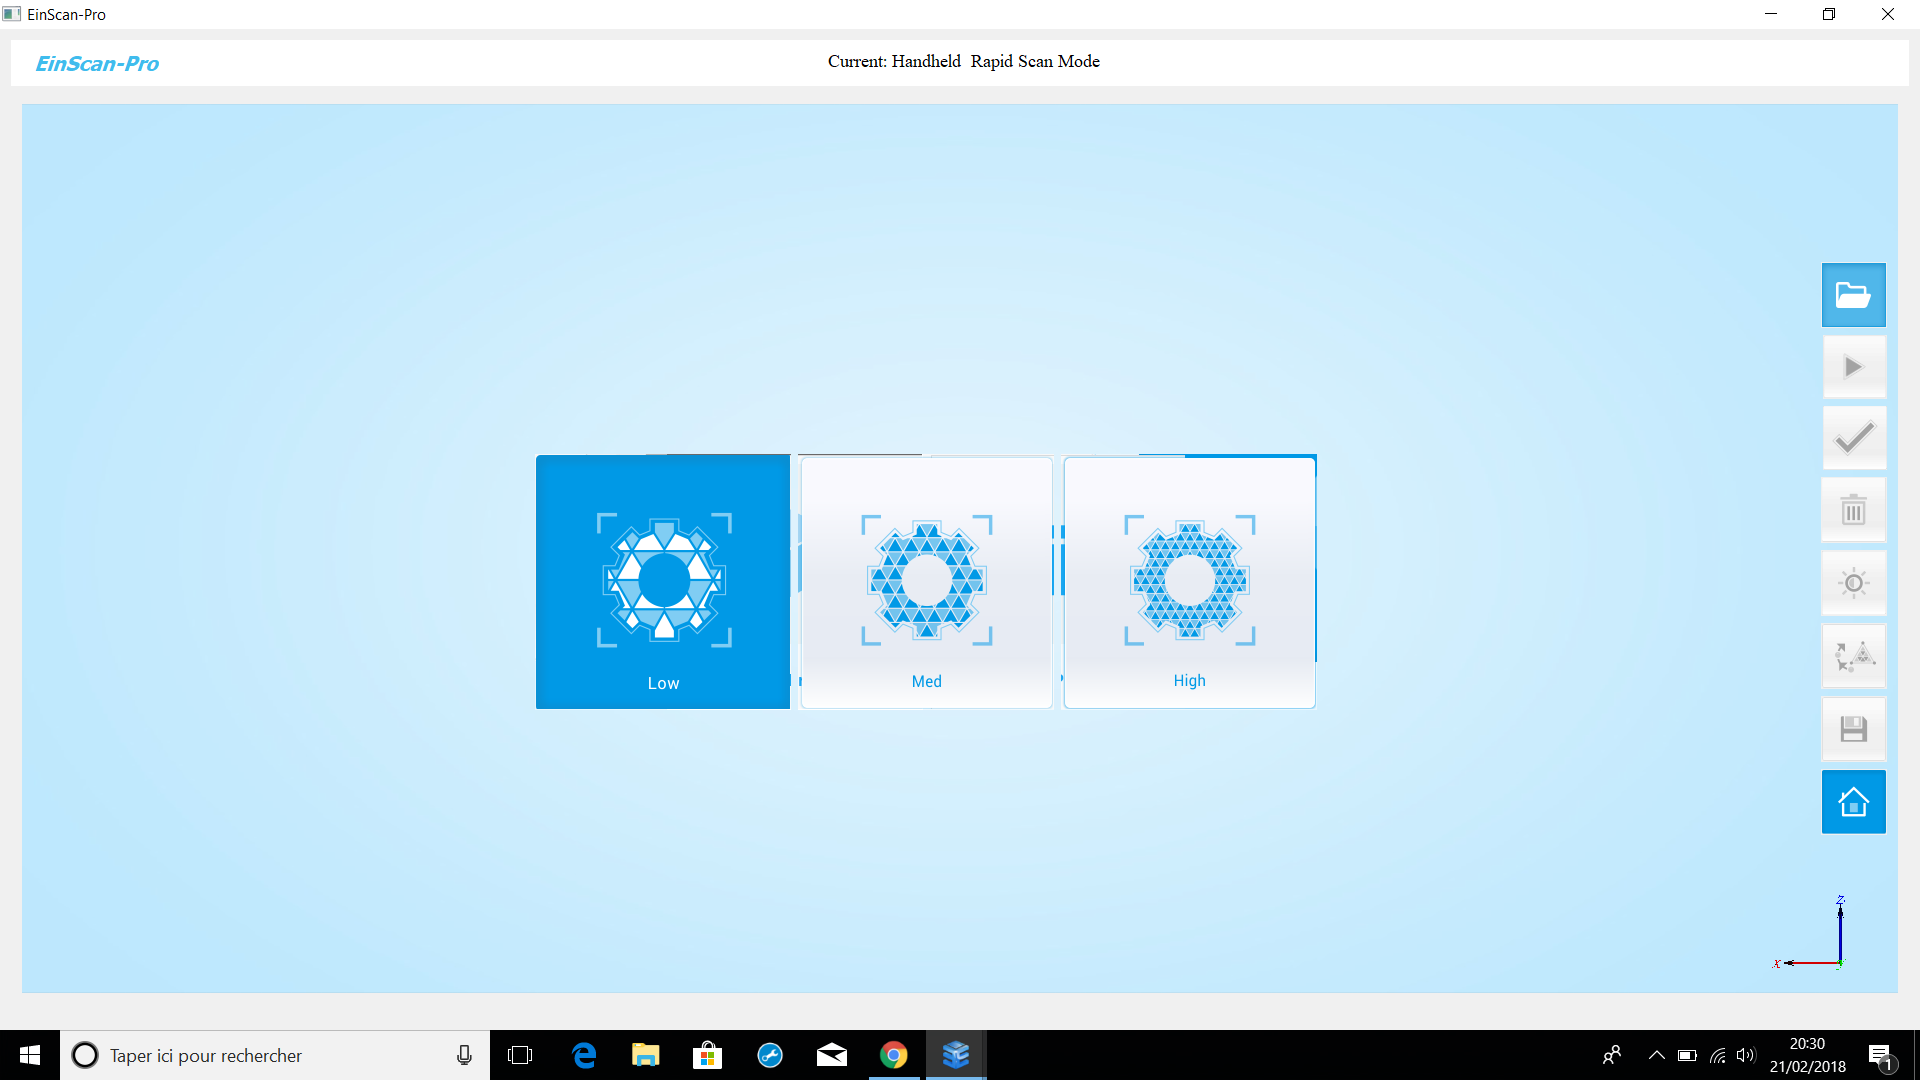
3 type of scanning exist, we will talk only about the Rapid scanning here.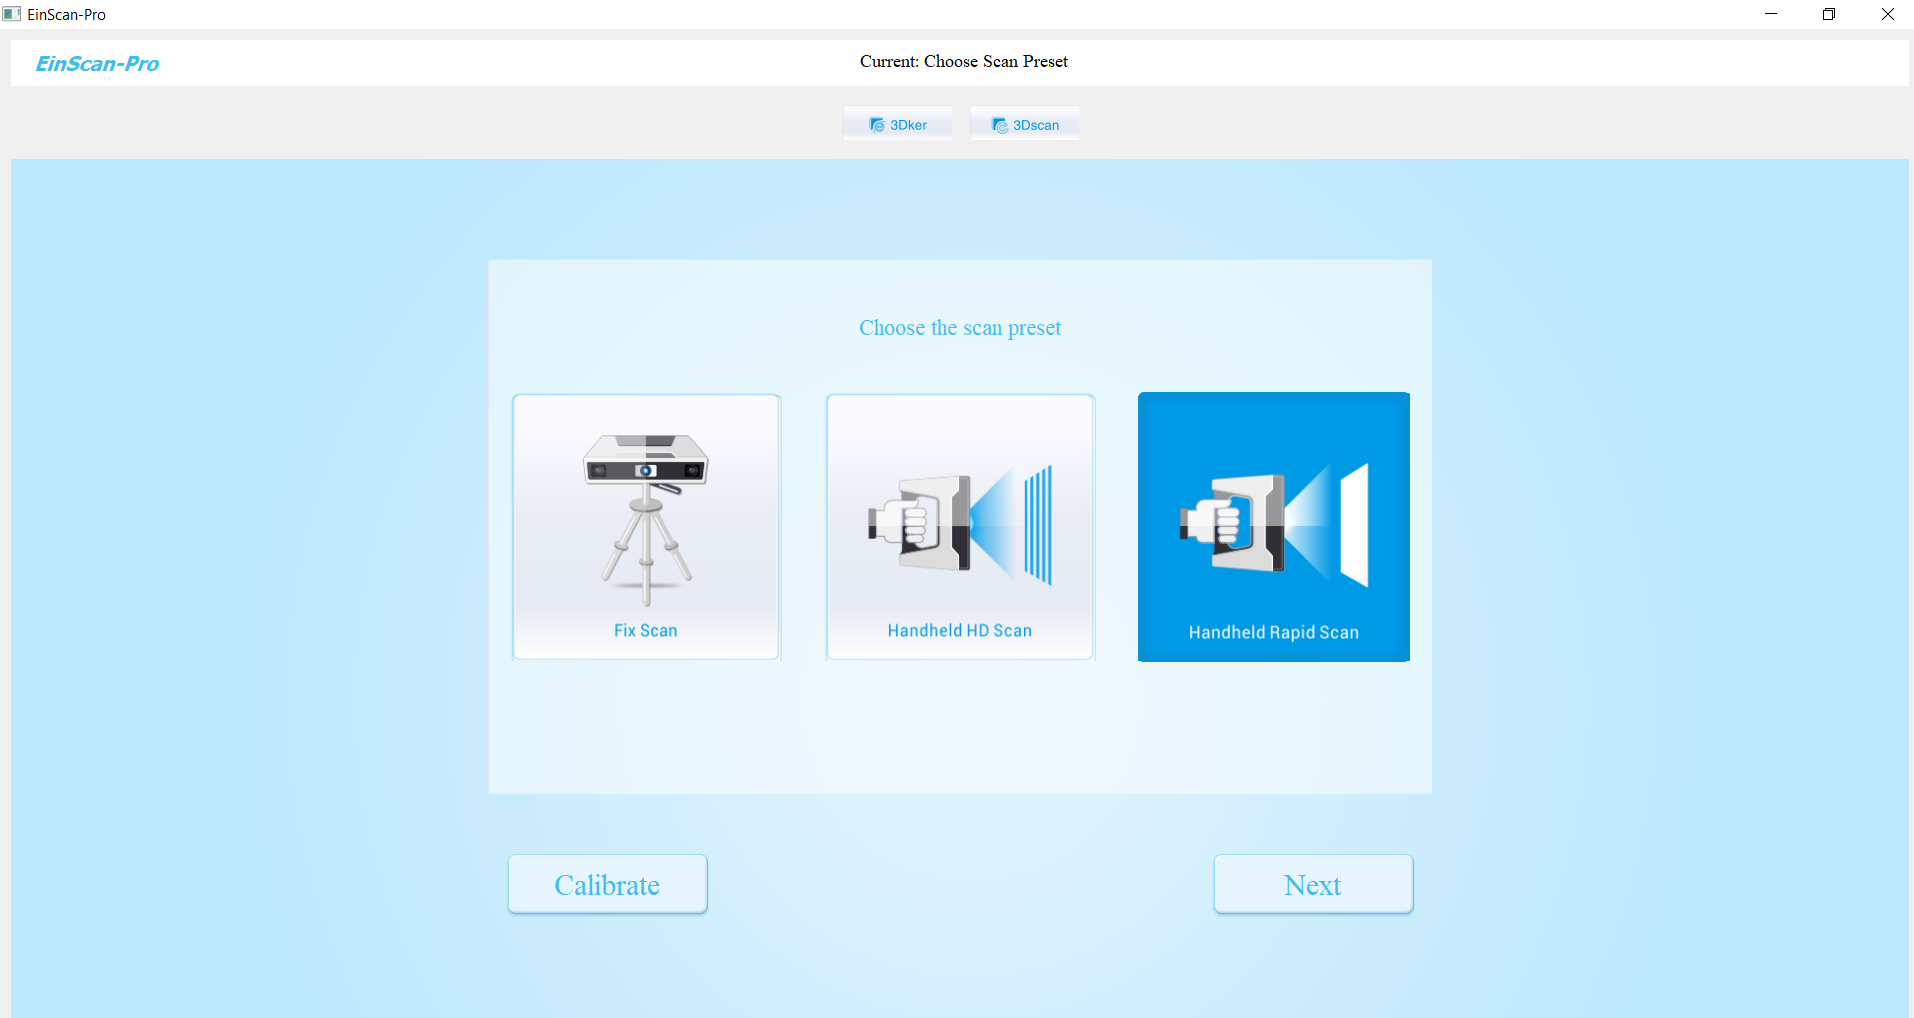 then we choose the quality of scann,
for starting we choose to make Low quality scan
then we choose the quality of scann,
for starting we choose to make Low quality scan
 when we scanning someone/something. we need to turn all over.
my technique is to start the far as possible and start by the complex part, like that, if it's not wor king i'm not loosing 15minute of scanning by accident.
The more complexe thing to scan are Hair. the texture seems too complex to scan
when we scanning someone/something. we need to turn all over.
my technique is to start the far as possible and start by the complex part, like that, if it's not wor king i'm not loosing 15minute of scanning by accident.
The more complexe thing to scan are Hair. the texture seems too complex to scan
 after i decide to not tring to scan hair, i gain some time.
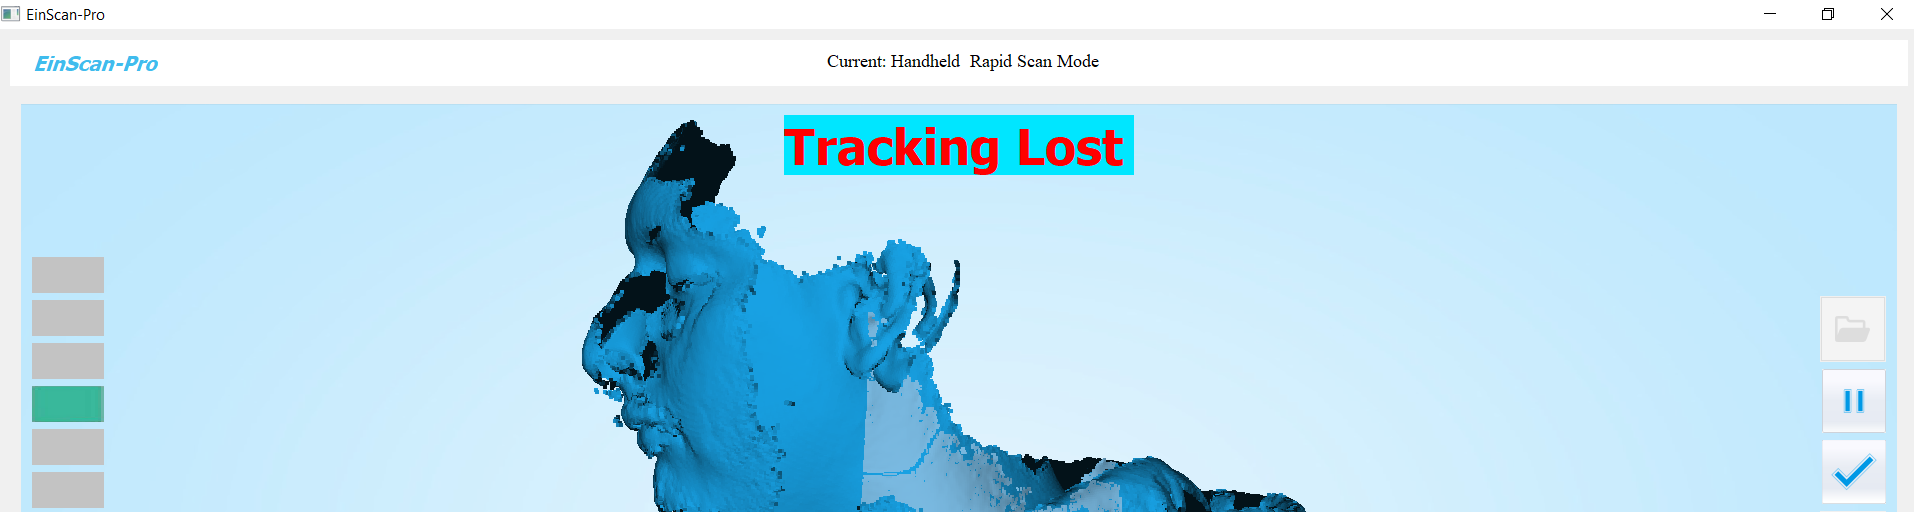
scanning skin is very effective. and worked great. so i scan thierry face.
after i decide to not tring to scan hair, i gain some time.
scanning skin is very effective. and worked great. so i scan thierry face.
 when the scan is fisnished we need to export the project file into STL file.
Troubleshooting
3D scanning was hard, scanning hair, wasn't so easy, i need to make a new test on this, the texture is pretty complexe and the software was a bit buggy -shutdowns during scans, doesnt save the file made.-
What i've learned
I learned to make a file with moving part in one print. it was really interessting to discover how to pint something, with moving part, making the Hinge of my final project was a improvement of my project. i'm pretty happy of the result. --
file of the week.
here you'll find the file of the week
For downloading
right click and save as
- Fusion file (f3d file)
- Hinge (stl file)
- 3D scan (stl file)