17. Wildcard
This week I worked with the Fusion 360 and the CNC to produce a 3D object and experimented with the vacuum forming machine.
Fusion 360
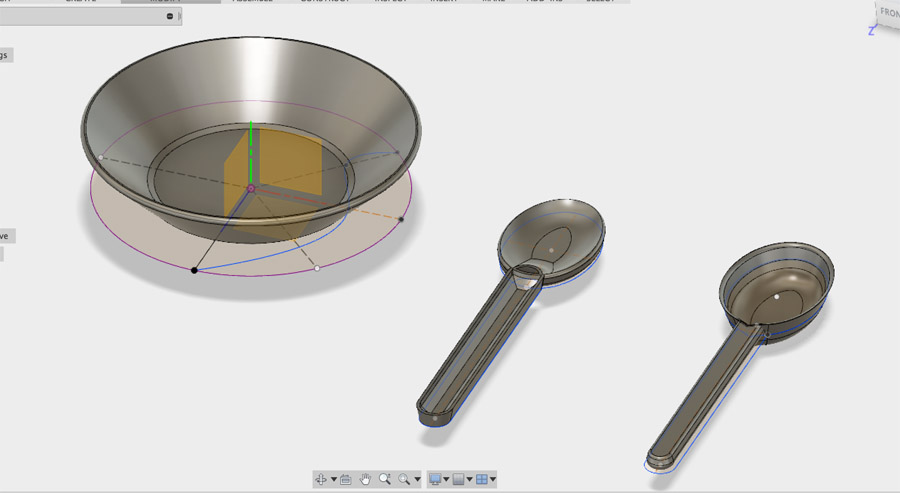
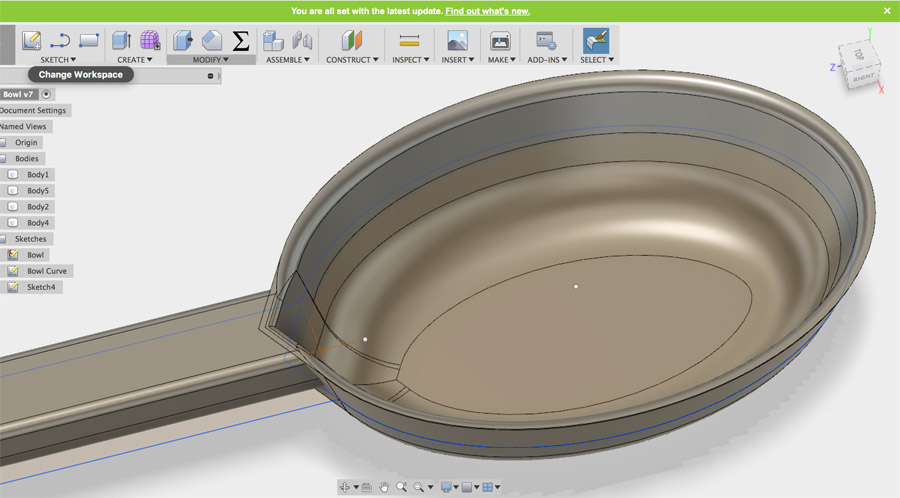
I worked in Fusion 360 to create a simple bowl and spoon. Rather than creating complex shapes using multiple parametric dimensions, I focused on what subtle changes I could make to edges through filleting and chamfering. I knew I would be creating a 3D shape with the CNC, so it was useful to understand CAM and how design decisions in Fusion effect the CNC cut paths. The following two tutorials were a useful introduction,
In contrast to the videos, I would use VCarve Pro to prepare the cut paths. The bowl was exported from Fusion 360 as an STL: This was done by right-clicking on the body of the bowl and selecting 'Save as STL'.
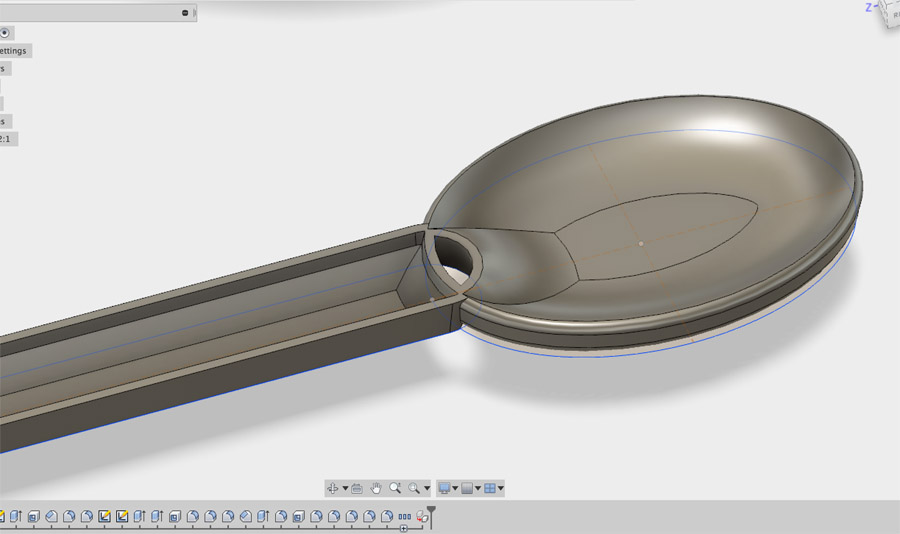
I attempted to create a spoon using simple shapes that intersected. This got more complex as I extruded and chamfered the head of the spoon which was quite flat.
I decided to redo the spoon and focused on extruding and creating a shell on the spoon head. I managed to create some interesting features on the lip of the spoon through inter-connecting lines.
V Carve Pro
After creating a work space of 300x300mm, I imported the STL for the bowl using the Modélisation menu at the bottom-left of the screen. The first menu indicates the position of the model in work space: I selected 'behind' and then centered the model.
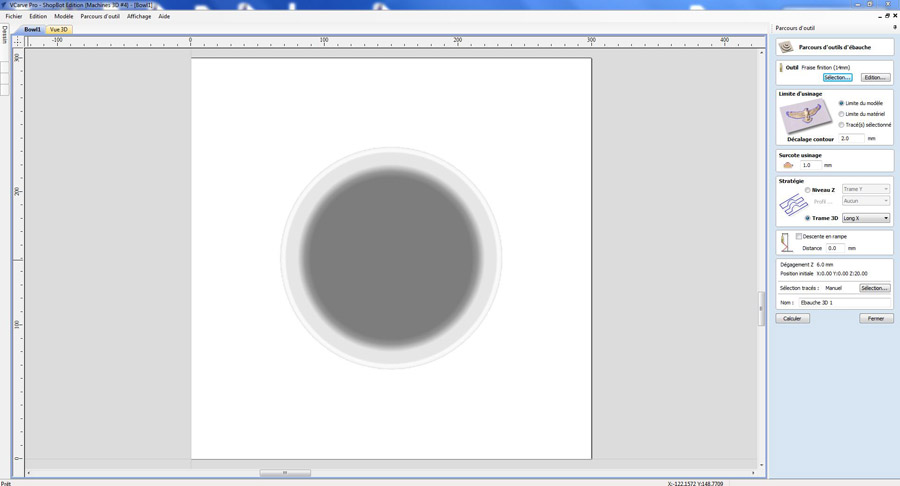
This lays the 3D file out in white and grey areas – Grey for the areas that will be cut deep, lighter grey for areas with less and so on. To cut a 3D file you cut it out in two stage, a rough and fine cut. These are selectable from the Right-hand menu: 'Parcours d'outils d'ébauche' (rough) and 'Parcours d'outil de finition' (smooth).
The above settings are for the rough cut. I discussed with Adel the available thickness of wood and adjusted the height of my bowl to match a 22mm piece of MDF. MDF would better serve the vacuum forming because it is more porous - helping to lock the melted plastic into position.
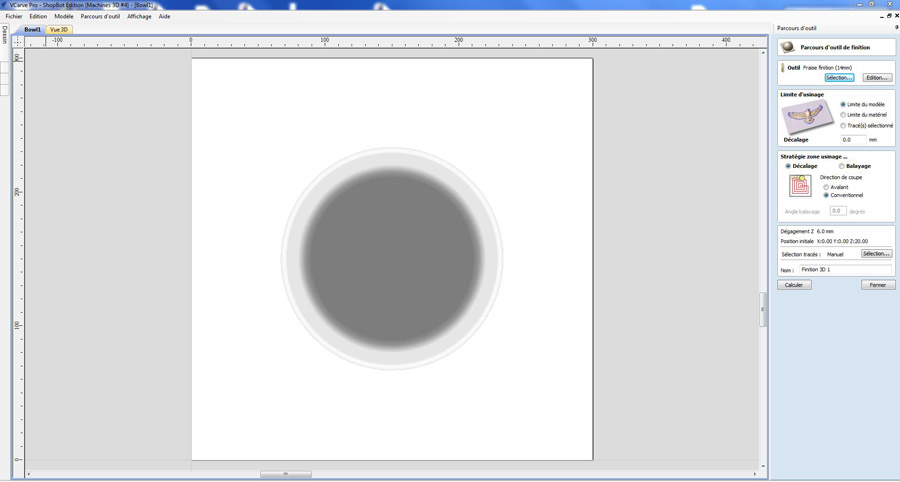
The above settings are for the fine cut. Notice I have selected Fraise Finition (14mm) for both rough and fine cut. This would allow for measured steps running up the curve of the bowl.
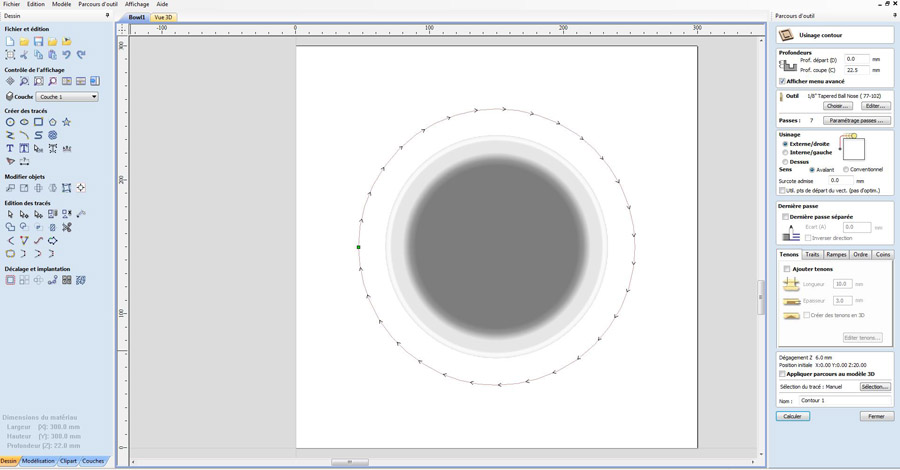
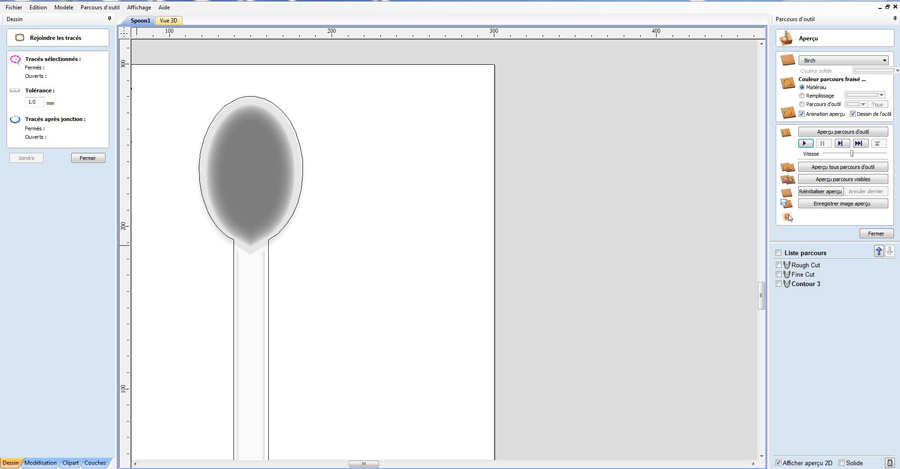
The 3D file has no inherent cut out, so one was created using the circle tool in VCarve Pro. This was sized in reference to the Fusion file and positioned by eye to line up with light grey areas. Tabs were added to the cut file using the 'Tendons' menu.
The 3D preview revealed the steps to cut the small bowl as an animation. Cutting time was approximately fifteen minutes.
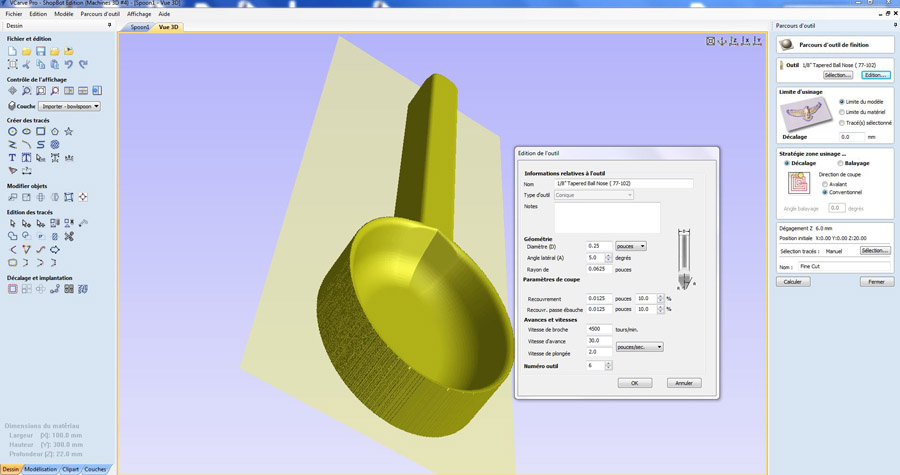
I then attempted to a similar system with the spoon file. A rough and fine cut file were assembled but this time with a smaller tool bit, the 1/8” ball nose, based on the smaller, narrower object. To create a cut path, I succeeded in importing a .AI file based on my original Fusion sketch (exported to Illustrator as a DXF). While the 3D file is open, select File > Import > Import Path.
In the 3D view, issues occurred with the position of the cut path on the model. I scaled and repositioned it making sure all light grey areas were enclosed in the cut.
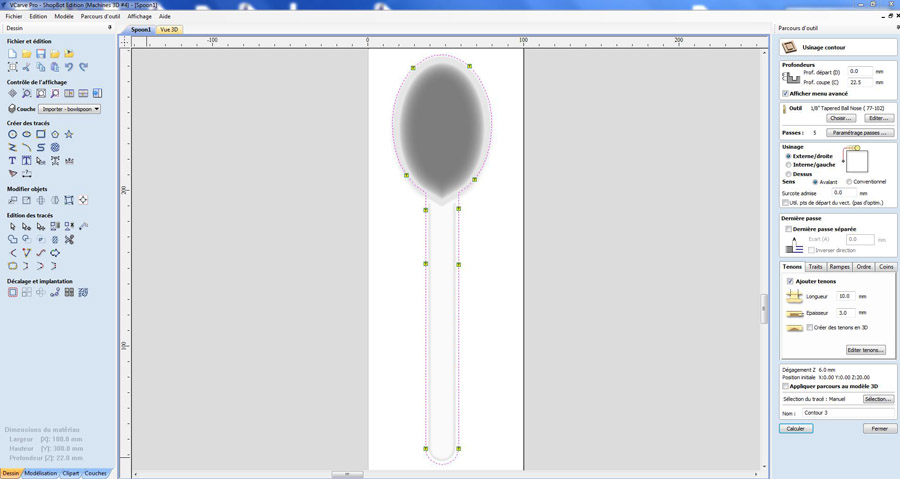
Finally, tabs were also applied near to the corners of the spoon – In hindsight this made it difficult to remove them, I would probably attempt the different strategy next time.
CNC Milling
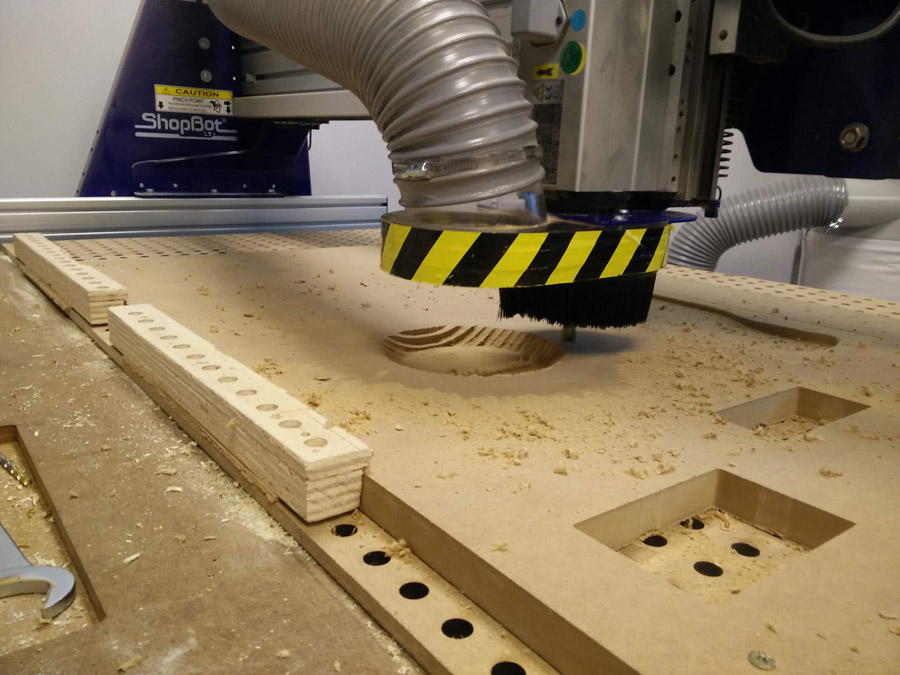
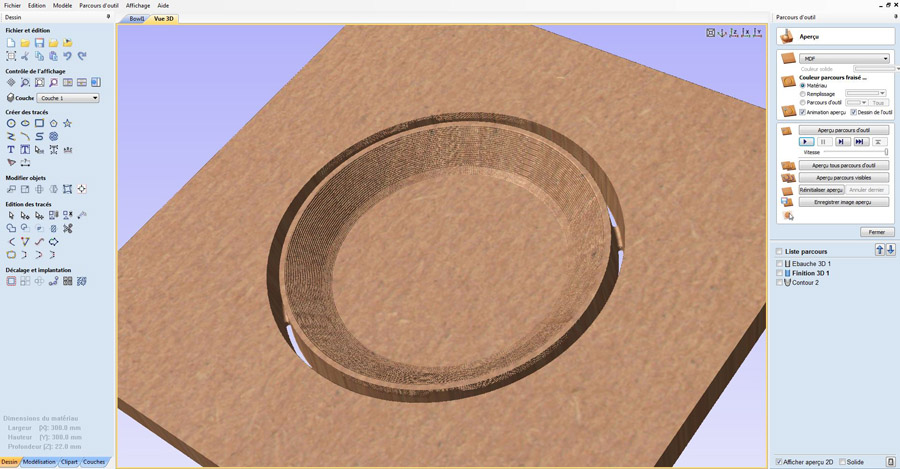
Earguards donned, air extractor on and the Shopbot was set in motion. Here we see the rough cut in progress running from left to right.
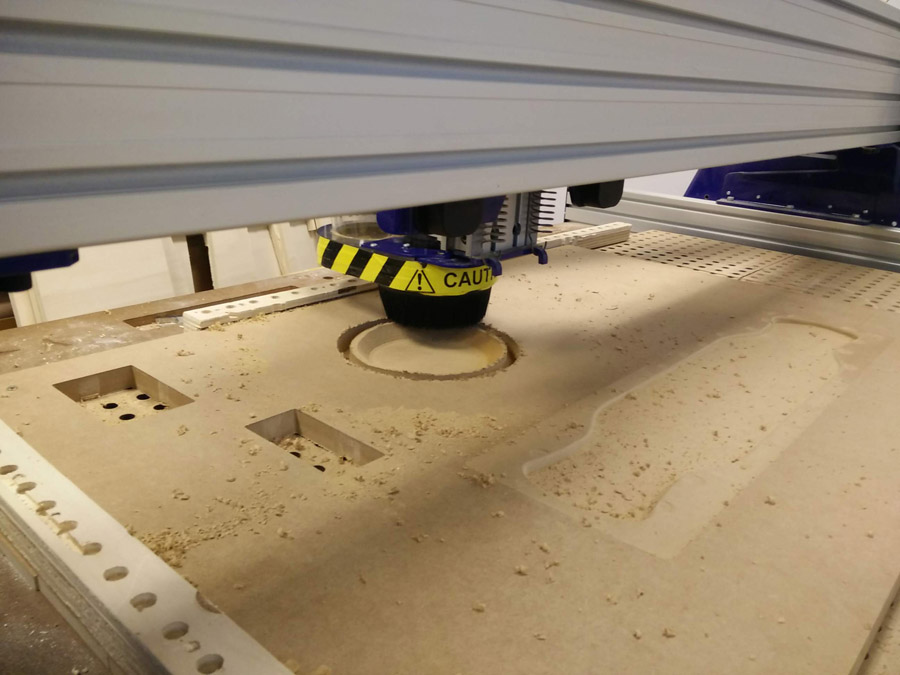
Then the fine cut which took a longer period of time. The file had been set that the cutting bit would move 0.7mm each time to form the steps.
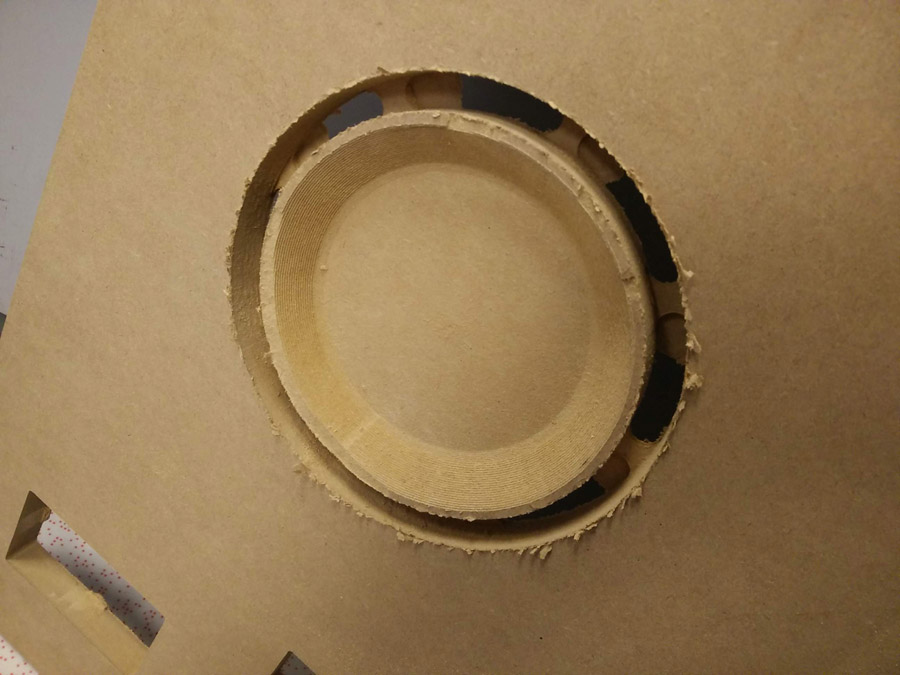
Before the running the cut out, the edge of the bowl was extremely smooth. It was also quite narrow, so when I used the 14mm fraise finition to cut it out, the edge was chipped and became jagged in places. I later removed the tabs by flipping the MDF and removed the tabs with a chisel and mallet.

I switched to plywood for the spoon milling. Despite the best efforts from Leo and myself, I was unable to run a 3D cut on the spoon. Despite a working animated preview, there was a persistent error when running the job: Parameter value above range for VS (304.00). I ran the CNC with the error and the software crashed shortly afterward. We were able to run the cut file (above) and attempted to adjust the speed and timing of the rough/fine cut. Adel also reviewed the position of the spoon in the work space. Unable to find the solution, I preceded with the vacuum forming.
Vacuum Forming
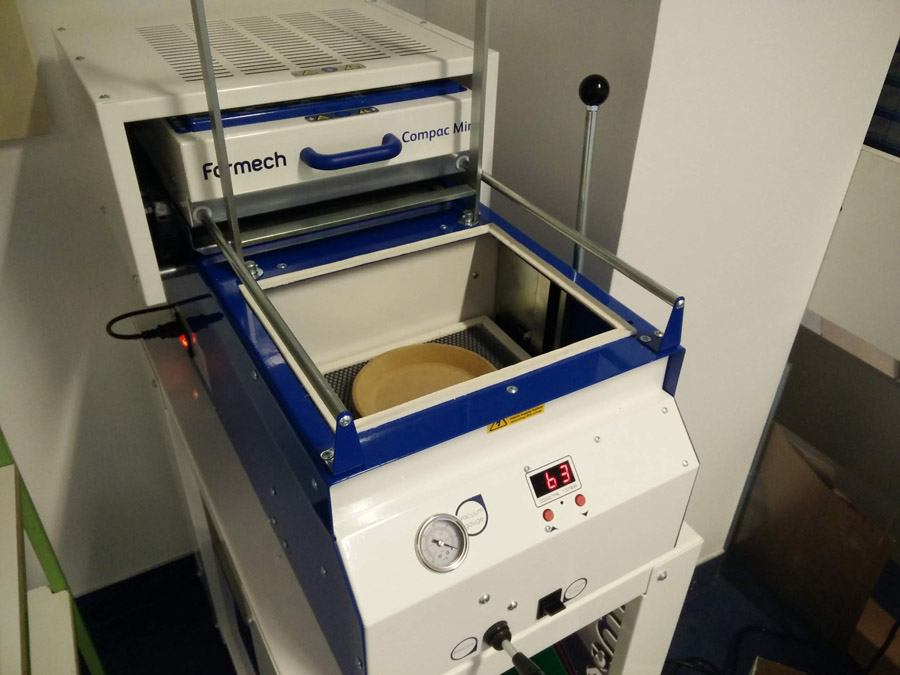
The vacuum forming machine is a Formech Compac Mini. It essentially heats sheets of plastic which can be wrapped around 3D positive shapes. Previously I had attempted to use it on a negative cast but it didn't work. This time, I reviewed the technical details on the Formech website to see if I could get a better indication of how best to use it.
I placed the bowl on the metal mesh in the chamber of the machine. The machine was turned on (switch on left of machine) and the time adjusted to 63.
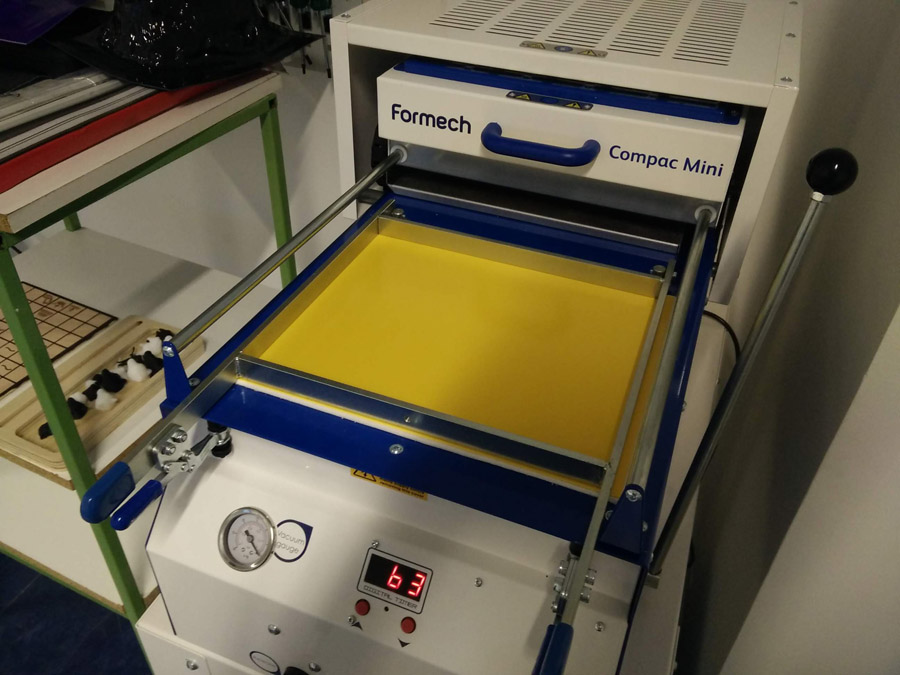
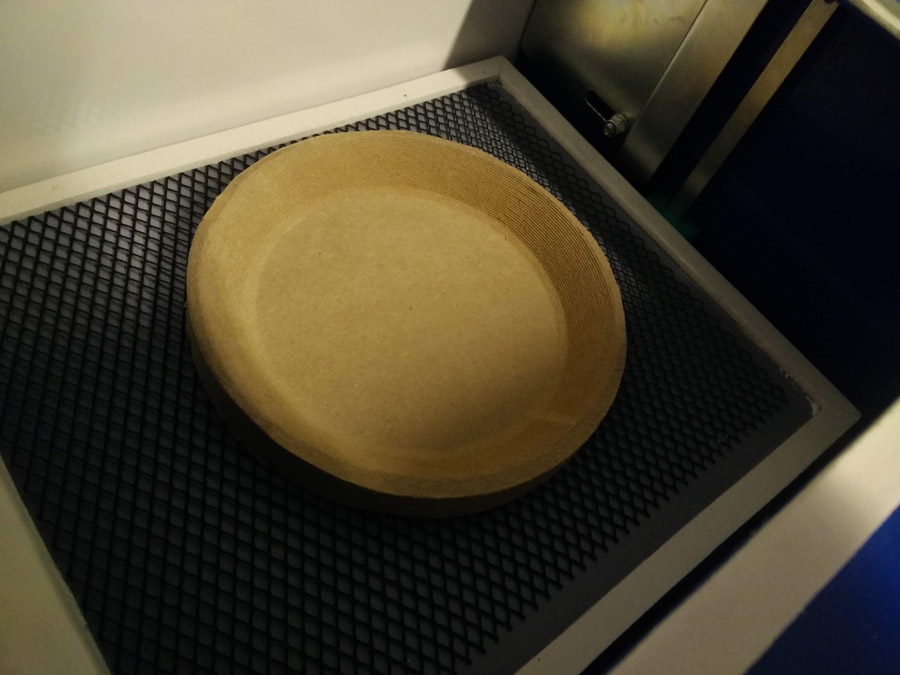
An arylic sheet was placed over the chamber and clipped in position with two grips. It is important to remove a thing layer of plastic from the PET plastic. One sign is shiny, so place this upwards if you want a shiny outer object. You then pull the metal grill (seen here with blue handel) over the sheet and the time commences. The sheet is cooking! When it beeps complete, pull back the grill and start the vacuum gauge (black switch, bottom). Slowly pull the lever on the right-hand side down over the object until it is covered. You can then use a combination of the release valve (small black lever, bottom) and the main lever to get the desired effect.

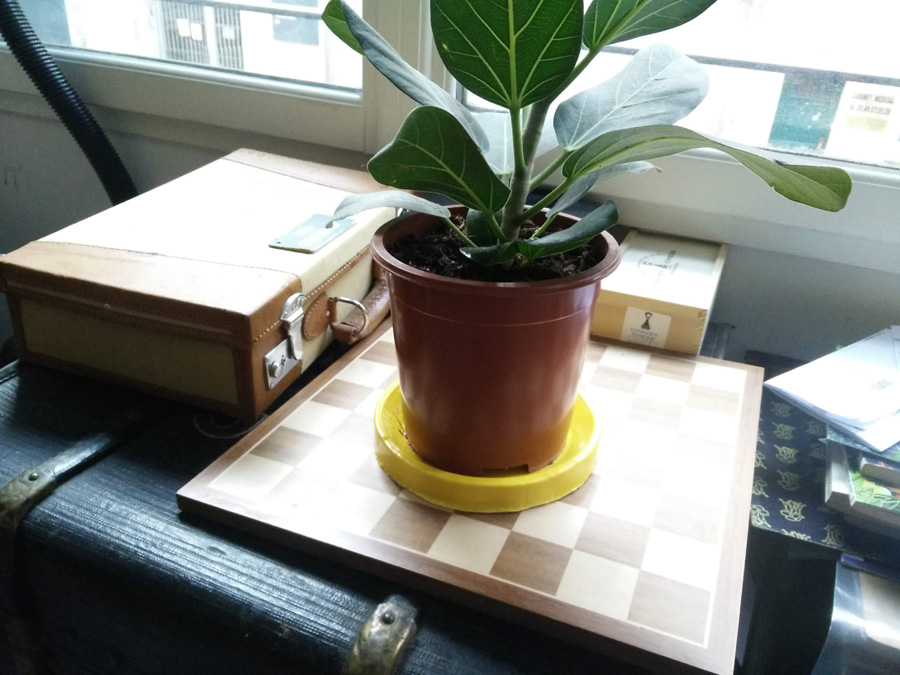
The result for the bowl was an effect sheet of yellow plastic around the bowl. The material was good and tight to the MDF, which is useful if preparing a permanent object.
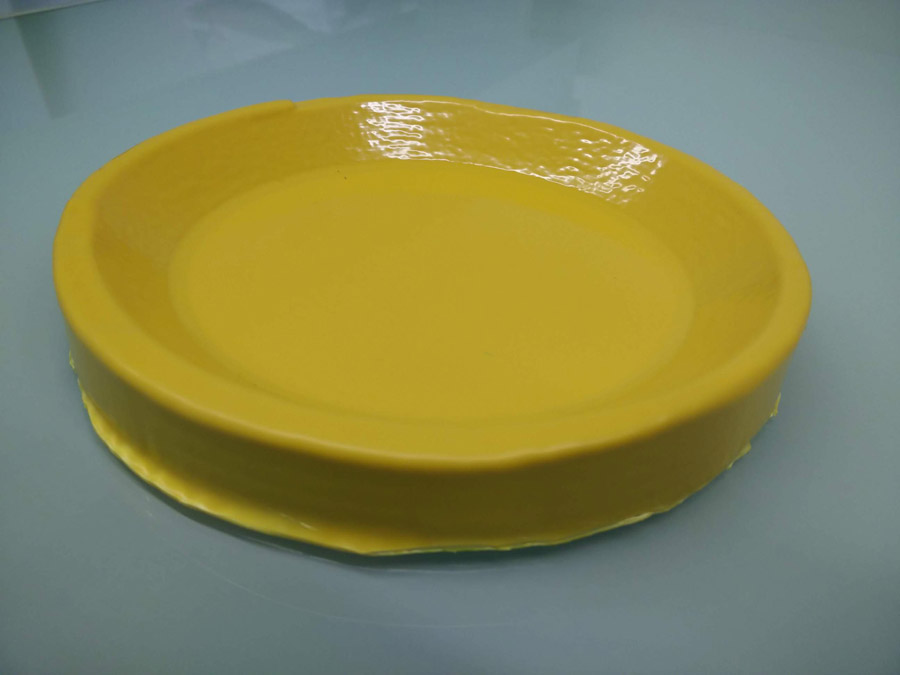
In a final step, I used plyers and scissors to remove the excess PET plastic.
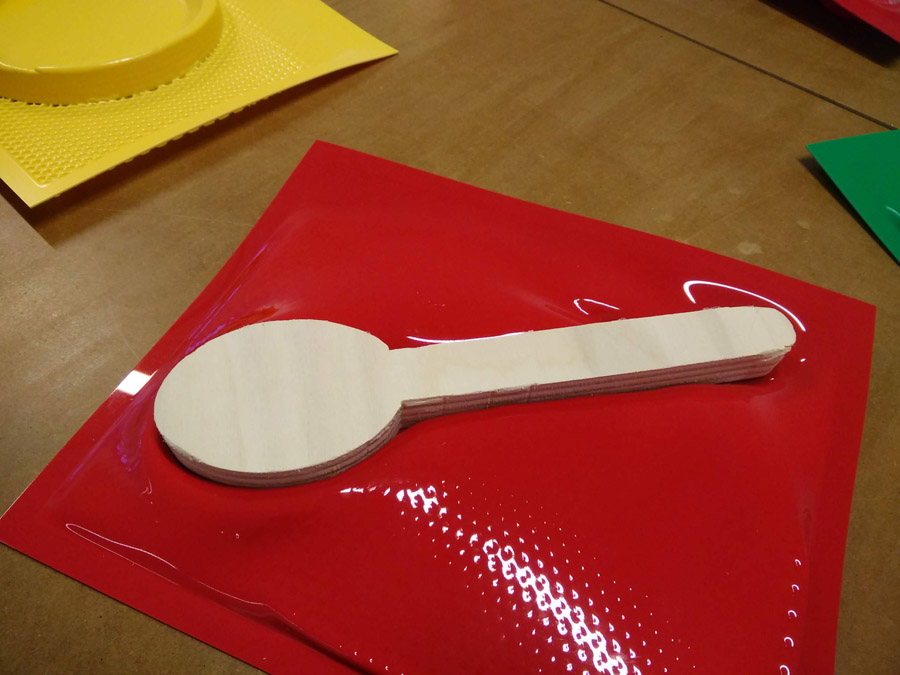
For the not-really-a-spoon, I experimented using two pieces of PET plastic on two sides of the object. Certain errors produced an interesting effect – Wrinkles in the material as air escaped.
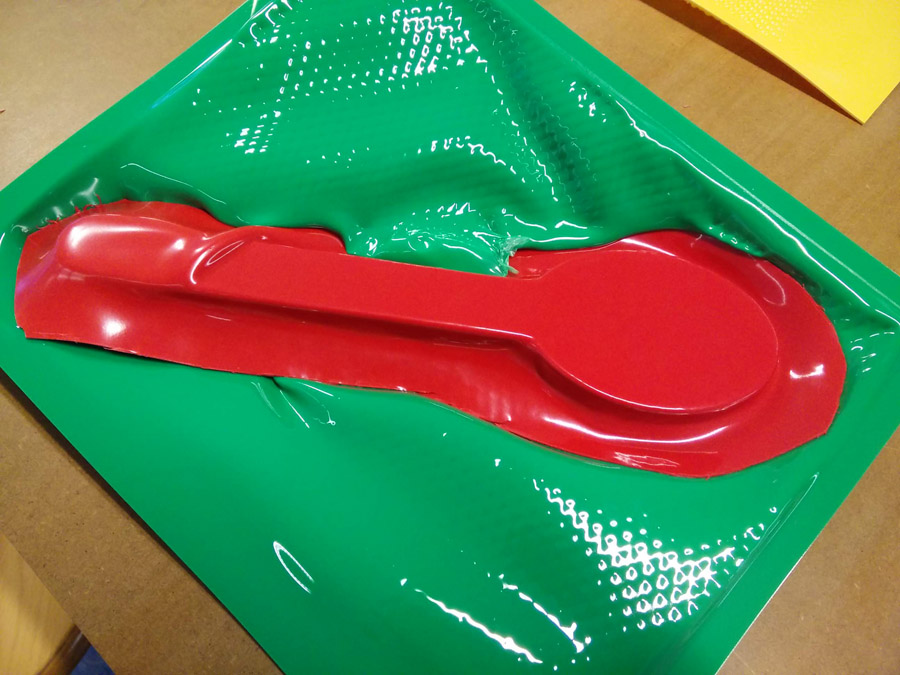

In a final step, I cut the two sides down to the shape of the wood.
In the end, the bowl made a handy base for a plant.