Machine design//
Starting with coding.
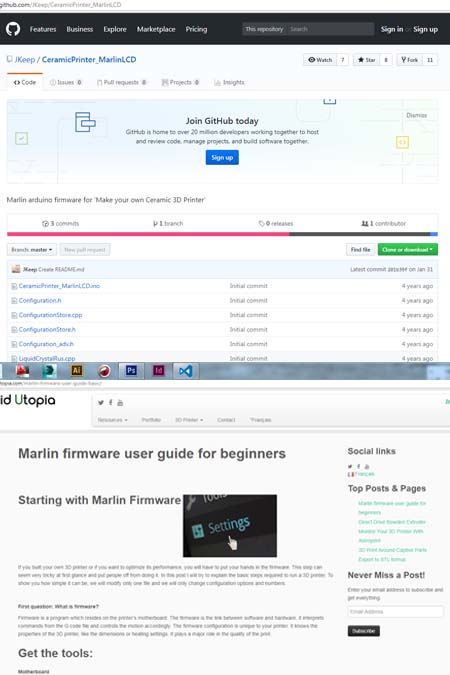
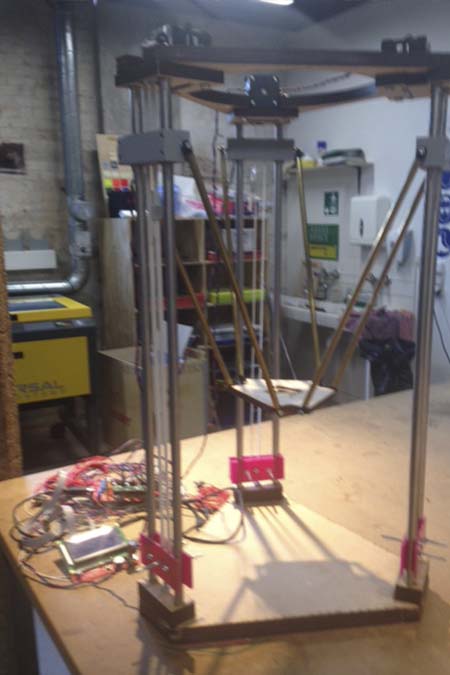
For the machine design week I chose to work with the modification of the clay 3d printer. I decided to work with coding since i am not so comfortable with this and now is a good chance to learn how to modify an existed code. I based on the existed 3d clay printer code that i downloaded form Git hub.Firmware is the coding language of the printer’s motherboard and is the link between software and hardware. It also controls the motion through the G code. Firmware also controls the properties of the 3D printer, like the dimensions or heating settings. For modifing the G code i will use firmware,notebook++.
Arduino board and communication speed
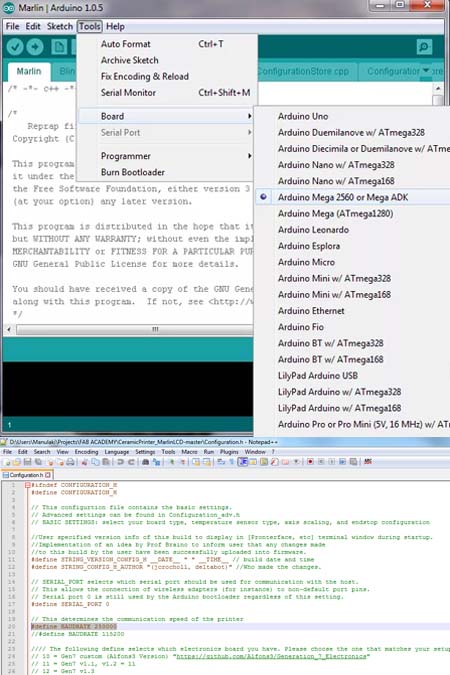
The software which communicates with the board of our 3D printer to install the firmware is the notebook++ and via this we will program the microcontroller.The next step is to chose the arduino board that we wil use. In our case is the Arduino Mega 2560.The path that was followed was menu/tools/board/arduino mega 2560.The first important setting that we will control is the communication speed. I set it in #define BAUDRATE 250000 (by working in the congiguration.h file) and i did not uncomment the next line //#define BAUDRATE 115200 which defines the alternative speed.There are two speeds commonly used by 3D printing software and if the main one does not work the BAUDRATE 115200 would do.For now i just kept this line as a comment.
Selecting the motherboard & the extruders
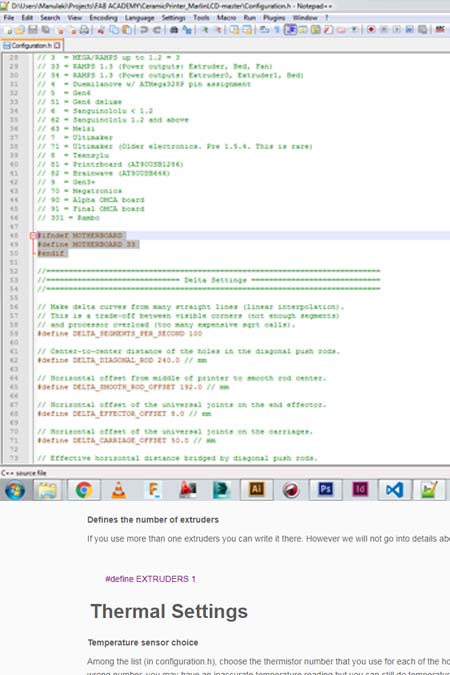
At this step i had to set the motherboard from a list that was already in the code. I had to choose motherboard 33 that stands for RAMPS 1.3 / 1.4 (Power outputs: Extruder, Fan, Bed). For now the fan and the bed setting is of no importance. Another setting that actually is missing from this code is the number of the extruders that the printer is going to use. Since for now we are going to use only one this information is out of importance.
Sensor temperature/minimum temperature
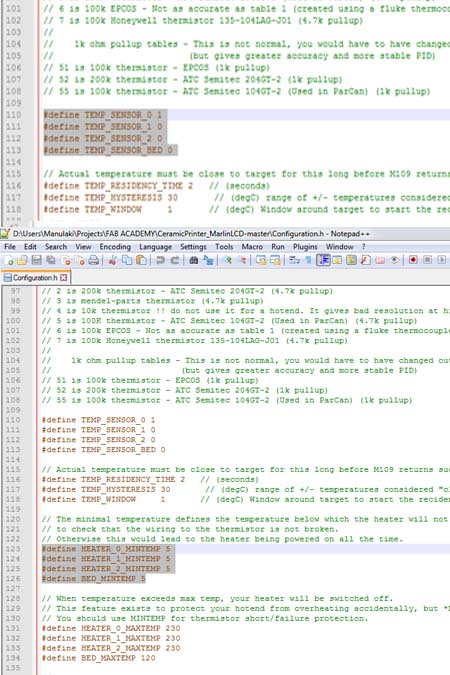
Among the list (in configuration.h), we can control the thermistor number that the printer uses for each of the hot ends and for the heat bed. TEMP_SENSOR_0 is used by the first hot end and TEMP_SENSOR_BED is connected to the heat bed. Since we do not use a sensor, i wrote 0 to disable it.The next step is to modify the minimum temperature. Since is very important for safety this setting was alredy set by default.We use a different temperature than zero in order to check if the thermistor works. This will prevent the controller from heating the hot end at max power.
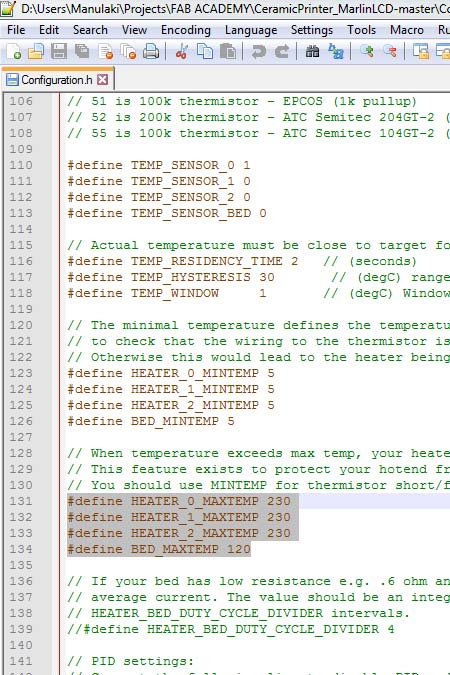
Maximum temperature
The hot end of our printer will have a specific maximum temperature resistance according to the hardware material.The following settings are again a matter of high security and they prevent the maximun dangerous temperature. So setting our moving zone is very important.
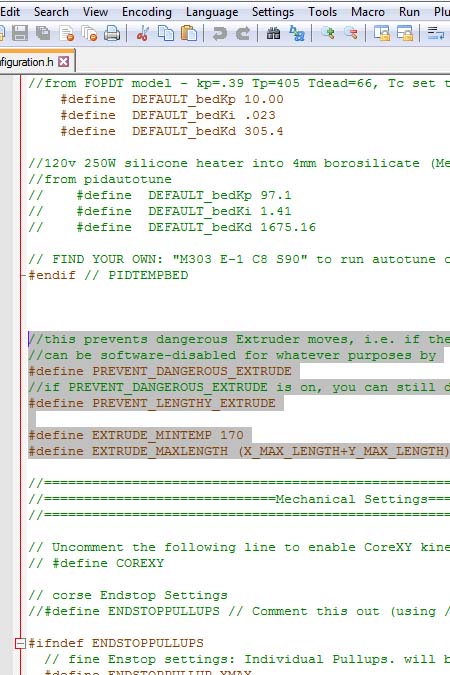
Extruder movements
The PID temperature controller is an advance issue and we are not going to regulate it here but we are going to regulate the values for the minimum temperature and the settings to prevent dangerous extrusion (is actuall set by default since is a security matter).
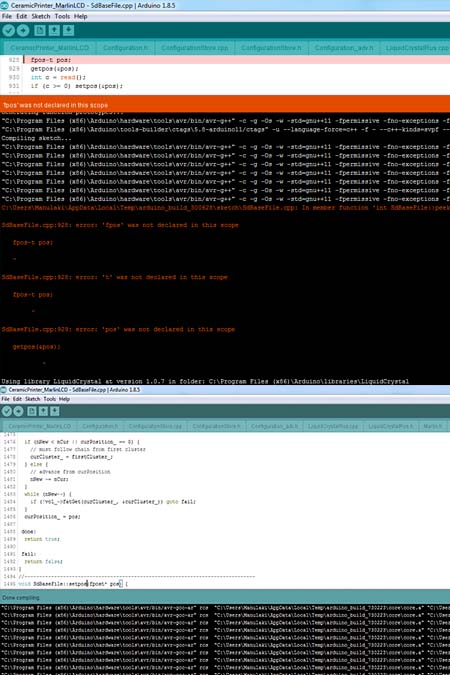
Verifying the code
Next step is to run and verify the code to arduino software. Back to the contain file we open the arduino file with all te rest gcode files included. If everhting is fine the arduino should give the message download complete. Inour case the forst trial was not succesful since i got a code mistake to some of the included files.After i fixed the mistake at all the files by replacing them (fpos_t to fpost) i verified again the code and this time everything went fine and the code is ready to be uploaded.
Configurating the clay 3d printer I
The next step is to configure our printer so it can connect automatically with the computer. Some printers need special drivers to access the device ut since we uploaded the firmware to your printer, the driver is already installed.
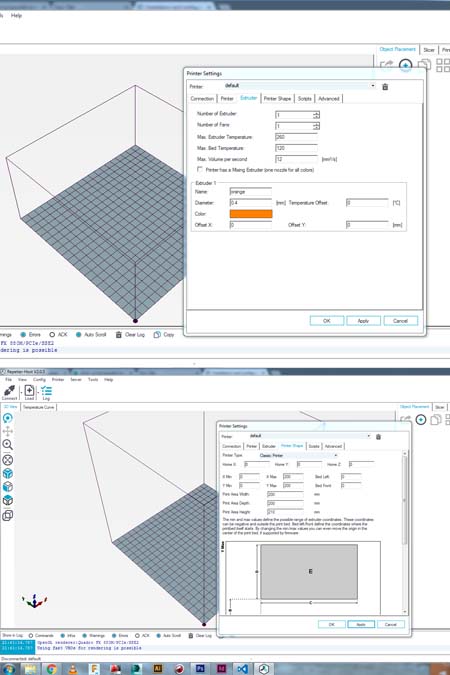
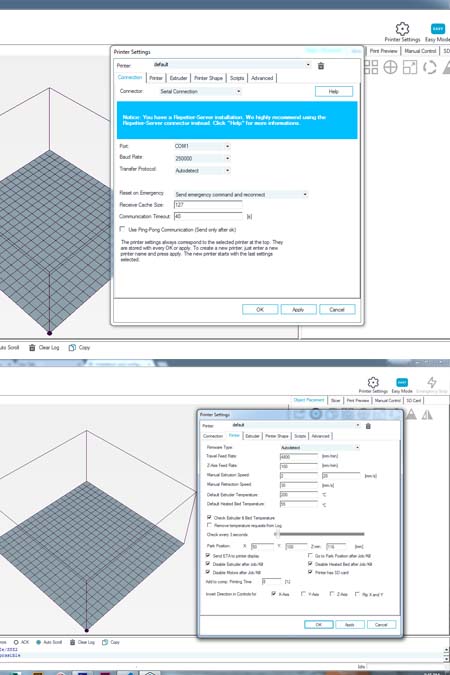
Configurating the clay 3d printer II
The next step was to follow the tutorial exactly as the pictures above and to set the max and mix temperatures, the extrudion speed and temperature etc. After all this steps the software is ready to accept an object.
Updating the code
In the end after trying a lot my team and I realized that the marlin code that i modified had to be updated to a newest version since we did not manage to make the machine work. The updated code acan be found in our group page here and especially to the webpage of Claus. The changes that were occured were exactly the same as in my code and were followed on the same sequence.
Slicing with cura
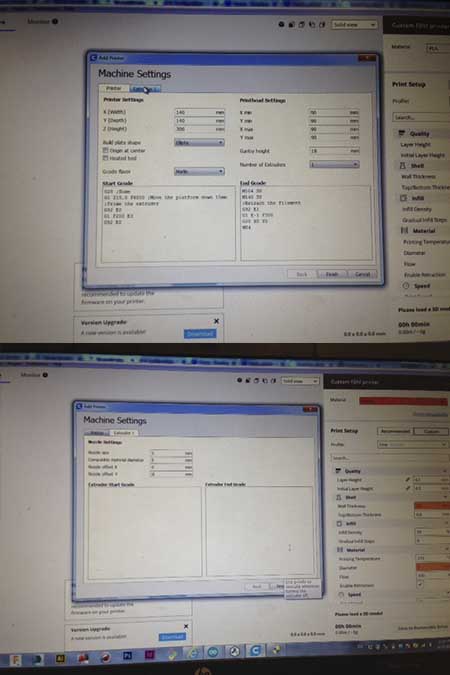
After a lot of effort to prepare the repetier software to slice the first clay attemt....i decided to slice in CURA!!!The reason was my old computer and the reason is that Repetier was crashing all the time. I used cura software at fablab's computer. I set a new delta printer by adding the characteristics of our clay printer. The path is settings -> printer-> add printer -> custom -> add printer -> printer settings_ x 140 mm,y 140 mm, z 306 mm -> buildplate shape elliptic-> gcode flavor marlin -> printhead settings xmin, ymon, xmax,ymax 90 mm -> gantry height 18 mm -> number of extruders 1 -> Extruder 1 -> nozzle size 5 mm -> material diameter 5 mm -> nozzle ofset x,y 0mm.
Ready to slice
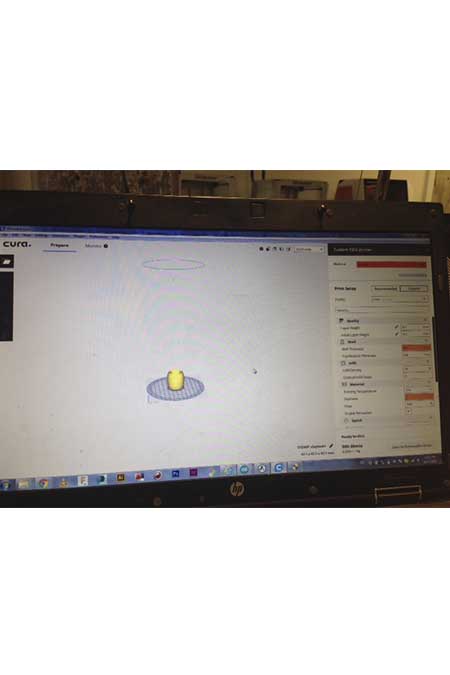
The enviroment changed completly when i set the delta printer. I added the small vase that i designed in 3d max and now i had to set then right slicing parameters. The most important was to set the bed tenperature to 25 and the nozzle temperature to 100. All these changes can be set by creating a new material. This is the path material -> manage material-> create -> here you set the parameters. I used normal pla parameters and i just changed the nozzle temperature and the bed temperature. The rest of the job is the field of Carina Herman that her final project is a clay extruder.