Mechanical design//
Why a clay 3d printer?
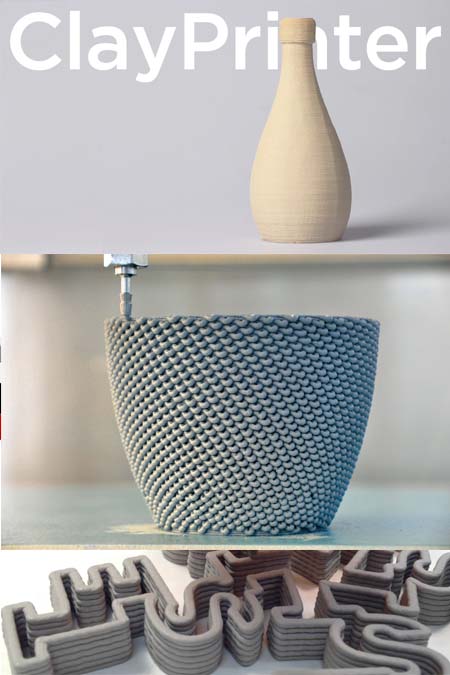
For the mechanical design week we chose to work with the construction of a clay 3d printer. We decided to make this choice since a clay 3d printer is a strong design challenge that combines technology, digital fabrication ann traditional artistic techniques. Creating a classic handmade item through a mashine for sure is an innovation.Moreover, the challeges in terms of the difficulty of the extruded material and its preferences is also an extra challenge.
Inspirations
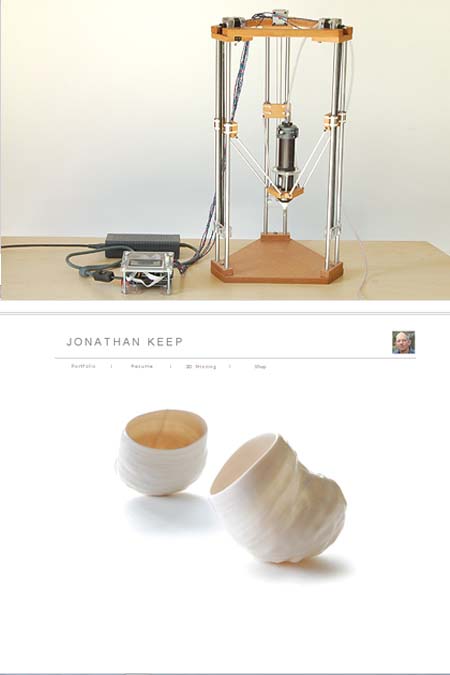
The initial inspiration came from the work of Jonaphan Keep who created a clay 3d printed in delta form. His documentation and his high quality 3d printed clay products convinced us that his experiment worked and soon enough we were working on upgrading his existing files.We chose to proceed also with a delta form instead of a kartesian one since the delta shape moving parts are lightweight and it’s easier to travel. That results in faster printing with greater accuracy.Delta form is also better in building higher objects like clay a vase because the buildplatform is fixed.
Group assignment//planning
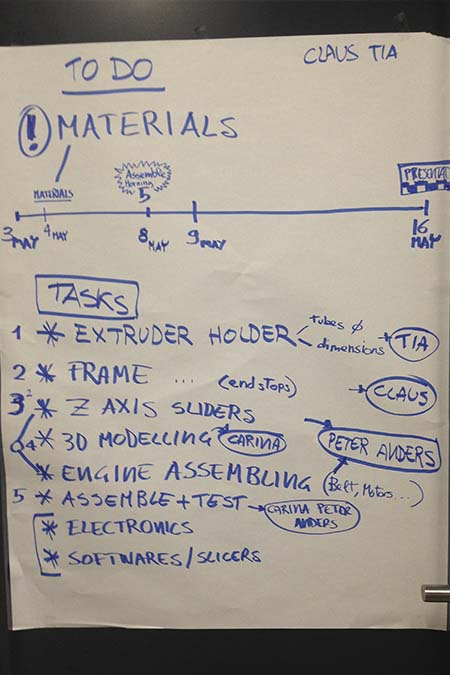
The planning and work distribution of this group project was arranged exactly in the same way that the mechanical design was presented by Prof. Neil Gershenfeld. The mashine was analyzed and divided into different mechanical parts and each member of the team studied a part. My part was the extruder / nozzle holder group and the upgrades that i could come with since clay is a demanding material in terms of right pressure, right extruder and nozzle shape. Moreover, one of the fab academy students of our team is building a clay extruder as a final project and studying the extruder holder is an important help for her.
Mechanism and upgrades
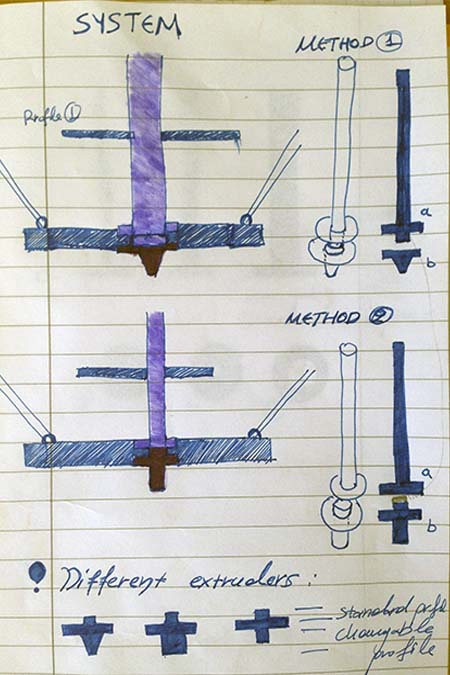
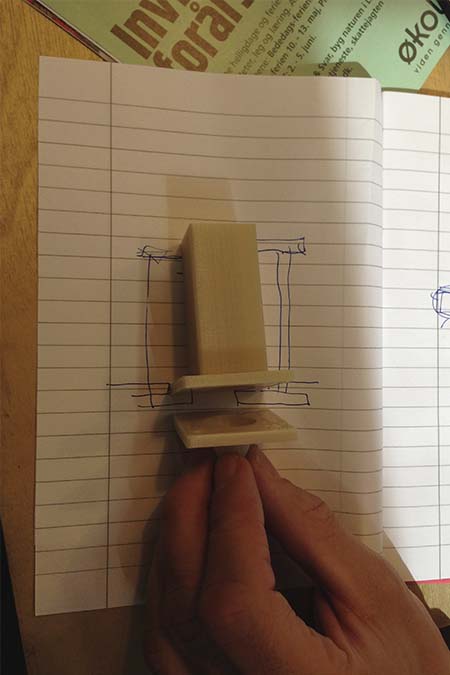
I proposed two different mechanisms that both have to do with adaptable design. The extruder holder is divided into two different parts and we can easily mount them on the top and on the base of the extruder holder. This way we can combine different extruders with different nozzles and we can have a variation of outcomes on terms of products.
Adaptable design 1
BApart from thr extruder holder another adaptable part was added in order to receive different profiles of extruders and different shapes. This ring apart form adaptability gives extra stability to the frame of the mashine.
Adaptable design 2
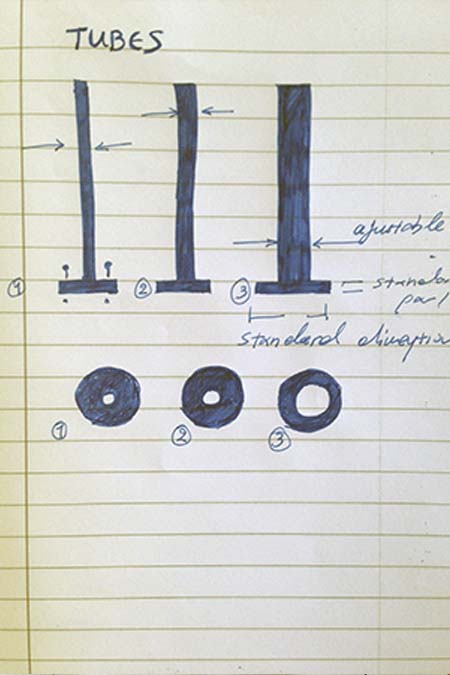
This initial sketch describes my first ideas about the adaptable upgrades.In the first design the extruder holder was more like a stable and not changeable component of the 3d printer but after the upgrades the users can easily combine different techniques and different clay materials.(liquid liquid clay, or cast)
Prototyping
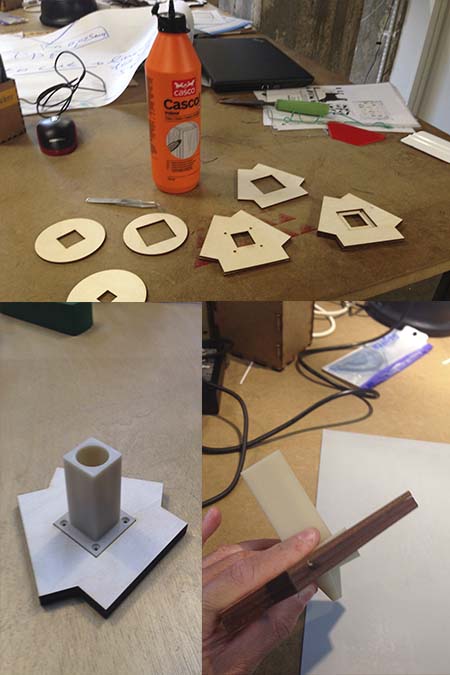
The prototyping was based on the existed extruder and nozzle design by Karina Herman and the progress of her final project clay 3d printer. The first prototypes were made by cardboard and different kind of attachments and connection were checked. After studying the clay behaviour i came into the result that the double connection between the extruder , the extruder holder and the nozzleshould occur with holes and screws since is the most safe and strong way to connect two parts. Alternative ways were tested such as clipping and sliding techniques but since the clay is gonna extruded to the nozzle with a lot of pressure the best way is the screws.
Rubber connections
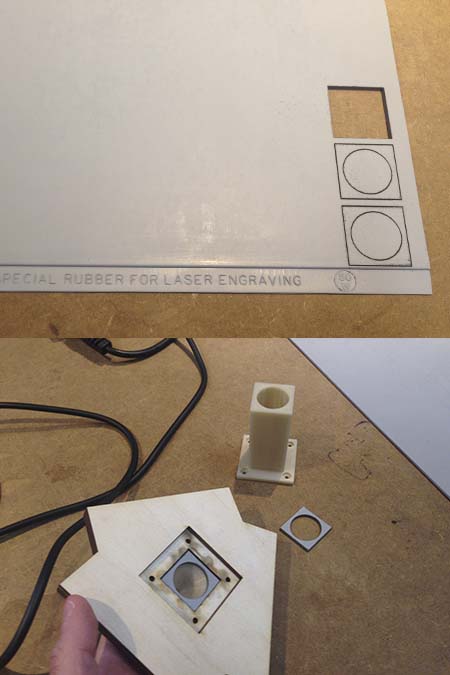
The high pressure with which the clay is gonna extruded lead me to design and laser cut special rubber parts between the extruderholder, the extruder and the nozzle. Two parts were enough to cover the gap between the different parts . The height of these parts should be a bit bigger thatthe gap bewteen the parts sinc we need to apply pressure in order to seel the connection.The laser cutting settings for the 2mm rubber were power 100%, speed 5,6 % and 500 ppi
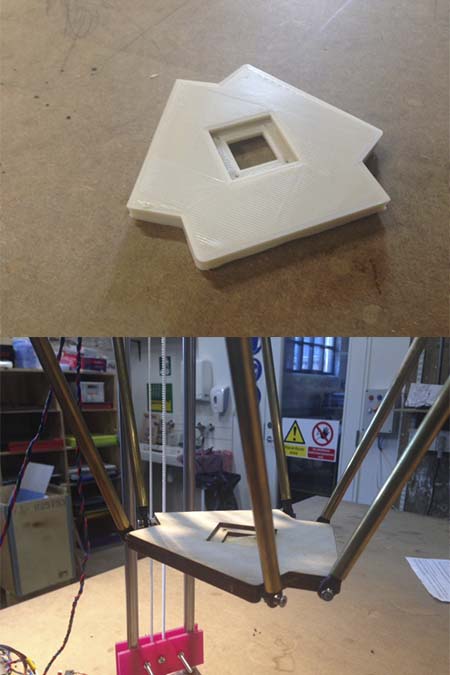
Final mechanical design
The final product of my extruder holder was made by 2,5 mm birchwood and the laser cutting settings were power 90% ,speed 6%,ppi 500.The ring had to be attached on the extruder tube and the extruder holder needed to be attached on the main frame with small steel tubes. After testing i realize that i need something more stable so i came up with a 3d printed item like the one in the picture above.
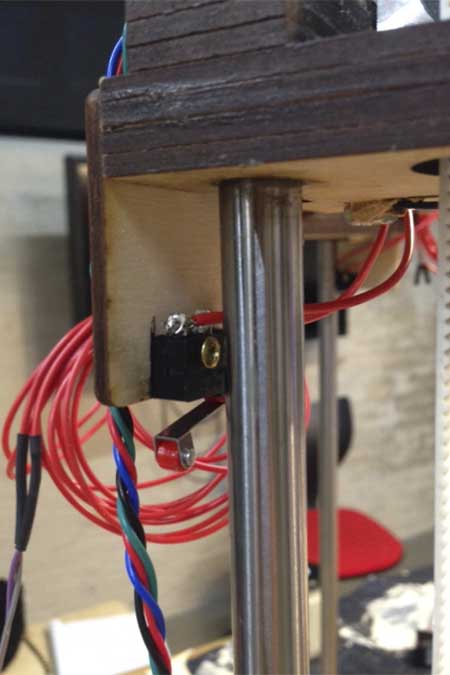
Endstops
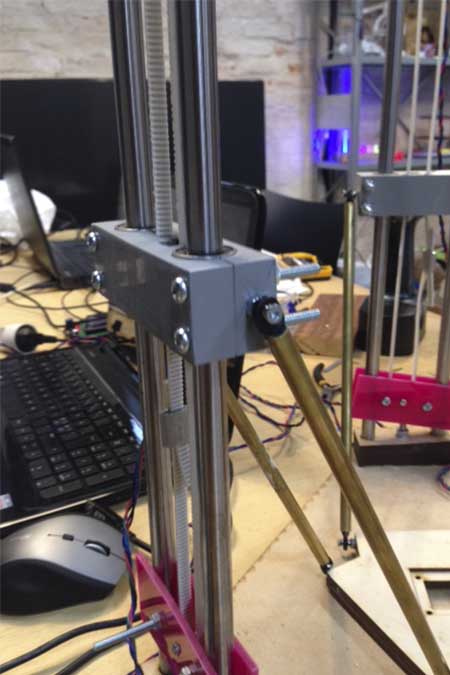
Detail of the 3d printed holders
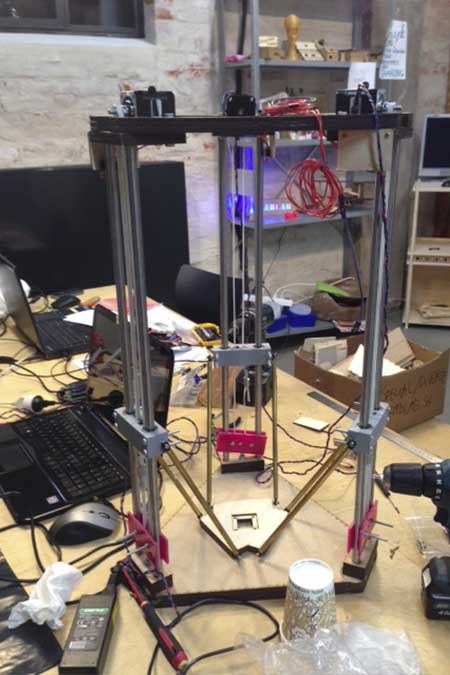
Our mashine
A hero picture of our clay printer.