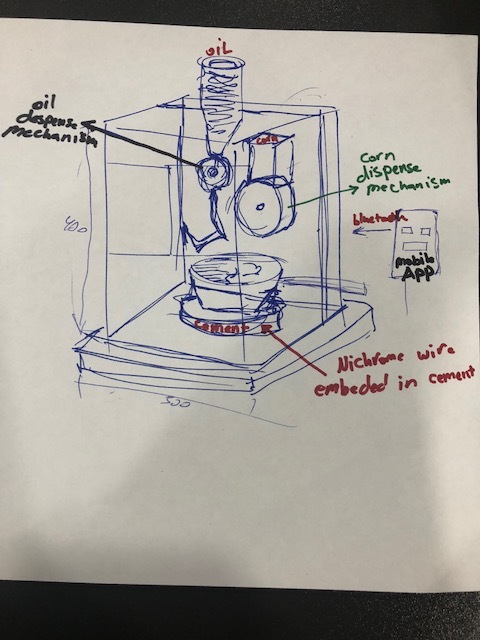
I am real big fan of pop-corn, I could literally eat it at anytime, for my final project I will be making a pop-corn machine which will pop popcorn with the use of a nichrome wire (heating element) embedded in a hydro-stone (cement), attached to a stainless steel pot. The machine will also allow the user to automatically select the portion of corn required and the oil via mobile application using bluetooth. This will be a first prototype in order for me to actually make a fresh pop-corn vending machine !!
I am planing to use nichrome heating wire to heat up the pot, thus my initial plan was to use our 3d clay printer to print a pot and have the nichrome wire embedded into it. I will be using a heating element nichrome with a resistance of
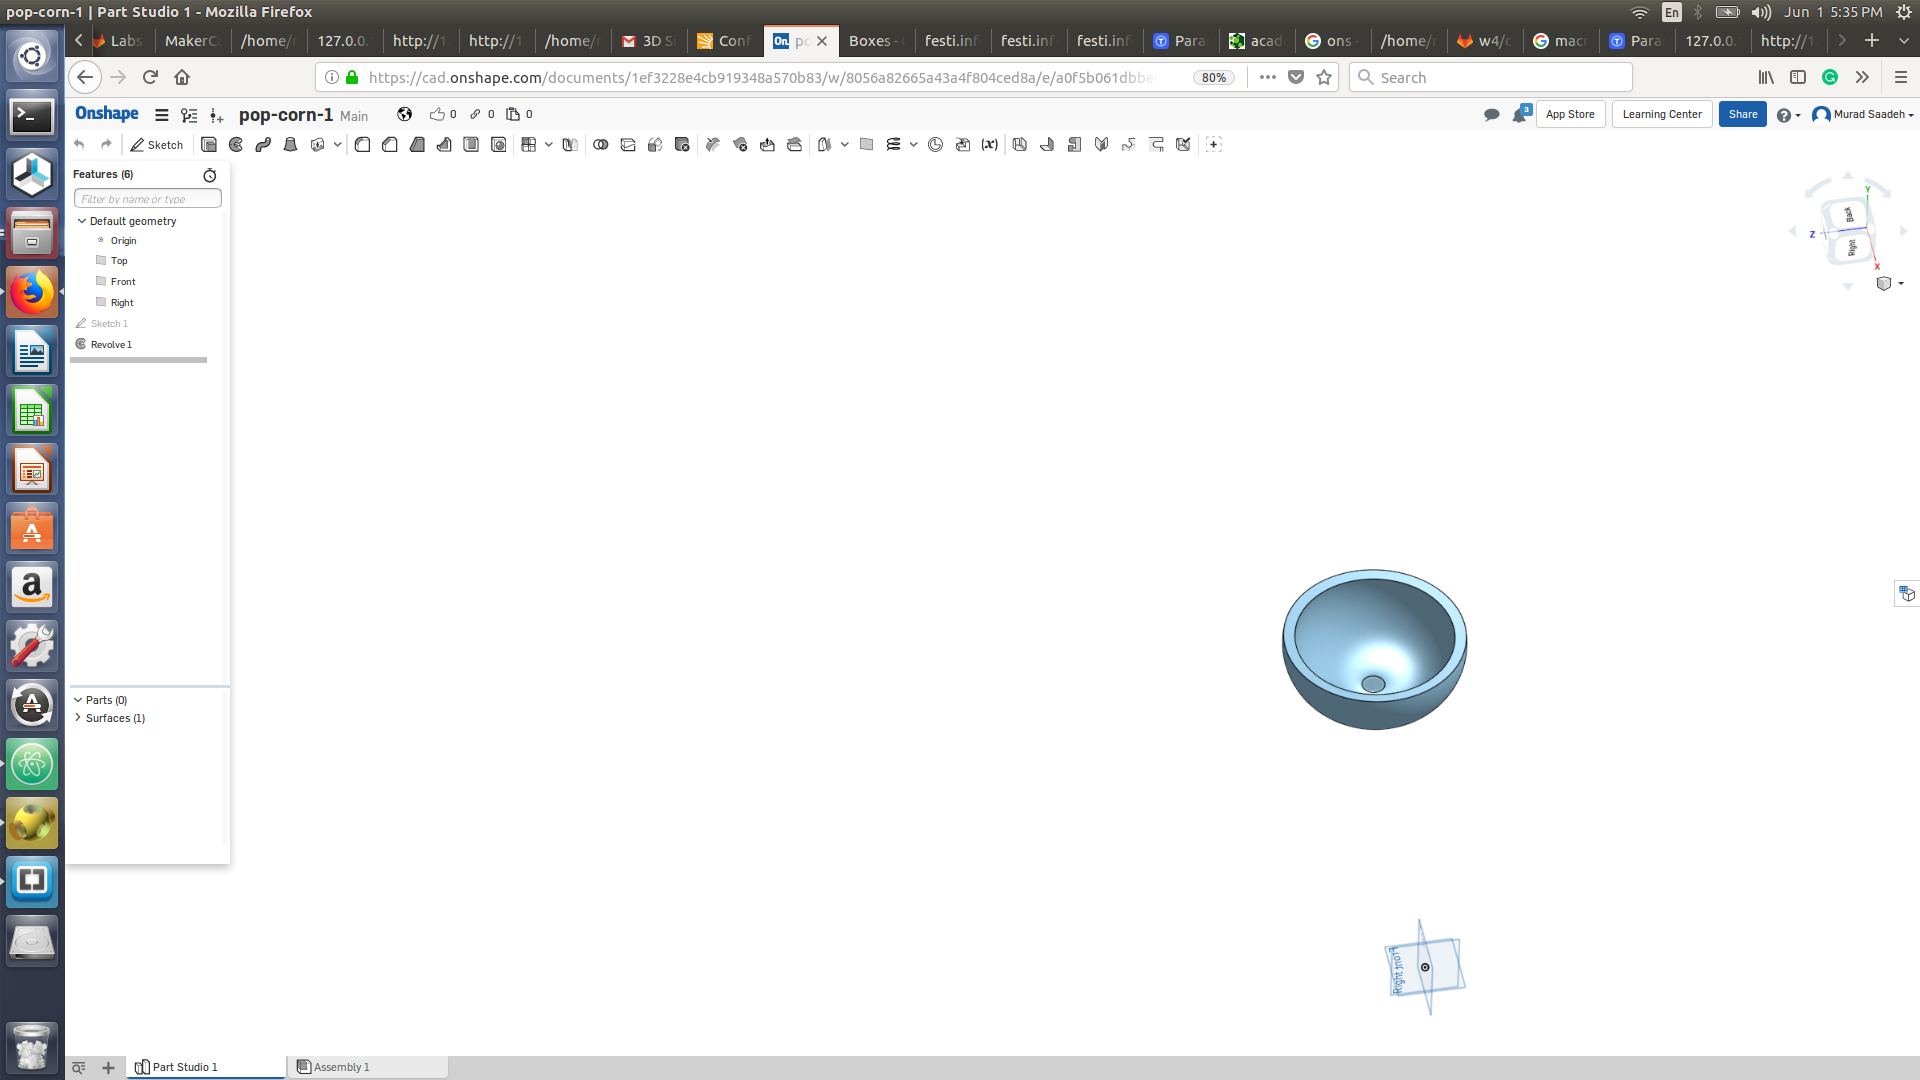
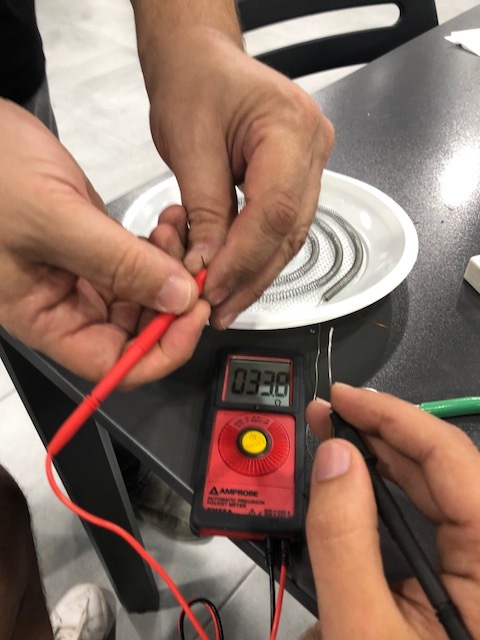
I will be using a heating element nichrome wire with a resistance of 30 ohms, thus when I connect to 220 volts it would consume 1500 Watts. I did my first test using a nichrome wire with 65 ohms resistance but wasn’t heating as expected and took ages to actually heat up, so for the final I used the 30 ohms nichrome wire.
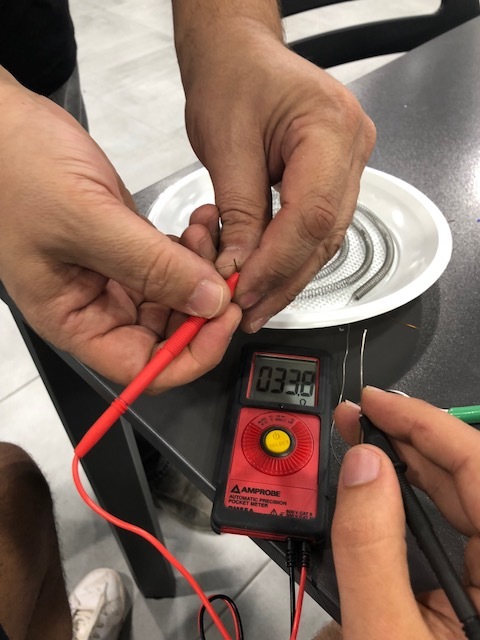
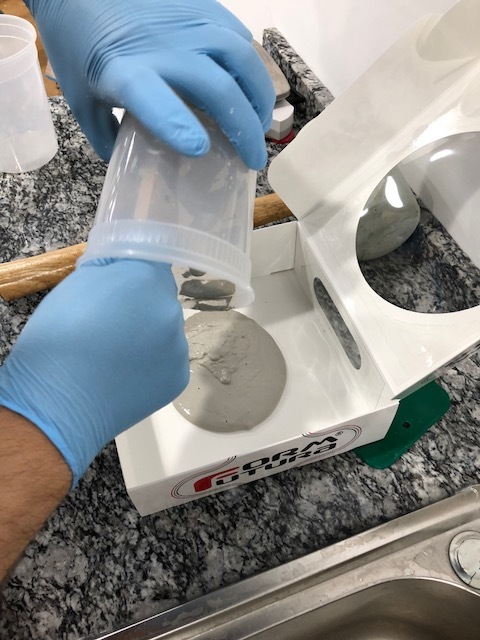
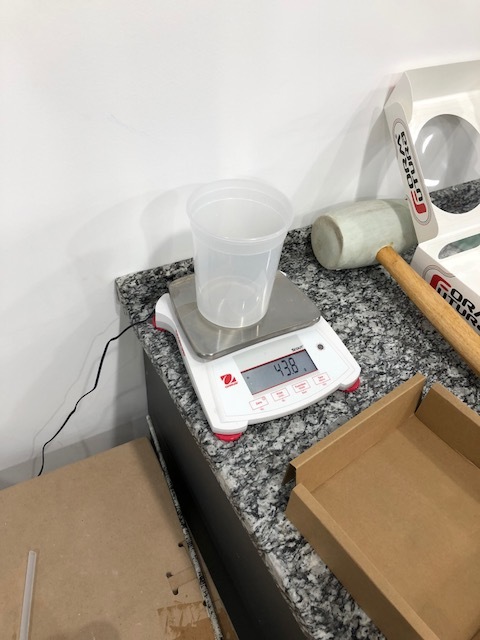
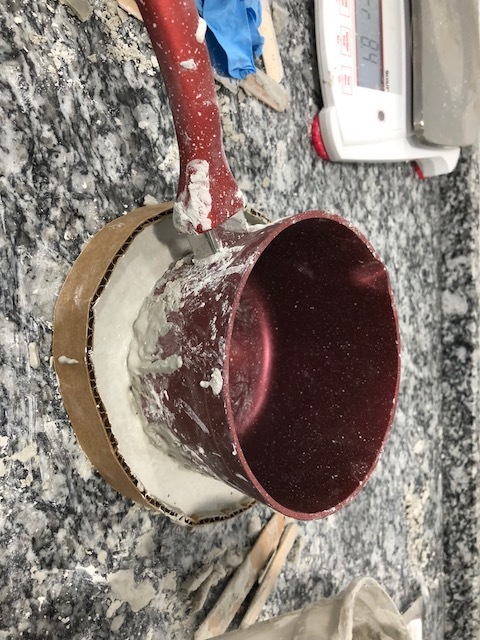
I came on the random Wednesday student check, Prof.Neil has suggested for me to try using the hydro-stone (cement) and embed the heating wire into it. I really did like the idea and I gave it a try. The hydro-stone that I will be using Hydro-stone super X (USG)link. Ratio of hydro-stone to water is 5:1, where I used 1000 grams of cement with 220 grams of water
Results were very amazing, I tested it I noticed that when I connected it to the electrical socket and the heating wire started heating , the actual cement was getting humid from inside and releasing water and some cracks were noticeable but this didn’t cause any effect as I kept on while for 30 min while putting water in the pot. Unfortunately, I did a stupid thing when I reconnected the wire to electrical plug, I forgot to ensure that the 2 end of the heating element were not touching which made the nichrome wire get burnt. I have to redo the cement composite again.
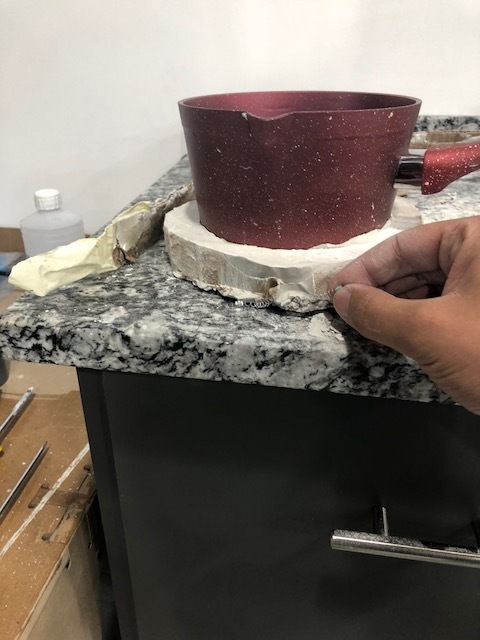

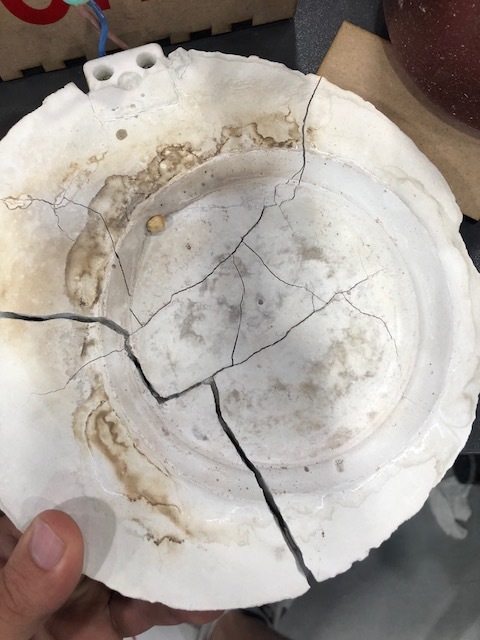
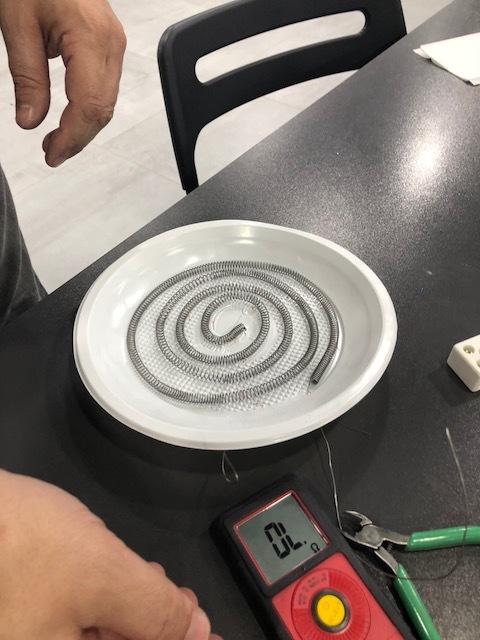
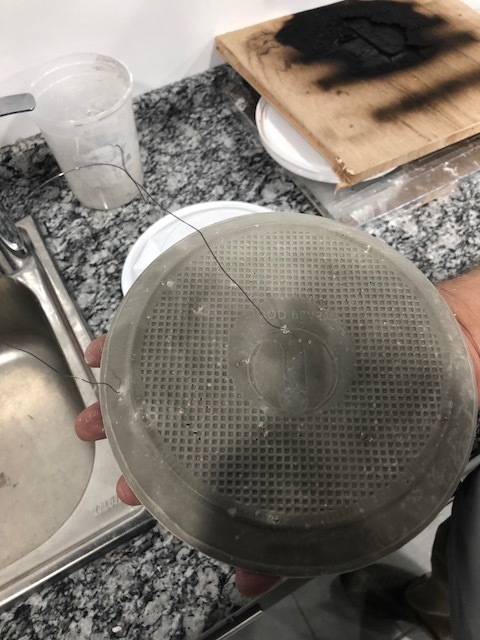
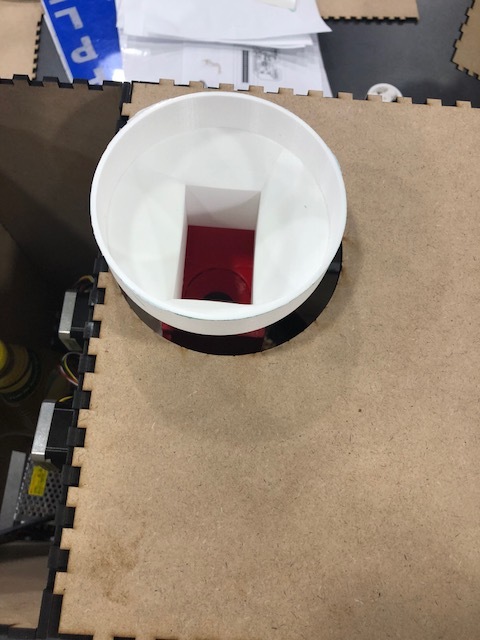
After several test the actual cement composite became very soft and unstable and big cracks were noticeable. This could have been done due to two things either that because I didnt control the heating medium with a rely to turn off the temperature once it reaches 250 degree Celsius, where for the first test I actually left it on for more than an hour and half. The other reason could be because of the way we routed the heating element in the cement composite. I have re done it while ensure to use a circular shape for routing the heating medium in the cement (check image bellow) and I am going to use a solid state relay with a thermocoupler to control the temperature.
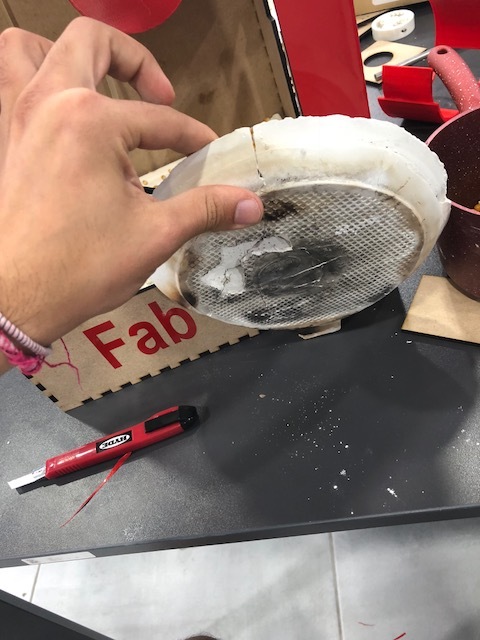
Unfortunately when I connected it to 220 volts, a lot of water was coming out from the cement and this has lead to both side of the heating element to break and create a spark. I ll re do it again but I will try to reduce the amount of water I will put into the composite. Moreover I think the other reason that lead to this is that I kept the pot on the cement while the cement was releasing water which lead to water to condense below the pot.
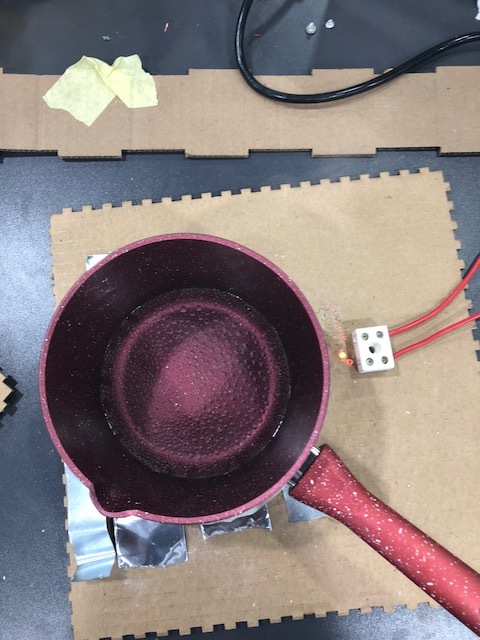
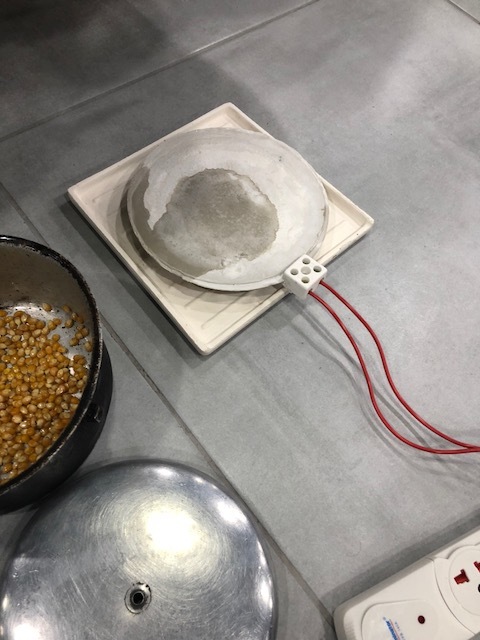
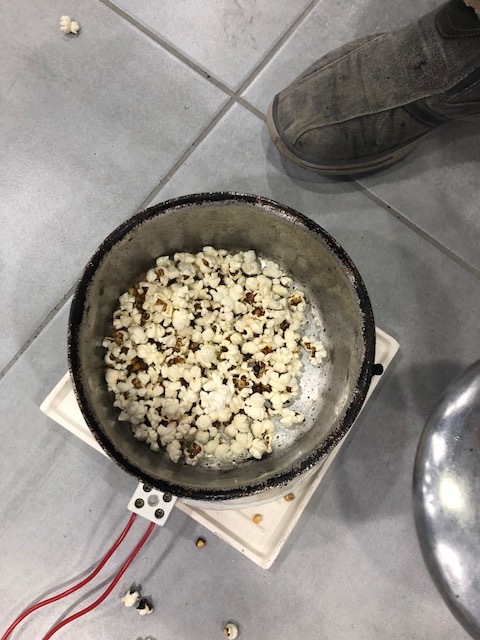
I re did the cement composite again and now using the 750 Watts wire ( 750 watts when connected to 220 V), I did try to reduce the number of layers as before I used to fit it the nichrome wire then wait for the cement to dry then make another layer to insulate it from the pot and then make the below layer to cover the end of the wire, for this time I just did 2 layers. For the water to dry I have placed in the sun for around 30 minutes ( I am not sure if thats a smart move or not!! but some people did advice to dry it out first). anyhow at the end this did work and the popcorn did pop but while waiting for all the pop-corn to pop a spark was noticed and the nichrome wire stopped conducting heat ( the actual 2 layers were spread apart so the end of the nichrome wire is where the spark happen)


I think it would be most approproite to use clay instead of cement as the cement cant withstand the temperature of the nichrome wire, the only difficulty is how to dry the clay. We have a really tiny furnace at our lab !!! I ll add more details once I test that keep visiting this page for more information.
When I presented my project Prof.Neil did suggest that I should have gradually heated the composite so that all the water must dry first. he suggested to do that by heating it to 50 degrees for 20 minutes, 100 degrees for another 20 minutes and so on.
I have researched several dispense mechanism, the first mechanism that I encountered was the Archimedes screw where it’s used at one of our lab machines (Delta 3mt WASP 3d printer) to dispense clay. I really did like the idea of using Archimedes screw, however I didn’t think it would be a suitable for my need as it would be kinda of hard to measure the amount of corn dispensed after each round. The Internet was full of ideas on how to dispense food for your pets, most of them do use an opening hinge for a specific amount of time then they would close it. As this idea do also sound great but I have came with an idea of a rotational wheel that would carry a specif amount of corn and dispense it.
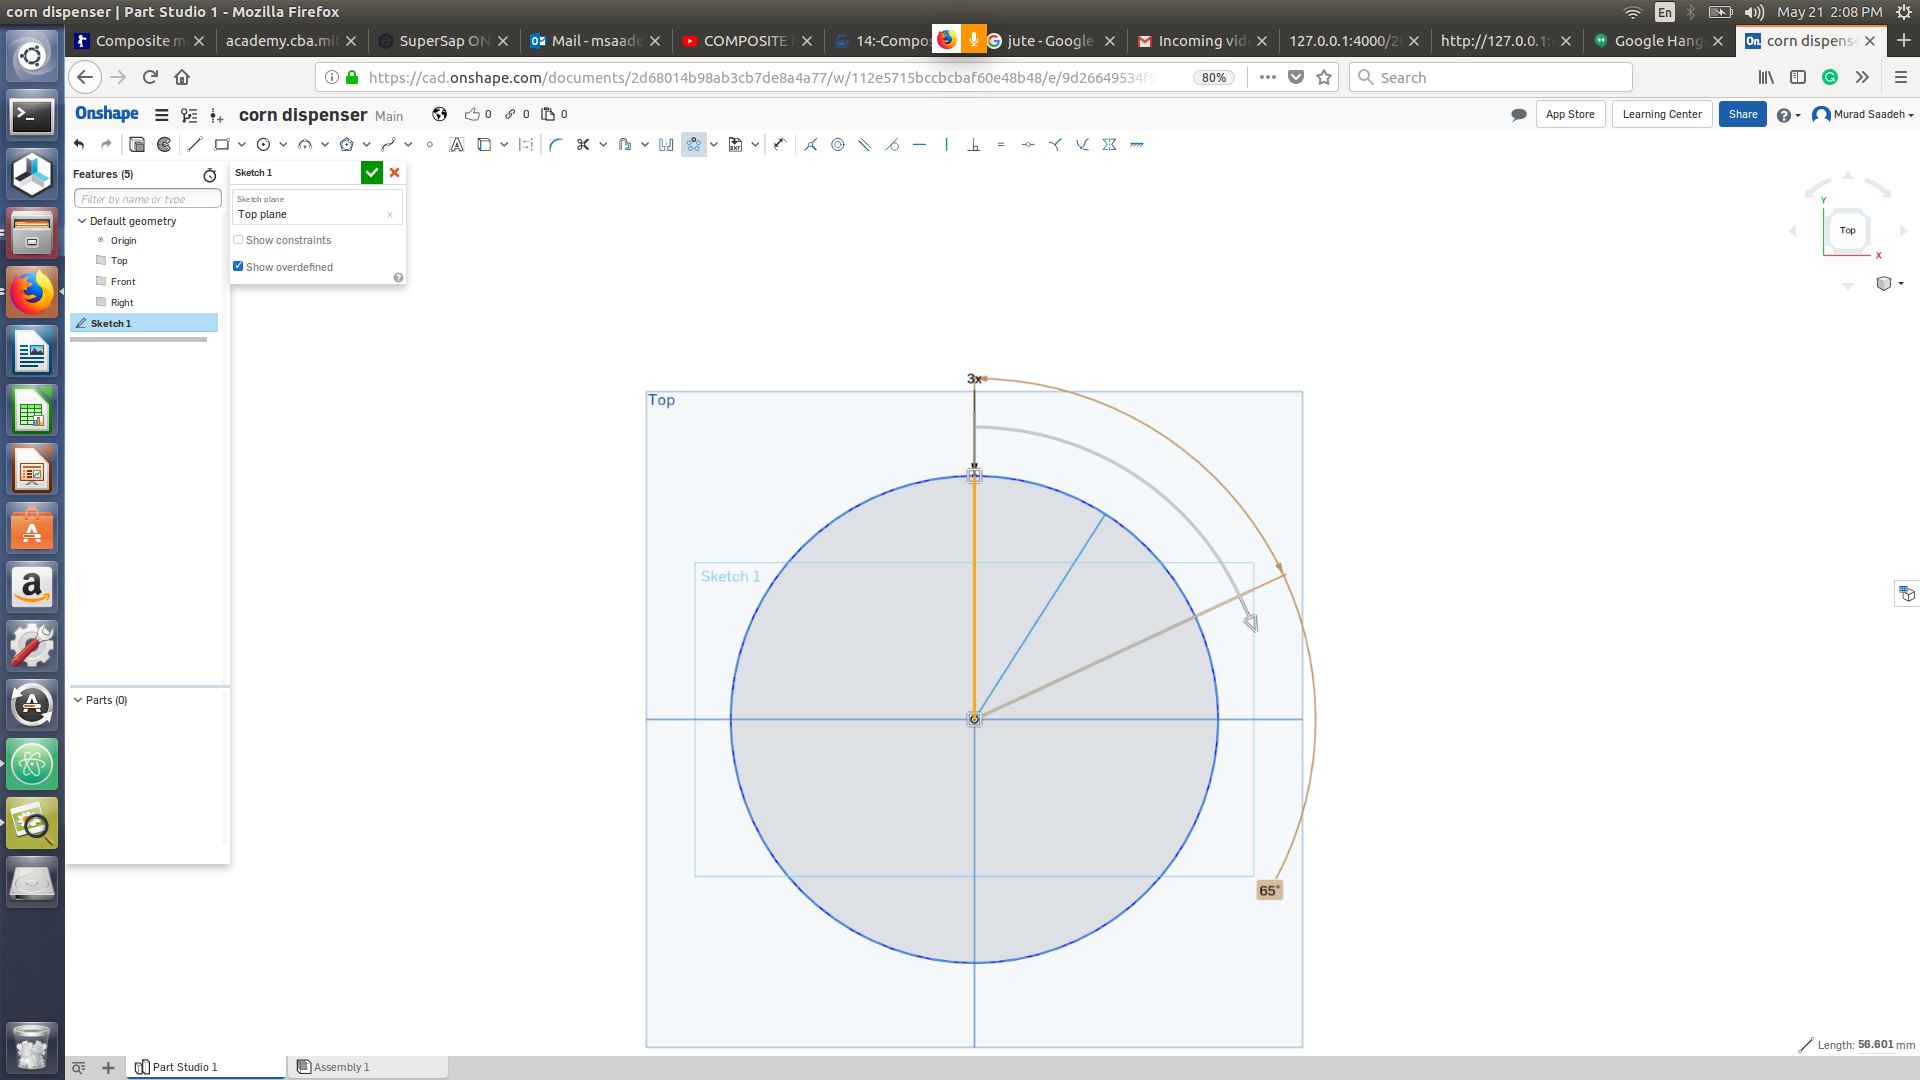
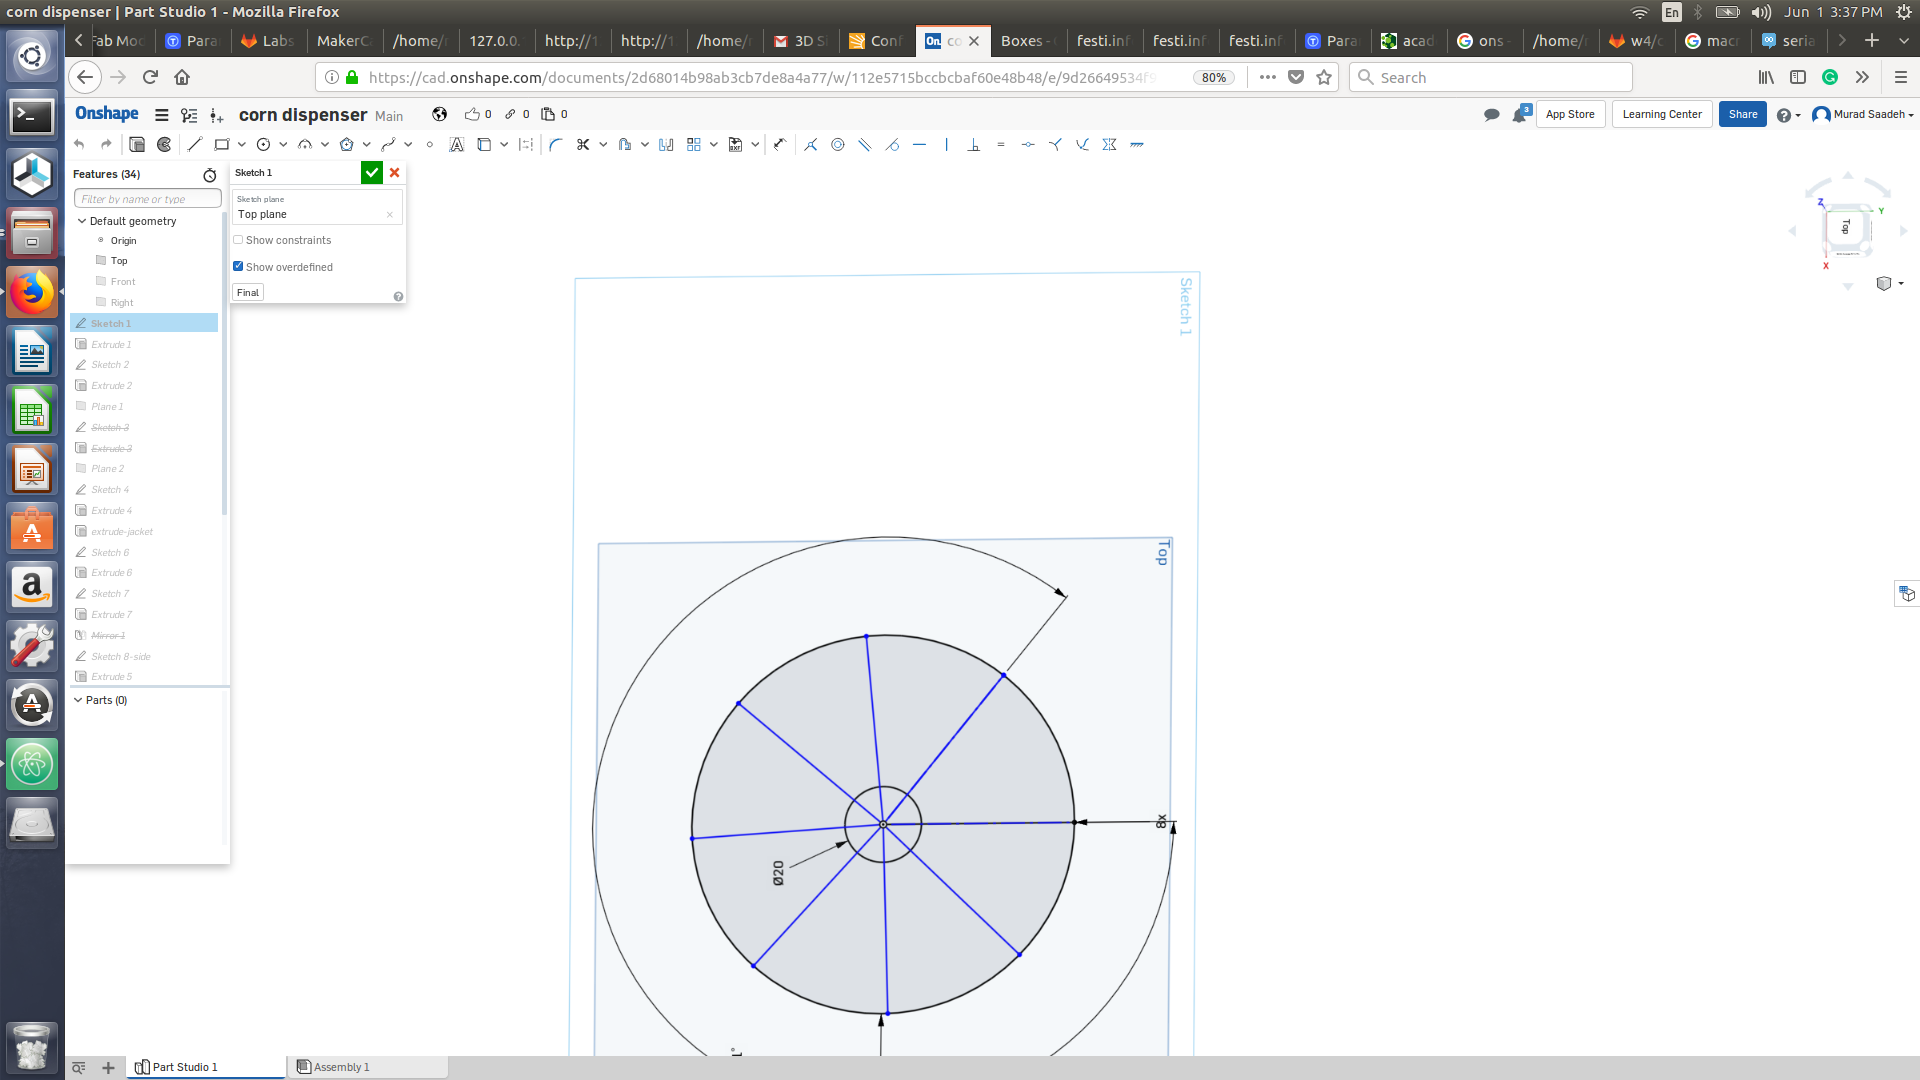
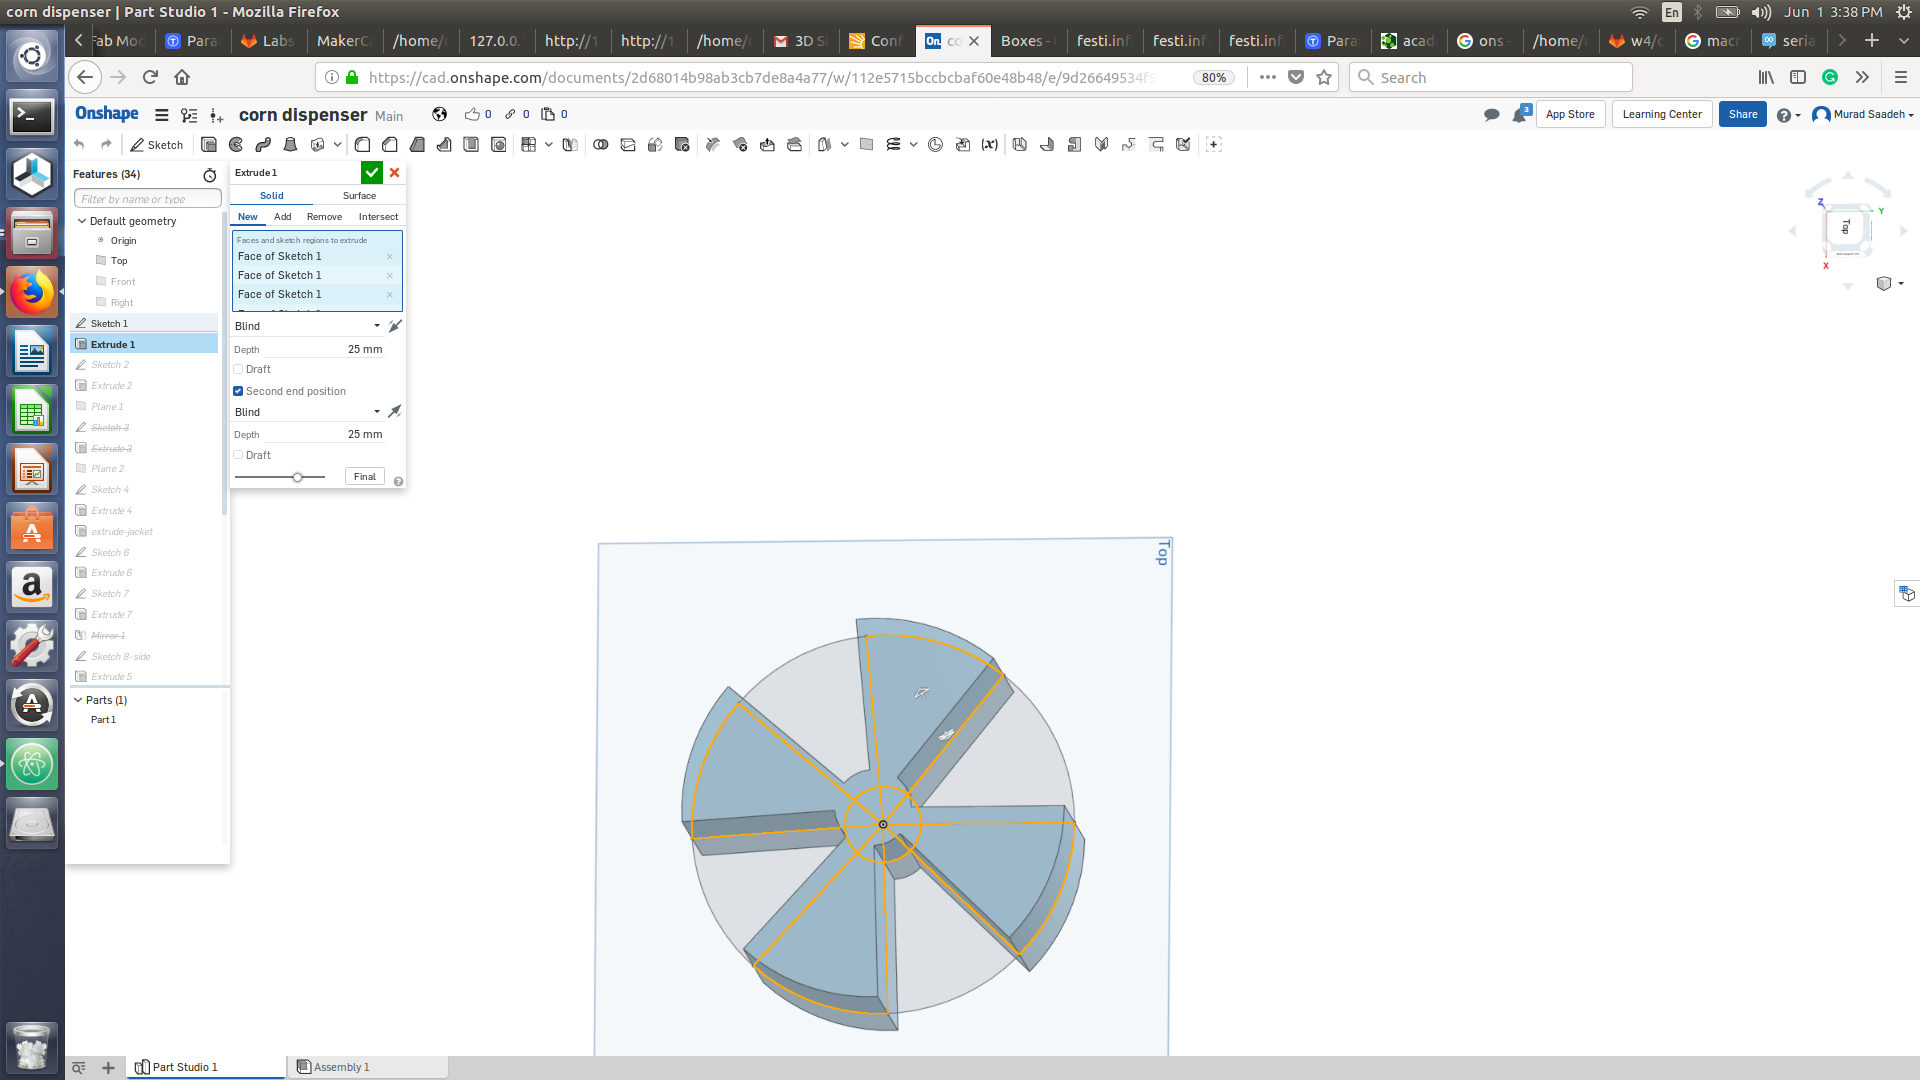
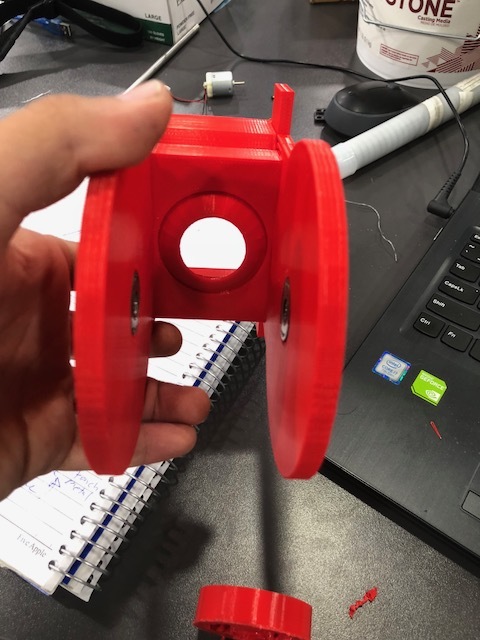
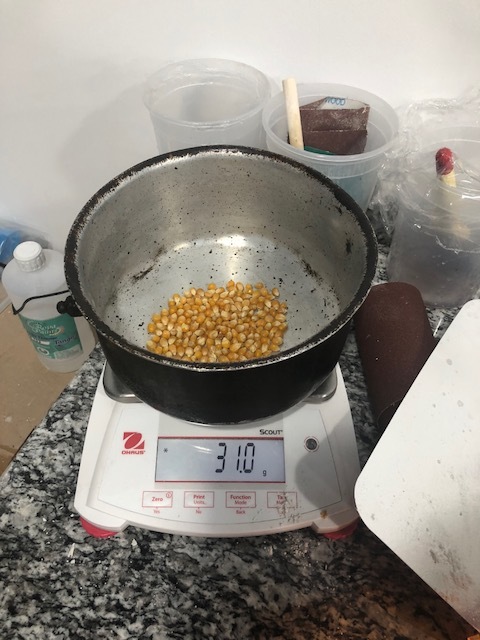
I will be using on-shape to design this part, I started with creating a circle and dividing it into 8 slices, where then I only extruded 4 of them that are going to be responsible for blocking the corn from coming out of the holder. I then created the outer jacket on the edges of the rotational mechanism, I have created with a hole of 8 mm in order to fit in a ball bearing for linear movement where I ll connect it to a DC motor to rotate it. Attached below is the image and source file. about 35 grams of corn is dispense every turn
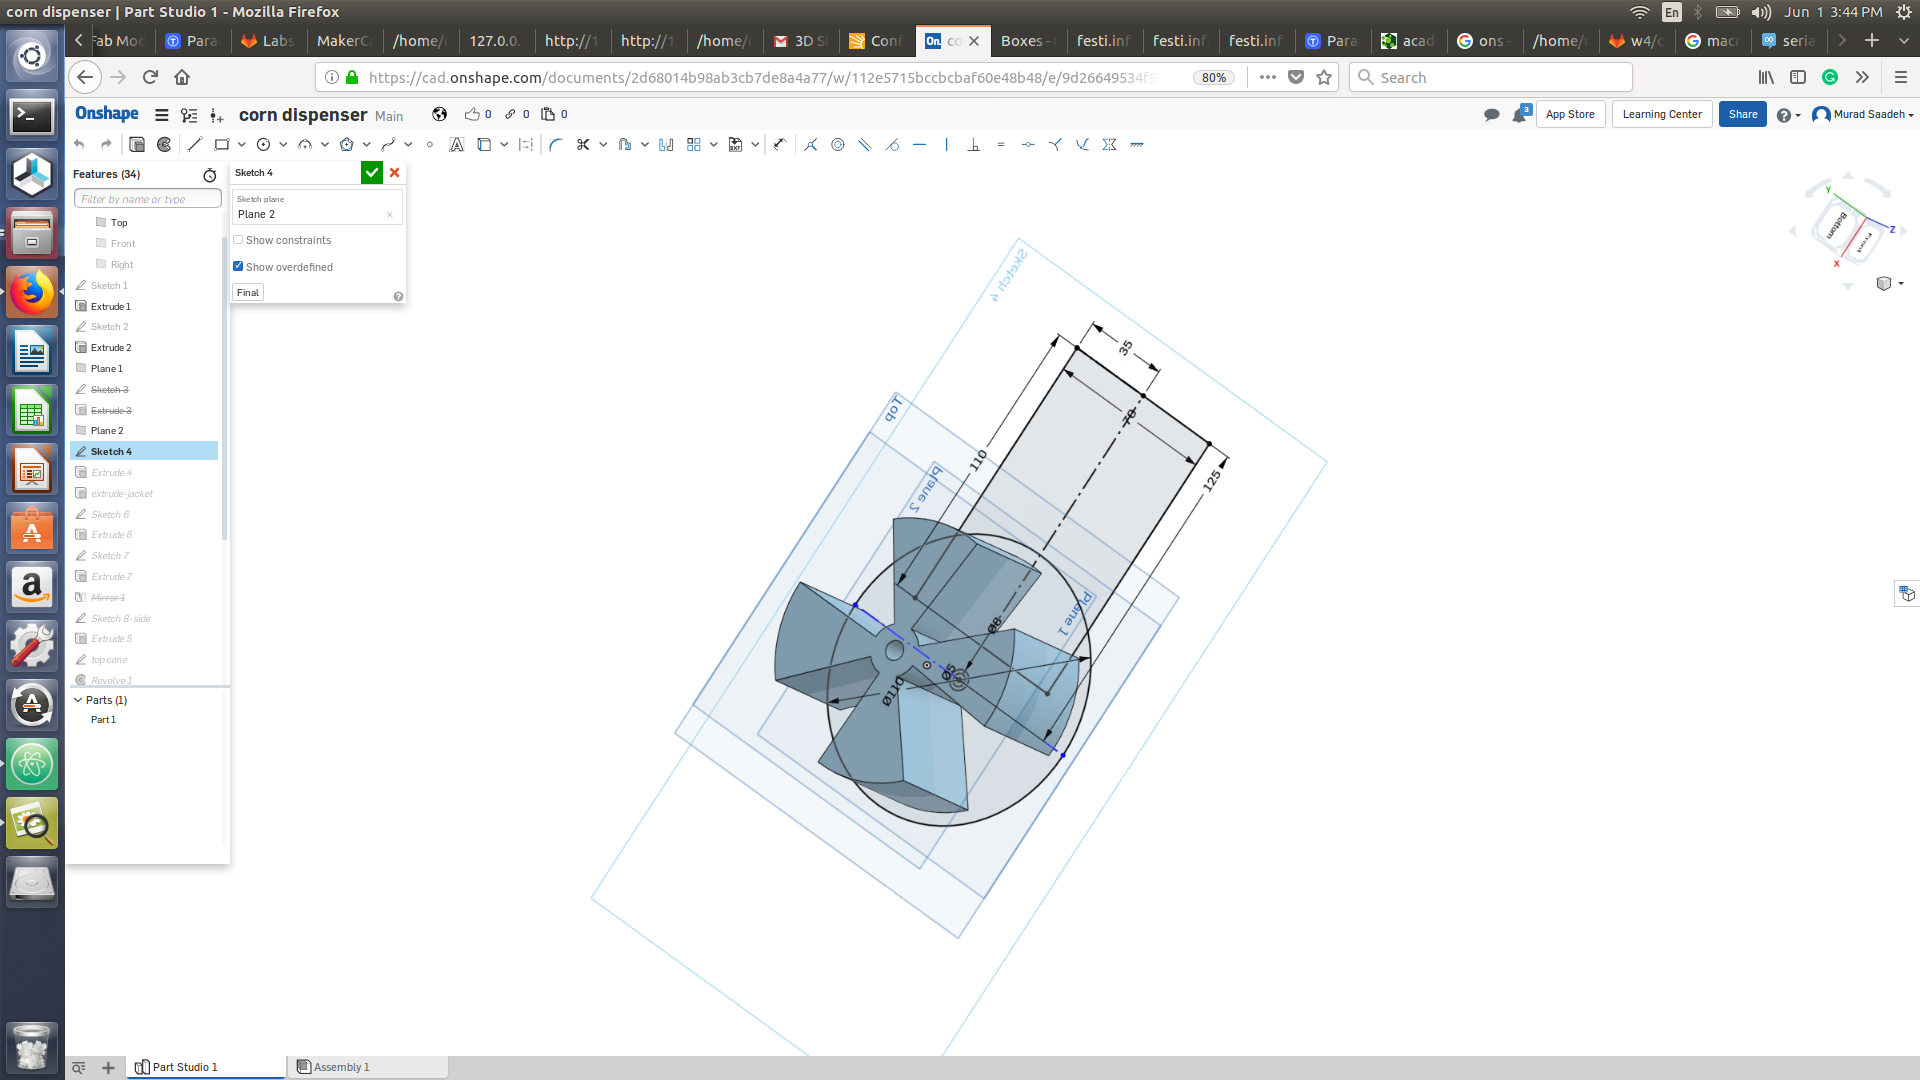
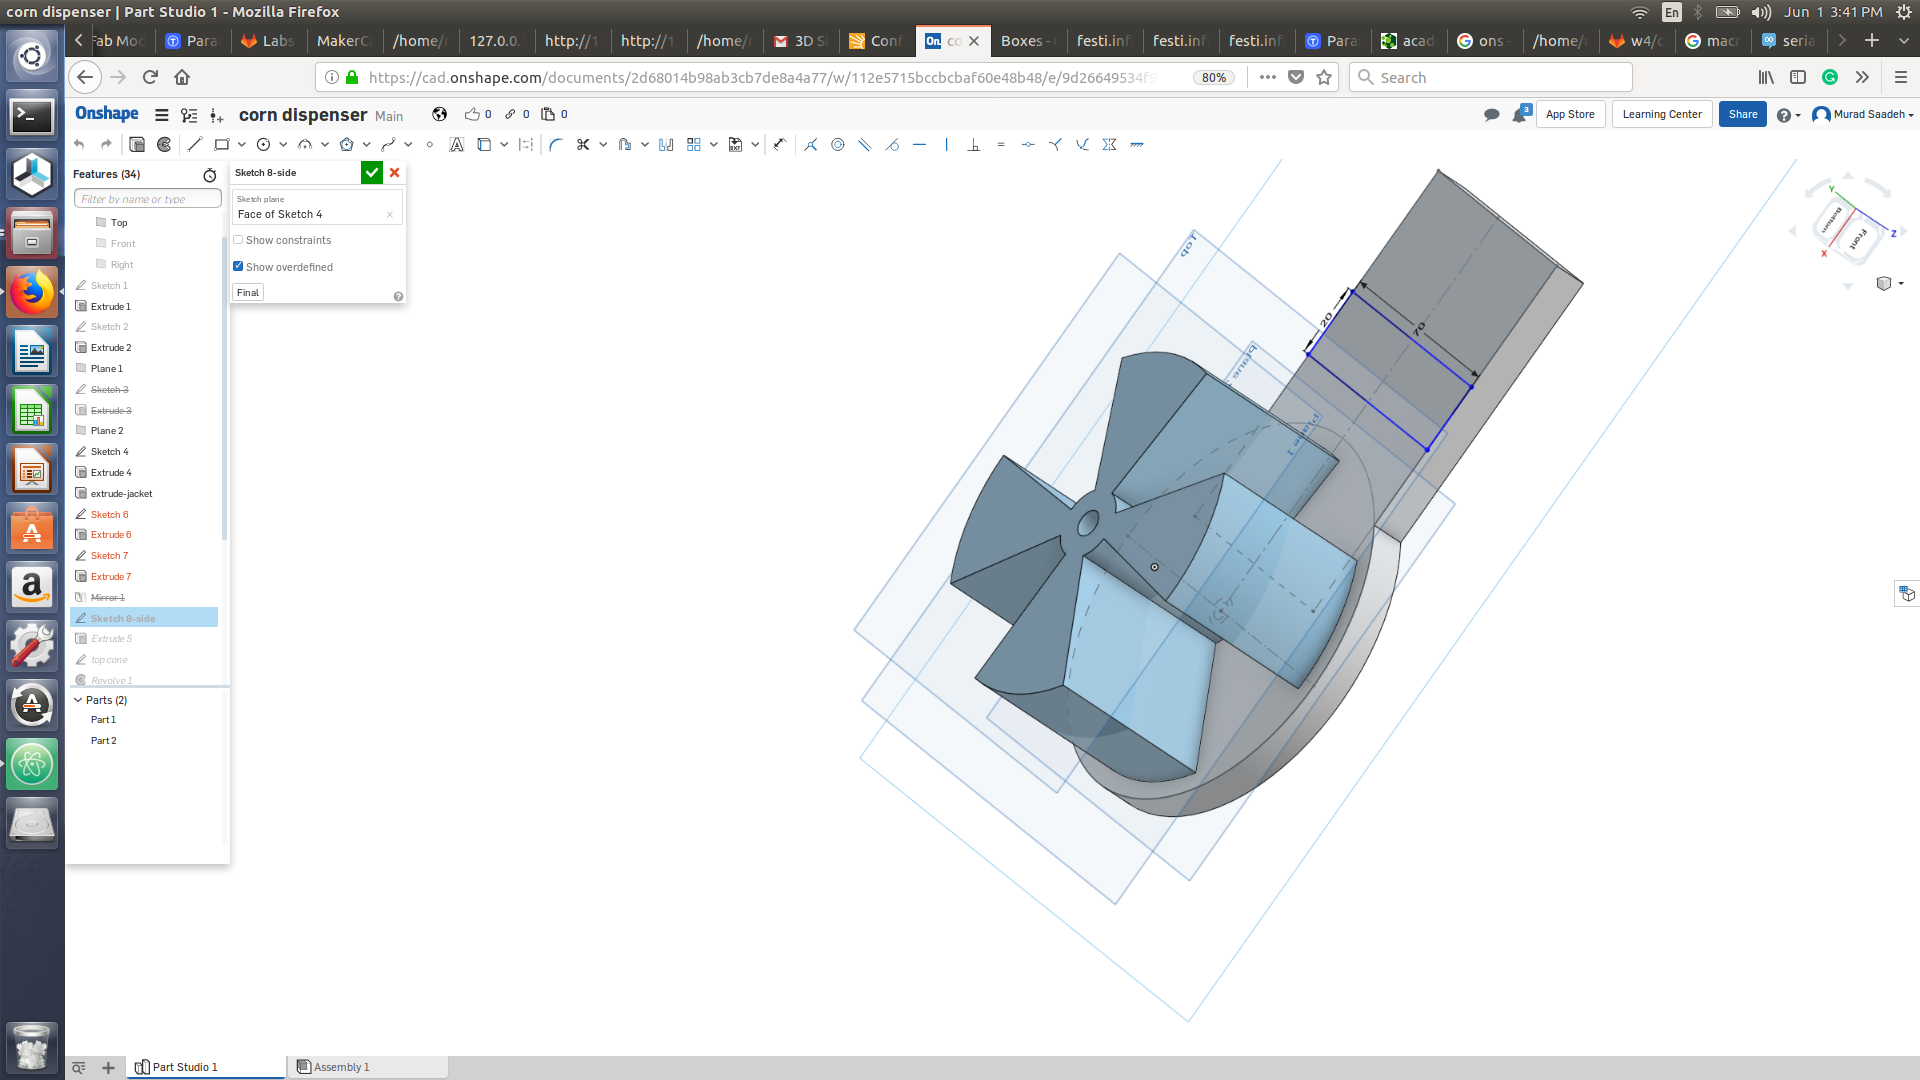
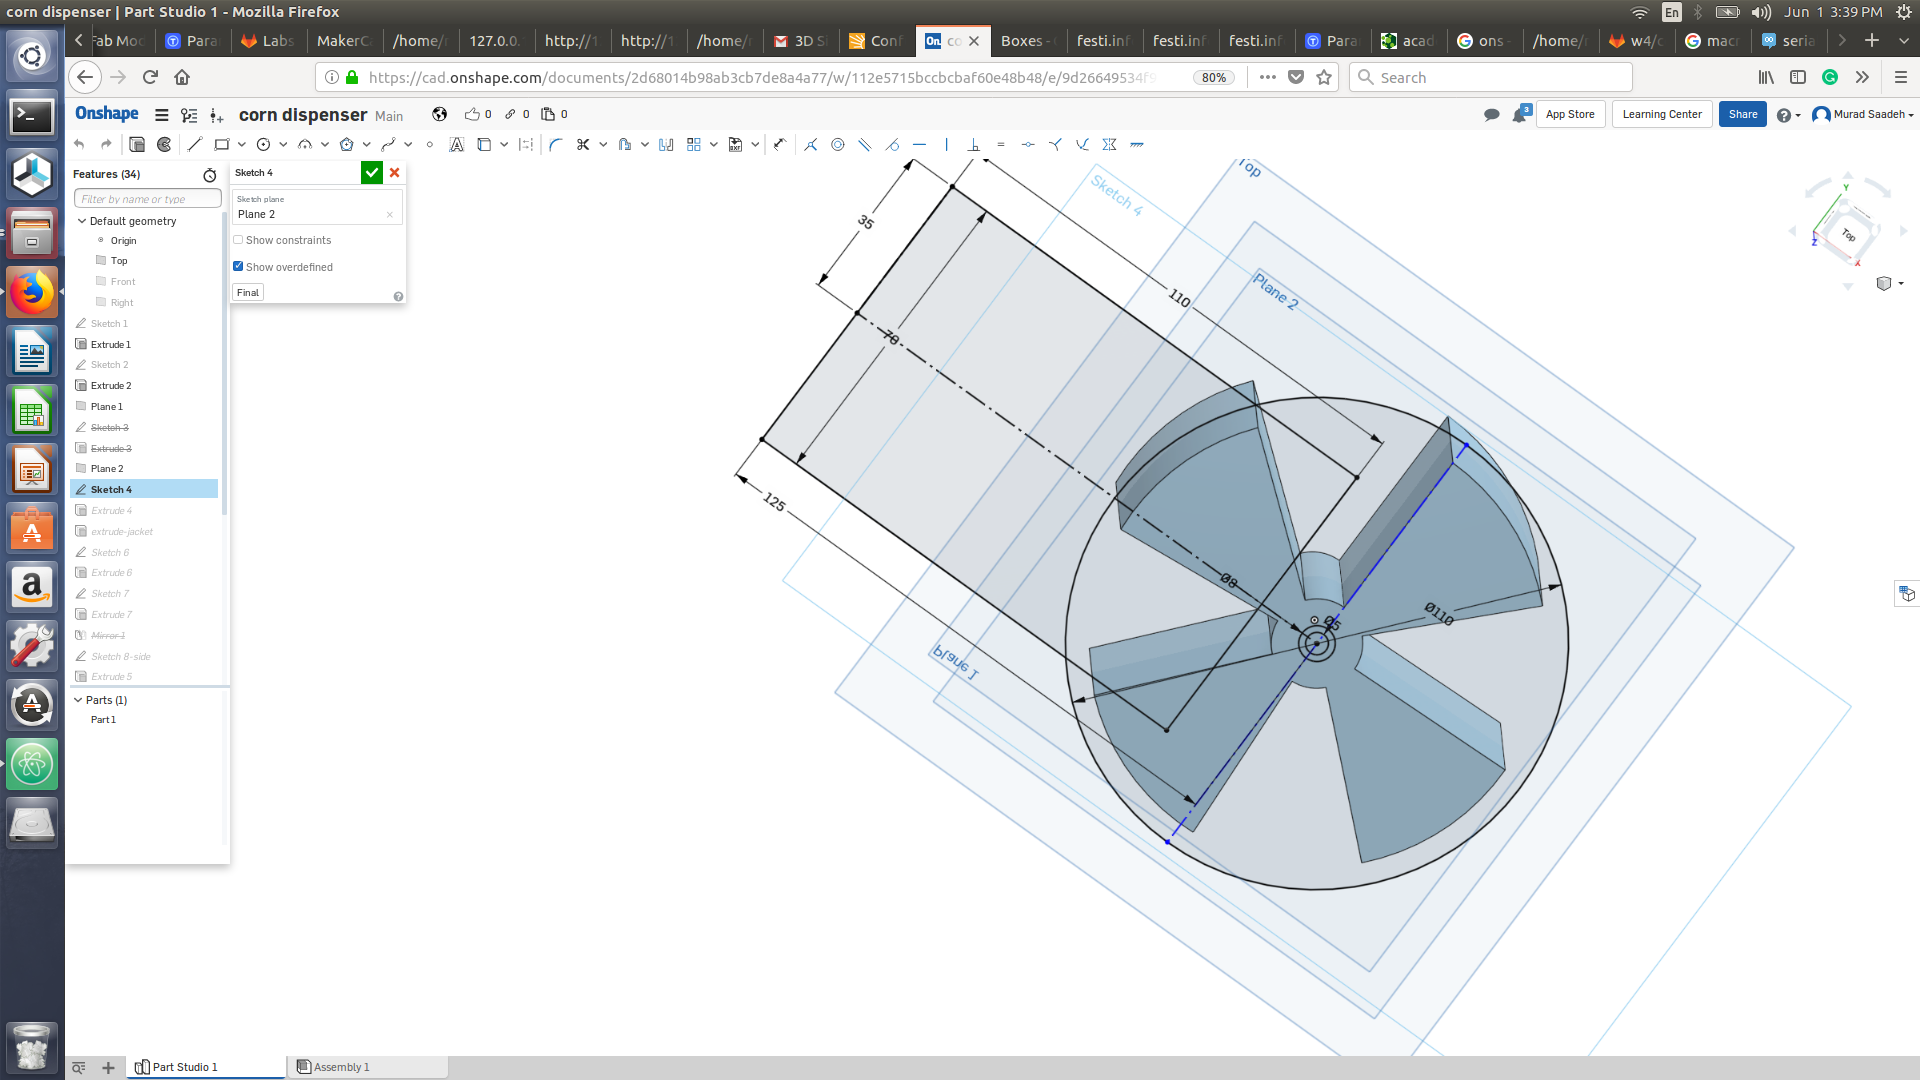
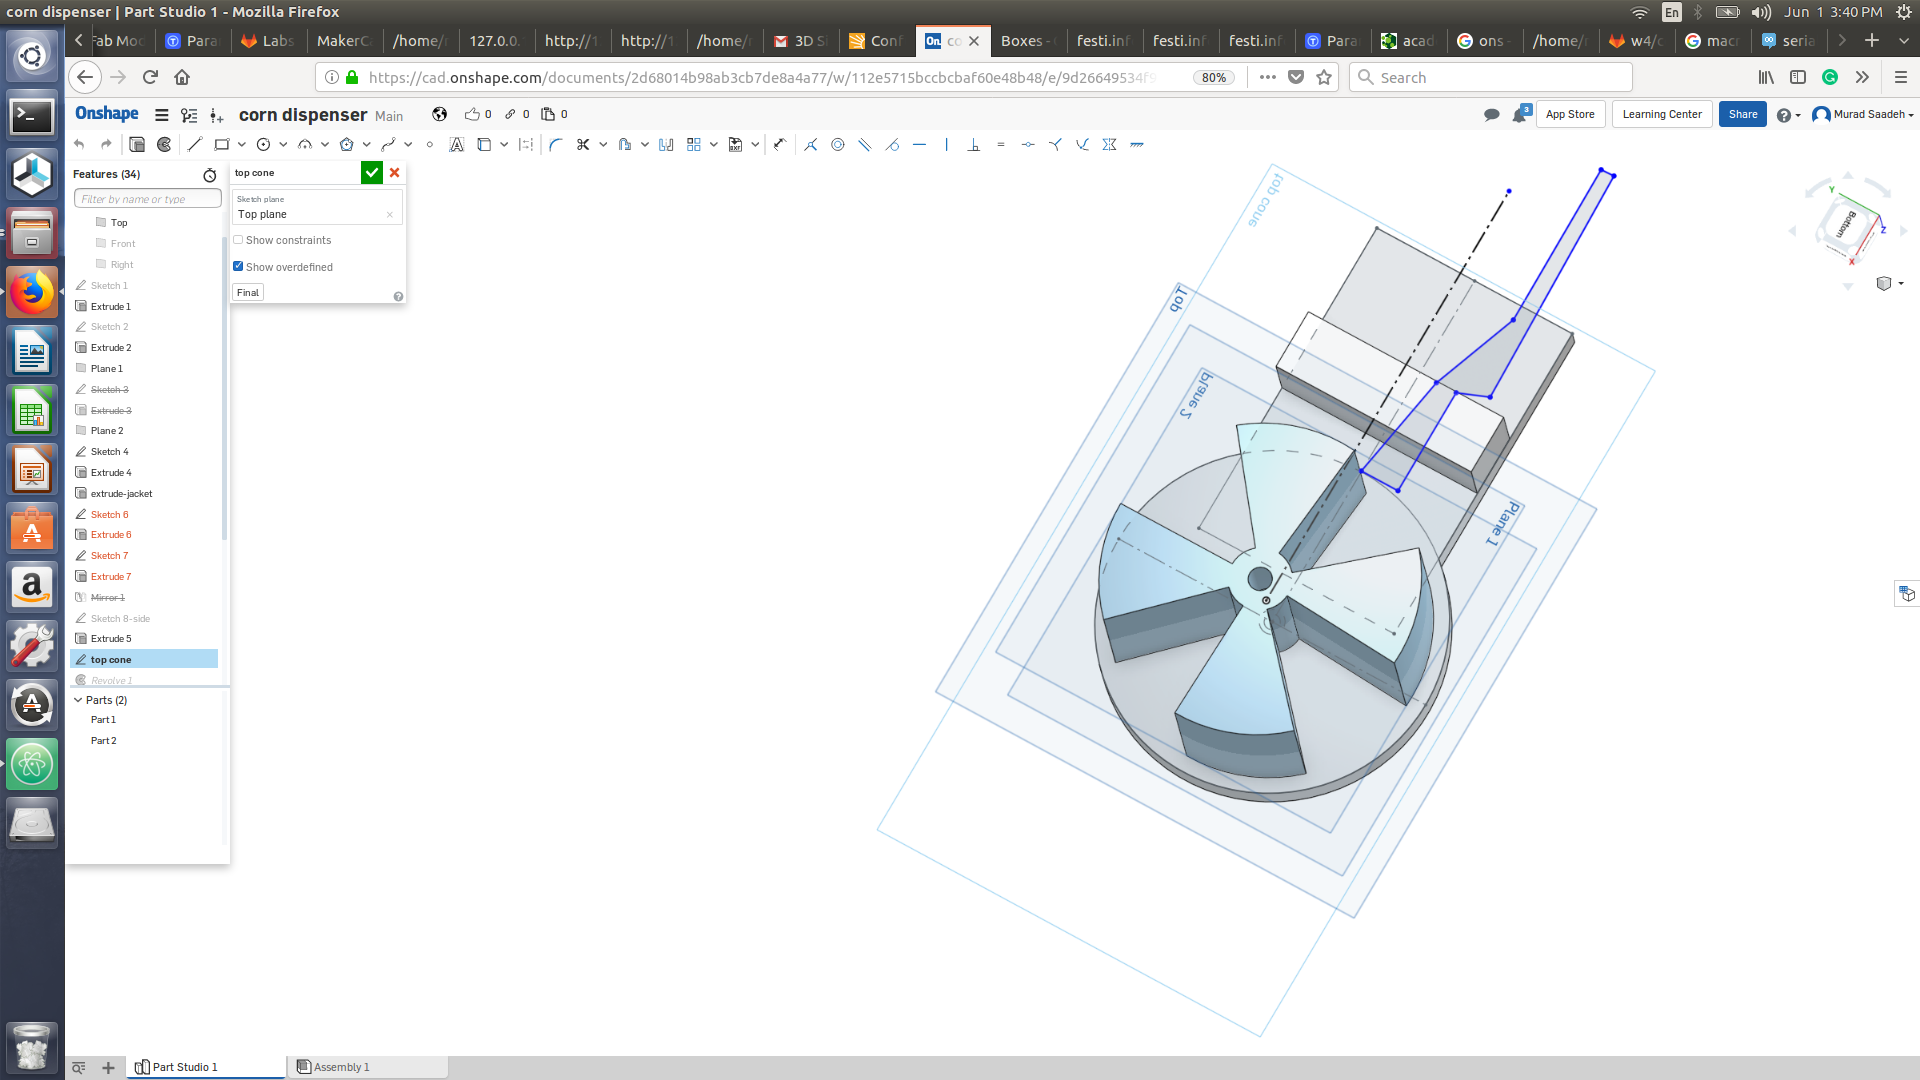
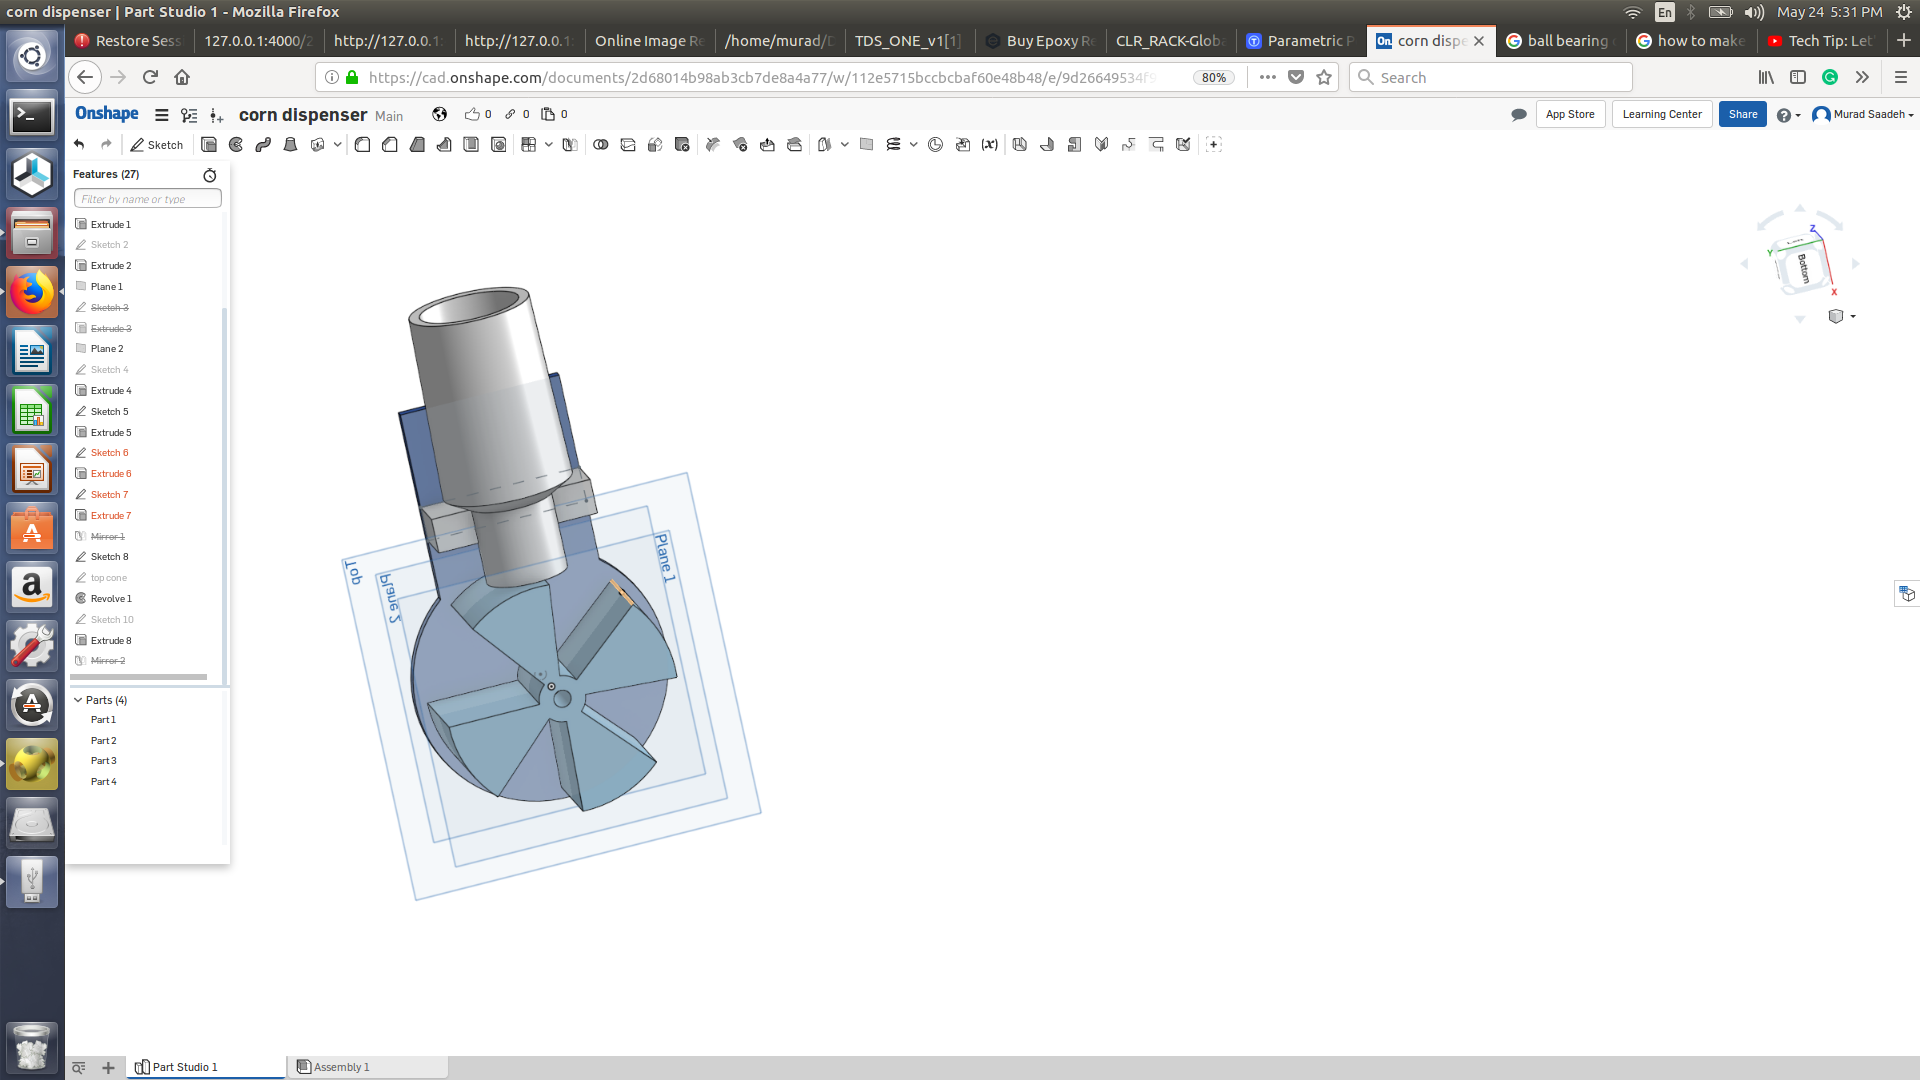
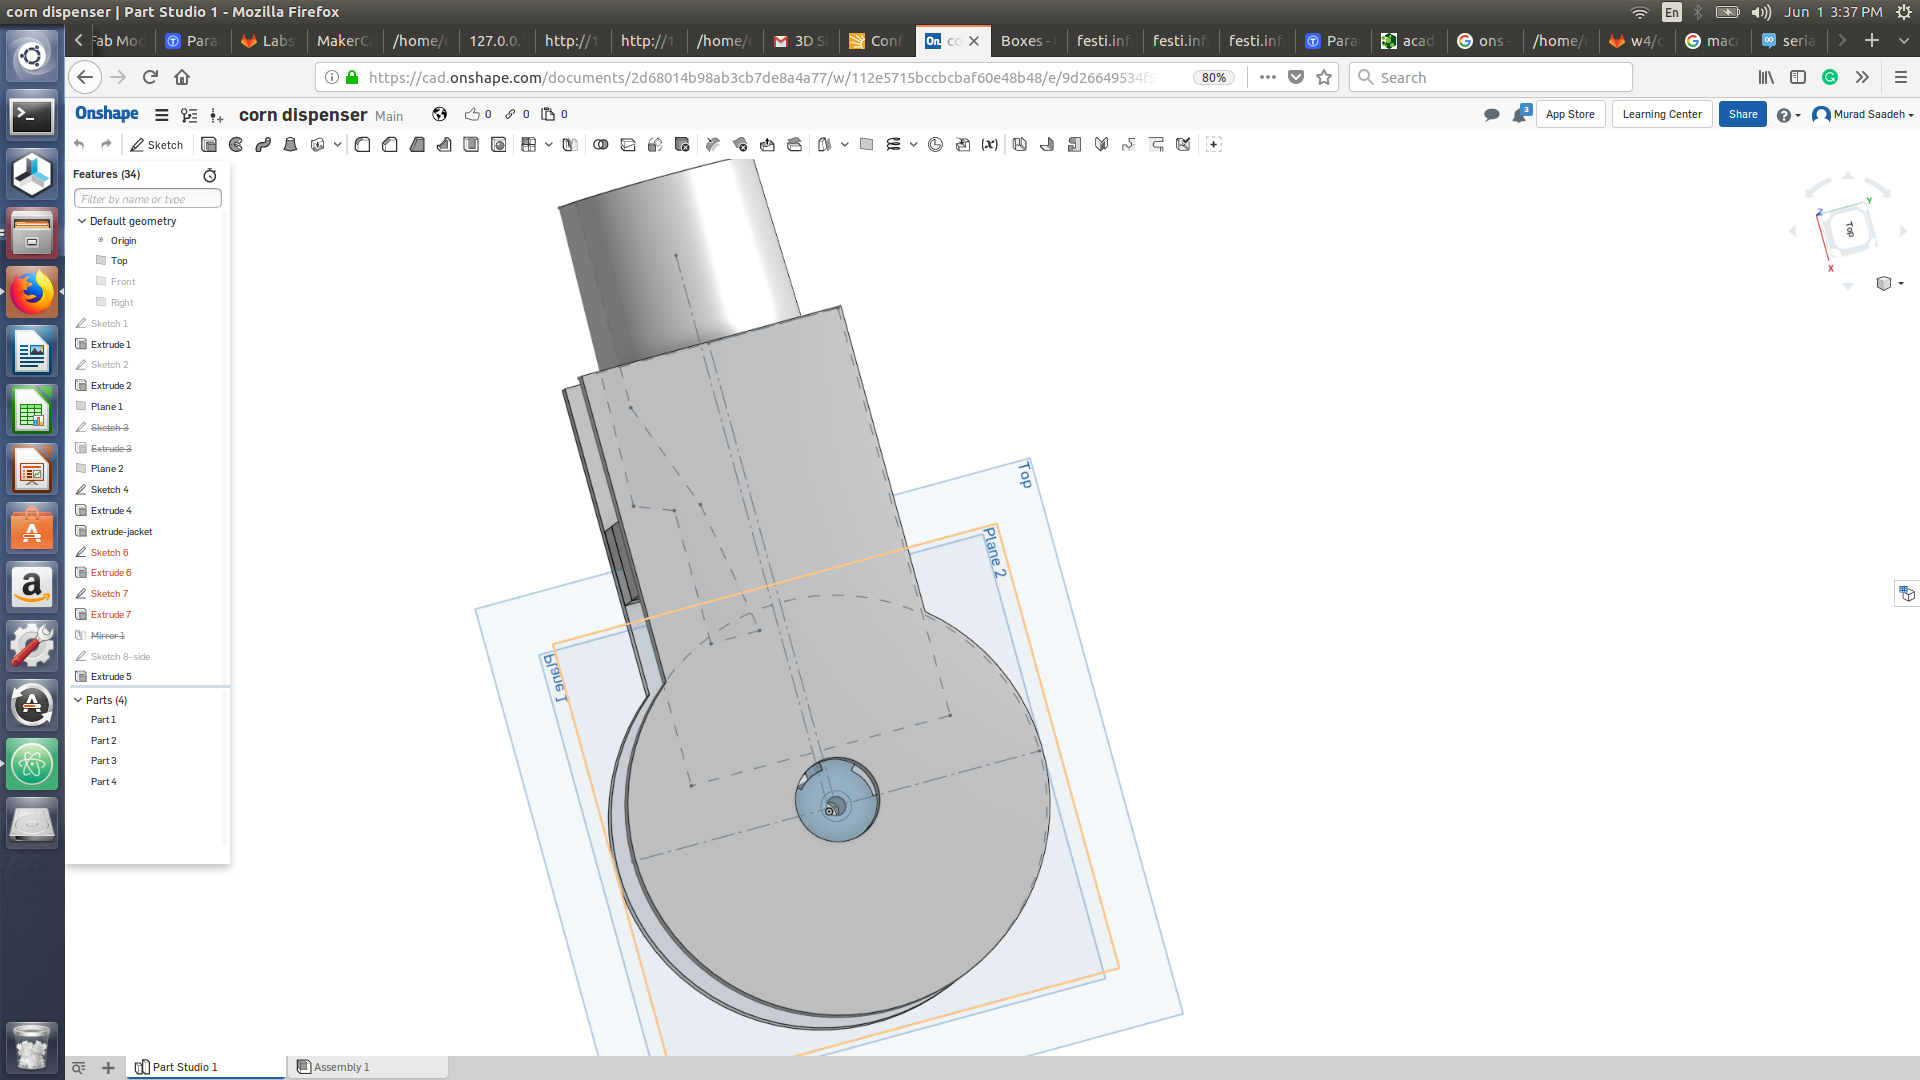
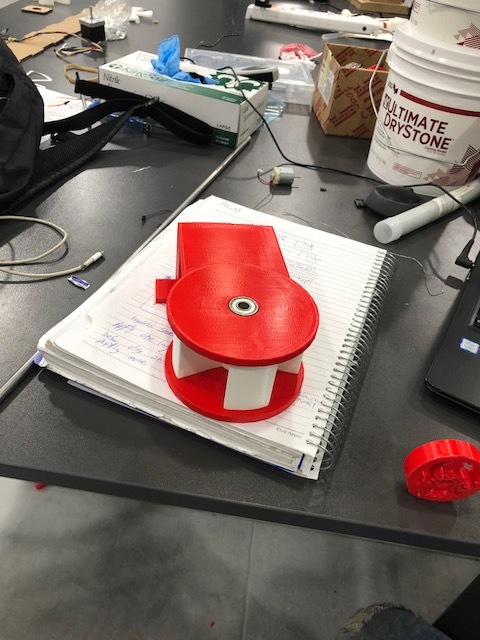
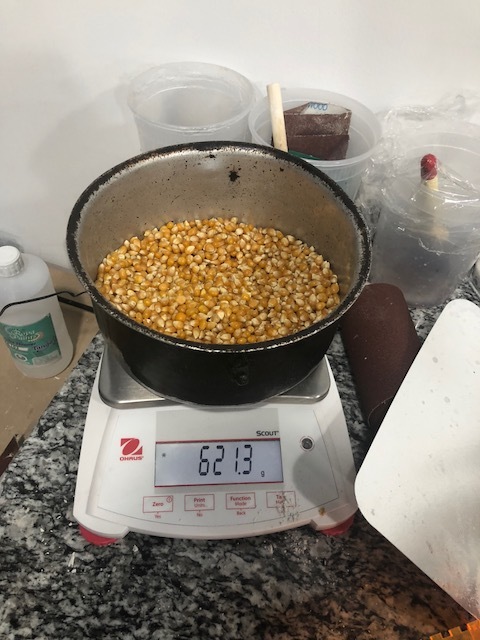
The actual size that the corn dispense mechanism is bit small as it can handle up to 200 Grams of corn, thus in order to improve I designed an extension in order to be able to hold a full popcorn bag which is equivalent to 600 Grams.

Corn dispenser Rhino
click to downloadExtension Rhino file
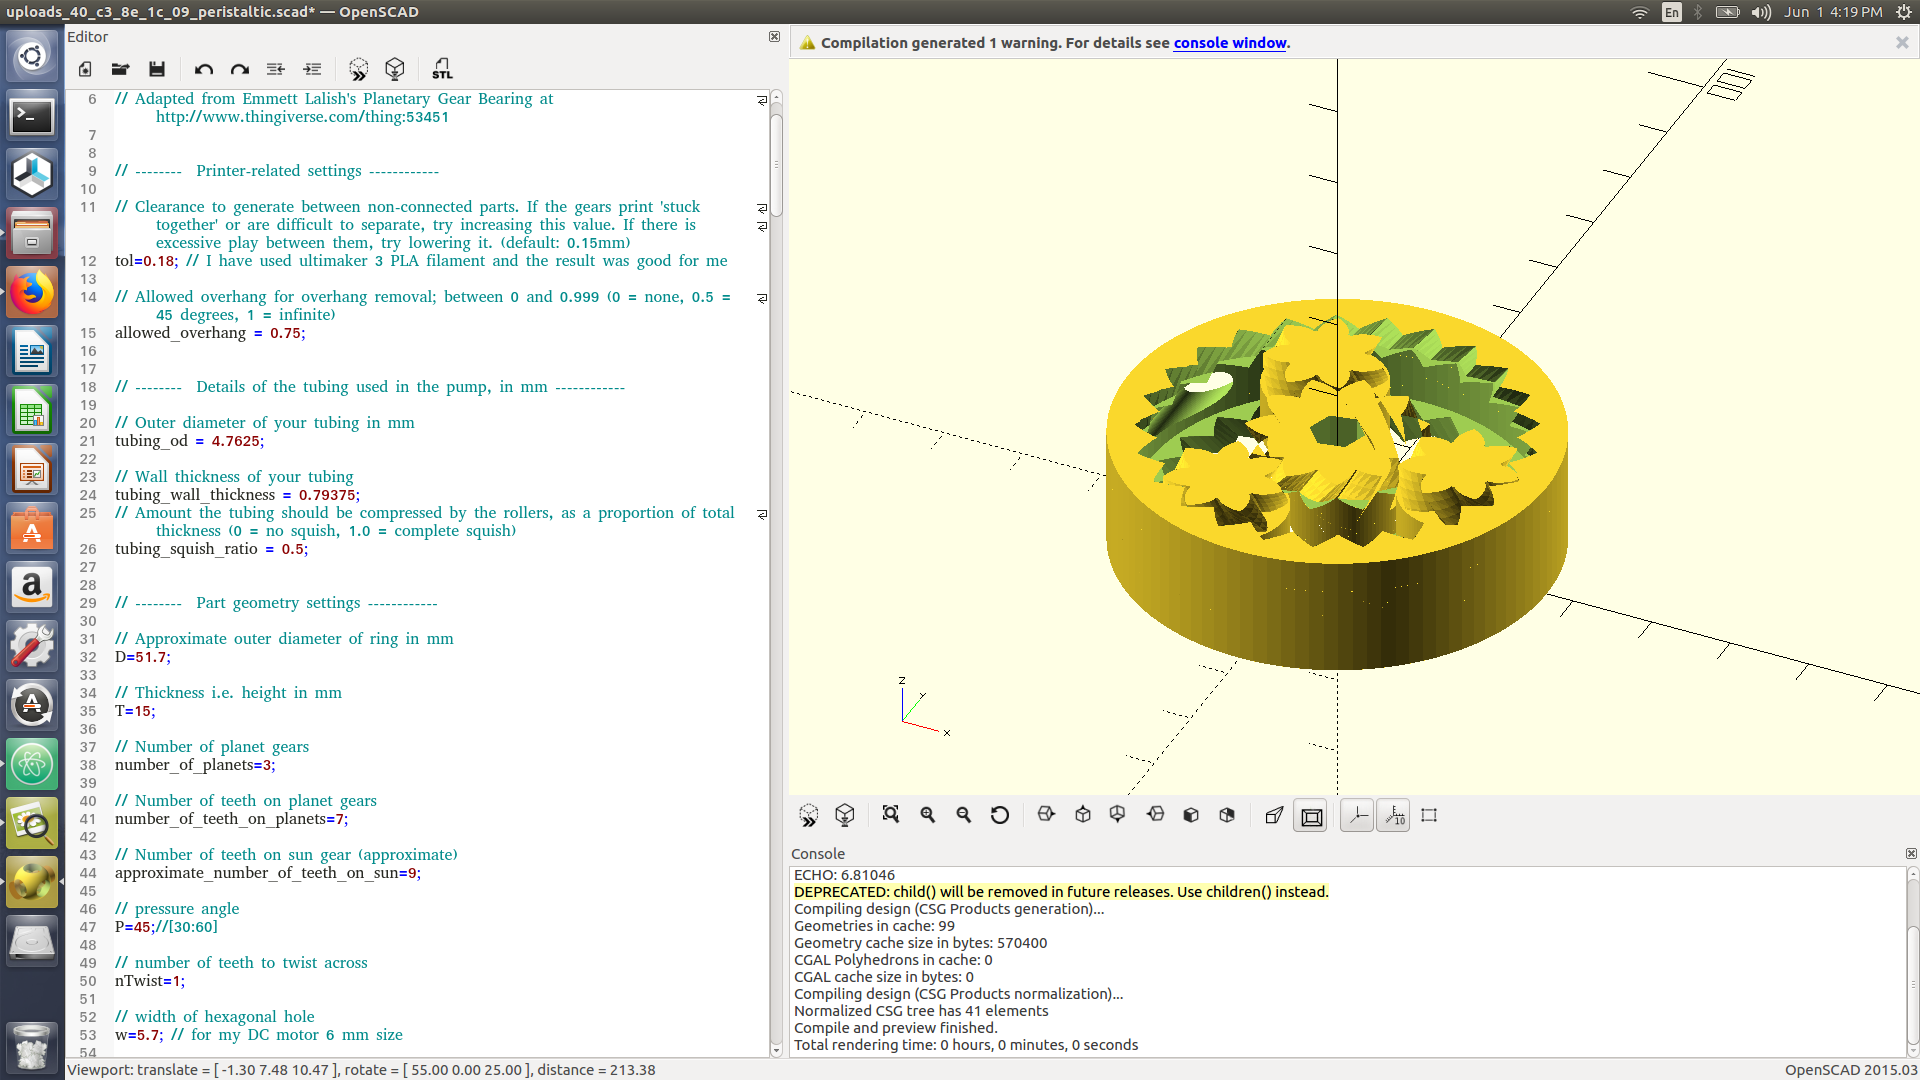
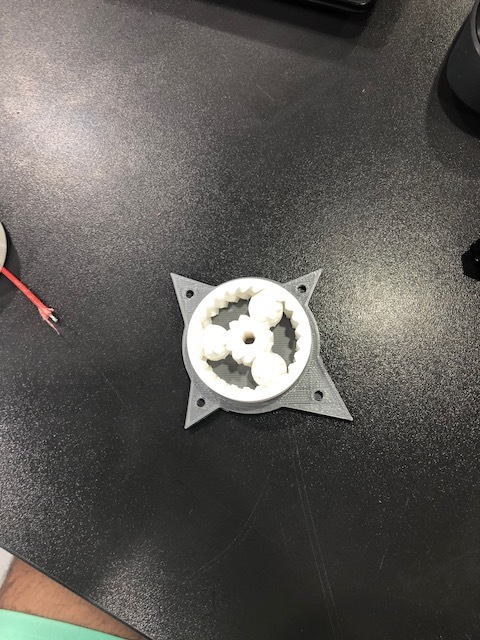
click to downloadThere are several ways to move liquids from one place to another,some project do use Archimedes screw to perform that. I came to really like the idea behind peristaltic mechanism to move liquids. peristaltic is when a rotating roller moves along a tube while compressing it and creating a seal which will create movement mechanism of the liquid to the other end of the tube (I used a fish aquarium silcicion tube). Most designers to create a hallow circular shape (using 3d printer) that would fit three or four ball bearing that will rotate, however I will be 3d printing the entire thing. I have came into a lovely parametric peristaltic project on Thingiverse, I have used the open-scad file to a update values to fit and create my peristaltic pump. I have changed the clearness (movement of the planets and sun) to 0.18 and it did print perfectly on the Ultimaker 3 PLA filament without the need of support or brim. However when I printed it on the Lulzbot taz 6 I needed to increase it to 0.23 as it was really stuck at 0.18.
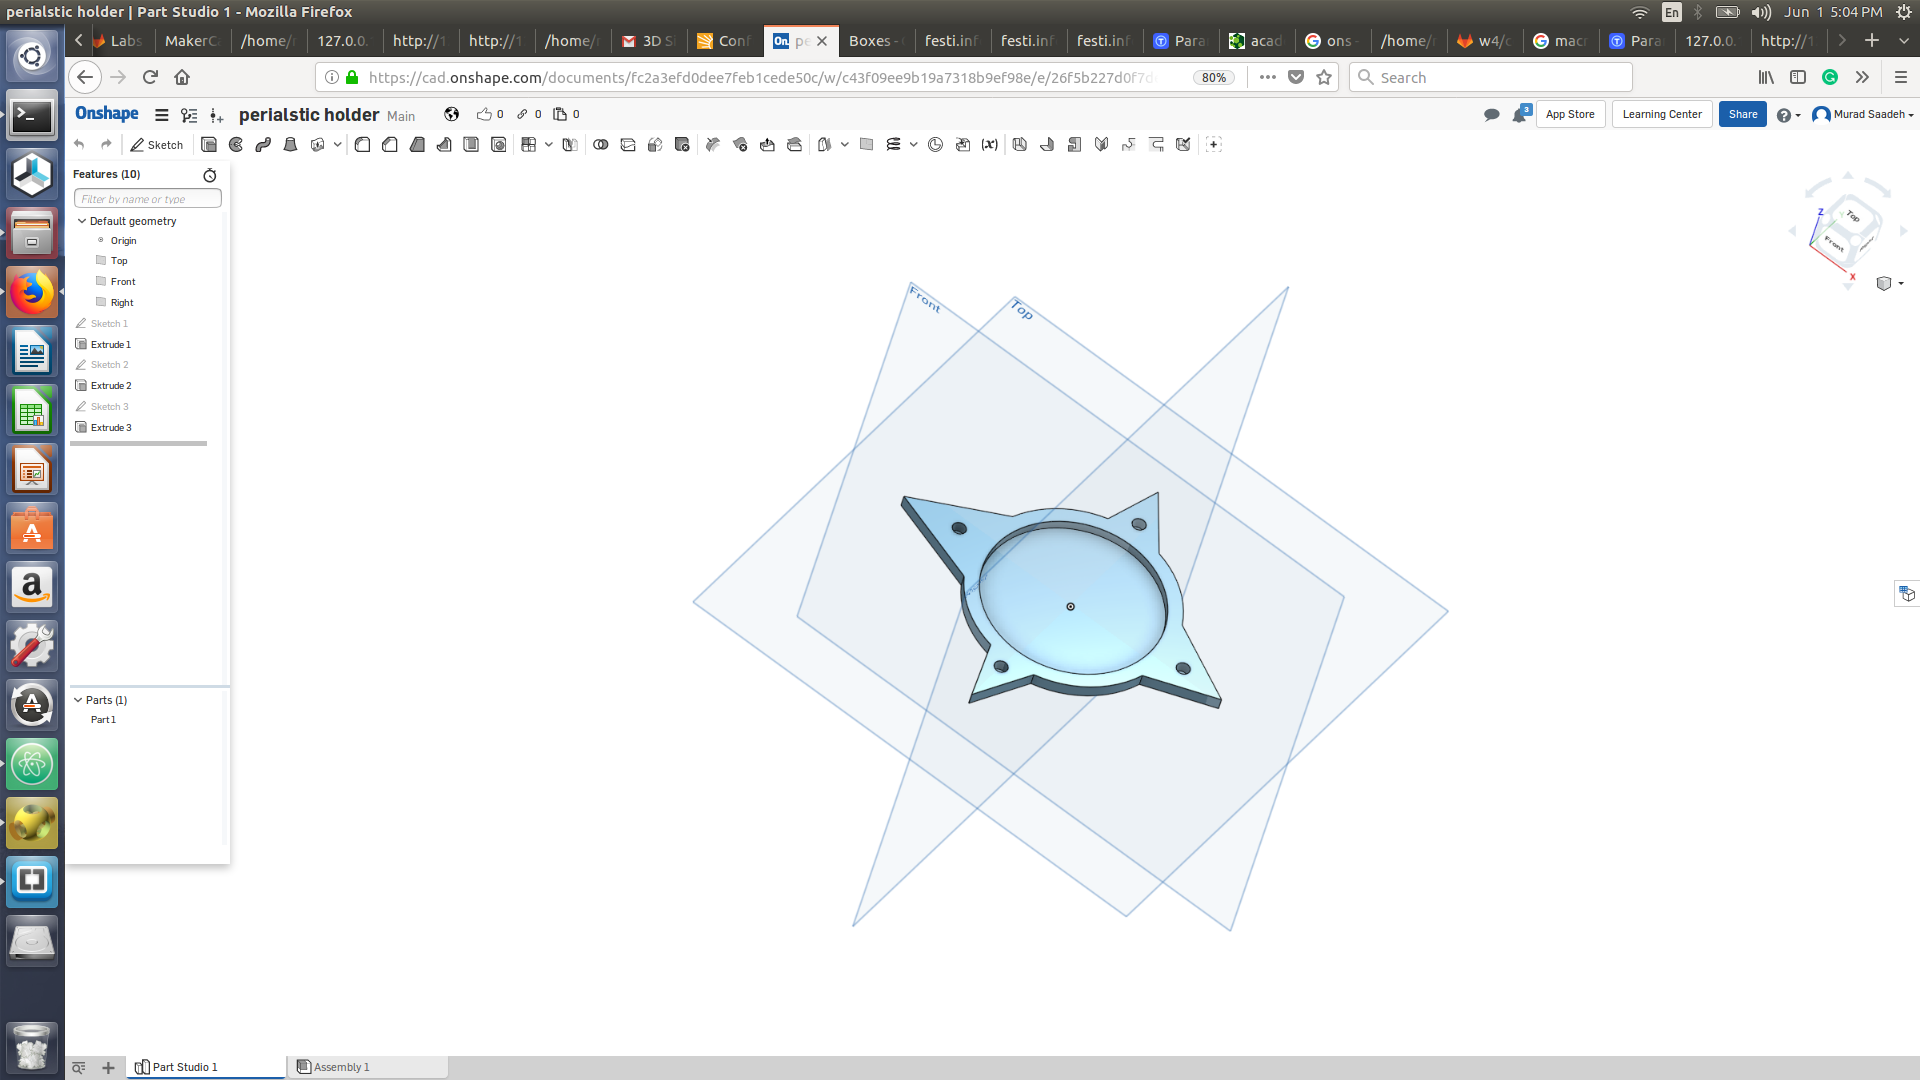
I have also designed a holder for the peristaltic pump to stick it to the outer box and the DC motor which will be responsible for moving the peristaltic pump.
Perstaltic pump holder Rhino file
click to downloadNema 17 motor holder
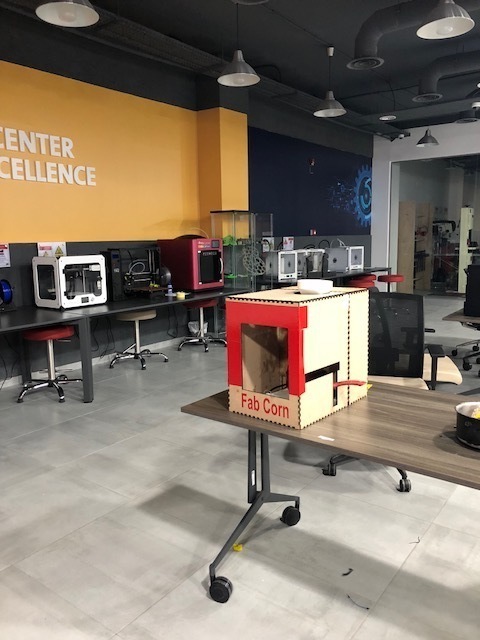
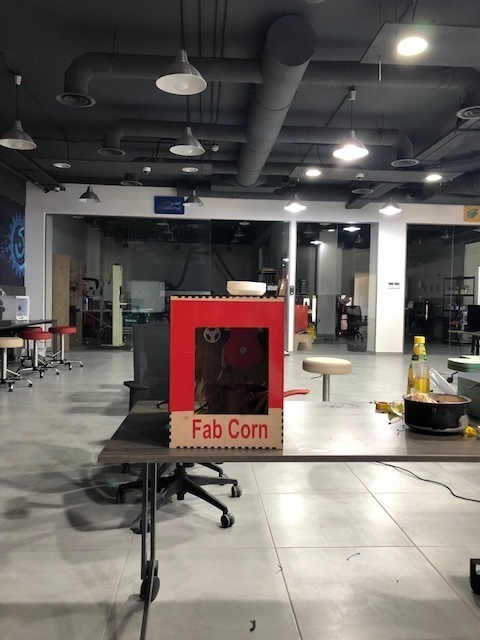
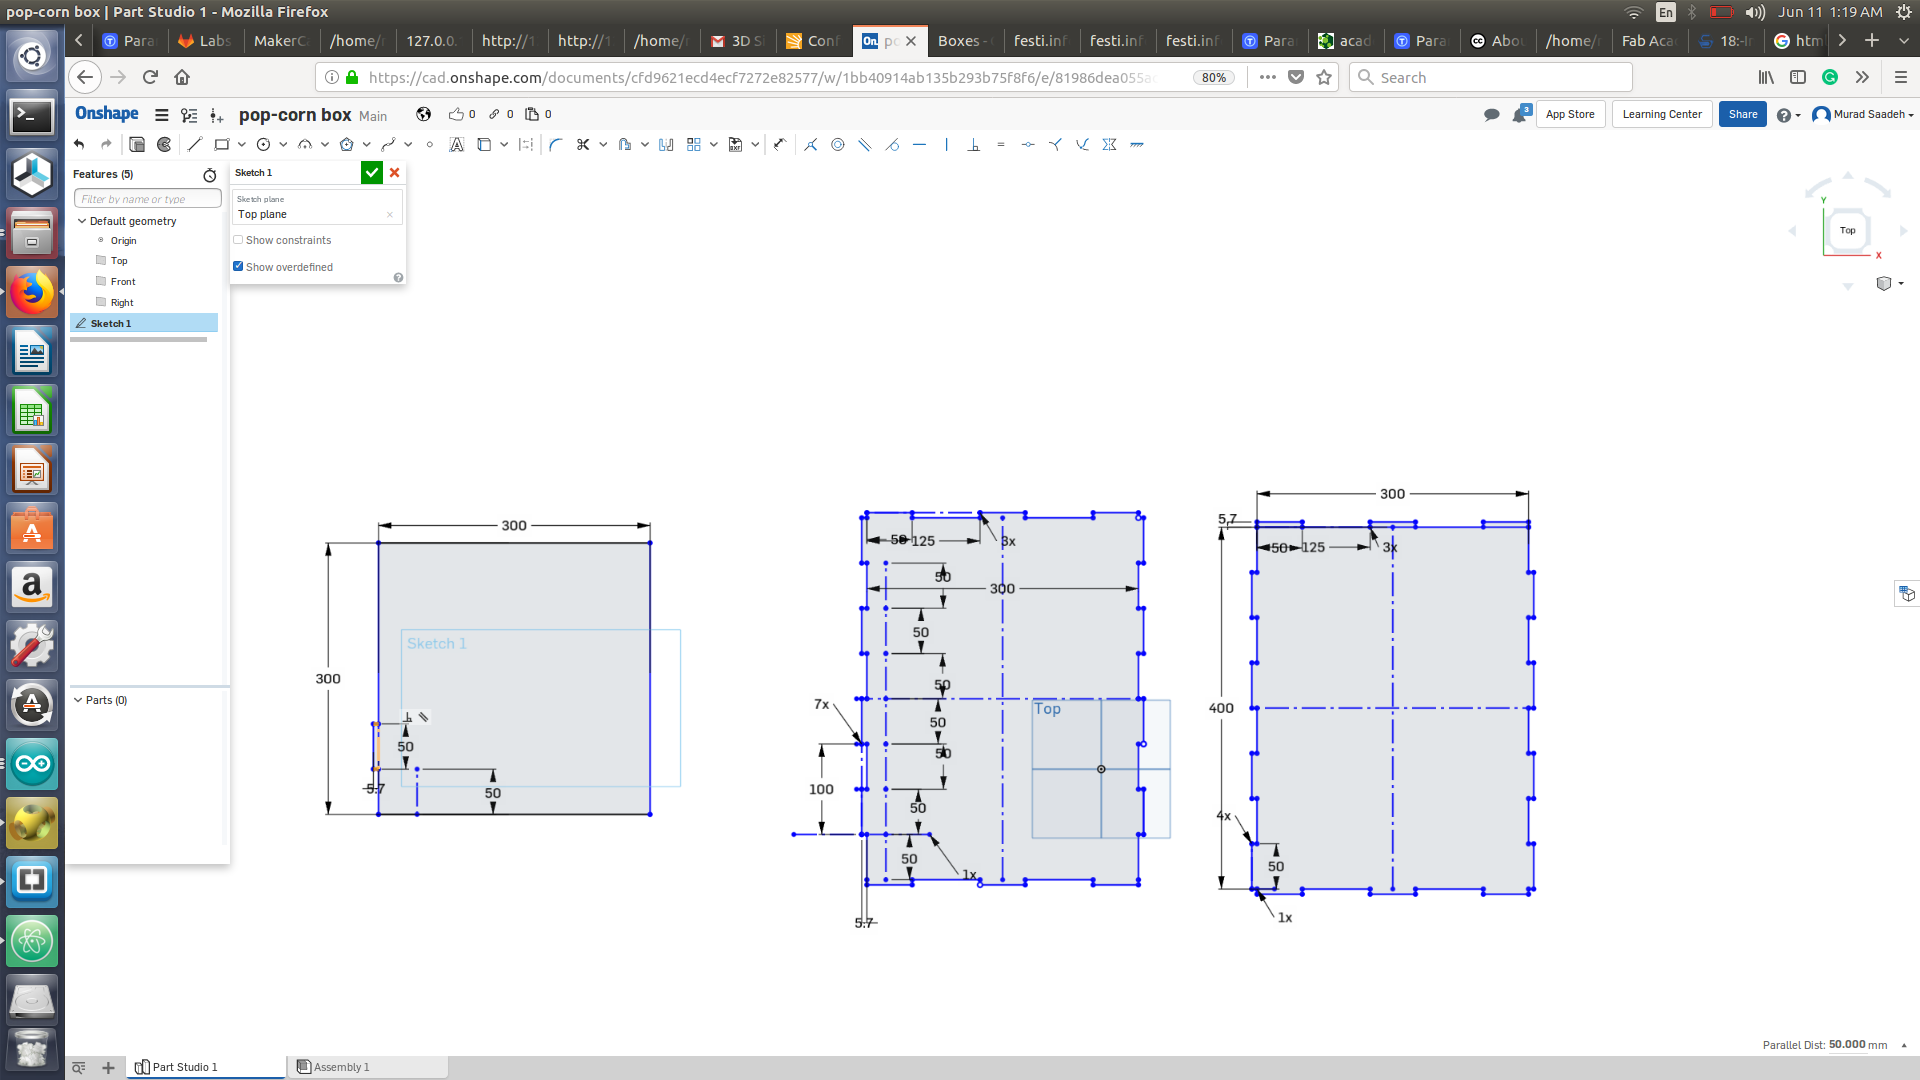
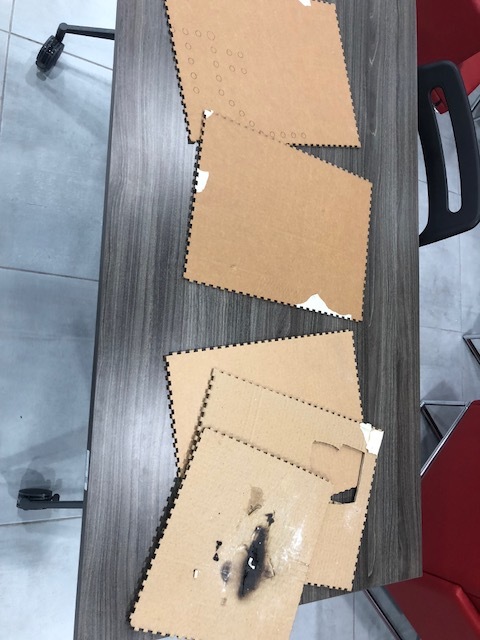
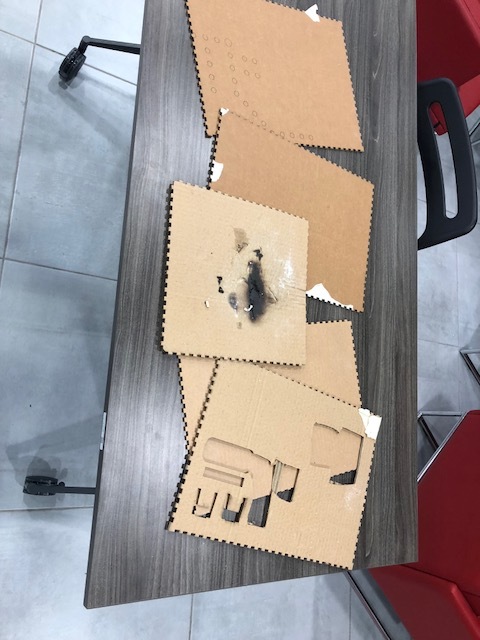
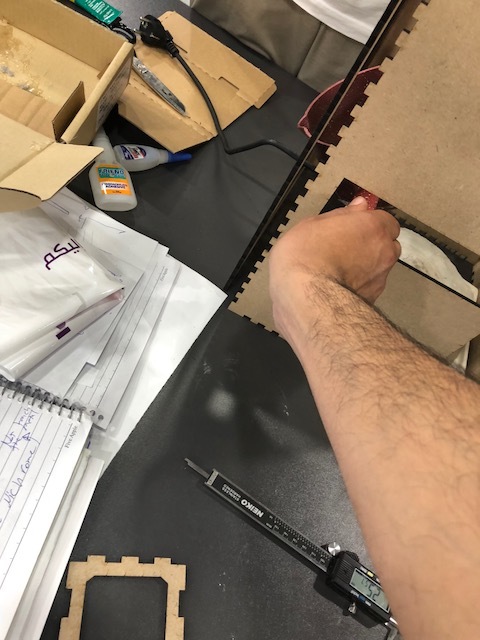
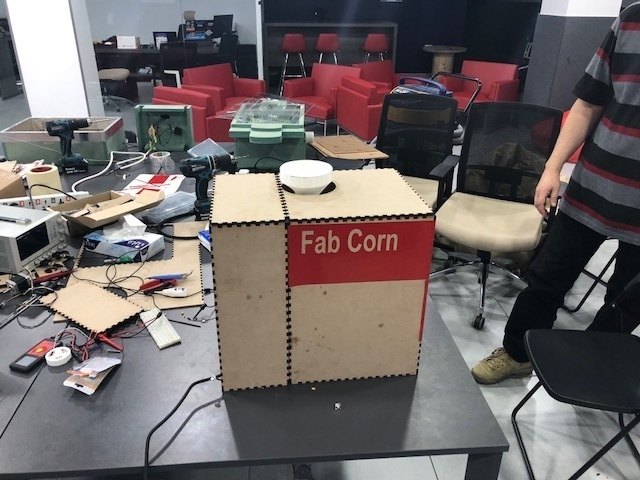
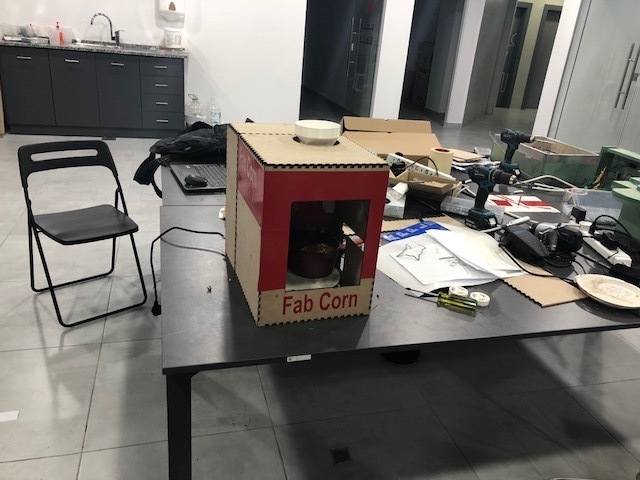
click to downloadFor the outside box I decided to created two boxes one for the actual machine and one to cover up the components. I want to try to make it press fit using 5.5 mm MDF wood where I will cut it using the laser cutter. I started my design using on-shape, I created 5 slots on each side with the width of 5.7 mm (to ensure its press fit) and length of 100 mm.
DXF source file
click to downloadTo be honest the result is not what I expected, I have found a website that create all kind of press fit boxes Link. So I have done it using this website then added my box special features using inkscape. The main difference between the one I designed and the one I did from the website above is that, the created the box using 10 slots where I only used 5 slots.
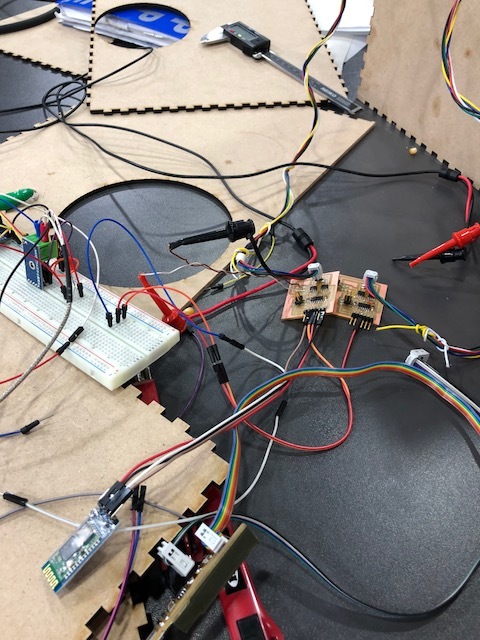
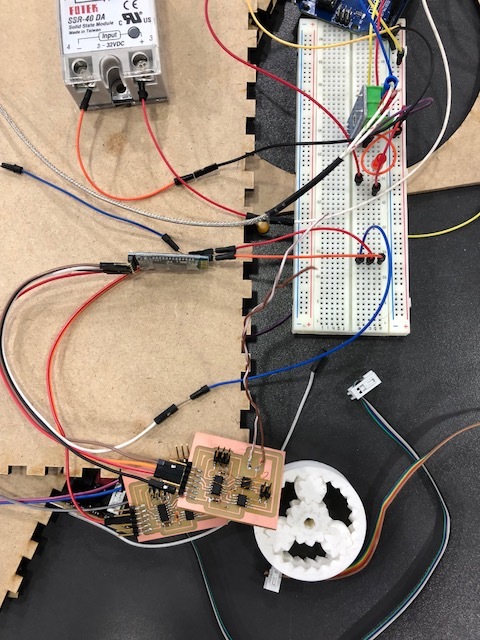
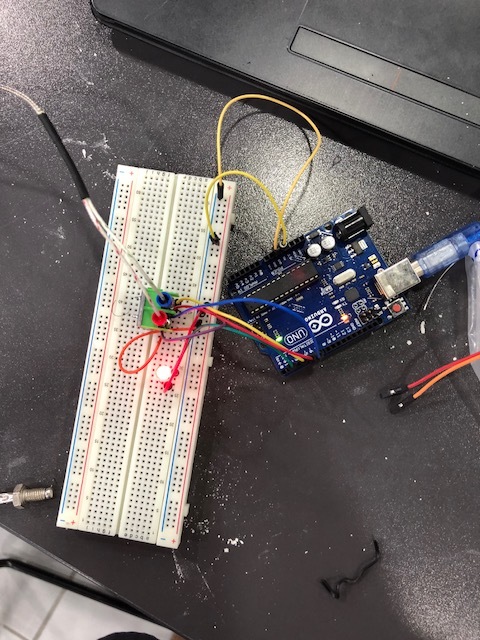
I will be using two DC motor linkto control both the corn and oil dispenser. To do so I ll control the time of rotation of the DC motor, for example I will need a 10 second of rotation for the first DC motor to dispense one portion of corn, and about 50 second of rotation for the second DC motor to dispense 6 ml of oil. I have already did create a motor control circuit (H-bridge ) for my output device week for a stepper motor. I will be using this circuit as it contains two H-bridges which was made for a bi-ipolar stepper motor, I ll use the first H-bridge for the first DC motor and the other H-bridge for the other one. The first H-bridge is connected to PA7 and PB2 where the second is connected to PB1 and PB3. Once all is connected I test it using python GUI and then connect to bluetooth to be able to control both motors using an android mobile application. I have also designed a circuit for the thermo-coupler and solid state relay, the circuit will measure the temperature of the heating cement block when its above 250 degree Celsius solid state relay will open the switch and when it below 210 degree Celsius it will trun back on. This will help control temperature to not rise and burn the corn or destroy the cement block like my precious experiments. To esnure everything is working fine , I ll trst the thermo-coupler and solid state relay on arduino first before moving to fabricating the circuit using aatiny 44 micro-controller. I ll also use the arduino vcc to supply 5 v to all microcontroller untill I recieve the batteries that I ordered.
The motor do work fine when I test using only a rotational code where I give one of the pins high and the other low, however once when I use the same code for the python code, it doesn’t work the motor is not even withdrawing current. At the begging I thought the problem was with the circuit as I made it like a month ago and there was motor header pin moving. I did a new circuit and soldered but this wasn’t the issue. The weird thing is that when I connect nema 17 stepper motor everything do work fine (help !!).
As I stated earlier, I initially decided to use two DC motor to control the dispense mechanism, this code surprisingly didn’t work specially when I used it with GUI python interface and Bluetooth. The two Dc motors do act weird by either just not turning or by turning really slow. I have contaced my instructor Sibu and he ll review the code and connection and let me know ( I ll update this when I come aware of the reason). For now I will be using the stepper motor where the user will select the amount of portion of pop-corn they desire. Thus for one portion of pop-corn which is a full slot from the rounded (about 50 grams) I will need to move the stepper motor 100 steps (half a turn) from an full position ( this positions I ll be using for the rest of my documentation), however if the user desire a 2 portions of pop-corn (100 grams) the it would require the motor to move 150 steps. As for the oil for each one portion, it will need about 15 grams of oil which is equivalent to 1000 steps (5 full turns).
// Pop corn machine corn dispenser code (stepper motor) to control portions via bluetooth
//Murad Saadeh
// 07/06/2018


#include <Stepper.h>
#include <SoftwareSerial.h>

SoftwareSerial mySerial(0, 1); // RX, TX
int serialData;
const int stepsPerRevolution = 200;  // steps per revoltion for Nema 17 its 200 steps per revolution


Stepper myStepper(stepsPerRevolution, 10,9,7,8);   // stepper motor pins

int stepCount=0 ;         // starting number of steps

void setup() {
 mySerial.begin(4800); // initialize the serial port:

}

void loop() {


  if (mySerial.available()) {
      serialData = mySerial.read();
   mySerial.print(serialData);

   if (serialData == '1')
    {
  if (stepCount < 100) {
    // step one step:
    myStepper.step(1); // motor will move one step each time

    stepCount++;
    delay(20); // this could control the speed of the motor, how fast it turns
  }
}


if (serialData == '2')
 {
for ( stepCount= 0; stepCount < 150; stepCount++)
{
 // step one step:
 myStepper.step(1);


 delay(50);
}
}
   if (serialData == '0')
    {
  for ( stepCount= 0; stepCount < 200; stepCount++){
    // step one step:
    myStepper.step(1);


    delay(50);

          }
      }
    stepCount=0 ;
}
}
// Pop corn machine oil dispense code (stepper motor) to control amount of oil needed for a specific corn portions via bluetooth
//Murad Saadeh
// 07/06/2018


#include <Stepper.h>
#include <SoftwareSerial.h>

SoftwareSerial mySerial(0, 1); // RX, TX
int serialData;
const int stepsPerRevolution = 200;  // steps per revoltion for Nema 17 its 200 steps per revolution


Stepper myStepper(stepsPerRevolution, 10,9,7,8);   // stepper motor pins

int stepCount=0 ;         // starting number of steps

void setup() {
 mySerial.begin(4800); // initialize the serial port:

}

void loop() {


  if (mySerial.available()) {
      serialData = mySerial.read();
   mySerial.print(serialData);

   if (serialData == '1')
    {
  if (stepCount < 1000) {
    // step one step:
    myStepper.step(1); // motor will move one step each time

    stepCount++;
    delay(20); // this could control the speed of the motor, how fast it turns
  }
}


if (serialData == '2')
 {
for ( stepCount= 0; stepCount < 2000; stepCount++)
{
 // step one step:
 myStepper.step(1);


 delay(50);
}
}
   if (serialData == '0')
    {
  for ( stepCount= 0; stepCount < 3000; stepCount++){
    // step one step:
    myStepper.step(1);


    delay(50);

          }
      }
    stepCount=0 ;
}
}
To create the python window GUI, I will be using the same techniques I did use for my interface and application week, please refer to that page for more information link. I will design three buttons for 1,2 and 3 portions of pop-corn. This is done by GUI interfacing sending an Arduino write of value of “1” for one portion, “2” for two portions and “3”for three portions. Please do ensure to change the serial port depending on what port your circuit is using.
import serial
import Tkinter
from Tkinter import *
import time


arduinoData = serial.Serial ("/dev/ttyUSB2", 4800)


def one():
    arduinoData.write('1')

def two():
    arduinoData.write('2')

def three():
    arduinoData.write('3')


def close_window ():
    led_control_window.destroy()

led_control_window = Tkinter.Tk()
led_control_window.geometry('1450x1300')
led_control_window.title("Murad Application")
Button = Tkinter.Button
btn3 = Button(led_control_window, text="One portion ", height=50, width=50, background="blue", command=one)
btn2 = Button(led_control_window, text="Two portions",height=50, width=50, background="yellow", command=two)
btn = Button(led_control_window, text="Three portions",height=50, width=50, background="red", command=three)


btn4 = Button(led_control_window, text="Press to close Application",height=10, width=20, background="blue", command=close_window)

btn.grid(row=0,column=0)

btn2.grid(row=2,column=0)
btn3.grid(row=3,column=0)
btn4.grid(row=0,column=20)
led_control_window.mainloop()

input("press enter to exit")
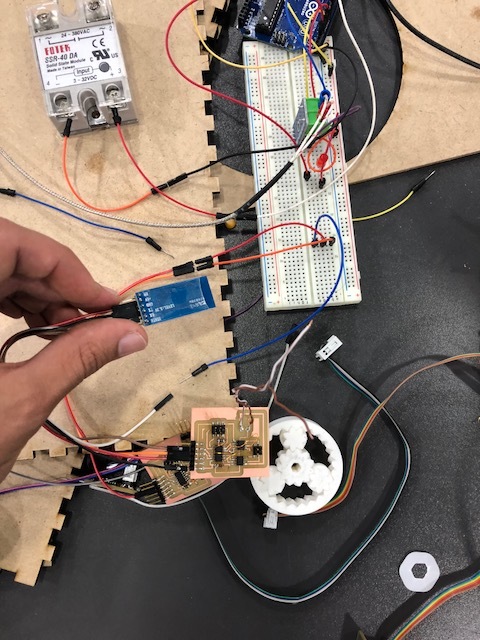
For bluetooth I will be using hc-05 bluetooth modules to control my motor driver circuit via mobile application. I came to realize that as I decided to use stepper motors instead of DC motors. I have to either use two separate bluetooth module for each circuit or mill a new ATmega circuit for fit the four motor driver ICs. However, as I am only sending one value I could try to connect the RX and TX of one bluetooth module to both circuits.
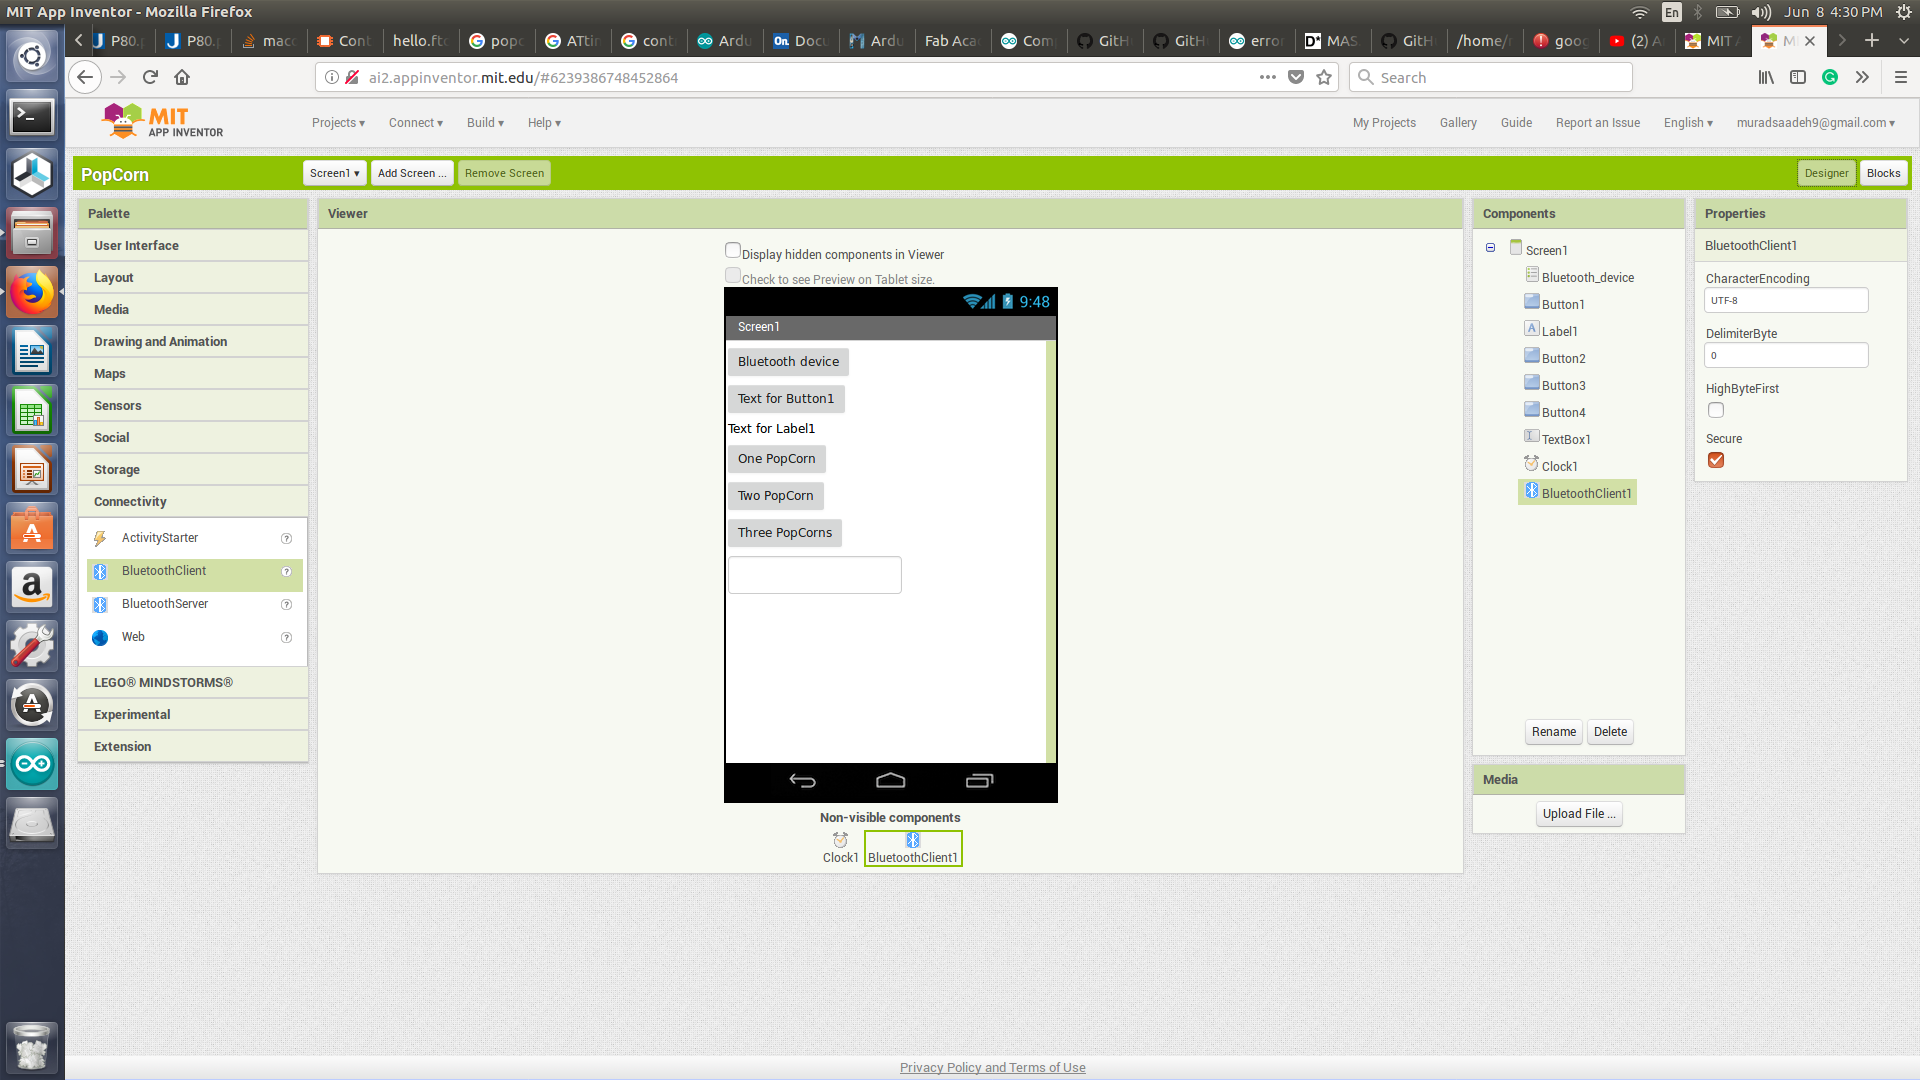
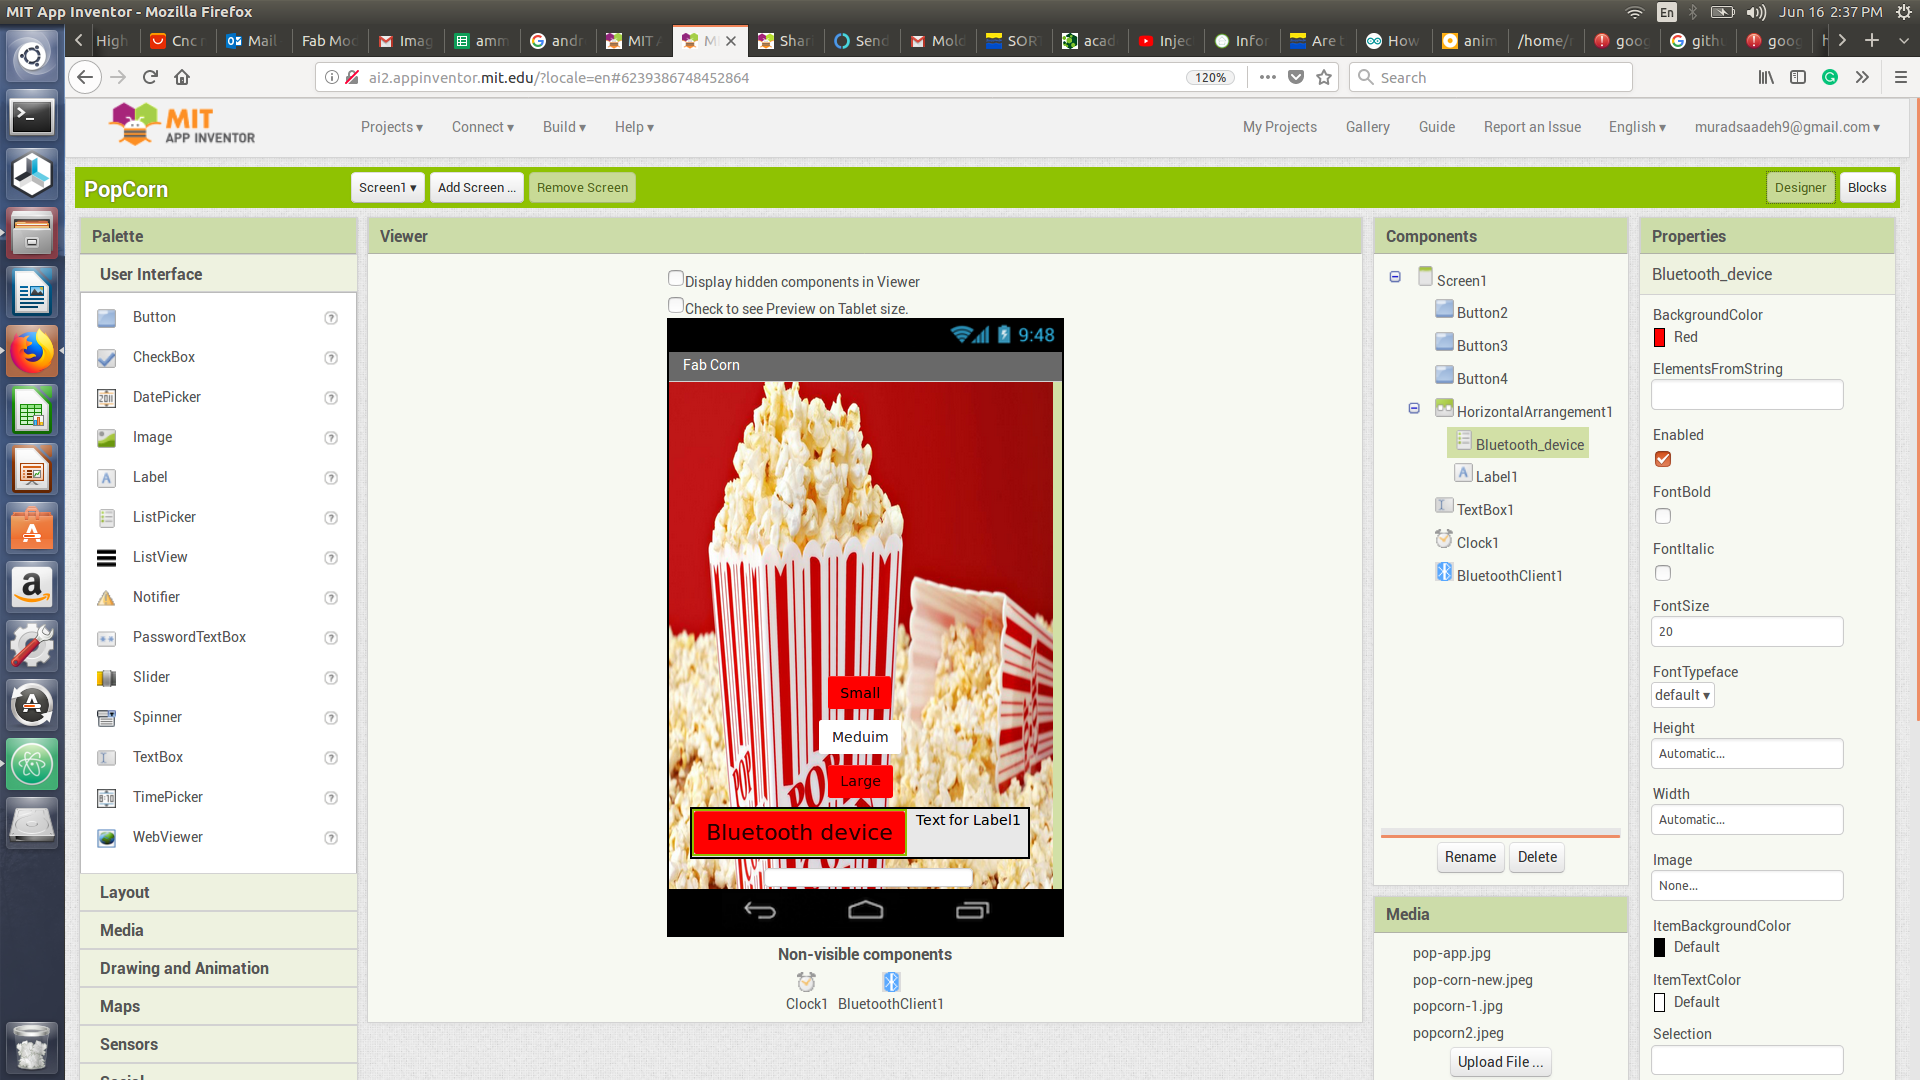
I have decided to make an application to control the fab corn to allow user to select the amount of portion they desired via blueetoh using mobile application. I will be using MIT app inventor to create the mobile application. The most important thing of the application is to allow the hc-05 bluetooth module to connect to connect to the application, then I ll add 3 buttons for a small, medium and large portions. As its my first time to design an application I have followed MIT app tutorial, they were extremely helpful. However for creating the bluetooth app I followed this tutorial and I found it very helpful youtube link.
From user interface select listPicker and drag it to ur app screen. This will show all available blueetooth devices
I added 3 buttons (small, meduim and large popcorn portions)
From connectivity drag Bluetooth client to send and recieve bluetooth signals
From sensors add a clock
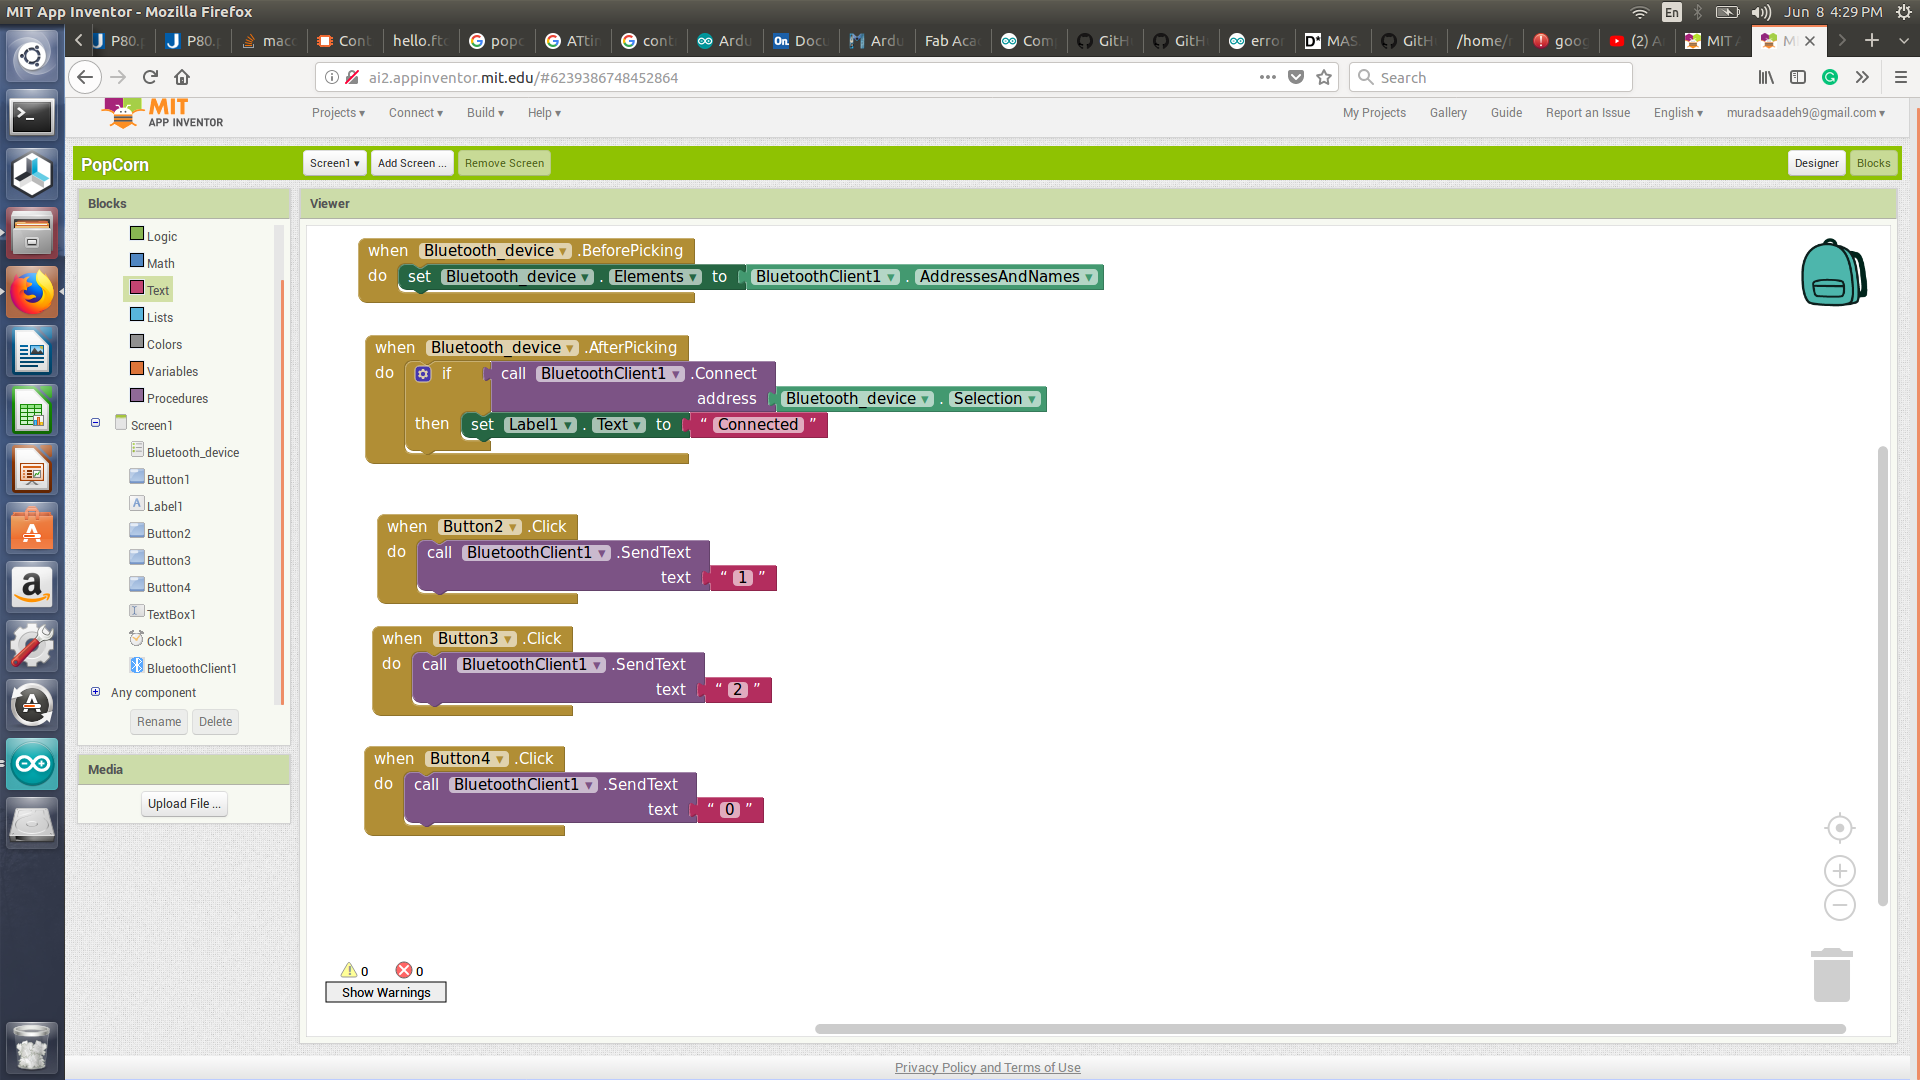
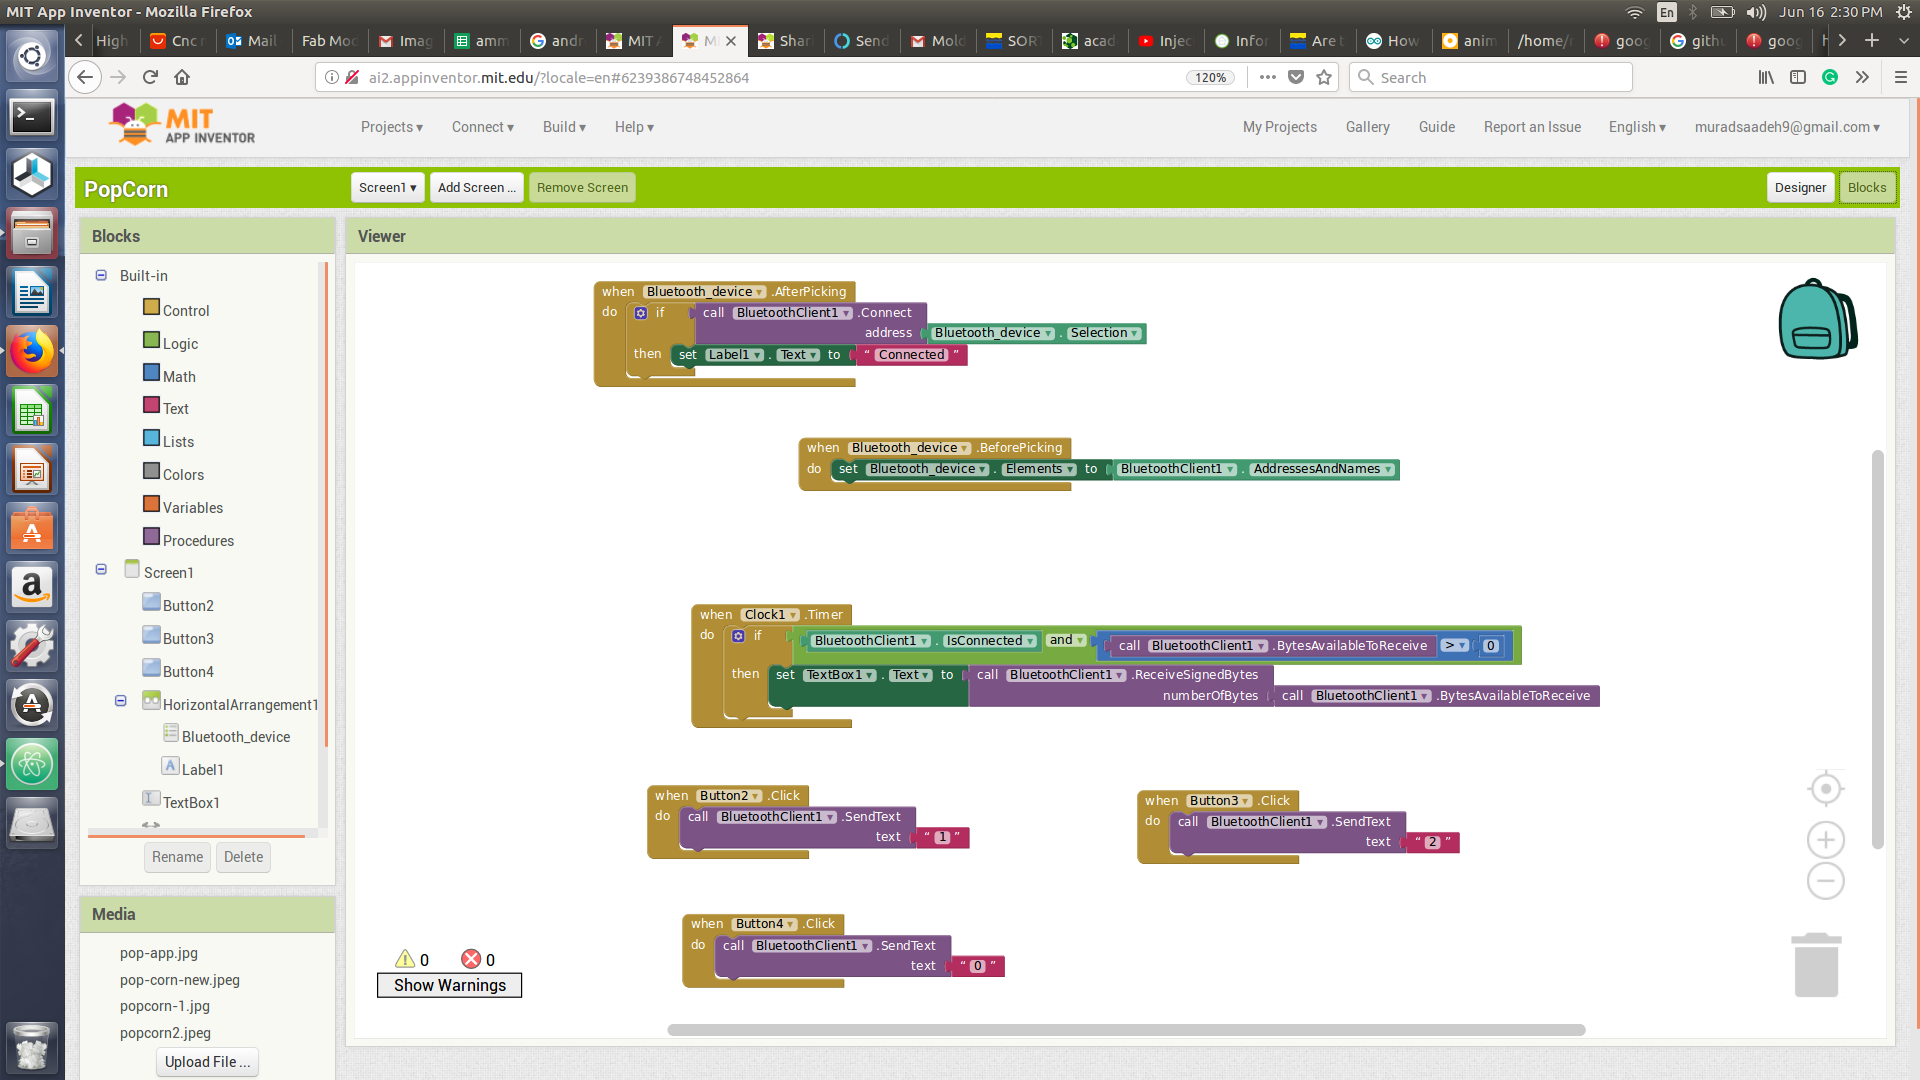
Choose list picker and select listPicker before picking, then choose set bluetooth device. element to bluetooth client 1. address and name
Now choose listPicker after picking then add (if then) from the logic tab , for if add the block from the blueetoth client (call bluetooth. connect adreess bluetooth 1). For then add set label.text to connect. This will make the device connect to the application.
Add blocks for the buttons when small.click , do call blueeoth client 1 .send text and change the text to 0,1 and 2 for each buttons which will send 0,1,2 to my bluetoth device where I ll control each function of it using the arduino code I did create in the previous section for oil and corn dispense mechanism.
Download Fab Corn application
click to downloadOne of the most important thing is having a thermocoupler and a solid state relay especially that I am using a heating element embedded in cement. This will make my product safer, controllable and accurate. Safer as the solid state relay will disconnect when the temperature is over 250 degree Celsius and turn on when it below 220 Celsius morover once I ll re do the cement block heating element I ll record the actual time required to pop the corn and create a variable that the relay will trun off after a specific amount of time. This will also help not to burn the popcorn as the typical pop corn popping temperature is 230 degree Celsius.
I bought MAX6675 module for thermocoupler, thermocoupler k type that can handle up to 600 degree Celsius, and a 220 volts solid state relay that can handle up to 40 Amperes.
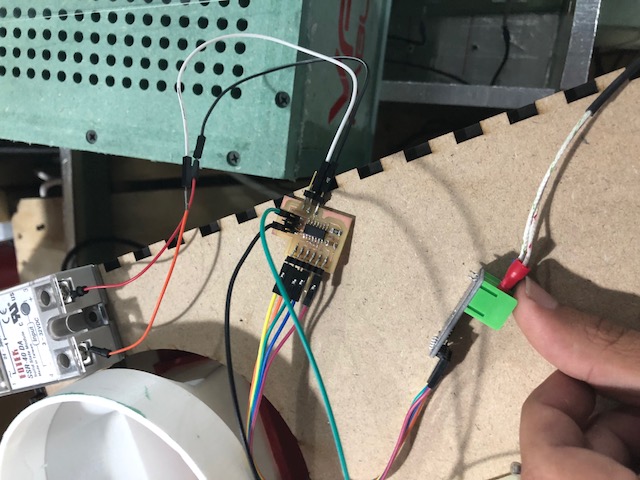
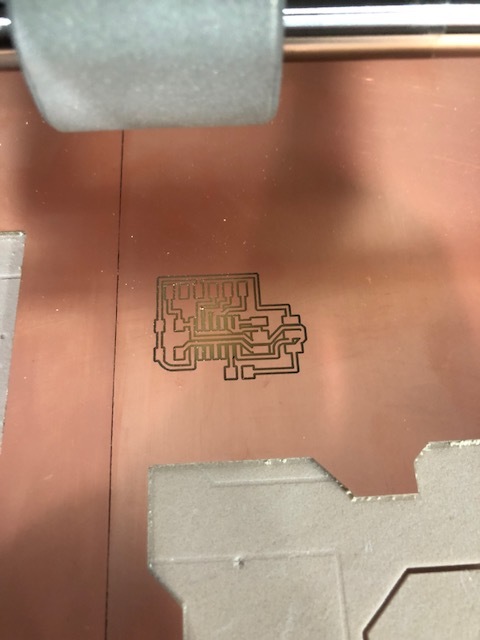
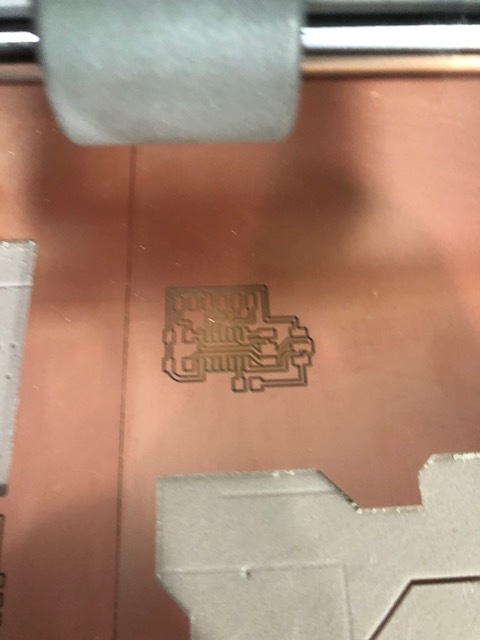
Initially I will test my thermoupler and solid state relay using arduino programmer, it was a succesful test and everything did work. I then milled a circuit and added the Thermo-coupler and the solid state relay to Aatiny 44 micro-controller.
code
//Control the FabCorn machine (final project) using a solid state rely to turn off and on depending on the temperature and the use of a thermocoupler //Murad Saadeh // 14/06/2017
#include “max6675.h”
int DO = 4; int CS = 5; int CLK = 6;
MAX6675 thermocoupler(CLK, CS, DO); // define thermocouple pins
void setup() {
Serial.begin(9600); pinMode(2,OUTPUT); // LED pinMode(8,OUTPUT); // relay digitalWrite(8, HIGH); // set the relay on, to start heating the element
}
void loop() {
Serial.print(“Celcuis = “); Serial.println(thermocoupler.readCelsius());
// turn the relay off if temp is higher that 250 degree
if(thermocoupler.readCelsius() > 250.00){ digitalWrite(2, LOW);// trun led off digitalWrite(8, LOW); // relay off, to cool down the heating element to 220 C }
// turn the relay on if temp is ,lower than 220 degree, this would give a range of to not turn off and then immidetly turn it back on
if(thermocoupler.readCelsius() < 220.00){ digitalWrite(2, HIGH);// turn led on digitalWrite(8, HIGH); // relay on, starting heating again till it reach 250 C }
delay(1000); }
```
The code did work extremely fine, however once I re do the heating element cement block, I ll test how long does it need to make a pop-corn and then create a variable so that the machine will turn off by itself after lets say 15 minutes or so.
I will be using a very similar schematic to to the push-button circuit just to save time, I connected an extra pin from the ftdi to pin number PA2. and I will be using the LED as a place to have two jumpers to connect them to the +ve and -ve DC terminal of the solid state relay.

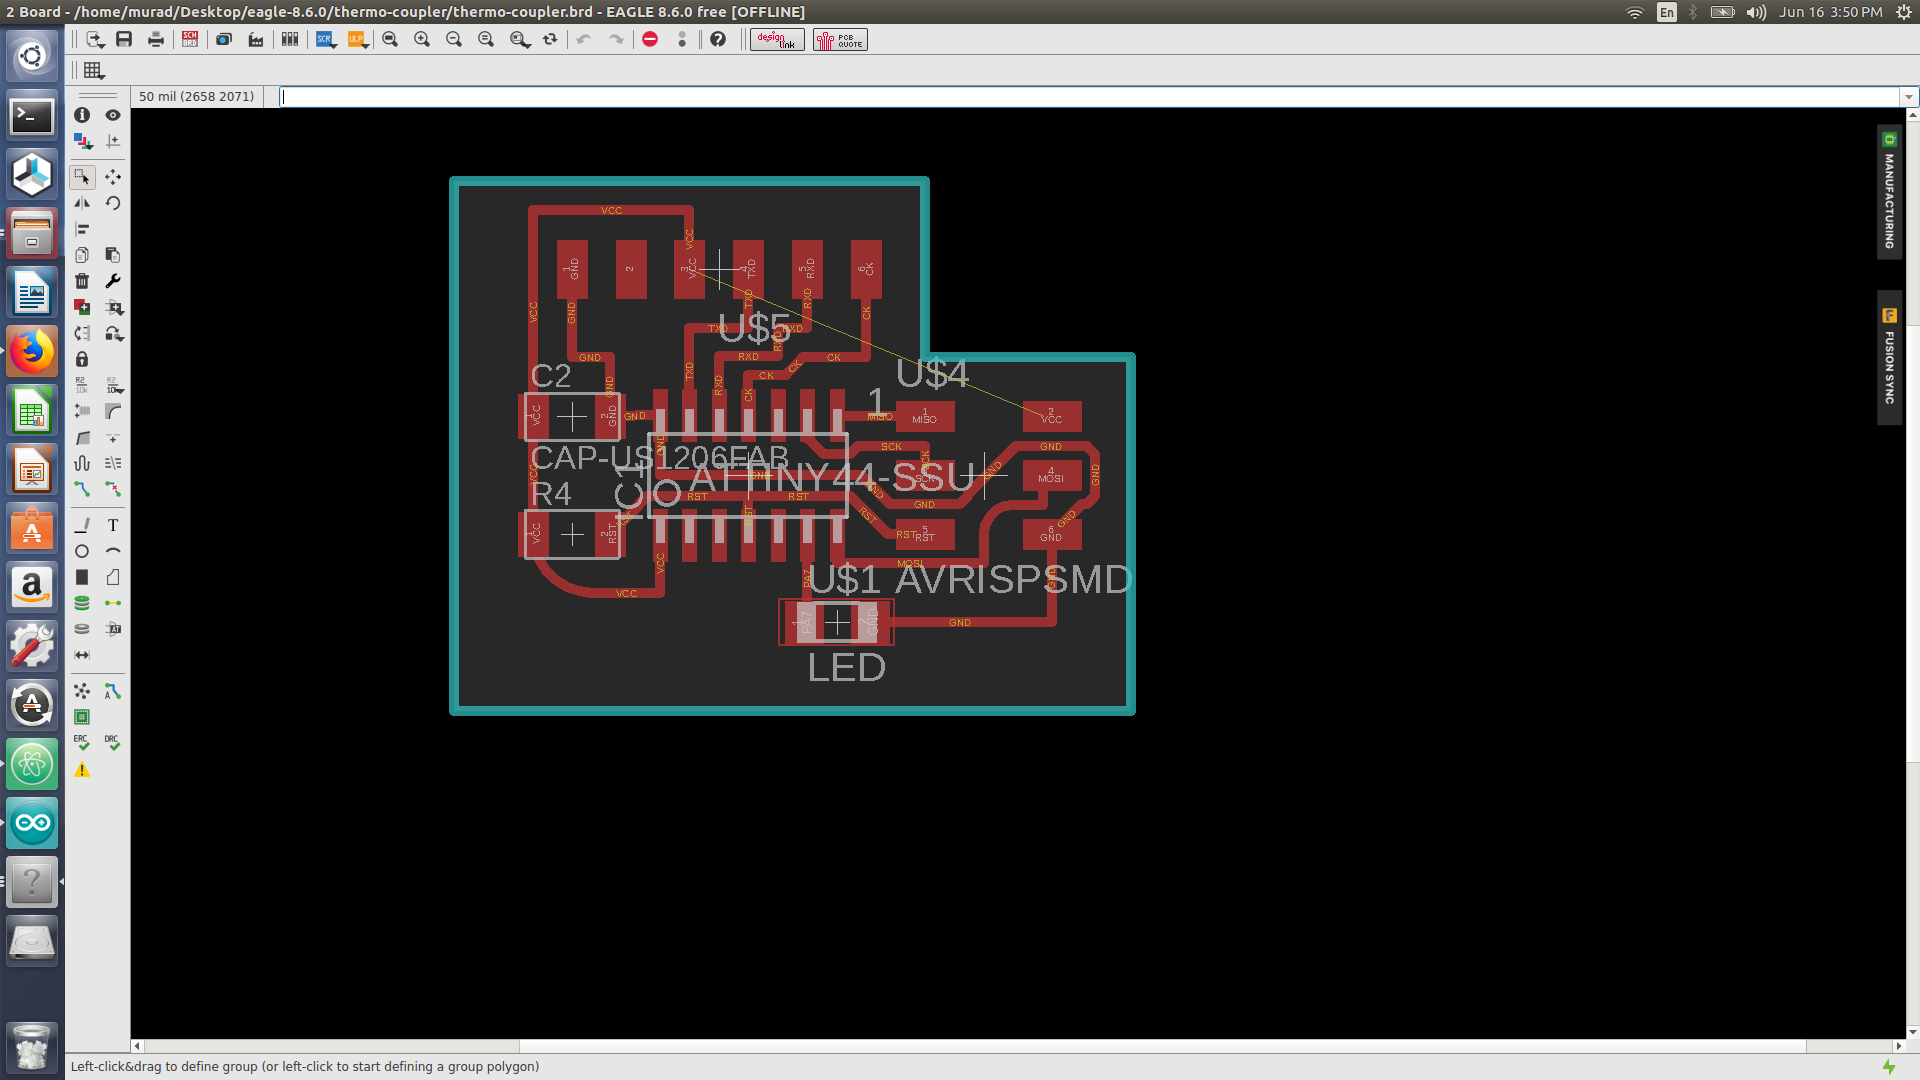
Themro-coupler schematic diagram source file
click to downloadThemro-coupler PCB source file
click to downloadFor coding the Aatiny 44 with MAX6675, I ll have to amend the arduino library that I have and change it to AAtiny 44 instead of arduino. To do that I changed the MAX6675 arduino library by just adding AAtiny into the library file.
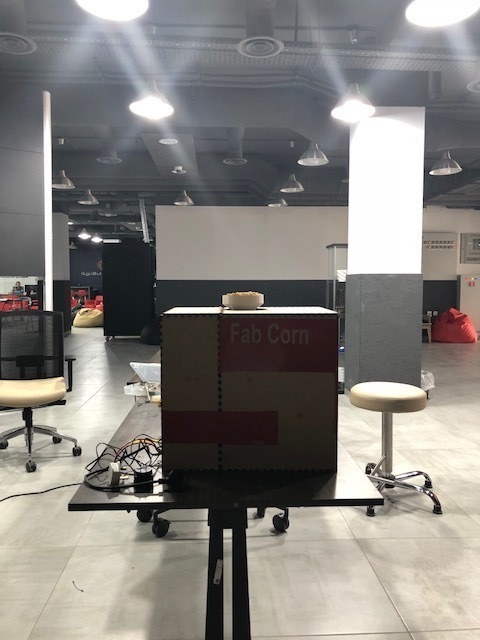
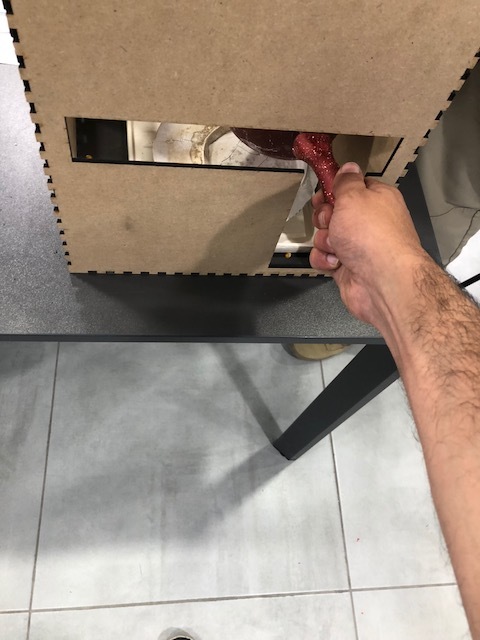
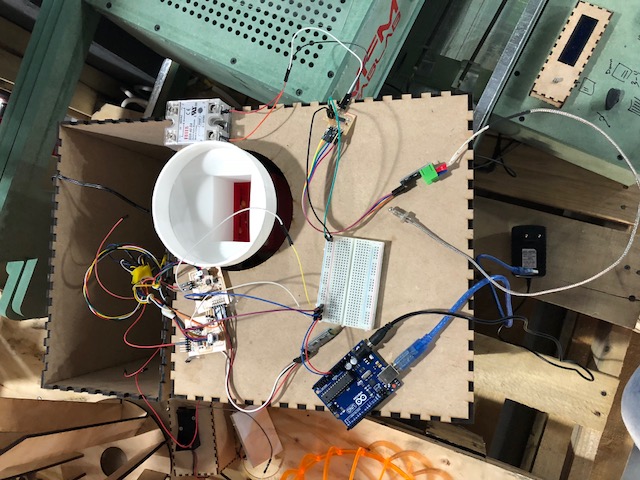
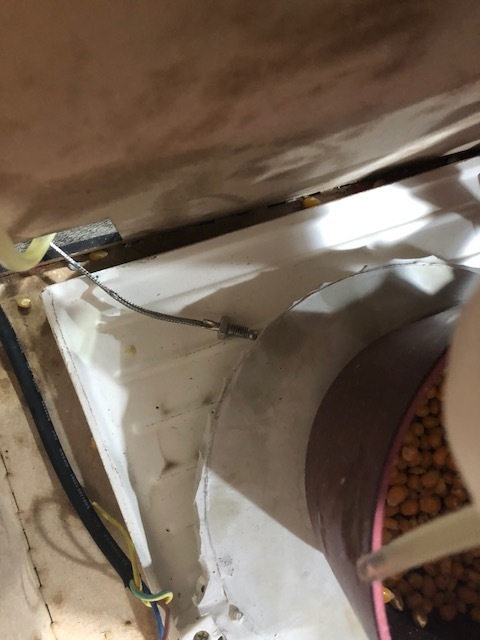
Fitting things in a small box is the part which I hate the most, I have laser cut an additional box to my fab corn to assemble all my electronics and the oil container there.
The stepper motors do require 12 Volts and up to 0.4 Ams per phase , for more information check stepper motor link, thus I ll be using a 24 dc power supply ( this did cause the motor to get a bit warm) available at the lab to run until I get the batteries that I ordered from Ali baba (12 v 1300mAh rechargeable). A battery would be a better fit so I wont have to connect 3 wire to an electrical plug to run my machine.
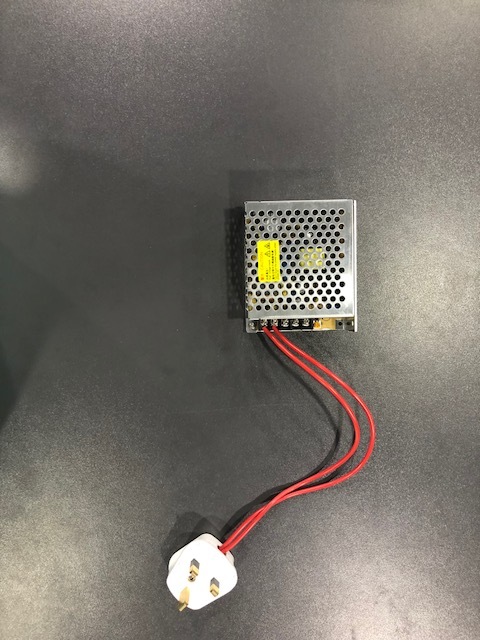
To run the two aattiny 44 circuit I ll be using the power coming from the Arduino (9 volts power supply)which will be responsible for running the thermocoupler ( until I figure out how to program it using aatiny 44). I also ordered this battery Ali baba link
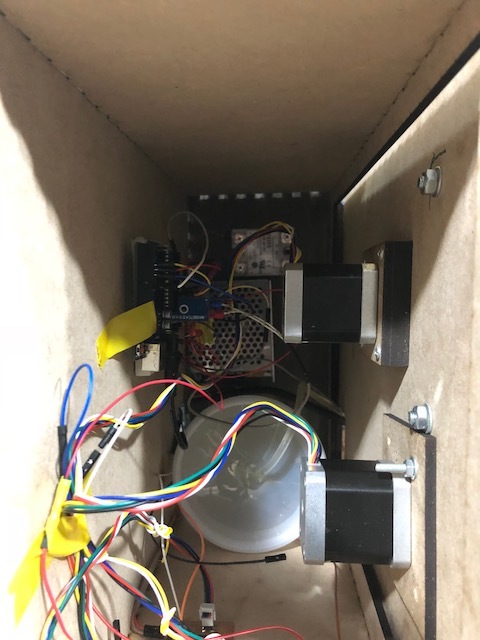
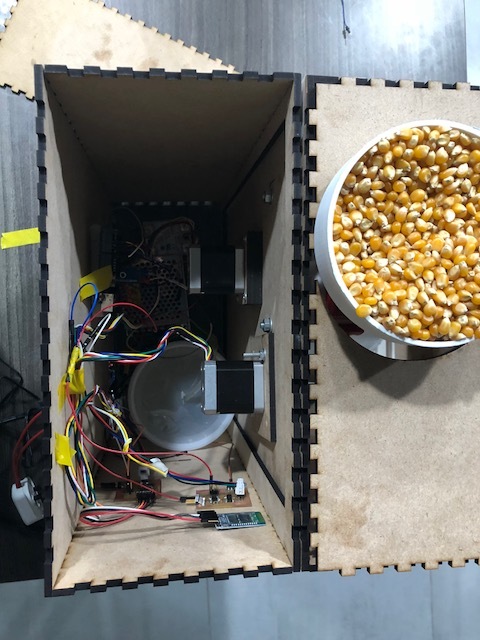
To be honest its very packed inside, however I hope once the batteries do arrive this mess will be much reduced, Unfortunately as I am living in Jordan batteries might take ages to arrive here and the local reseller are way over priced !!
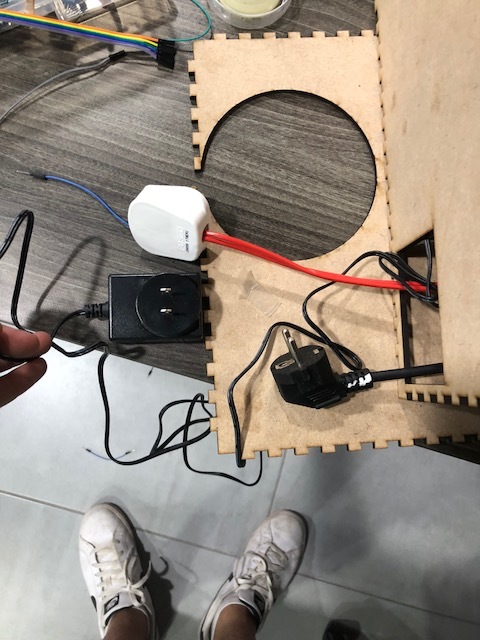
Having to plug those 3 plugs every time you want to run the machine is not acceptable !!