WEEKLY ASSIGNMENTS
3D Scanning and Printing
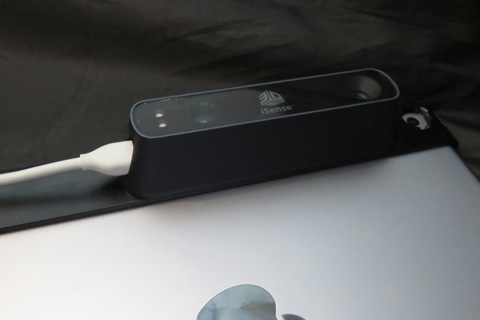
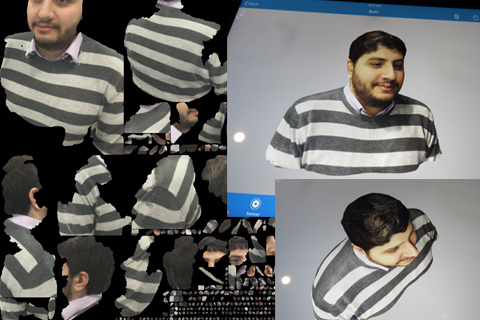
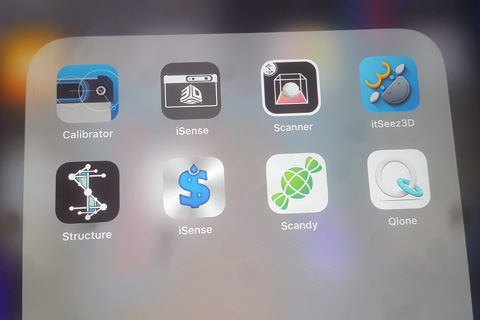
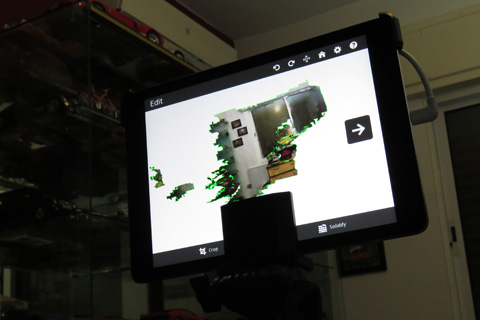
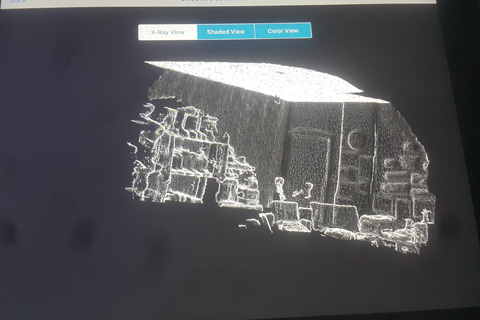
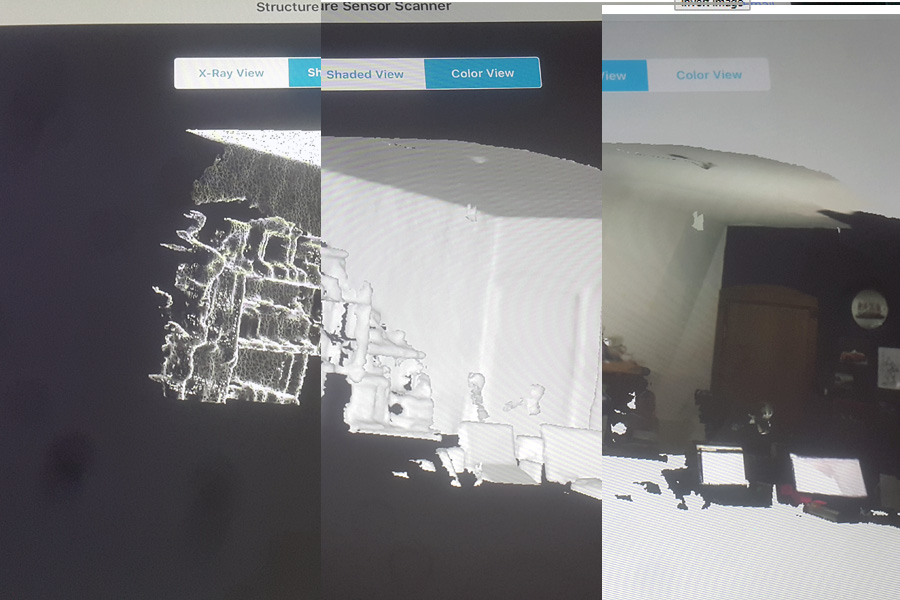
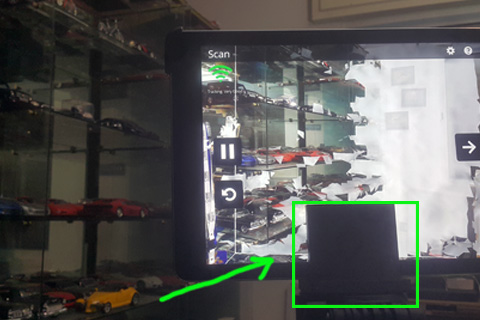
For the scanning, I used more than one software (ItSeez3D, Scanner, I sense, and Qlone ) all of them are the application on ( Isense / iPad 2 ) can download them on your Ipad2. From the past experiance, I know how the light is so important, this is one of the things you need to understand how it works, a good light will help the camera in the Isense to read all the color and the geometry. In some apps ( Scanner ) you have the option to get an output as Xray or as solid with default gray color or as full color. The scanner is for the basic level, you can't get out of it that high detail, you can't compare it to Zcorp scanner as an example, but to do a quick scan to use it as a reference or to print a quick shape, yes this will work. The other issue you will face with this device, you need to have a very steady hand, and a person ( frizzzzzed in his place – thanks, Sanad he did not blink ) the moment you have a move you get a stretch in the texture and the polygons affected by this. I try 2 techniques, first to move around the object, a second I mount the scanner on a tripod using the ( 3D iPad printed piece I design and print - in a green box ) and rotate the object on his Y axis. Both are fine, as a basic result. I found out the first test ( i hold the scanner and move around the object more practical for me, you will get a good result if you have a study hands and notes the massages on the iPad when it appears informing you that you are moving to fast or you are very close to the object.
The other thing is the reflection of the material if you have an object with reflections material the scan won't work ( it can't be read from the scanner cam. the same thing applies to the transparency of the scanner that object is not there, the solution is very simple
1- Reflection objects you need to add a powder to the surface ( kill the refection or the glossy ) all-time i am using baby powder. but you need to be very careful of the amount you're using too much will affect the scan reading.
2- Transparency, as an example use white paper by sticking it to the back of the class. or in general, bring any mate material and place it on the other side of the transparency object.
3D Printing
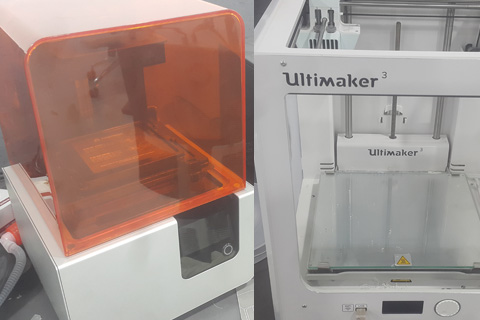
This is something I am familiar with, I used in the past the powder modeling tech. ( zcorp 540) and Zbuilder ultra ( Envisiontech ). both tech. will serve you in different ways, all of it depends on what are you looking at and what are you planning to do with the outcome ( final 3D object ).
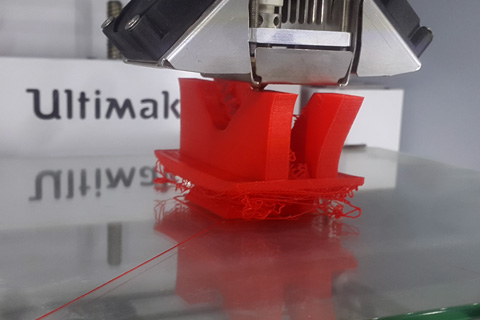
On the other hand you need to know about the support stucture, how it works and effect the out come, as an exsample in uttimaker 2 the sturcture build from the same material that builds the main object, now that's a problem by it self, espically when you're design contain hangover or cross object, now the software calculates and setup the support deppeneding how the 3D techinology works, it depped on layer by layer to be built the full geometry or parts, so the design that has a lots of hangovers or coves, need a lots of support stucture to keep it stand up and finish as it's designed, ( remember that the material is extruded as Flexible plastic) the material behavier, in this case, it can't hold it slef untill it cooled down and stick to the other layer.
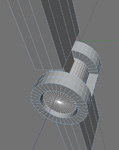
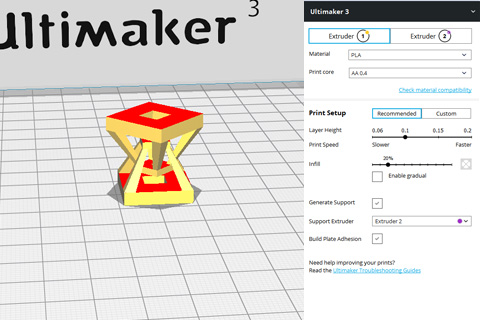
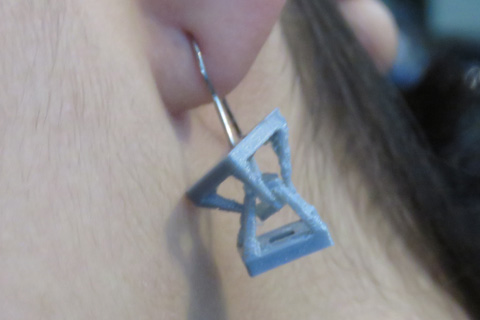
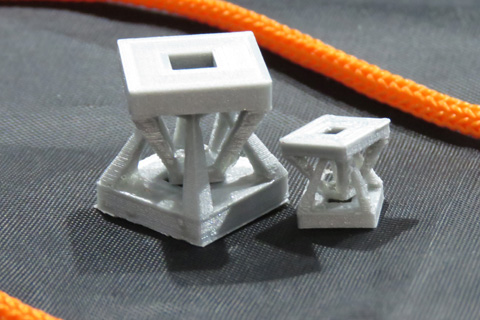
When I design the earring intersection and complexity took place in the design, and to execute the design on CNC want be effective and complicated, and I am talking regarding how 2 geometry interacts with each other. the full process on the CNC mache is not workable and you're going to notes it from the design.
The right solution to build it is to use 3D printing, with a support structure can be removed easily.
Then I try Ultimaker 3 I used PVA as support the definition for it (polyvinyl alcohol) is a water-soluble support material for multi-extrusion 3D printing. With a good thermal stability, PVA is excellent when you want to print a complex model that requires support for large overhangs, deep internal cavities, and intricate geometries.
the size of the earring base 10mmx10mm and the necklaces 17mmx17mm

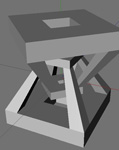
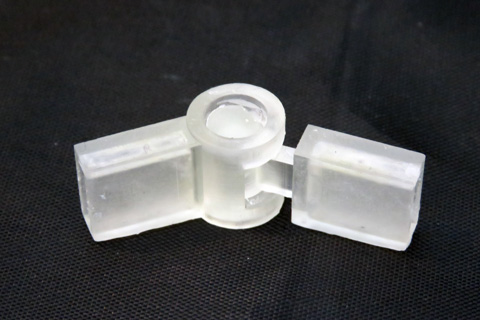
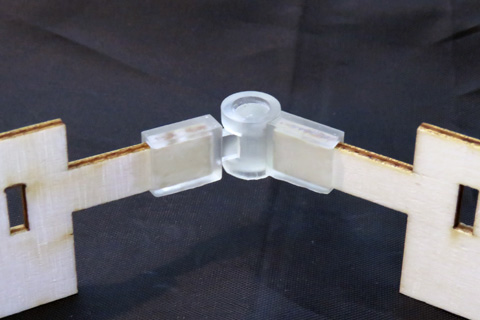
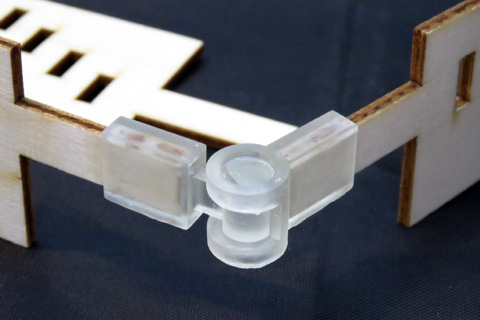
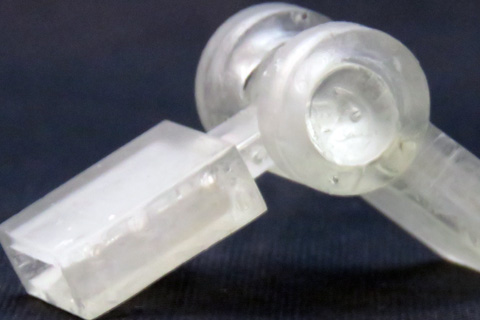
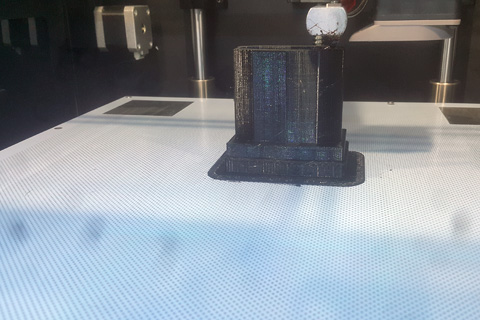
Another test I did was for the Arch kit I am working on, I design a hinge to link two parts from the conceptual face and let is rotate 90, I try the first model on the ultimaker the result was bad coz of the clears I need between two moving parts, so I shift the print o the form 2 the first test was ok but the hinge stuck (become one object) so I change the object orientation, the print was excellent. And this is an added value for the Arch kit I am working on.
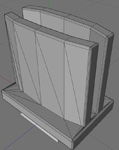
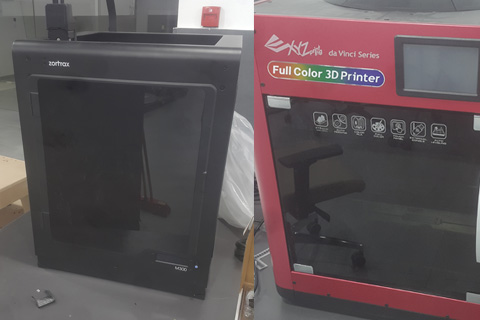
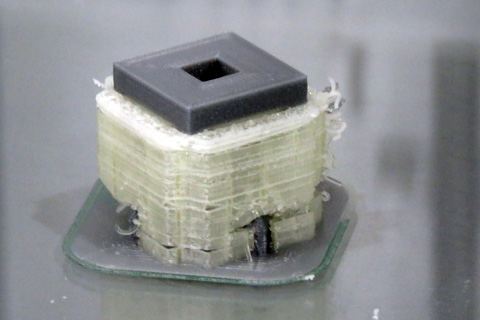
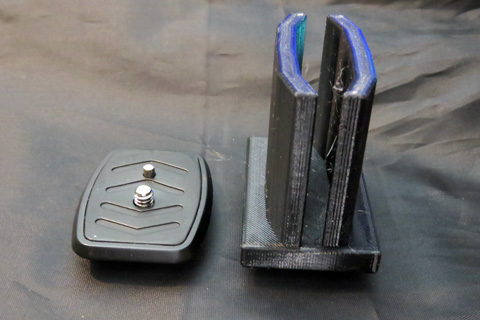
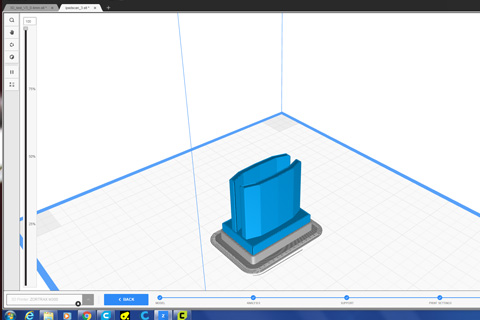
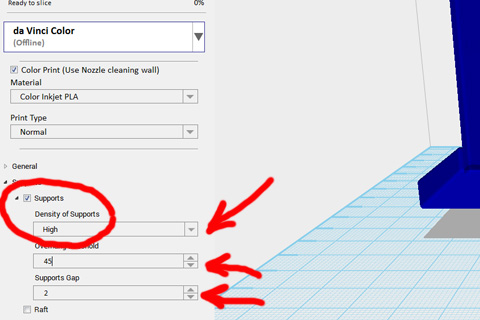
This task leads me to design a holder for the iPad to fix it on the camera tripod. So you have the more stable process of collecting the data. I face a couple of technical issues when I was printing ( specially DaVinci XYZ - Maker ) the first when I picked the option on the support I made it low, after 5 min in printing I found out they did not work right and the support start taking the shape of a carve, the solution was to build the structure as high.

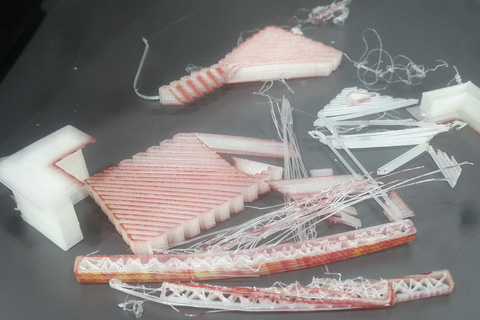
For the group task, the test model for the printer we worked on it to get more knowledge regarding the parameters and limitation for each machine, especially the thickness, and the min for the gaps. During the test on different printers, I found out that we have by mistake comparing between 2 different sizes for the same model.
One of the things the user for the 3D printer (the type of materials), you need to understand how the functions of the object (moving parts), the support system, and where it's linked and what does it support, and the direction. For the test, it gives us the major parameters and the dimensions. But it's a basic to compare and be aware when you're designing and printing, this is what reflected in my design when I design the hinges for the Arch. The concept I am working on. The first test didn't work, but when I rotate the object the result was (a workable hinge)...
3D materials
ABS (Acrylonitrile Butadiene Styrene) has a long history in the 3D printing world. This material was one of the first plastics to be used with industrial 3D printers
PRO
- Low Cost
- Good impact and wear resistance
- Less oozing and stringing gives models smoother finish
- Good heat resistance
Cons
- Heavy warping
- Needs heated bed or heated chamber
- Produces a pungent odor while printing
- Parts tend to shrink leading to dimensional inaccuracy
PLA
Polylactic Acid, commonly known as PLA, is one of the most popular materials used in desktop 3D printing It is the default filament of choice for most extrusion-based 3D printers because it can be printed at a low temperature and does not require a heated bed.
PRO
- Low Cost
- Stiff and good strength
- Good dimensional accuracy
- Good shelf life
CONS
- Low heat resistance
- Can ooze and may need cooling fans
- Filament can get brittle and break
- Not suitable for outdoors (sunlight exposure)
Nylon
Nylon (a.k.a. Polyamide) is a popular material in the plastics industry, known for its toughness and flexibility. Nylon filaments typically require extruder temperatures near 250 ºC, however, some brands allow printing at temperatures as low as 220 ºC due to their chemical composition.
PRO
- Tough and partially flexible
- High impact resistance
- No unpleasant odor while printing
- Good abrasion resistance
CONS
- Prone to Warping
- Air-tight storage required to prevent water absorption
- Improperly dried filaments can cause printing defects
- Not suitable for moist and humid environments
- This is just quick information about materials.
Full information can be found ( www.Simplify3d.com )
Downloads
Ipad Holder Hinge E-Ring 3D scan