WEEKLY ASSIGNMENTS
Computer-Controlled Machining
For this week assignments, I will go with the direction of parametric design for my furniture. Start looking for deferent approaches and how other designer and manufacturer looking at this style and how they implement the methodology as function product.
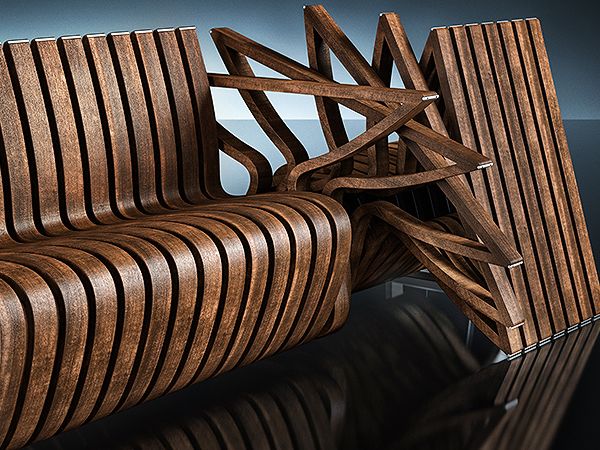
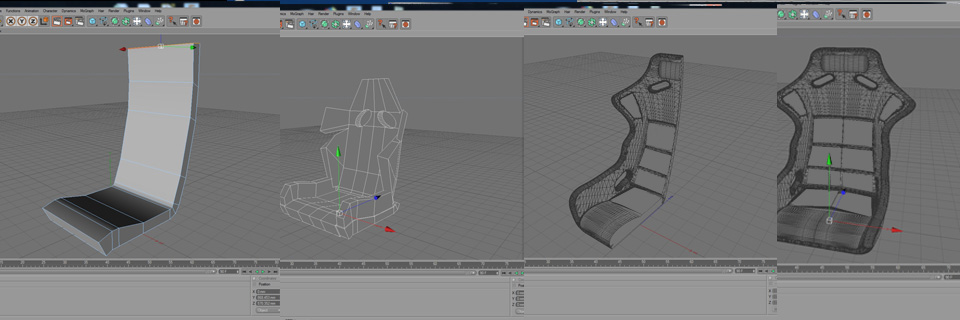
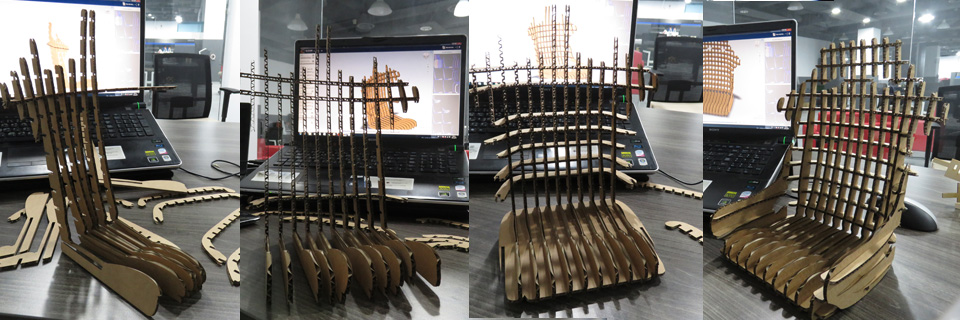
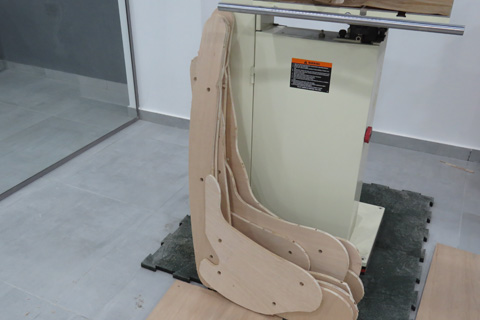
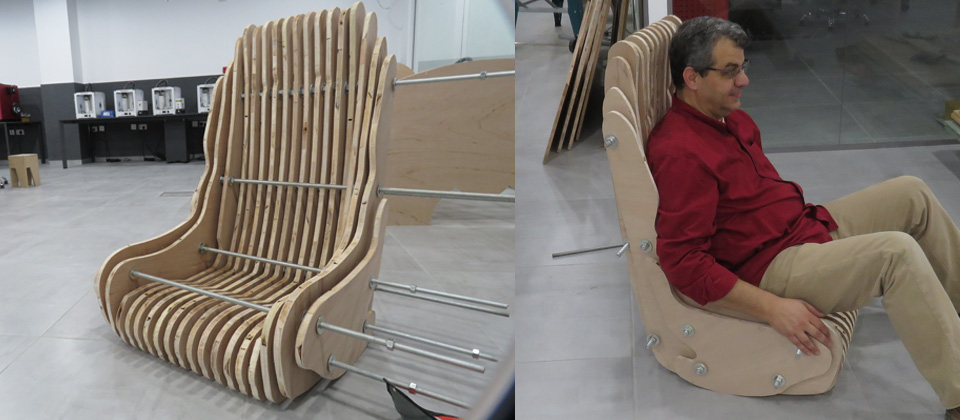
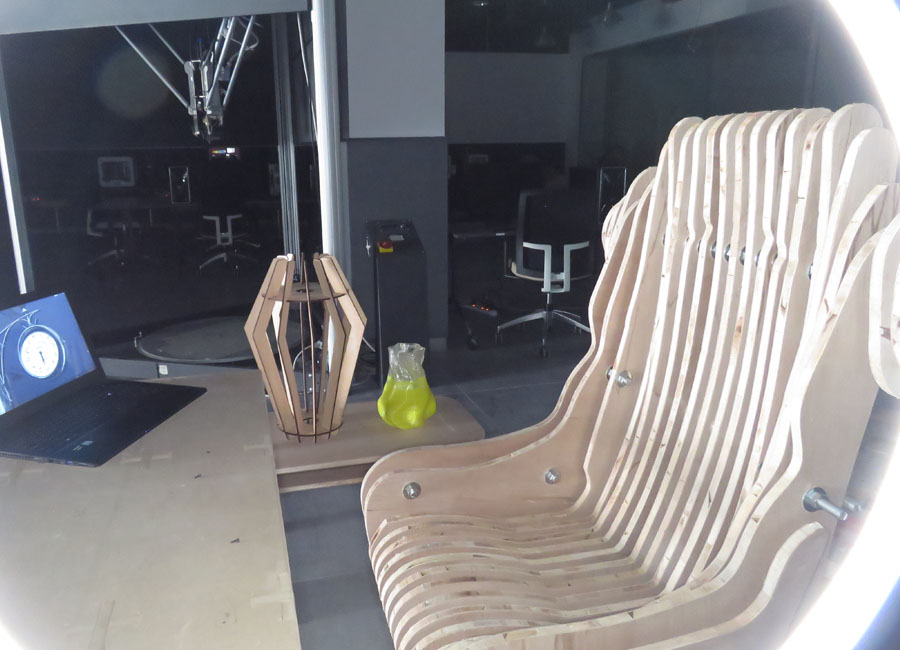
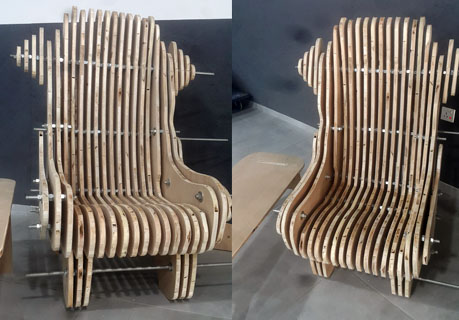
I choose to build a chair ( racing seat ) and use metal nuts and roods, at the same time I experiment other design like to design a Sofa, the result was good and it gives me a good idea how the program works
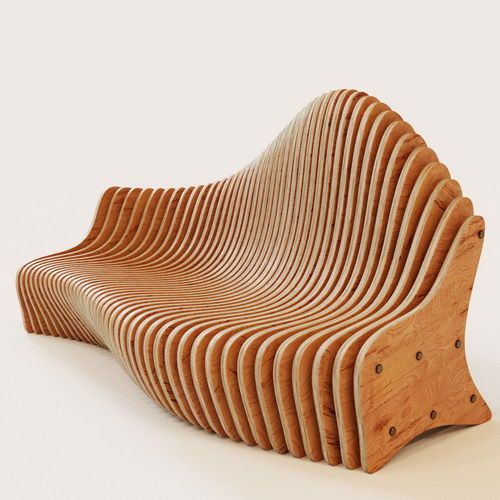
The size of the Sofa was ( 150x90x85 CM ), as I mention it, during your design keep in your mind how to manufacture the product. and it runs different levels
1- Tools in the programs your using.
2- Machine
3- Material your using
Understand these help me a lot to build a functional product, or an excellent prototype.
Designing in 3D programs I have a couple of advice first, have a look at blueprints especially the ones have dimensions and technical drawing. this what I did in this week, looking for lots of blueprints, one of the best sources for good blueprints ( the blueprint.com).
usually, I start my design with a cube and do a lot of extruding command inside adjusting points and edges reposition or rotate the polygon, plus the one that will help in the design, symmetry command that you will find in all the 3D programs, why this is an excellent tool, it keeps you concentrated on one side and don't worry how the left side as example will look like.
these ways of modeling need lots of practice and understand the technical plans. Think about it as reverse engineering process, the primitive shapes help a lot in the design.
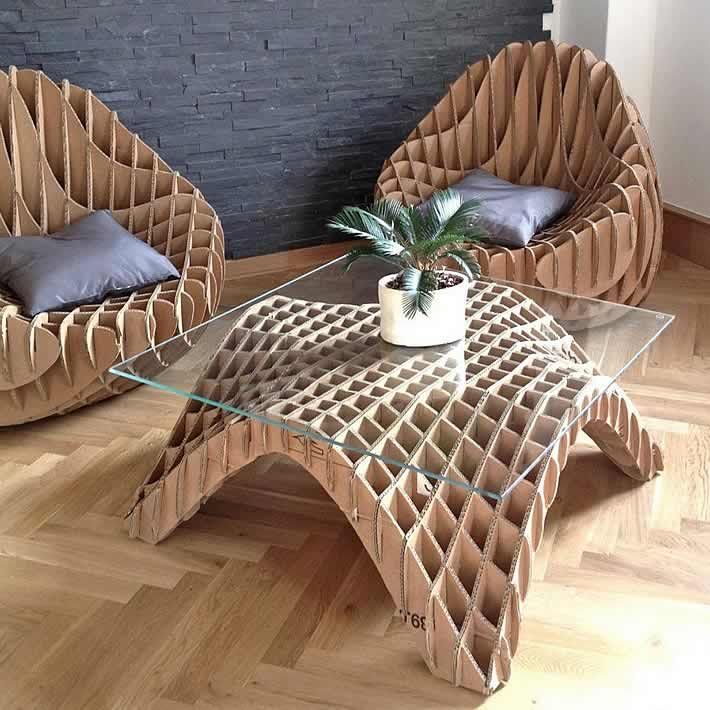
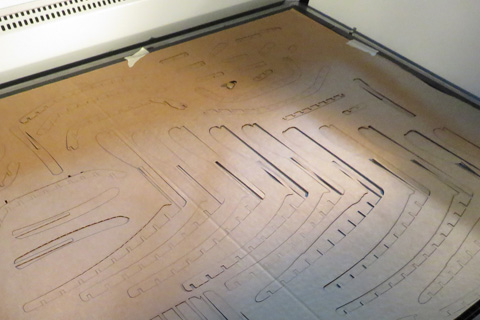
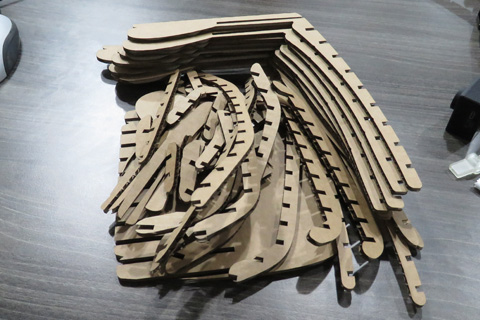
Testing the design using the Laser cutter, where I face a lot of problems, not from the design itself but from the thickness of the material ( new cardboard ) , I run the test couple of times until i found out that in the program I set up the unit as CM and my original setup was in MM, after I reset the unit as MM, it cut and the fitting was excelant.
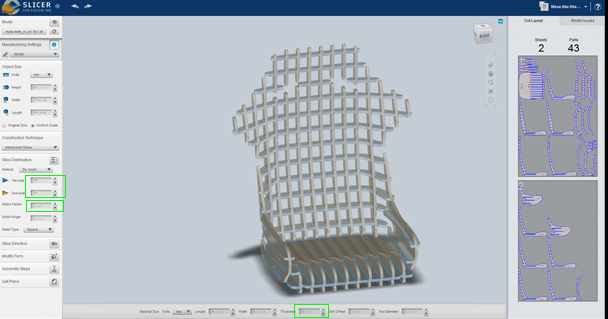
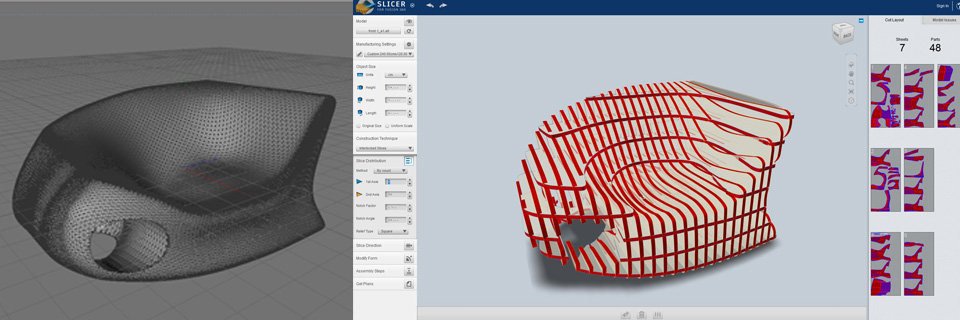
Using SLICER as a program was very helpful but you need to be aware regarding the parameters and how to work with it after I finish the modeling, opening the model in ( slicer ) you need to set up the following
1- Size as printed ( EPS, PDF, or DXF)
2- Thickness material
3- and the important one UNITS
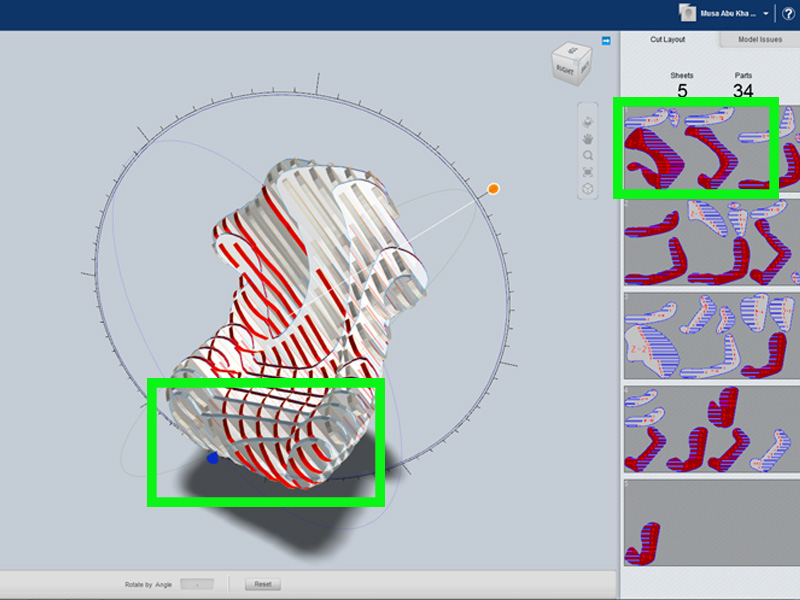
4- Construction Techniques - Interlock Slices ( 1st Axis 2nd Axis ) these you need to test it a lot until you have a gray object if you have a red or blue this is an issue you need to solve by adjusting the number in the Axis section.
5- Notch Angle, found out the 80 as Angle is very good, and the fitting was excellent.
6- Slice Direction this you need to test and understand how your object work and the structure
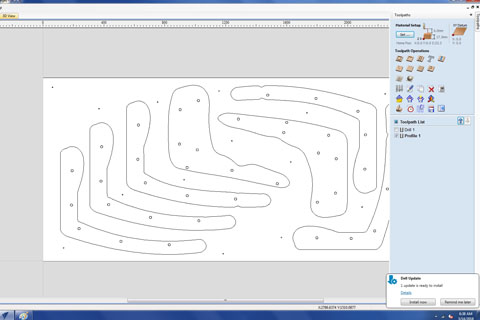
Another thing you need to take care when you export the Sheets, you need to use other software to re-nest the parts

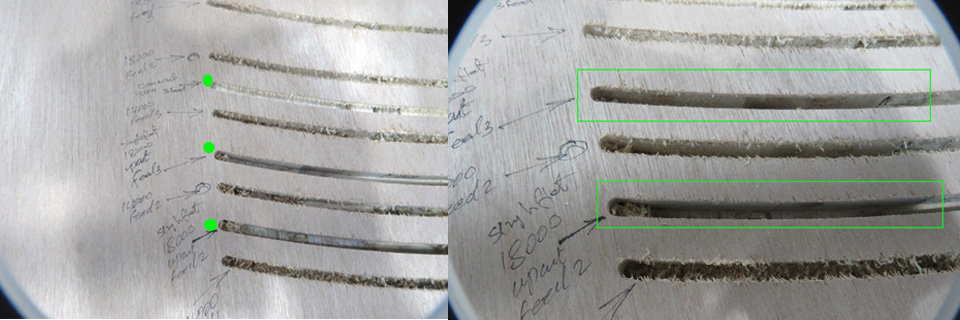
After I set up all the nesting to start cutting, I was looking for the best direction to do the cutting on shop boot especially after the group assignment.
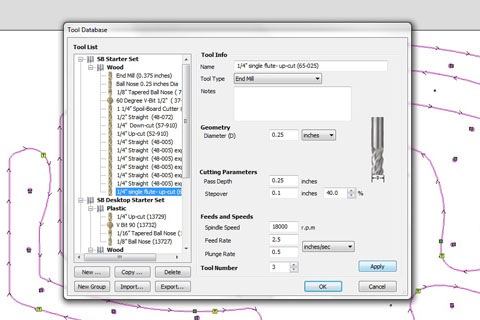
Speed 18000 RPM
Feed 2.5
Down Cut
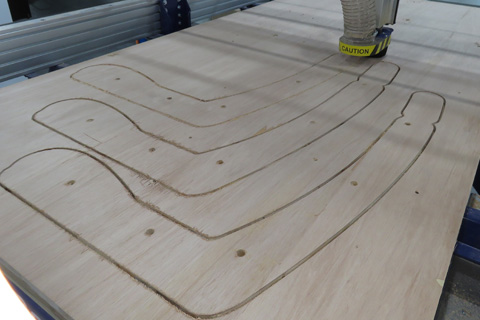
other technical thing I face was the setup in ShopBoot, X, and Y direction and they indicate to the main table, I did the flip between them, the result was the milling head when out and stopped the machine. after fixing the direction, and drill the holes to fix the wood board to the milling table.
The result, in general, is nice but I don't recommend this type ) Blockboard( to use it on the shop boot. it is always different in the sound of the cutting plus the wood finish is not clean. you need to clean it up not like the MDF where you get a clean cut.
another thing with this wood ( as a straight line you can get a clean line but when you do carves or the design have lots of carve a the finish is bad to average, plus as I mention it you will have a big chance some parts from the wood will peels
I need 3 sheets to do the job on ( BlockBoard 2400x1200 x17.3 mm) to finish the fill parts of the chair. 10 metal rods, around 250 nuts, and 400 washers.

To download the files, right click with the mouse and chose “save link as”