WEEKLY ASSIGNMENTS
Molding and Casting
This week was fantastic, especially try new techniques in modeling and casting. Learn more about the material and the different between molding and casting. Mold Making is required for casting a wide range of materials. Once a mold has been constructed it can be used to manufacture multiple identical parts. Molds are an exact reverse of the product being cast and are made by CNC machining or by replicating a 3D pattern using mold-making techniques.
Molding is the process of manufacturing by shaping liquid or pliable raw materials using a mold or matrix, which have been made using a pattern or model of a final object. But, Casting is a manufacturing process in which a molten metal is injected or poured into a mold to form an object of the desired shape. This has injected or broken out of the mold to complete the process.
Casting is a manufacturing process in which a molten material is introduced into a solid mold and allowed to solidify. The solid material takes the shape of the mold. The term usually refers to metals but can also apply to the same process for other materials. Ceramics can be "slip cast" and polymers can also be cast. Molding refers to shaping a material that is soft but not fully liquid. (think wet clay, for instance) A molding as a process might also use a mold to shape the soft material but doesn't necessarily require one.
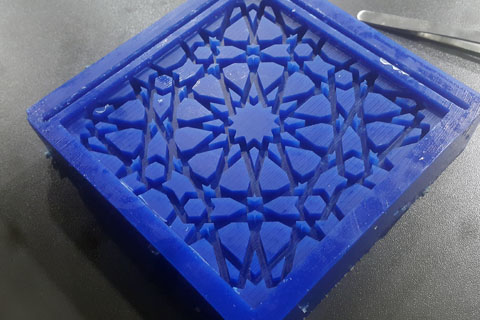
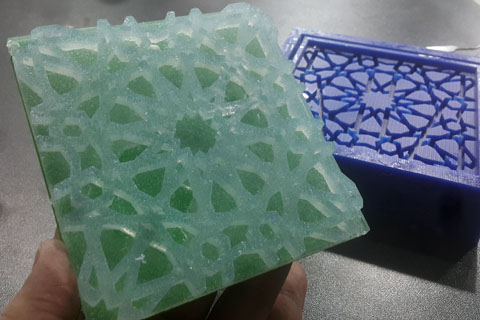
I start with a concept to use one of the patterns in furniture and architecture. And using it for print as the stamp.

1- Design the pattern as a base of the stamp
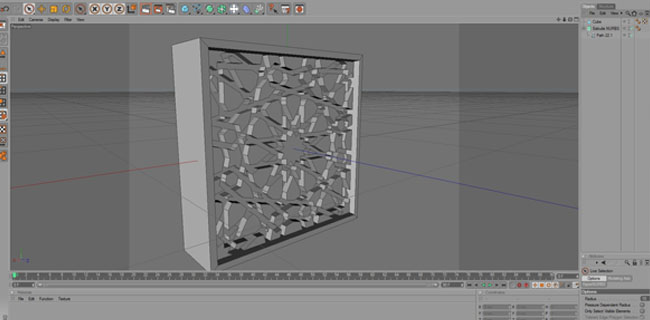
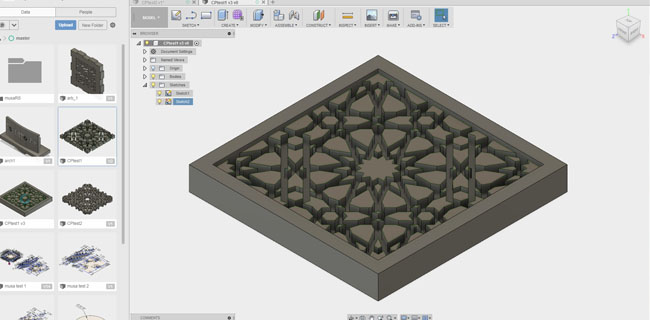
2- border around it as a ring
3- For the 3D software, I try both C4D and fusion 360.
4- design a hard base with a hand
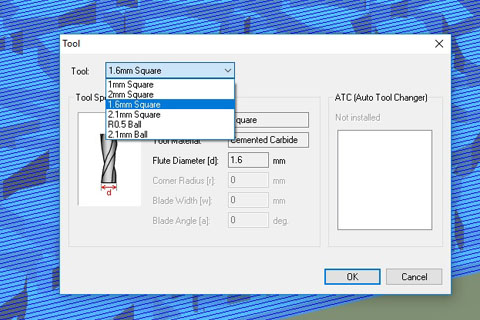
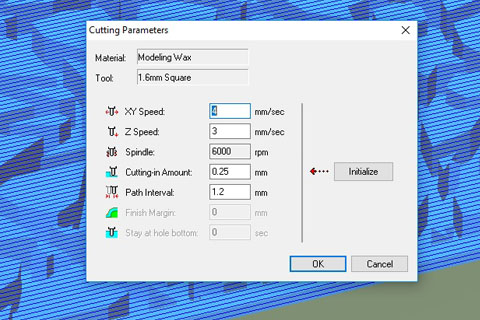
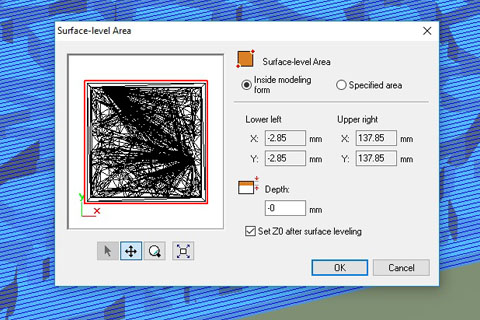
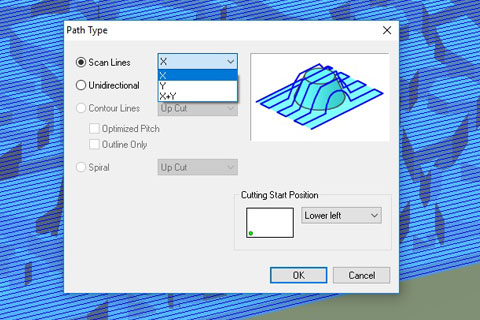
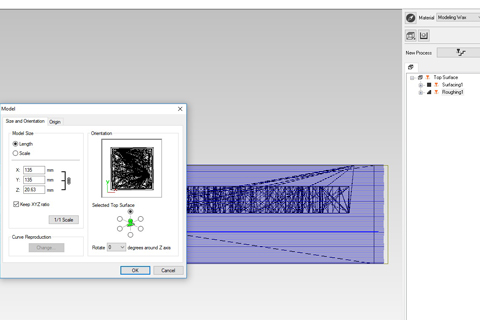
After finishing from the 3D model (design) I used Roland SRM 20 for milling the mold the material used was 1.6mm. And one more thing was surface level for the mold and this is a practical advice from Sibu to make sure you have a level surface even if the material looks suitable. The full process it took 72 hours to finish.


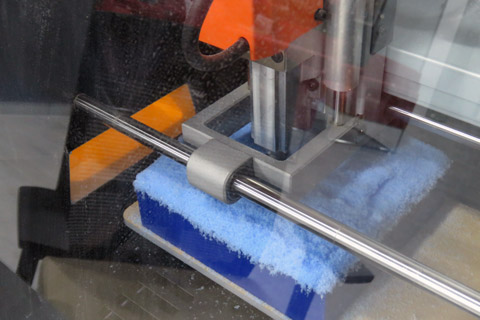
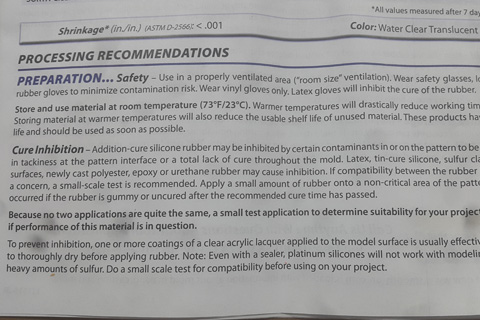
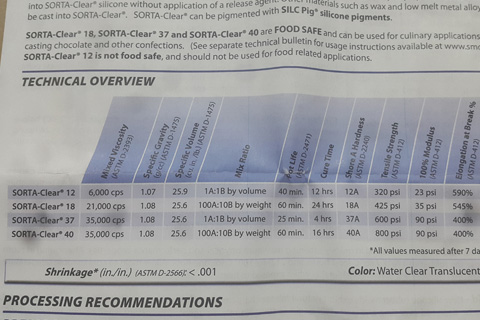
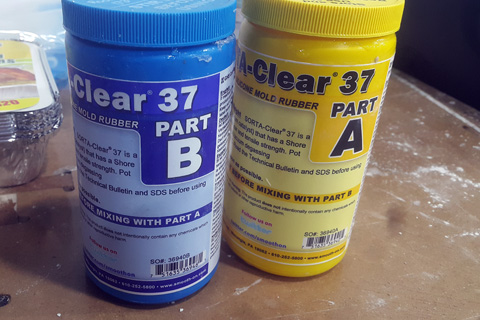
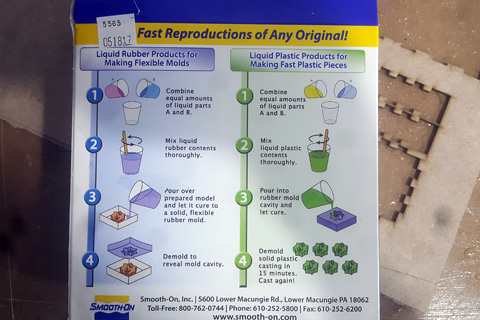
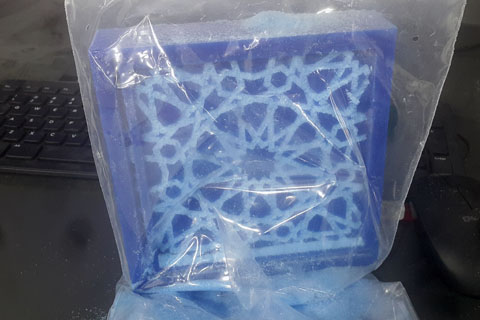
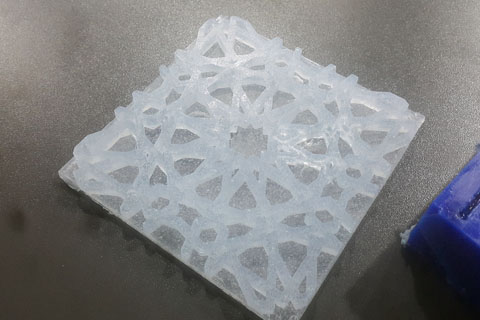
After 3 days I start setting up the second step mold the shape, from our inventory in our workplace I sued ( Smooth-on SORTA-CLEAR 37 ) SiliconeMold Rubber, this was one of the most excellent examples for good packaging with direct instructions how to mix. Plus the product instruction inside the box the first thing captured my attention was the safety (Ventilation, wear glasses, long sleeves, and rubber gloves.)
so I used an equal amount of liquid from A and B as a mix ratio by Volume and you can note by mixing them the color is a light blue for the liquid, starting the mix the first thing that I notice that there are air bubbles within the mix. That was not something I can control at this stage, or when I Pour the mix on the mold, if I want to take out the air from the mix I need to use a vacuum so the air will rise up to the surface because of the difference of the air inside the mix will level up to the surface. But I have work with what is available now so what I did was after I pour the mix I start gently shake the mold and hit it on the table surface, I manage to take out as much as I could from the air, overall it was fine.
Now you need to set and wait (setting time) the temp inside the workplace was around 24c it took more than 26H to cure to a flexible rubber. One of the things I face was Demold because of the detailed in the model it was a bit hard and this is an advice you need very careful with high detailed models take your time.
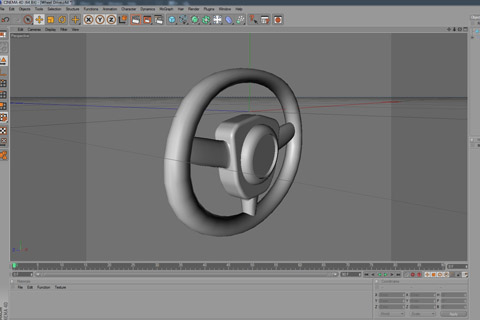
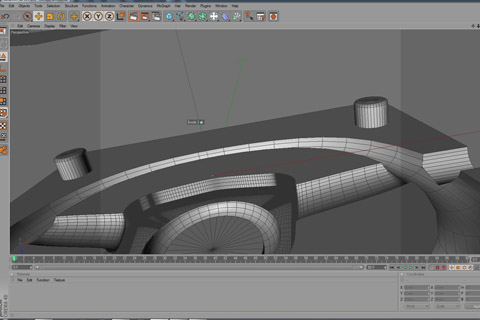
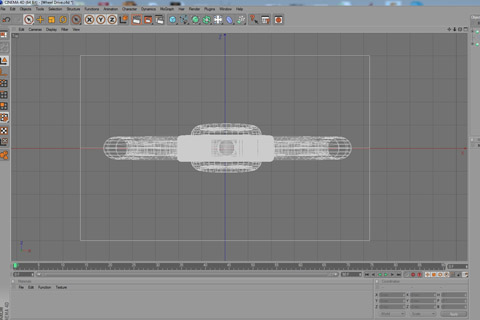
The next thing in my maid to cast this steering wheel using two parts
To download the files, right click with the mouse and chose “save link as”