W04│ Computer-Controlled Cutting
Tools
Group Assignment: Kerf
Individual Assignment: Vinyl & Laser cutting
Download files
1. Tools.
This week we needed to characterize our lasercutter and make test by varying cutting settings and dimensions.
Currently we are using the

2.Group Assignment
LASER CUT SET UP
To define the cut & raster parameters we use Autocad. We make this first attempt with 4mm MDF the folling settings (speed 22% / power 100% / Frequency 5000) but as you can see, the laser burnt the borders.
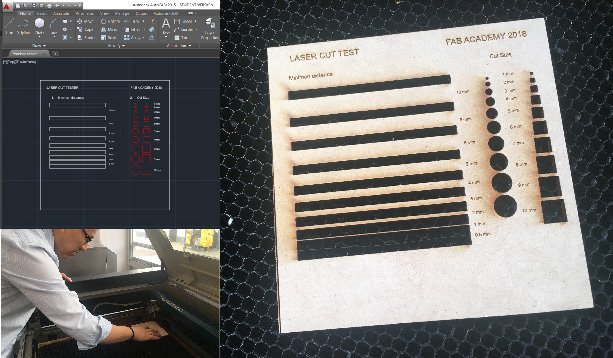
We had to restart the process by making a new test design, here the parameters we use and the results.
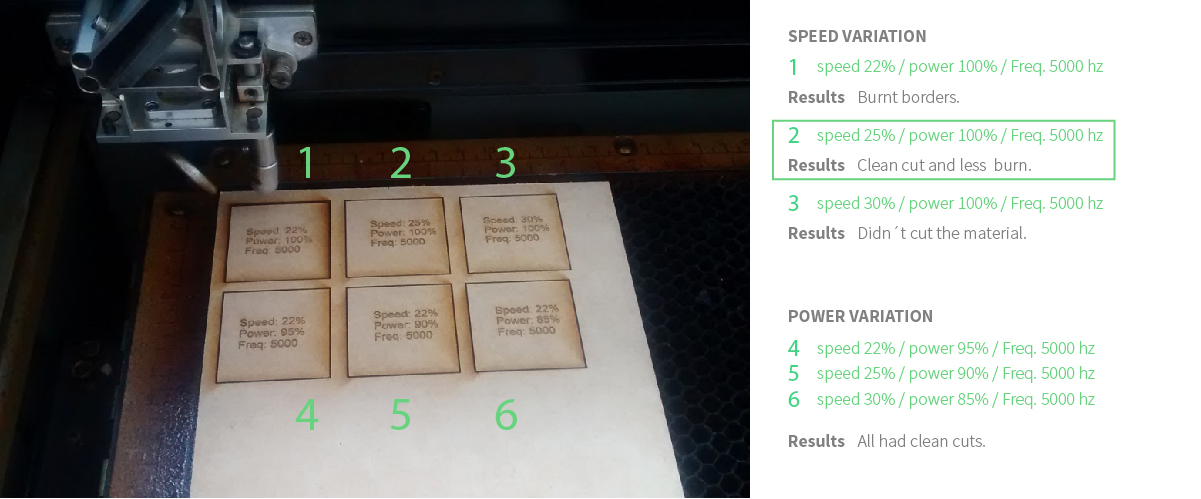
KERF
For this part of the assigment we use Fusion 36O for the design and the folowing settings: speed 25%, power 100%, frecuency 5000hz.
2. Individual Assigment.
1.VINYL CUTTER
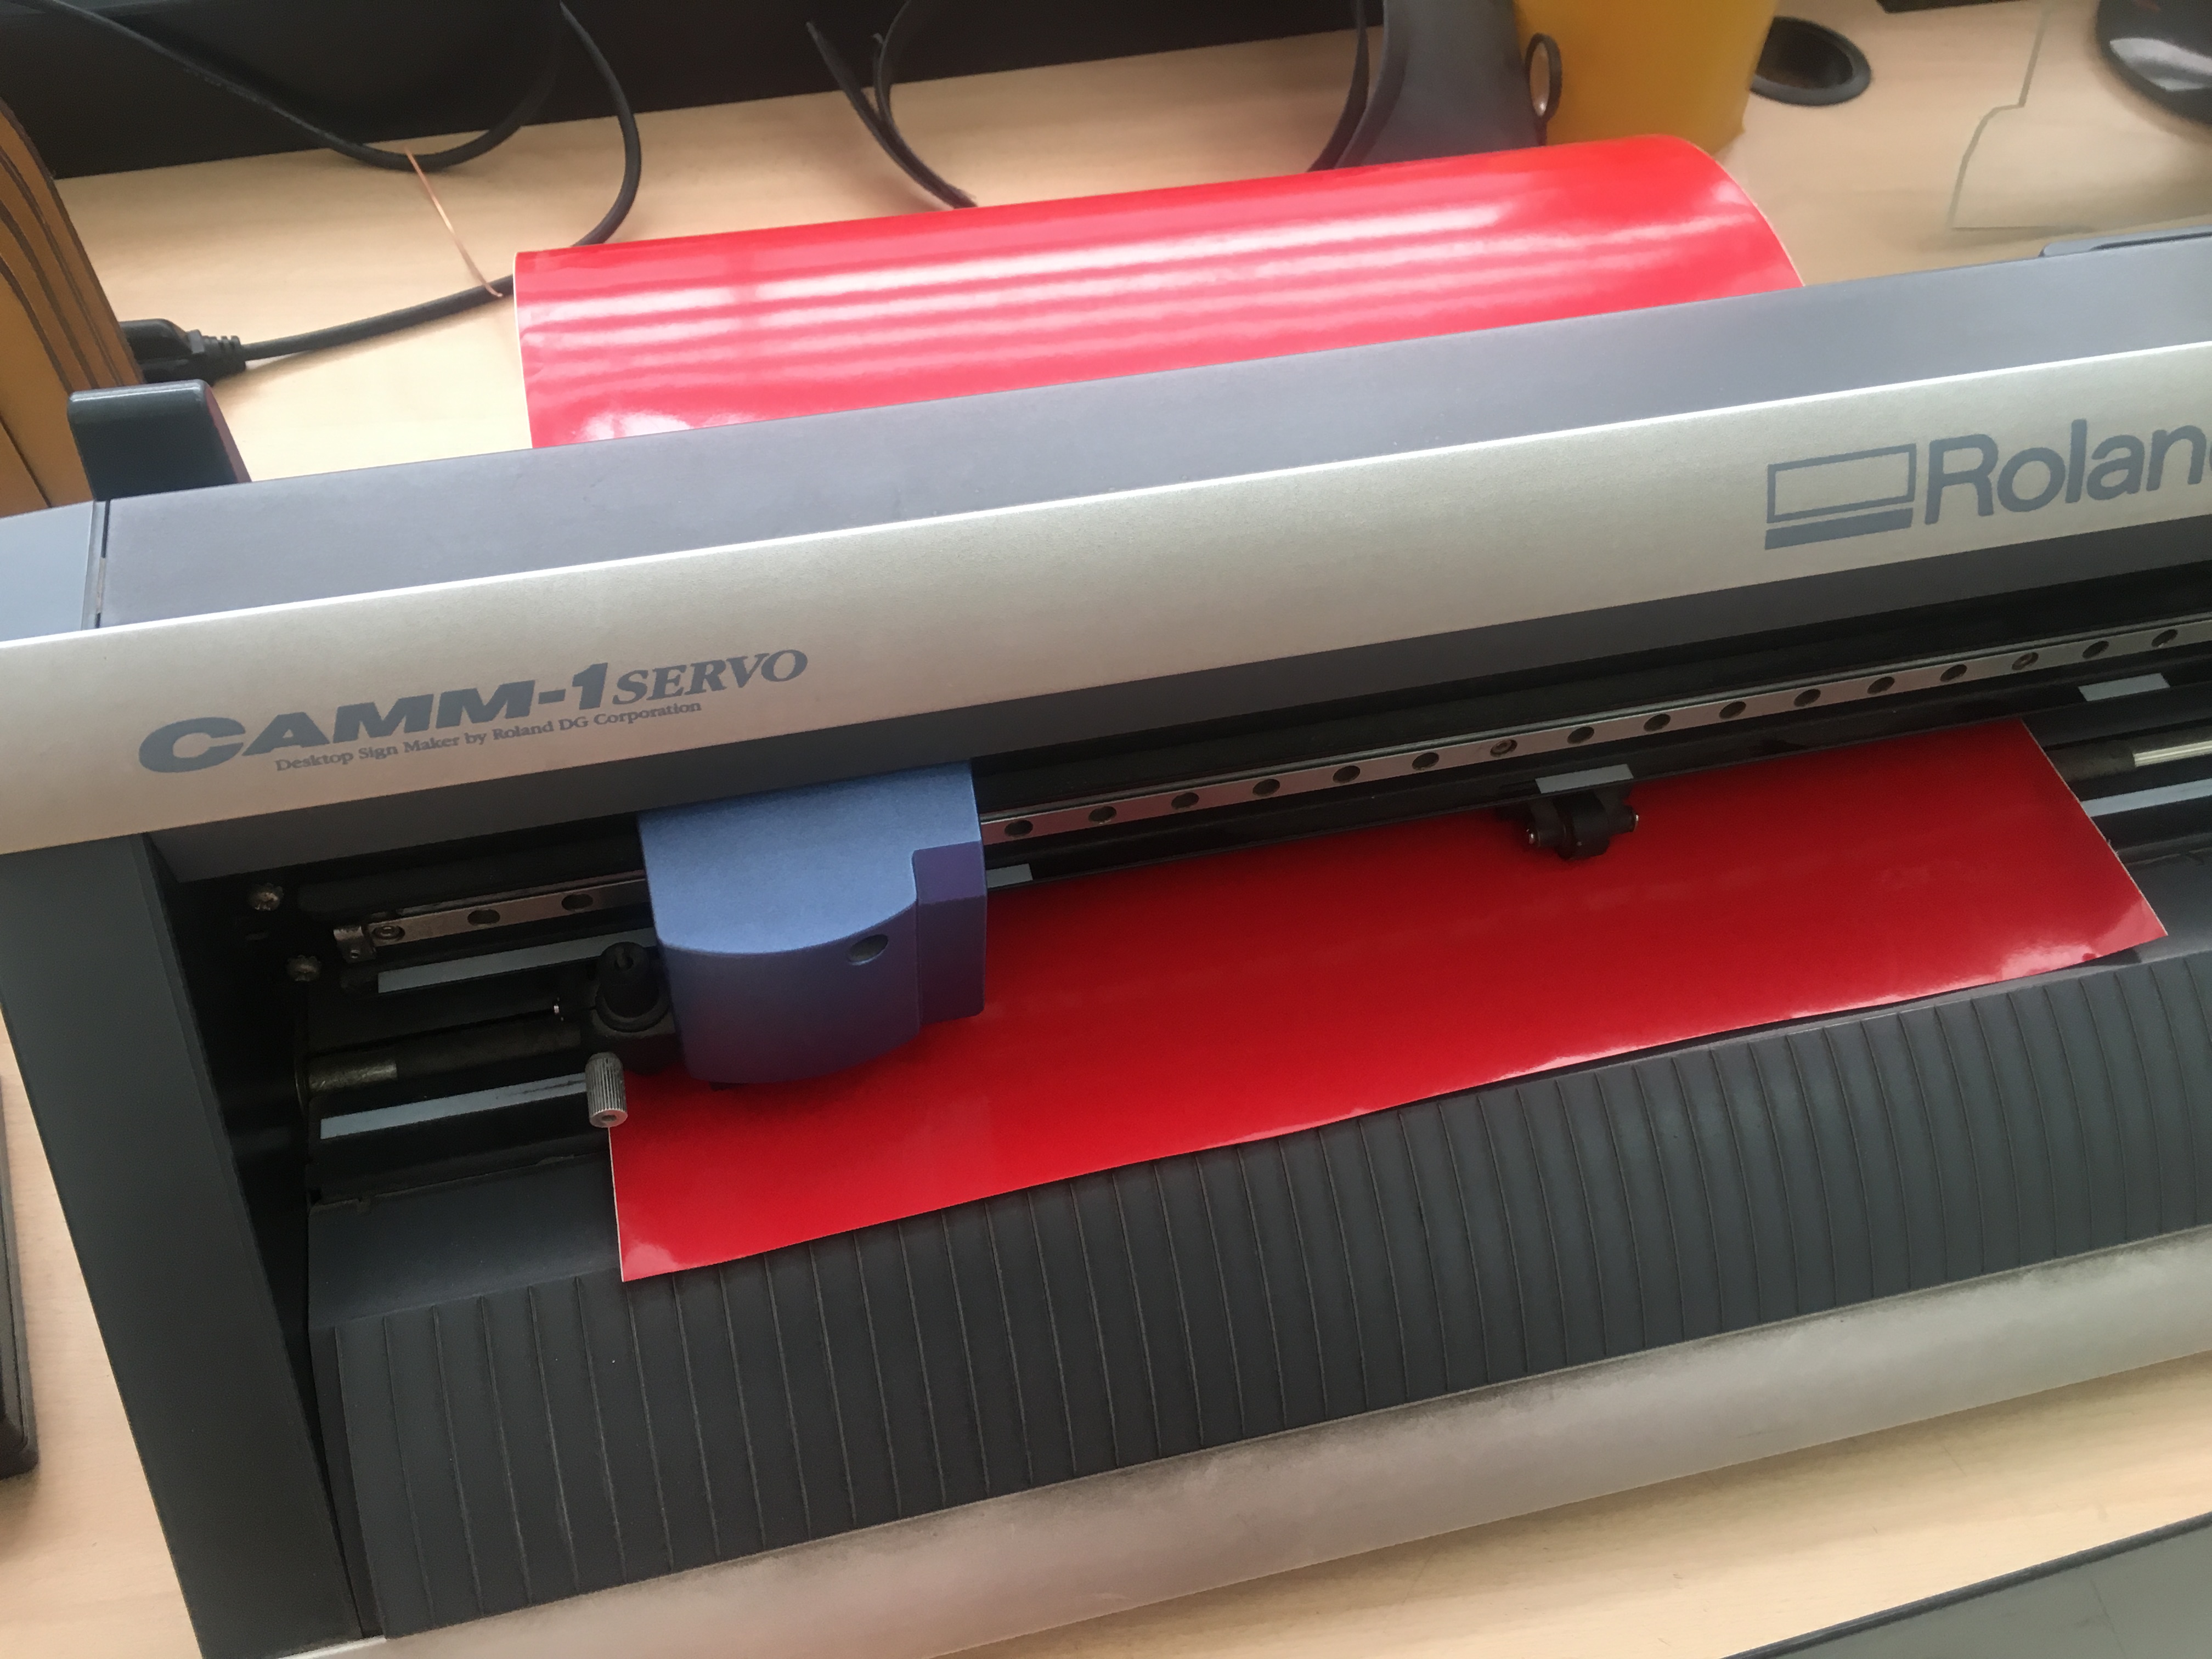
- Camm-1 Servo Roland set up: First I loaded the roll and adjusted the guide wheels. It is important to align the roll parallel to the machine at the front and back otherwise it won't work.
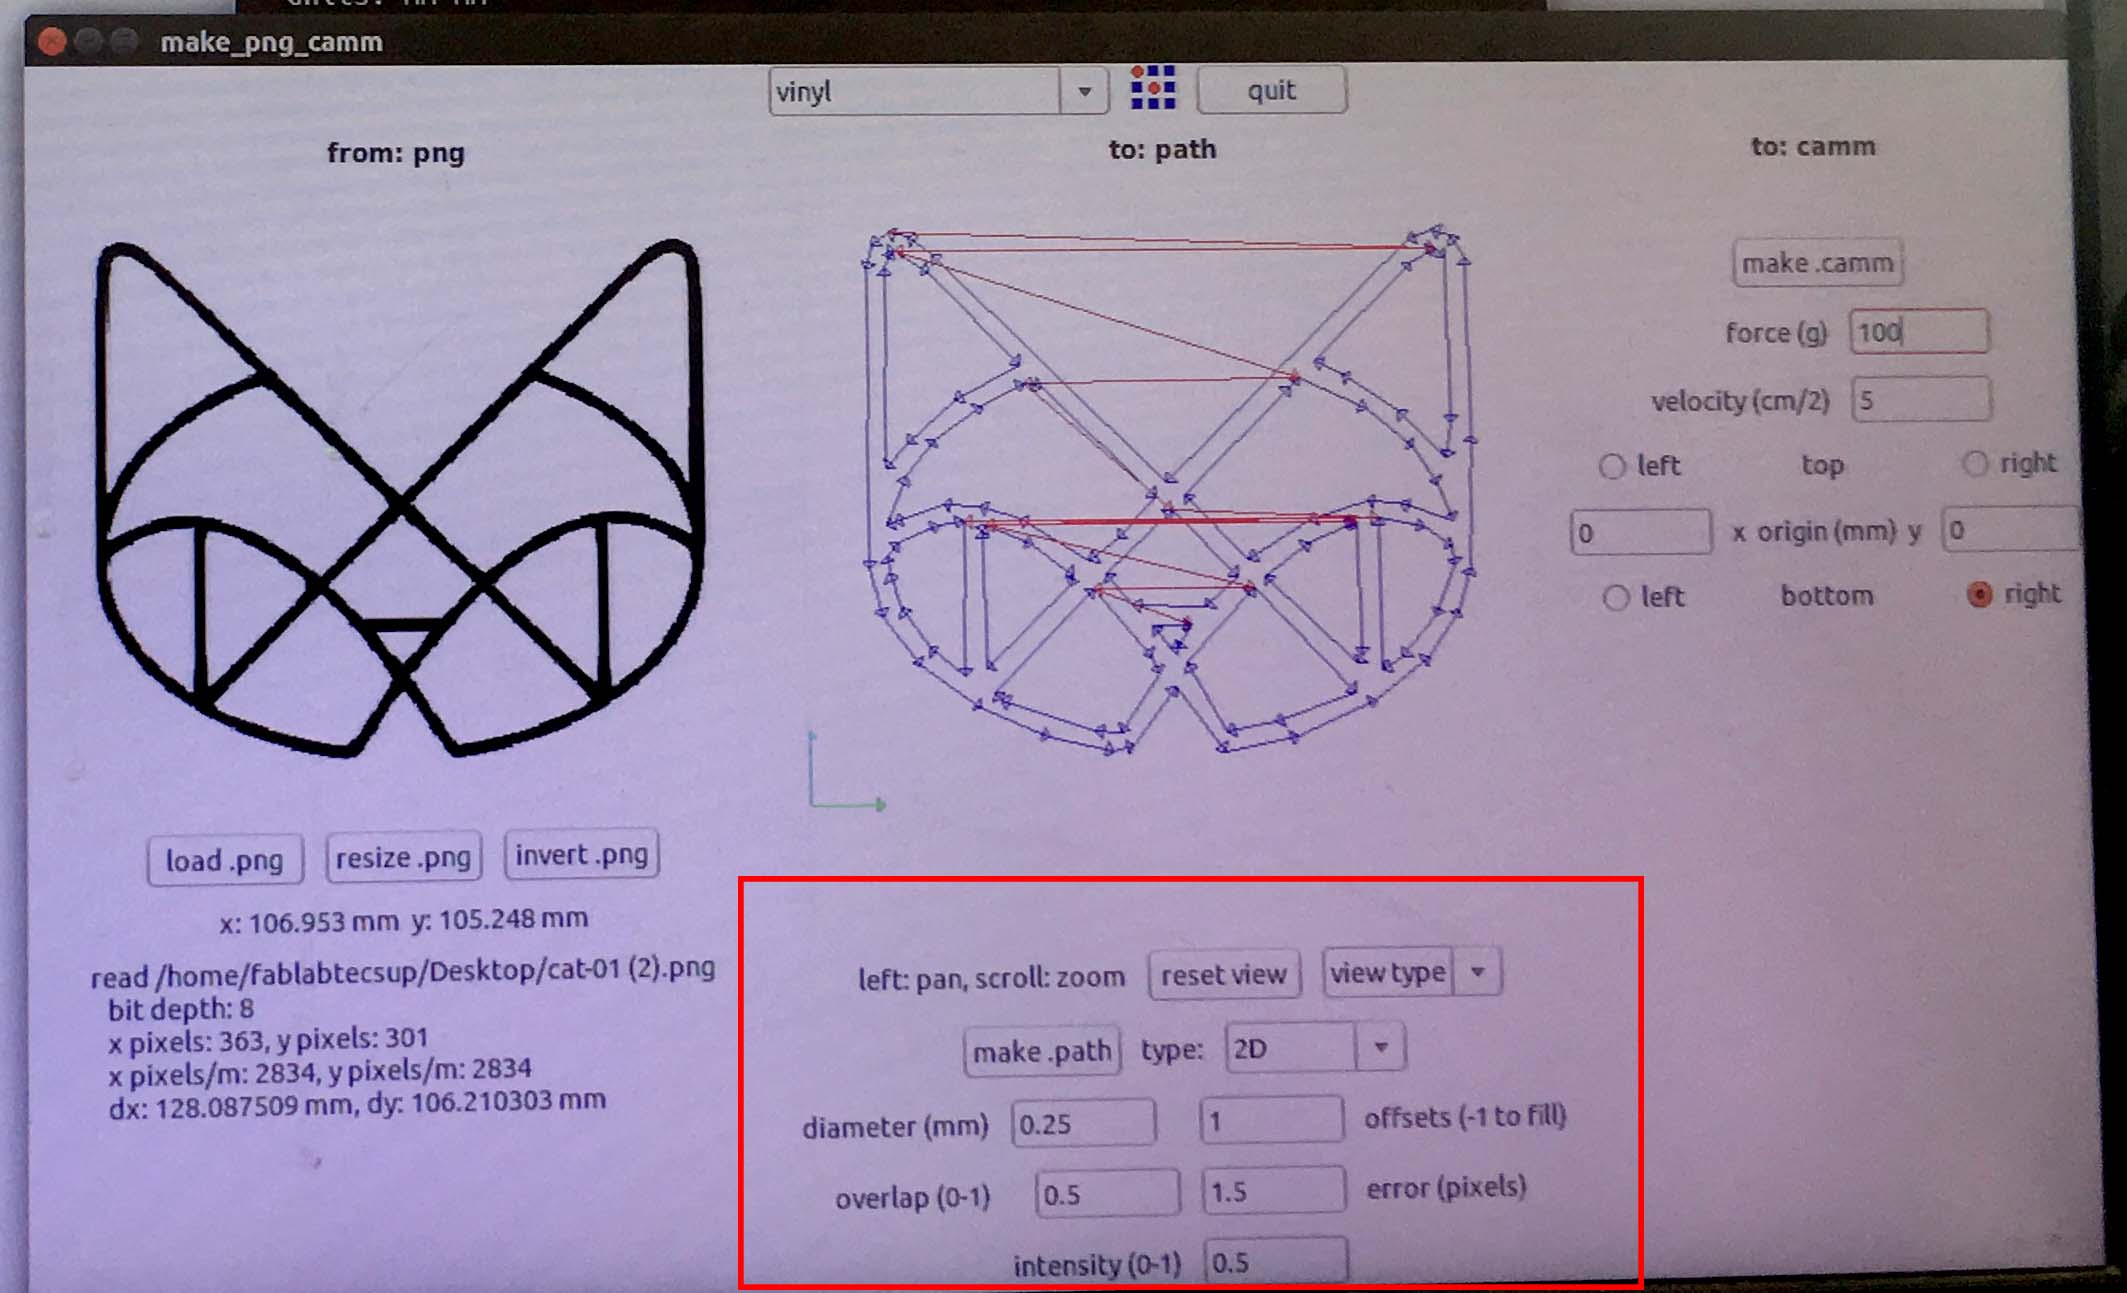
- Parameters:We are usign Fab Module and I set up the machine with: Velocity(cm/2) 5 / Force(g) 100.
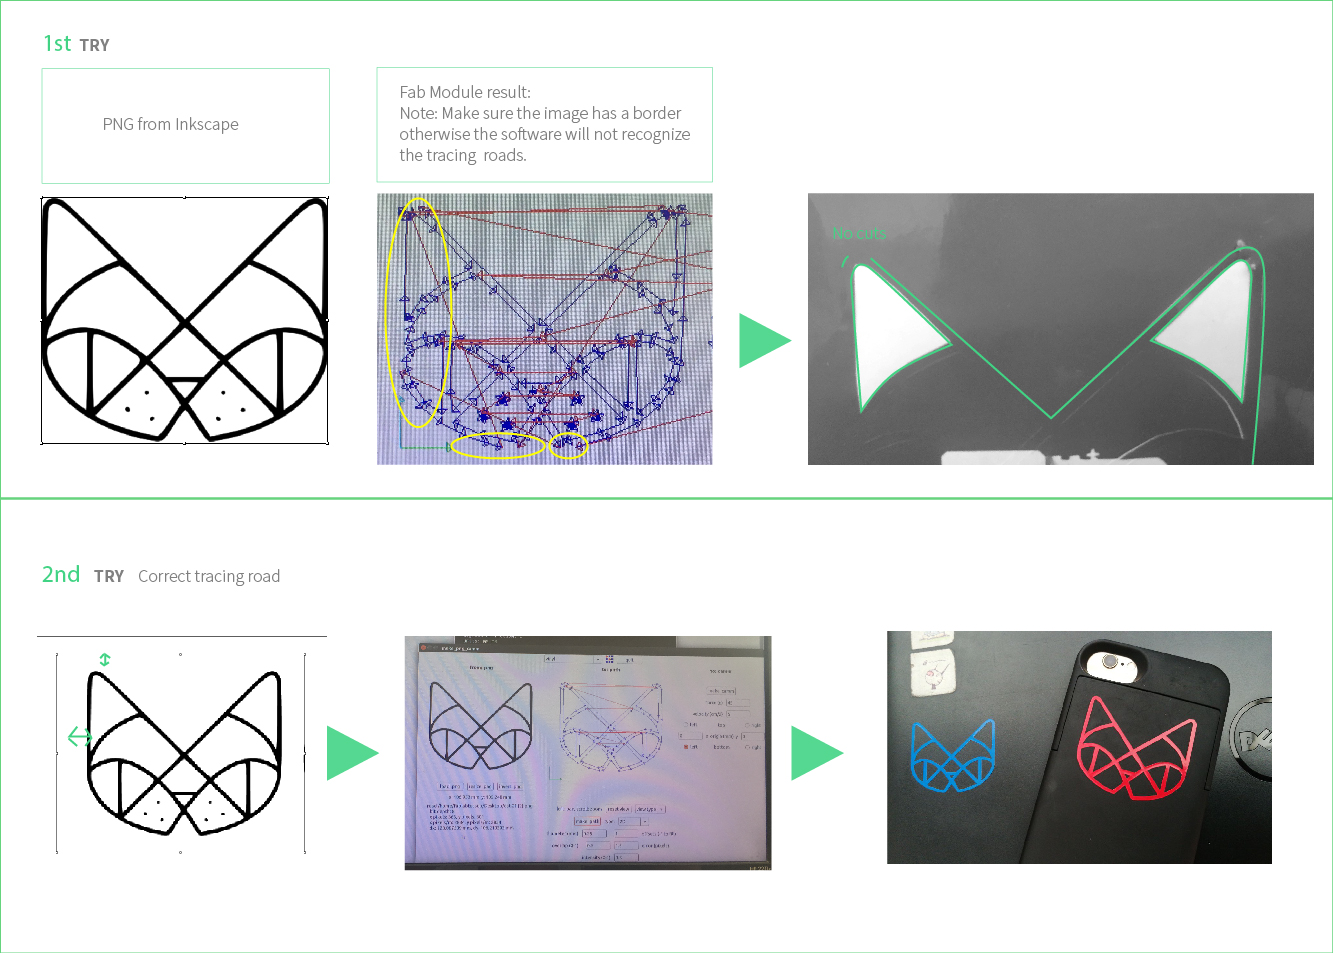
- Some troubles I faced: With first PNG file I exported the image didn't have padding between the content and the border. The machine didn't recognized all the image edges. On the second attemp I add the padding and it worked.
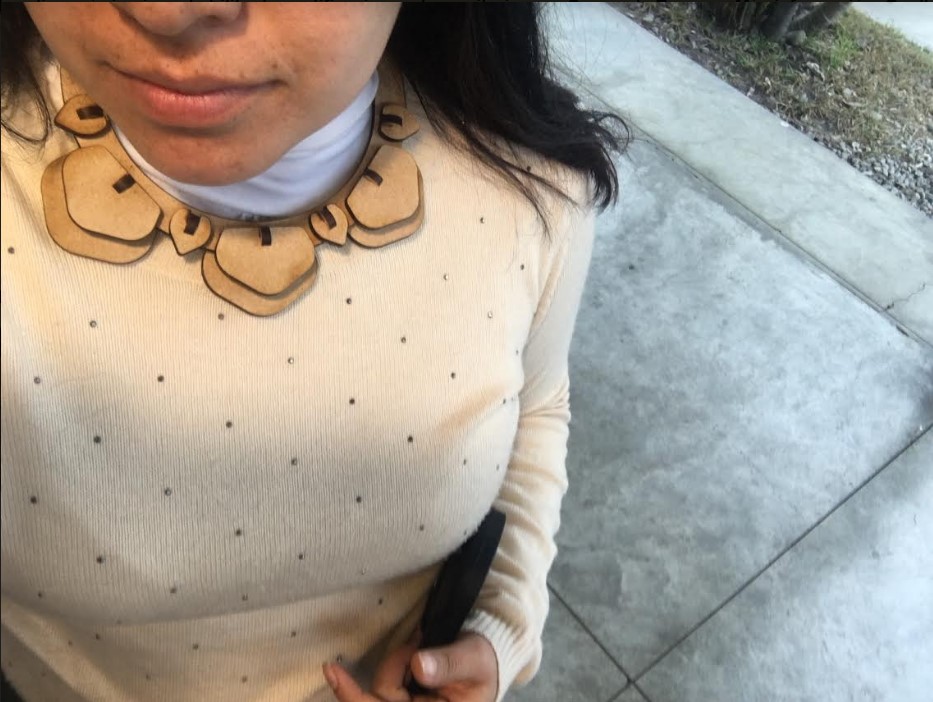
2.PRESS FIT KIT
For this assignment I wanted to mix two of my favorite things: succulents and necklaces. I started with an sketch and then I tried Fusion 360 to make the it parametric.

My experience with Fusion 360 was in between love and hate, it took time to make it parametric but after serveral failures I managed it. Here the main steps I took to make the necklace.
Development
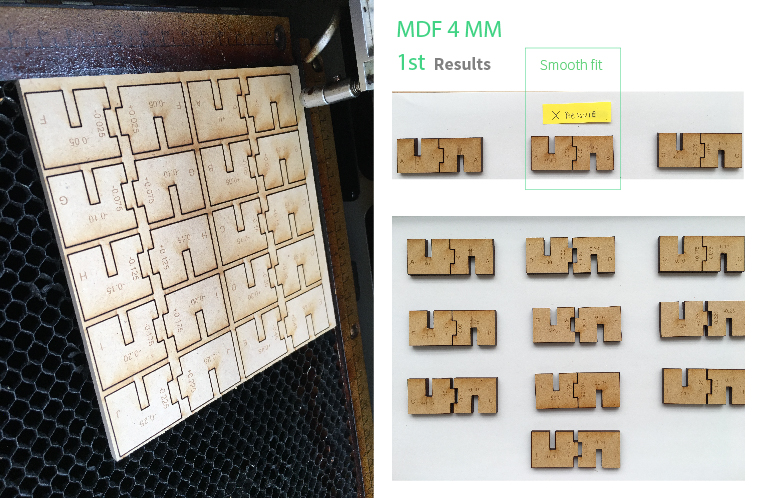
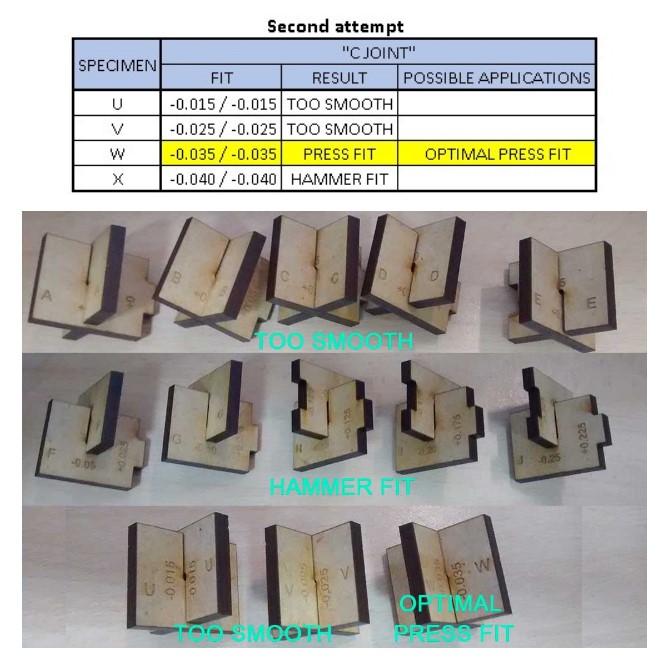
- Material selection: We had available 4mm MDF and according to previous tests I used the following
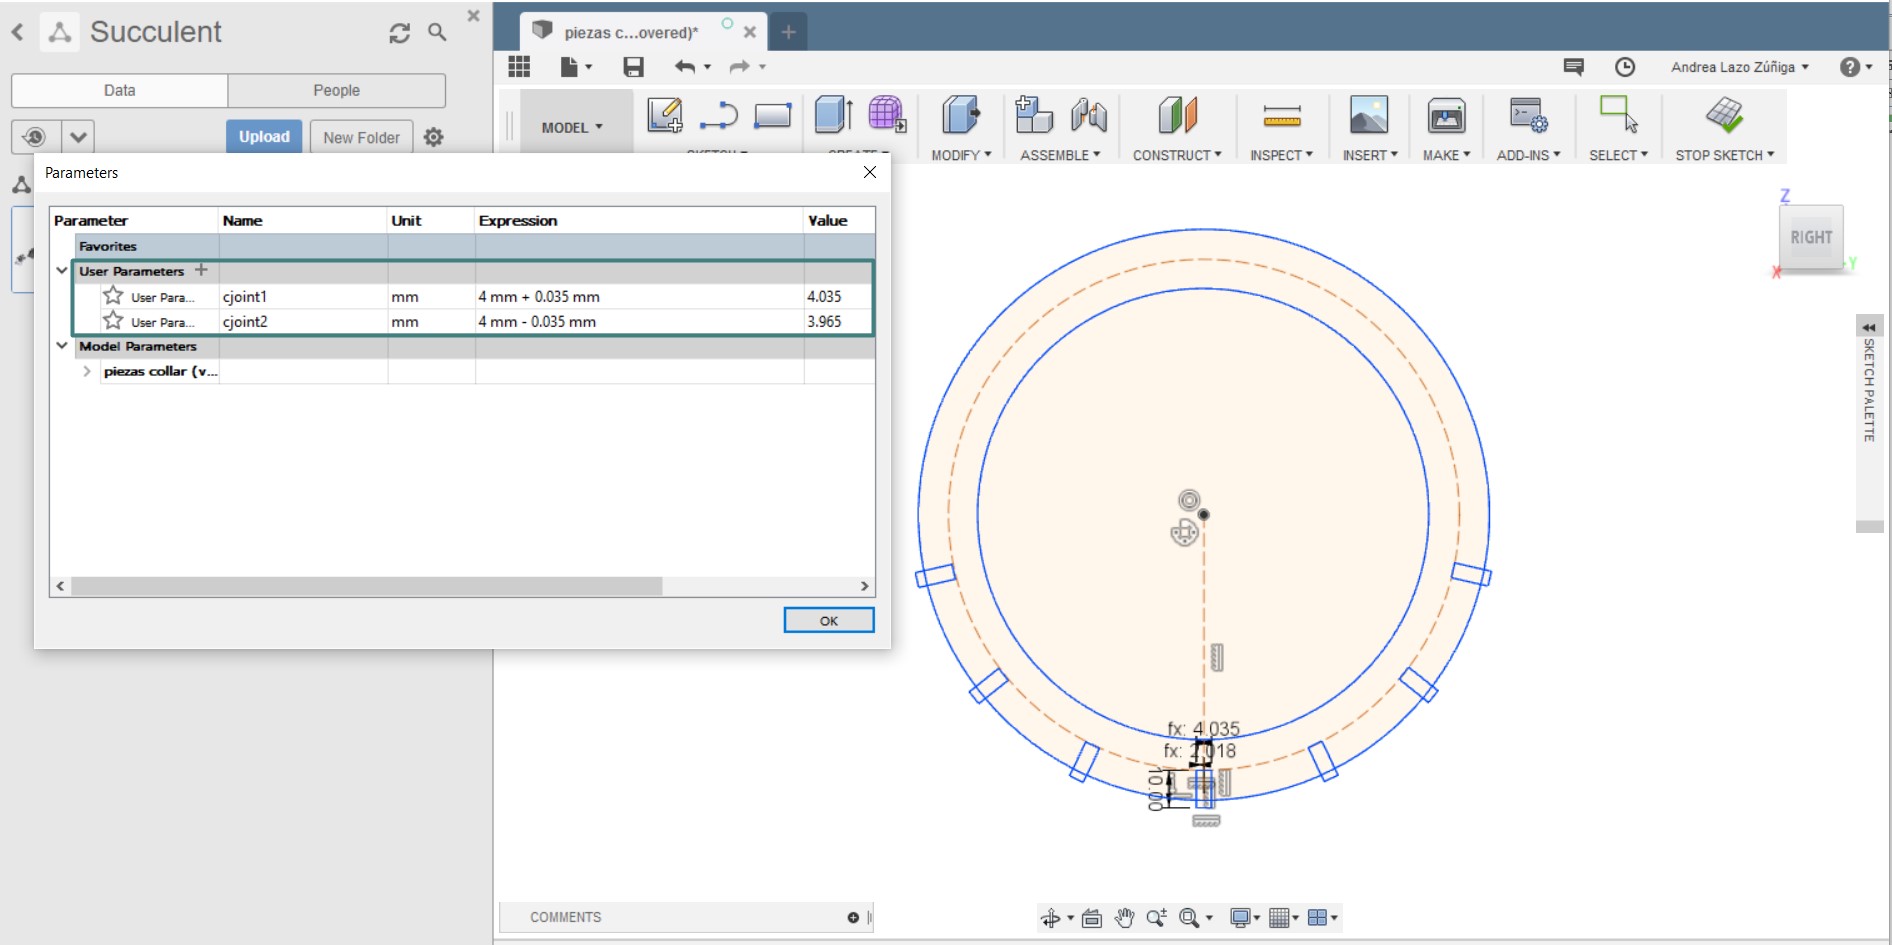
press fit . - In Fuison 360 I set up the parameters according to the material I had. To do it go to
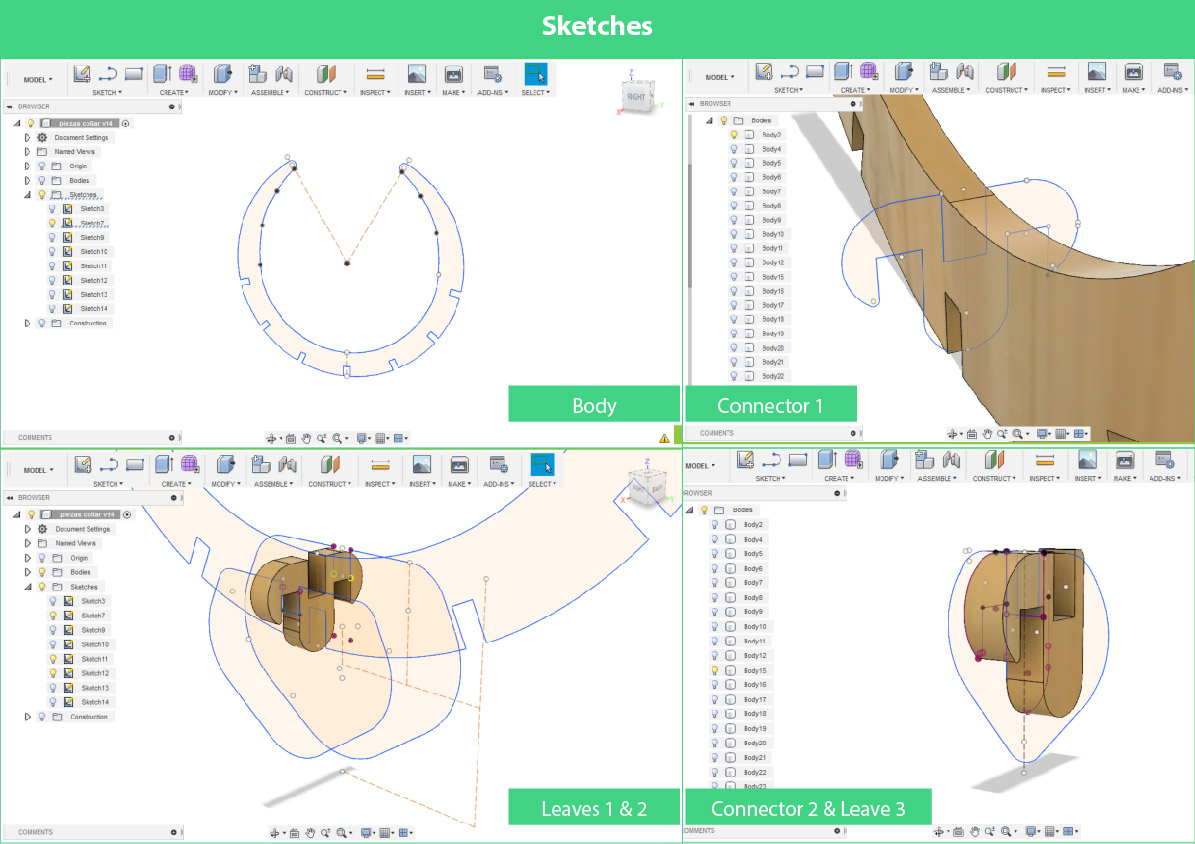
Modify --> and chooseChange Parameters - Now it is time to start working on the sketches. My necklace has 6 type of pieces, 3 leaves(different sizes), 2 connectors and the body. In Fusion 360 I drew them using construction planes in order to place the each item exactly where they belong.
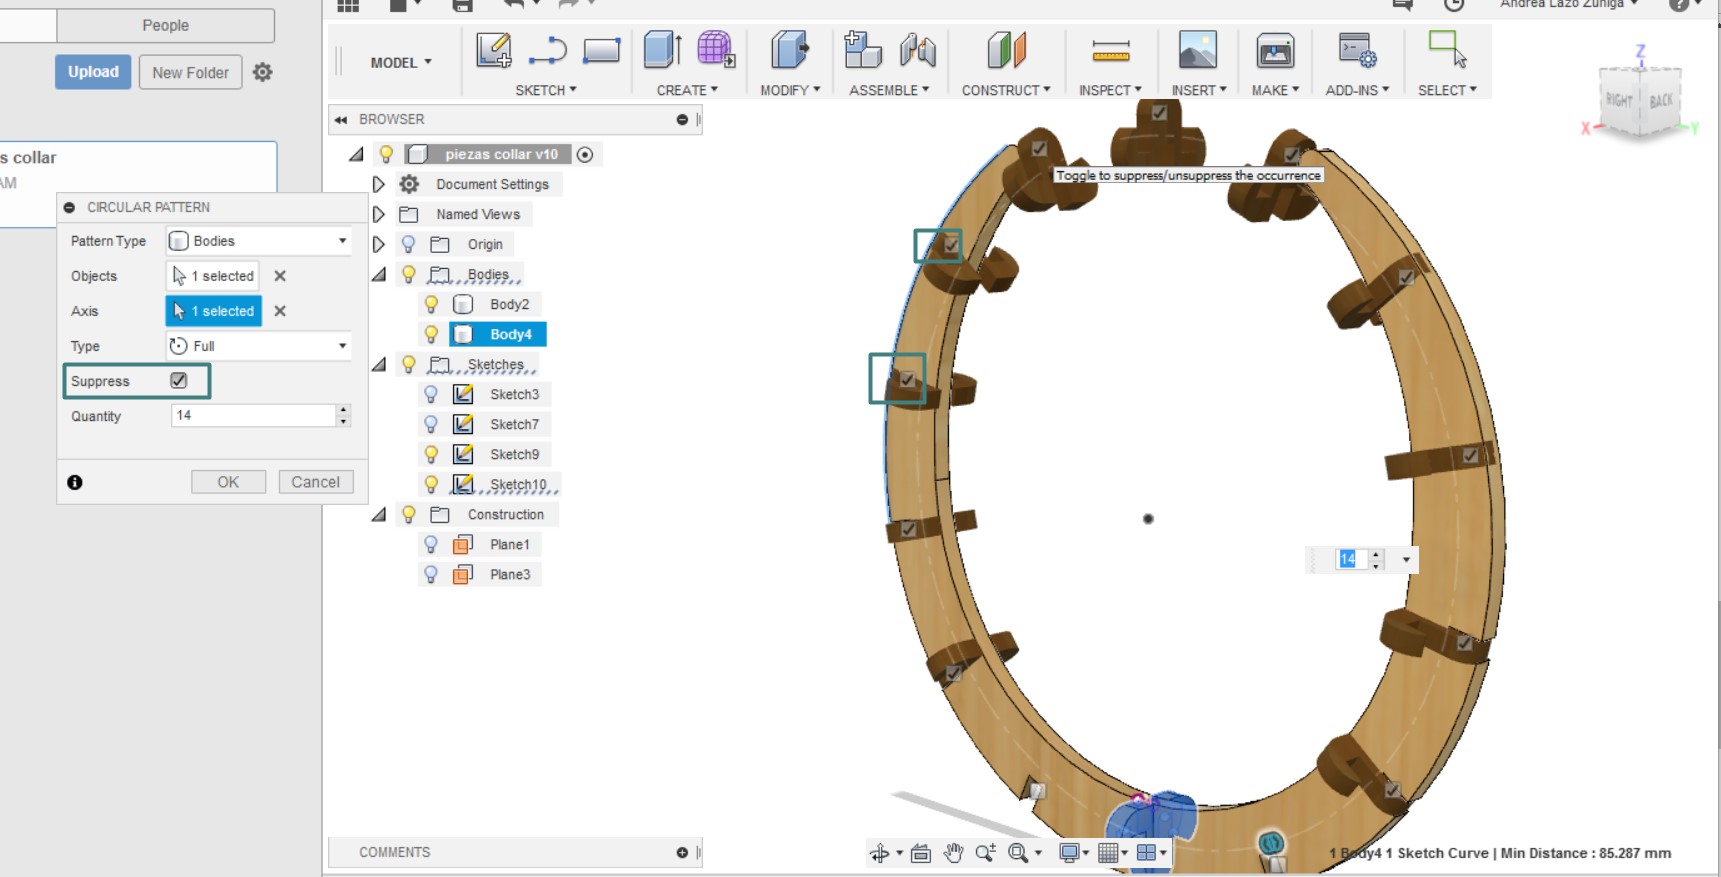
- One of the tools that helped me a lot was
Circular Pattern , it has an option where you canSupress the elements that are not necessary. - Now it was time to cut!, but first I needed the
DXF files. In Fusion, by clicking on each sketch with the right button of the mouse, it is possible to save as DXF file. What I didn´t like was that I had to do it with all the elements and then add them in a single file. I used Autocad to do it, but when I oppened them, all the construction lines came so I had to clean them up.

Production and Assembly
Once all the files were ready to be cut, I needed:
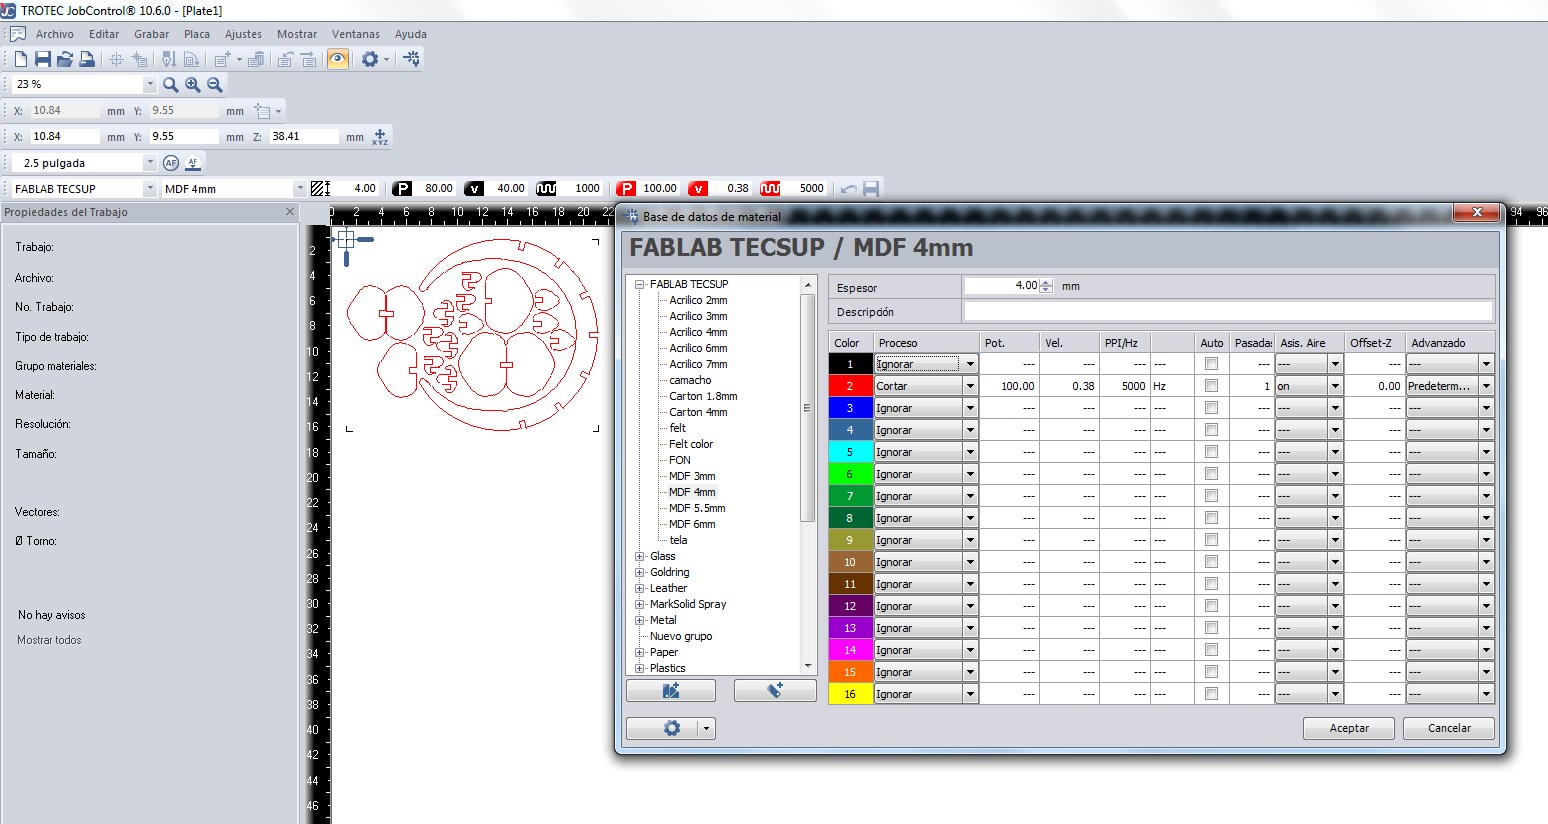
- Preset Trotec parameters.
- As it is shown below, the edges were burnt due the power and speed parameter.
- The necklace has 18 pieces and it is very easy to assembly them as it is shown in the following video.

RESULT
Here is my Design:
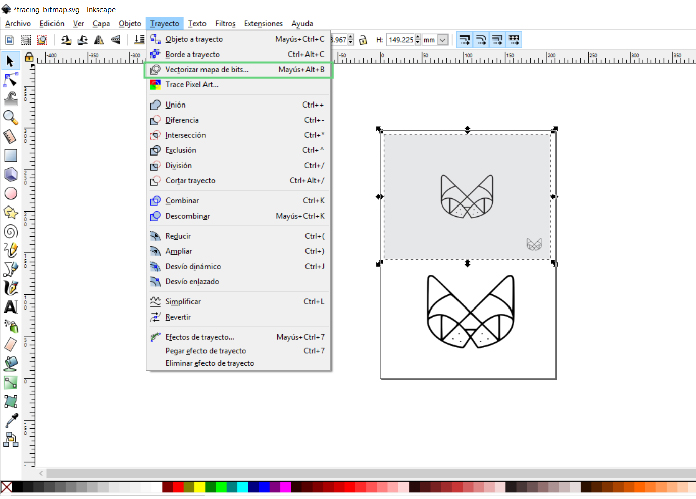
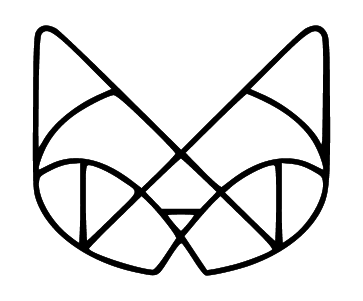
Cat Vinyl:Download PNG file
Necklace:Fusion file
Cut file:DXF file