Week 2
Project Management
We were introduced about the principles of project management, and also about the different project management systems which makes it possible for simultaneous distributed development. This week's assignment was to work through a git tutorial, and to build a personal site in the class archive describing myself and my final project.
Git, GitHub & GitLab
Git is a free and open source distributed version control system. Version control is a system that records changes to a file or set of files over time, so that one can recall specific versions later. The "Version history" in "Google Docs" is an example of version control. Using Git, we can work on the files in a local folder (called as the repository) and then integrate the changes to the repository hosted on a remote server . The rights over the online hosted repository can be shared with multiple persons, with each of them able to clone the repository to a local computer. Each of them can add their individual contribution, with git tracking every changes and then integrating the changes onto the online repository. Git can be installed in Ubuntu by entering the following command in terminal.
sudo apt-get install gitGitHub is an online web service where we can host git repositories. GitHub provides remote access to the Git repositories. GitHub offers free accounts in which the repository will be public and can be downloaded by anyone. The free accounts are commonly used to host open-source software projects, making GitHub the largest host of source code in the world. GitHub also offers private repositories and Microsoft is closing the acquisition of GitHub while this is written.
GitLab is a web based Git-repository Manager just like github, that organizations use for internal management of git repositories. The entire student documentation and class archive of Fab Academy and all of the projects in the global Fab Lab Network is managed on Fab Cloud which is hosted on GitLab. An account in the Fab Cloud was created using the email received from Fab Academy. On confirmation of the account, access was granted to the Git-repository of the student's at our lab. It is the archive (repository) where our personal websites are hosted.
Web Development
Writing HTML code for the website can be made easy by using text editing softwares having live preview capabilities. Atom, which is a text and source code editor, is an ideal software for the same, and is also free and open-source. Atom can be installed in Ubuntu by entering the following three commands one after the other.
sudo add-apt-repository ppa:webupd8team/atom
sudo apt-get update
sudo apt-get install atom
The basics of HTML, CSS & BOOTSTRAP were learned from www.w3schools.com
Hypertext Markup Language (HTML)
HTML is
a language for creating web pages and web applications.
To begin learning HTML, create a new file inside a new folder and name it
as index.html. This folder will be the parent directory of the website
and index.html file will be the home page for the website.
Open the index.html file in Atom and enter the HTML codes.
Pressing Ctrl + Shift + h will
open the live preview in Atom. Setting the style of an HTML element inside the HTML
document itself can be done by entering the codes in between style attribute.
Cascading style sheets (CSS)
CSS is a language that describes the style of an HTML document. CSS describes how HTML elements should be displayed. Create a new file inside the parent directory of the website and name it as style.css. Open the file in Atom and enter the necessary codes.
Inserting the url link of the style.css file inside the head element of
the HTML document's will apply the style while the webpage is rendered by the
browser. The same external style sheet can be used for
multiple HTML pages making it possible to
change the appearence of an entire
website by changing just the stylsheet (.css) file.
Bootstrap
Bootstrap is a popular HTML, CSS, and JavaScript framework for developing responsive, mobile-first websites. Bootstrap is completely free to download and use. The tutorial for Bootstrap can be found here
Making a WebPage
1. To make the home page of the website, create a document and
rename it to index.html. For the style sheet,
create another document
named style.css in the same folder.
2. Open the index.html file in Atom and add the necessary code to make the webpage live. The style of the website can be changed by entering the necessary codes in the style.css file after linking the style sheet inside the html document. Enabling live preview of index.html in Atom makes the work easier.
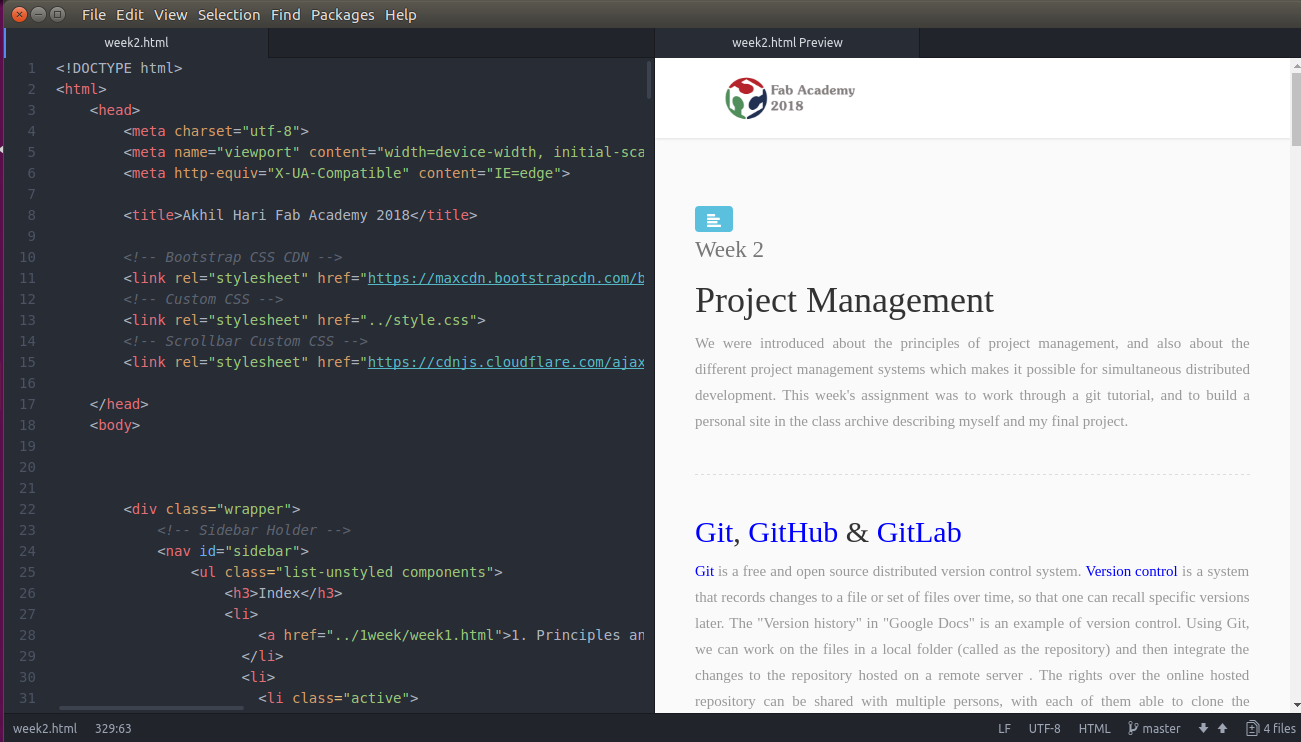
The example codes from w3schools was copied into the index.html file to begin with. After the initial setup was made, necessary elements and styles were incorporated from other tutorials to make the webpage. This was my First web page layout designed in HTML. The elements are styled inside the HTML document itself. The index.html file was created by adding codes from different tutorials. The initial layout and design was used till Week 15, after when i started using bootstrap and external style sheets. The current layout and design of the website was created by downloading the the code obtained from this website (originally authored by Ondrej Svestka) ,and then by modifying and adding the elements to suit the requirements.
Below image shows the user interface of Atom with Live preview enabled.
Uploading to the class archive
For uploading to the class archive, we have to first generate an SSH key for the personal computer. Secondly, we have to clone the Git-repository onto our personal computer and then add the website files to the local repository. Finally, we have to push the changes in the local repository to the Git repository hosted in Fab Cloud.
1. Creation of SSH key
SSH keys are a common way to connect securely to remote machines. Git allows to work locally and then to share or "push" the changes to the remote server. Before pushing the changes to a GitLab server, we need a secure communication channel for sharing information. The SSH protocol provides this security. SSH keys are to be generated for each computer with which we work locally. In Ubuntu, this can be done by entering the follwing commands in the terminal.
ssh-keygen -t rsa -C "your.email@example.com" -b 4096The keys will be created inside the .ssh folder in the Home directory of Ubuntu.
To copy your public SSH key to the clipboard, enter the following
command in the terminal. Before entering this command, the xclip package
has to be installed in Ubuntu by entering sudo apt install xclip in
the terminal.
xclip -sel clip < ~/.ssh/id_rsa.pub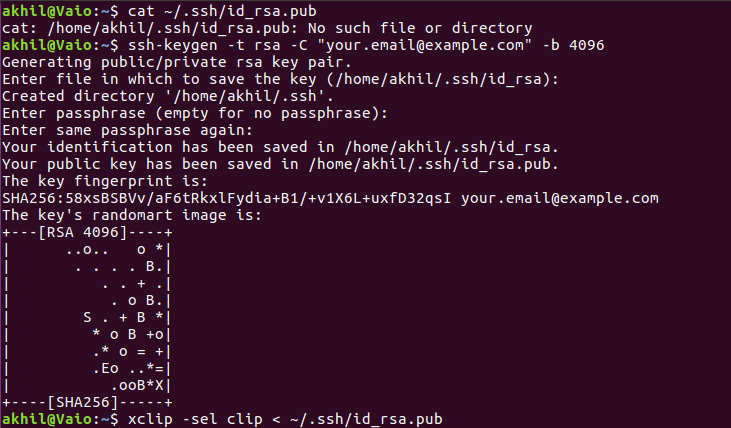
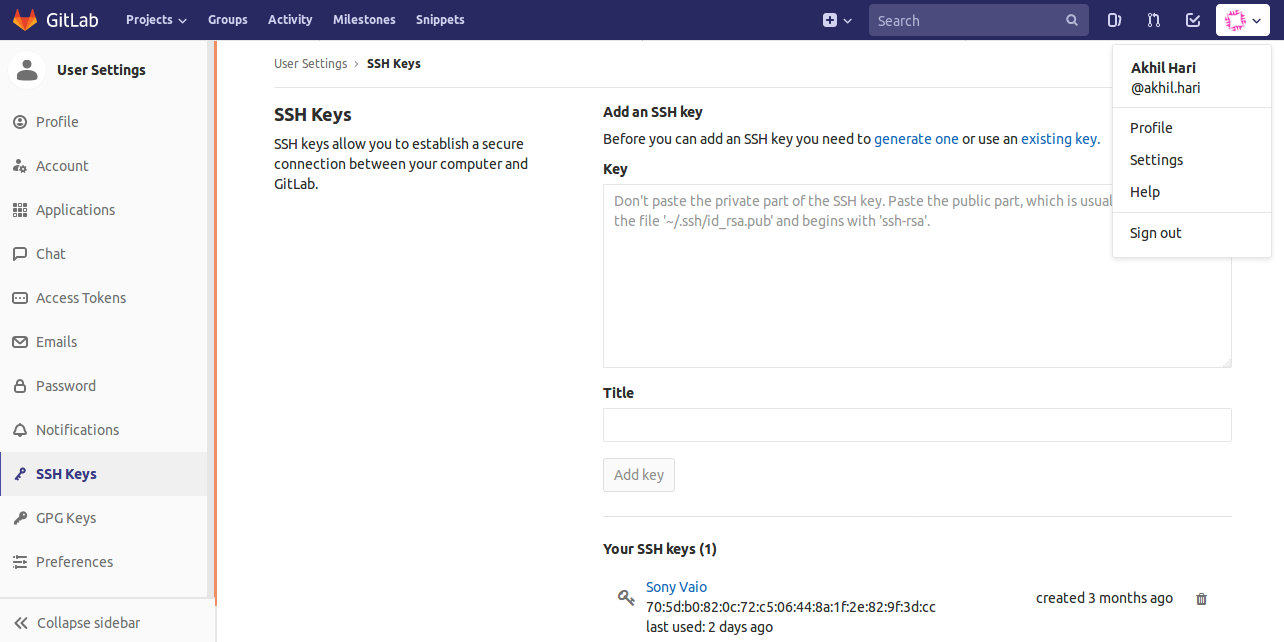
The above image shows the terminal window during the process. After generating and copying the key, we have to login to Gitlab(Fab Cloud) with our credentials and navigate to the SSH Keys tabs in the settings menu. Paste the public key (stored in the clipboard) in the 'Key' box. We can also specify a title for the key for identification. Below image shows the screenshot after pasting and adding the key.
2. Cloning & Creating the website locally
In the Account Overview menu in GitLab, the link to push via HTTPS is available. The Git-repository was cloned to the personal computer be entering the following command in terminal.
git clone https://gitlab.fabcloud.org/academany/fabacademy/2018/labs/fablabtrivandrum/students/akhil-hari.gitThis will create a directory named after us in the Home directory of Ubuntu. This is the repository with which we work locally. While working with Git, always navigate the terminal into the repository before entering the commands. The website files have to be created in the freshly created local repository and later pushed to GitLab. The next step is to specify our username and email address to the Git-repository using the commands below.
git config --global user.name "akhil.hari"
git config --global user.email akhilhari87@gmail.com
3. Pushing to GitLab
After copying the index.html file created earlier into the local git repository , the following commands can be used to push the files to GitLab. More commands can be found at the official Git Tutorial which is web interactive and easy to follow.
1. lsto list the folders and files in a directory
2. cd foldernameto navigate into the folders in the directory (Replace "foldername" with the actual folder name.)
3. git statusto see how the repository status has changed
4. git add filname.extentionTo tell Git to start tracking changes made in a file (Replace "filename" and "extenstion" with the actual)
5. git add '*.extention'to add many files of the same type (Replace "extenstion" with the actual)
6. git add --allto start tracking all the untracked files in the directory
7. git commit -m "Title"to add all the tracked files to the Git-repository. We can give a Title for each of the commits we made for easy identification.
8. git push -u origin masterto push all the committed files to the GitLab repopsitory.
9. git pull origin masterPulls files from GitLab