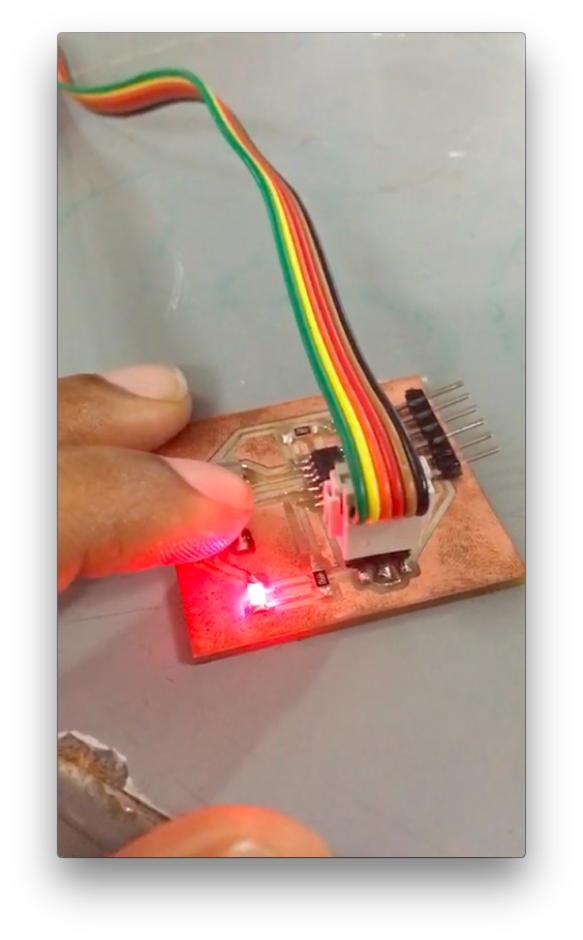
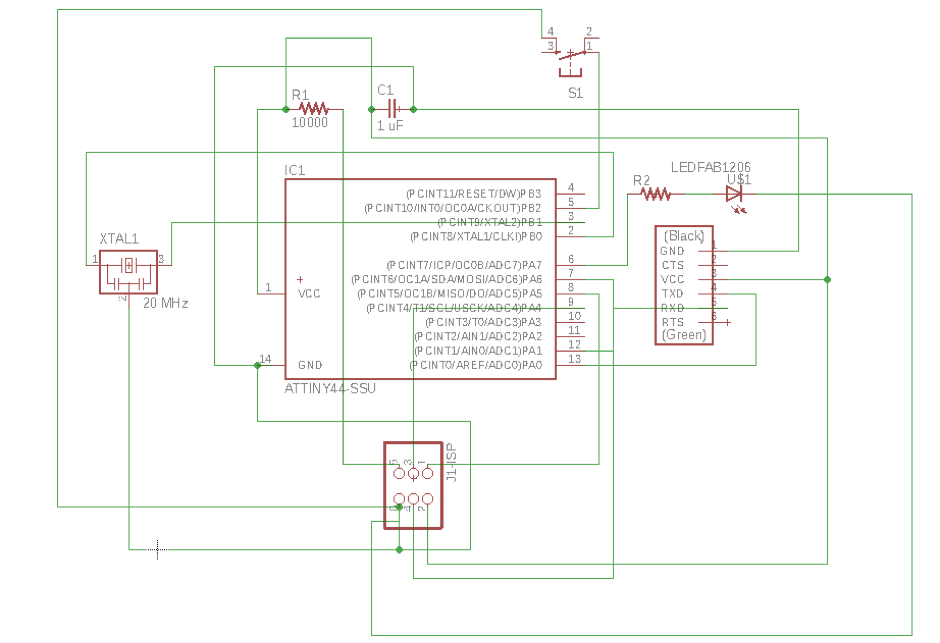
We had already flashed our ISP programmer in week 5 (electronics production). We modified the design of the echo-hello-world by adding an LED and a switch; modified the fuses and tested it in week 7 (electronics design). This week we had to learn different ways to embed a program in the chip. We used the LED and switch on the echo-hello-world board for different programs using C language directly and with Arduino environment.
I have added some fragmented documentation of codes in assembly language and in python that I learnt from others but didn't complete trying it myself. I hope to try these in the future.
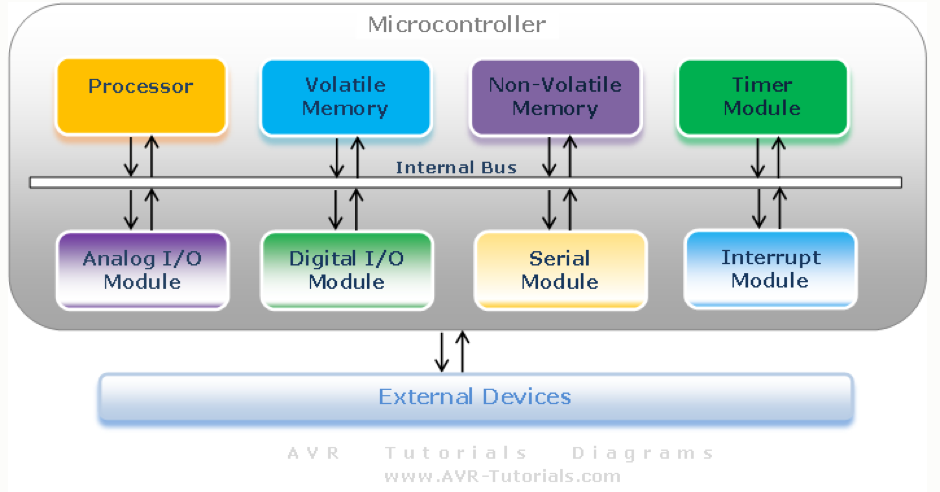
1. Microcontroller - Basics
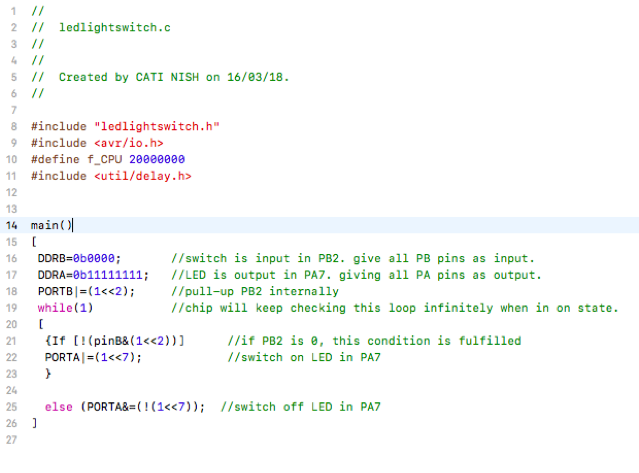
2. C programming language to control the LED using the switch
3. Arduino to control the LED using the switch
4. Assembly language to control the LED using the switch
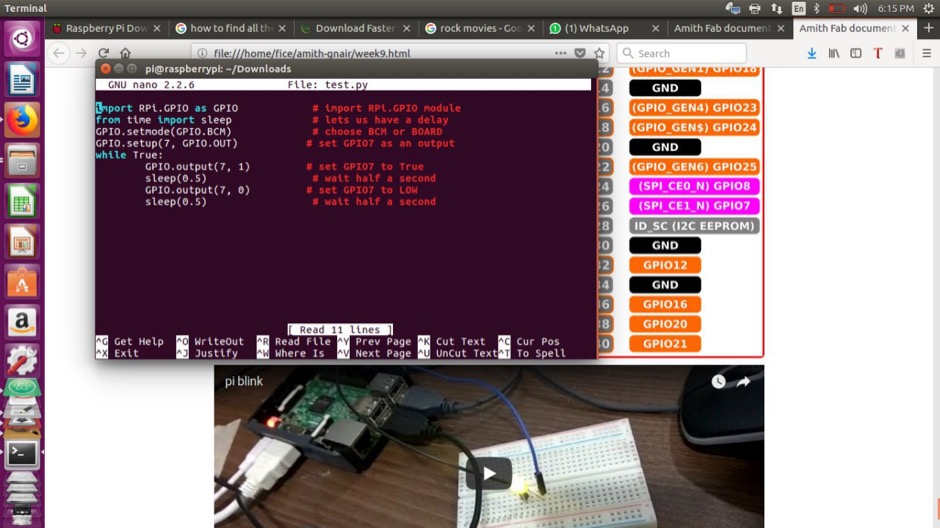
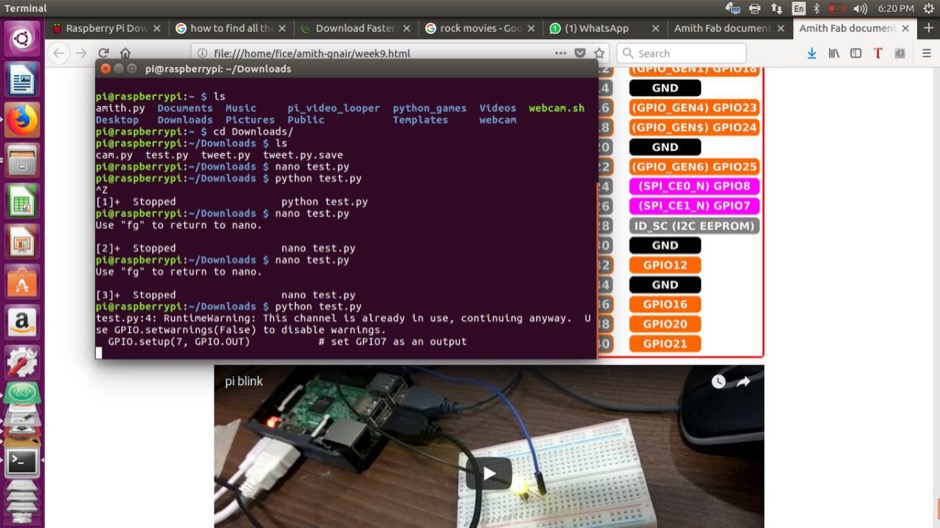
5. Python programming in Raspberry pi to control the LED using the switch
Some video clips from the week..
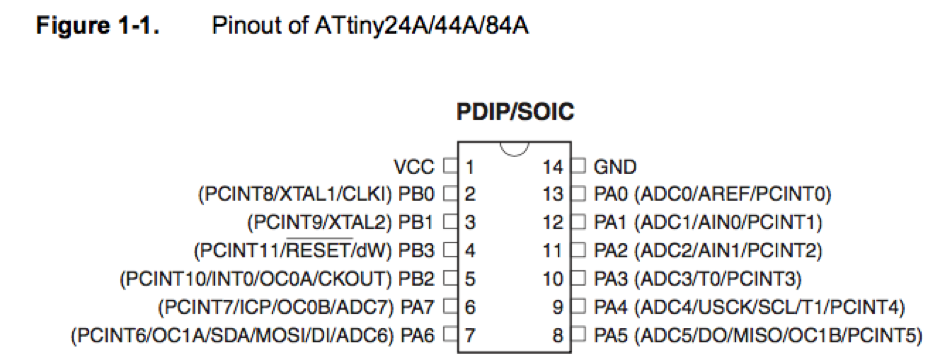
As per Wikipedia: AVR is a family of microcontrollers developed by Atmel beginning in 1996. These are modified Harvard architecture 8-bit RISC single-chip microcontrollers. RISC is the short-form for Reduced Instruction Set Computer. AVRs are classified into the ATtiny series, ATmega series, ATxmega series and so on. From the datasheet,'By executing powerful instructions in a single clock cycle, the ATtiny24A/44A/84A achieves throughputs approaching 1 MIPS per MHz allowing the system designer to optimize power consumption versus processing speed'.


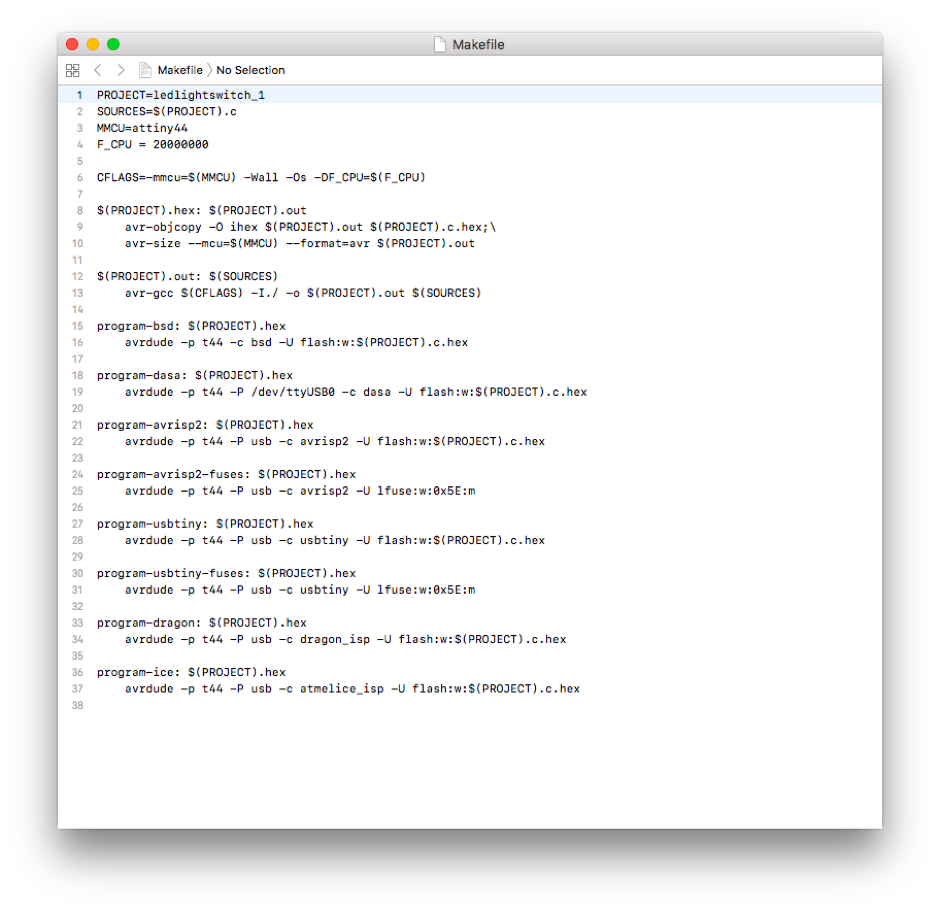
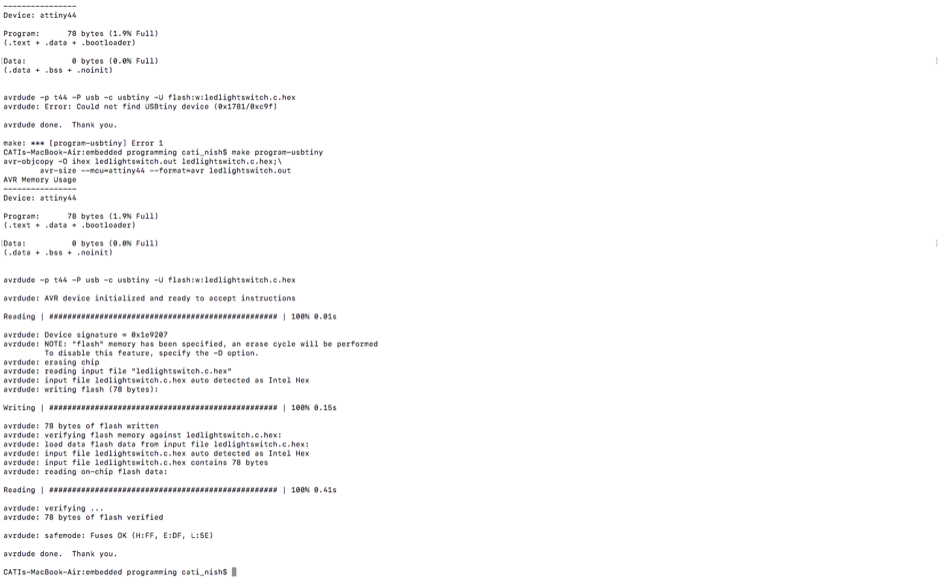
To program an AVR microcontroller, we need to write a code in C, compile it with avr-gcc and transfer it into the microcontroller using avrdude. The AVR toolchain (avr-gcc, avrdude and avr-libc) is freely downloadable. Read this Fab academy tutorial to know about the make command and the Makefile.
Latch switch for LED (.C file)
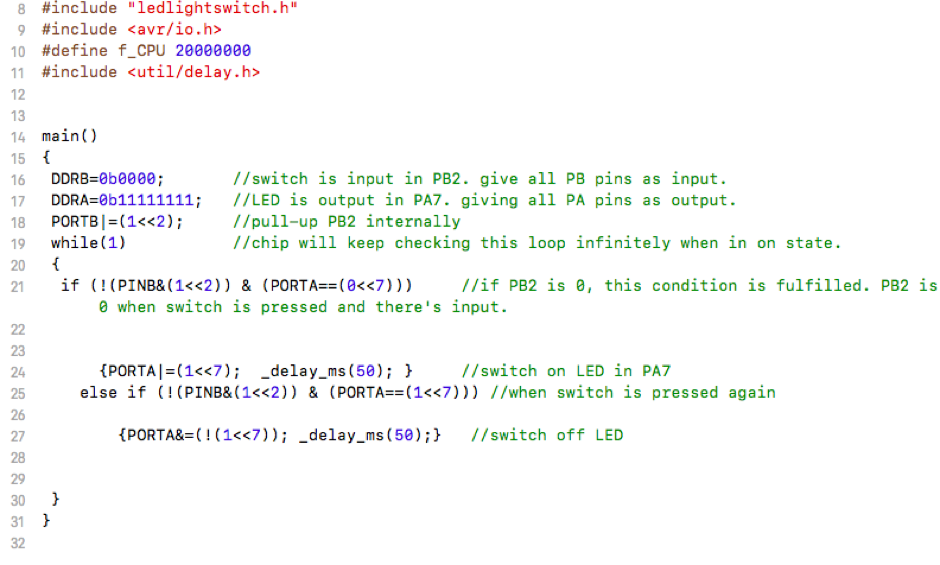
Press-and-hold switch for LED (.C file)

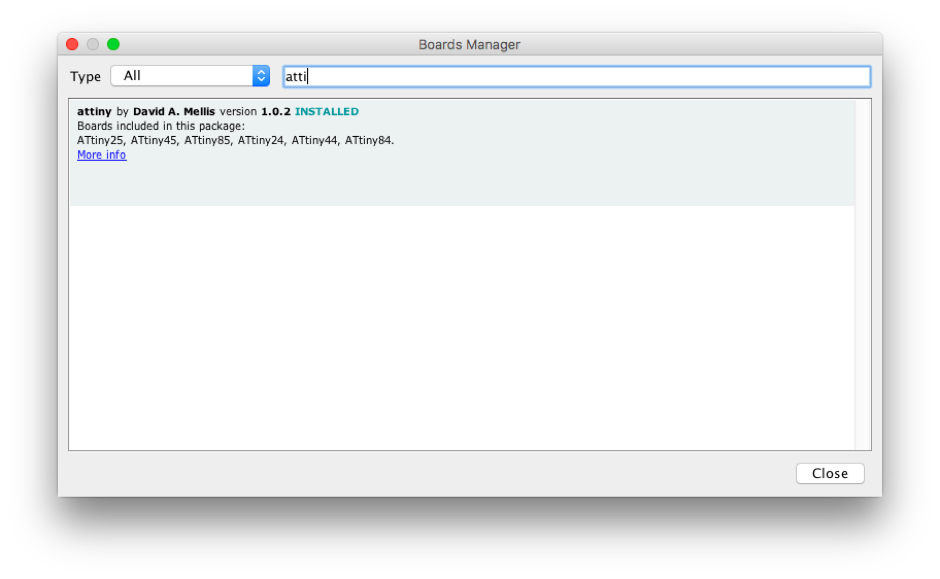
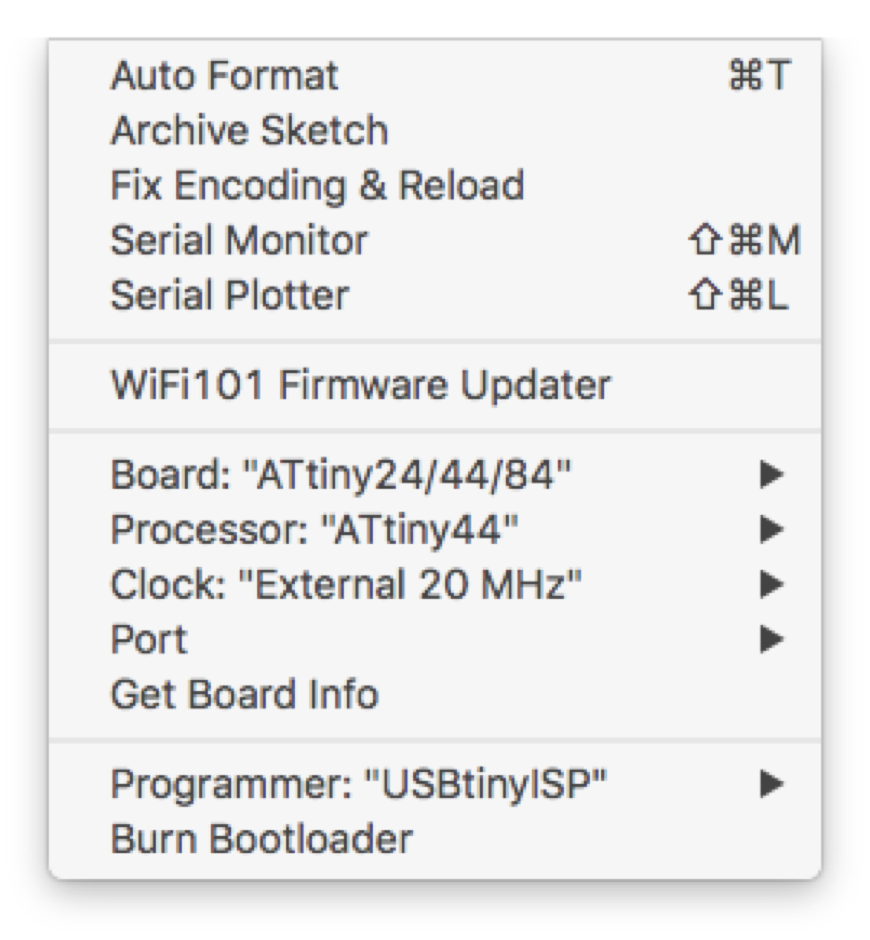
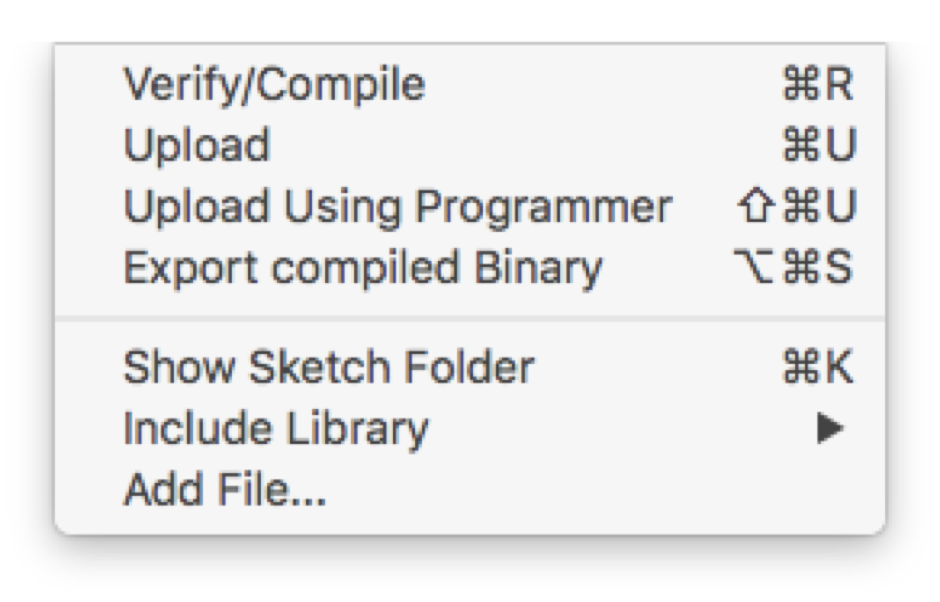
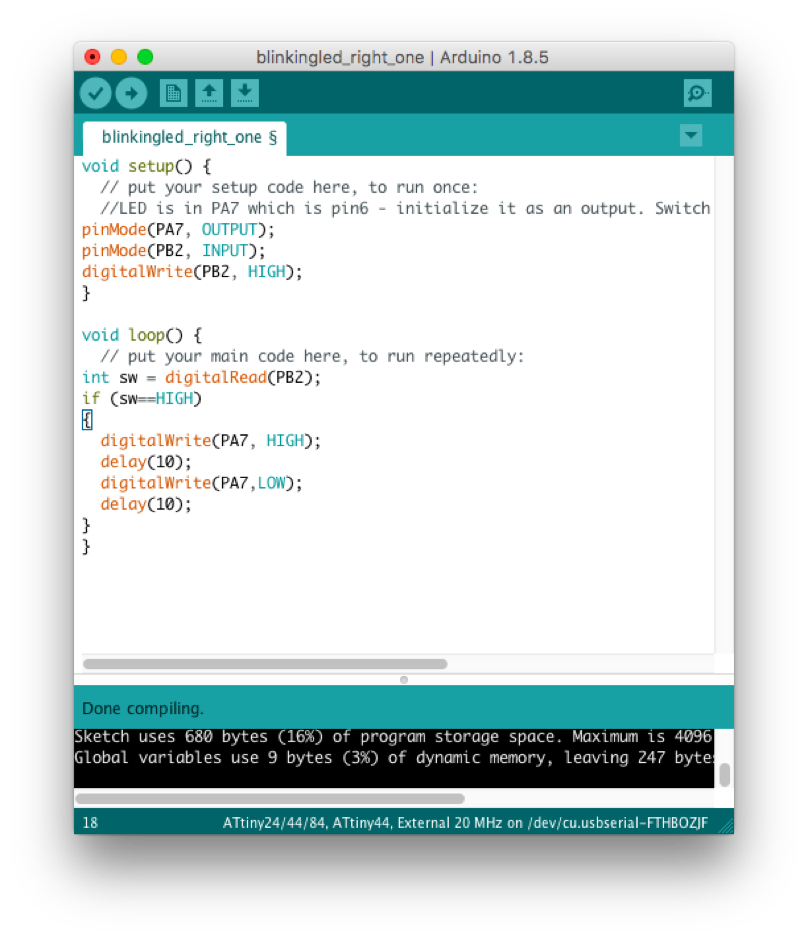
To program an attiny chip using Arduino, we need to add the board library using the option to add in Preferences. The steps are explained below. The code written to make the LED blink when the board is powered is given below.
Blinking LED (.ino file)

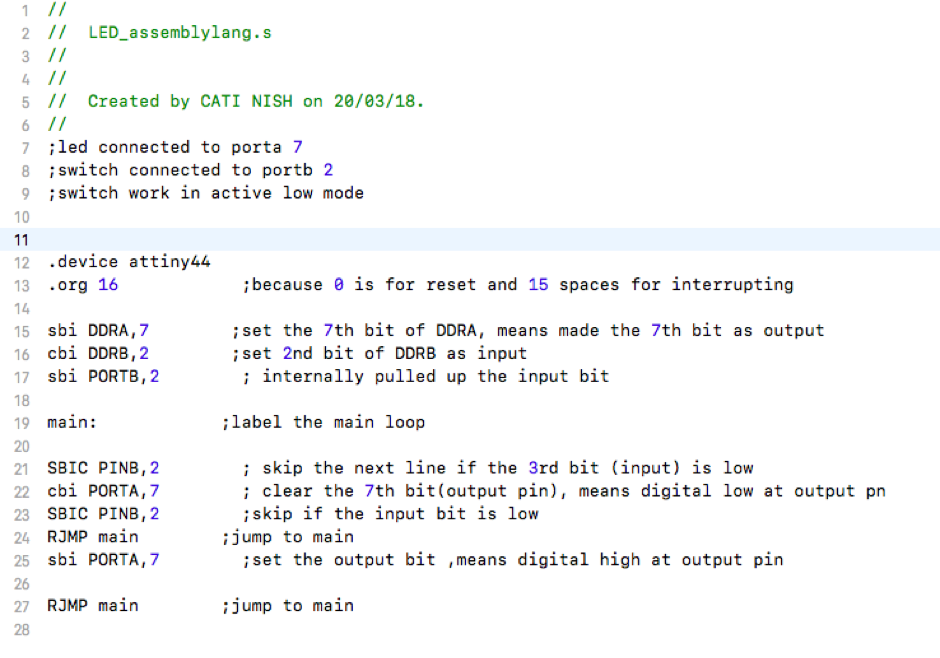
This is Yadu's program. I wanted to try this. However, I did not succeed (because I didn't spend too much time in searching) in getting the right compiler. So I have just added the file and screenshot, in the hope of learning and trying this some other time.
Blinking LED (.s file)
Amith brought a 'Raspberry Pi' board to the lab and explained it to us. I didn't try programming it myself but hope to, some time in the future.