Home
Week Four : Computer-Controlled Cutting
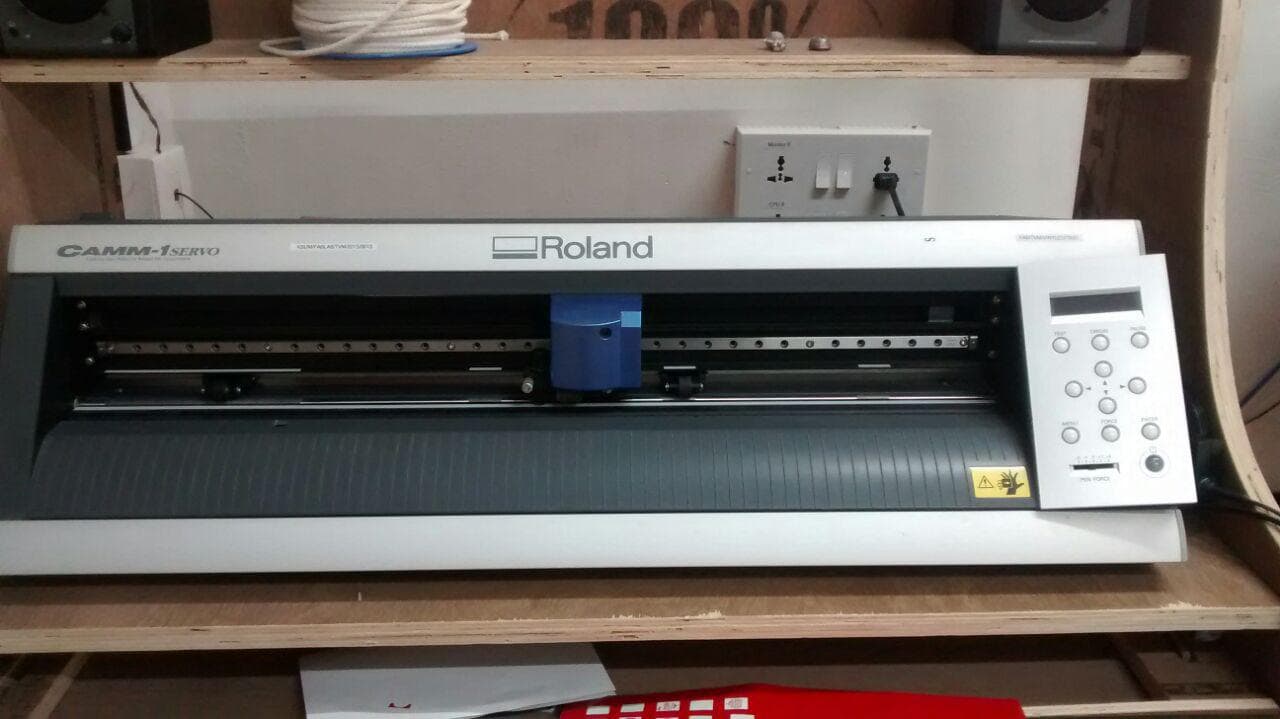
Vinyl Cutting (Roland camm-1 machine)
From earlier days itself, I was crazing in customizing my car and bike. I wondered how the local vendors do it. Now I had the real experience for myself.So i take this opportunity to thank Fab academy for this wonderful experience they provided and special thanks to my instructors Vinod, Lancy and Yadu who gave me a wonderful seession on Vinyl cutting using Roland camm -1 machine.
The problem faced here is, if u are not loading the material clearly, error screen appears on machine. And also for complex image you have to set more force (ie 90-140g) and velocity should be less( ie 2-4 cmsq.) Challenge faced was to put the masking tape on the vinyl.But clearly i enjoyed and get to know how this machine works I used Inkscape for making it a vector image, and converted it to PNG file. I loved the end result of my Vinyl cutting session.
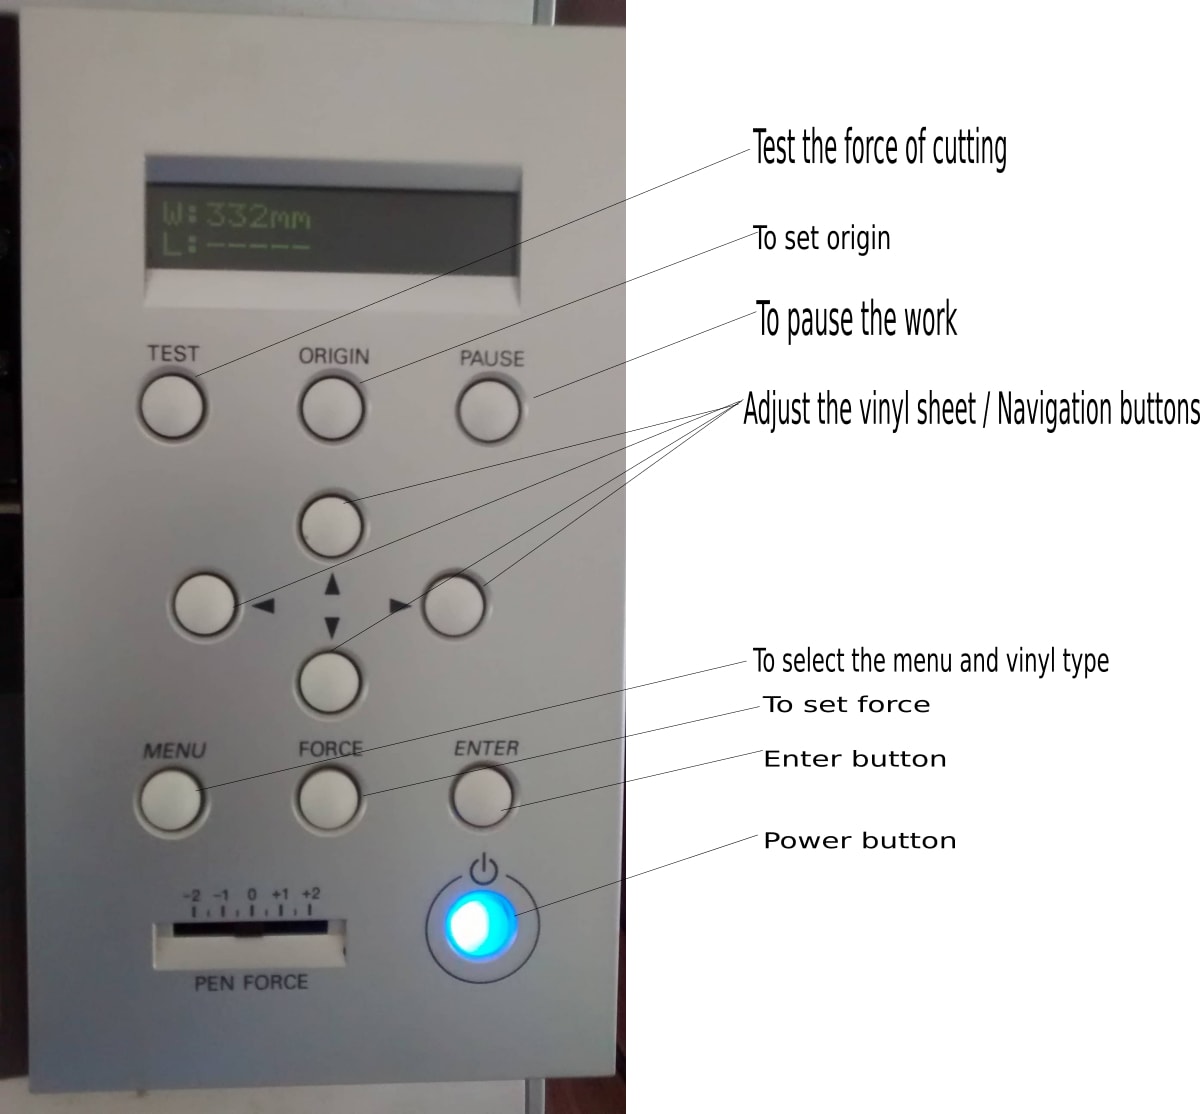
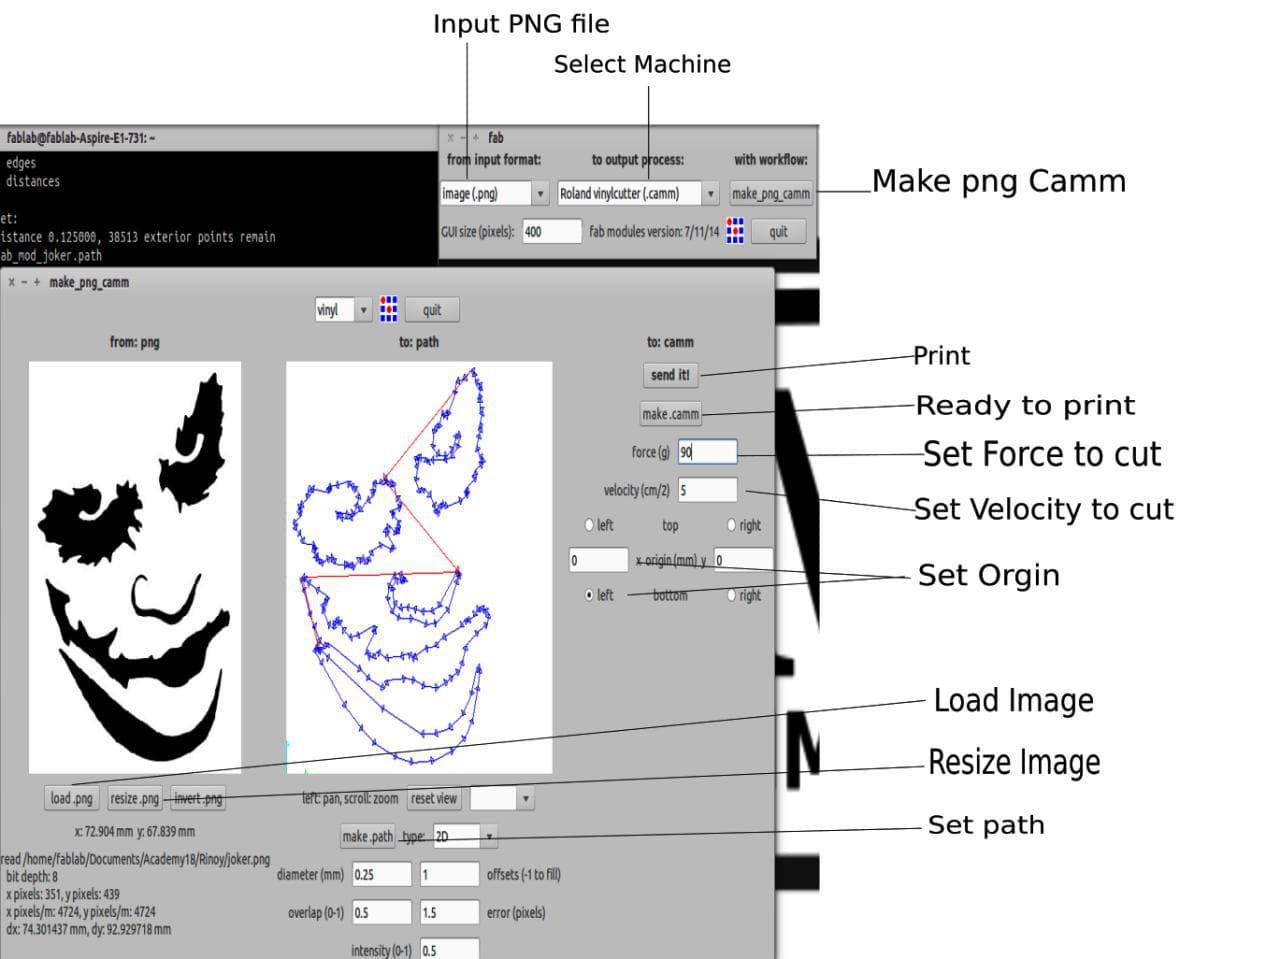
Main functions in Vinyl Cutting (Roland camm-1 machine) is shown below.
Cut something on the vinylcutter
I used Inkscape to invert the image and get the bitmap trace of an image which I have downloaded from internet
How it looked in my room
When the vinyl sheet is not loaded properly, machine shows error message.Error message and cause of error is uploaded below.

Steps of inserting Vinyl Sheet in Vinyl Cutter
Switch On the Vinyl Cutter machine.
Press back the lock handle.
Insert vinyl sheet in it, either in the form of piece / edge or roll. I used a piece of vinyl sheet
Align the sheet through wheel holders and one can also set it using white marked lines.
Now, pull back the handle lock to lock the current position of the vinyl sheet.
Now, using operating interface of the vinyl cutter machine, select the sheet type (sheet or piece) then press 'ENTER' button. I used piece, because I set and fix a piece of vinyl sheet in it.
Now, the cutting head moved and scanned the actual size and dimension of the inserted piece of vinyl sheet, and showed it on the screen of operating panel interface of the vinyl cutter machine.
After all above steps, the machine is now drawing my design through its small pin.
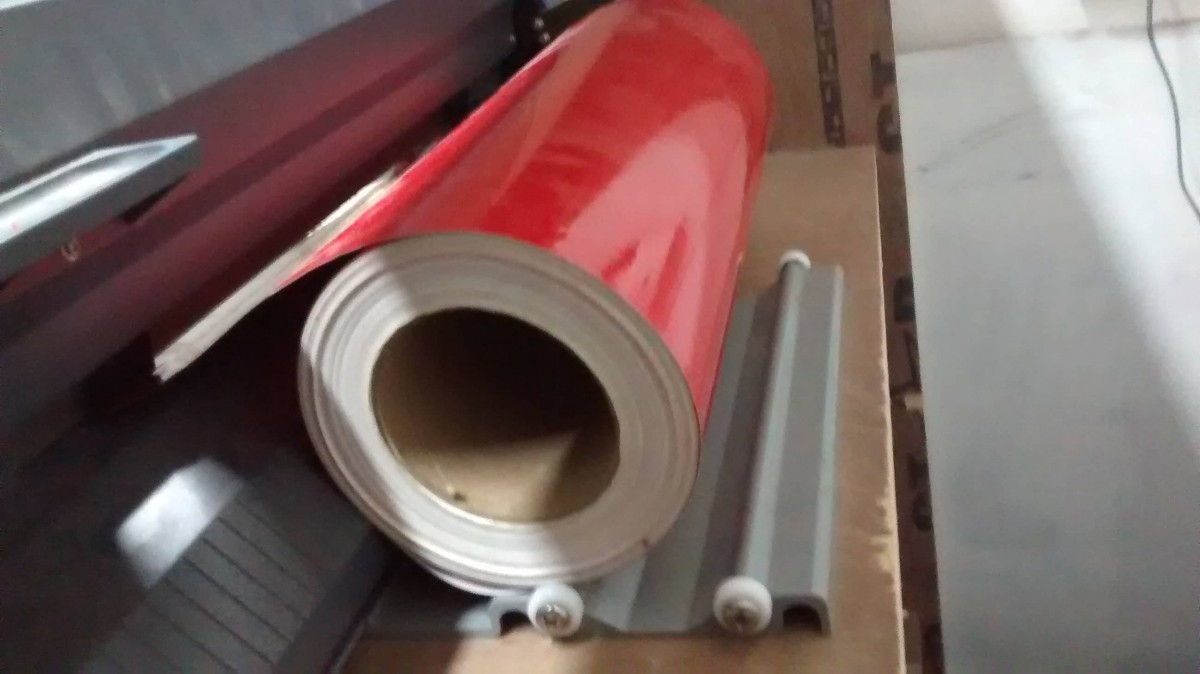
If the option selected is a roll, the machine will only measure the width of the sheet. The length of the sheet is measured using an IR sensor. The below image shows the IR emittor and sensor and also the textured rod over which the roller hold the sheet firmly. The white band seen is the sacrificial layer.
Machine setting
Load the vinyl sheet, select the type of sheet (piece or vinyl roll)
There are two IR sensors, located at the vinyl loading location.
For holding sheet and focus the cutting, Position the rollers along the white strips.
Orgin can be set if needed or else it starts from the focus
Machine will detect the size.
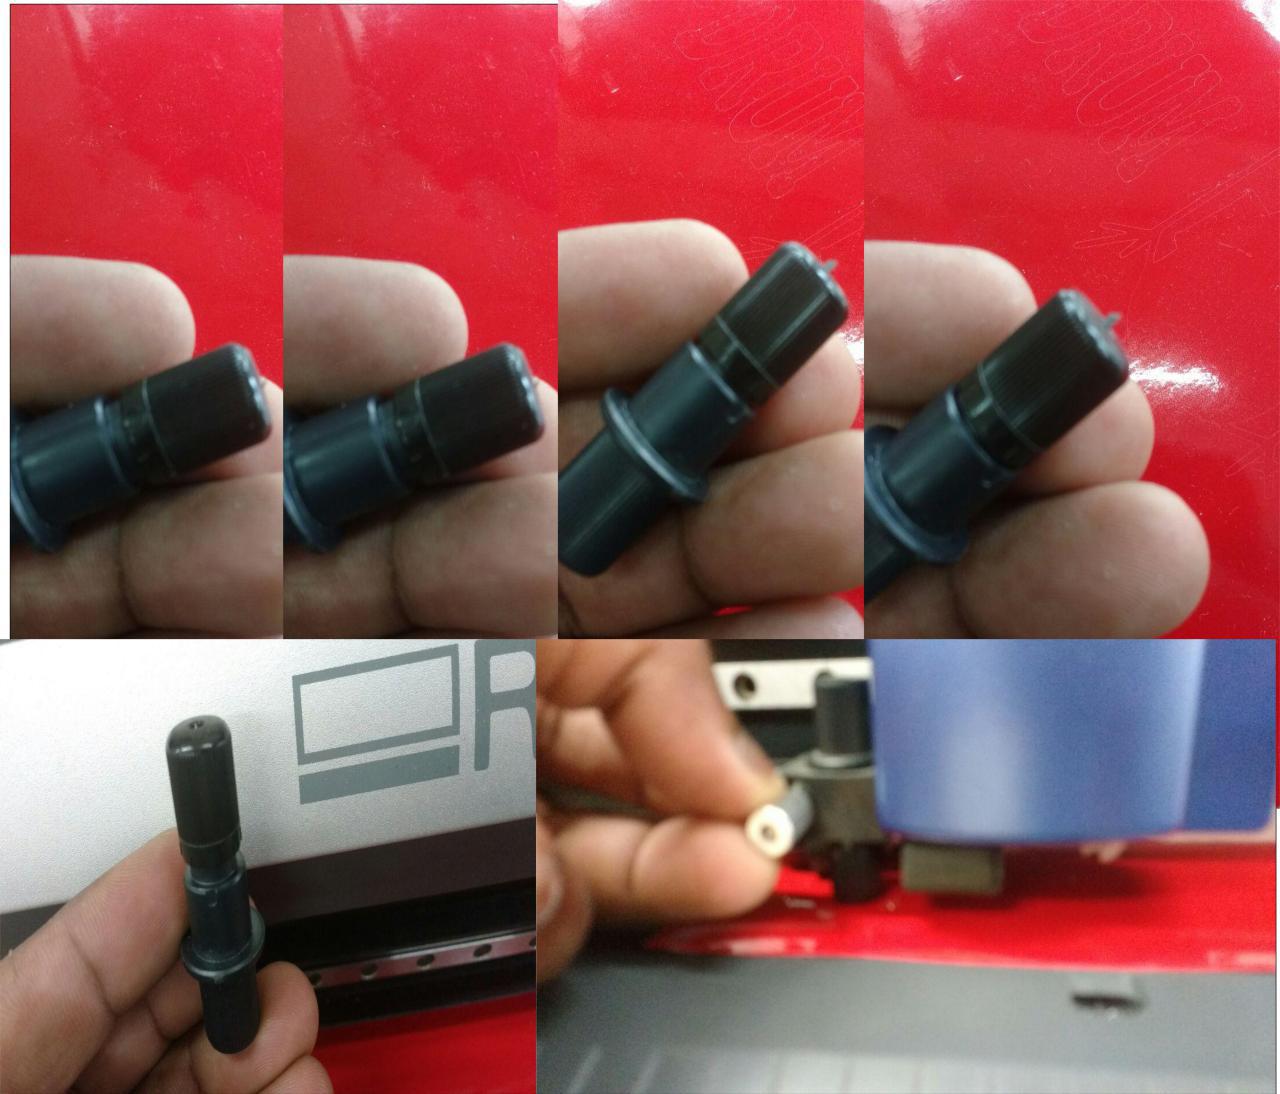
Blade adjustment on the tip of Vinyl Cutter
We can adjust the blade of the tool tip accordingly to the thickness of vinyl sheet by rotating the tool.And also we can Set Force so that vinyl cutter exterts more pressure to the vinyl sheet.
To get a good cut we have done many test, the apt force will be 90g and velocity of 3cm/s
Parameter when you use the vinyl cutter
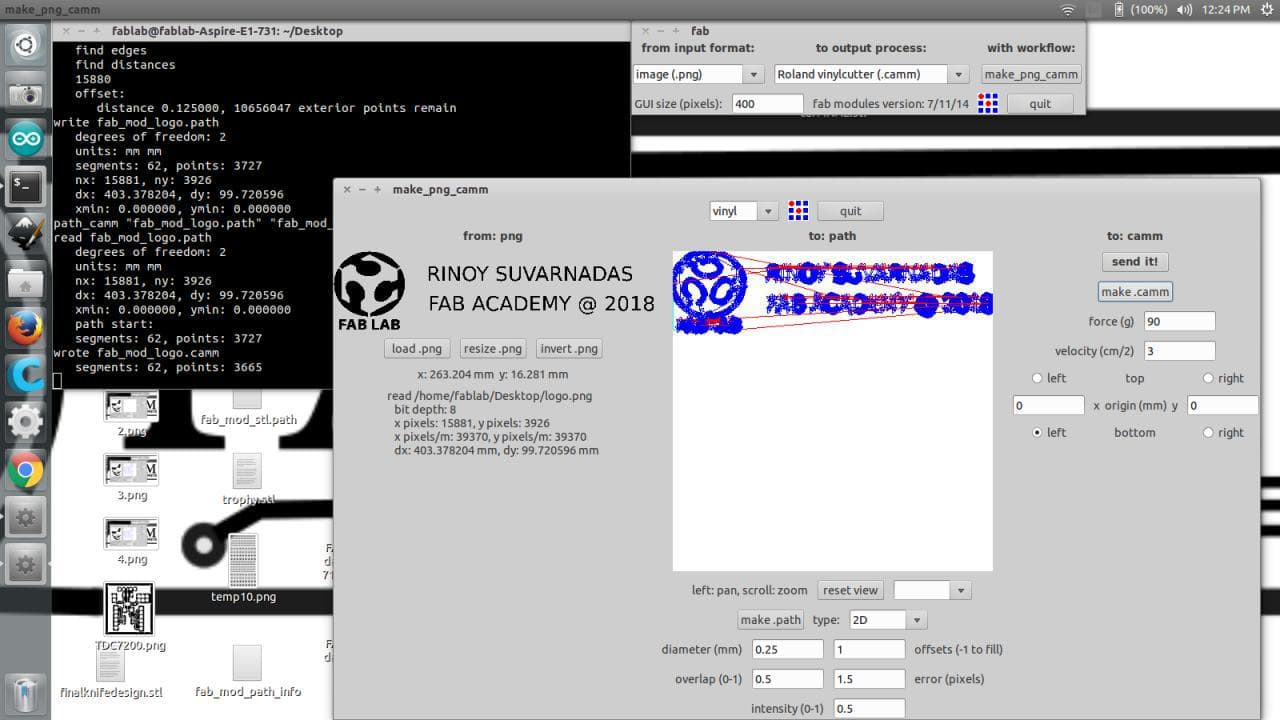
Software : Offline FabModules
Open the machine and select your work piece (Roll, piece or edge)
The machine will measure sheet. Save these dimensions
Input Format : Image(.png)
Output Pocess : Roland vinylcutter(.camm)
Make_png_camm
Load File : Load.png
Select Tool : Vinyl
Make Path : make.path
Set Axis : Set X, Y & Z
Set Velocity : 3cm/s
Set Force : 90g
Diameter : 0.25mm
Overlap : 0.5
Offset : 1
Error : 1.5pixel
Intensity : 0.5
Roland Milling Format : make.camm
Sending : Send it!
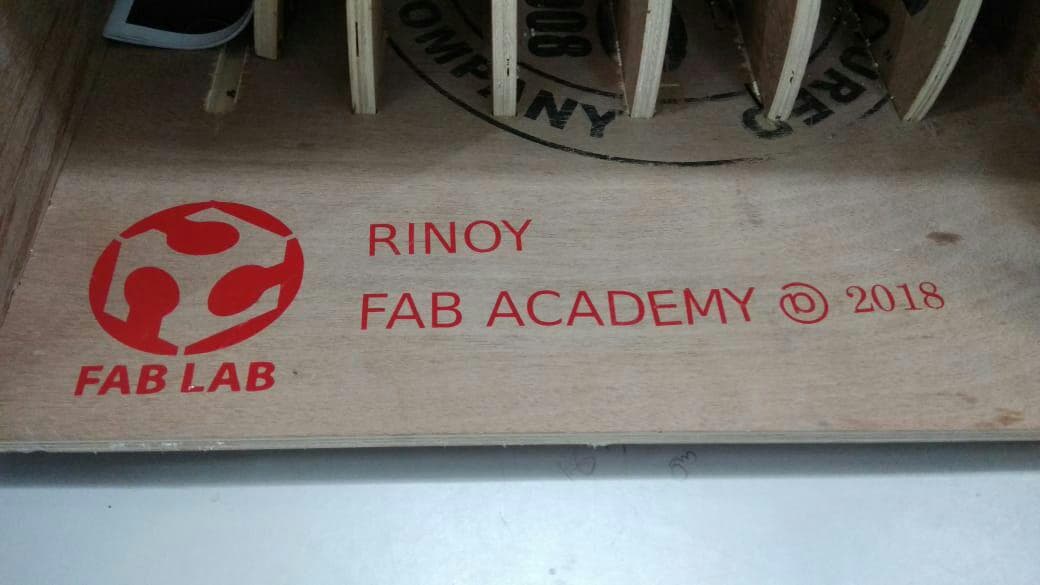
I have also designed my name with my academy year in INKSCAPE

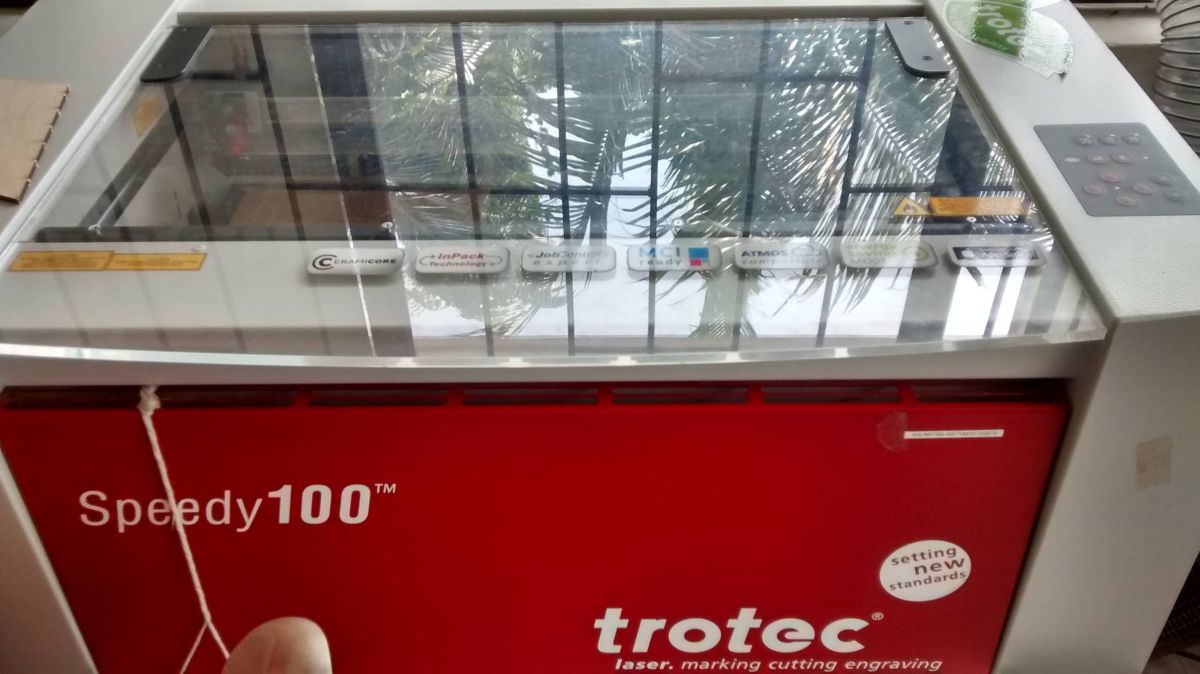
Laser cutter (Trotec speedy 100)
I faced many problems in designing(Designing the parametric). But my instructor Lancy guided me. From his instruction I had used Fusion 360 for the first time.
Always set stroke paint in "RED" & RGB value to 255
Assignment
Laser Cutting Machine
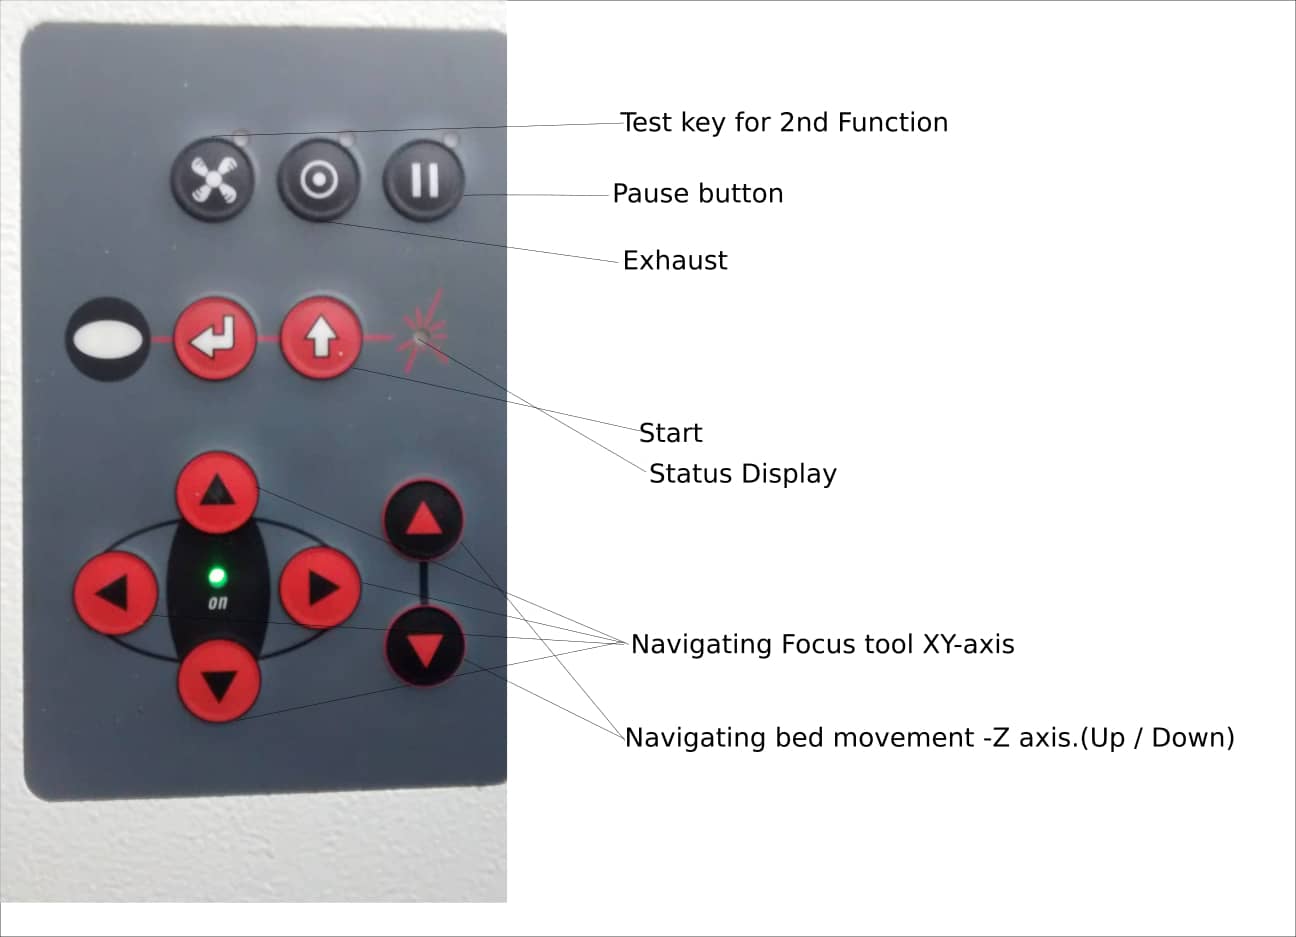
Laser Cutting Machine - Controls
Parameters that vary according to Materials
Materials Used
1. Acrylic 3mm
Engraving : Power : 80 velocity : 55 Frquency: 1000
Cutting :Power : 100 Velocity : 0.70 Frquency: 2500
2. Acrylic 6mm
Engraving :Power:80 Velocity : 40 Frquency: 1000
Cutting : Power:100 Velocity : 0.40 Frquency: 1000
3. Cardboard 3mm
Engraving : Speed : 55 Velocity : 5 Frquency:auto
Cutting : Speed : 85 Velocity : 3 Frquency: Auto
4. Wood 3mm
Engraving : power: 4 Velocity :50 Frquency: 70
Cutting : power: 100 Velocity : 0.80 Frquency: 2000
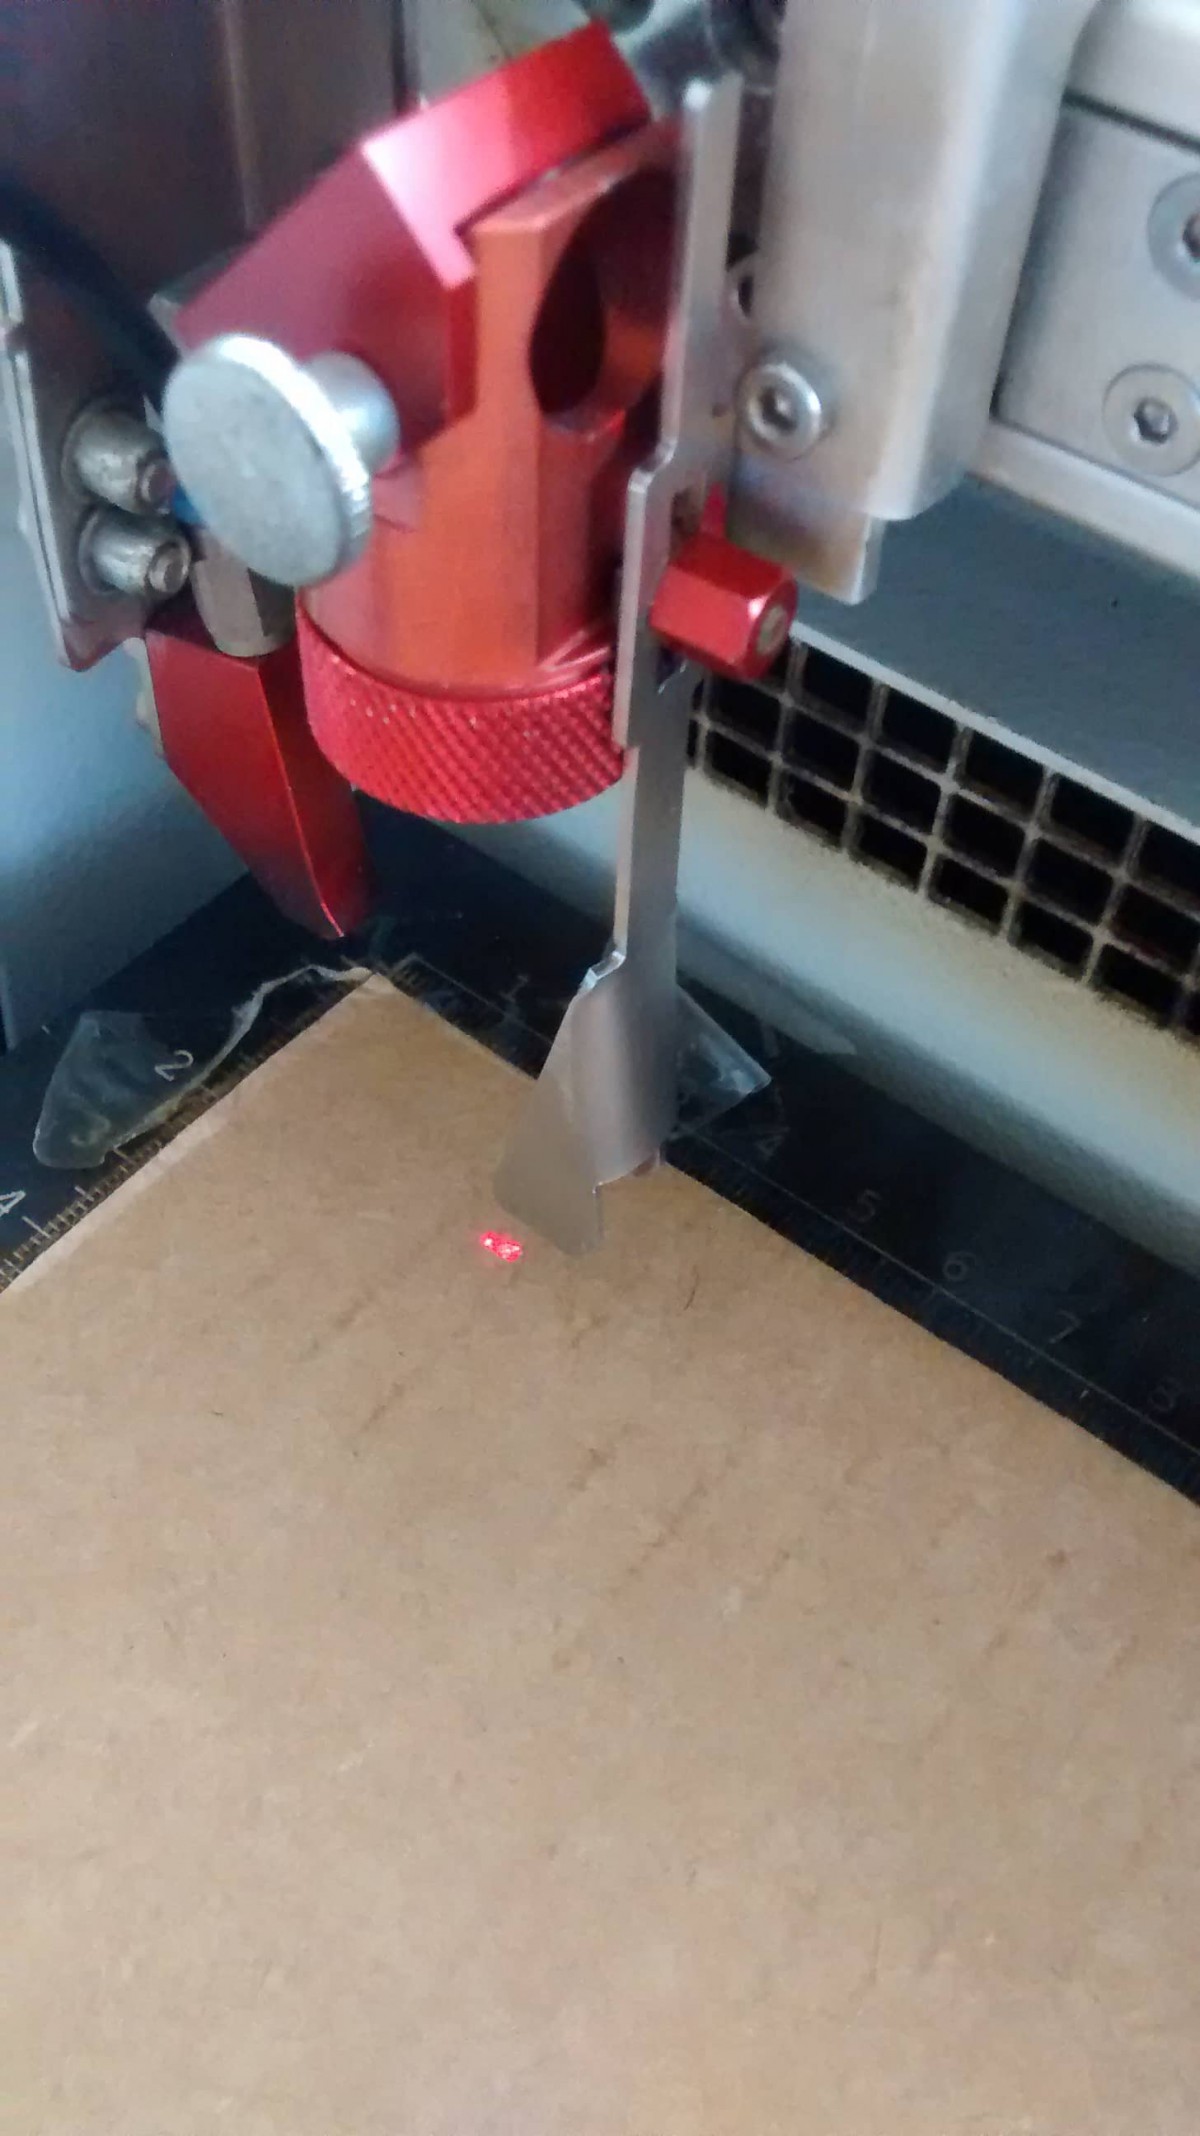
Focusing
We simply hangs the focus tool on the laser head, and then moves the working table manuallyuntil the surface of the workpiece to be engraved toches the focus tool.
Focus point is set as shown in image below
Characterizing lasercutter, making test parts that vary cutting settings and dimensions on different materials (acrylic 3mm, acrylic 6mm, plywood, cardboard sheet)
Set the design and converted into ".dxf" file and Opened in INKSCAPE
Set the stroke paint in "RED" & RGB value to 255 for "Cutting"
Set the stroke paint in "Black" & RGB value to 255 for "Engraving"
Print Options >> Print Preferences >> Select Material type and Cutting Force
Print >> A Trotec Print window appears
Start the machine
Set the material in bed and set the FOCUS
Select the file to cut and drag it to pointer where we set zero
Click ready to start the process of cutting
After cutting, allow the fumes to go out and remove the material carefully
Parametric using solid works
Set dimensions in "millimeter" and standars to "ANSI"
Drew Part
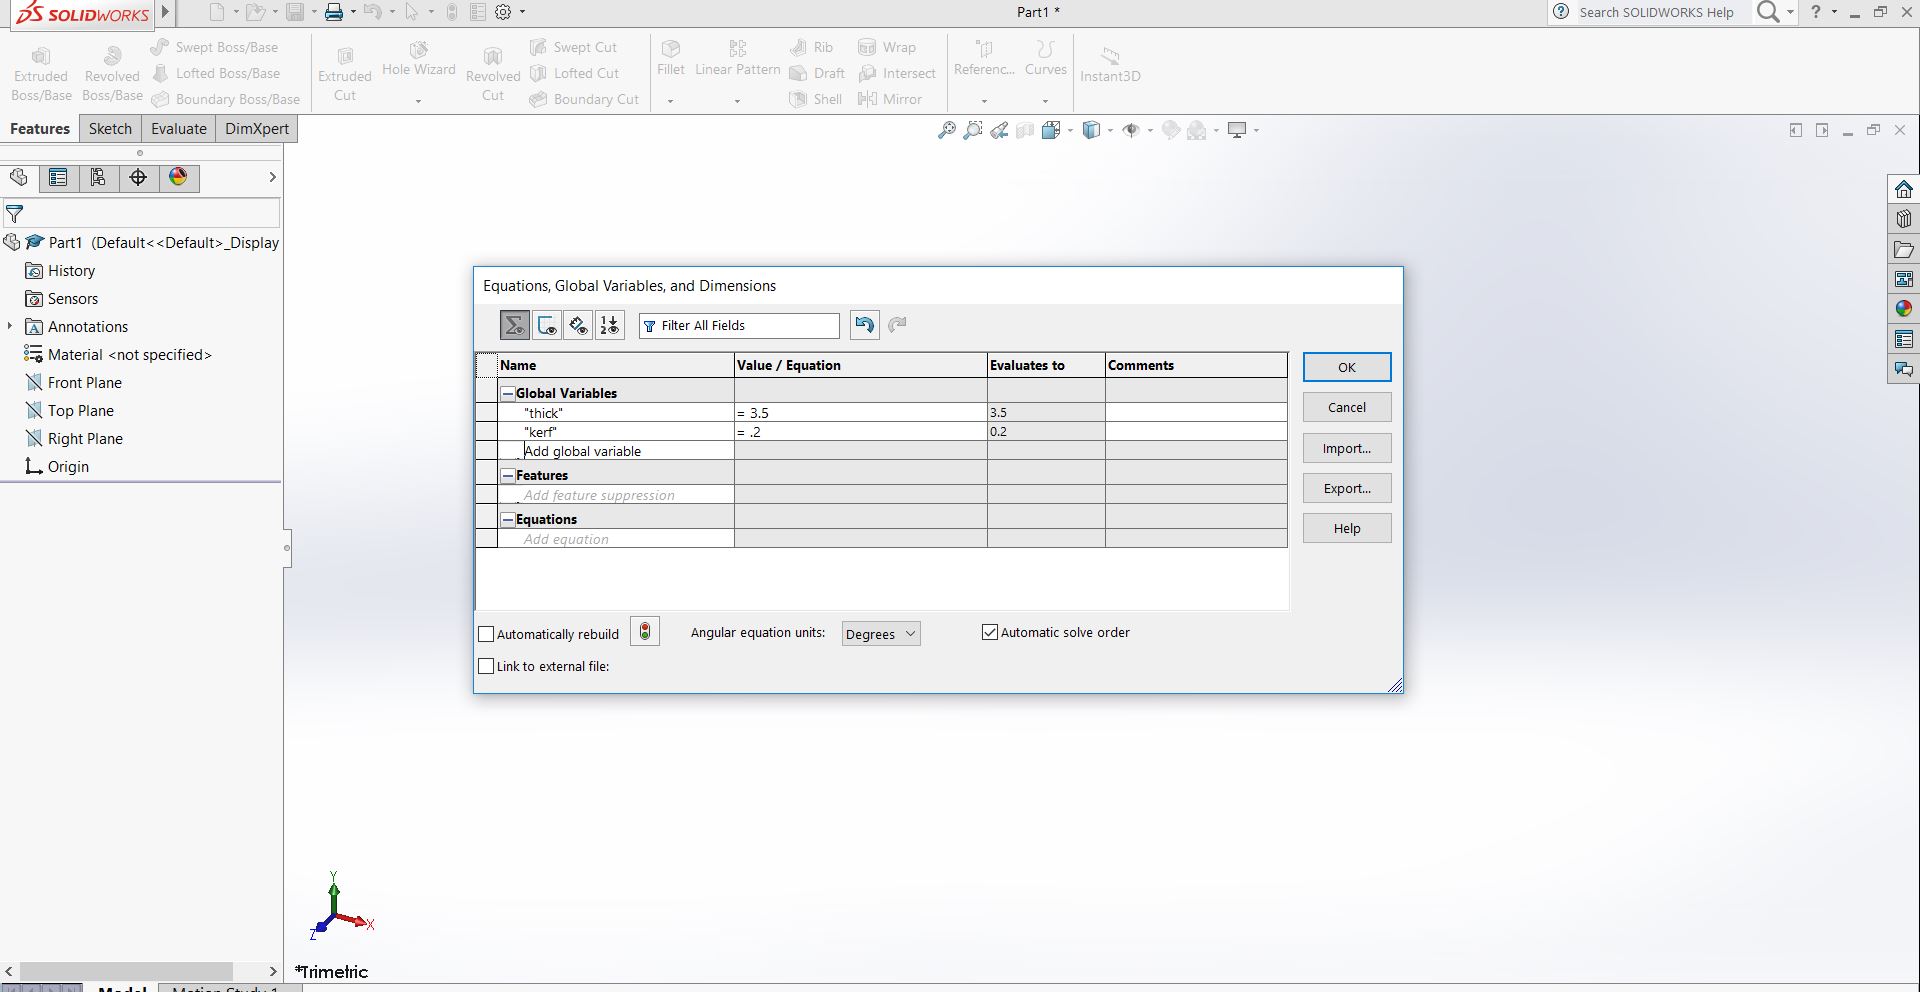
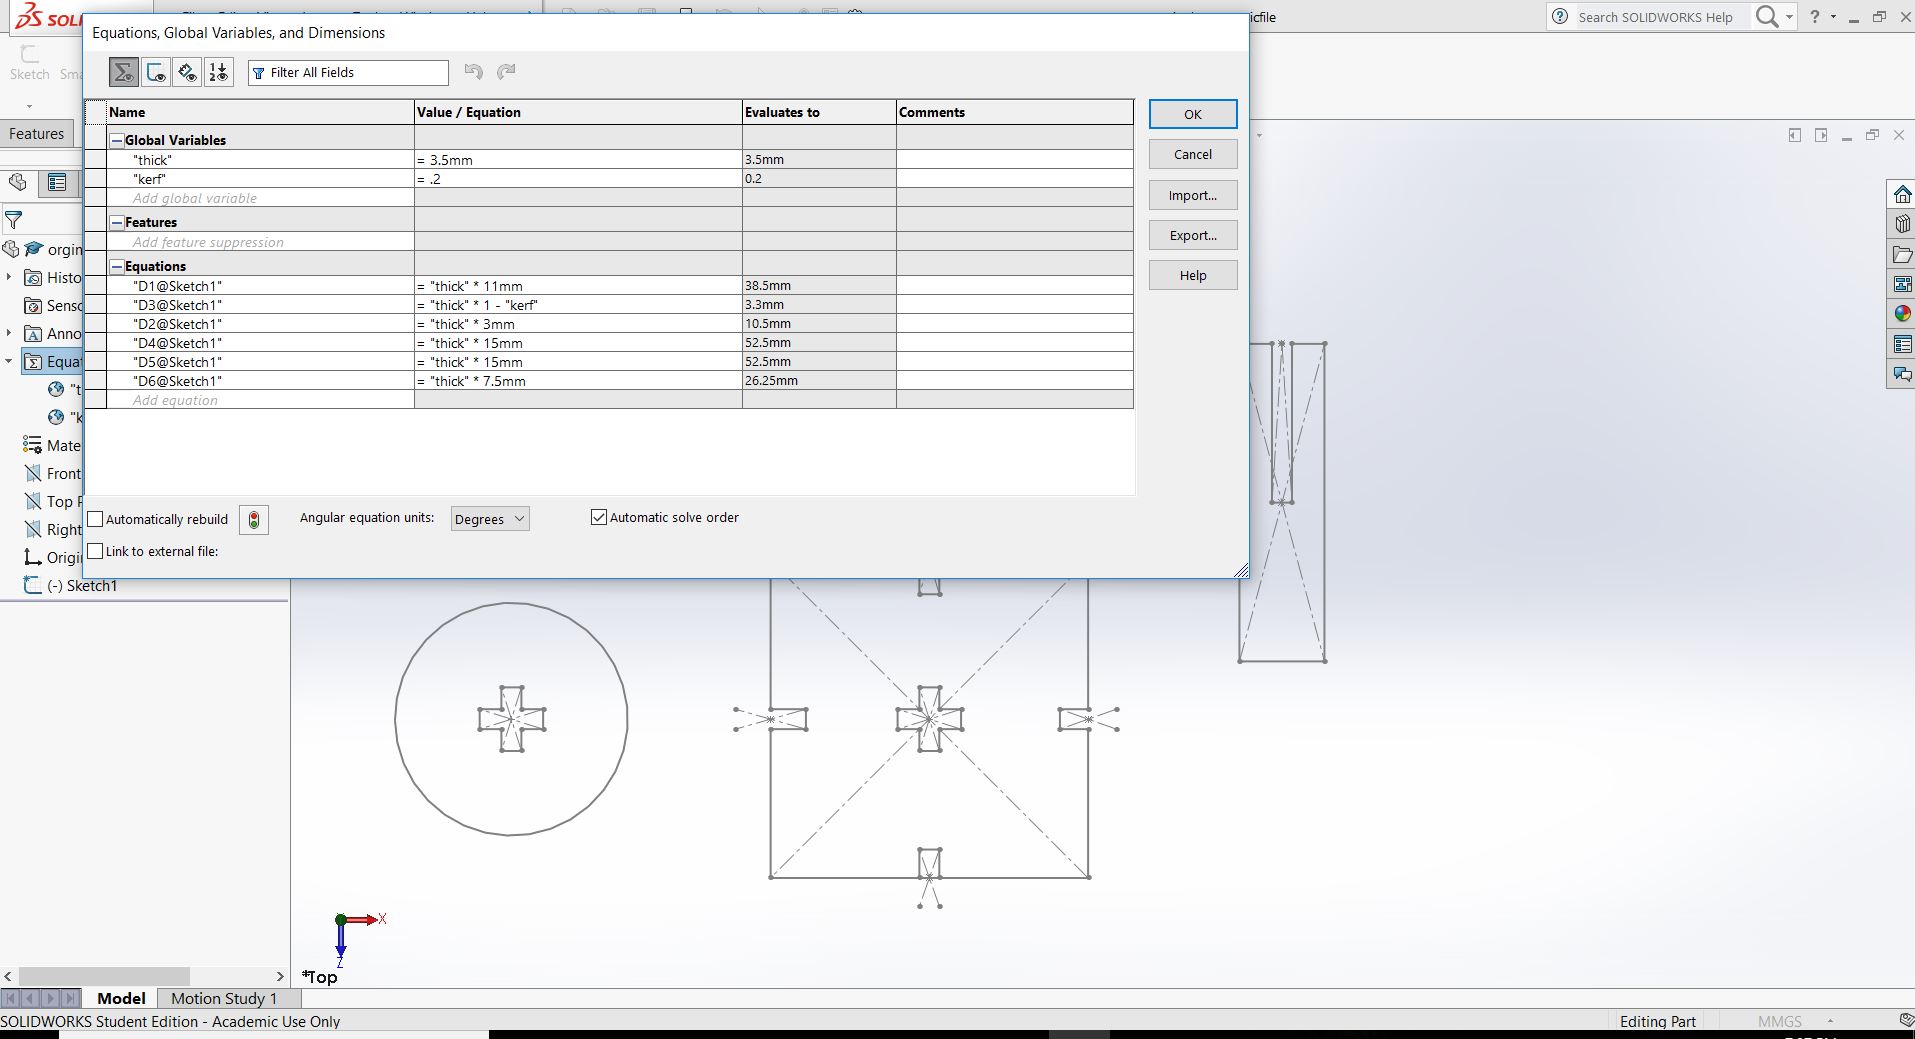
By selecting Equations we can change / define Global Variables
Selected Tools > Equations > set Global Variable > Values
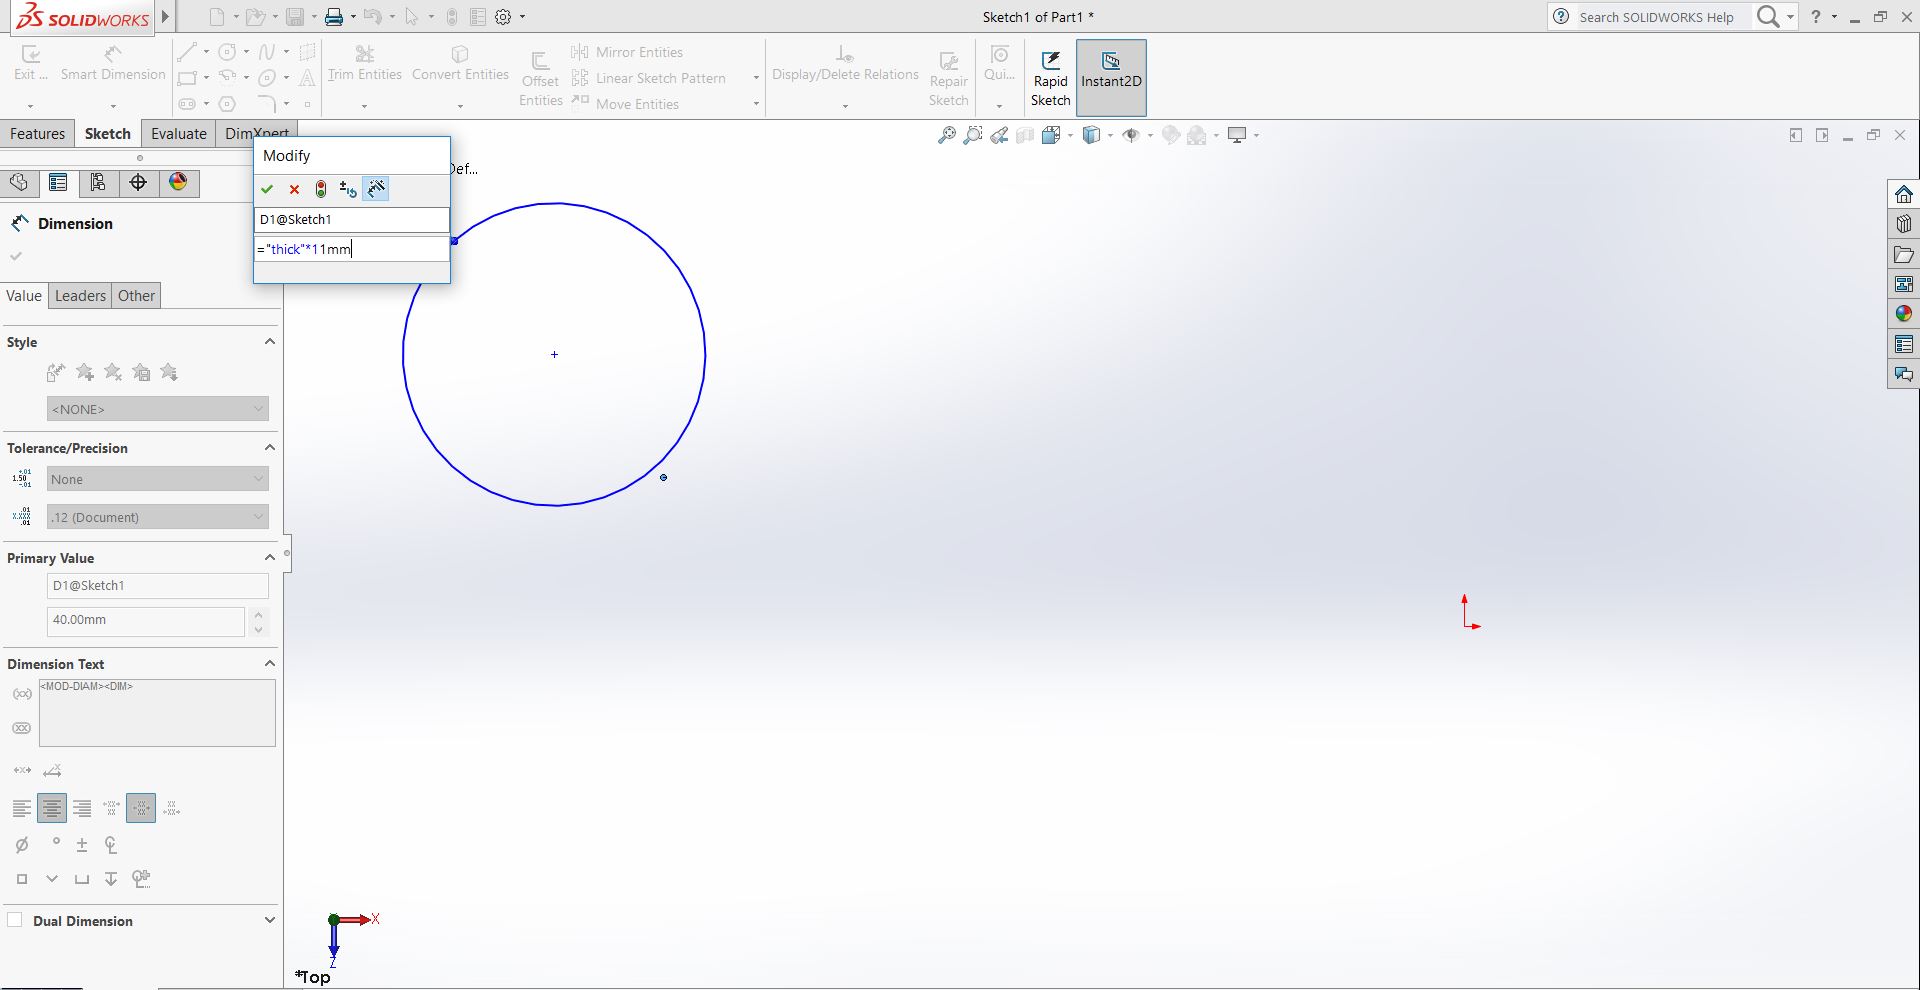
Drew Circle > Dimension > Modify > "Name" >Value in "mm"
Trimmed

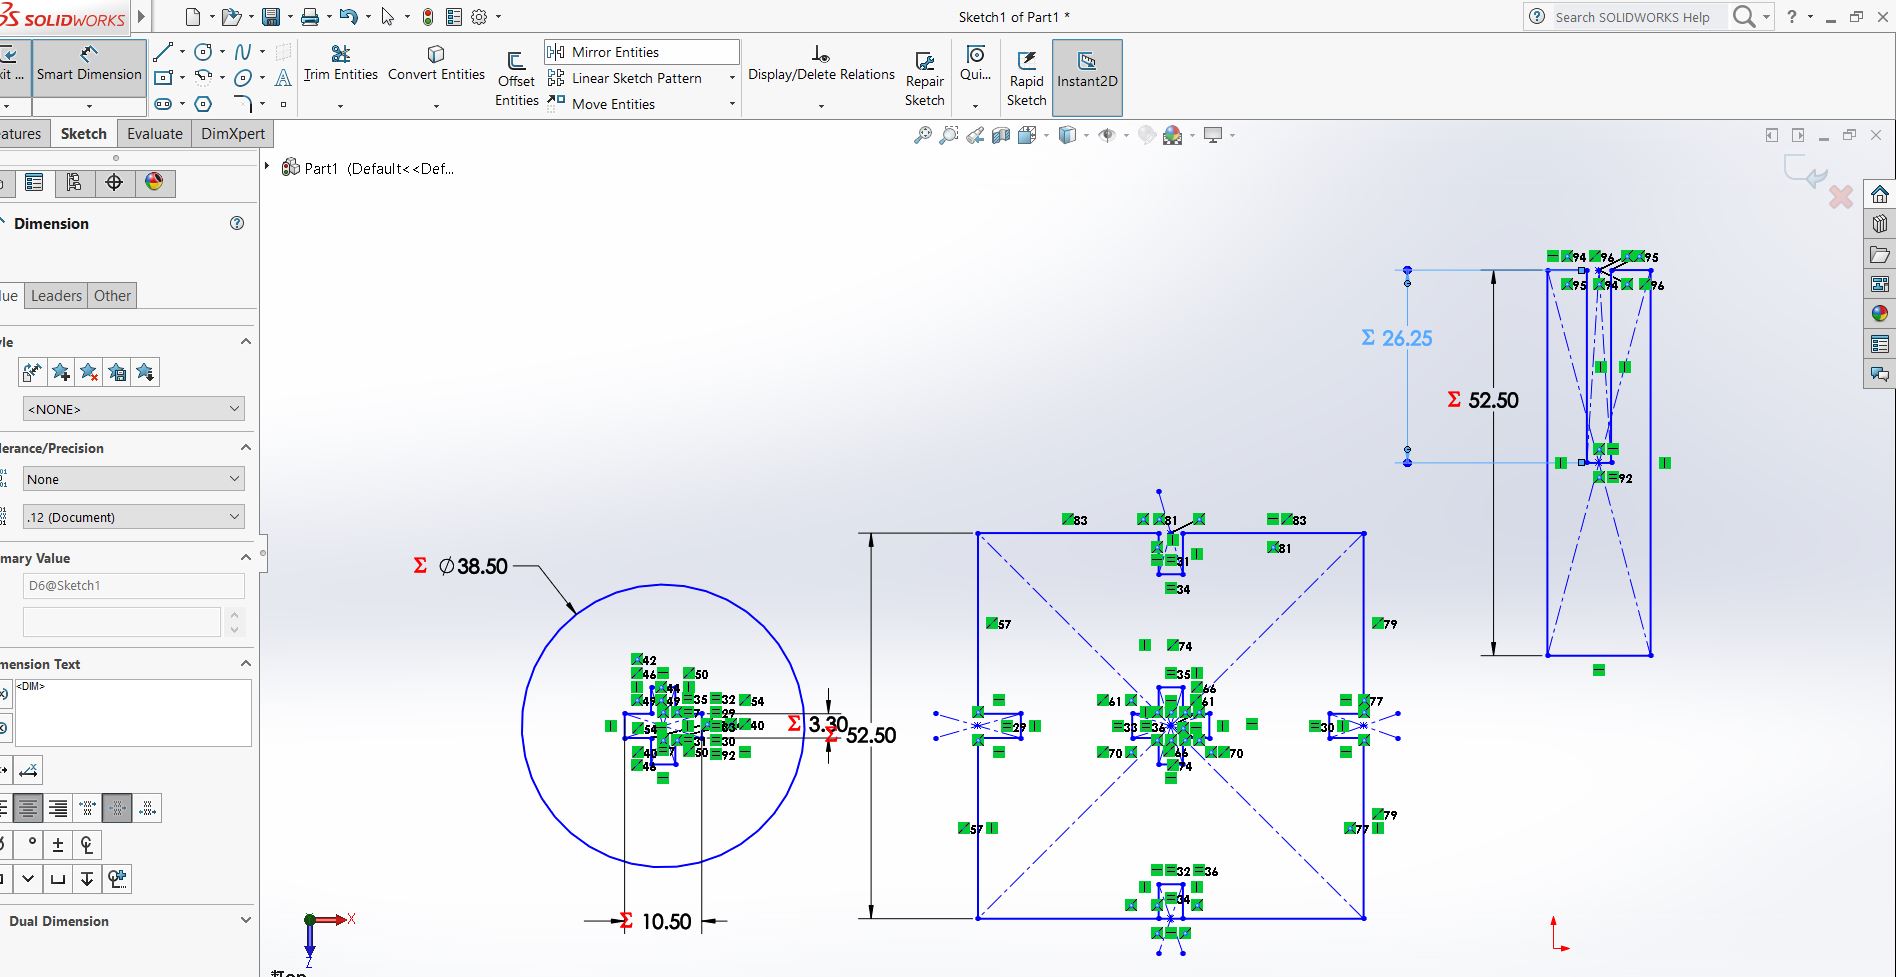
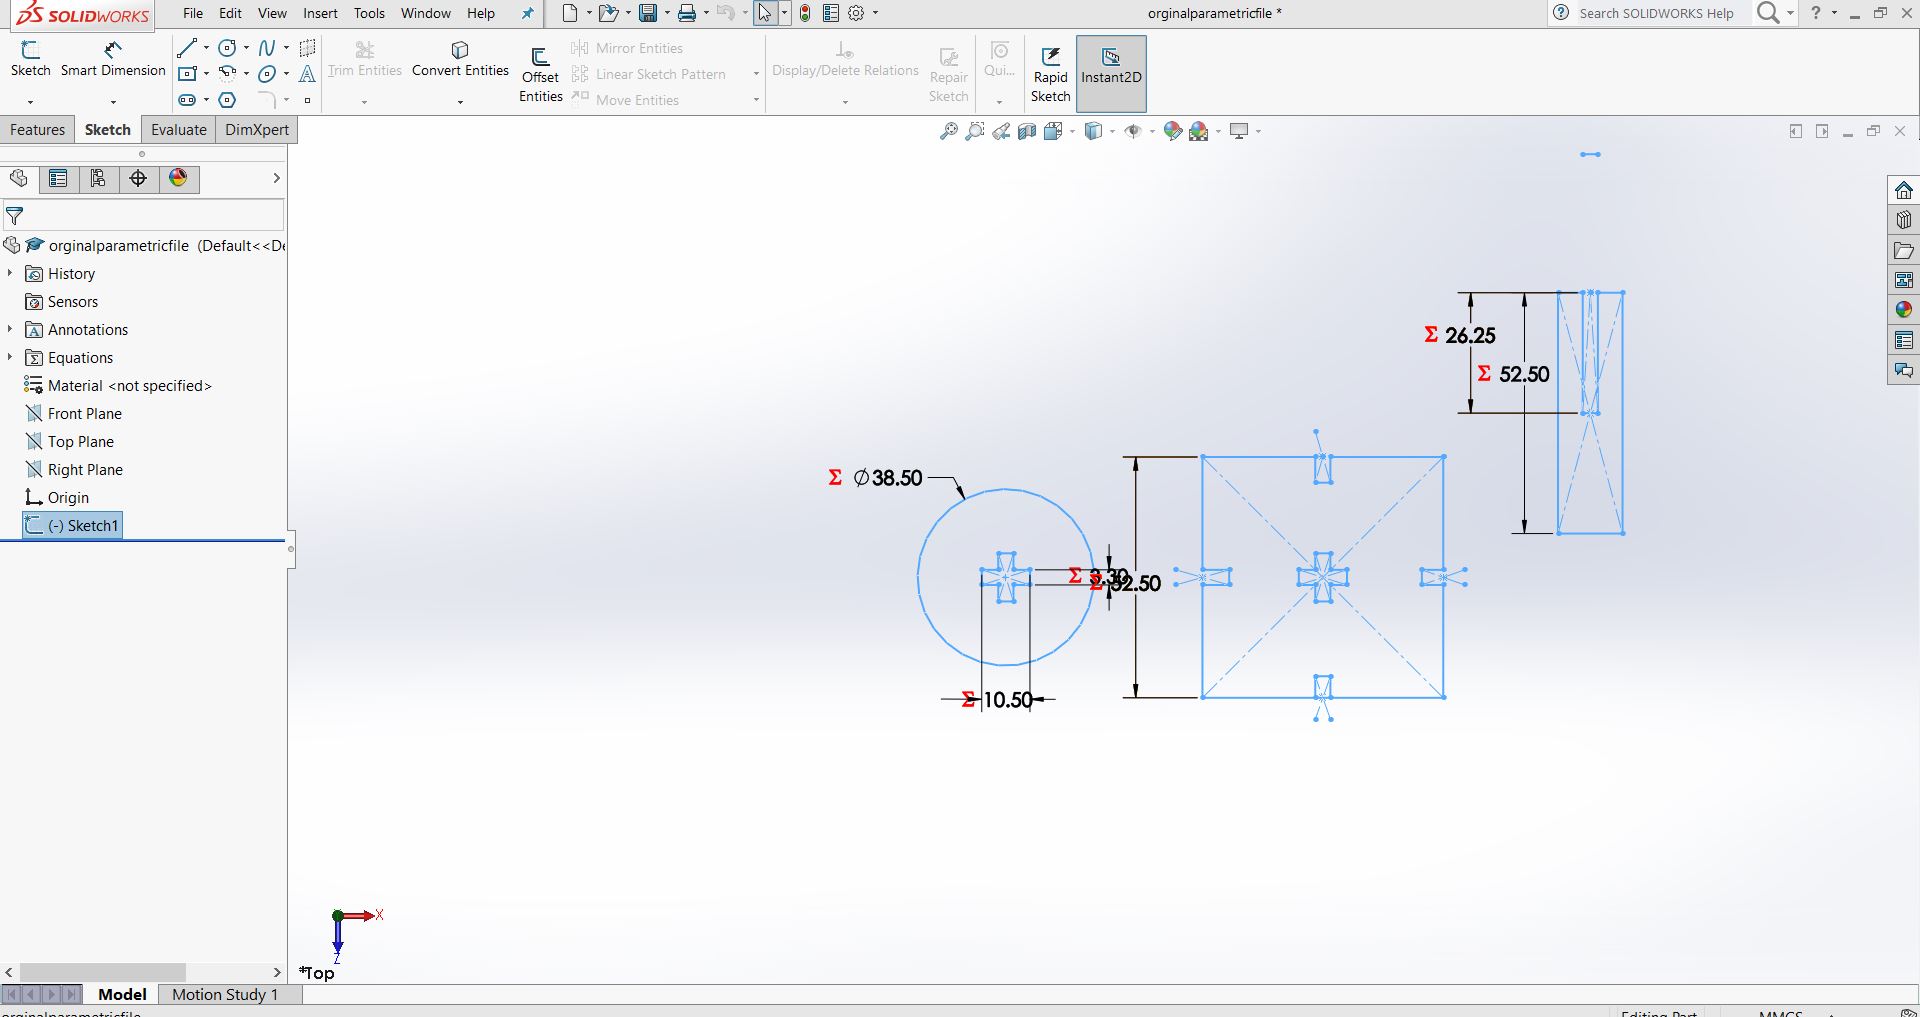
Parameter that can change
Have given a global variable as "THICK" and given kerf "KERF" and also have assigned values for each
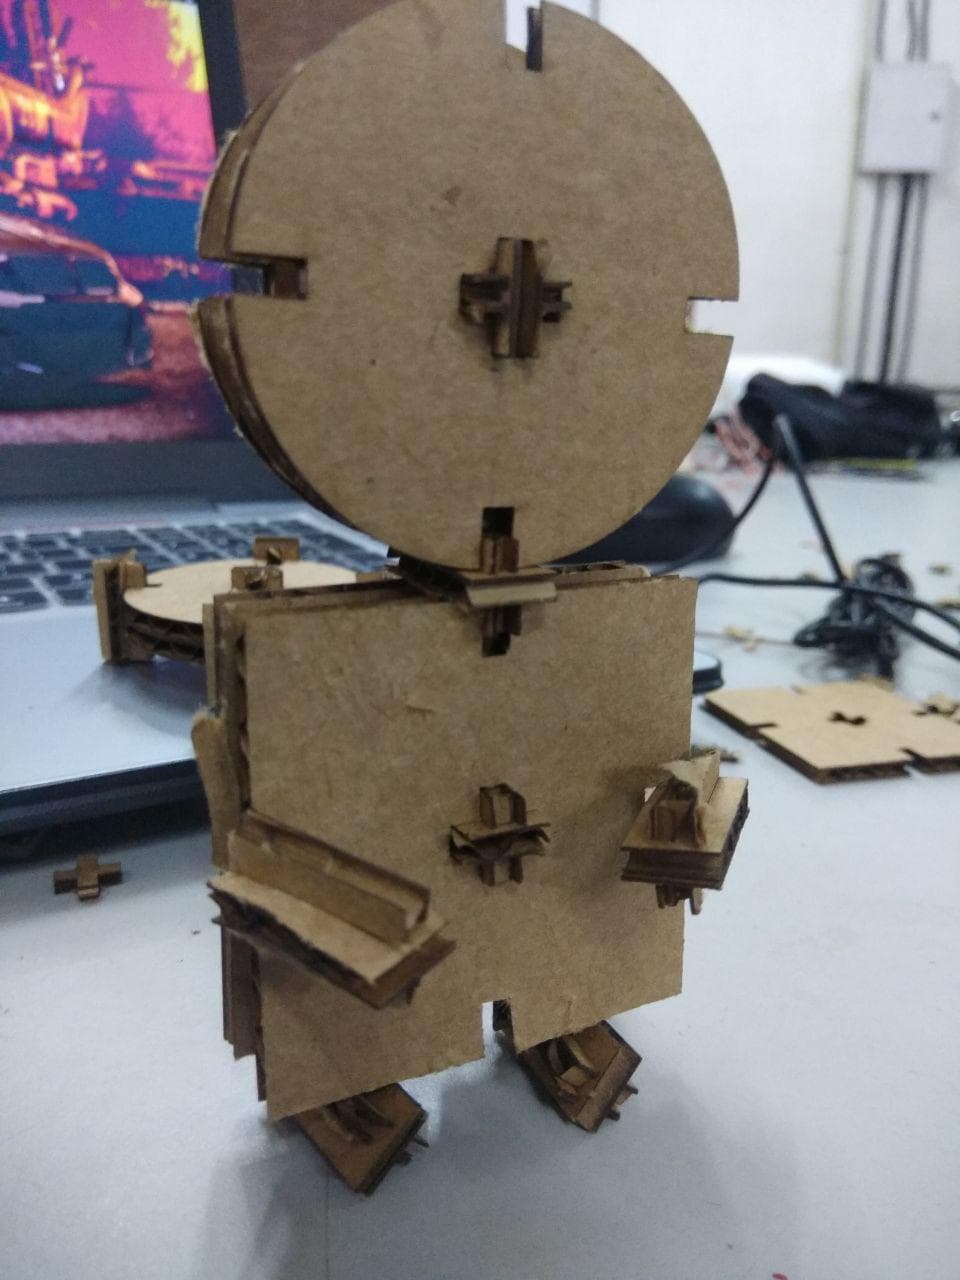
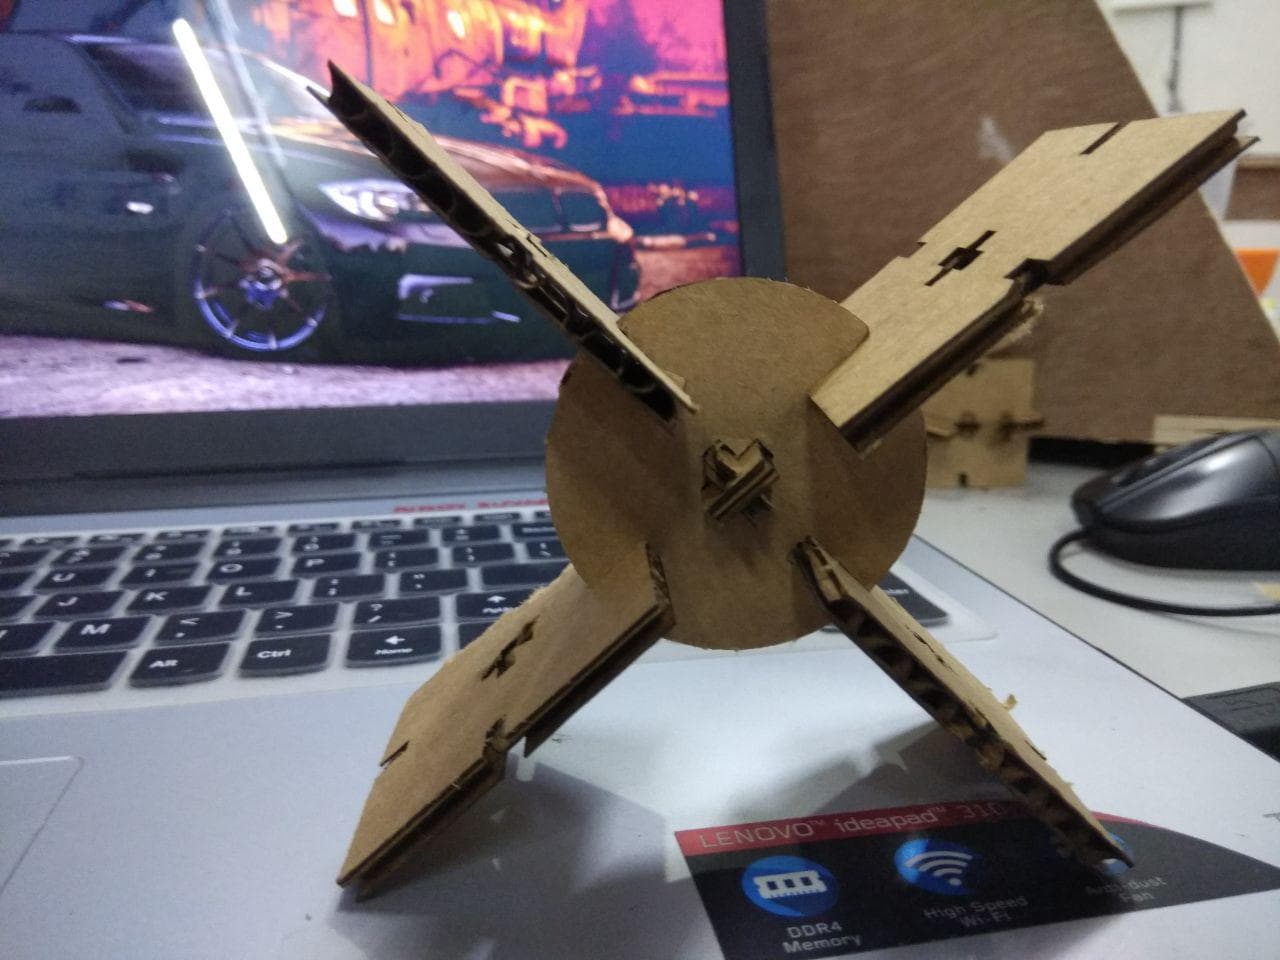
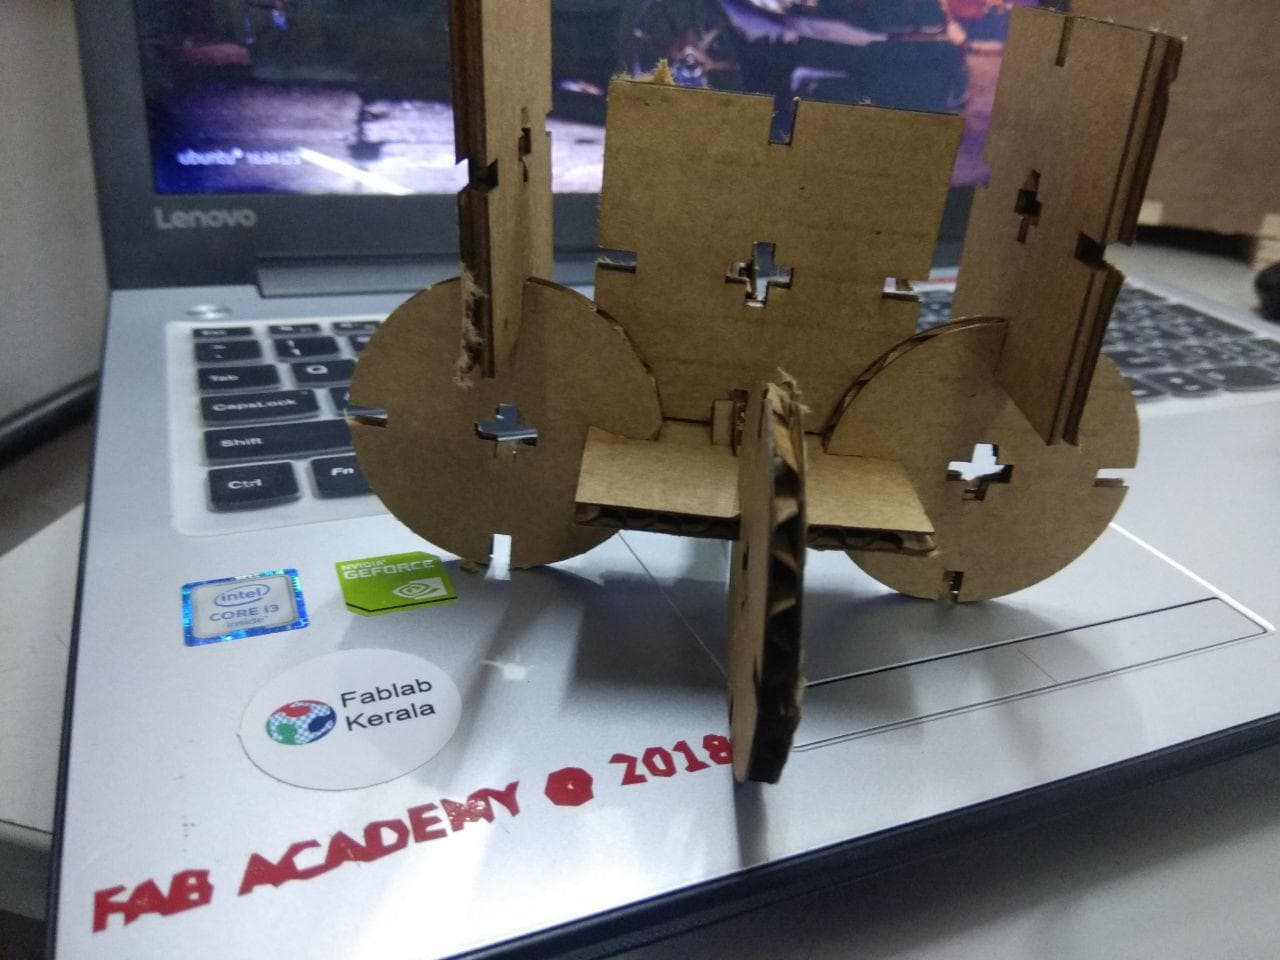
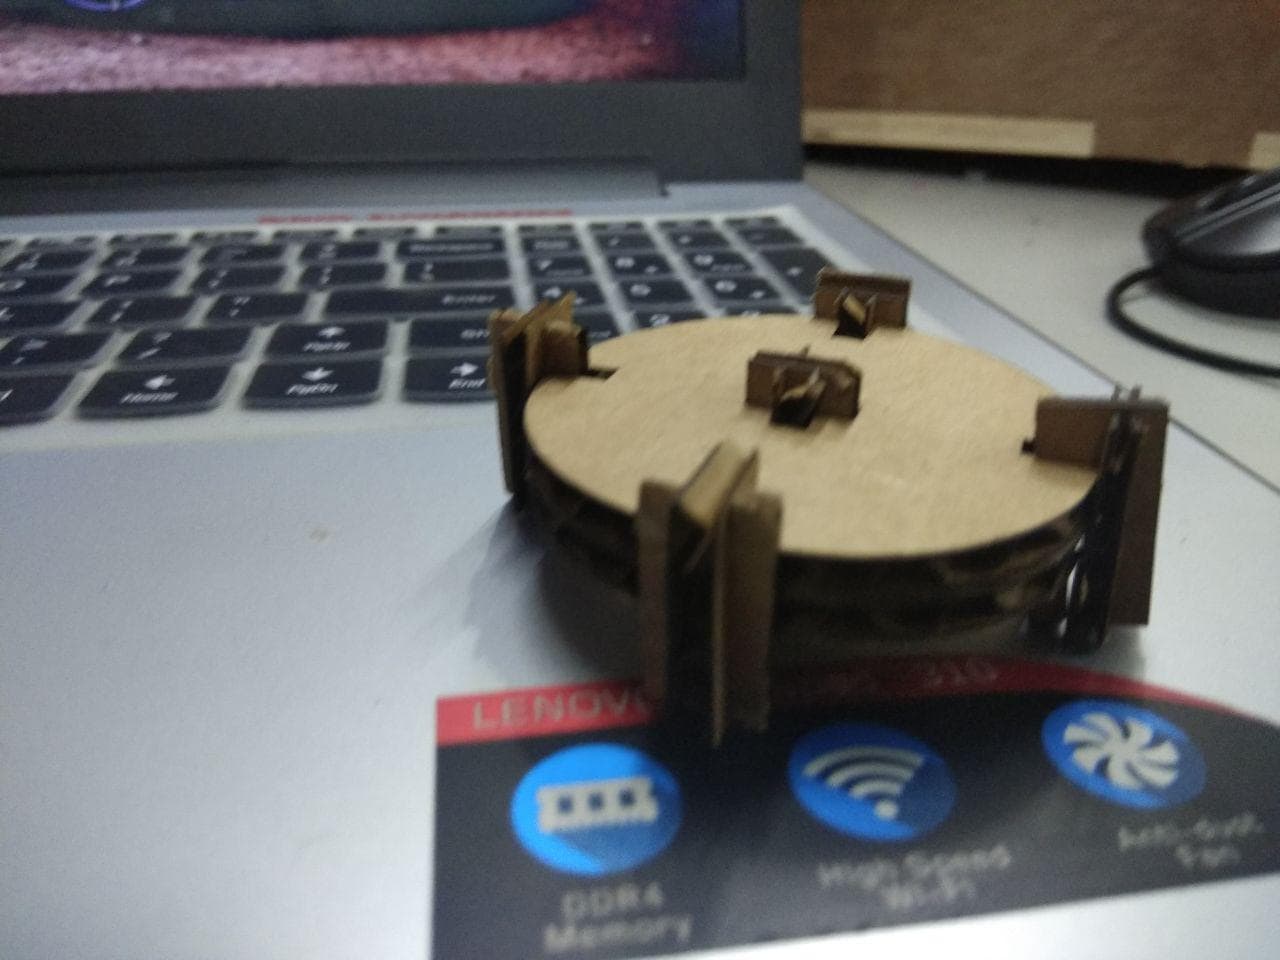
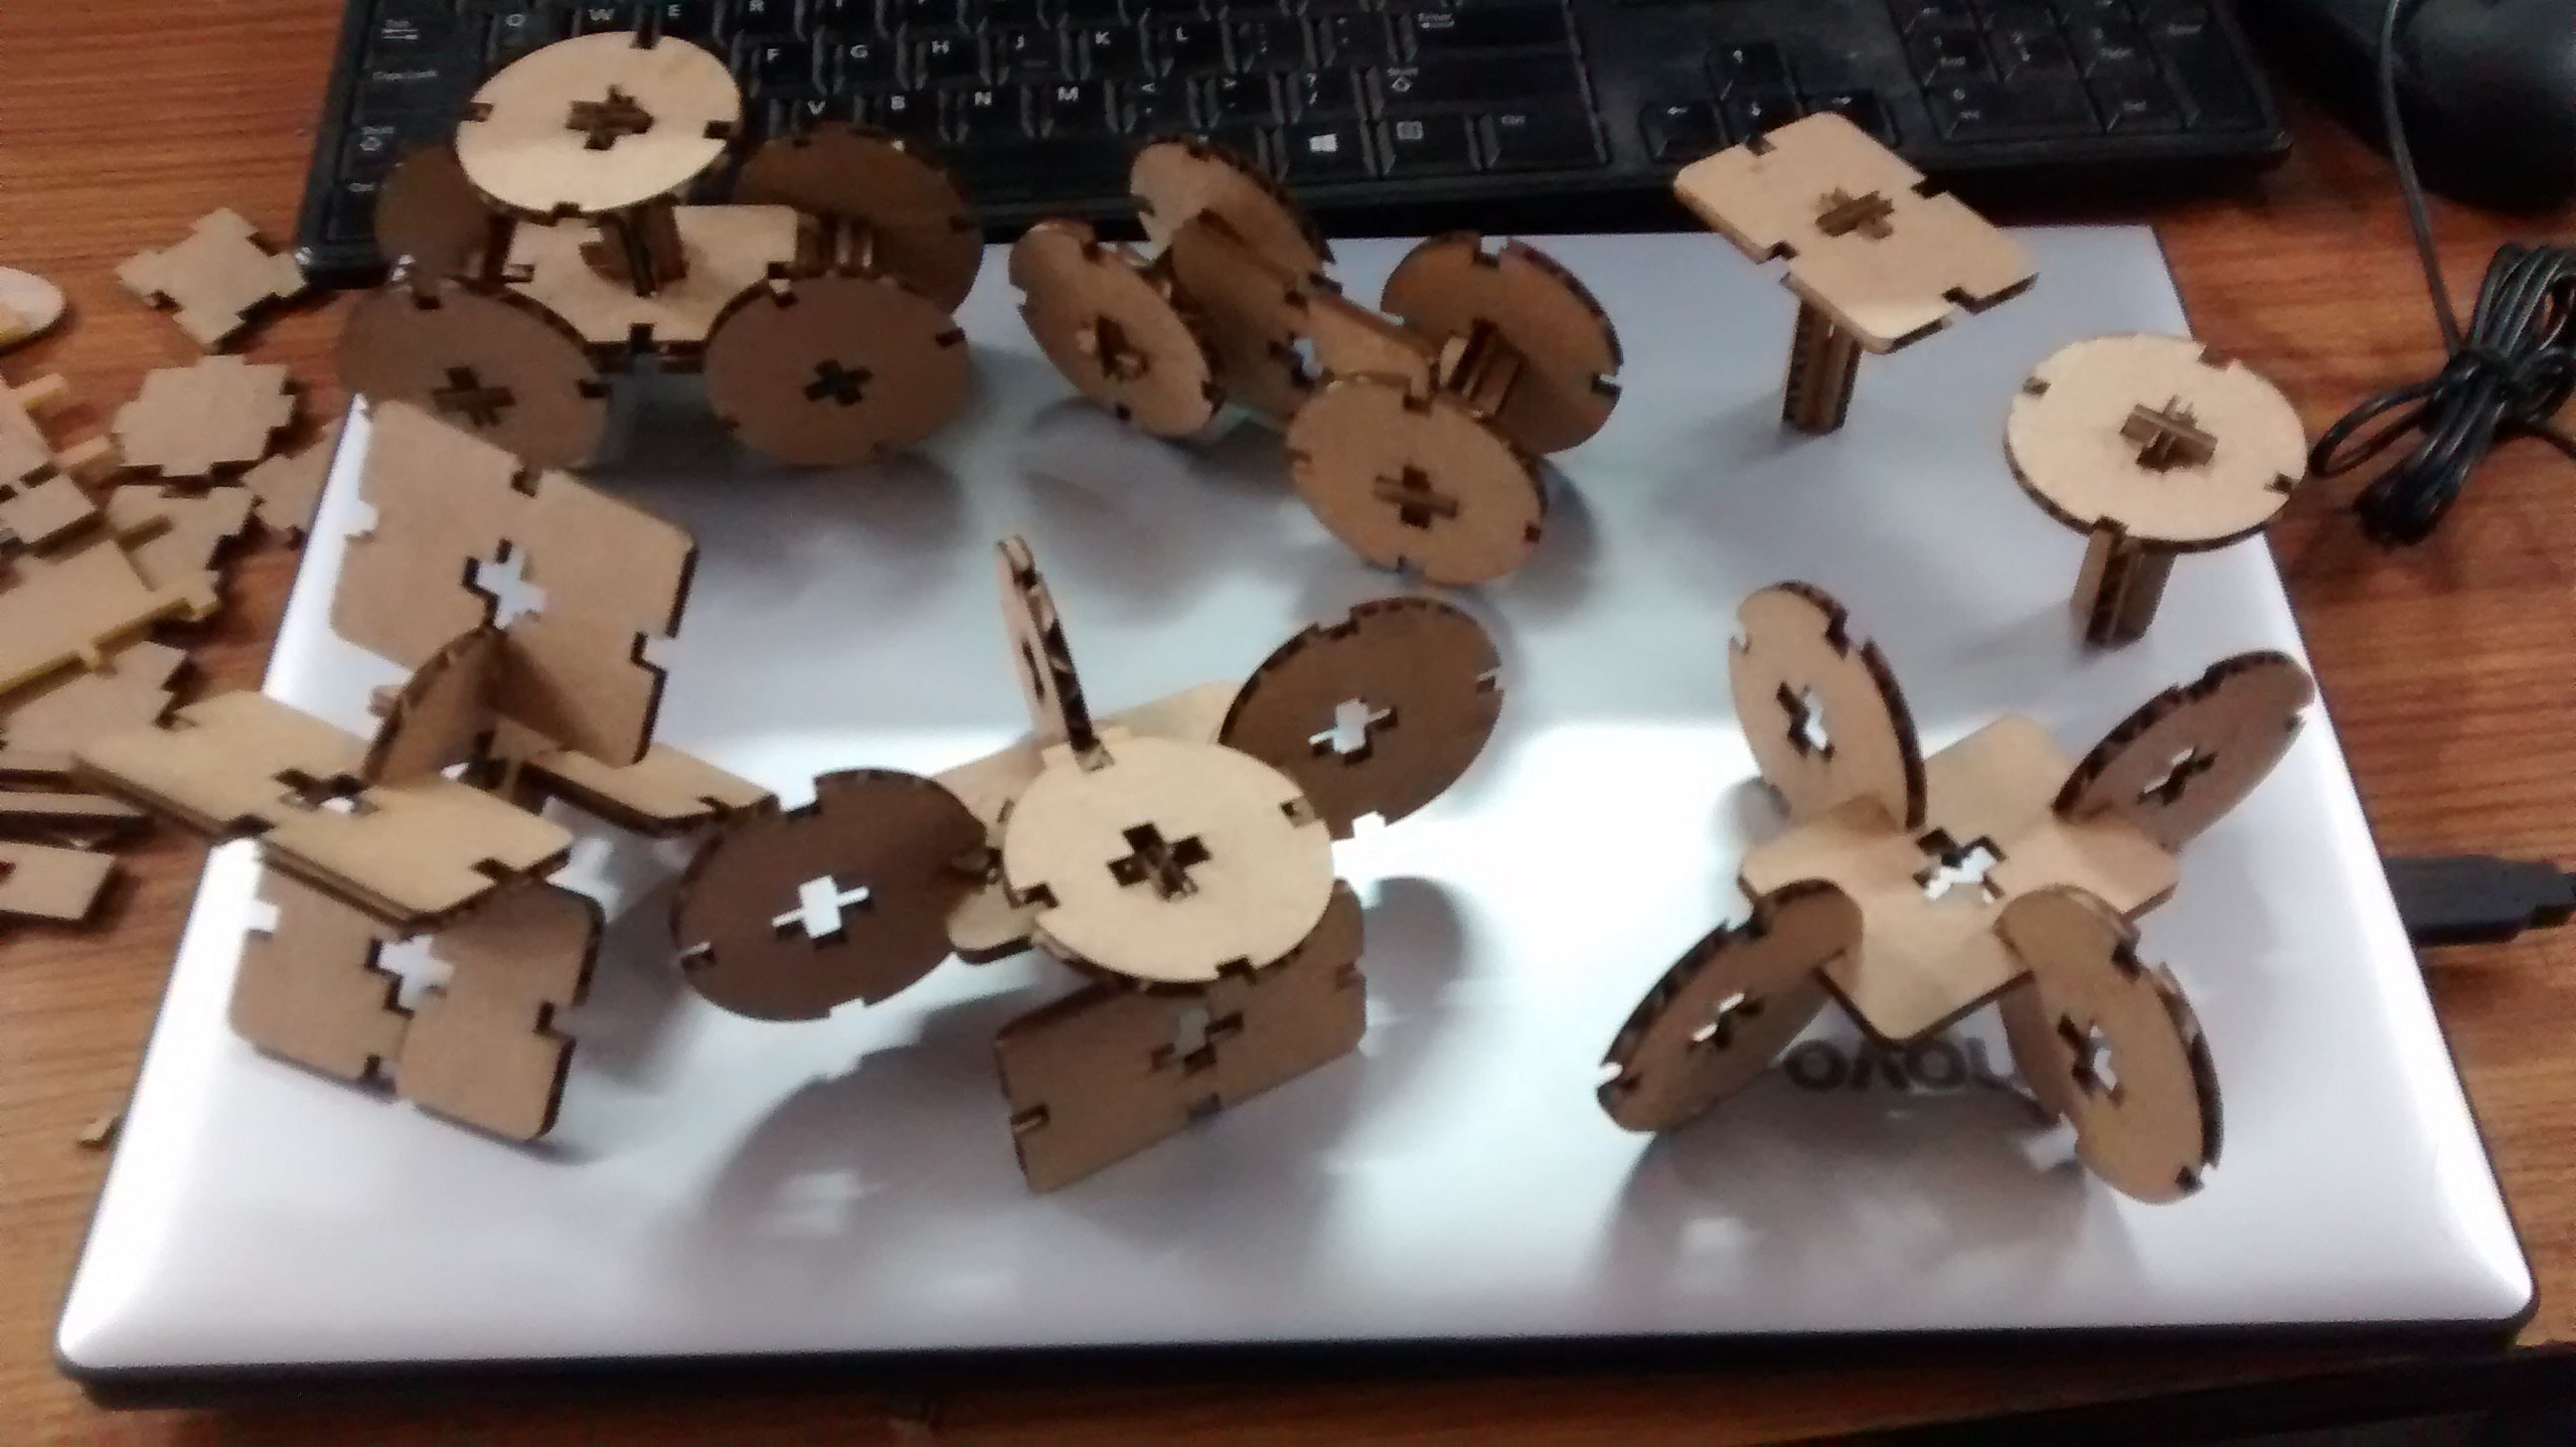
Steps I followed after designing a parametric design as well as my design is as follows.
My parametric design and stuctures made out of it is as follows. (with one of my own designs(Truck))
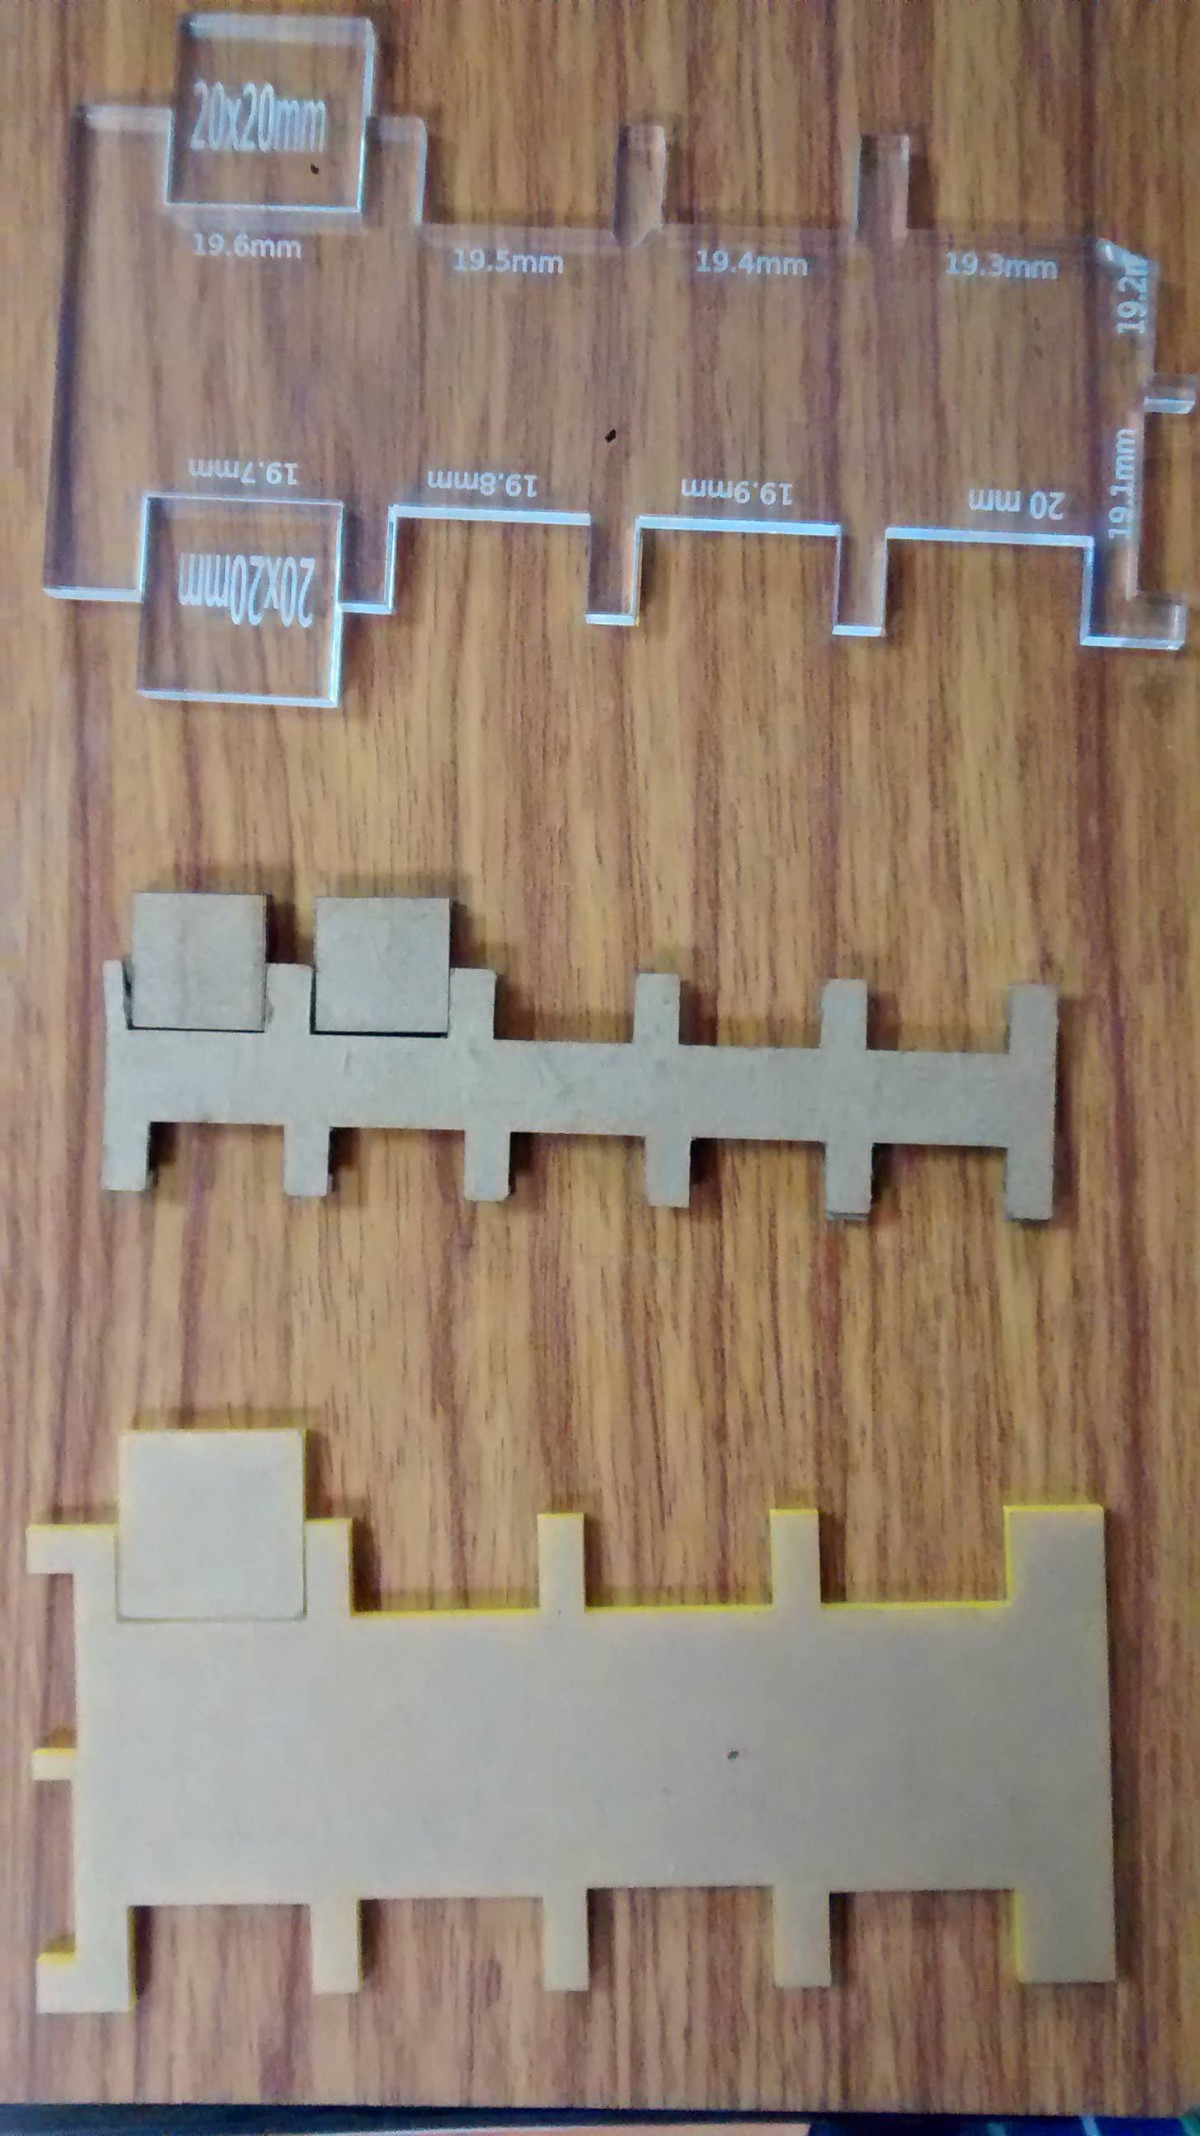
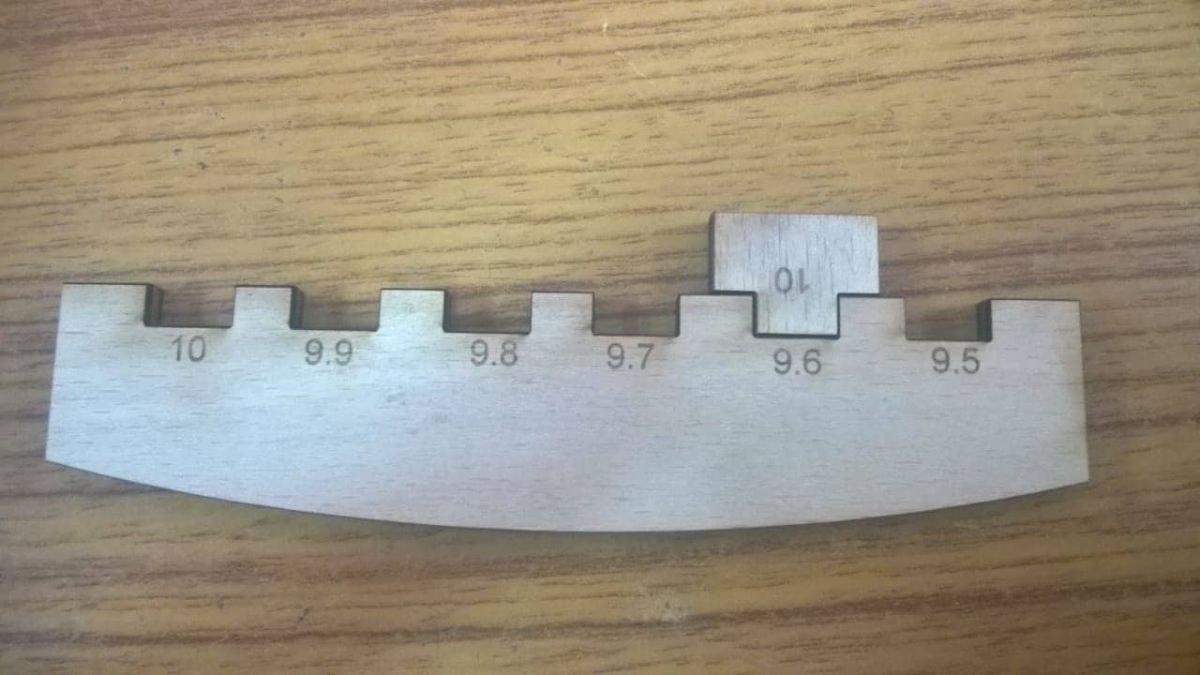
Group Assignment
We have to construct a press fit kit as a group project we have to find out the kerf (Dimension reduced due to the cutting operation) of different materials like cardboard,acrylic and wood
Materials Used
Acrylic 4mm
Acrylic 3mm
Cardboard 3mm
Wood 3mm
After setting up the design files we converted the sketch to dxf format and using inkscape the cutting operations was done
Kerf Measured
Kerf for Acrylic 6mm : 0.3mm
Kerf for Acrylic 3mm : 0.3mm
Kerf for Cardboard 3mm : 0.2mm
Kerf for Wood 3mm : 0.3mm