Week13 - Interfaces and Application Programming
-UnityBackgroundI started game developing in 2016, I always had this "I can do a better job" feeling when playing games, specially for the games you live in, MMORPG (Massive Multiplayer Online Role Playing Game) games like Angels Online, Dofus and some famous ones like World of Warcraft or the really old but still surviving RuneScape. 
I lived in Angels Online (TopRight), it's not a very well known game in the UAE, when you find someone who knows the game, you feel like you have just met a person from your home country and you have been living all your life abroad with no one but locals around. I am not exagerating, this is how we feel, i can actually tell you the history of the game, some famous people in the game, people who grew up with me, I am soo deep in the game i actually contribute to the Wiki page of the game. Games like that are very real, they are like a simulation of the world in a PC, game gold has an actual value to real money, like Angels Online used to be like $1.00 = (1.09 Million) game gold, last couple of years it was like $1.00 = (120 Million), then the item that was the control measure of the game lost it's value, the prices changed again into i dont know what. you see its intersting to live in those games, i can totally understand people who play games for the rest of their lifes and dont even try to work hard in their lifes, because you have no idea how hard they are working in the games. People actually make money from Selling "Kamas" (Dofus Currency), it is so profitable that they created something called "bots", thats a short for robots, its when you see charcters playing the game by some sort of a software, no actual person is playing them, you know that because they all have the same fighting routine and they dont talk, they fight in a group and they all dont talk. It is indeed fascinating for me. Back to Unity, I have worked on over 10 games, I couldn't have done it on my own, My friend Maitha was the one i started all of this game developing project with, it was because of her artskills that i actually was motivated to work on making a game, It is no fun making a game with ready assets. I even tried before i met her, but i failed because i kept stopping out of boredom, and there was no specific goal, i was just trying to learn on unity to get the skills, but what i would advice everyone who is intrested in doing something, do it right, get yourself a goal in mind, dont learn something because you want to gain the skills, that could be boring and might kill your motivation. Our first published game is called "Chaotic Mind 01", it is an iOS (iPad Only) Cryptography/Puzzle game. 
We remade the game 3 times over a year and developed several games in between, this game has a good feel now, way better than the older makes, but it is still not the way we like it to be, so we will actually remake it again with lots of changes. I did use unity and program this game, Maitha did all the artwork in the game. We do have several other games, but most of them are either not finished or we cant share it because its now legally a property of an organization because we entered their competition and this was part of the rules. Our Team is called MythicalBear, our website is still under development, its been a year that way, but we intend to fill it soon, by the time you read this we might have content :D 
Week Work Starts HereI followed a youtube tutorial for this week and it was very helpful. The first thing i did was to copy his code and understand it. Right from the start for the unity GUI i knew what i was gonna do. I wanted to create 2 buttons and so i did. At the Hierarchy, right click and go to UI/Button. This creates a button in a Canvas object along with an EventSystem, the Canvas and EventSystem are important, dont delete them, in the picture below i created 2 buttons already, you can see one of them is named "On" the other is "Off". 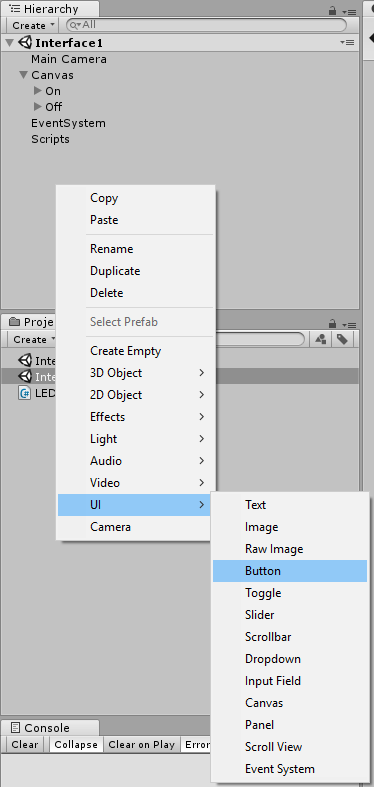
If you select a button you get this below. Button Shape and Color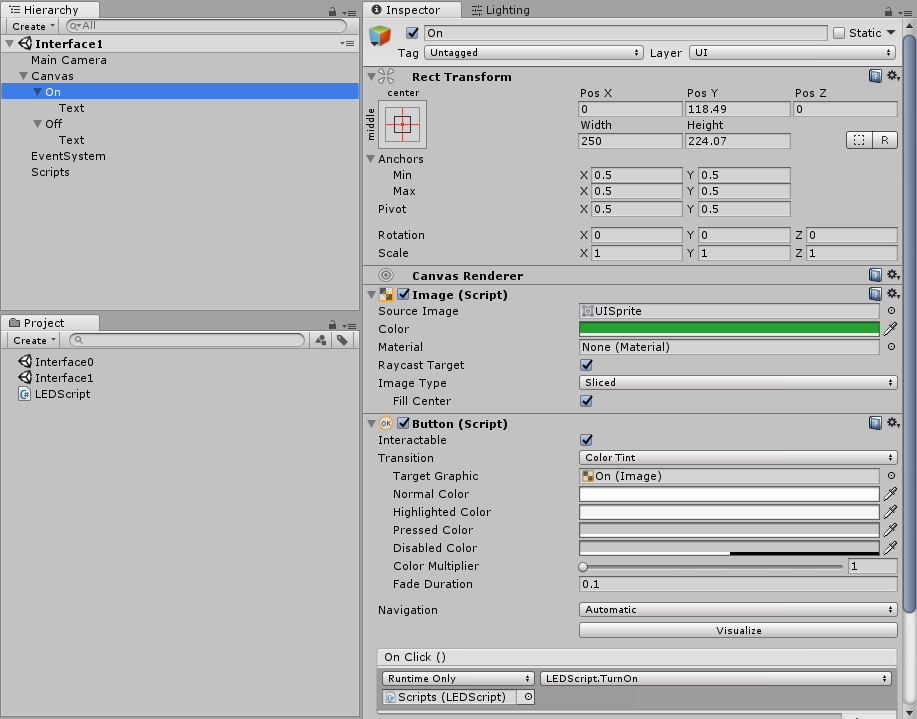
In the Inspector tab, you can see the "Rect Transform" you can adjust you button width and height from here. In the "Image" section, you cacn change color or use another button Image in source image, I just changed the color to green for on. Button Text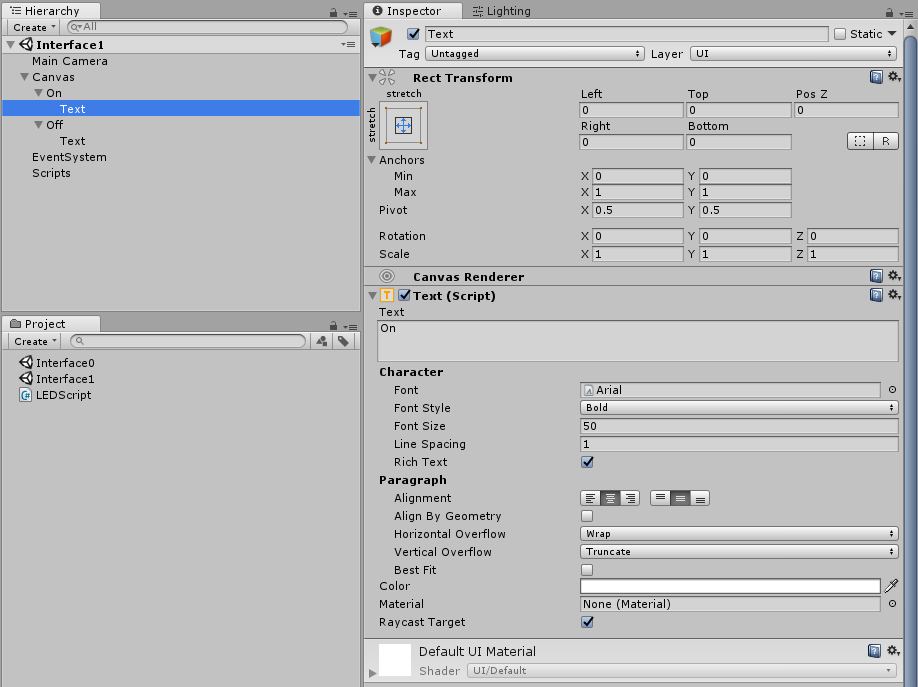
When you select the Text child of the button, you can choose the color,style,size of the font, and that is what i did here, as you can see its pretty forward. You can see changes in the Scene Tab, and move around the buttons from the canvas if you didnt like the location. 
You can also see things in the Game Tab. Scene Tab: This is where you can manually modify your game, you can look at things more clearly to edit and fix here. .NET 2.0, Write something here before you push! Unity Script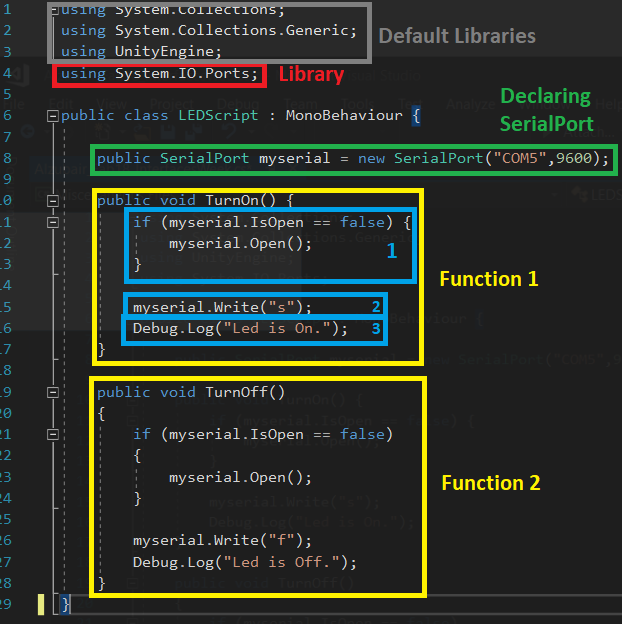
Gray: This is like the default libraries included when you create a new script in unity.
Lateron the script has to be assgined to a gameobject, below i created a GameObject, named it "Scripts" and pulled the "LEDScript" from the Project files tab to the Inspector tab of the "Scripts" game object. 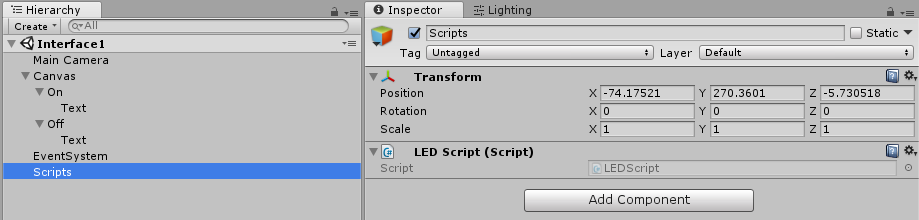
Now we will assign each buttons with functions, below is an example on the "On" button, In the inspector, you will find something called On Click(), you hit the + sign to add a function, first drag the Scripts object to the Red Marked space, then click on the Green marked space to get this drop down menu, then find your script name followed by the correct function you created in the code, I want the TurnOn function to be assaigned to the "On" Button. 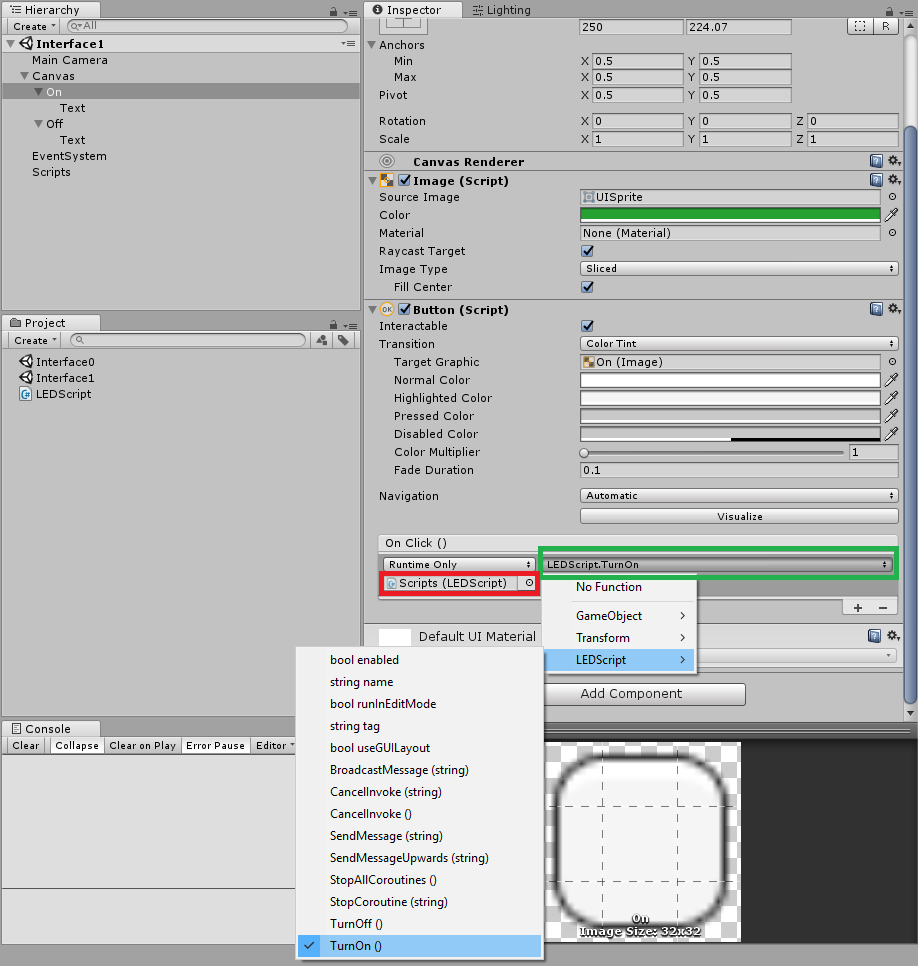
Do the same on the Off button and you are basically done with the unity side. Arduino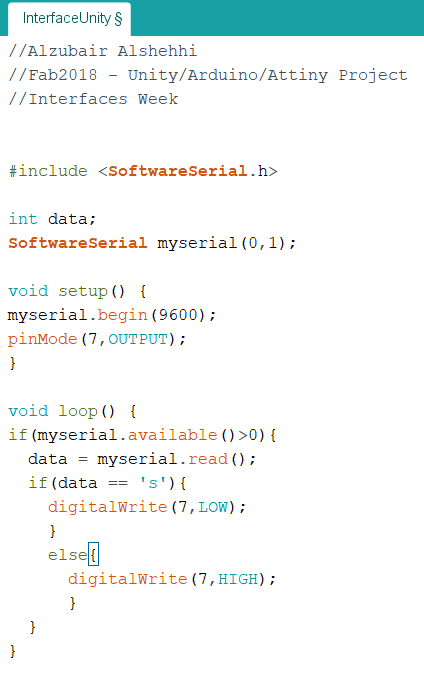
The above code is really simple, nothing new here.
SoftwareSerial: The attiny does not have the serial built in the chip, that is why we must use the softwareserial library. TestingPlug in the board with just an FTDI Cable, check which PORT are you using and if it was different than COM5 then change it in the Unity Script. You can check which port you are using with Arduino, go to Tools/Port. and then run the Unity Scene you just created. Download Arduino Code here. This is the same board from Week07. |