This week were tasked with:
1: Build a personal website describing you and your final project.
2: Upload it to class archive.
3: Work through a git tutorial.
I started working on my website almost 2-3 days before the academy. I am a complete novice when is comes to html/css and other web related technologies.
My primary plan was to use some nice templates available online edit and tune them to my liking and push them on the academy servers. I opened the 2017
academy archive and started browsing various websites and lectures. After going through the classes, I came across JEKYLL. I knew it was some kind of
site generator. Going through the website I saw many benefits to using jekyll over any other convectional method, here are a few....
1: The posts are written in markdown
I'm very familiar with markdown. Also it much easier than CSS/HTML.
2: Support for liquid
You can use loops, logical operators in code rather than to type everything.
3: Lots of developer support
Lots of people are already using jekll, hence there is a very high chance
that problems I encounter are already asked by someone before and already solved.
3: Easy to edit configuration on the fly
Jekyll allows you to concoct your sites in any way you can dream up, and it’s thanks
to the powerful and flexible configuration options that this is possible. These
options can either be specified in a _config.yml file placed in your site’s root directory,
or can be specified as flags for the jekyll executable in the terminal.
Installing jekyll on windows is now possible with Linux Subsystem for Windows.
$ gem install jekyll
$ jekyll new fab-academy-website
$ cd fab-academy-website
$ jekyll serve
This will create host a copy of the webpage on your pc, you can access it by going to http://localhost:4000.
Not being an expert myself, I browsed the web for many templates. I got the 'windows 95' template from the website. It is a relatively simple template.
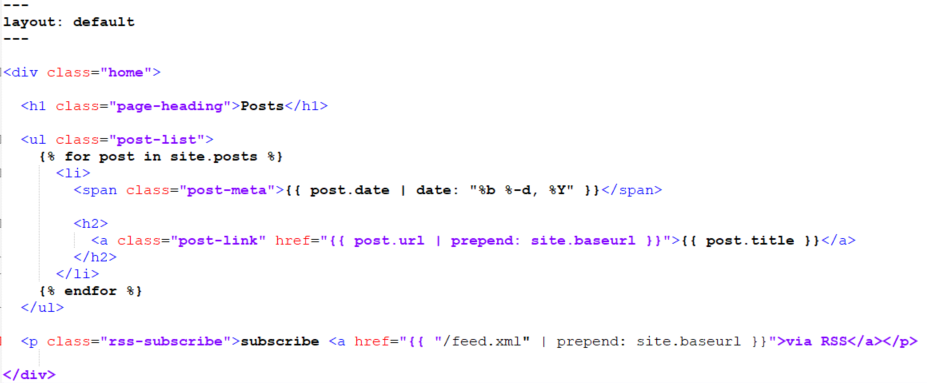
I modified the index.html to better suit the my needs. I changed the tag names from tag1, tag2, tag3... to Project Idea, Week 1, Week 2... Due to the
support of yaml and liquid, writing html is code is much easier. Liquid can be directly types in html to automate most of the stuff. For example:
Each Jekyll page has a YAML frontmatter block. The front matter must be the first thing in the file and must take the form of valid YAML set between
triple dashed lines. Anything inside '{{ }}' is treated as liquid and can be coded accordingly. Here instead of linking all the posts serially, I have
used the for loop which will generate code for all the posts present in '_posts' folder.
After lots of editing, the site was successfully up and running on the class archive.
There were a few problems with Jekyll, which I didn't foresee. They are:
1: The posts are written in markdown
Markdown is good for simple websites, many rich text features are not available. Even arranging pictures can be painful.
2: Support for liquid
I'm not well versed in liquid. Liquid is also not widely used language. So code was harder to debug.
3: Lots of developer support
Different people had different ways of doing the same thing. Many of them were from older versions and the code didn't work as expected.
My website was then ready after debugging for what felt like eternity
Although the website looks good, it is a template created by someone else. It doesn't feel right to me. I wanted a website which might be simple, but created by me. The next day Neil mentioned that jekyll, php etc run some code on the server and hence they might be exploited. Although I liked my website,
I decided to start from scratch to avoid headaches in the future.
I have hosted the original website on github, you can find it here
A complete tarball for my Jekyll website source is available here
This time I planned to go with the simpler HTML/CSS route. the best source for learning HTML is none other than Mozilla Developer Network. They have most
simplest and easy series of tutorials to develop for the web. I planned on doing a minimalist website this time. Taking some inspiration from previous students
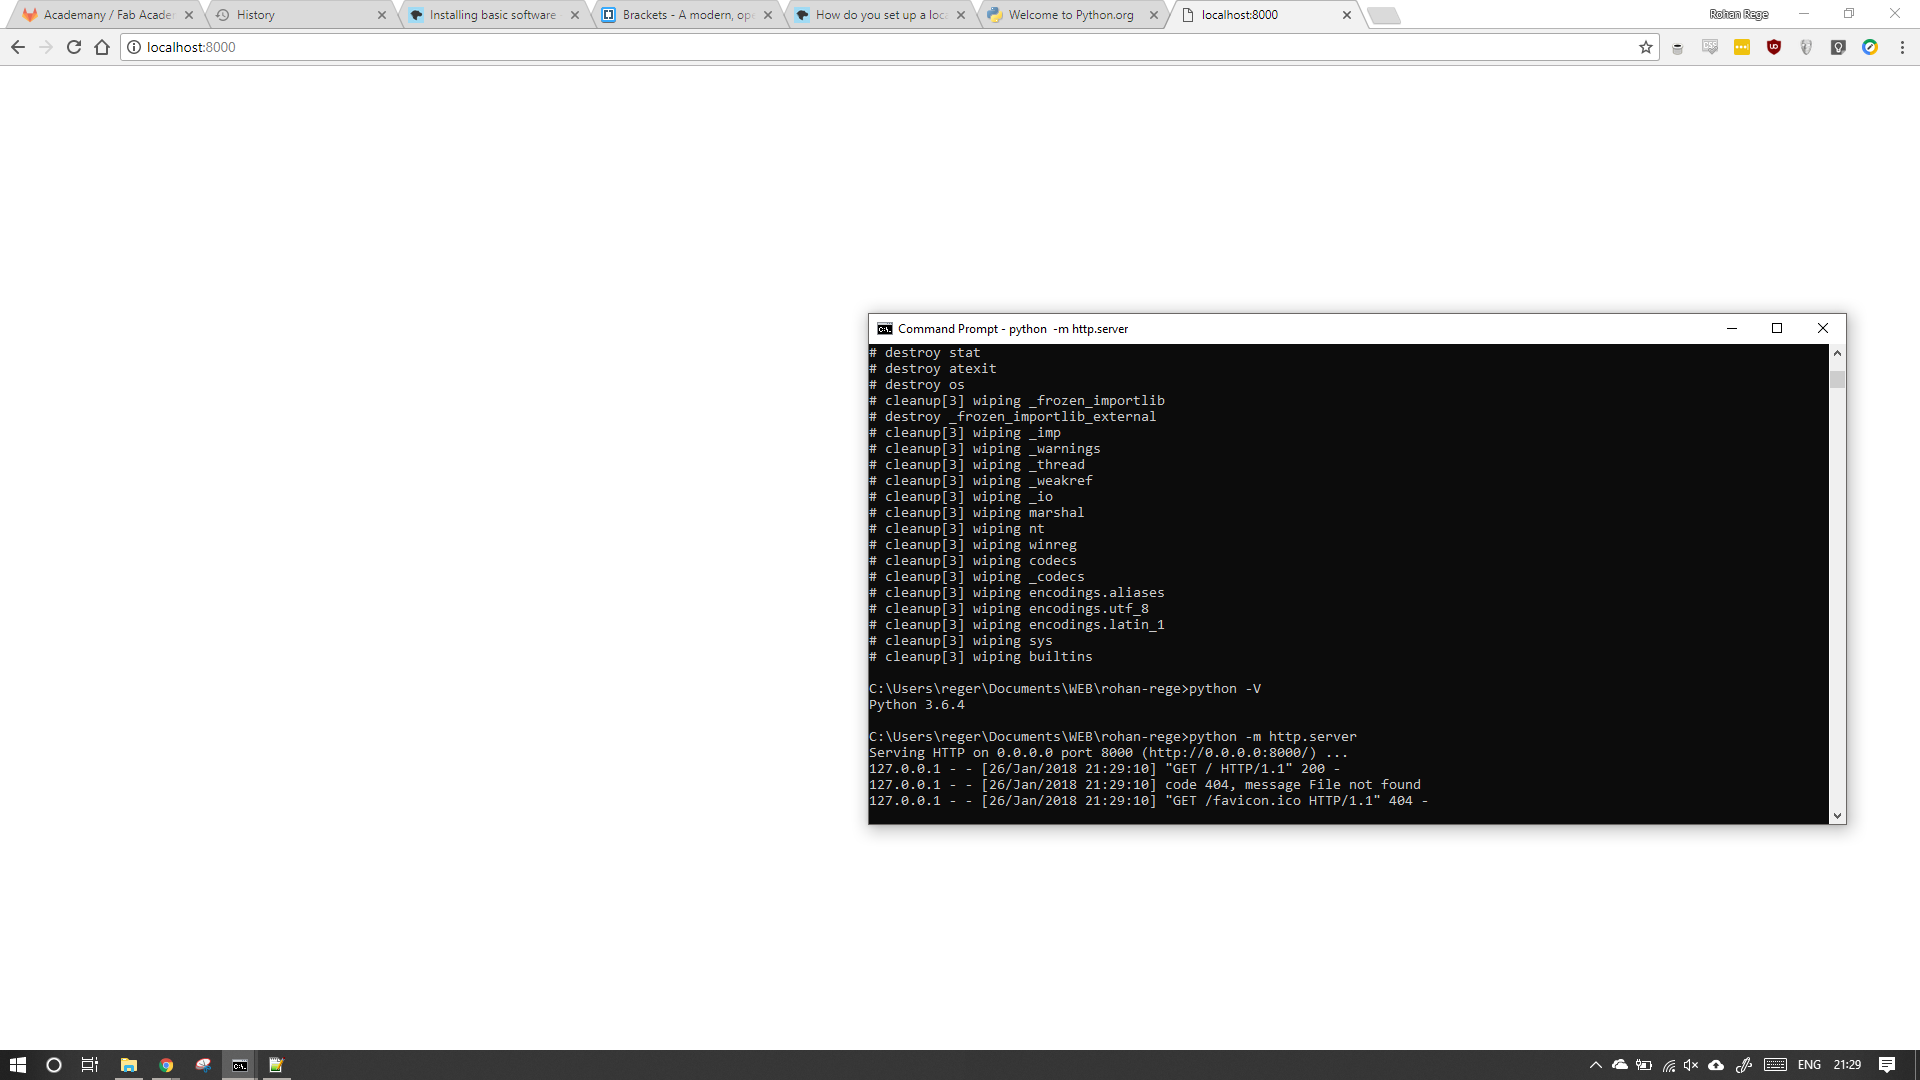
I started developing my own theme.One of the advantages of using jekyll was the website ran on a local webserver, rather than opening index.html through browser.
Running the website on a webserver is more beneficial and helps to run most code correctly. I achieved this by setting up a local testing server using python.
$ cd /your/website/path
$ python -m http.server
The will host the /your/website/path directory on your machine at http://localhost:8000
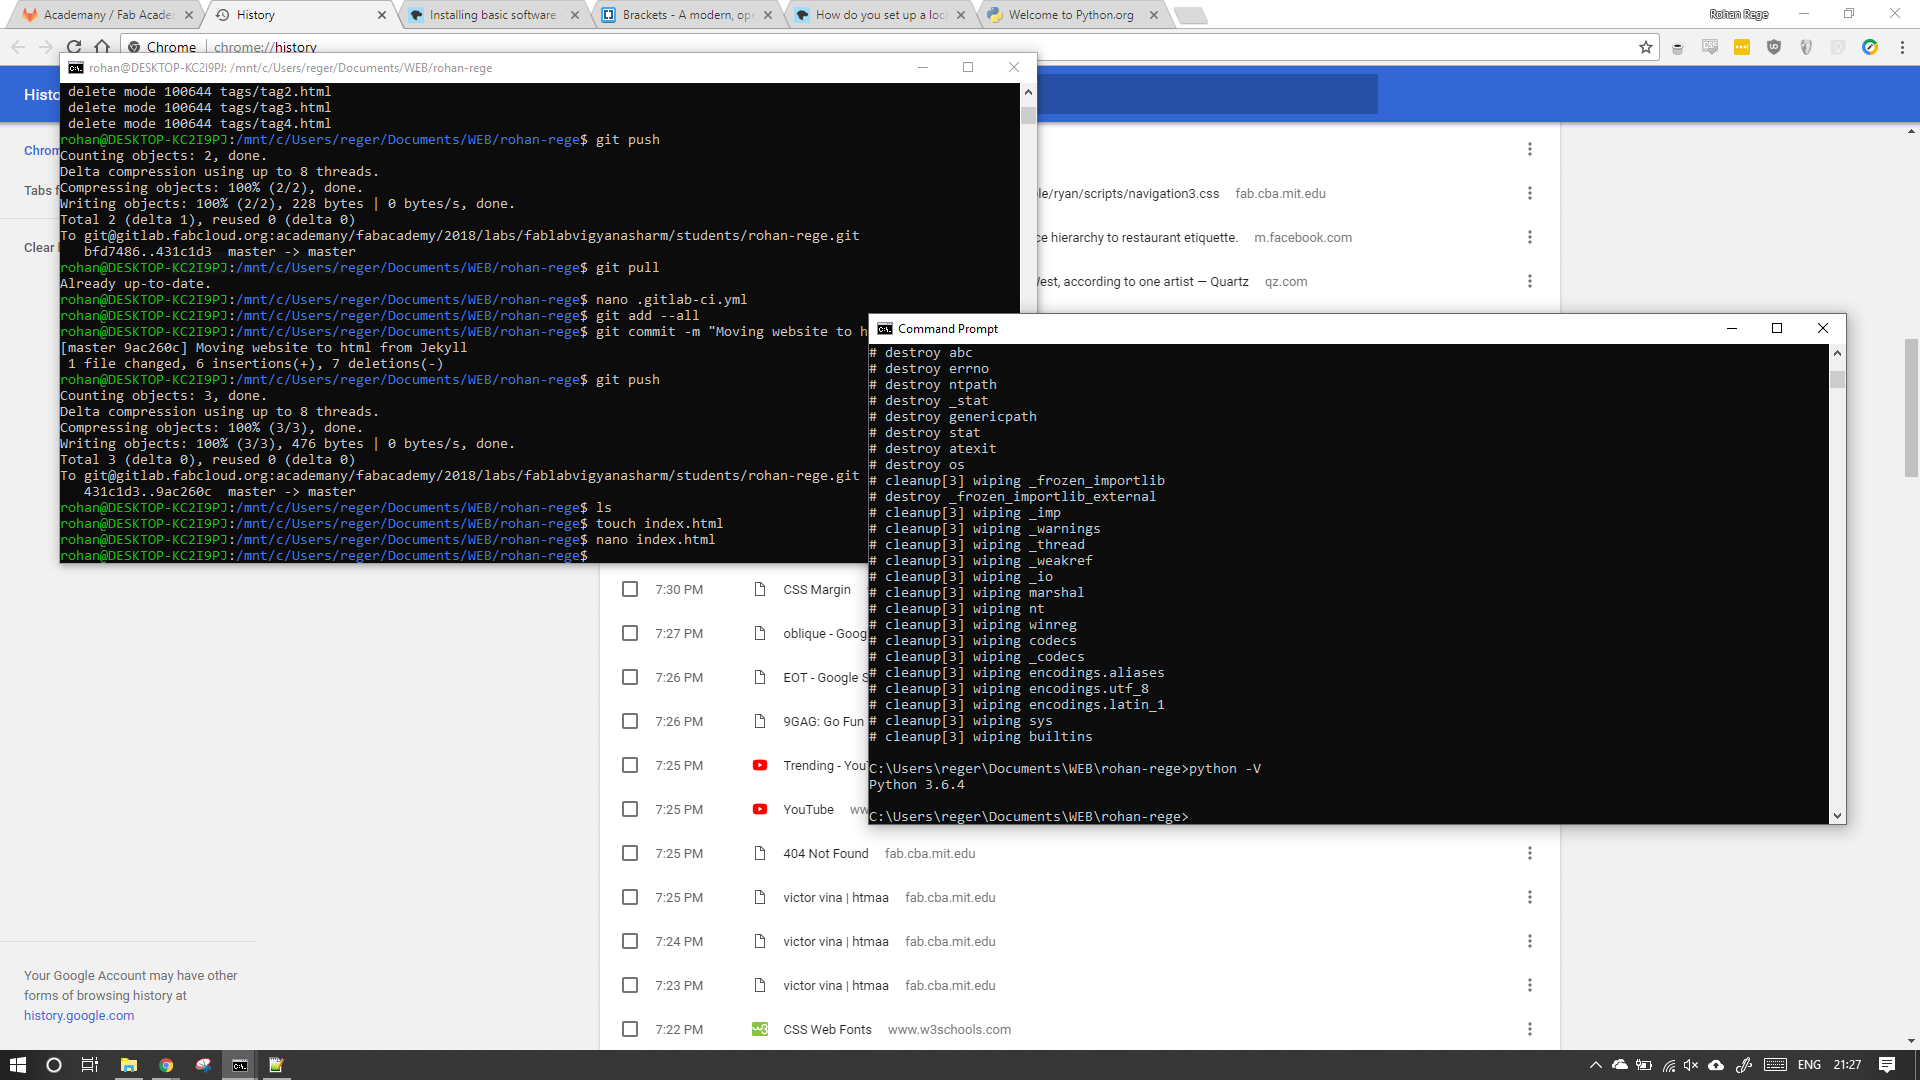
I used nano to create place holder files for index.html
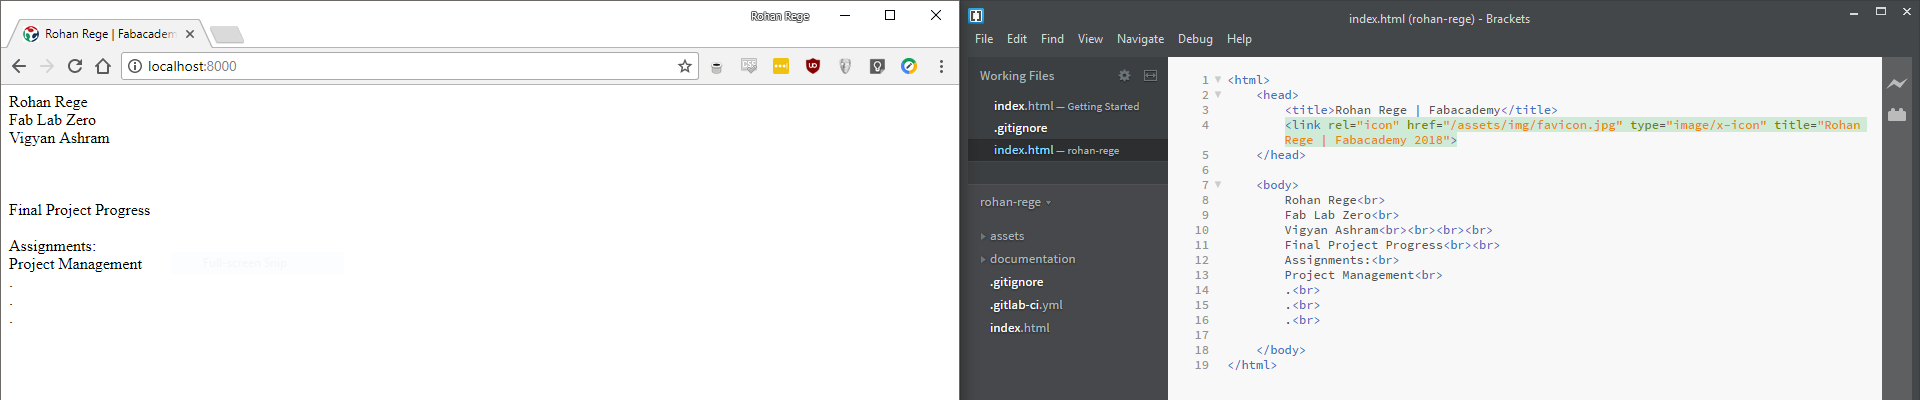
Writing code in HTML is pretty basic and by using brackets, I was ale to increase my speed by quite a lot. I created a very basic index.html page in a
matter of minutes.
Once I was happy with the content, it was time to uglify the page with CSS. Again for CSS I would recommend using the MDN resources as they are enough for both
beginer and expert. I planned to go with a notebook style webpage with adding highlights, and fun hover features.To add styles with help of css do as follows:
% mkdir /path/to/css
% touch /path/to/css/yourcssfile.css
Now add the following to the head tag of your page.
< link href="/path/to/css/yourcssfile.css" rel="stylesheet" type="text/css" >
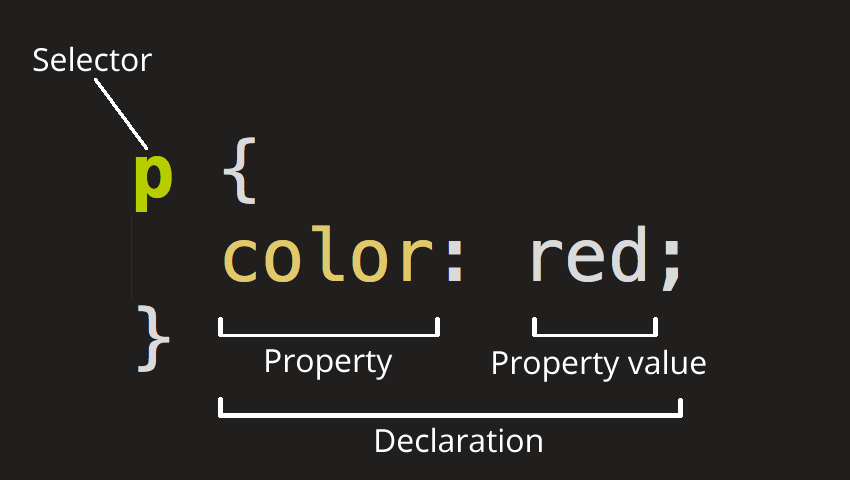
The anotomy of a CSS ruleset is as follows:
The whole structure is called a rule set (but often "rule" for short). Note also the names of the individual parts: Selector:
The HTML element name at the start of the rule set. It selects the element(s) to be styled (in this case, p elements).
To style a different element, just change the selector.
Declaration:
A single rule like color: red; specifying which of the element's properties you want to style.
Properties:
Ways in which you can style a given HTML element. (In this case, color is a property of the <p> elements.)
Property value:
To the right of the property after the colon, we have the property value, which chooses one out of many possible appearances for a given property
Git is a version control system for tracking changes in computer files and coordinating work on those files among multiple people. It is primarily used for source
code management in software development, but it can be used to keep track of changes in any set of files. As a distributed revision control system, it is aimed at
speed, data integrity, and support for distributed, non-linear workflows. -Wiki
There are many tutorials available for git, but the one I prefer is a youtube video by Code Academy
Remote Setup:
To setup your local computer with remote repository, we need to first add SSH key to the remote (Gitlab) server. To do that do the following steps:
$ sudo at install git
$ mkdir ~/.ssh && cd ~/.ssh
$ ssh-keygen -t rsa -C "mail@domain.com"
$ ssh-add ~/.ssh/id_rsa
$ cat ~/.ssh/id_rsa.pub
Your public key will be visible to you, copy the complete output starting from ssh-rsa and ending with mail@domain.com. The next step is to add the key to your
gitlab profile.
Login to gitlab -> navigate to your profile folder -> Profile settings -> SSH Keys
Now using the web editor add a index.html to your repository. Gitlab provides continuous integration and continuous deployment pipelines to test, deploy and monitor code.
To add support for CI/CD to the repository make a new file from templates choose .gitlab-ci.yml and choose the HTML from the next dropdown menu.This way our repository
is deployed as a webpage.
Local git setup:
Before using git with gitlab is needs to know who you are. To set up git execute the following commands:
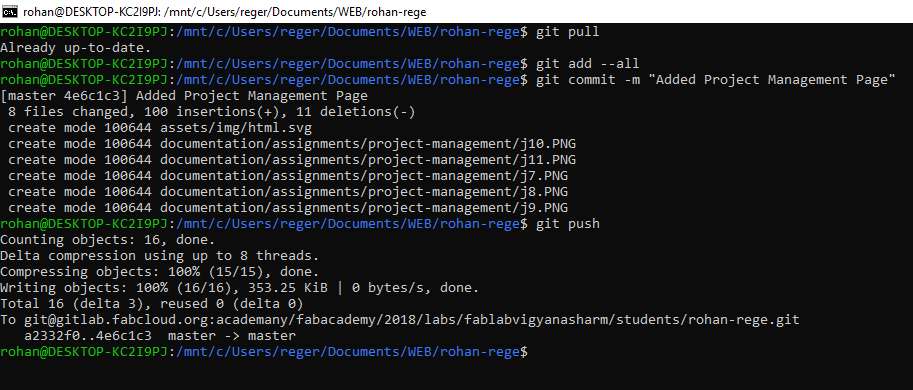
You can see the index.html and -gitlab-ci.yml files created remotely are now downloaded locally. Now copy all my HTML CSS code to this folder. Then to upload the code execute the following code:
$ git pull
always do git pull before starting to work so as to merge any changes made to the remote repository.
$ git add yourfilename
or to all multiple files at once
$ git add --all
$ git commit -m "Your comment"
Enter your comment after -m if you don't, git will a txt editor and you'll have to enter a comment there.
$ git push
Your output should be similar to mine
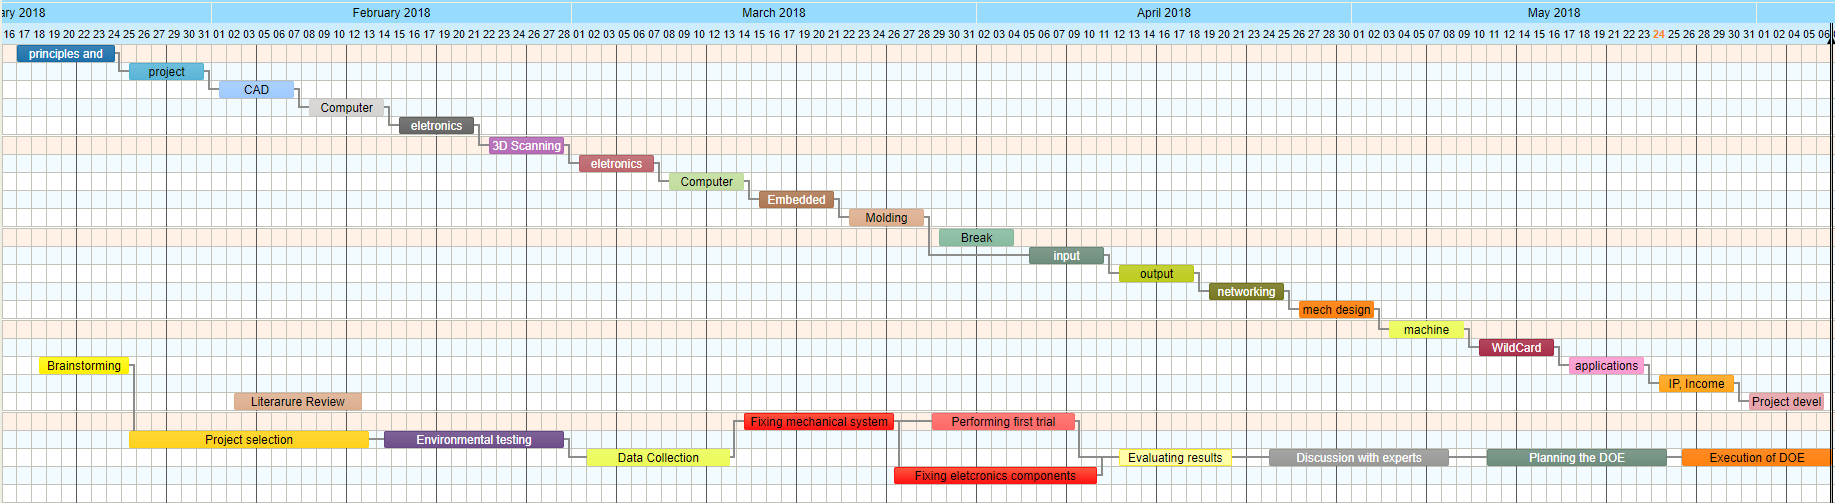
I have also created a Gnatt chart for project management. I always made gnatt chart but never followd it before. hopefully this time will be different. To make a ganatt chart I used Toms planner. It is a online tool with paid and free options. I have used the free option.
There are two parts to the chart. The top part is as seen the chart for the fab academany assignemnts.
The bottom part is my project plan
 3: Work through a git tutorial.