This week week the goal of the assignment was to study embedded programming . Embedded Programming is programming of the microcontroller . This is primarily done in embedded C . Embedded C is the lowest level of the programming language . This week to study embedded programming I programmed my hello world board . My Hello world board contains Attiny44 . which made by Atmel . Following is the data sheet of it
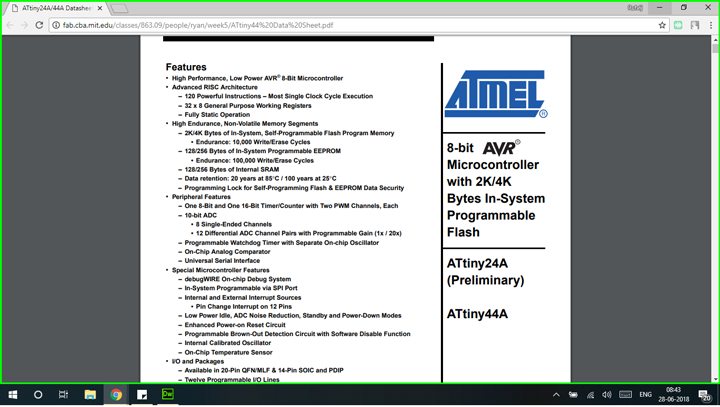
This is the first page of the datasheet which shows the features of the IC . This pages breifly mentions all the functions of the IC .
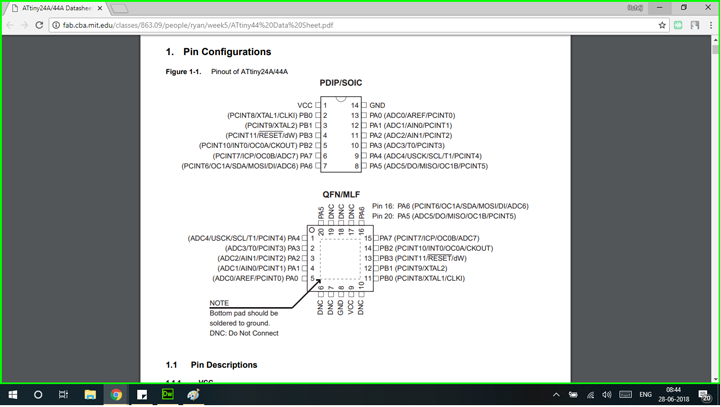
This is the pinout diagram of the IC . Pin-out diagram of the IC means that the physical mapping of the pin in the block diagram to the IC. This is extremely helpfull in desingning as some pins in your design can be interchanged but some cannot be changed which have specific functions . For eg : The common IO pins can be interchanged between the each other to simplify board design . Serial Communication are hardwired into the IC , that cannot be changed .
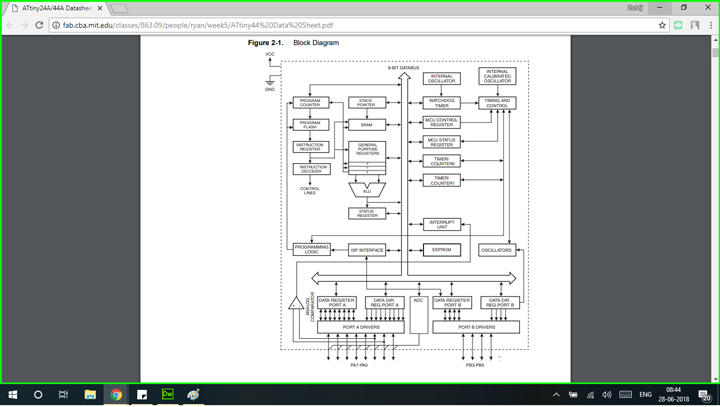
This is the block diagram of Attiny. This shows the registers which are present inside the IC .These registers are also defined in the code macros .
To understand embeded programming , we must understand the physical structure of it (pic of block diagram to be added ). In the following picture . You can see the ports of the IC . Each of these ports has a dedicated register which sets or resets . This particular register is R/W i.e read and writeable . In the simplest case if I write "0010" to the Port A . which is 4 bit register . PA3 , PA2 will be low , PA1 will be high and PA0 . This is basics of the logic which is used to toggle the ports pins .
Programming the hello world board
Embedded C ( GIT BASH )
Embedded C is quite extensvely used in programming micro-controllers . This directly addresses the registers of the microcontroller . Various function are defined as Macros . These macros can be defined in a library this the most effficent way of coding . Embedded C can be directly done using Atmel Studio . Following series of screenshots show programming the hello world to blink using the Embedded C platform. This language has a stiff learning curve . in this case it is done using GIT Bash along with AVRDUDE .
,
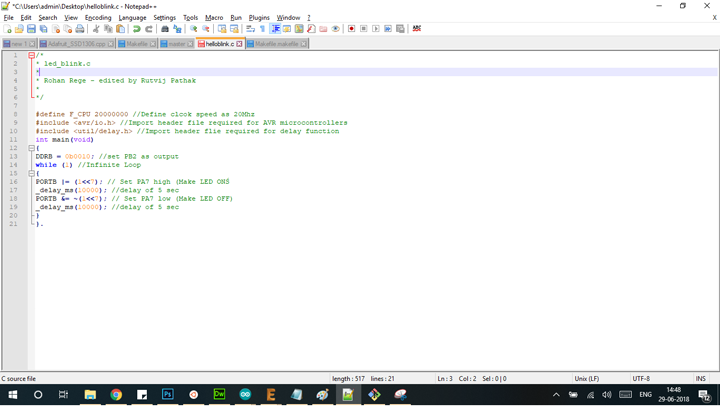
This is the C code to toggle a single pin of the Attiny44 .
Code is as follows . First the clock frequency of the Attiny is set using F_CPU at 20 Mhz . Basic header file for the input / output and delay is imported into the code .
The main loop starts where DDRB (Data Direction Register of Port B )register is set with " 0b0010 " which denotes that only PB2
Next a while loop is added with a delay function to switch ON or OFF the LED
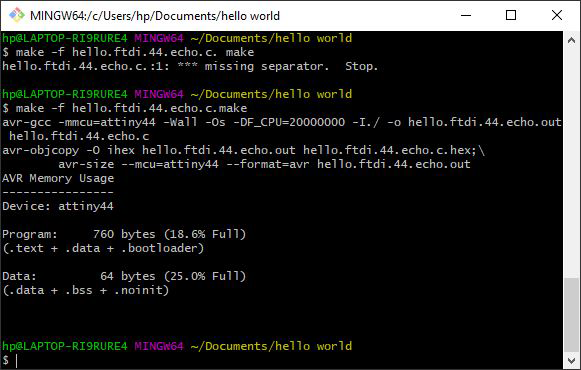
This is the Git Bash GUI which we used in the electronics production week . here the c code can be compiled using "make -f filename.c "
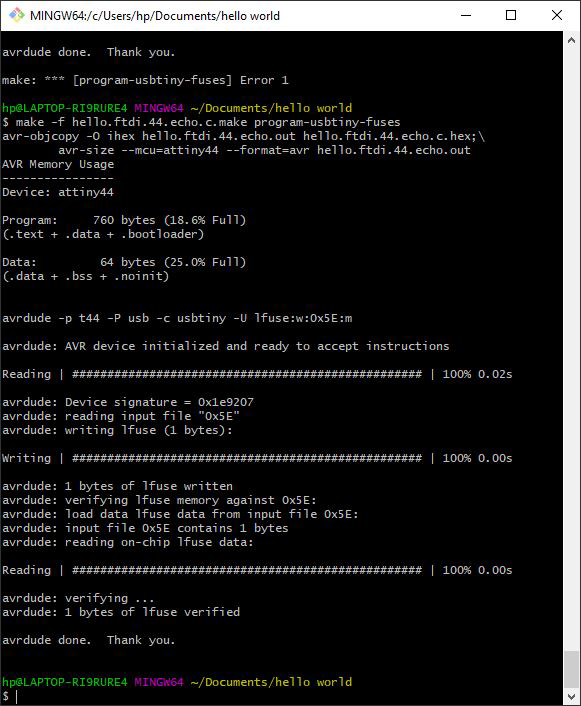
This is the burning of the code in the helloworld board using avrdude .
Programming using Arduino
,
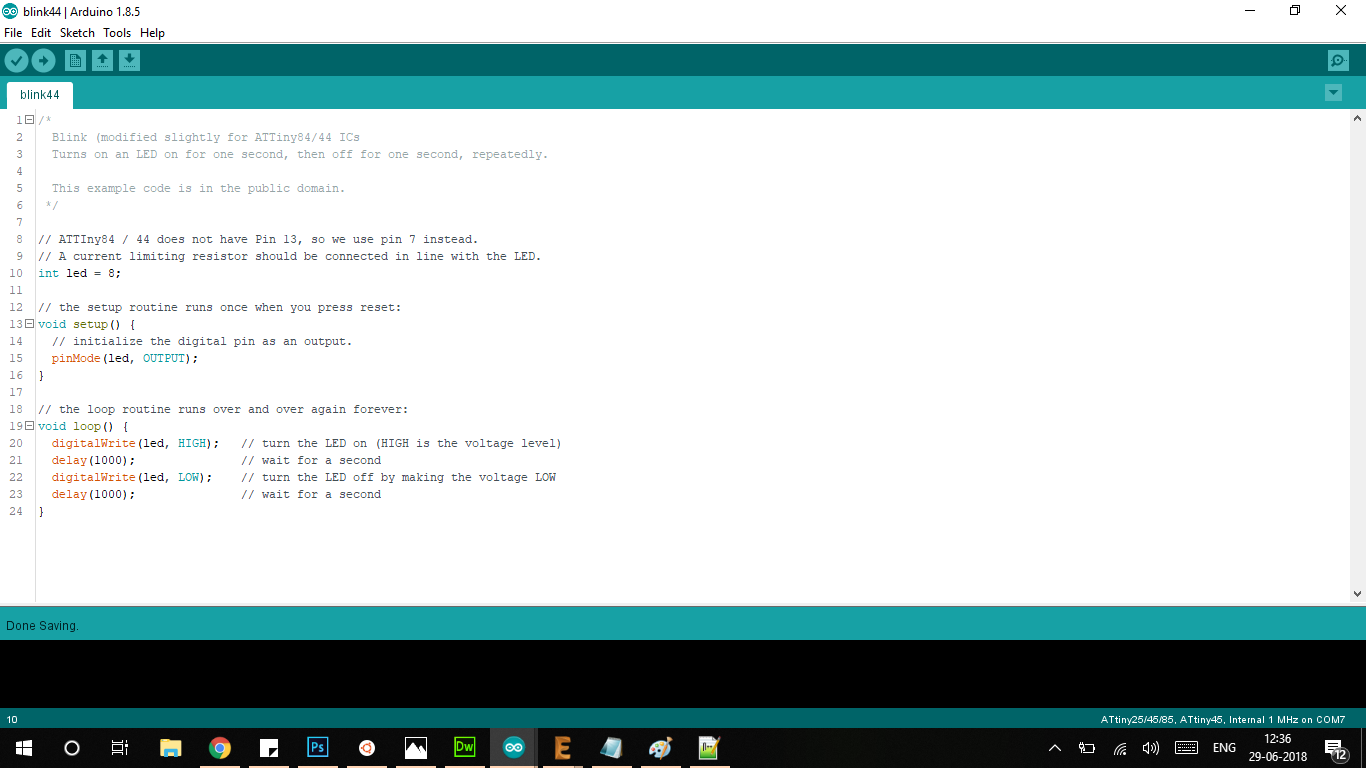
Following is the same blink code but in Arduino . Notice the functions which for toggling the pins . This function is defined as PinMode (pin, mode) this function defines the mode of the pin . I.e it can be either input or output
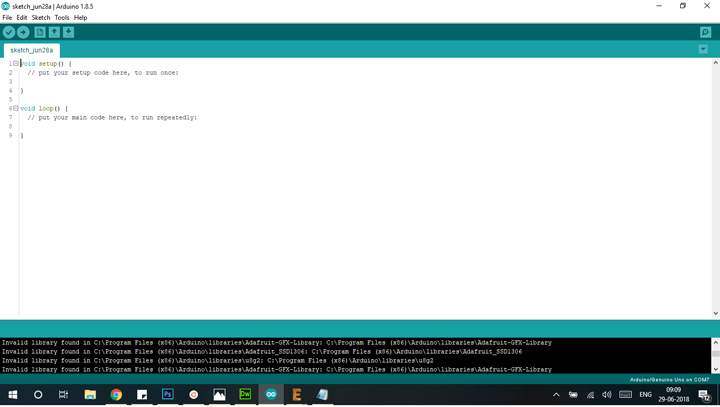
This is the main interface of the arduino when it starts . This is the most basic program i.e it called a blank sketch .
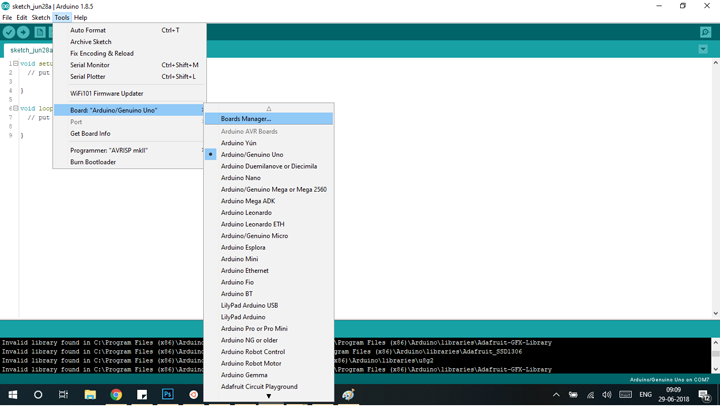
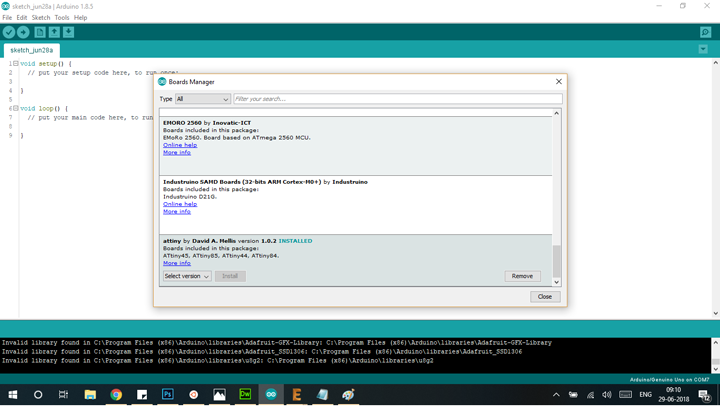
This is the board manager which can be accessed using tools > boards > boards manager can be accessed .In this particular instance , to program Attiny 44 we need to add additional boards and programmers . This can be done using the following process
This is the dialog box which can be used to add additional boards in this case "Attiny by David A . Melle ". This allows the user to add various IC's which are supported in the Arduino Environment .
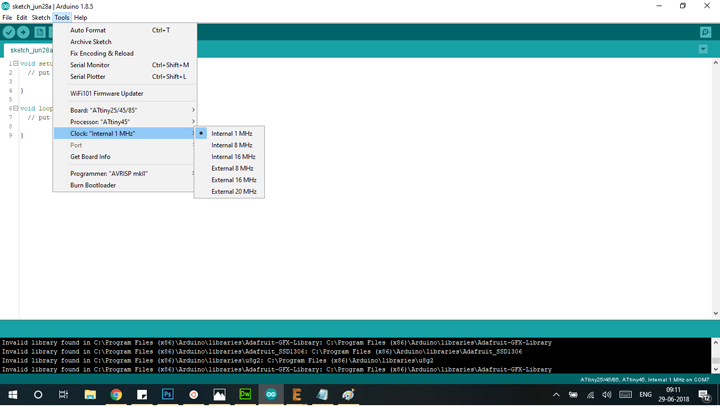
Choosing the configuration of the IC to be used . Clicking here we can acces the various boards and programmer options which are available inside the arduino environment
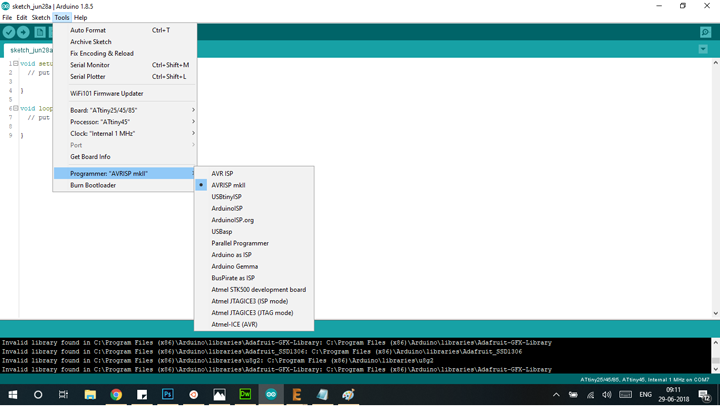
Choosing the programmer to be used from various options which are available . These programmers have small differences which can result in errors if chosen incorrectly .
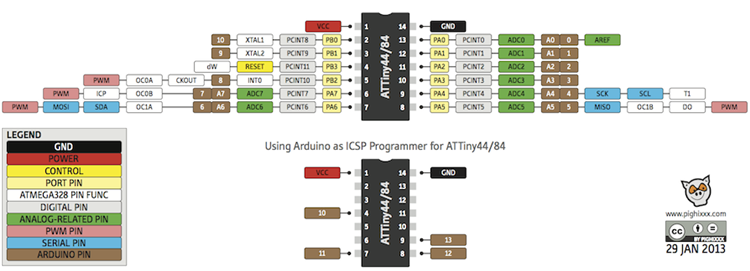
This is the pinout of the Attiny44 mapped with respect to the Arduino IDE.
This is the code required for blinking the led on the arduino board.
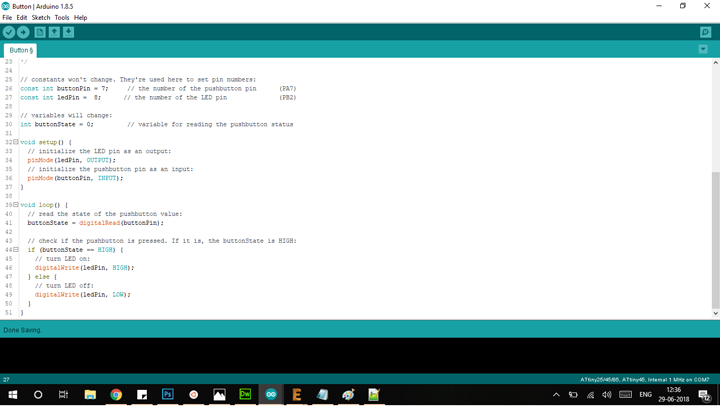
This is the code required for switching OFF the led when button pressed
This is the working of the HelloWorld boards illustrated in a video .