Describ what I learned by testing the 3D printers
I have some considerations to do this activity:
- Is important cilinders have a minimum diameter of more than 4mm
- Flat surfaces should have a minimum thickness of 3mm
- It improve the communication between the designer and the client
- To ‘see’ designs at conceptualisation stage.
- It saves time in the design stage.
- 3D scanning is used to ensure that parts fit together first time, without multiple iterations.
- You can get some virtual models and from physical ones, the details depend of the IR Cam Sensor
- Help to remanufacture parts when there is no CAD
- Fast, comprehensive quality control.
- 3D scanning is a fast, accurate way to digitise and archive artefacts.
- 3D scanning allows designers to update manufacturing methods.
- 3D scanning can transform the process of creating tooling for components.
- The prices of the service are very high.
- 3D printing will destroy some business companies, becouse allows to design our own models and don't depend of buying elements made.
- The printing time is slow
3D Scanning
- 3D scanners can be very slow, all the data adquisition could have problems if have too much light in the workspace.
- The clarity of the image may not be the best, is important to use mesh software to correct the element
3D Printing
3D Scanning
DISADVANTAGES
3D Printing
I have learned the filament properties of PLA and ABS as options to print
Lets check this PLA filament datasheet, click to this link
Lets check this ABS filament datasheet, click to this link
Below I share a summary of the mechanical properties and some characteristics of the ABS and PLA filaments
| Properties* | ABS | PLA |
|---|---|---|
| Tensile Strength** | 27 MPa | 37 MPa |
| Elongation | 3.5 - 50% | 6% |
| Flexural Modulus | 2.1 - 7.6 GPa | 4 GPa |
| Density | 1.0 - 1.4 g/cm3 | 1.3 g/cm3 |
| Melting Point | N/A (amorphous) | 173 ℃ |
| Biodegradable | No | Yes, under the correct conditions |
| Glass Transition Temperature | 105 ℃ | 60 ℃ |
Show how I designed and made the object and explained why it could not be made subtractively
Group Activity
It is important to make an adjustment kit to verify the tolerance and resolution that the PLA filament has for printing our models.
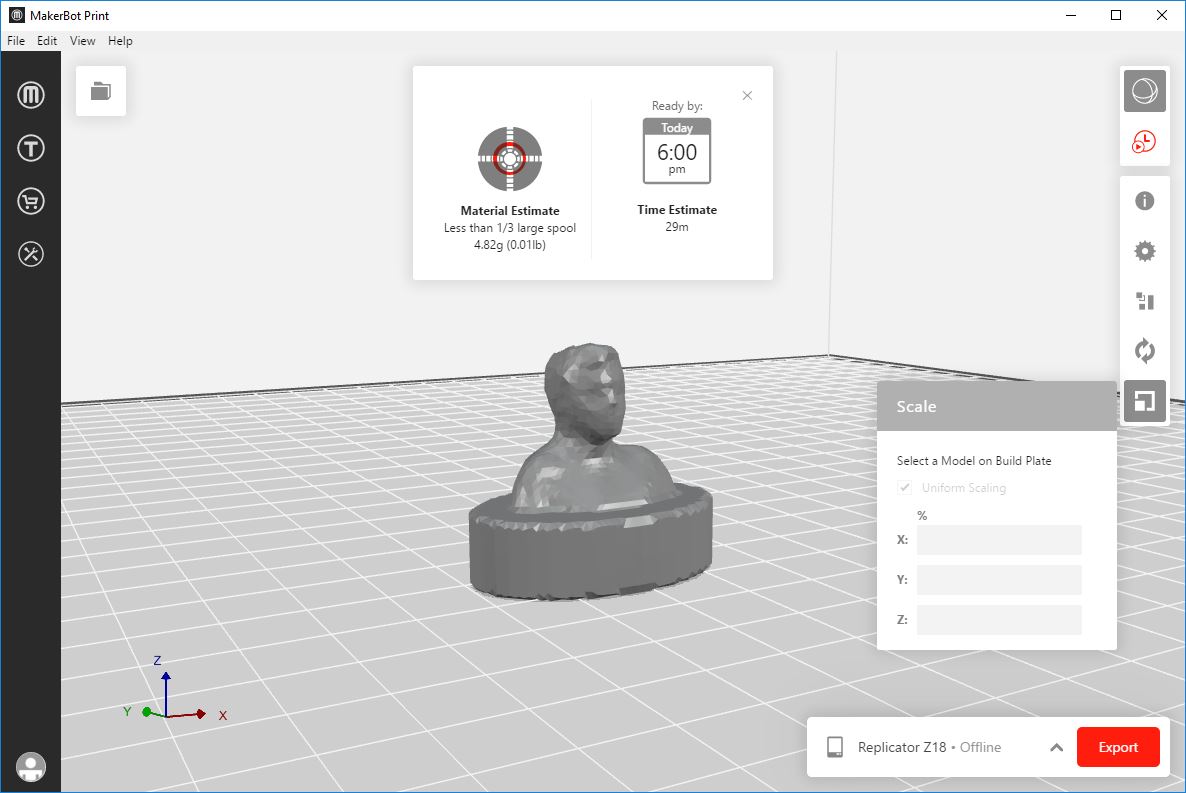
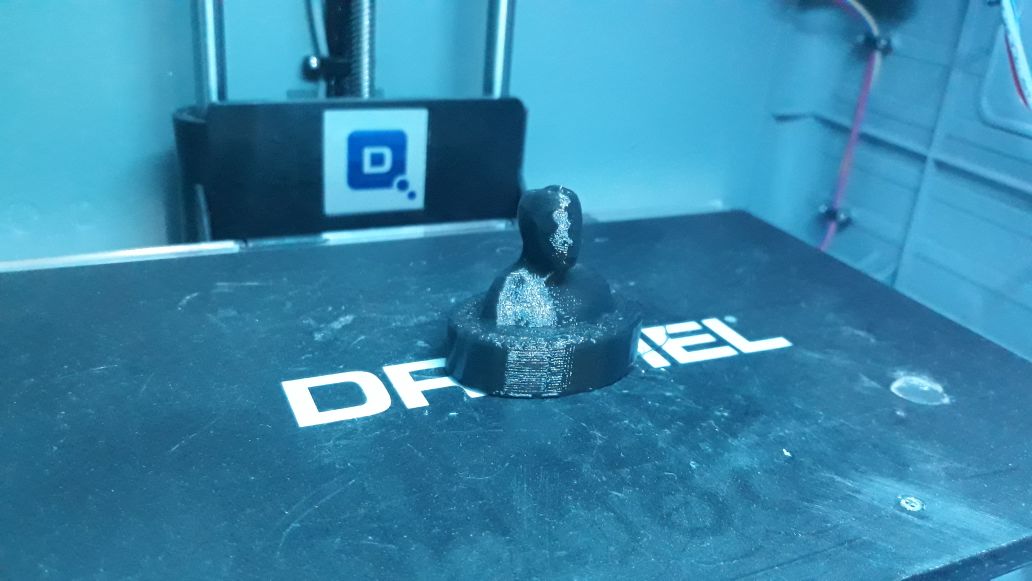
David Arias, a FabAcademy´s teammate has proposed a Press Kit design to complete grupal activity, these elements were designed to check the fit between two PLA pieces, eaach piece has a specific diameter. To this activity I have clon his design on AutoCAD 2018 2D and 3D

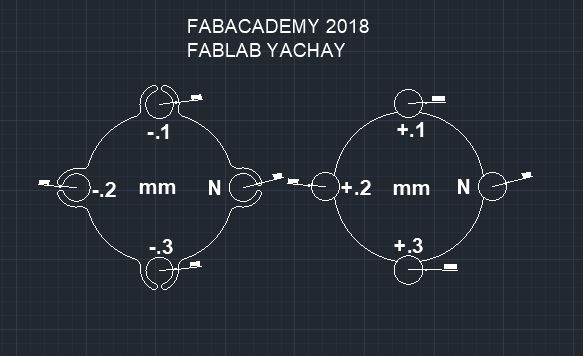

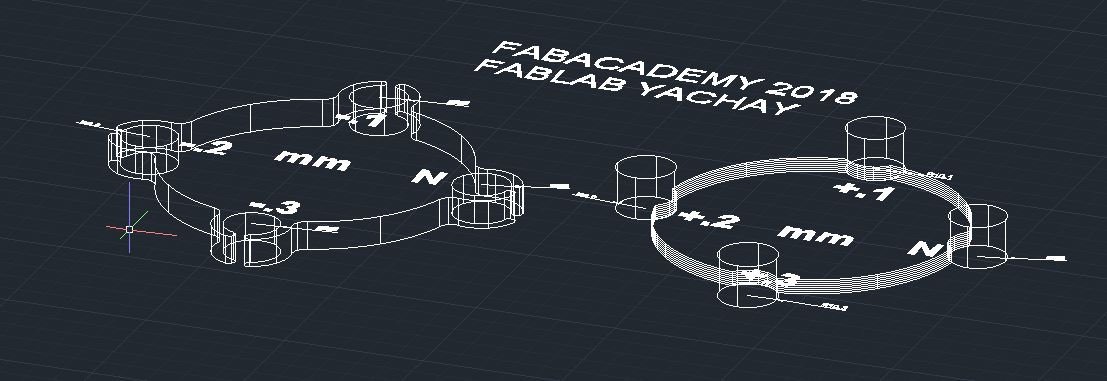
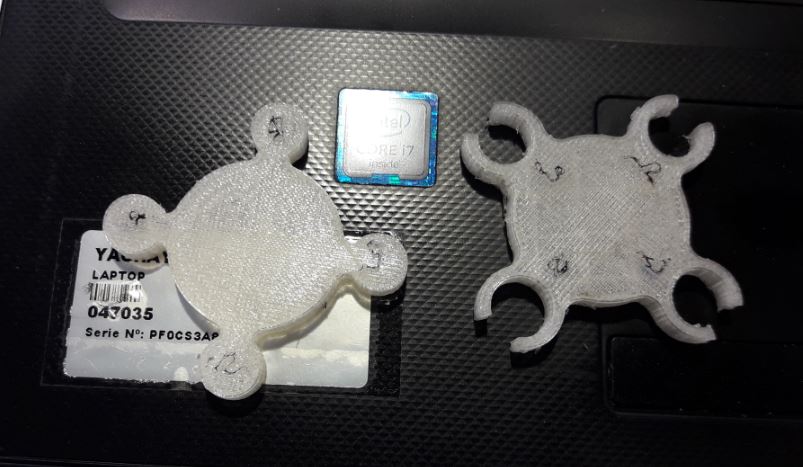
When the design is finished, let's save as .STL or .OBJ file to print on PLA filament, and the result is this:
 p
p 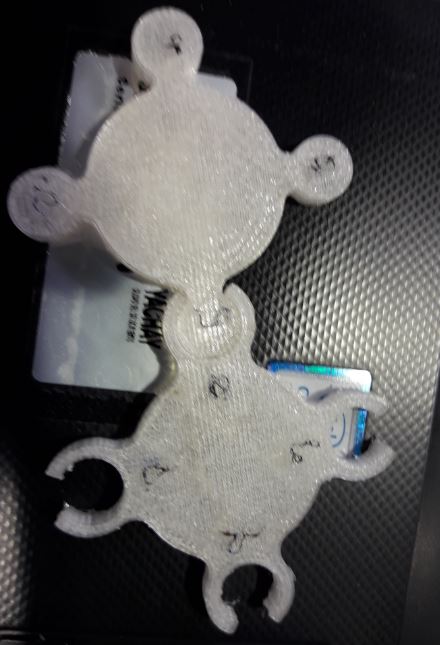
Individual Activity
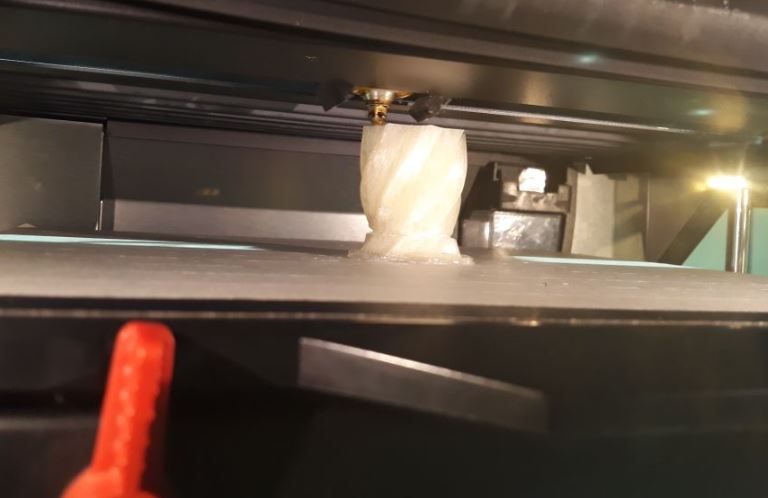
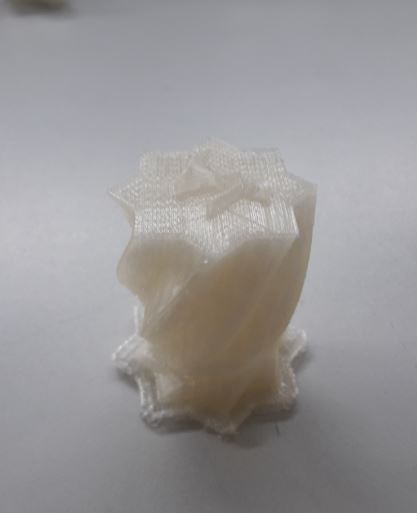
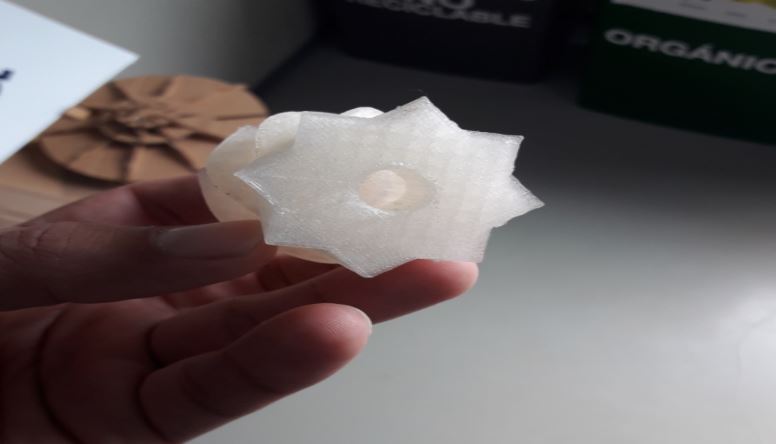
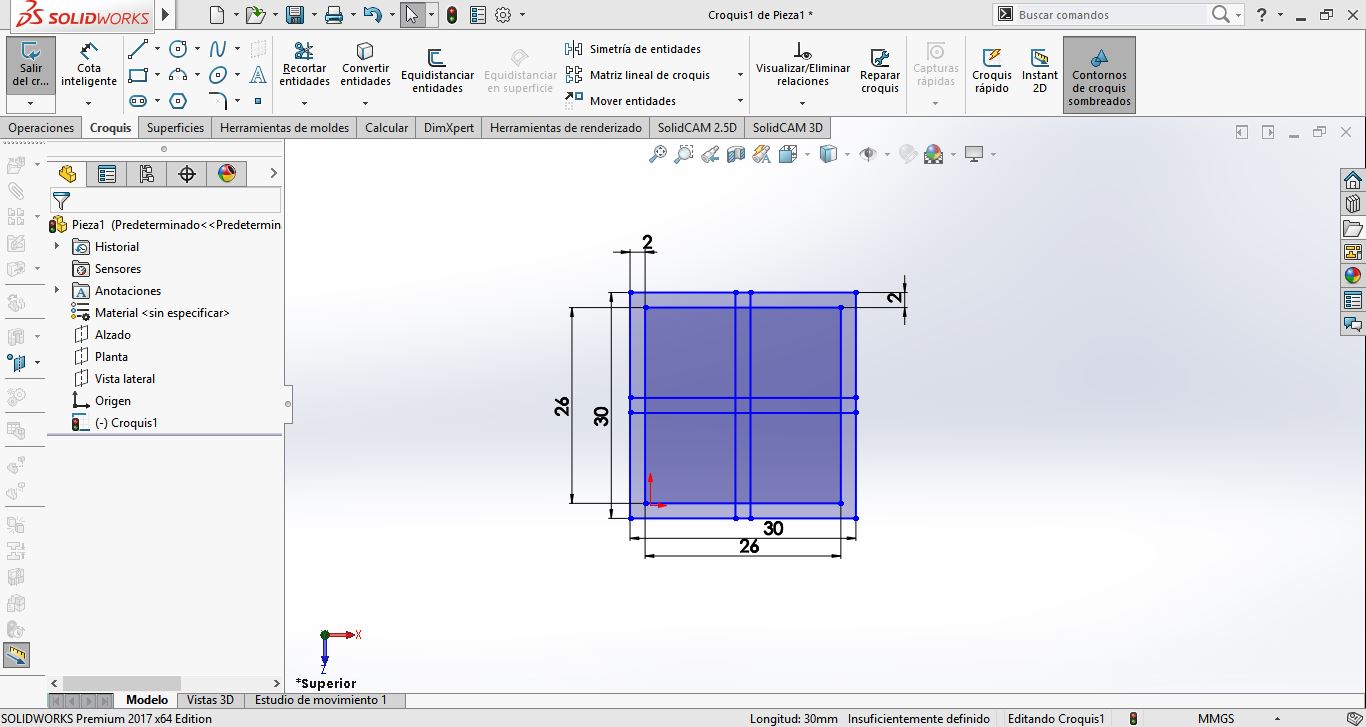
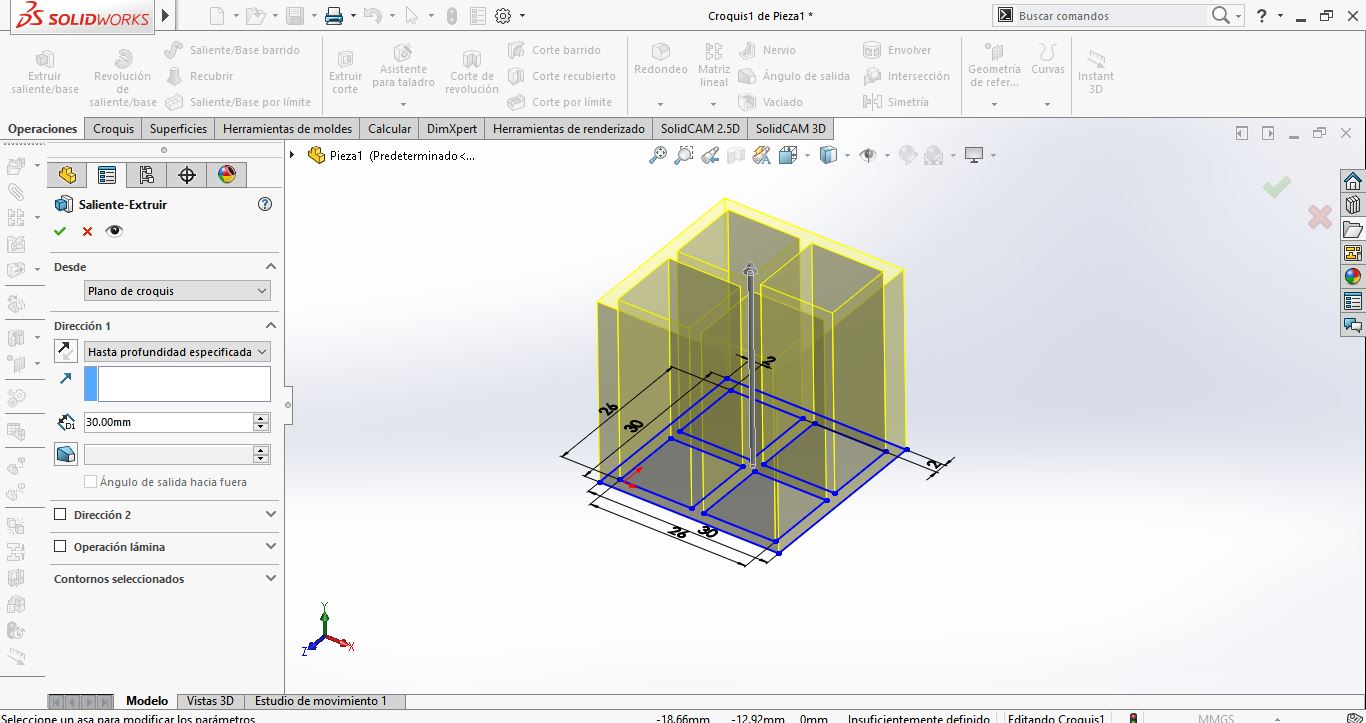
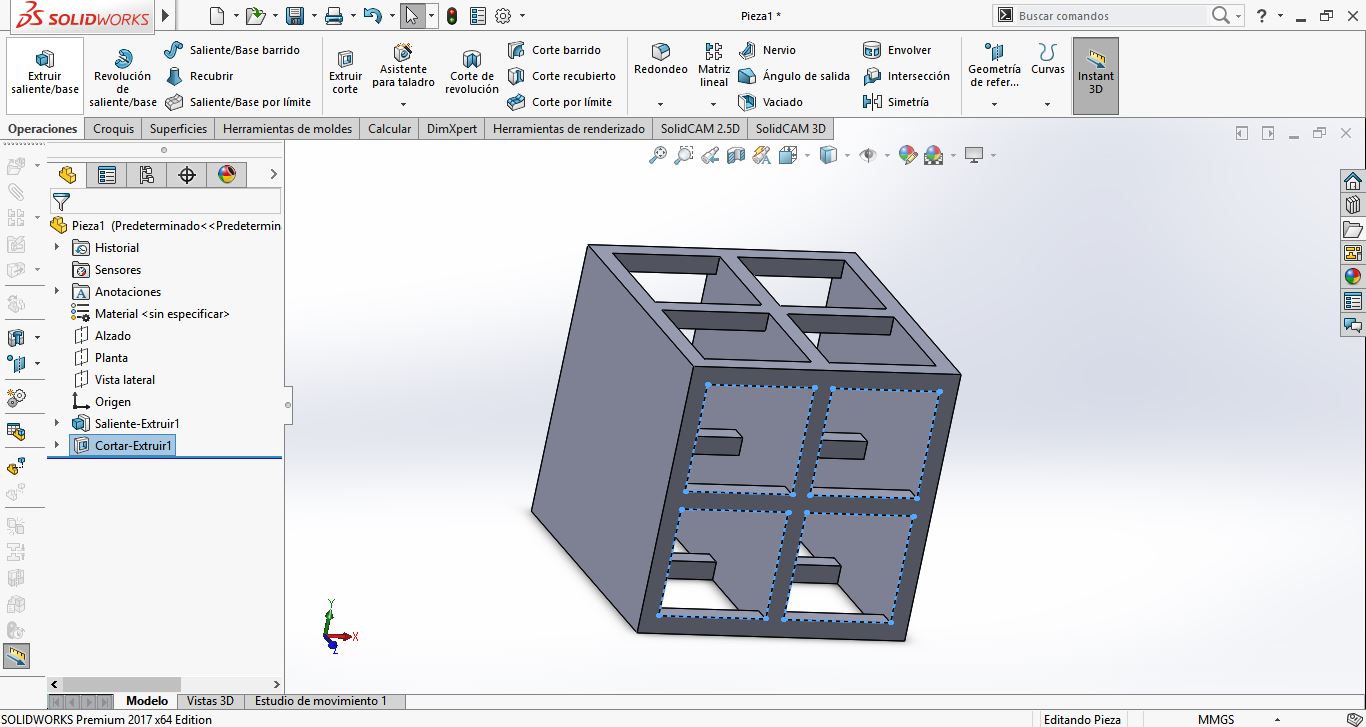
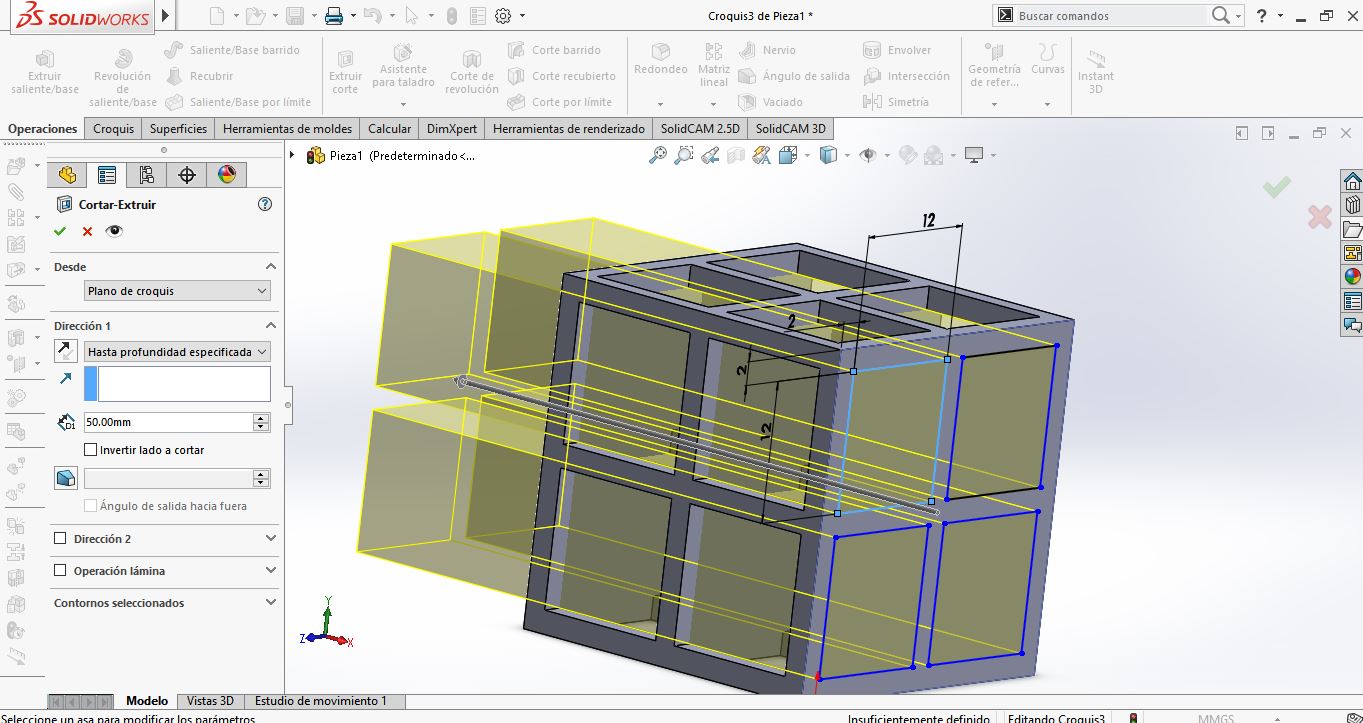
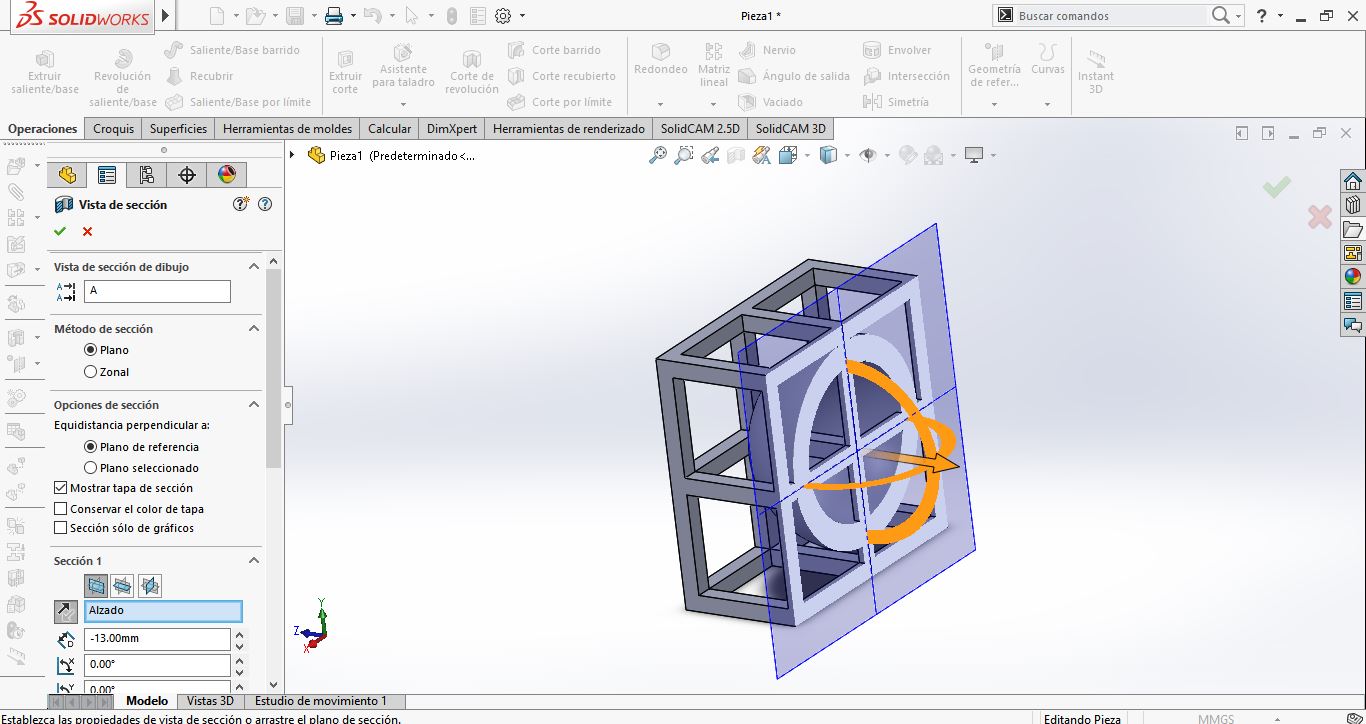
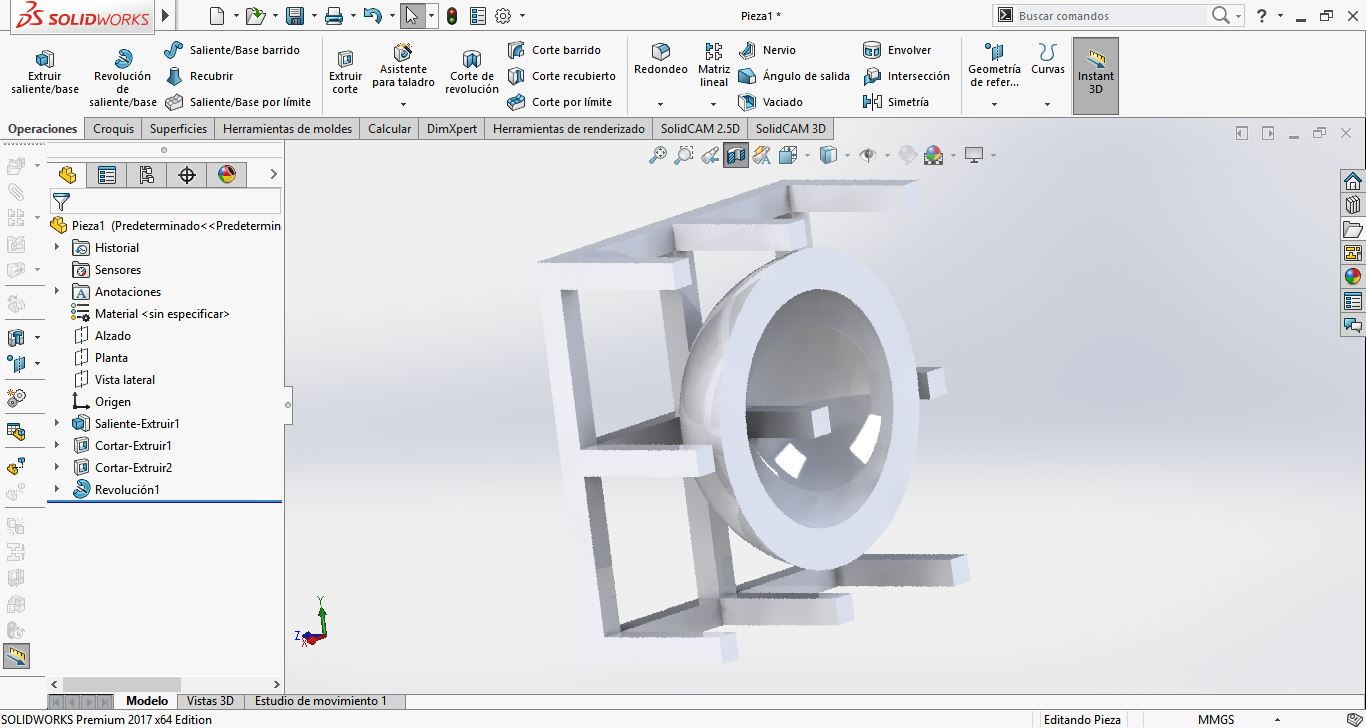
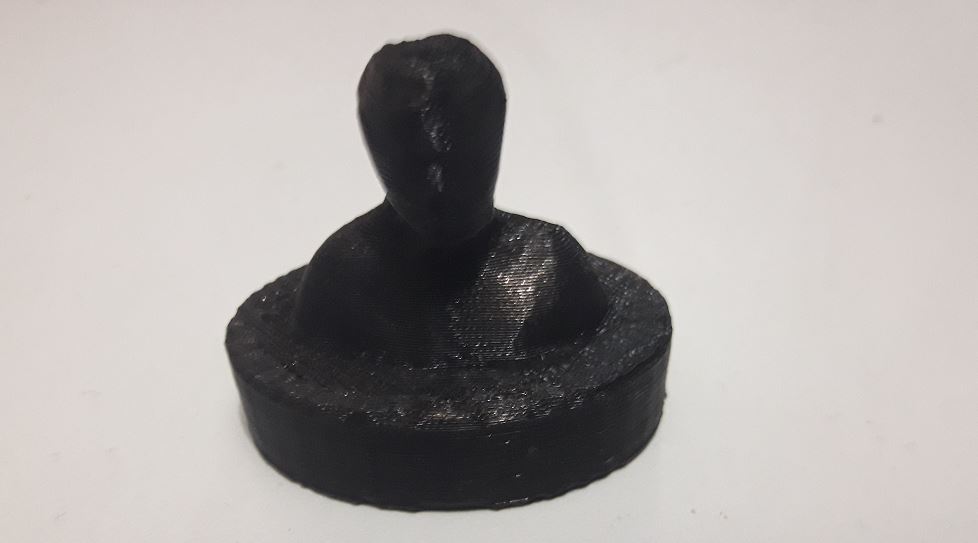
Next we propose the development of a piece designed in SolidWorks that fulfills the characteristic of being manufactured by addition, the design consists in the development of an extrusion of a star profile with rotation, inside the piece has a neck of 2cm and an internal emptying of the material. Below we can see the development procedure in the design software and its manufacture in PLA material:
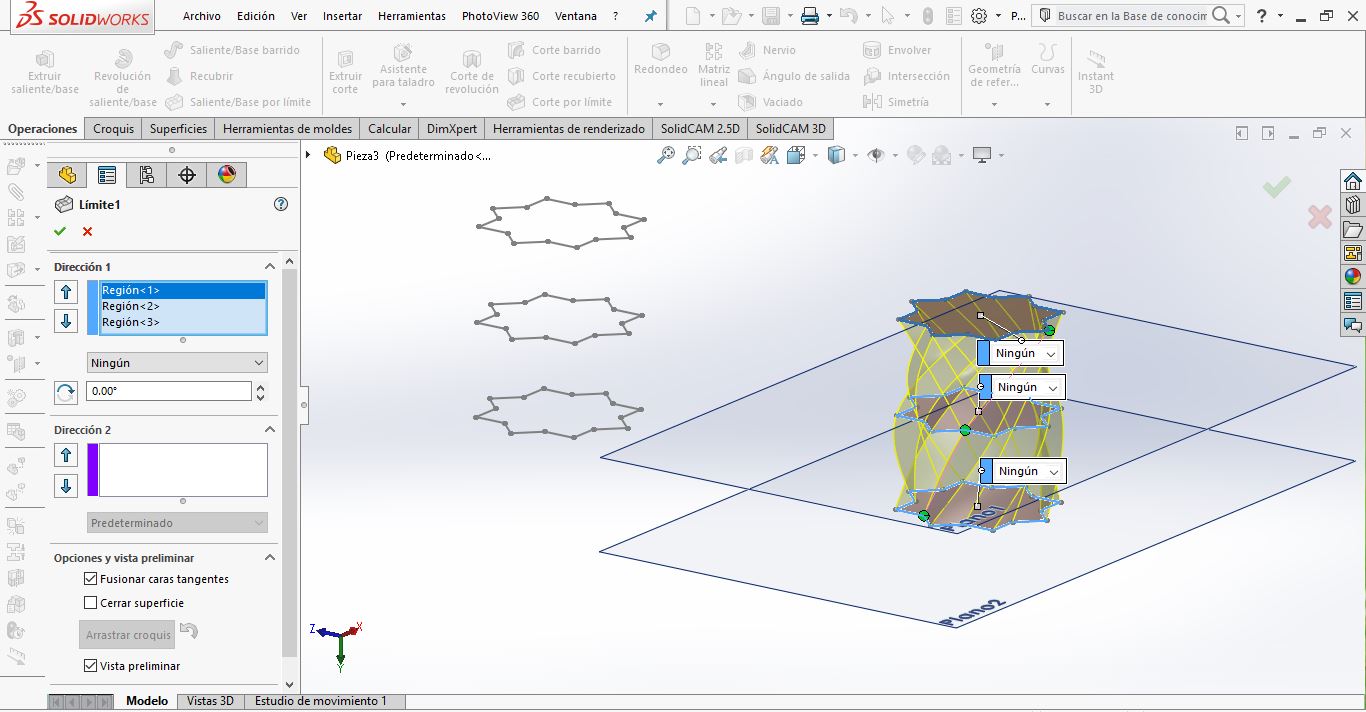

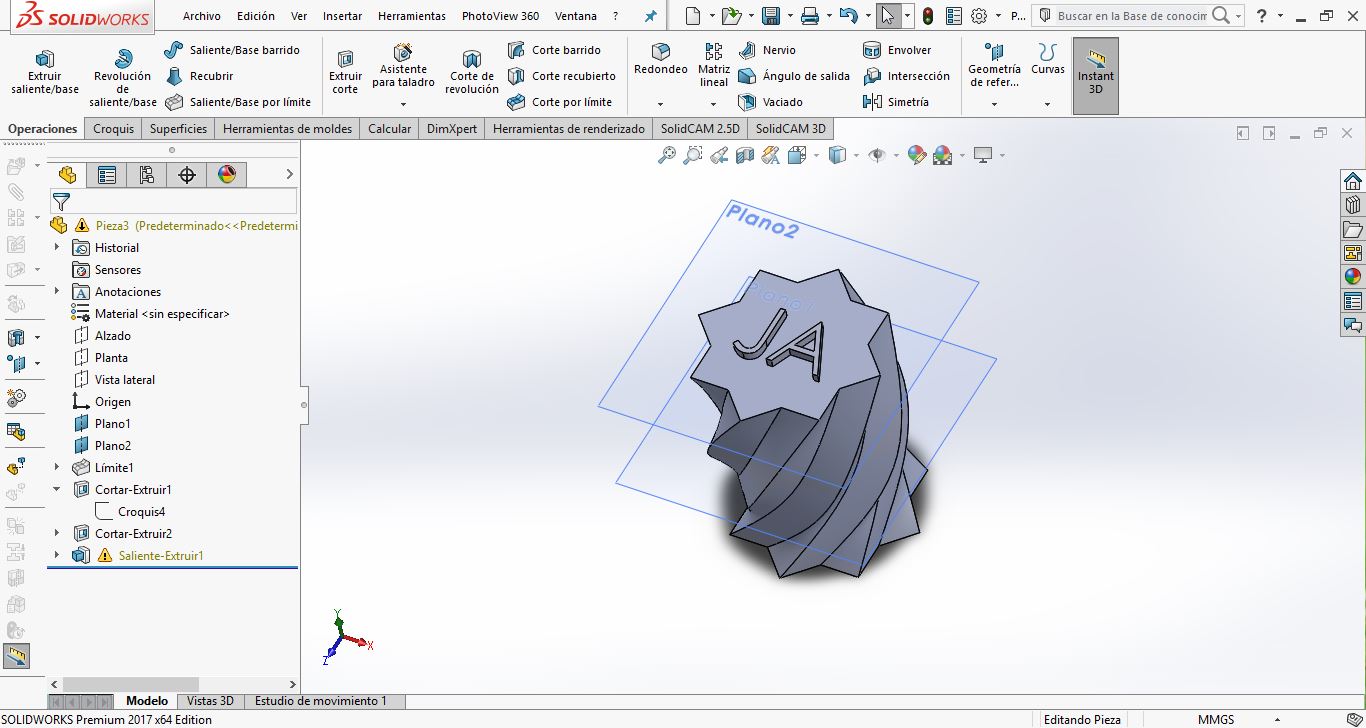
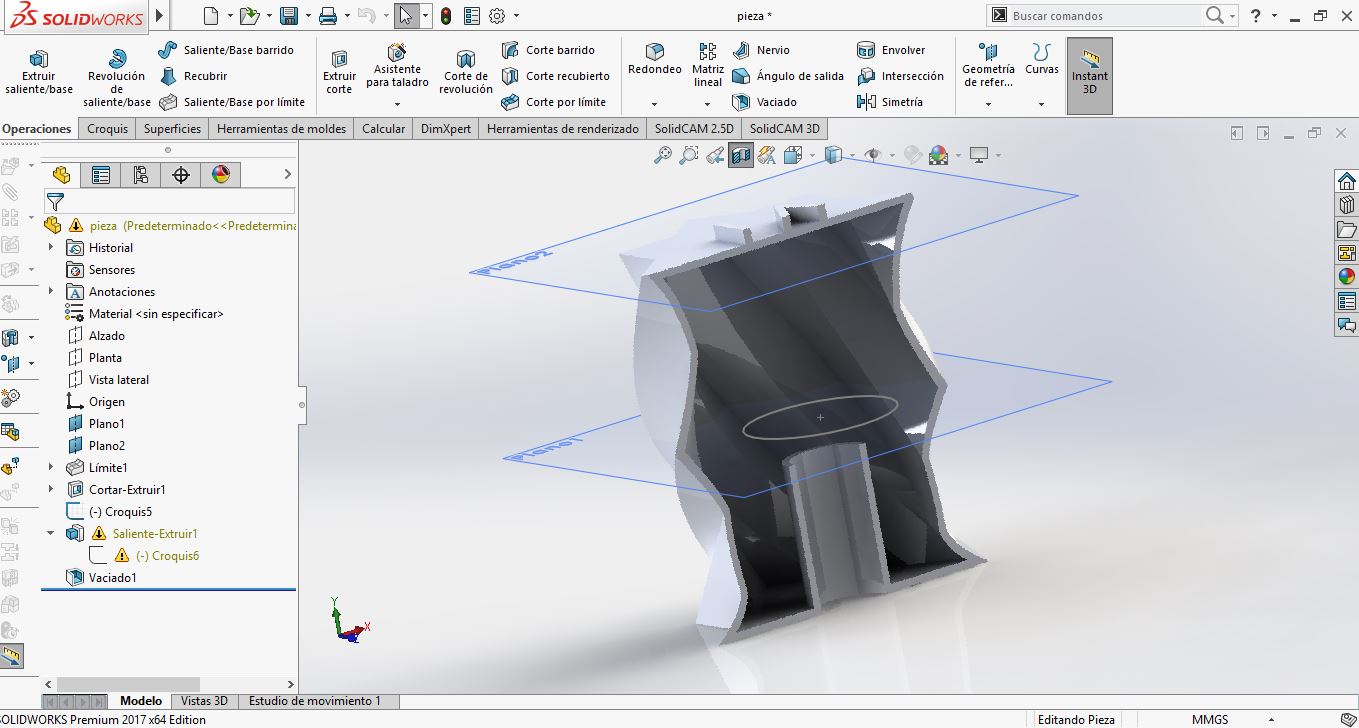
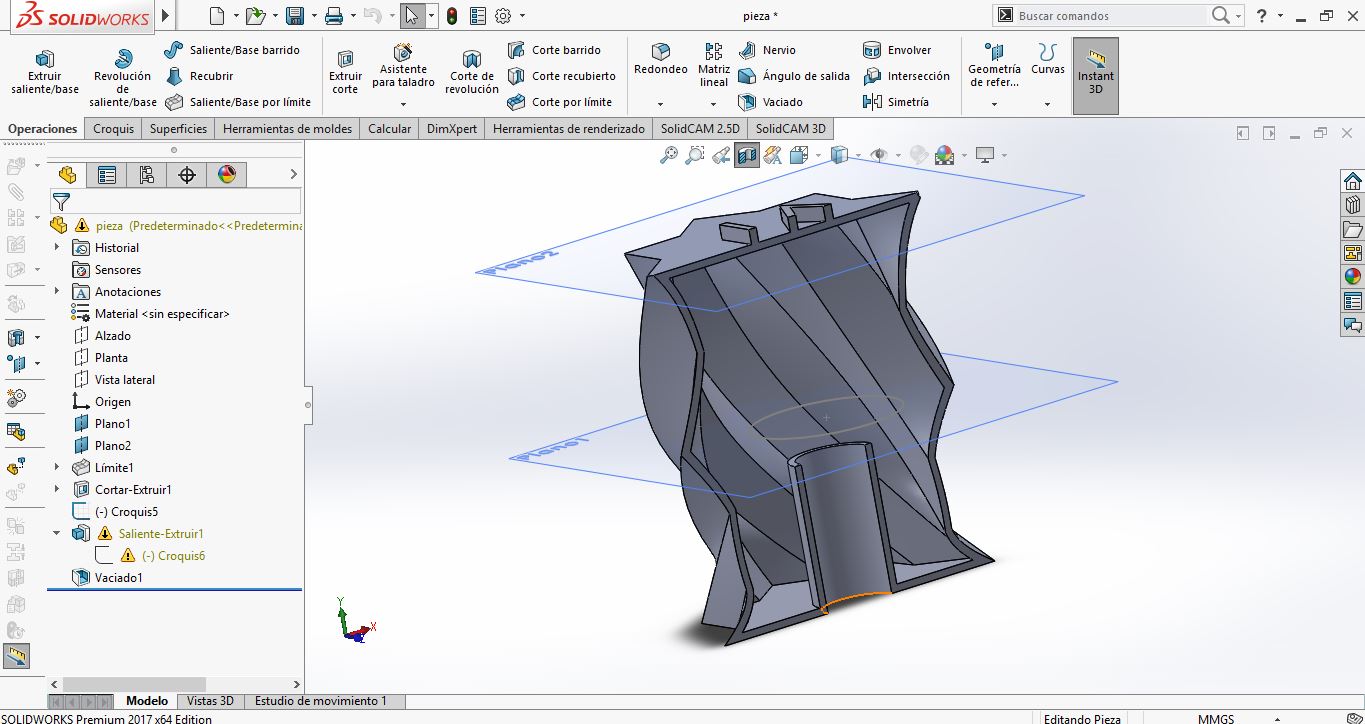
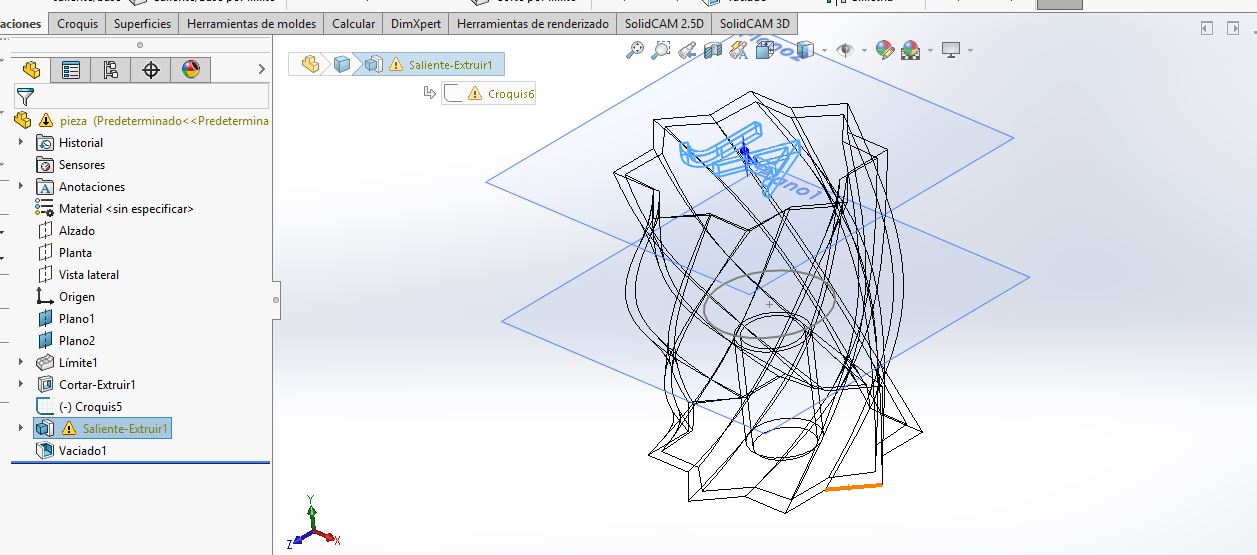
Its important to save the model in .STL extension.
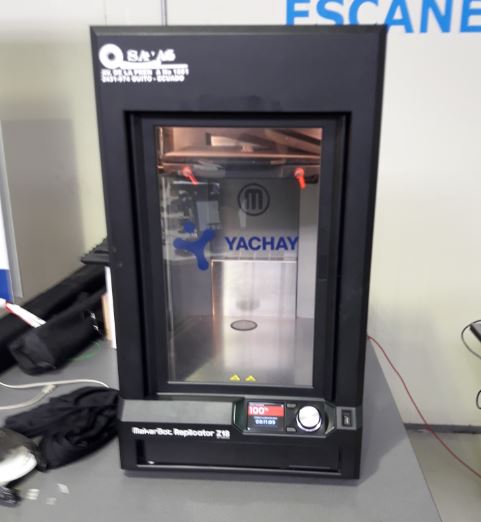
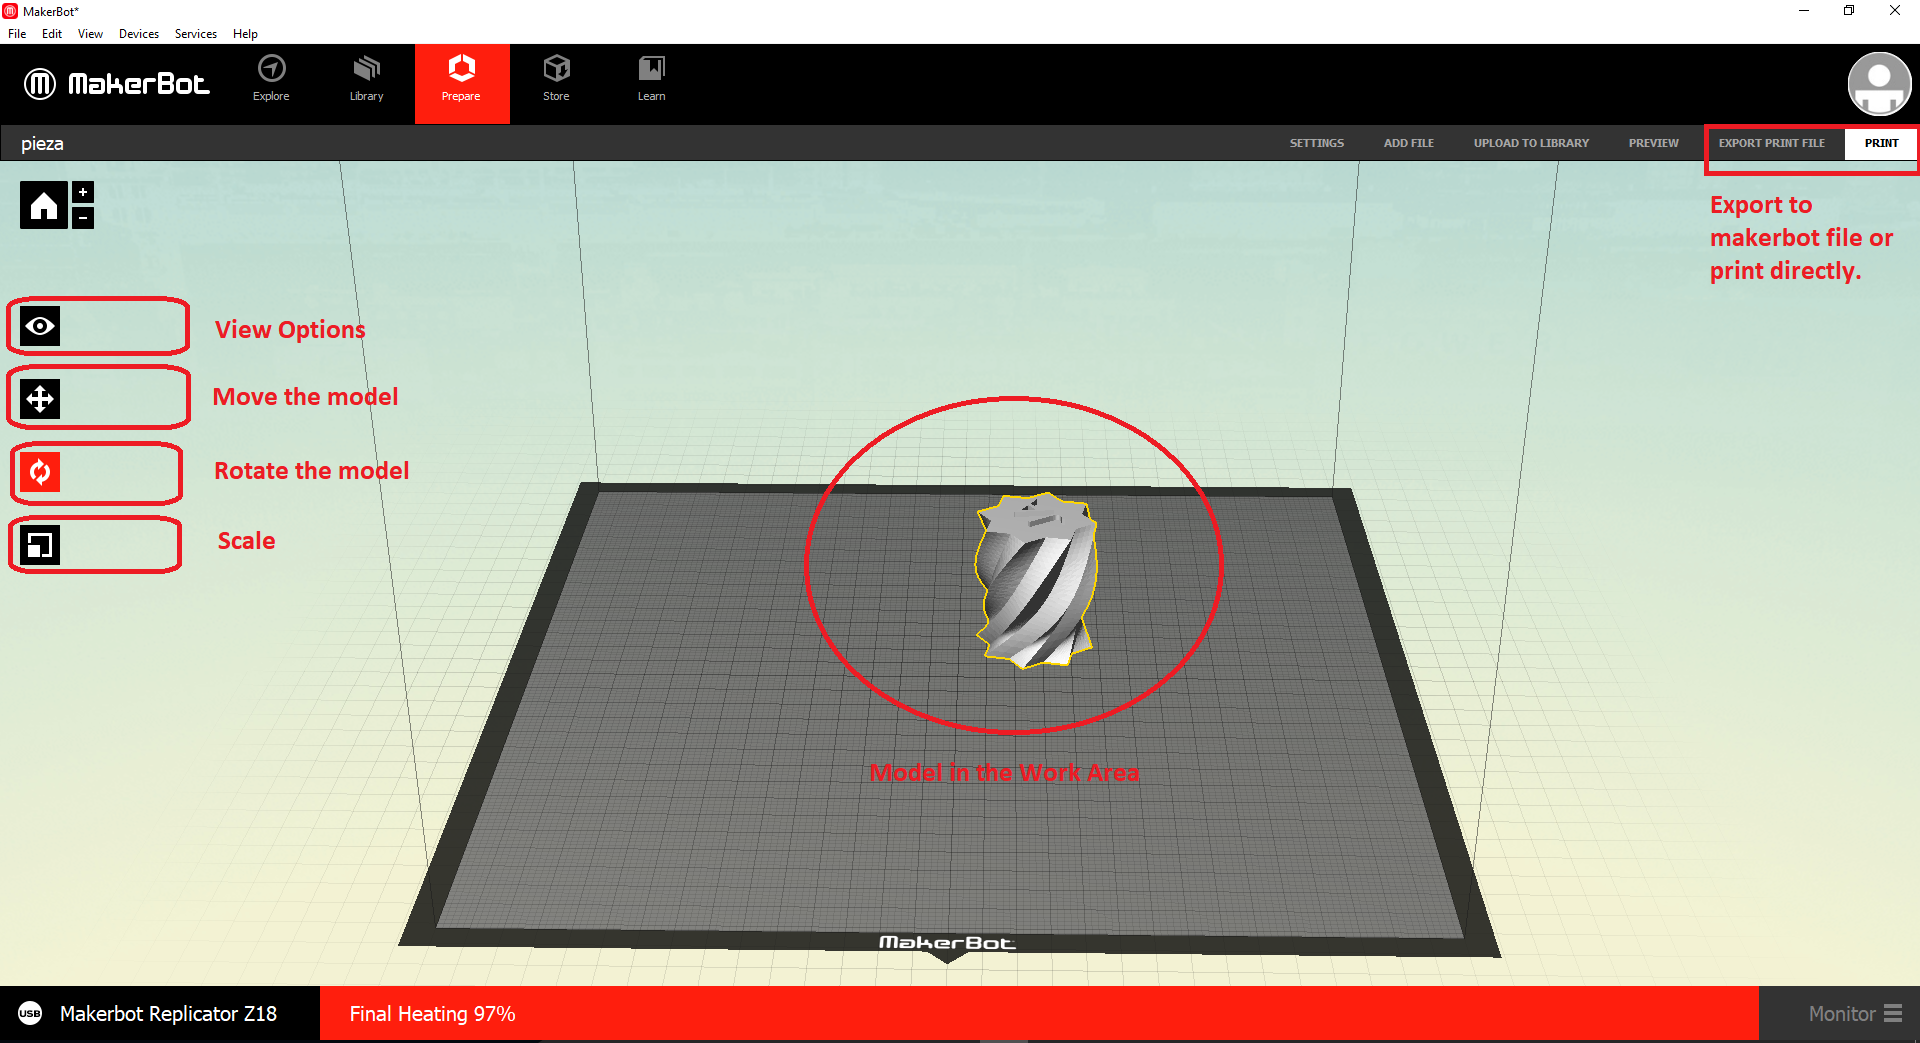
To print the element it's necesary to specify the 3D printer that I going to print on. I'll work with a Makerbot Replicator Z 18, in this link you can see all the printer characteristics. Is important to specify the workarea space that I'm going to use.
It has 2,592 CUBIC INCHES, 30.0 L X 30.5 W X 45.7 H CM, 11.8 L x 12.0 W x 18.0 H IN
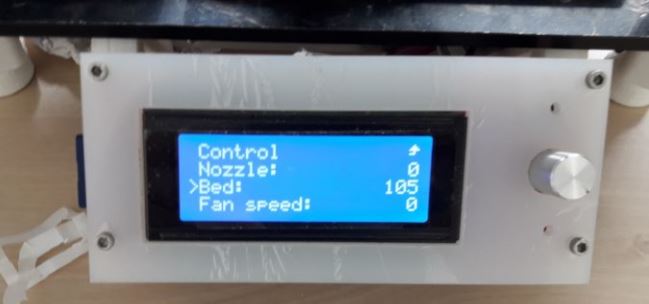
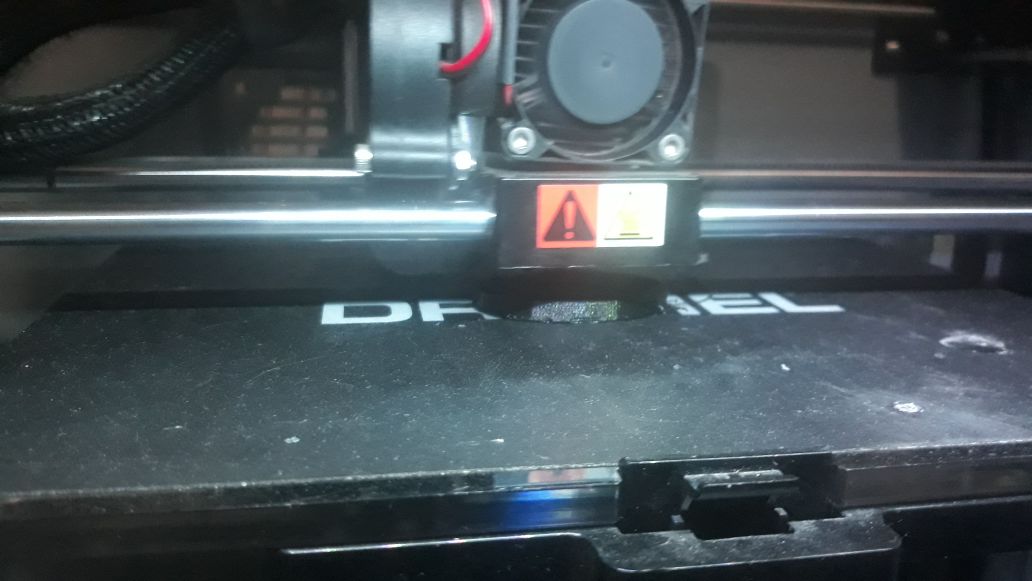
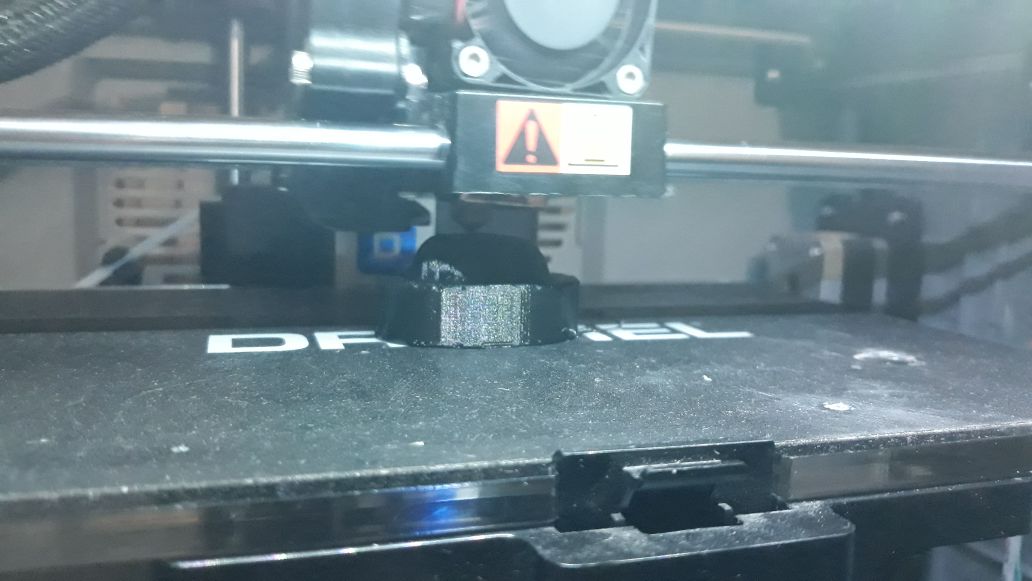
To use the machine is important to connect to the power, then turn on the switch located on the back.
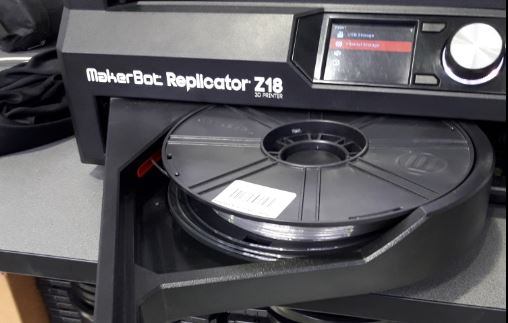
Once the machine ON, is important to feed the 3D printer with a filament roll PLA on the filament compartment, shown here:
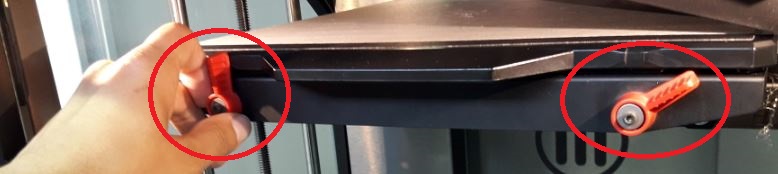
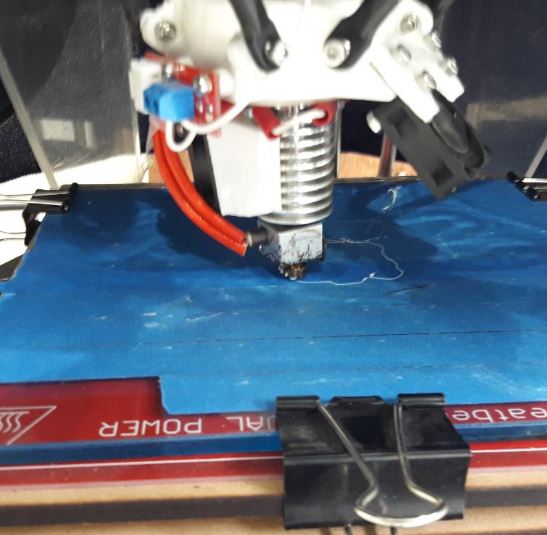
Then it is necessary to prepare the tray, I recommend to put masquin tape on the base and then put glue stick so that the element is not stuck to the tray at the time of finishing printing. When the tray is placed in the work area of the printer it is necessary to place the securing devices to adjust the tray to the printer
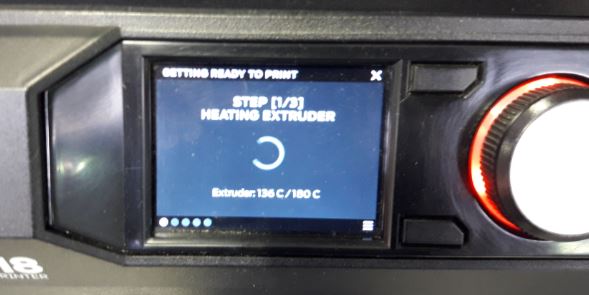
Finally, let's change the file extension in our design in Makerbot software, need to configurate and save some position parameters and send to print.
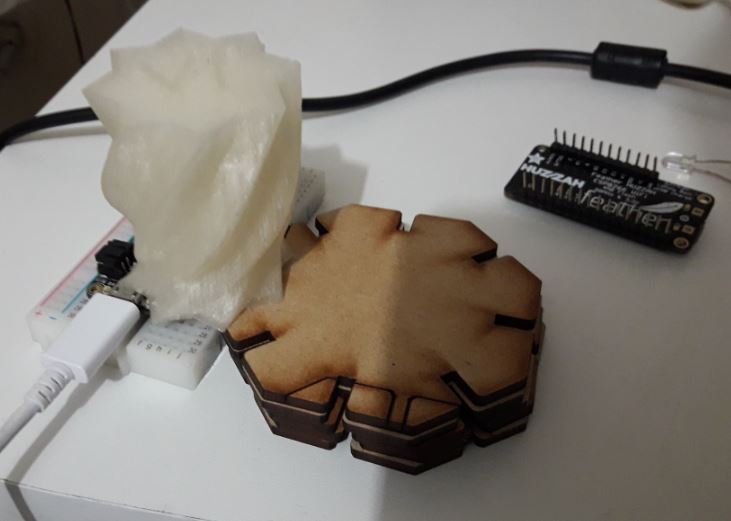
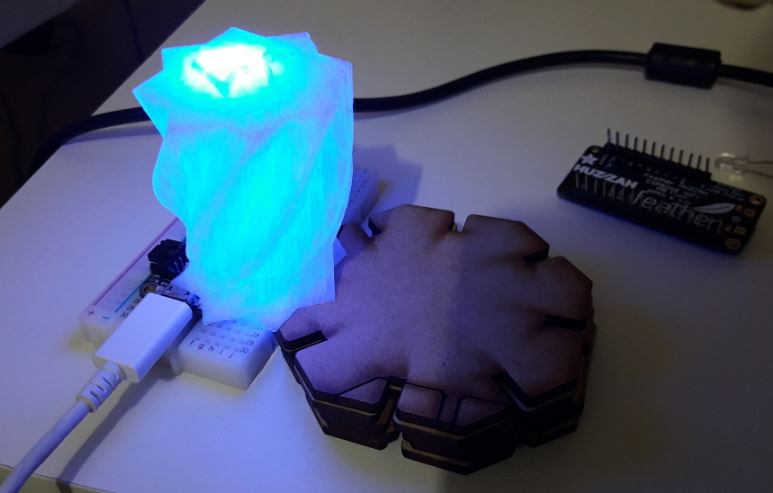
Now, im going to use the model with an electronic circuit to interact.
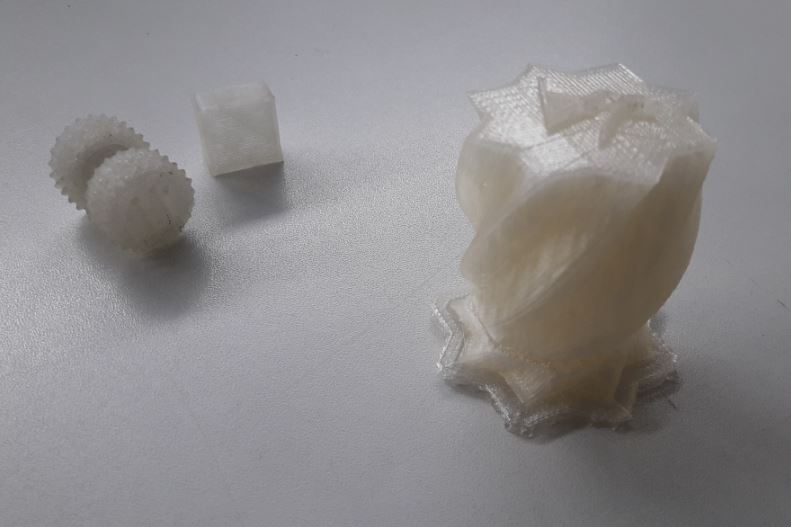
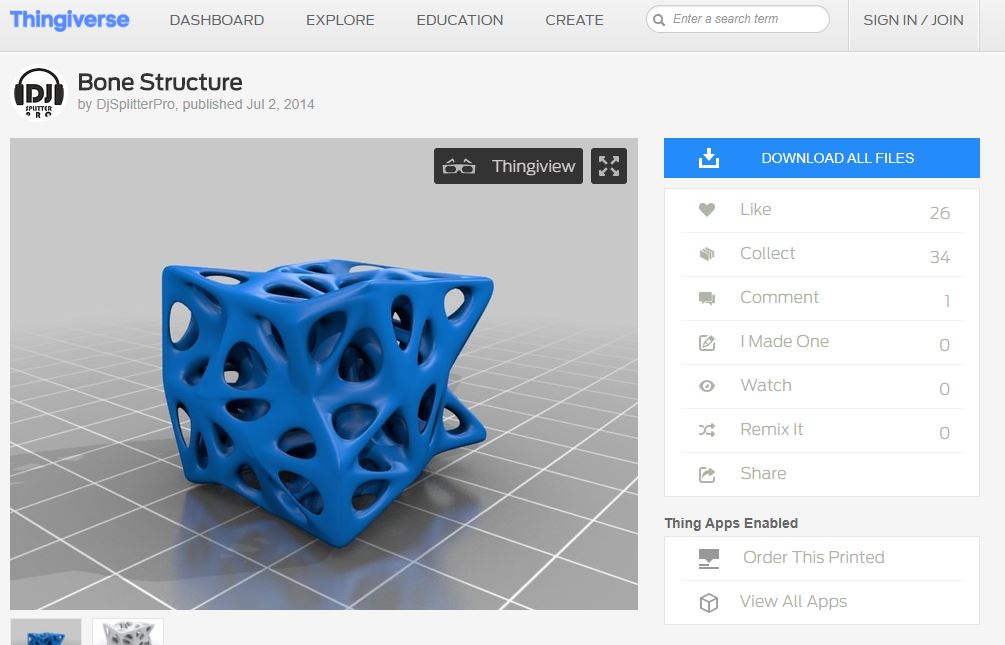
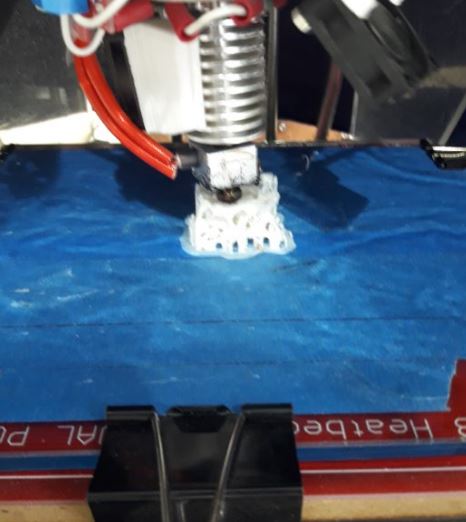
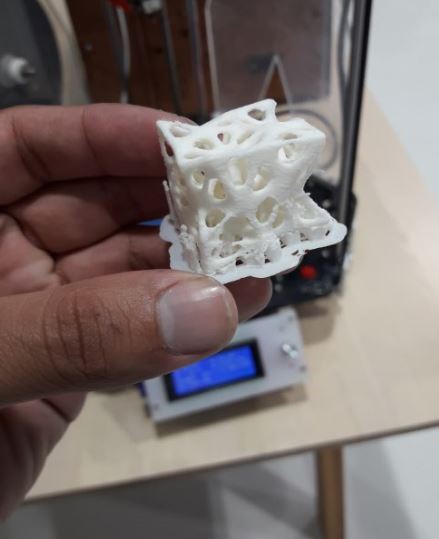
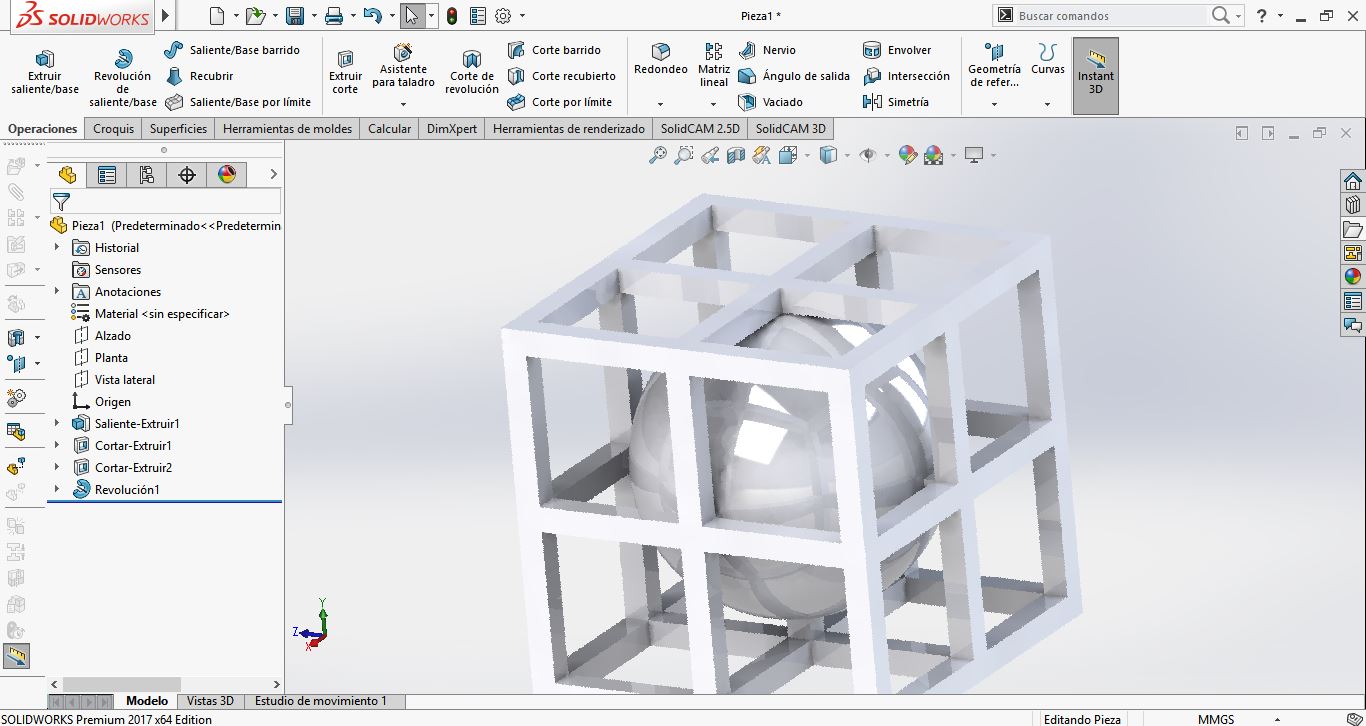
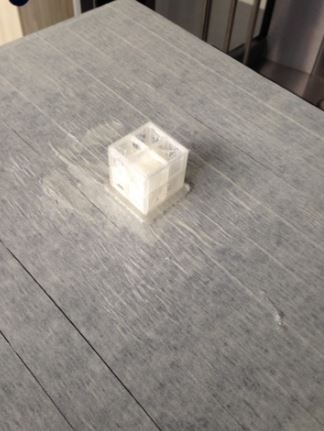
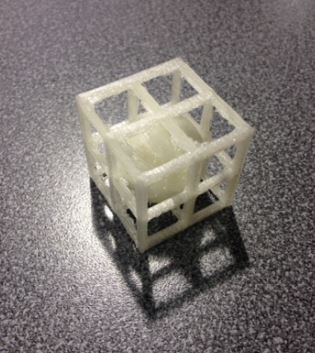
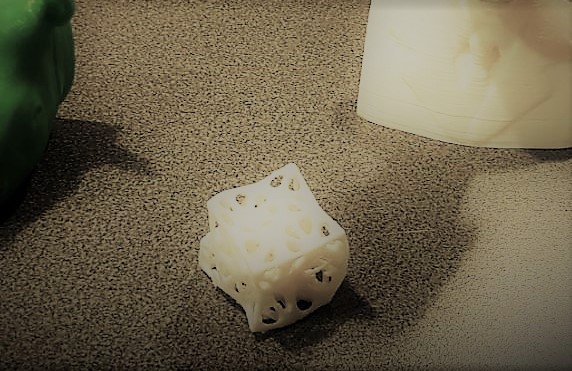
To start with this activity I have downloaded a 3D model from a Web Repository ( Thingiverse) a 3D Bone Structure Small Cube
Once downloaded the model lets configure the printing options, I need to specify if the model need supports for printing son parts of the structure, I took some considerations (put masquin tape on the base and then put glue stick so that the element is not stuck to the tray at the time of finishing printing):
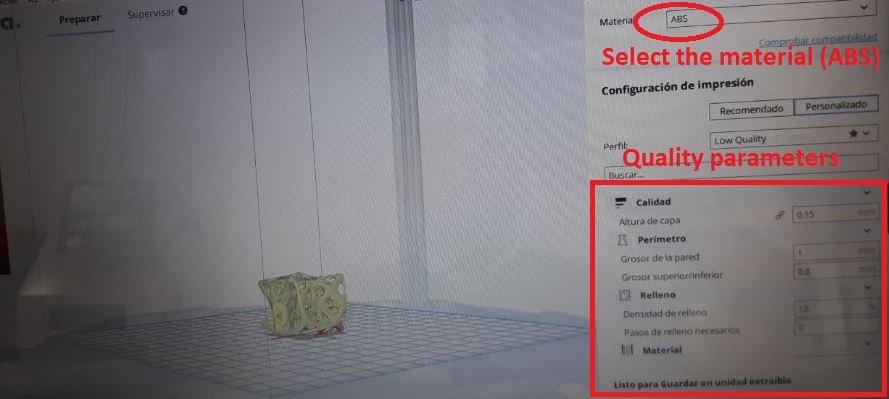
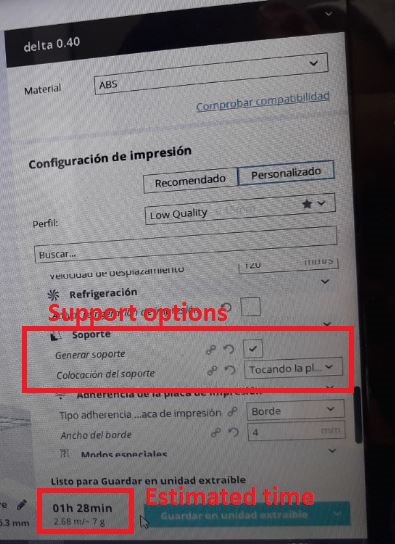
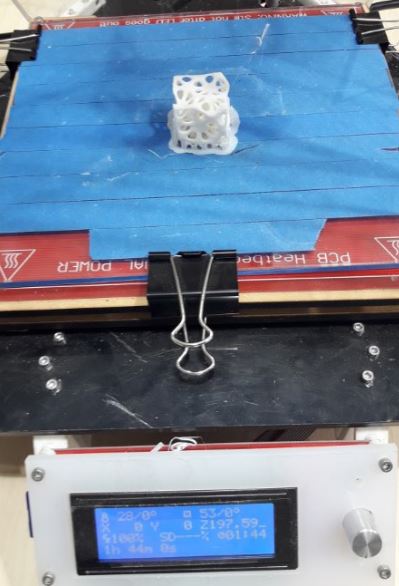
Next, I will use a Delta ABS 3D printer
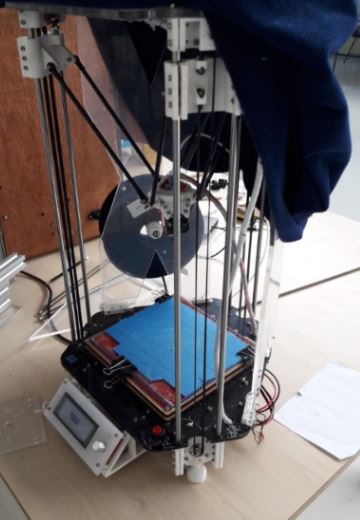
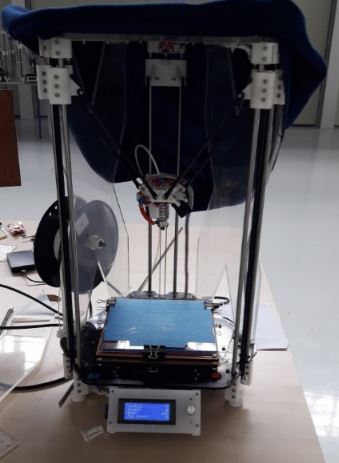
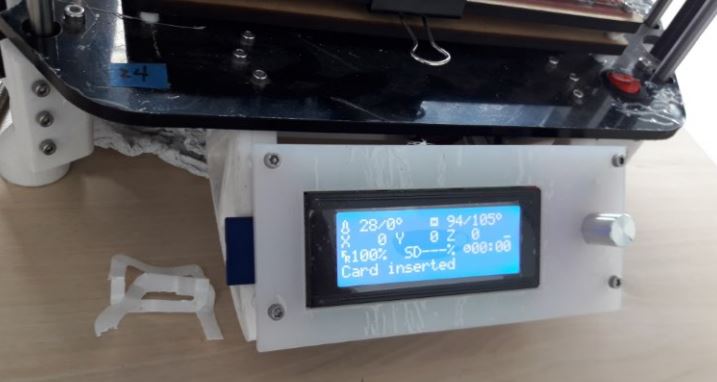
Once the printer is ready, it will first calibrate the workspace, then will print
Calibring 3D printer from joseacostaska on Vimeo.
Finally the printer is ready to print the model, let's wait an hour and a half to complete the activity.
For this activity, I will use the Makerbot 3D printer from the laboratory, the same one that was used to perform Exercise 1, the design was made in SolidWorks and complies with the characteristic that is a non-subtractive design.
DESIGN
PRINTING
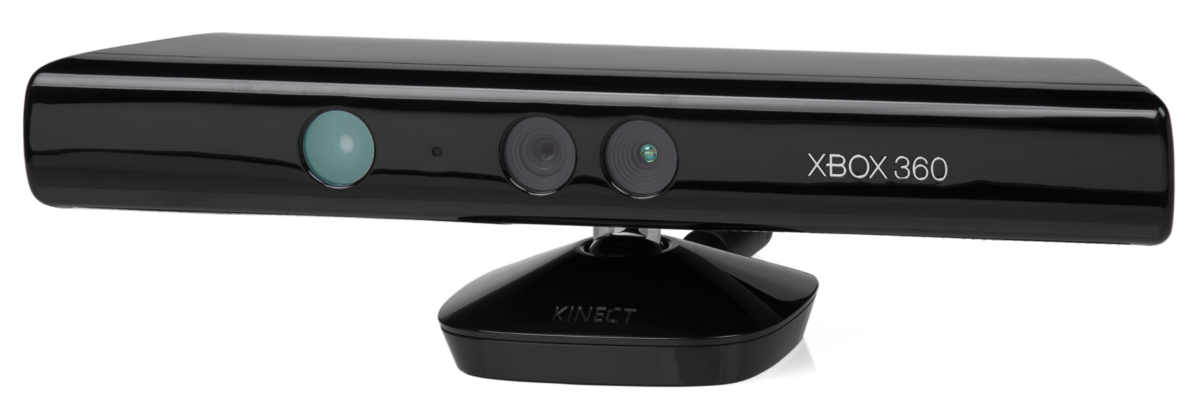
Scan an object
For this activity is important to have:
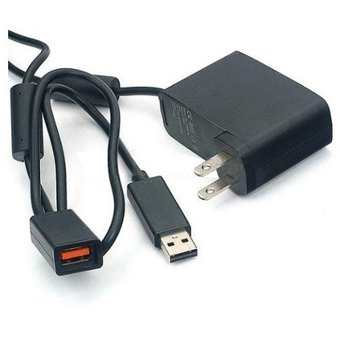
- A Xbox Kinect 360 for Windows
- An Xbox Kinect 360 adapter for PC
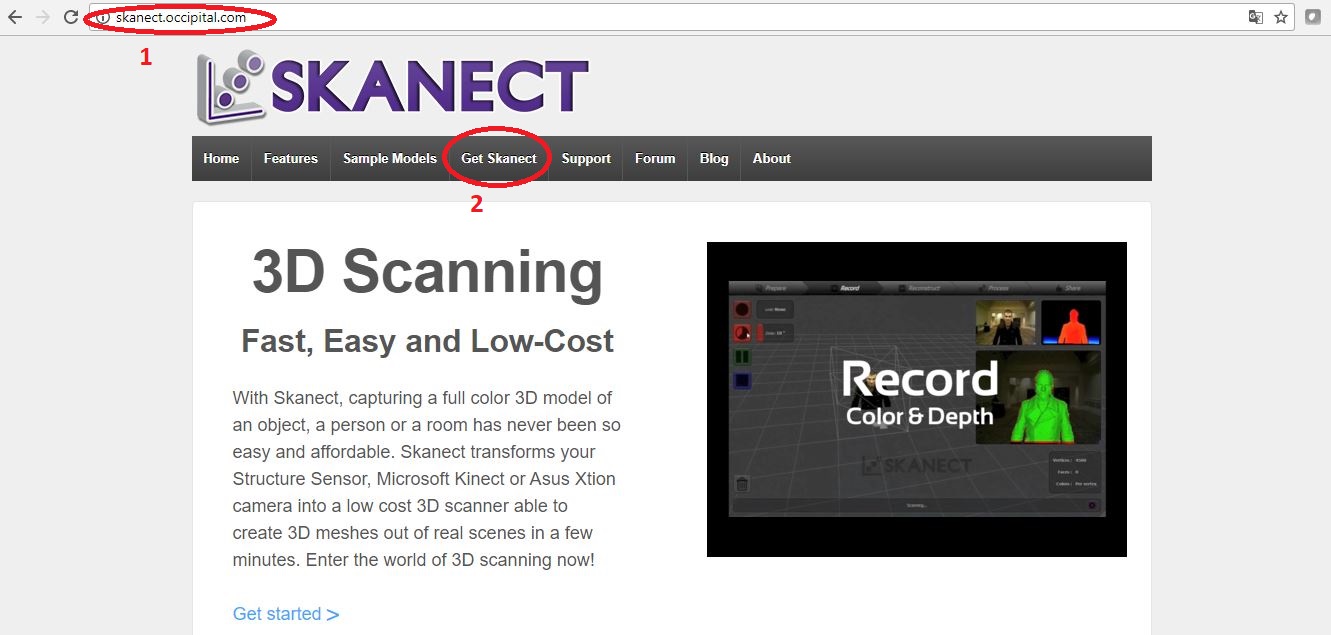
For this activity it's important to download and install Skanect software, you can download the software here
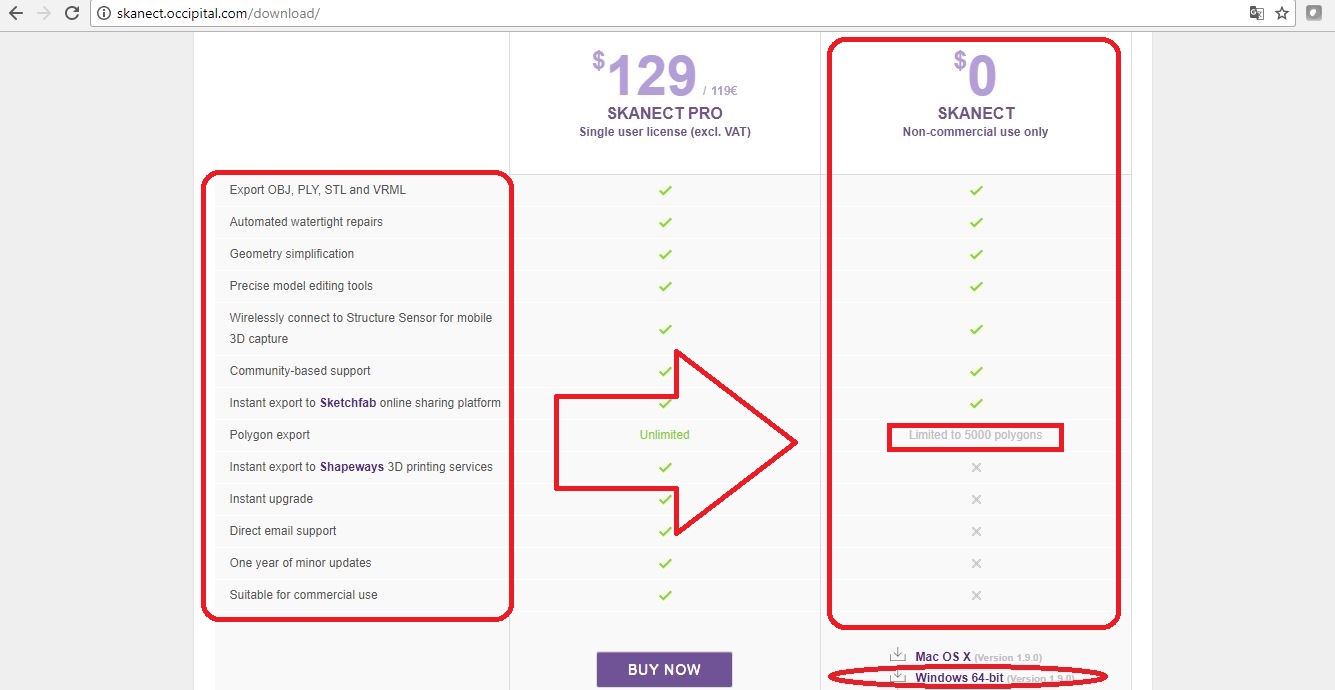
Now, it's important to download the software, in my case I will test the free option. This option has the following specification:
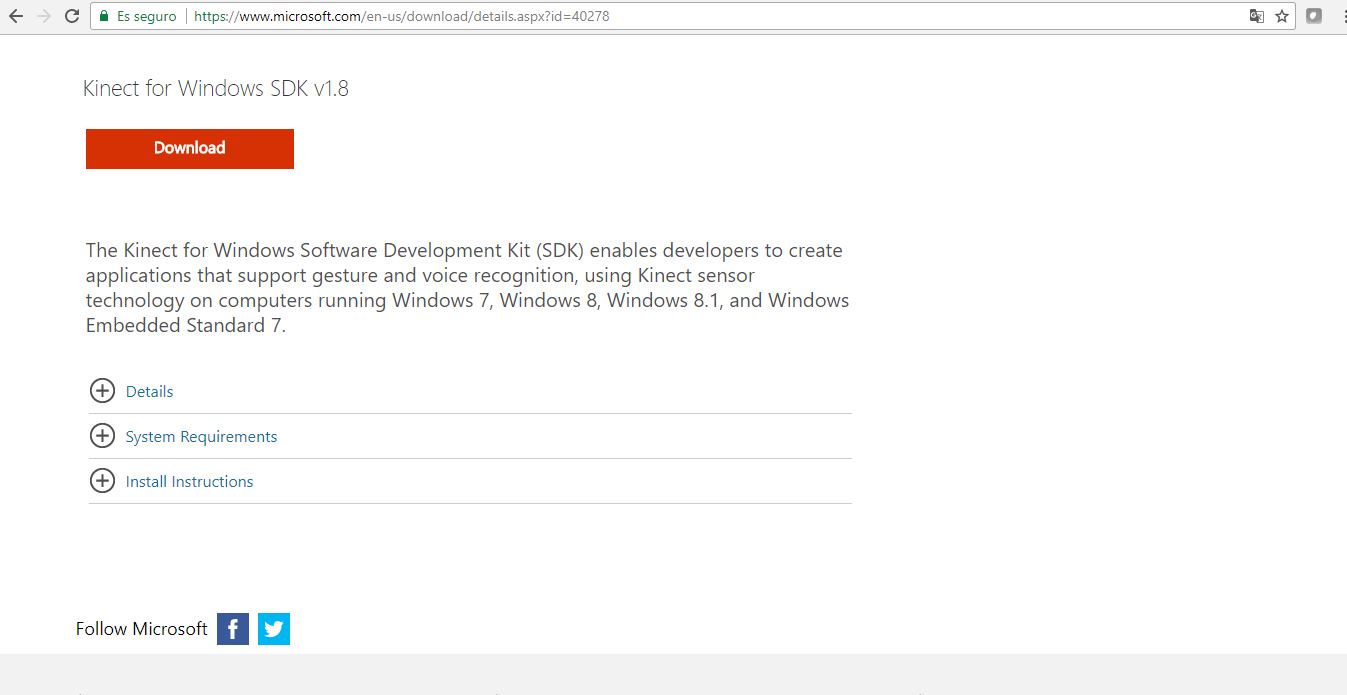
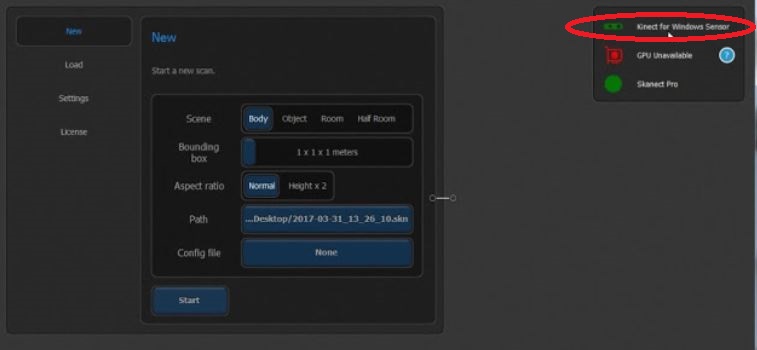
Once Skanect has been downloaded, let's configure Microsoft Kinect 360 drivers to link to Skanect for scanning activities, please let's go to microsotf kinect to download "Kinect for Windows SDK 1.8" (If we download 2.0 version, it corresponds to Kinect ONE).
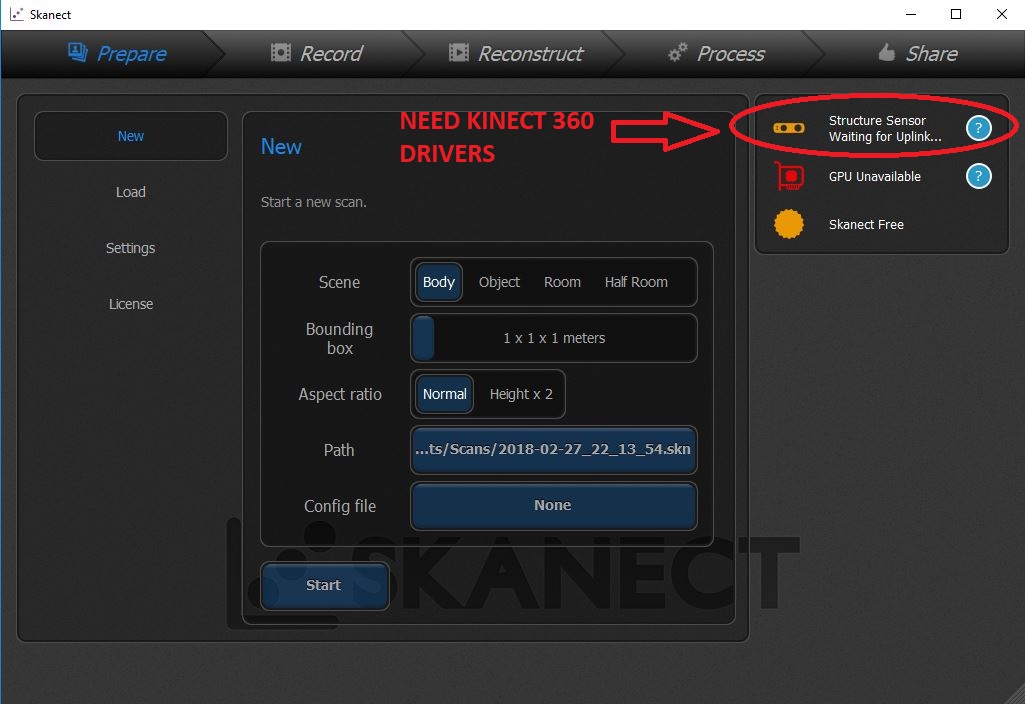
With the correct drivers for using Kinect 360 we can conect the sensor to PC and then open the software using admin rights. To start scanning first is necessary to set the configuration according the space you will work in
In the next page the software allow us to accuire the virtual model scanning the object that we want, in this activity, I have recorded myself.
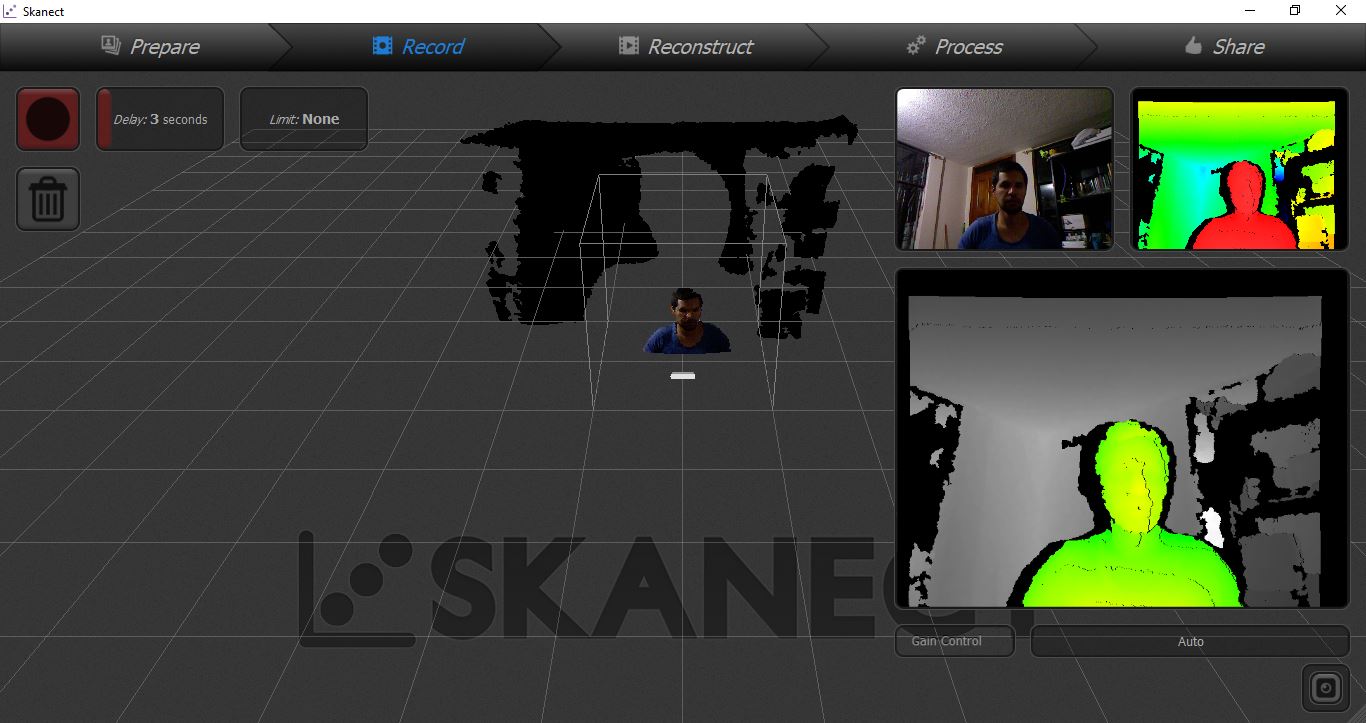
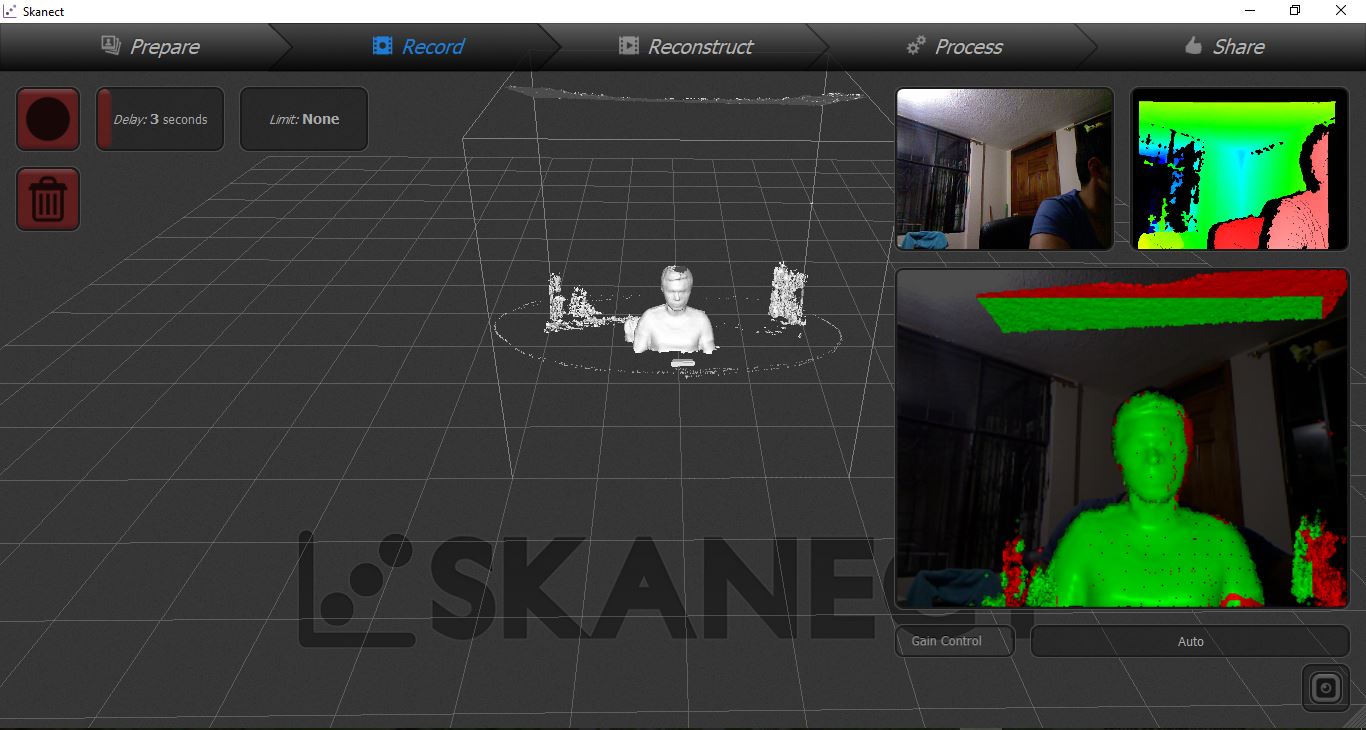

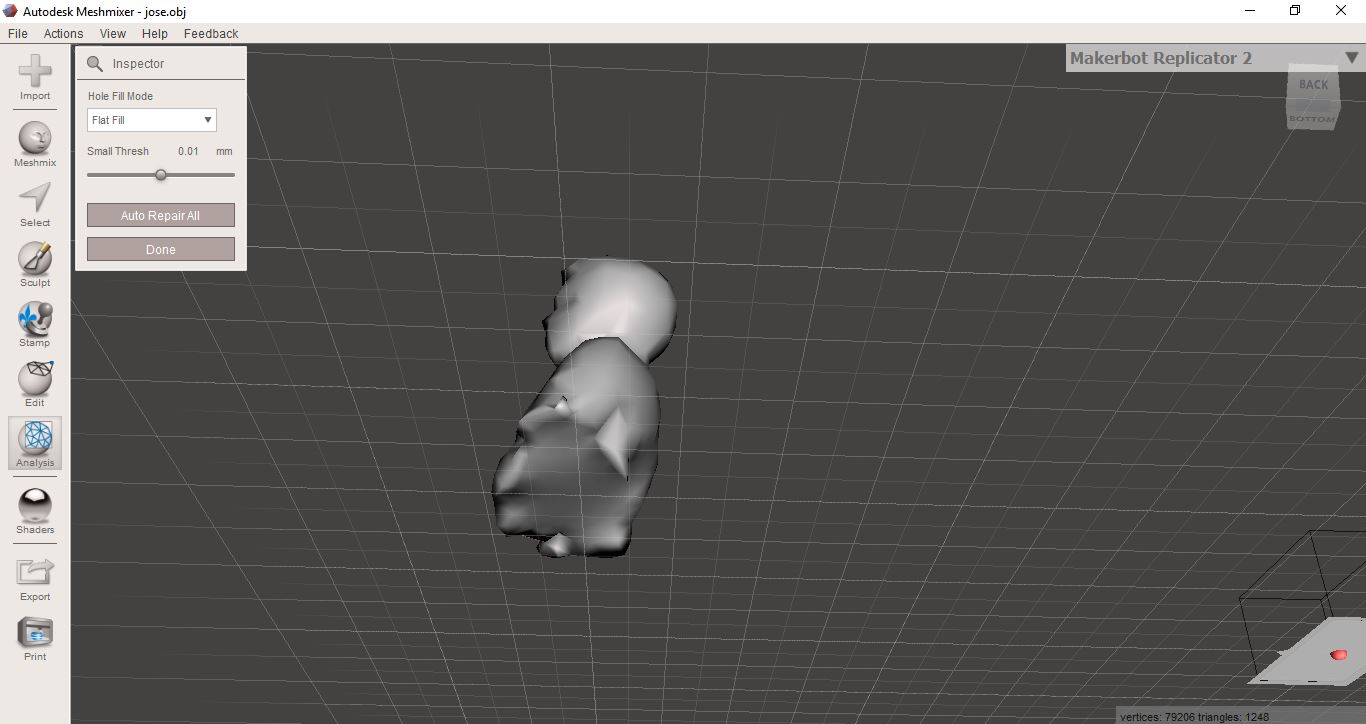
Then I need to fill all the holes gotten, erase other object in the space
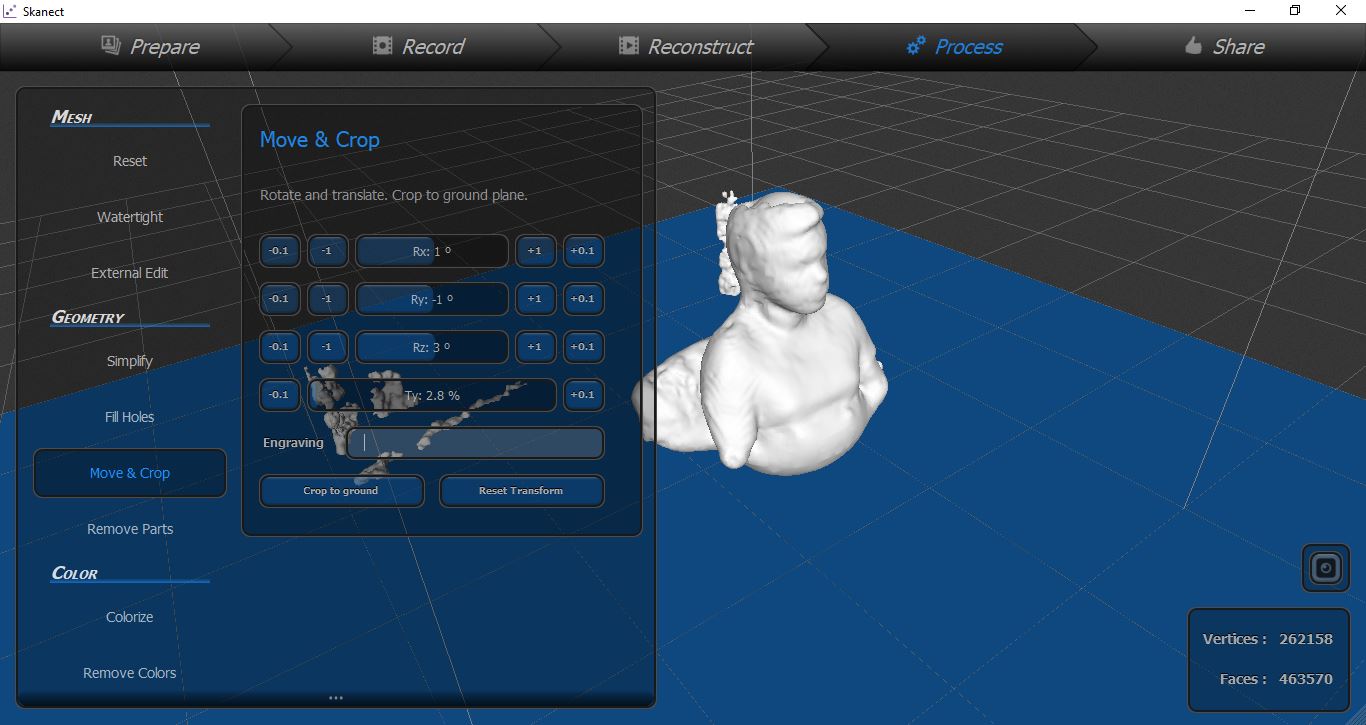
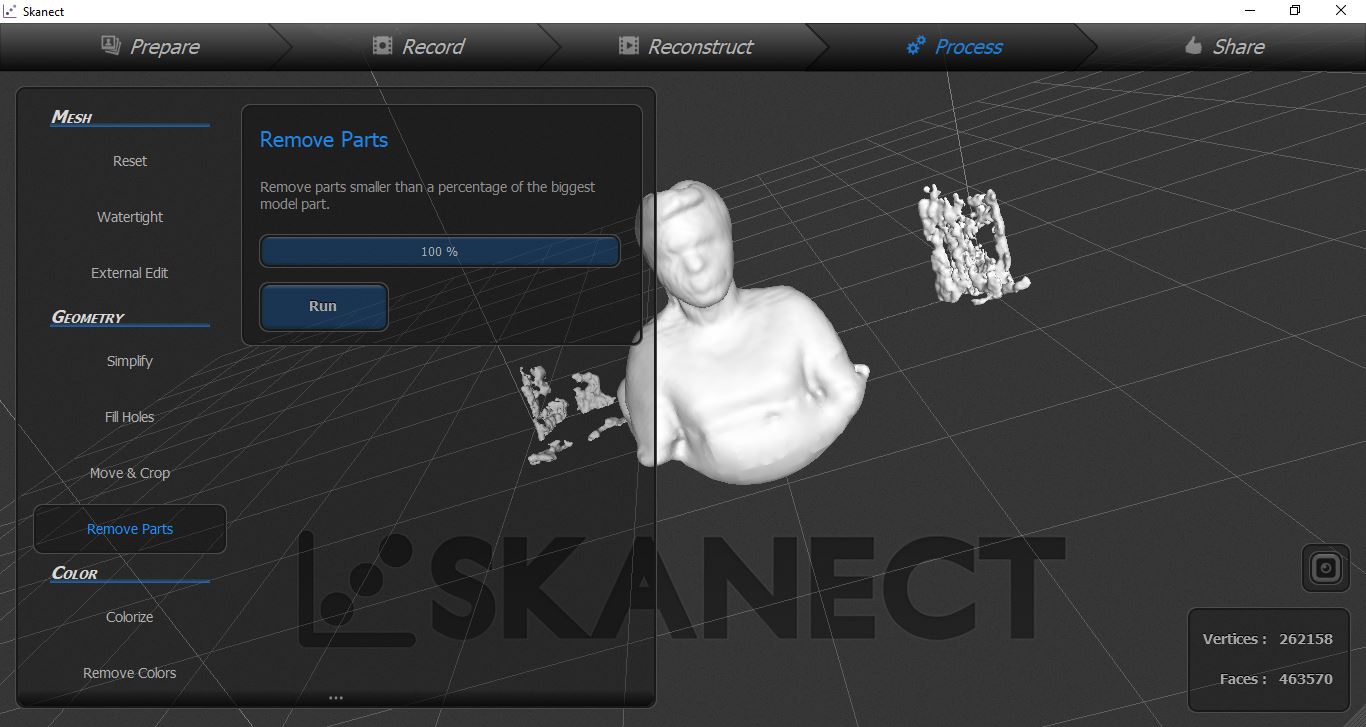
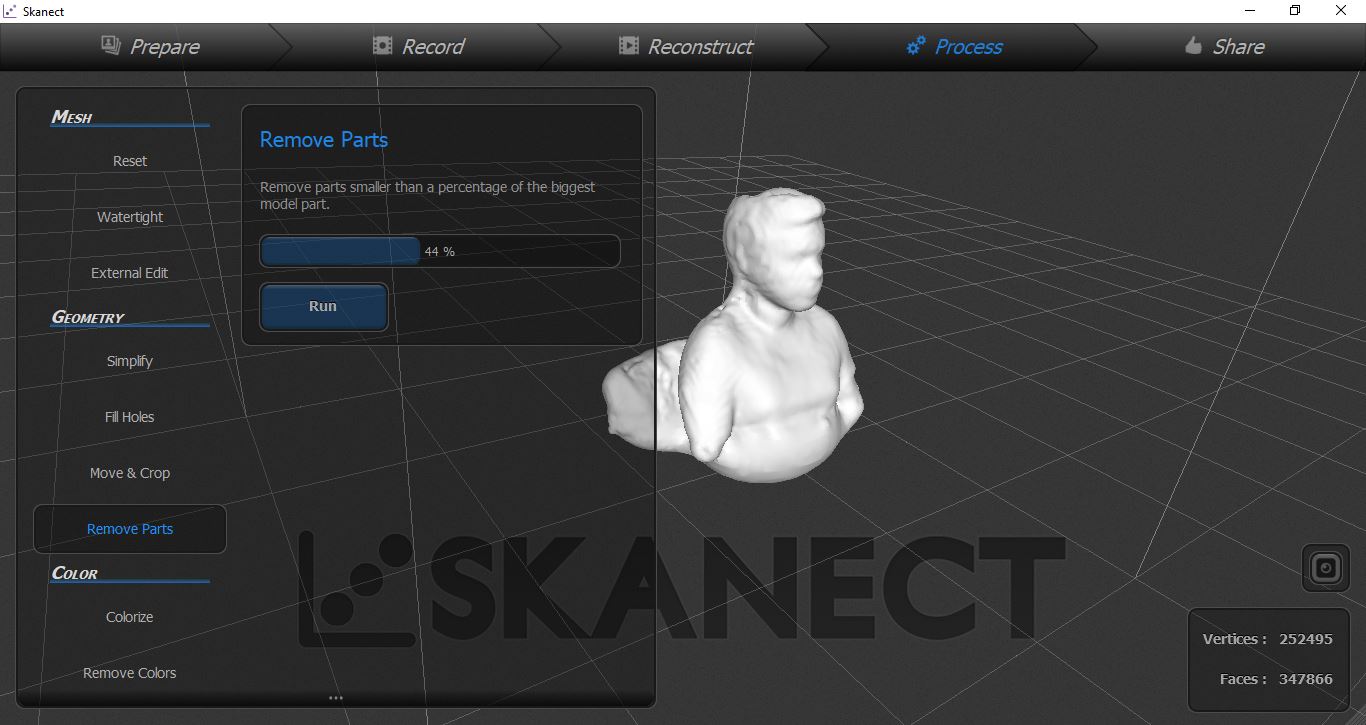
Finally, to end scann activity, it's important to export the design to a Mesh design software to correct scan failures or put on textures
Now, Ill use MeshMixer to improve the design, Let's install this free and useful Autodesk Product
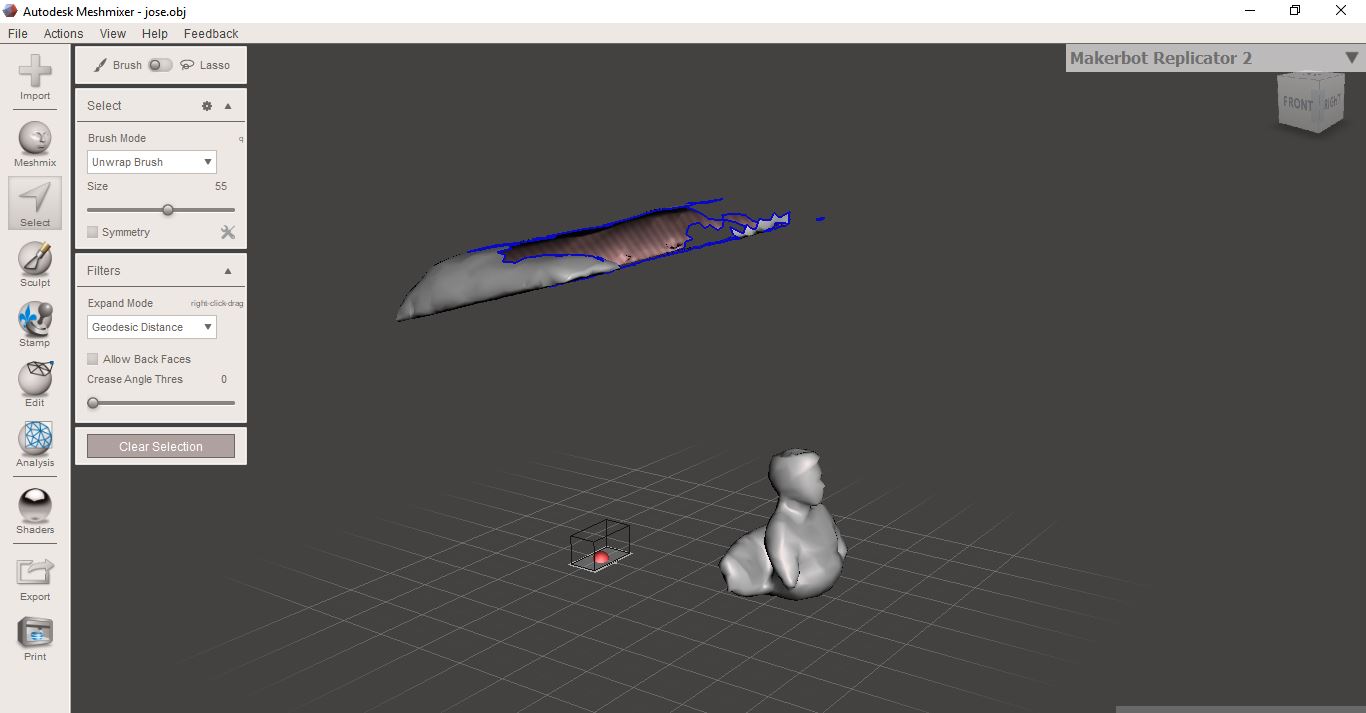
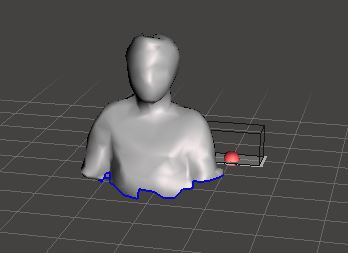
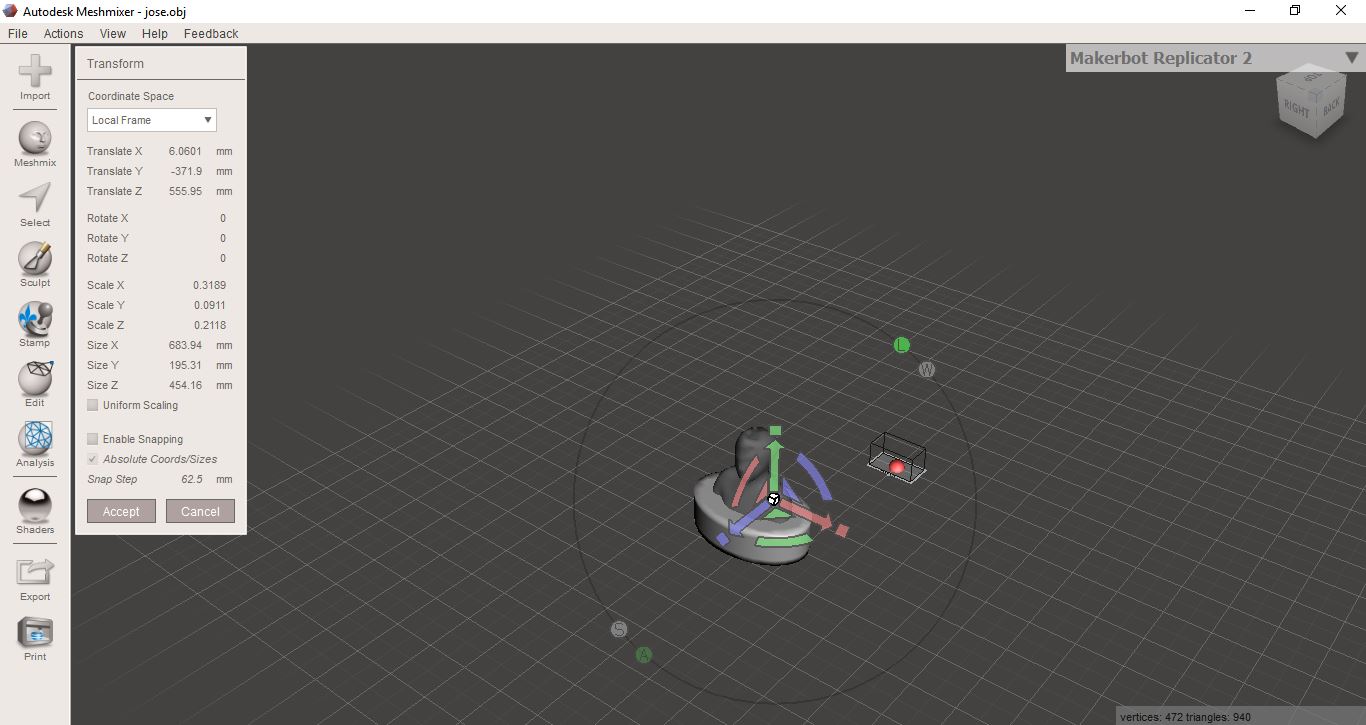
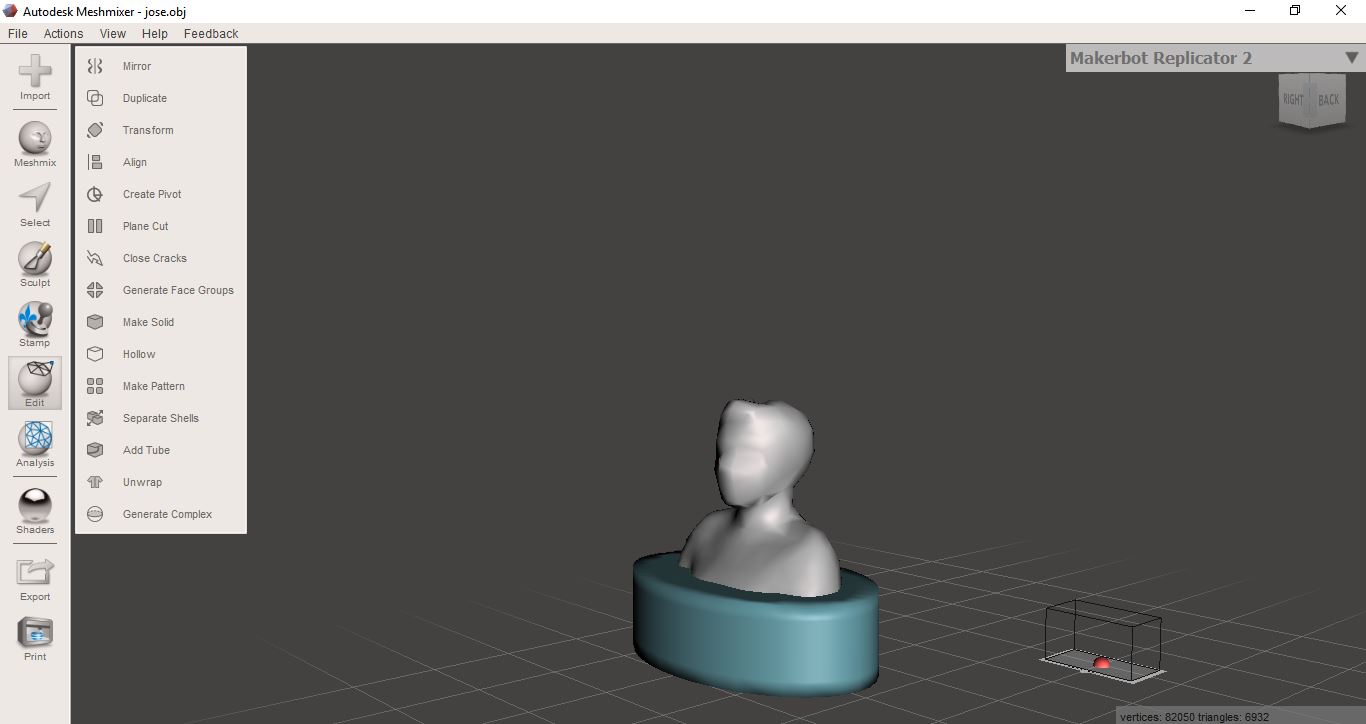
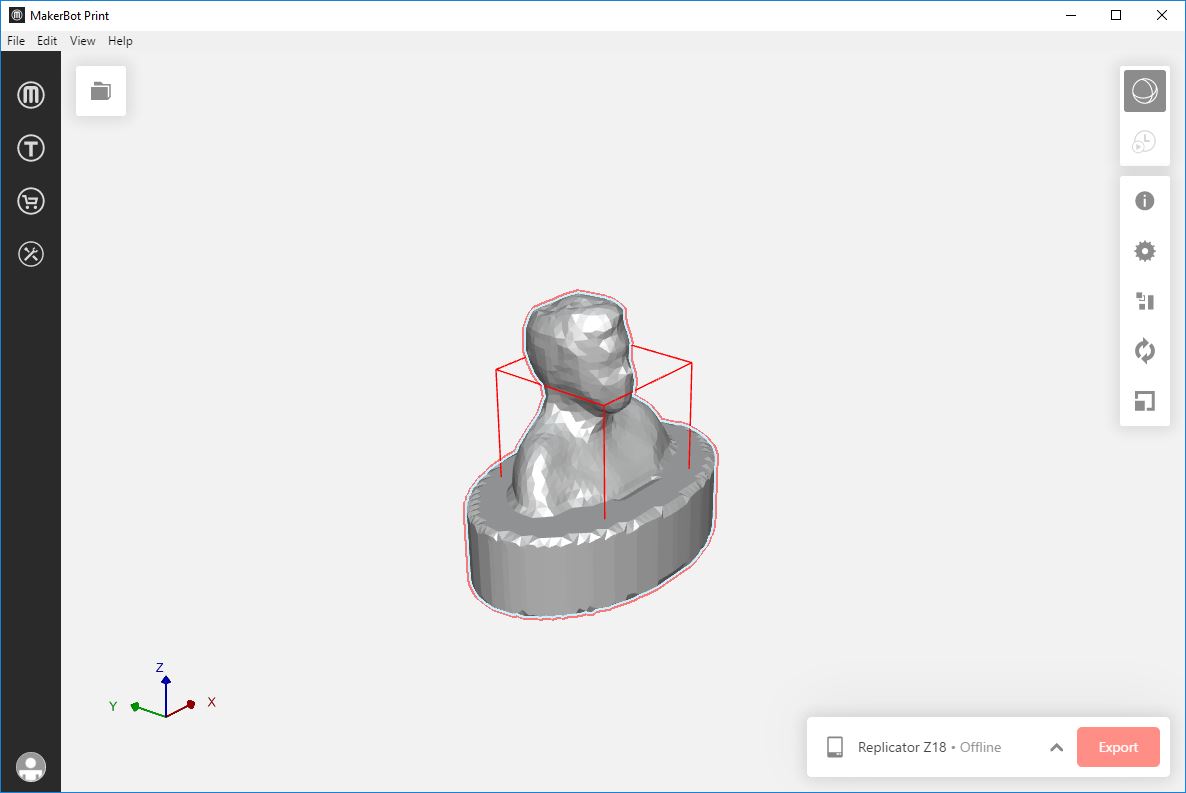
Finally, save as .STL or .OBJ the result, then print in any material
Outline problems and how I fixed them
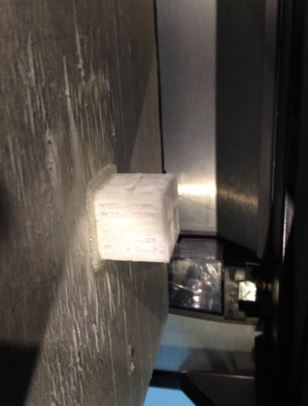
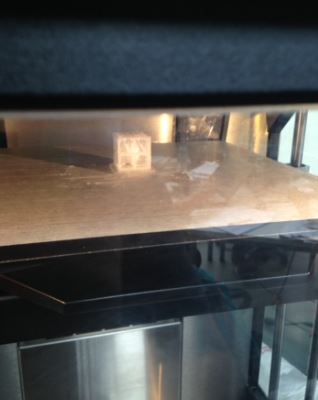
- Design problems during printing are due to the filament roll being stuck. To solve this, I paused the printer and solved the problem with the filament.
- Walls are not touching themselves, I correct this problem calibrating the machine by printing a calibrating models
- The base of the design is attached to the tray, to solve this problem, when starting with the printing activity it is good to place insulating tape on the tray, and place on its surface sticking of bar
- Sometimes printer stop extruding in half design, in SouthAmerica is a big and common ploblem when electricas service is off, this is hard to solve and its the main reason of failure on electronical equipments.
- Skanect allows us to use a free version with restrictions. We can save our scanned models with a very low resolution, which means that in many cases there is no similarity with the scanned element.
- The price of a 3D scanner is expensive. I recommend to find a used Kinect 360 in your local market to buy with a lower cost
3D PRINTING
SCANNING
HERO SHOTS
Include the design files and ‘hero shot’ photos of the scan and the final object
EXCERCISE 1 download
EXCERCISE 2 link to Thingiverse to download the model
EXCERCISE 3 download
GROUP ACTIVITY download
SCAN MODEL download