PRINCIPLES AND PRACTICES. PART 1
Leson background
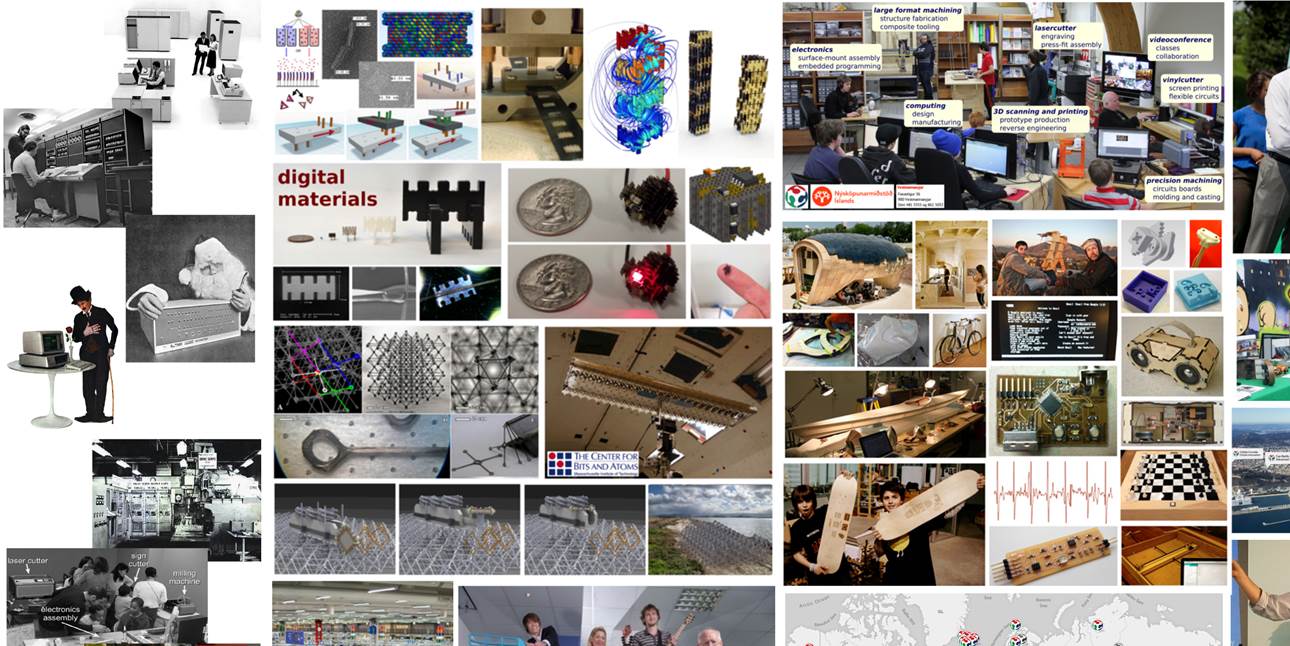
This first lesson could be summarized in one sentence: "The world of the Fab Labs". There was a specific text that caught my attention: "When science fiction became a scientific reality." I work in a Fab Lab and that is what really happens every day. We met the main components of a Fab Lab, the world congresses, the fab lab foundation and various projects.
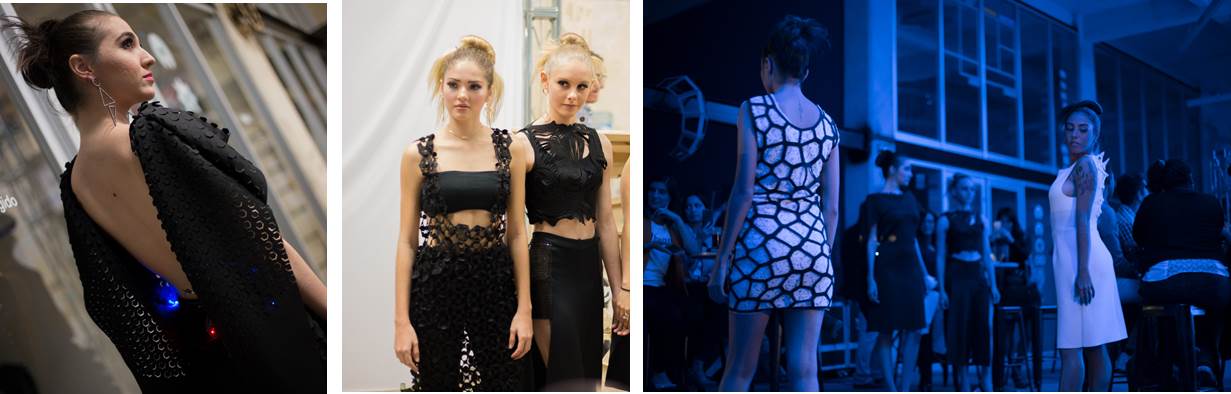
We also knew the different programs such as BioAcademy and Fabricademy. My Fab Lab is a node of the Fabricademy program and amazing things have been done. I share some images of the results.
Assignment
Plan and sketch a potential final project
CONCEPTUALIZATION INSPIRATION
THIS WEEK WE LEARNED FROM THE HTML LANGUAGE AND THE WORK FLOW IN GITLAB
BACKGROUND.
HTML is a computer language devised to allow website creation. These websites can then be viewed by anyone else connected to the Internet.
My personal task: Read the book recommended by Neil
Work through a git tutorial
GIT TUTOTIAL
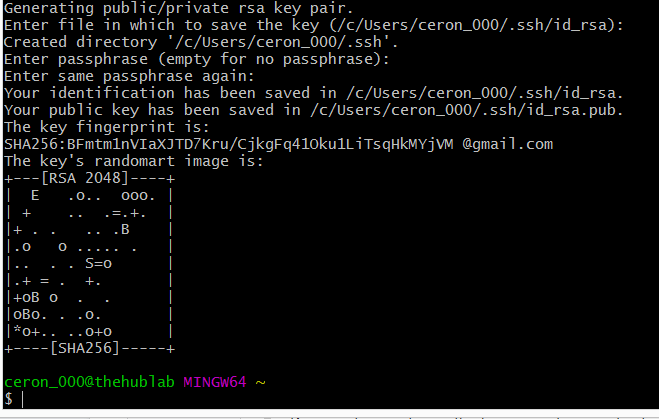
I generate a SSHKey direct from the GitLab putting the following commands in the terminal:
I would like to develop a interactive element for citizen participation in the public spaces. Obtain data of citizen
to facilitate decision-making in urban planning.
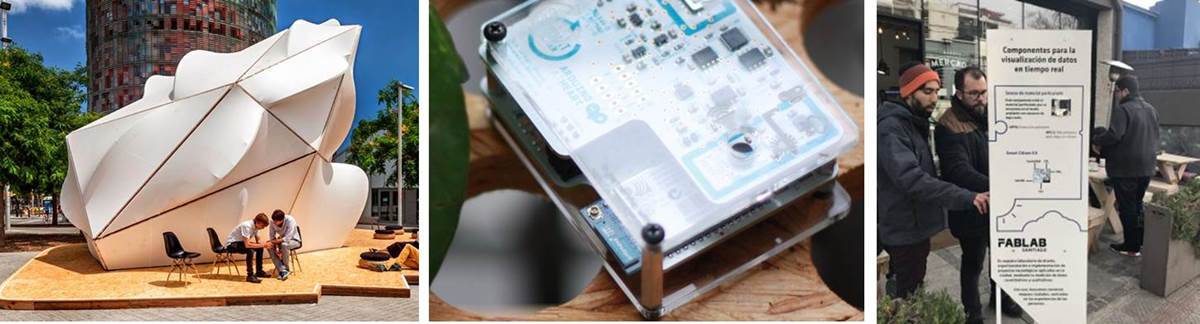
For the approach of my possible final project, I was inspired by some initiatives. Fab City / Totems-FabLab Santiago / Smart citizen / Fab Condenser
FIRST IDEA
Obtain data of citizen
to facilitate decision-making in urban planning through an interactive urban device.
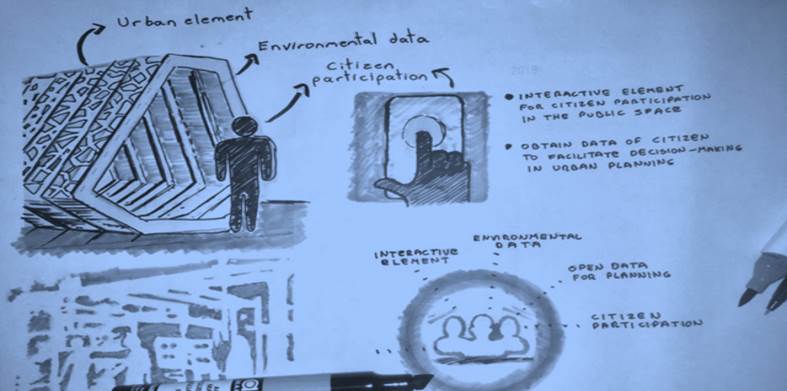
SECOND IDEA
Finally I decided to focus my final project on the subject of thermal comfort. Previously I worked with commercial sensors during the master to obtain thermal comfort data in homes. One of the main problems that arose was the cost of the measurement equipment. Derived from this, work slowed down having only one measuring device.
Therefore, the development of a low-cost thermal comfort measurement device is one of the objectives of my final project.
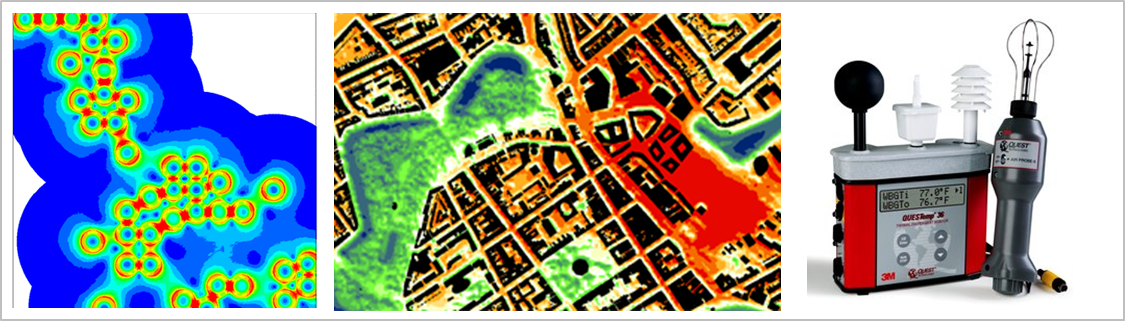
 THE PROJECT: HEAT STRESS DEVICE
Develop a map of open data of thermal stress in public spaces that show environmental data and perception of thermal comfort of citizens. The municipal authorities can take specific measures in these places to protect residents from the health risks of heat stress. These measures can be revitalization interventions through shading elements in public spaces or other strategies.
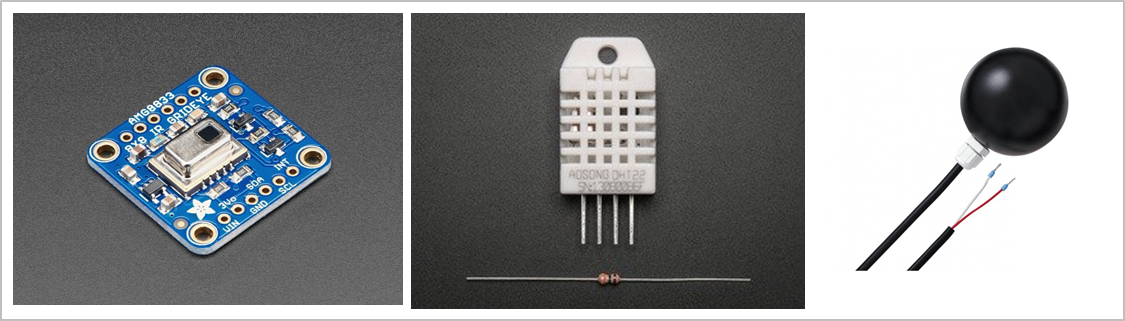
Principal components:
Adafruit AMG8833 IR Thermal Camera Arduino
Natural wet-bulb temperature sensor
Globe thermometer temperature sensor
Dry-bulb temperature sensor
LCD
Others componentes
See more of the final project
PROJECT MANAGEMENT. PART 2
This week we learned from Html lenguaje and the work flow in Gitlab.
- The definition of HTML is HyperText Markup Language. HyperText is the method by which you move around on the web — by clicking on special text called hyperlinks which bring you to the next page.
- Markup is what HTML tags do to the text inside them. They mark it as a certain type of text (italicised text, for example).
- HTML is a Language, as it has code-words and syntax like any other language.
A good tutorial is w3schools
. Previously I had knowledge of the Html language. However, the git platform was completely new to me.
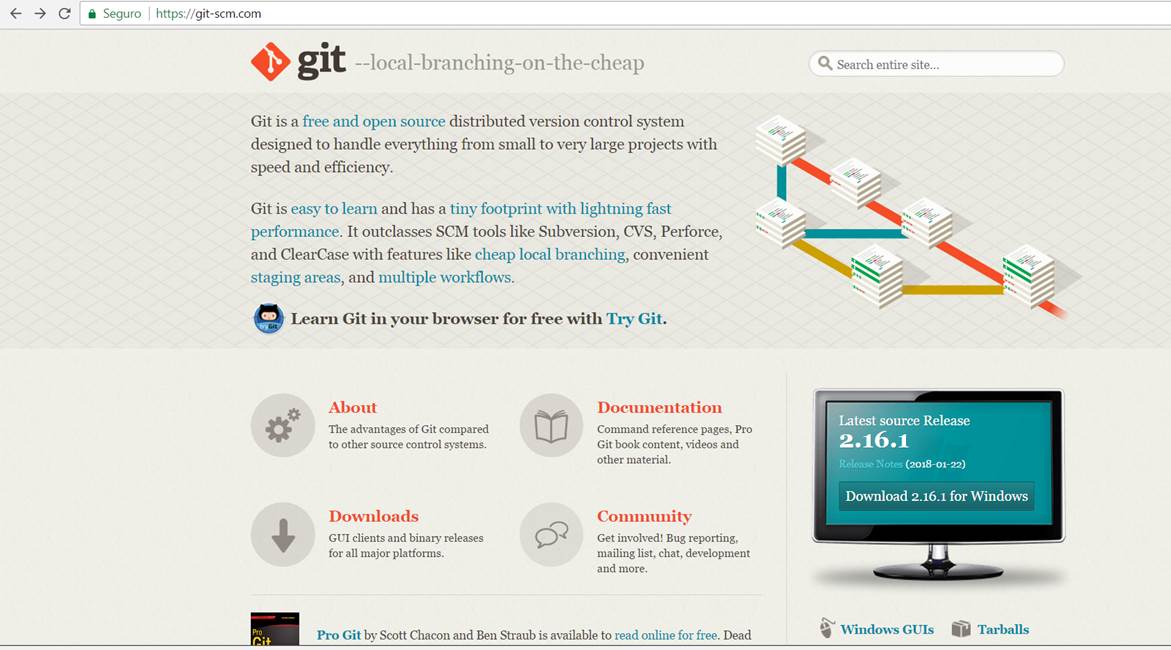
I understood the qualities of this tool and its workflow. Whit this tool it is possible to quickly organize some of your files and send them without compromising all other modified files in your working directory. The following image presents a summary of git plataform
ASSIGNMENTS
Build a personal site in the class archive describing you and your final project
work through a git tutorial WORKFLOW
Sign and upload the Student Agreement
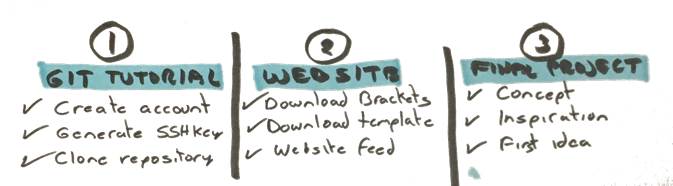
Create account in GitLab.
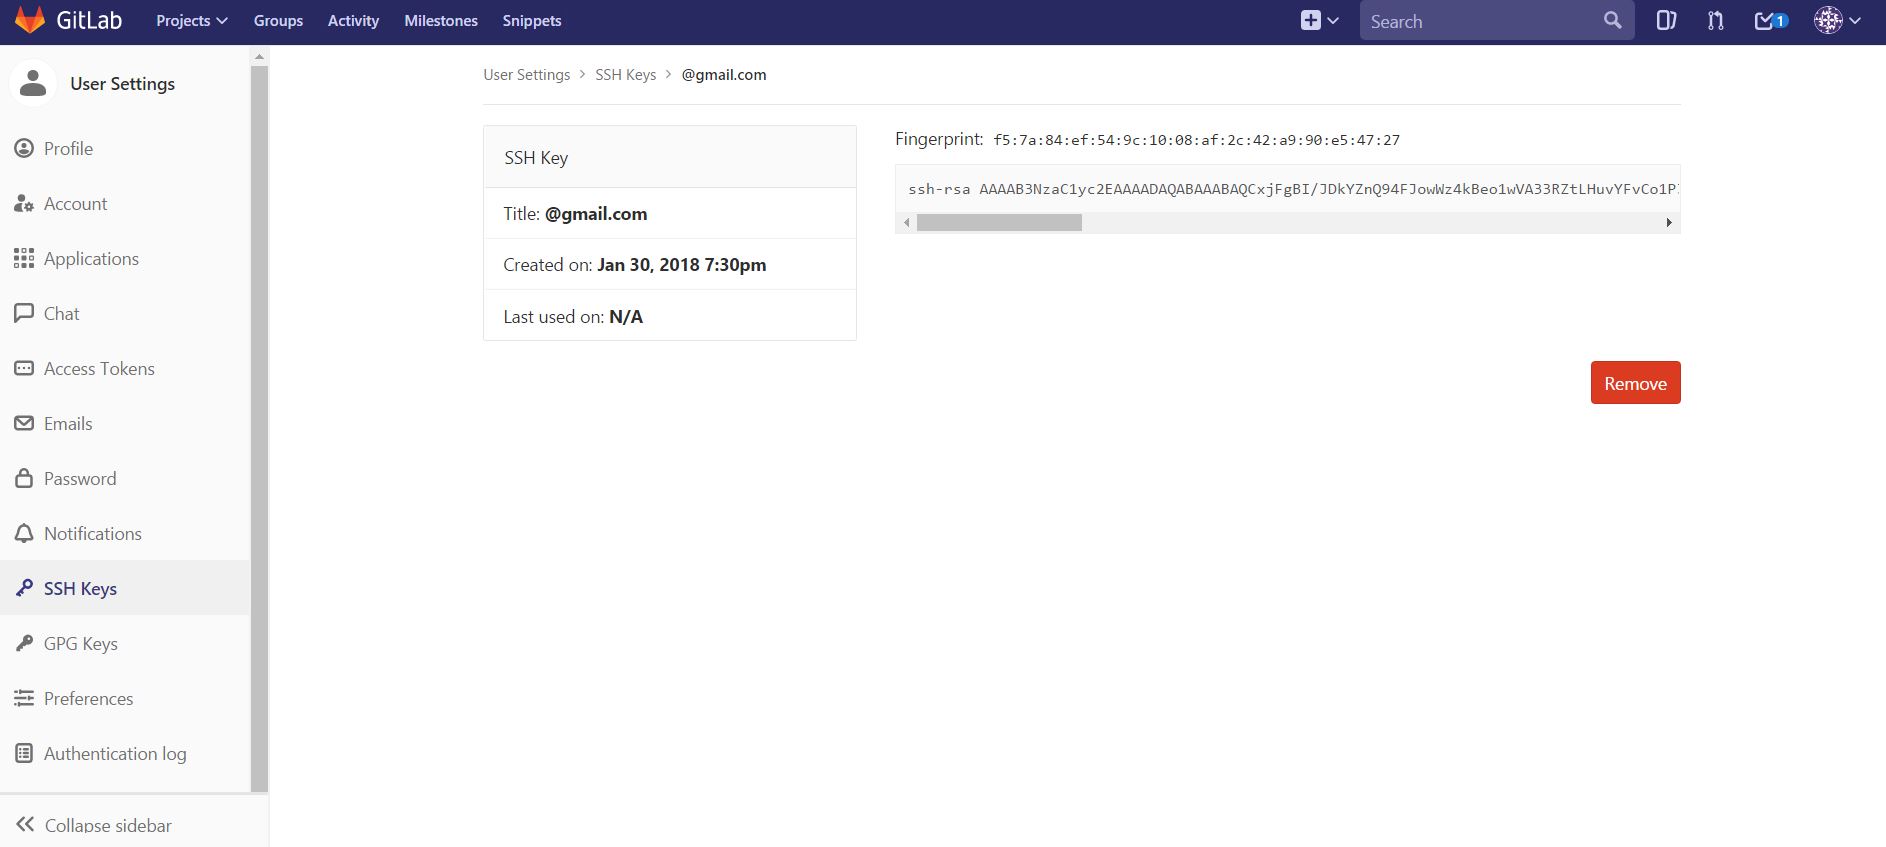
Generate a SSHkey.
cat ~/.ssh/id_rsa.pub
ssh-keygen -t rsa -C “$your_email”
cat ~/.ssh/id_rsa.pub
Then I copy and paste the key in my public profile on GitLab
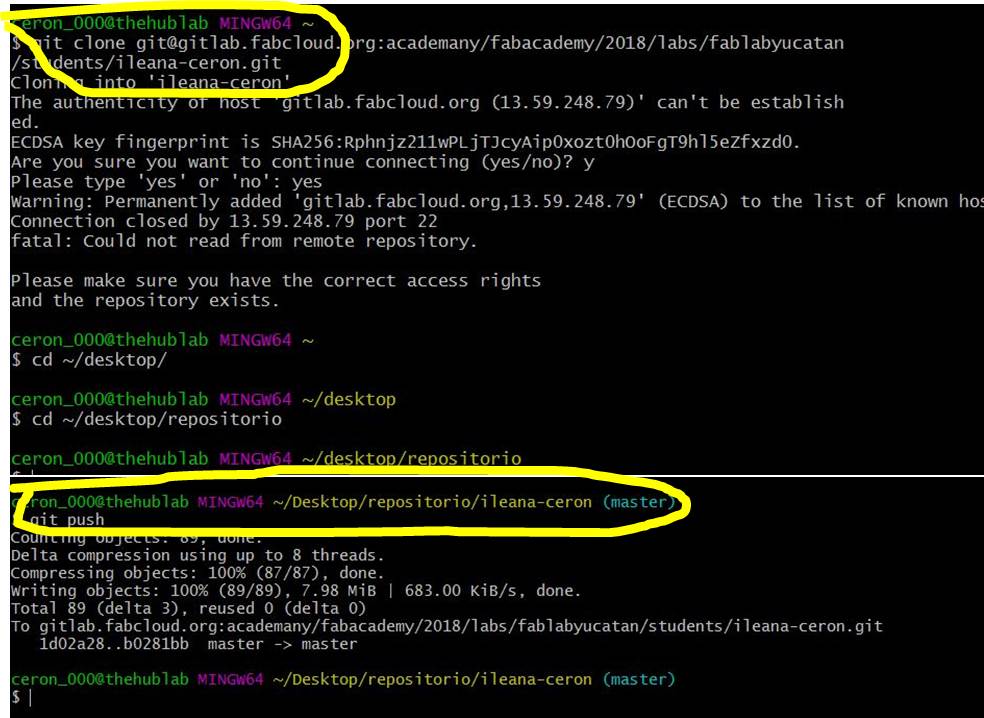
Install Git | Clone repository
For clone archive I followed this commands in the terminal:
cd ~/Desktop/
git clone git@gitlab.fabcloud.org:academany/fabacademy/2018/labs/fablabyucatan/students/ileana-ceron.git
git config --global user.name
git config --global user.email
Build a personal site in the class archive describing you and your final project
The template in which i worked is helios

The main updates I made were as follows:
Finally the template in which i worked is helios
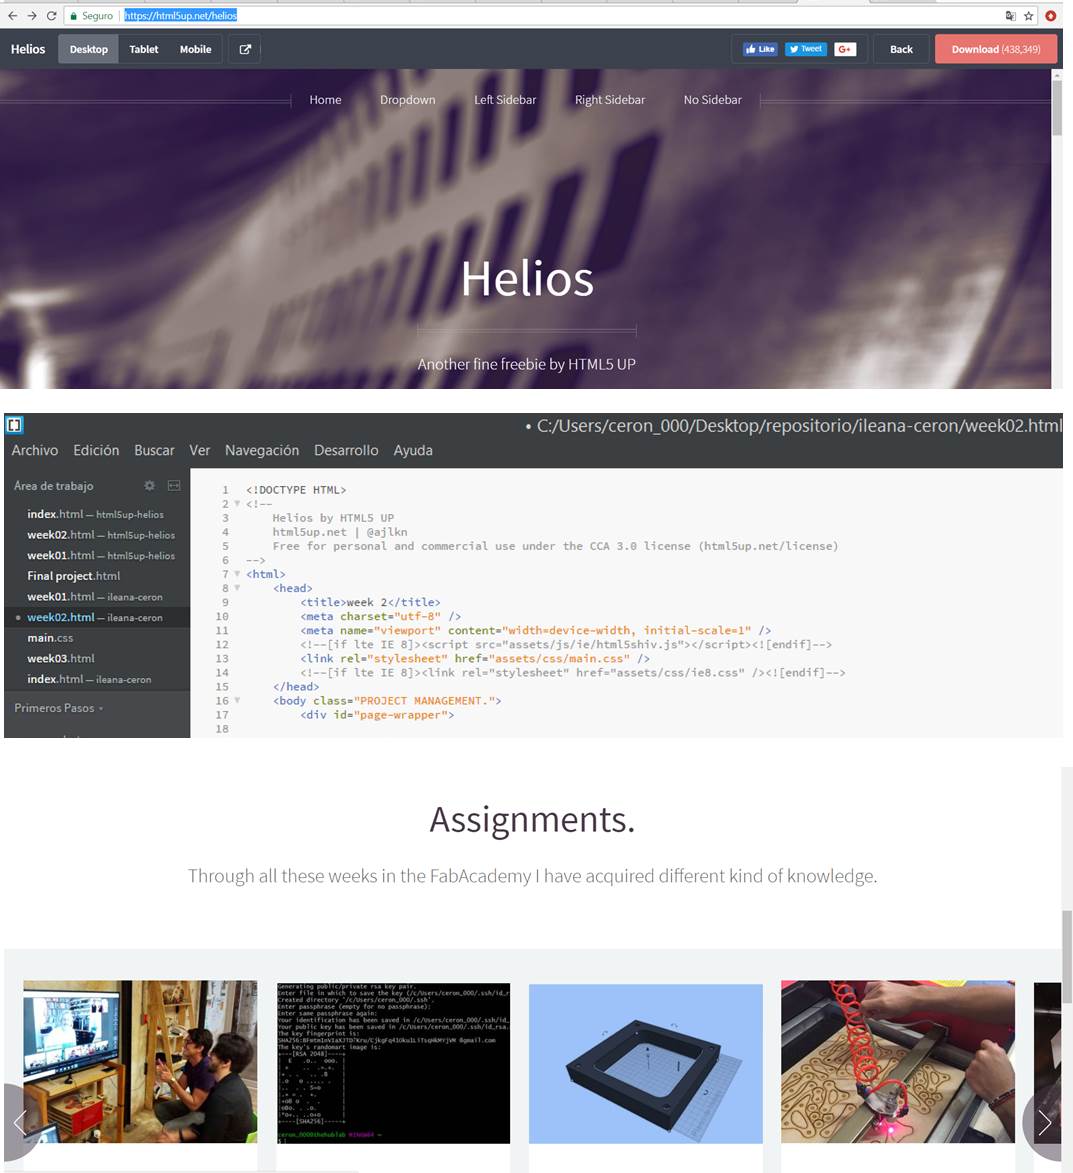
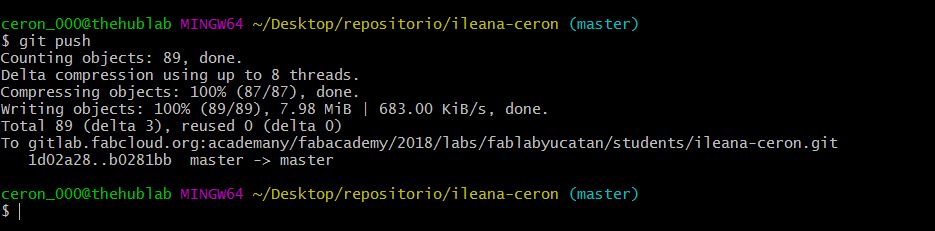
Finally I started the content of the web page. Once finished I copied the html`s files in the repository of the Fabacademy. I used these commands in the terminal of GitBash:
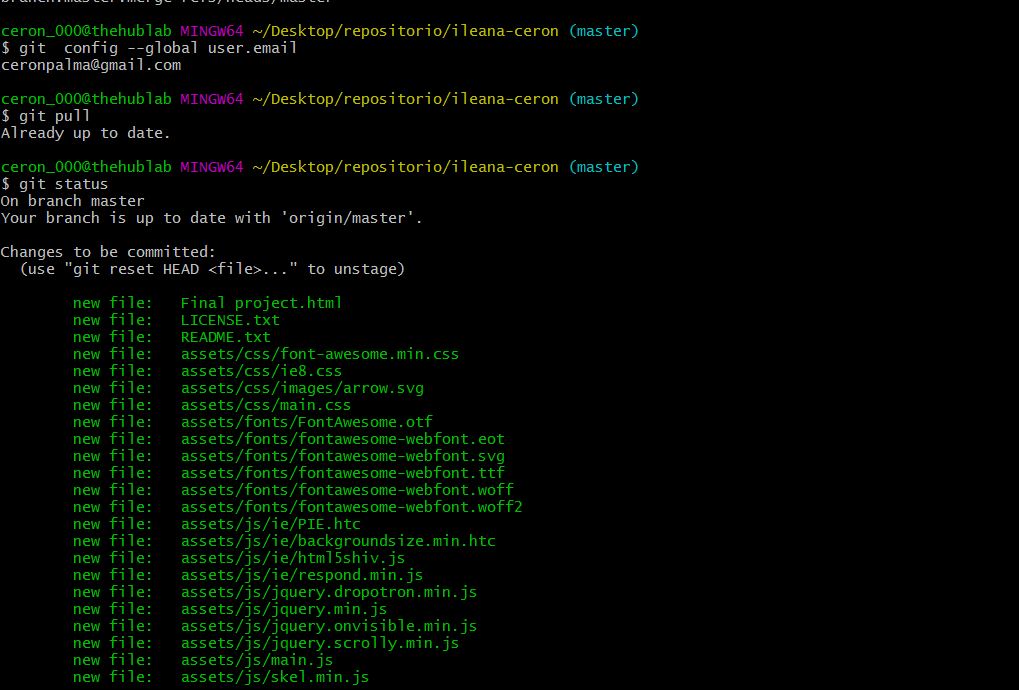
cd ~/Desktop/repositorio/ileana-ceron
git pull (change files)
git status
git add .
git commit -m "commit message"
git push
You can see final project here
NOTES
When wanting to upload the web, I was constantly marking error. This was associated with the root of the directory that was incorrect
PROJECT MANAGEMENT UPGRADE
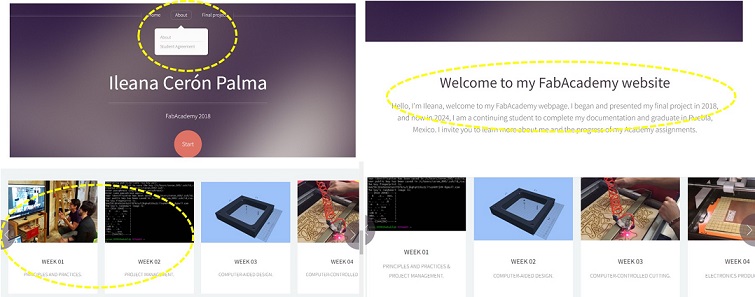
1) On the website, I made adjustments to the home menu by adding the 'About Me' and 'Agreement Signing' sections.
2) I merged two lessons into one session (Principles and Practices, and Project Management).
I created a new section for the agreement.