


You can find the technical data sheet in this >>link<<

You can find the technical data sheet in this >>link<<

You can find the safety data sheet in this >>link<<


For this design I make in the software fusion 360, because this software allows me modify the parameters of machine with which I will work. This software is very similar to software solidworks in the design part.


The first step to make the design is create a sketch with the button in the left image and select the plane which will work, the next step is select the tool line tome begins a make the design, the longest measure is of 15 cm because the area of work of machine is less than 30 cm and for this the design is segmented for the size of the machine.


In the next piece, the first step is the same that in the before design, the next step is select the tool circle to make the design, for the other circles with the same tool to 45 grades, in the last step for the both design use the tool extrude for make the width for the figure the measure in this case is 10 mm.


To make the process of the machine first select in cam in the menu, for the figure of two figures is the same process each one, remember that in the order that the processes are carried out, that order will follow the machine remember that in the order that the processes are carried out, that order will follow the machine.


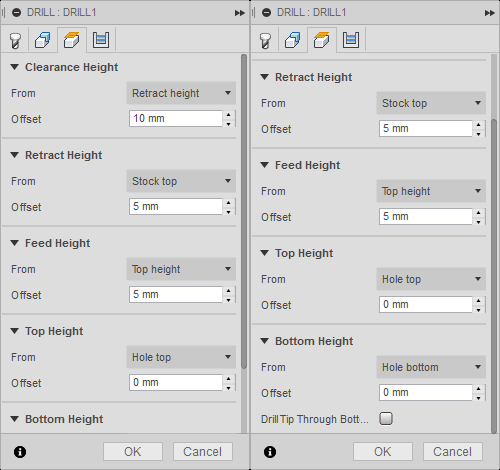

In the first process “drilling”, first configurate the parameters, to start select the mill to work, in my case I had to customize one, next configurate the spindle speed and plunge feedrate to continue is select all the faces to make the machining, the others parameters to default, this process is to make a hole in the material.


The second process is “contour”, in the first window select the same mill to work in the machine and the principal parameters to configurate is spindle speed and cutting feedrate the other parameters depend on the design, the second part you select the contour to make, you must select in the base of the design after if you want select tabs to the machine did not cut completely in the last pass and the piece did not move, last in the quarter tab activate the option multiple depths is to the machining make in some layers.


To export to gcode when you finish all the process in the folder to contain all the process you make right click and select the option post process, next you select the machine if you want give chance a name and press the button post to export the file.


In the software of the machine first import the file, to make this first click in project manager next in add new project, in the space you can drag the file and to press save, before you can use the file press in mill, in the next step you use the jog to give a zero point in the machine when you finish press in mill to start the machining.

Remember select the correct point zero in in the machine because if you save it very high the machine may not completely cut the material, and don’t forget the sacrificial material in case you get to spend a lot of the mill.
In the next videos show the milling process in the machine FABtotum, how make the figure.


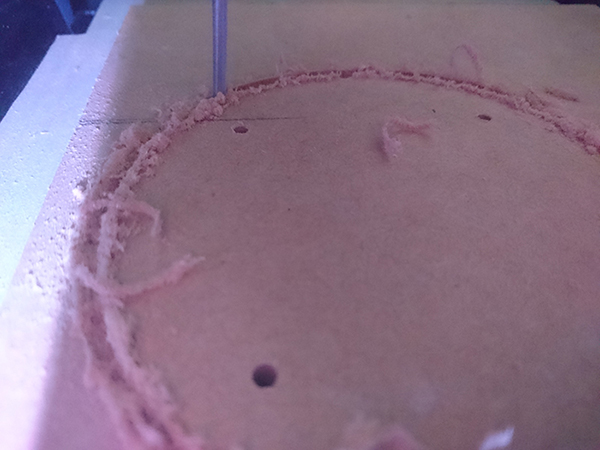
In the milling I have a problem, the feedrate is too fast and the depth of roughing is much and the measure various, test in the first milling when you do it and measure it, for this trouble there is a small separation between the pieces.


The next step is join with a wood sticks in the holes made in the figures like a pressfit, then cut the excesses of the assemblies, finally cover with enamel paint, in my case I occupy a paint spray with enamel.


To make the composite I use the resin and jute fiber, first in the mold spread a release agent in all the area that has contact with the resin, next cover with jute fabric, then mix the resin with catalyst, the catalyst portion is 10% of the total resin that you use, with the protection gloves, mask and apron. Apply in the fabric, use enough resin so you can join jute, remember make this process in an open space by the strong smell of the resin, to spread, you can use a sponge or brush.
Finally, with a plastic wrap and seal well to close the vacuum and the fabric can generate the figure.

In the previous videos, I show you how it closed under vacuum, in the first video I try with a motor of refrigerator but don't work very well because does not absorb what is necessary, in the second case I use a vacuum machine and it worked better.
I recommend using a bag that covers the whole figure to have a better absorption protect the tube with which it is absorbed to avoid leakage of the liquid to the machine, at the time of the design make assemblies or simulations to be sure of the measurements and avoid problems, secure the material well to the bed to perform a good machining, perform well the mixture of the resin to have an adequate time at the time of absorption.


In this week use the cloth his name is “yute” is a fiber natural very used for applications in textiles, I test with resin polyester, the fiber I see in my country to contain some things and this fiber is very resistant and to add the resin to give a firm, to try this I used the lamp as mold and use the mold to do in printing with a counter mold to adjust the fiber with the resin to form the figure.


First to begin to see the reaction the material make a little proof with the resin, then I prepared the lamp to use with a mold first is to protect with a release agent with kitchen oil, with the according protection in tour hands hold a fiber while place the resin, make sure that the resin creates a thin layer, next cover with counter mold to adjust the materials between them, the composition of the resin is of the 100 % of resin a 10% catalyst this mixture you can vary depend of how fast you need solidify the resin, if you need less time, you should increase the catalyst to make more fast the reaction.


In the second objective I describe the construccion and the process to make in the composite with resin and jute.
For the composite, I select two materials jute and resin, for test and how react the two materials.
The mold is the same of the previous assignment and use the molding and casting for make counter mold, the composite show in this assignment how that make and the amount you need to make the mixture.
The problem is the jute width and the mold is very attached at counter mold and place the jute between the mold and counter mold is very complicate, I recommended in the moment to make the mold first know the width of the fiber and proceed to print the mold.
The datasheet is in the top of the website.