This is the machine we will use to this assignment to make a different design, your operation is very similar to previous machine we use in electronic production is a CNC machining, to use this machine, first you must be with security measures like an earmuff that isolate the sound and goggles like protection main, by the size of the machine you must be safe in a distance because it power, also some pieces can hit you by spindle speed, while machining not leaving the machine alone for possible errors fasten small parts as safety.


Prepare the machine to cut first, attach the material with screw on the bed of the machine and put the correct mill to chance use the machine spanner, know the rules of preparation of the machine, switch in off and see the frequency variator is right.

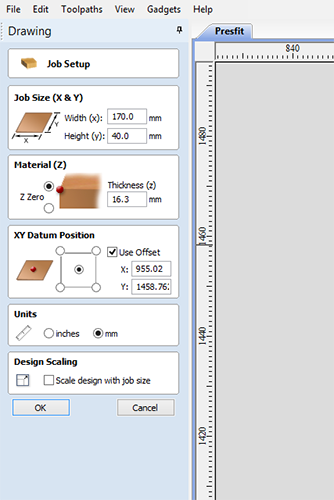


To continue with the software to edit the file also to configurate the position and margin of the cut, you can choose
the height where it starts cut the height of the material or thickness and situate the start point center, contour the piece,
if you want chance the units, in this case edit the piece in 2D.
you can edit the cutting depth, select the mill correct
you can decide cut for outside or inside and rotatio of the mill


If you have this error is a problem in "XY Datum Position" beacuse in x and y must be on 0, before configurate to cut you can simulate the cutting machine.


In the software you can set the point zero in axes x, y and z. For wax the axis z you must apply the sensor under the mill and pincers preform ground contact, make sure that it conect because can break the mill.


Once the file has been edited and the machine correctly configured, we proceed to cut the board, for security turn on the extractor
be sure to adjust the machine brush, while you are cutting listen to the mill in case it makes a greater effort.
turn the switch to
rotate the mill and finally press the button start in the software to start the cut.


At time of cutting at the time of cutting two problems appear two problems, in the first cut paused and was not reset to the starting point
and restar the cut, performed cuts in another side.
In the second cuttting the problem is the mill because was not the same as that selected
in the software, caused the part and cut measurements to change and do not cut completely.


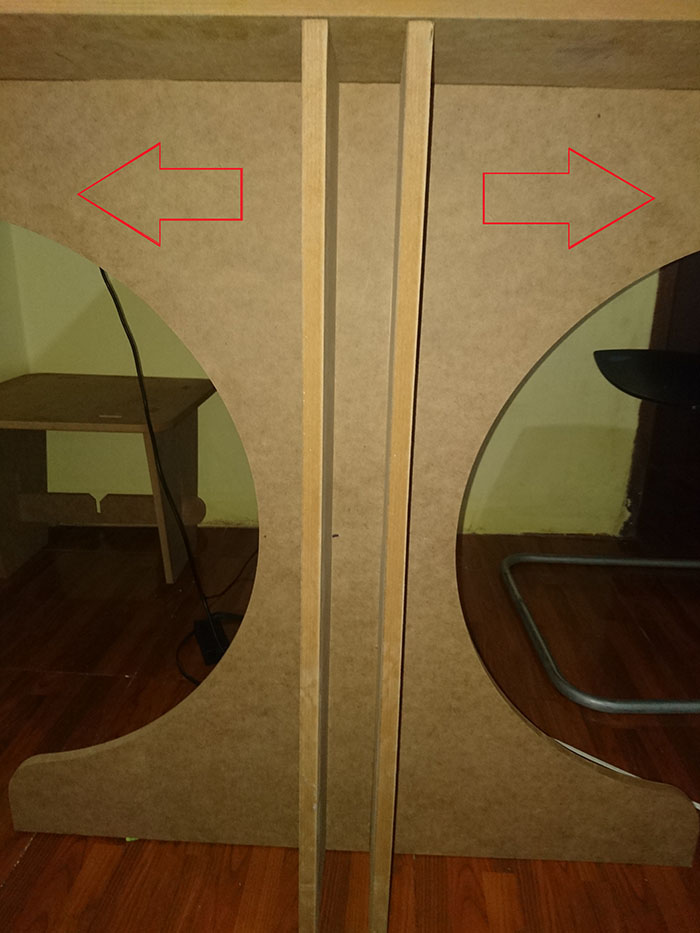
With the previous figures get the measures of the thickness of material to that presfit is right, if your measures of the figures not right you must correct it, the difference of the measures is a 1 mm to correct presfit, once corrected proced to cut, Do not forget the space that you must leave so that the mill does not stop with what you assure the material

To this piece I forget the dogbone , this is to the presfit be adjusted to the end and this was corrected by performing it in the software.


In the software to correct this error in the corners make a circle of 3.18 mm, the measure is for you to have a good union and varies according to the thickness of the material, for cut the excess line I use the command trim.


to fix this error, make the dogbones, I use a drill so that it does not touch the tips of the other piece, this was used due to the time of use of the machine.


In the second part the presfit did the pressfit space increare and table stability fail, to put the table in the top have diferents errors by the deformation of the base the presfit need more pressure.
The files are the same process that I use in these >>files<<, the design is base for the design in laser cut only I make a little modification.


I based this design in the assignment of the week 3, I change some parts, measures and little of the first design because we did not have much material, the tools to use for modify the design is line to increase or chance some measures, with the circle I use to make the dog bone for a correct press fit, to complement the tool line use trim entities to limit some lines to some extent, use symmetry of entities to duplicate some part of the figure.
For taste the machine first made a figure for try different measures for the correct presfit and with the first time have some problems but that helped us to know how to cut with the machine, the process and all the information is at the beginning of the machine.
The errors all we had is presented and stand out in the process both in the test and at the time of make the design.
Files in Repo