Project Documentation
Based on the project concept i started working on the applying fab academy skills each week on my project idea. The documentation is evolved each week as i made progress aligned to the skills i had learnt each week. As per recommendation from Neil this is a better way to document as i make progress.
Idea is to evolve the project in a set of spiral, each week. Also this helps me work on the project from the start instead of rushing towards the end weeks. You can find more details about Project Concept here and my final presnetation and video here
Approach i followed for my project
- Design using CAD
- Prototype Electronics on Arduino
- Make something using digital fabrication skills learnt in each week
- Integrate the solution
- Document progress
Week 3 Computer Aided design
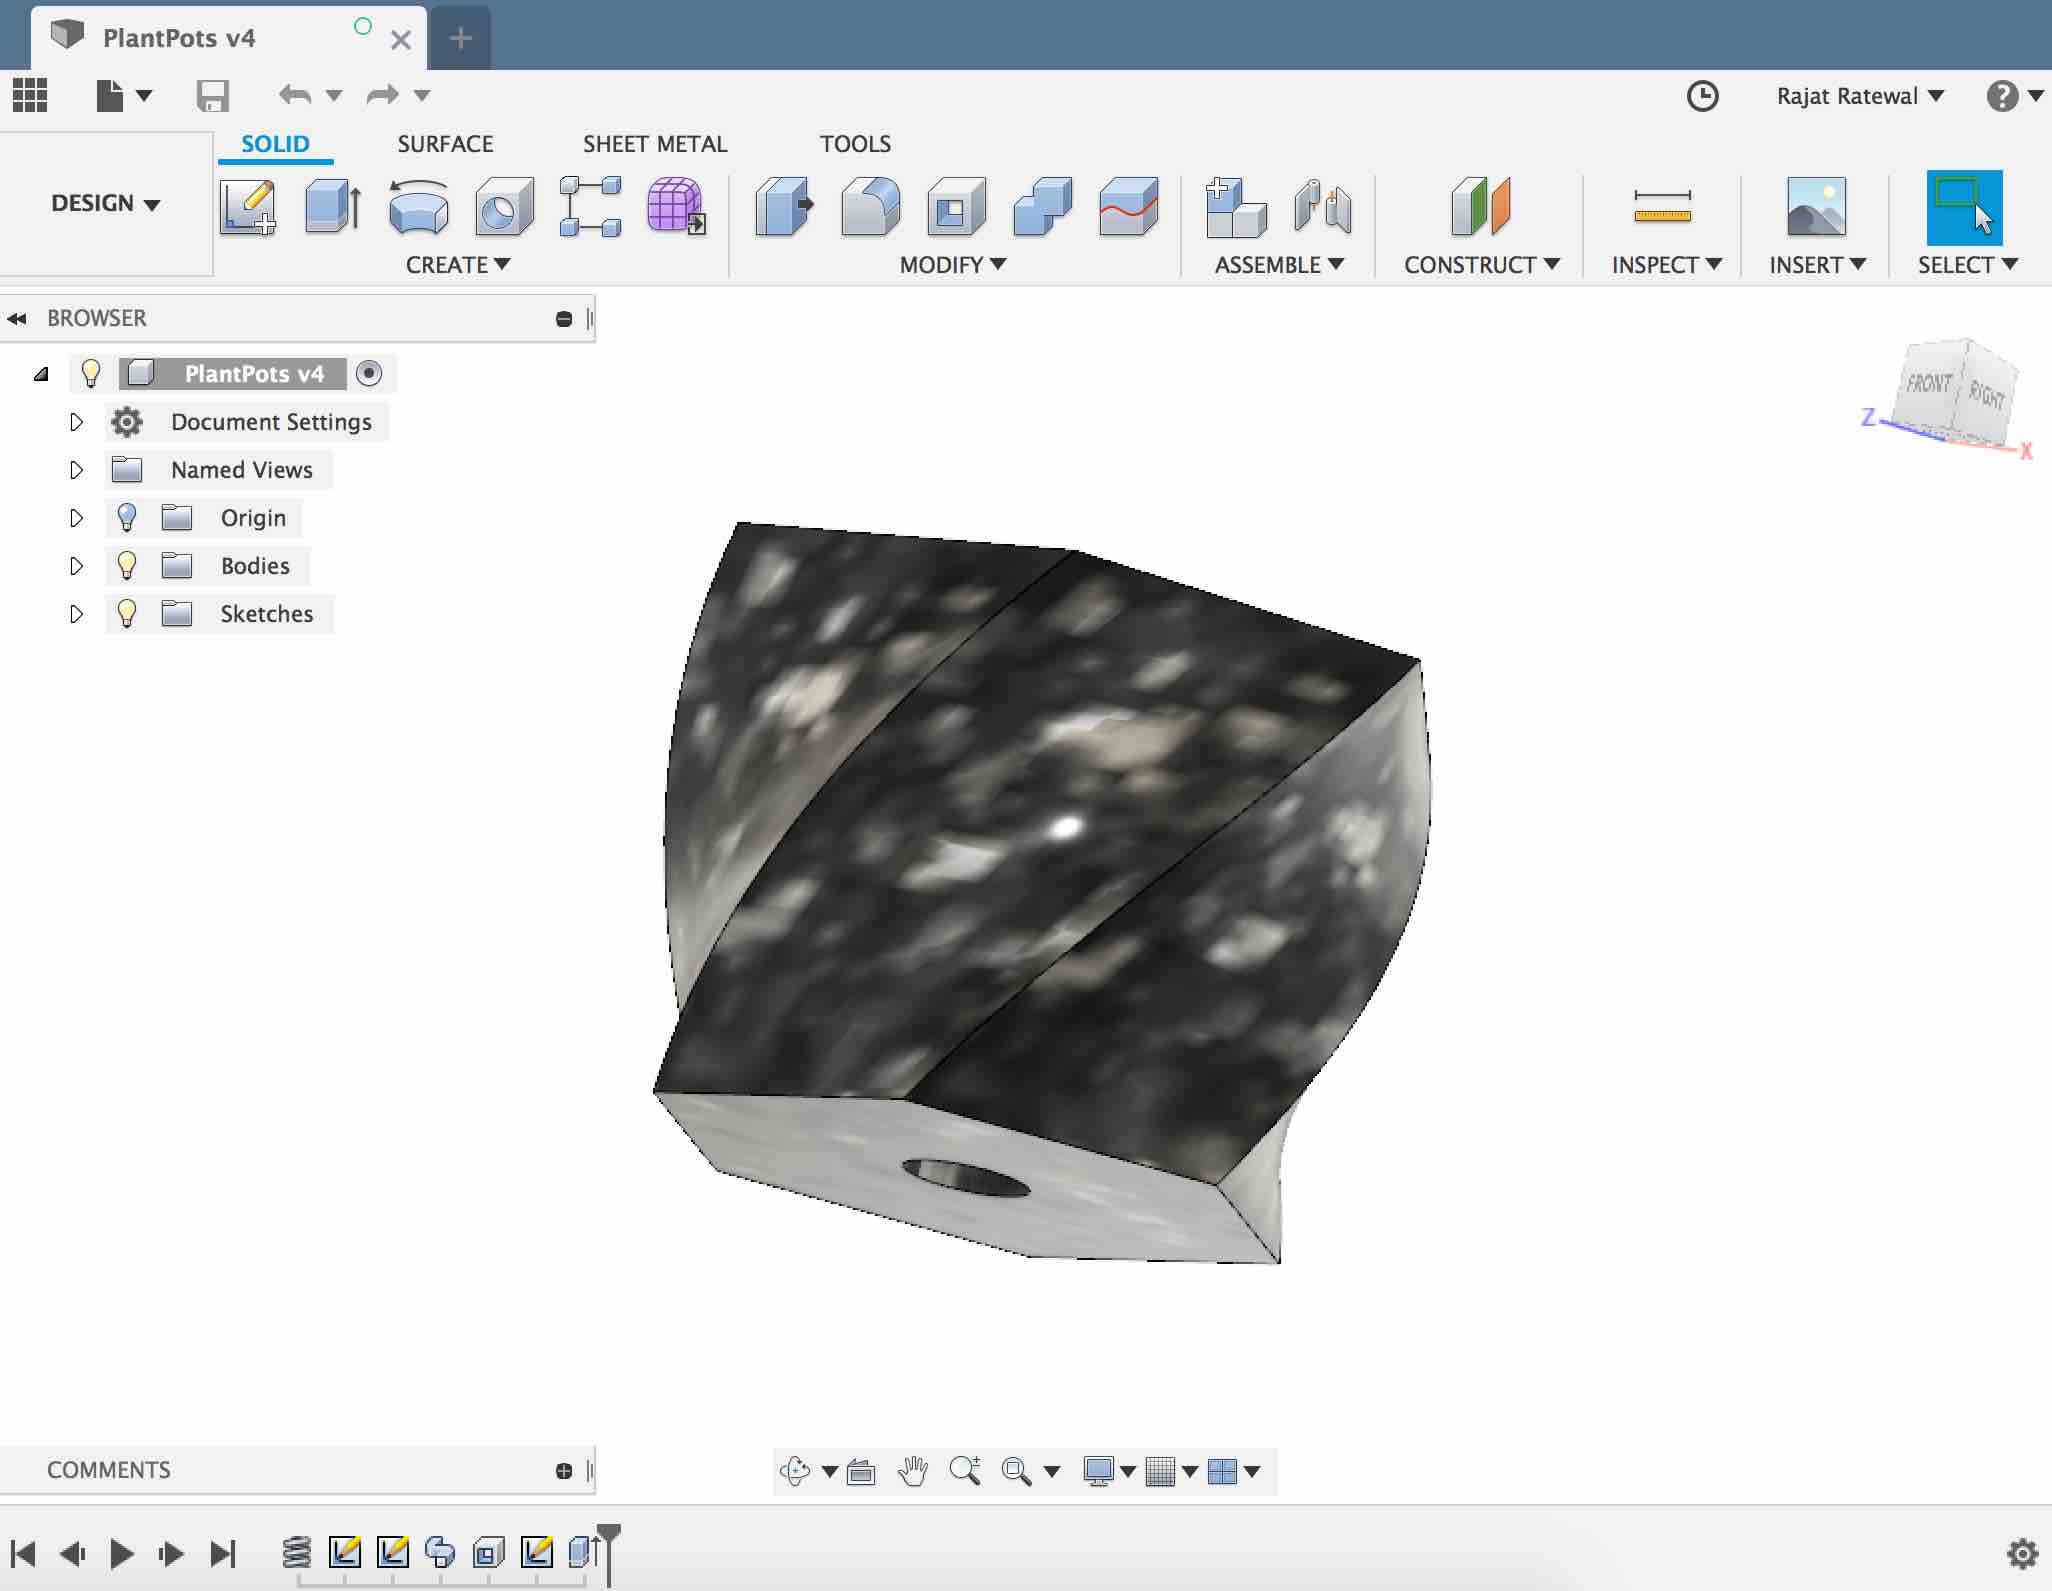
Designing a Flower Pot
In this week i learnt computer aided design and tried various softwares. At the end i settled for Autodesk fusion and here is what i designed by following below you tube tutorial aligned to one of my objective(Design my own frames and pots for planting seeds, saplings on my rooftop) mentioned in project concept. You can download the fusion file from here
Some cool images

I also tried to create a net pot to
Week 4 Computer Controlled Cutting
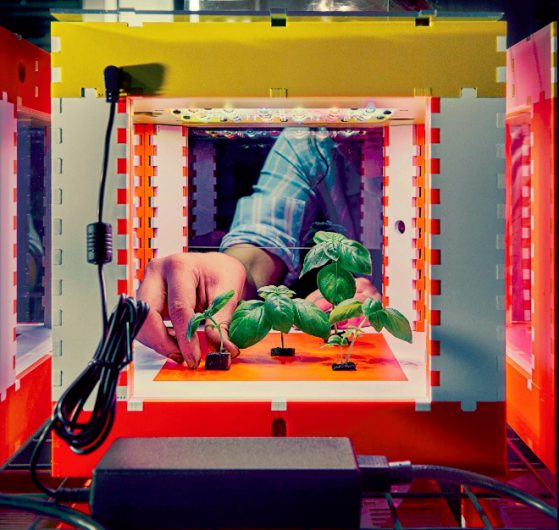
In this week i learnt about laser cutting. So i started working on Idea 1 to design a frame for food computer.
Idea
So i decided to build a press fit cube for personal food computer this week. The design idea is taken from MIT open agriculture food computer version 3
3d Design for Food computer
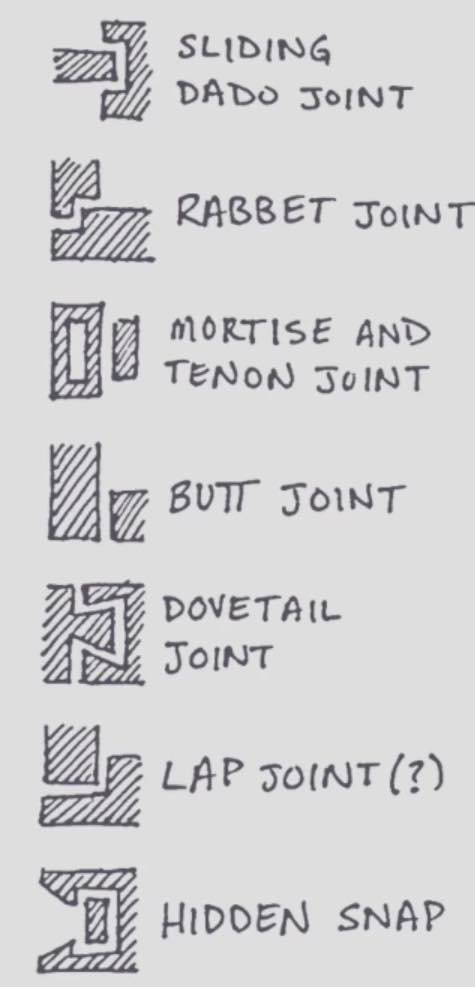
My instructor Rahul shared thar i cannot simply use design files already available in MIT open agriculture github repo but i need to showcase that i can design in CAD software. So instead of using the design from MIT i created a new parametric one. I used mortise tenon and sliding dado joint to build this.
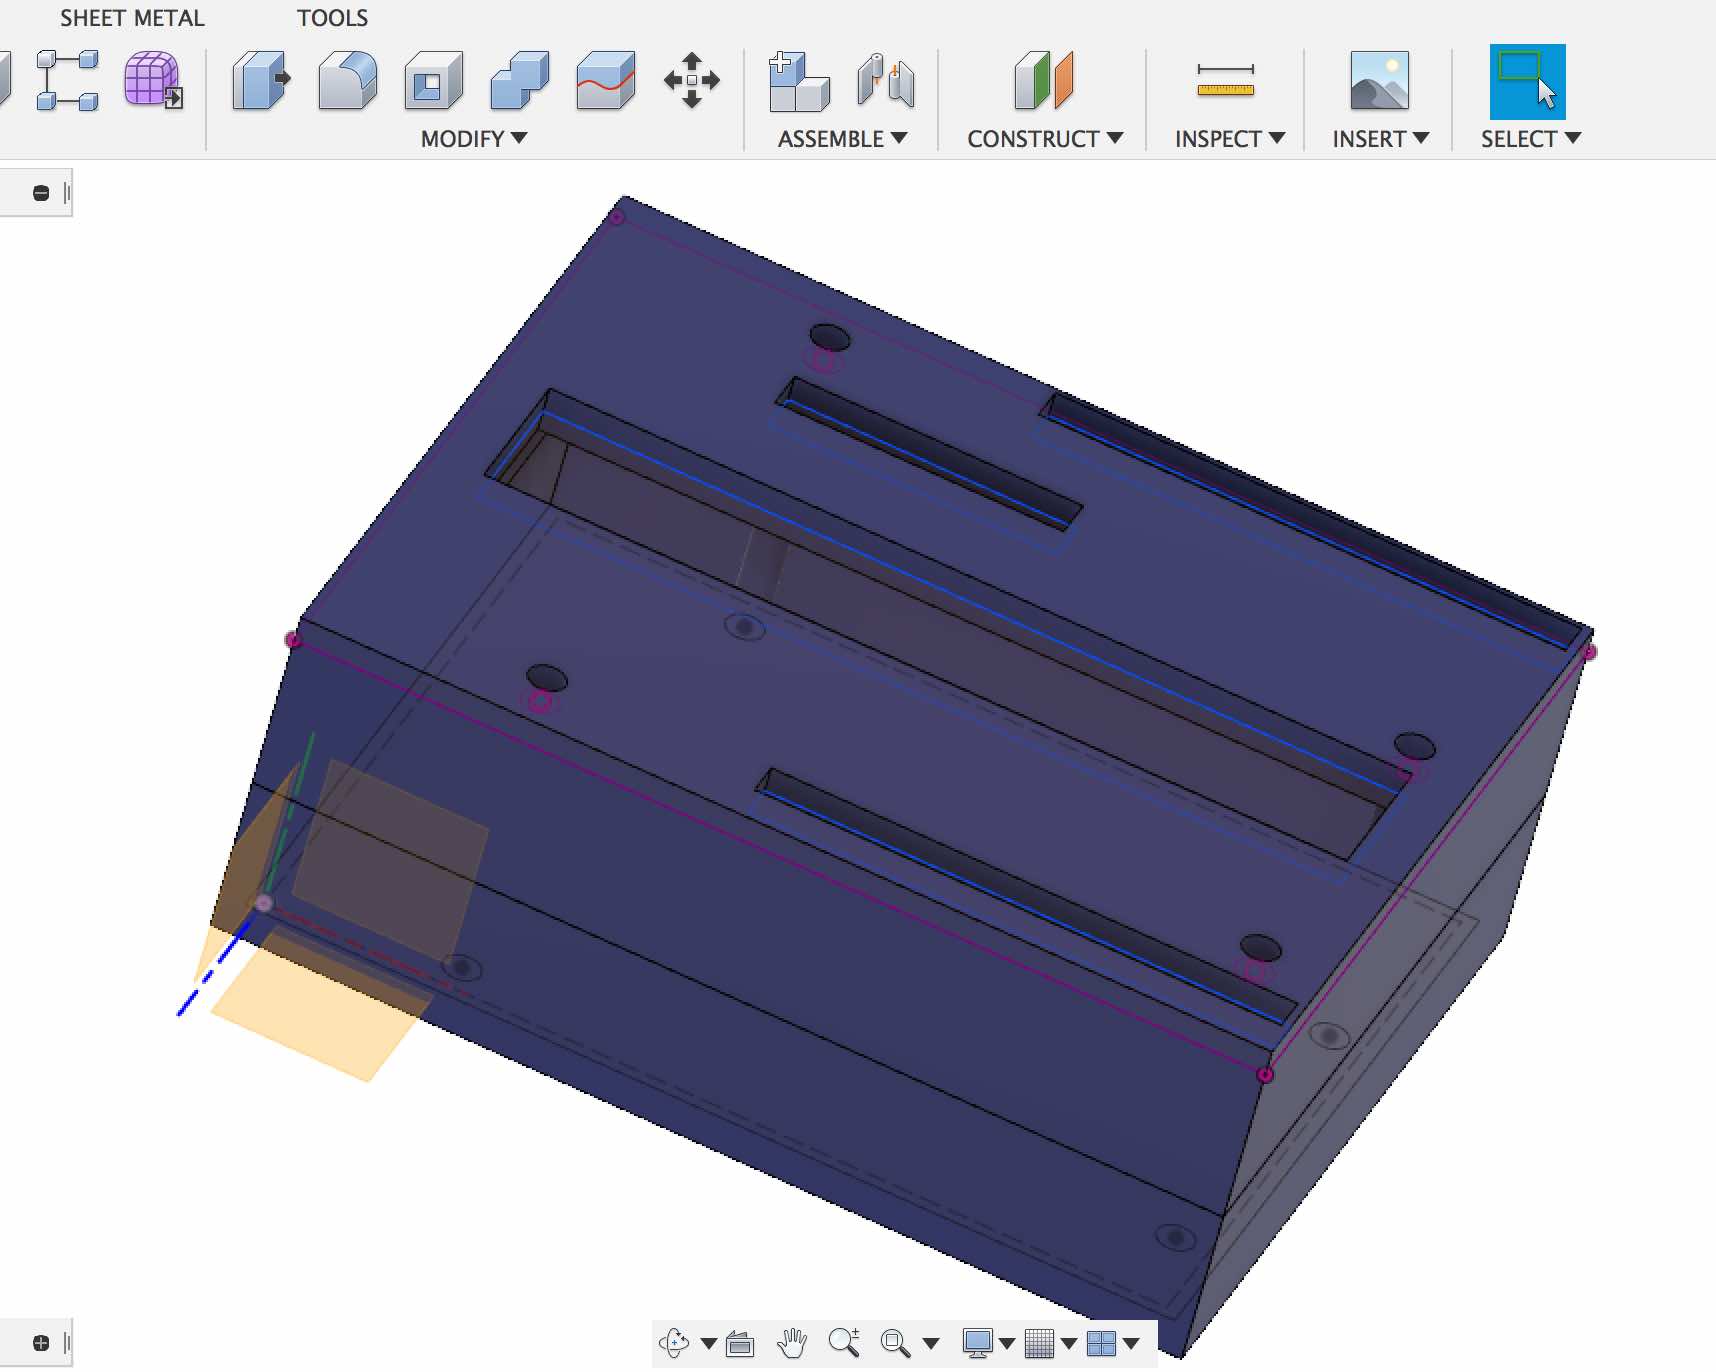
Design Autodesk fusion
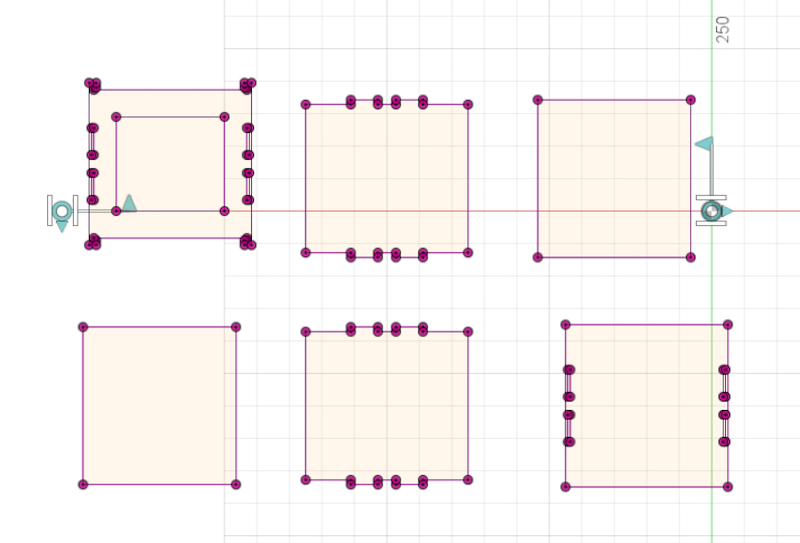
Normally for 2d cutting, in all 3d softwares you need to design a sketch. For me it was simpler to understand something in 3d and not in 2d. Its a different approach then most of my fellow students used in designing. So i have taken a reverse engineer approach where i design sonething in 3d and then convert it into 2d. For laser cutting you need your model in 2d extract. Simply means that the thickness of your material is the height.
I found following you tube tutorial quite handy in this.
You can download the file from here and look at design timleine to see how the design has evolved. But for simplicity below are the steps i did
- Create a single rectangle
- Use extrude to give some thickness (in sketch you never do it)
- Use circular pattern to copy the component
- Use Combine geometry feature to create slots. It was just amazing how simple interesection of geometry can give me types of slot
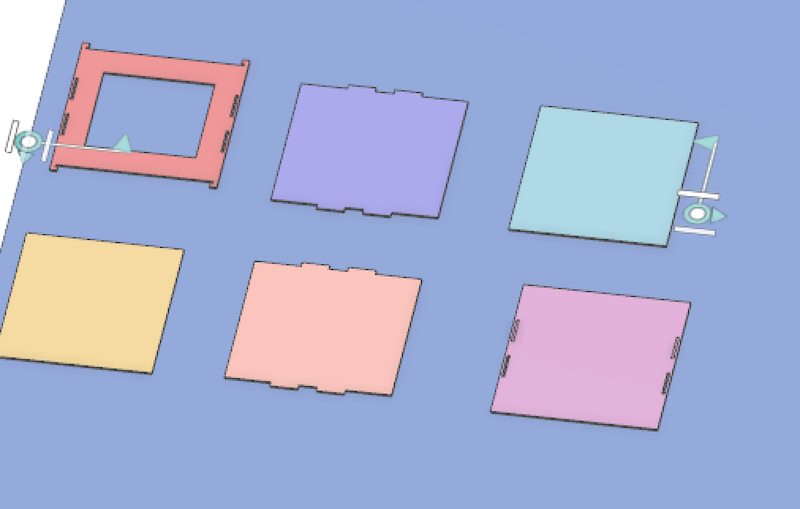
- Use assembly to put down the 3d objects
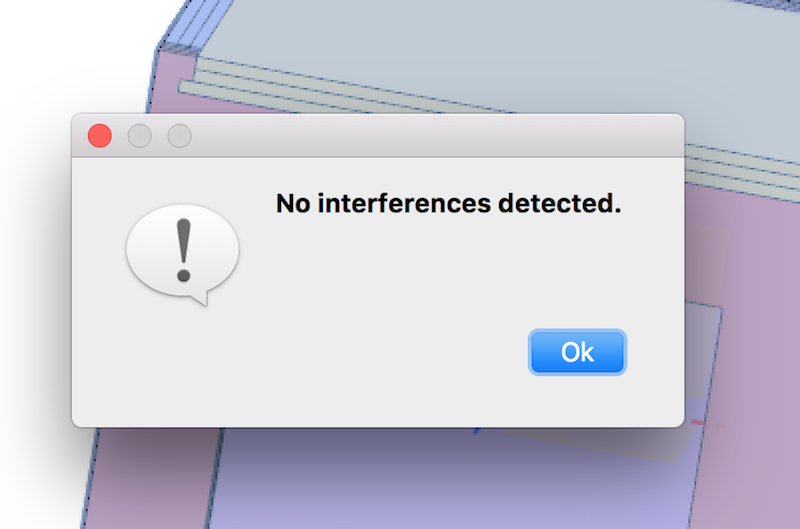
- Check for interferences in design
- Create a mid plane and use Intersect to get 2d picture
- Use export to DXF command and import it into Laser cutting software
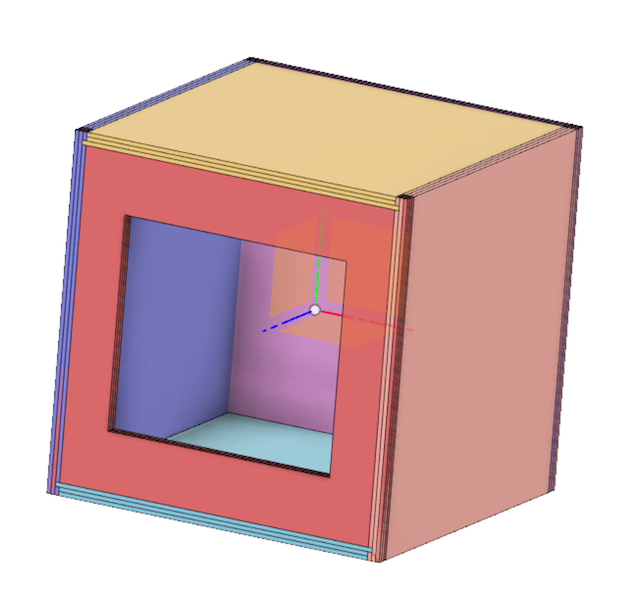
Snapshots from Fusion
Final designed Box
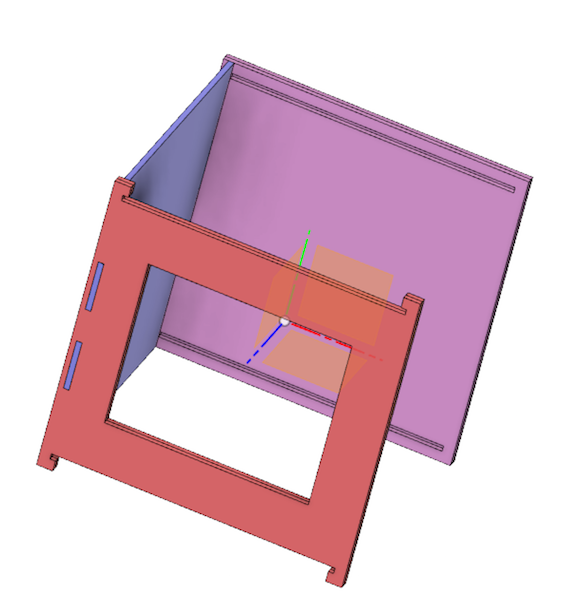
Sliding Joint

Mortise and Tenon Joint

2d Sketch
Cheking interfernces in design
Laser Cutting
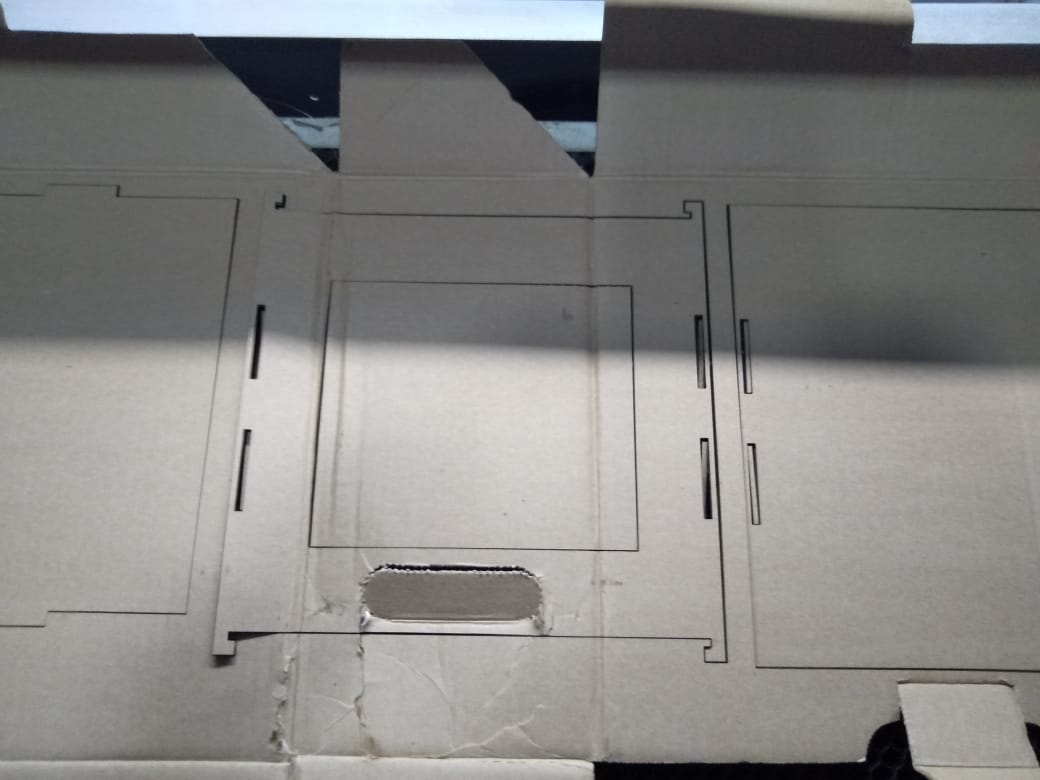
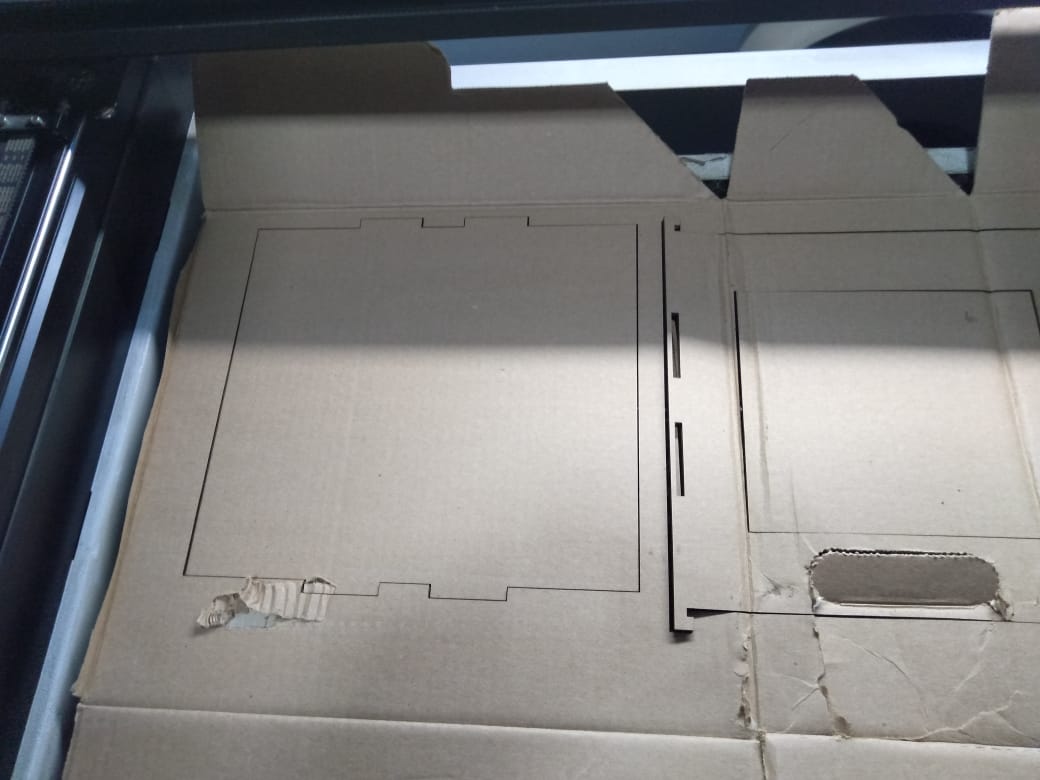
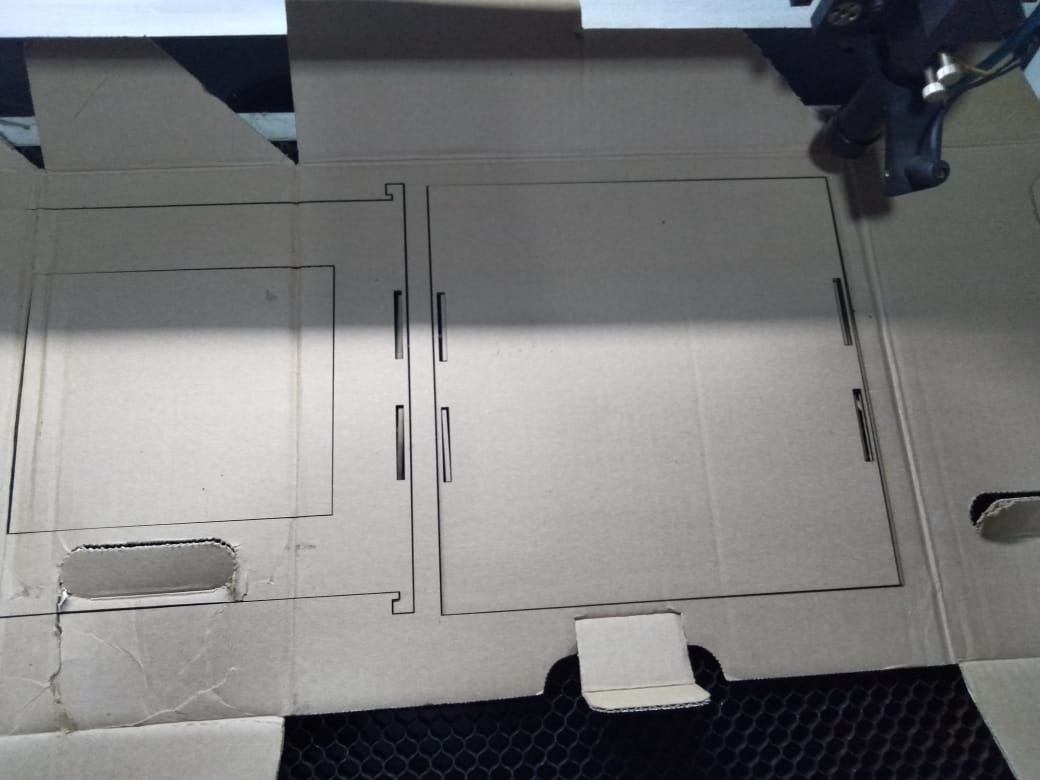
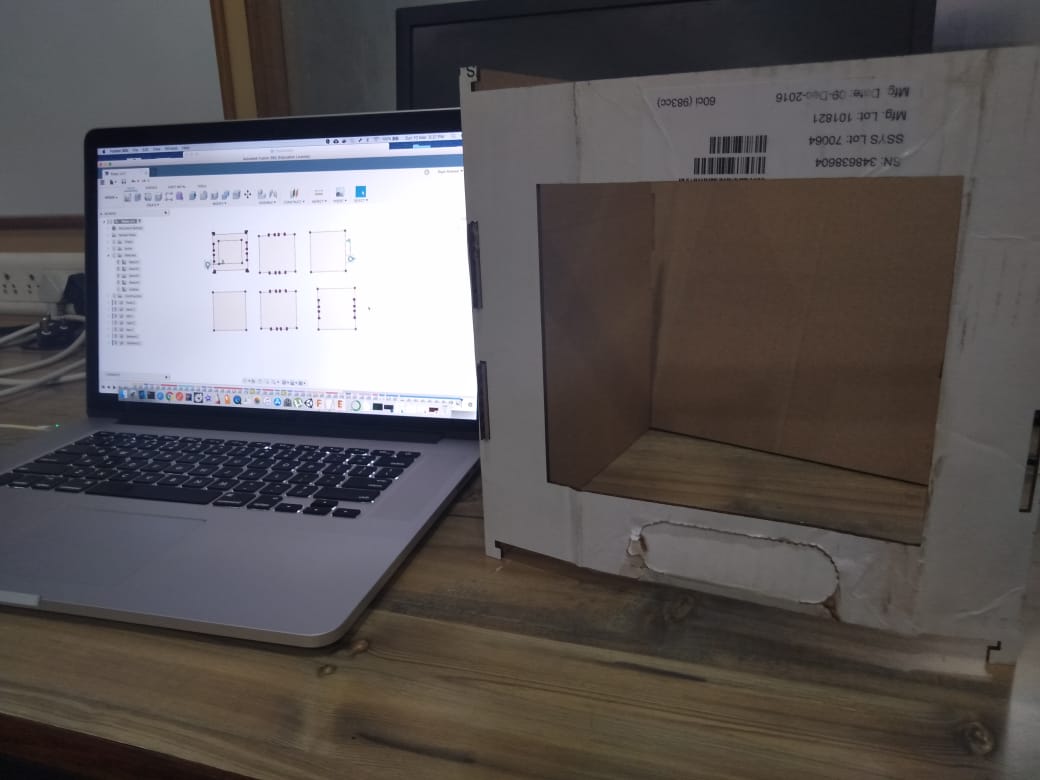
Final Outcome
Week 6 Computer 3D Scanning and printing
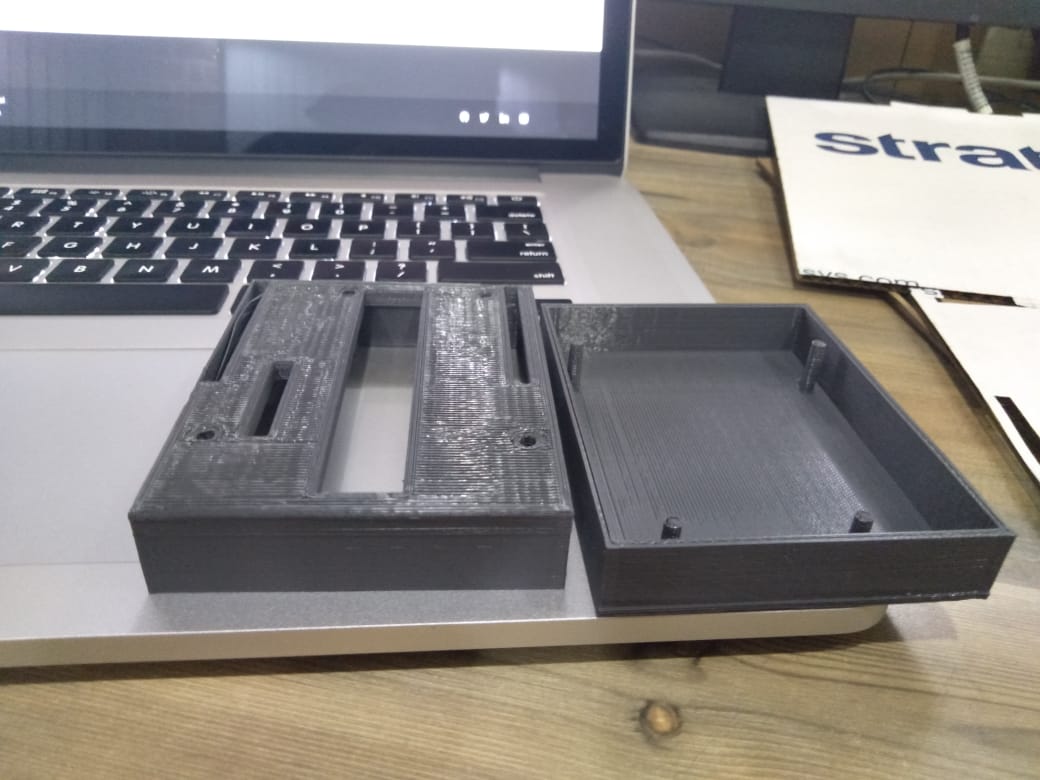
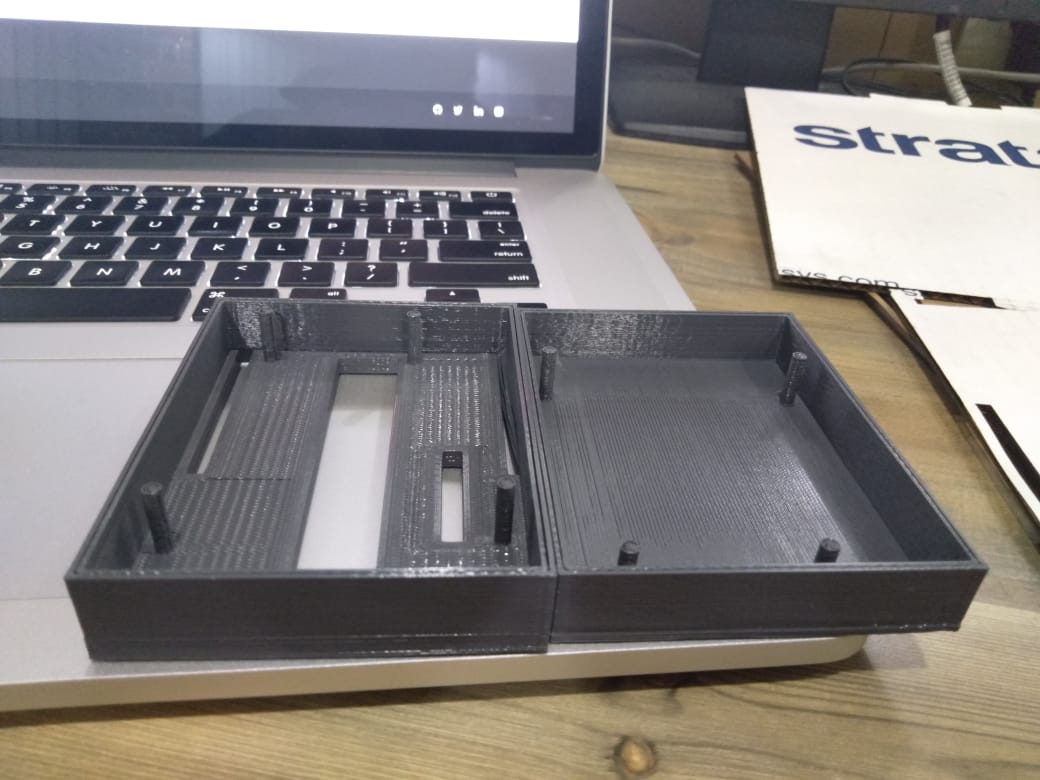
In this week i designed an enclosure for my electronics. 3d printing is an additive manufacturing technique. You can find more details for 3d printing week here
Designing the electronics enclousre box
I again used Autodesk fusio to design this. You can download the file here
Final Outcome
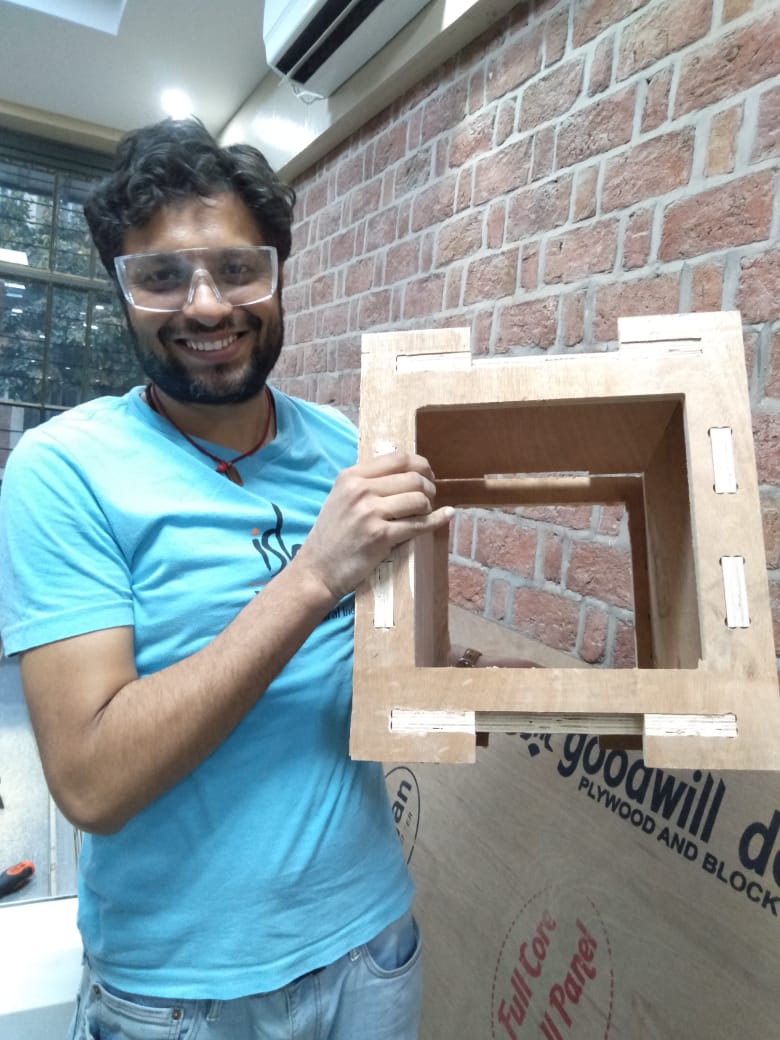
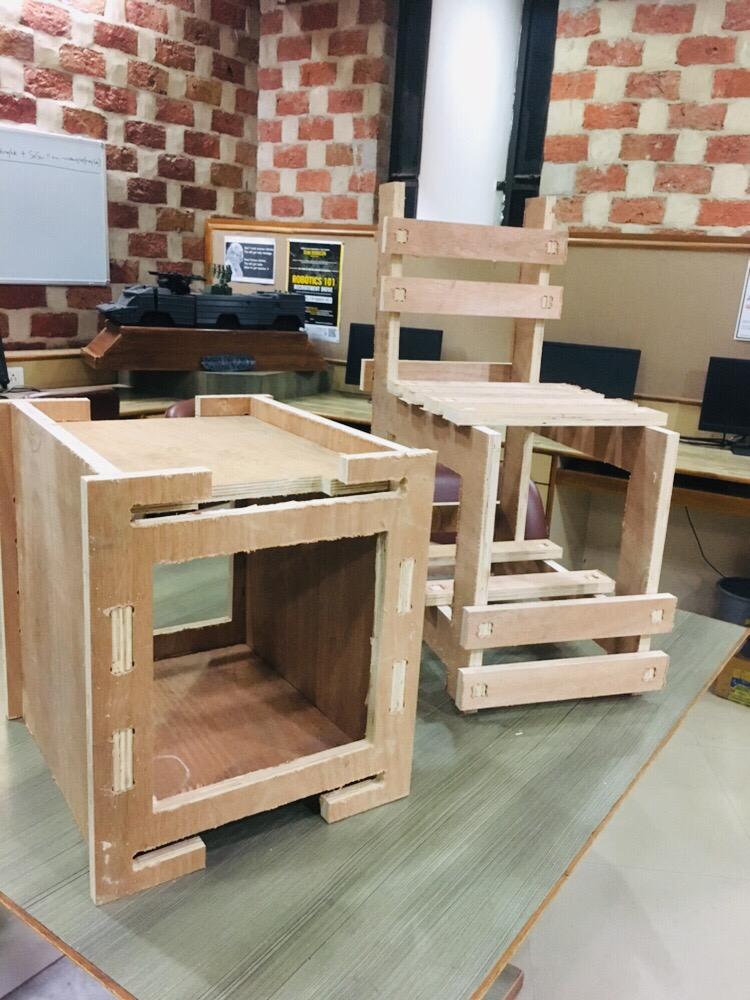
Week 8 Computer controlled machining
In this week idea was to create something big on CNC machine. This week we had issues with CNC machine and we waited for two weeks to finally get it fixed. In laser cutting week i designed a box, so plan was to create same design on CNC machine. And here is the output.
Week 11 and 12 Input and Output Devices
This week i started playing around with sensors. Like reading data from a sensor and then displaying it on an OLED display and also designed my final board.
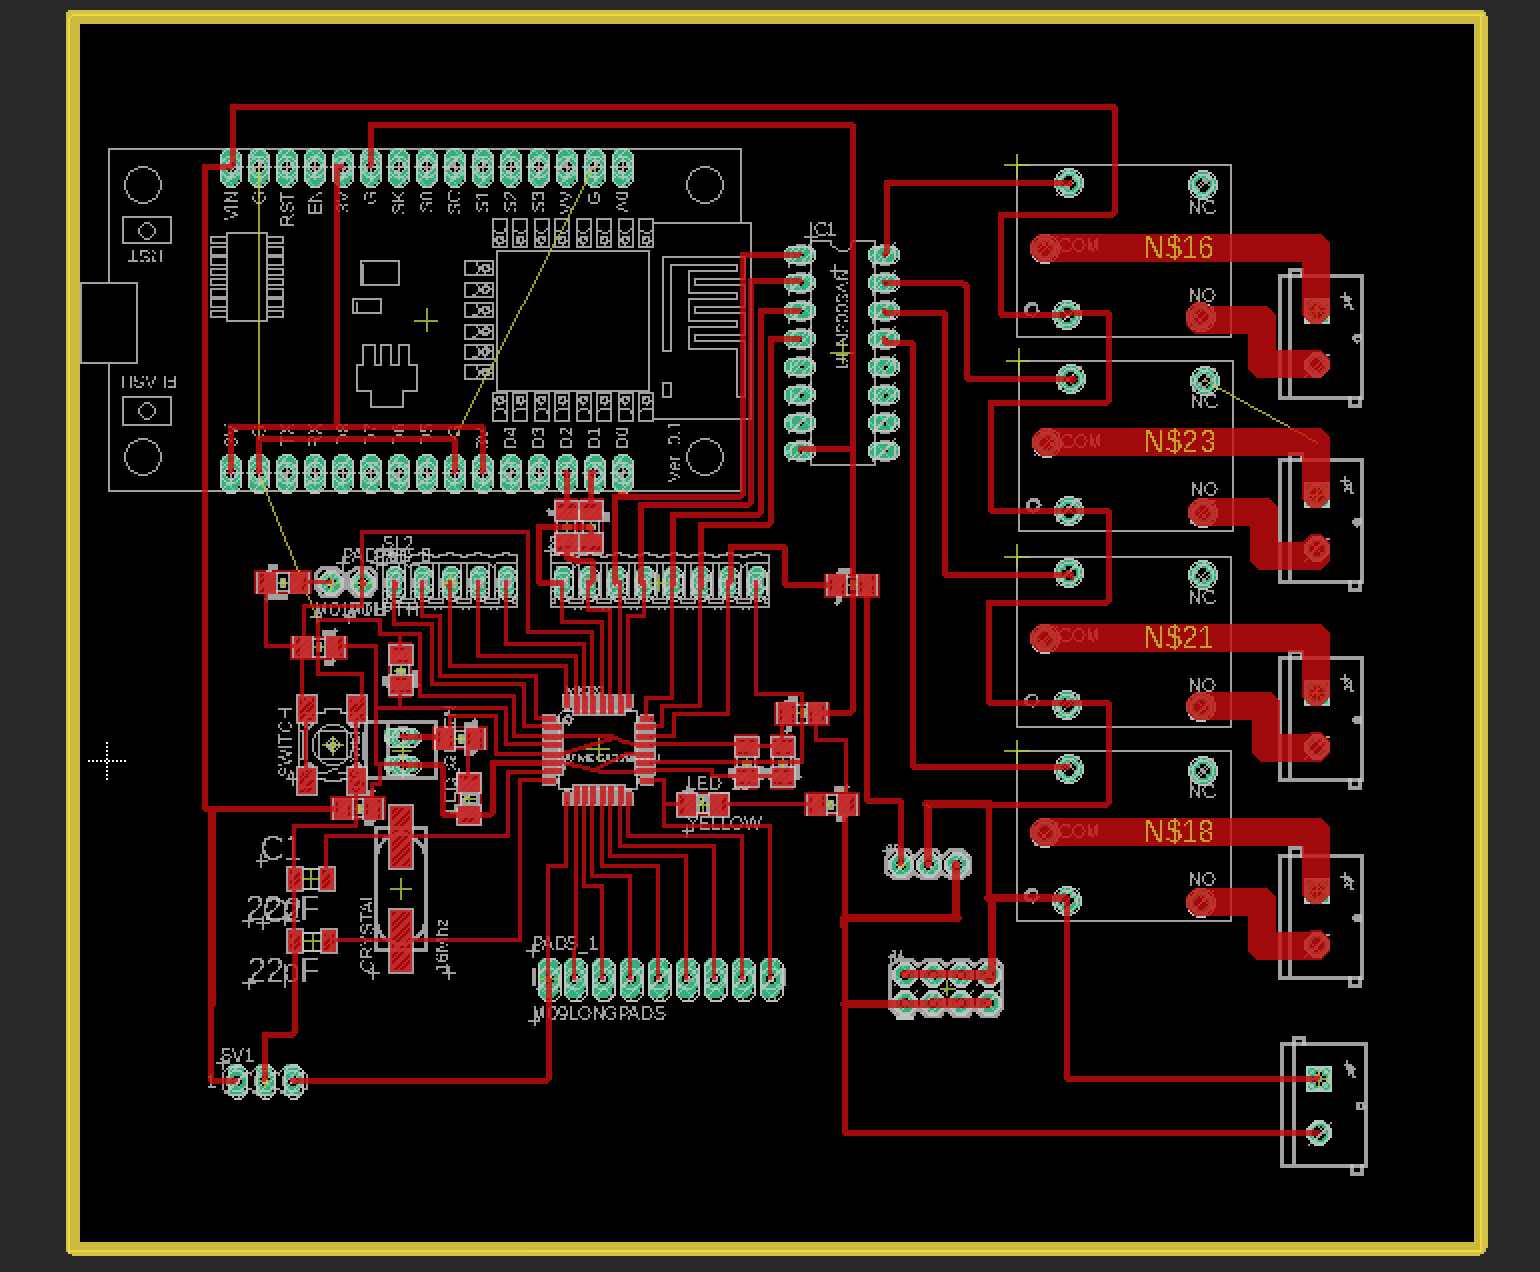
Project Board Design
I used eagle to design my final board. So i downloaded design files satsha kit and changed it as per my final project. I decided to use I2C protocol and added NodeMCU too. You can find more details in Week 11 Input Devices , Week 14 Networking and Communications and Week 16 Application and Interfaces how this design is a key integral part of my final project. Idea is that i am planning to use NodeMCU which will take instruction from Alexa (AWS Voice Enabled Speaker) to control various relays that would turn on LED lights, Fan, Water Pump etc. for food computer using Voice command.
Final Code for Input and output
#include <Adafruit_SSD1306.h>
#include <Adafruit_GFX.h>
#include <dht.h>
#include <Wire.h>
#include <ArduinoJson.h>

// OLED display TWI address
#define OLED_ADDR   0x3C

#define SCREEN_WIDTH 128 // OLED display width, in pixels
#define SCREEN_HEIGHT 64 // OLED display height, in pixels

// Declaration for an SSD1306 display connected to I2C (SDA, SCL pins)
#define OLED_RESET     -1 // Reset pin # (or -1 if sharing Arduino reset pin)
Adafruit_SSD1306 display(SCREEN_WIDTH, SCREEN_HEIGHT, &Wire, OLED_RESET);

dht DHT;

void setup() {
 Serial.begin(115200);           /* start serial for debug */
 pinMode(5, INPUT);
 pinMode(13, OUTPUT);
 pinMode(14, OUTPUT);
 pinMode(15, OUTPUT);
 pinMode(16, OUTPUT);
 pinMode(17, OUTPUT);

 Serial.begin(9600);

  // initialize and clear display
  display.begin(SSD1306_SWITCHCAPVCC, OLED_ADDR);
  display.clearDisplay();
  display.display();

  // display a line of text
  display.setTextSize(1);
  display.setTextColor(WHITE);
  display.setCursor(27,30);
  display.print("Food, Computer!");

  // update display with all of the above graphics
  display.display();

  delay(6000);
  display.setTextSize(2);

   Wire.begin(8);                /* join i2c bus with address 8 */
   Wire.onReceive(receiveEvent); /* register receive event */

}

void loop() {
  // put your main code here, to run repeatedly:

  delay(100);
  digitalWrite(13, HIGH);   // turn the LED on (HIGH is the voltage level)
  delay(1000);                       // wait for a second
  digitalWrite(13, LOW);    // turn the LED off by making the voltage LOW
  delay(1000);

  int chk = DHT.read11(5);
  Serial.print("Temperature = ");
  display.clearDisplay();
  display.setCursor(6,30);
  Serial.println(DHT.temperature);
  display.print("Temp:");
  display.print(DHT.temperature);
  display.display();
  delay(2000);
  display.clearDisplay();
  display.setCursor(6,30);
  display.print("Humi:");
  display.print(DHT.humidity);
  display.display();
  Serial.print("Humidity=");
  Serial.println(DHT.humidity);
  delay(2000);

}

void processCall(String command){
      DynamicJsonBuffer jsonBuffer;
      JsonObject& root= jsonBuffer.parseObject(command);

       if (root.success()) {
          int gpio = atoi(root["gpio"]);
          Serial.println(gpio);
          int state = atoi(root["state"]);
          Serial.println(state);

          //set GPIO state
          digitalWrite(gpio, state);
       }
}

// function that executes when data is received from master
void receiveEvent(int howMany) {
  String data="";
 while (0 <Wire.available()) {
    char c = Wire.read();      /* receive byte as a character */
    data += c;

  }
    Serial.println(data);           /* print the request data */
    processCall(data);         /* to newline */
}
Final Outcome
Week 13 Application and Implications
Objective of this week was answering questions related to my final project and propose a final project that integrates the range of units covered, answering the following questions.
- what will it do?
- who’s done what beforehand?
- what materials and components will be required?
- where will they come from?
- how much will it cost?
- what parts and systems will be made?
- what processes will be used?
- what tasks need to be completed?
- what questions need to be answered?
- what is the schedule?
- how will it be evaluated?
- projects can be separate or joint, but need to show individual mastery of the skills covered where possible, you - should make rather than buy the parts of your project
This week i spent time on answering the BOM for my final project like what material i would need and what would be the overall cost for the project.
BOM
Here is the list of material that was required for the project
| Component | Specs | Quantity | Usage | Cost | Image |
|---|---|---|---|---|---|
| NodeMCU12E | Wi-Fi | 1 | Connectivity with Alexa | 400 Rs | 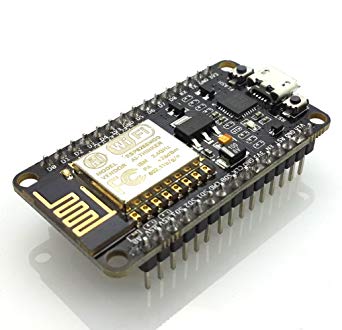 |
| Atmega 328p(SMD Package) | Microcontroller | 1 | Food Computer Brain | Available in Fab Lab Inventory |  |
| Crystal | 20 MHZ | 1 | Maintain clock cycles | Available as per Fab Lab Inventory |  |
| Food Computer Frame | Enclosure | 1 | Enclosure for Plants | made from 18 mm wood available in Fab Lab Inventory, created using digital fabrication Skills | |
| Power Supply SMPS 230v AC , 5VDC & 12VDC | 12v & 5 V | 2 | Power up LED for food computer and main supply for electronics board | 800 RS | 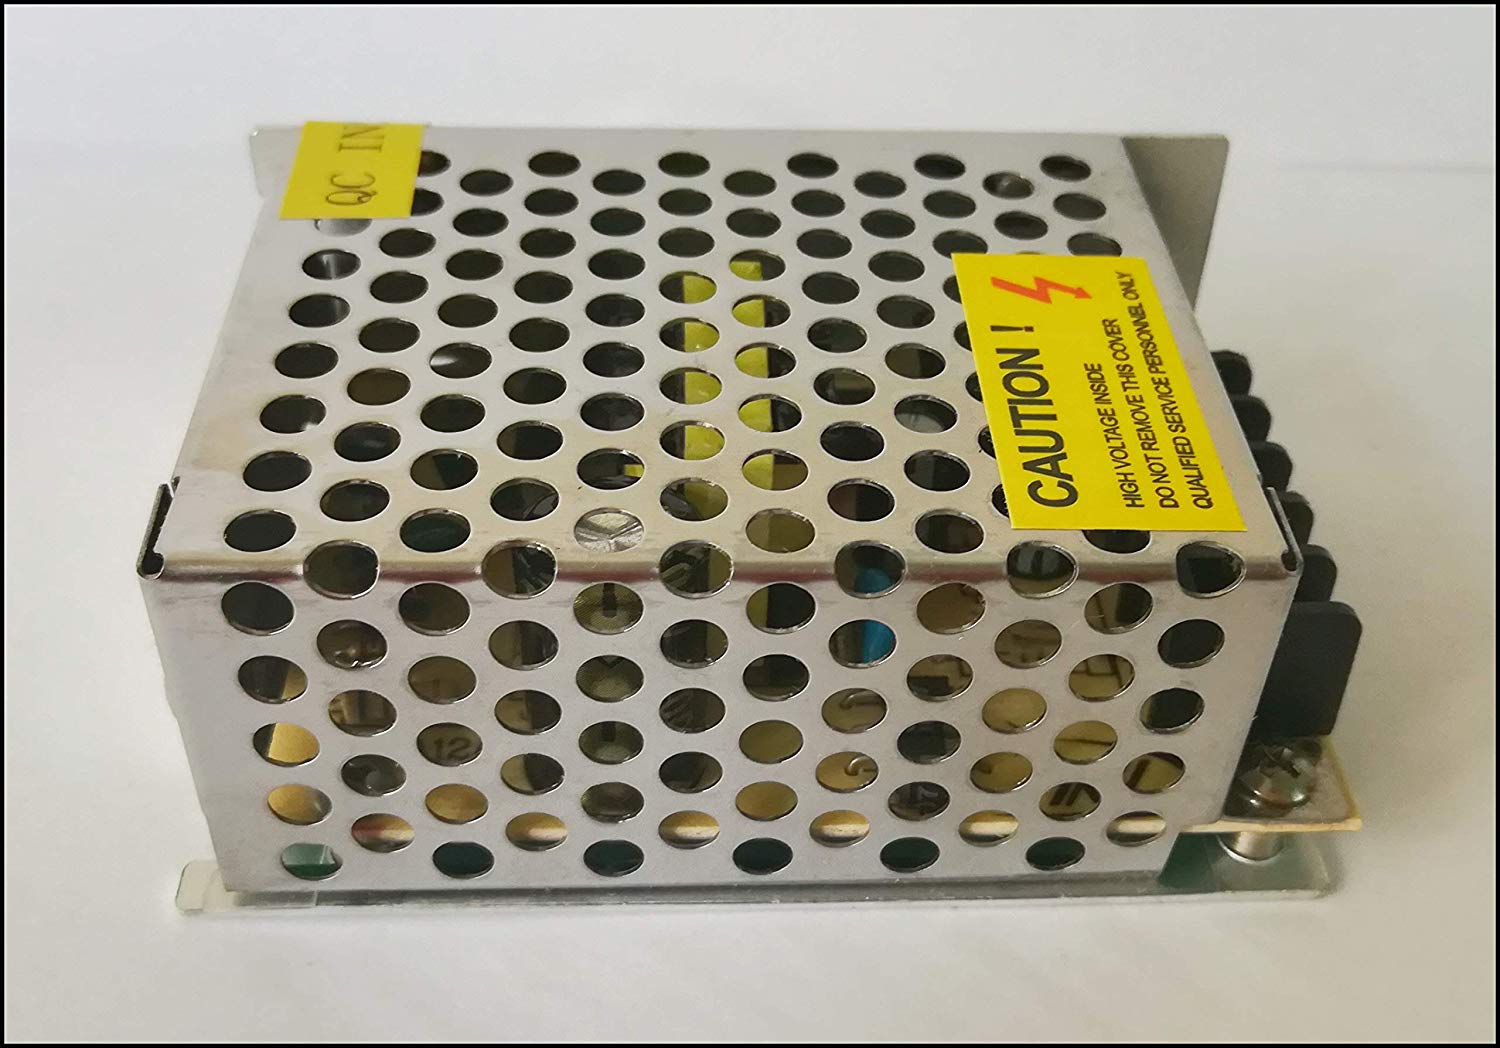 |
| DHT22 - Temperature and Humidity Sensor Module | Sensor | 1 | Capture Humidity and Temperature For Food Computer | Part of Fab Lab Inventory | 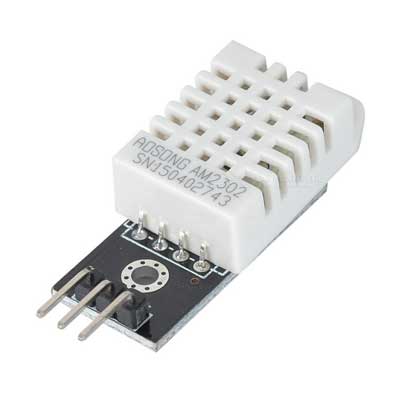 |
| IIC SPI Serial 128X64 OLED LCD LED Display | Sensor | 1 | Display Humidity and Temp Reading on LCD Display | 410 Rs | 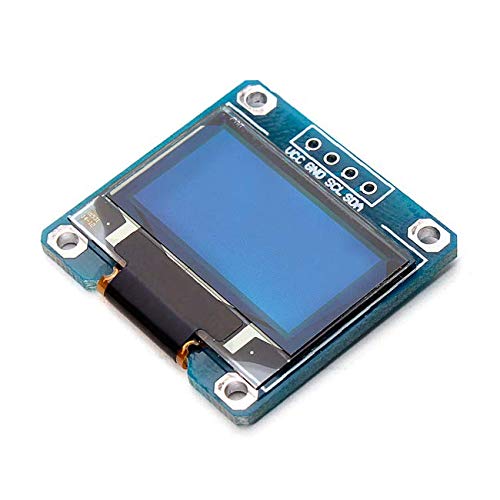 |
| Water Pump | AC 230V | 1 | To circulate water in food computer and aquarium | 300 Rs |  |
| Air Pump | AC 230V | 1 | To circulate Air in aquarium | 300 Rs | 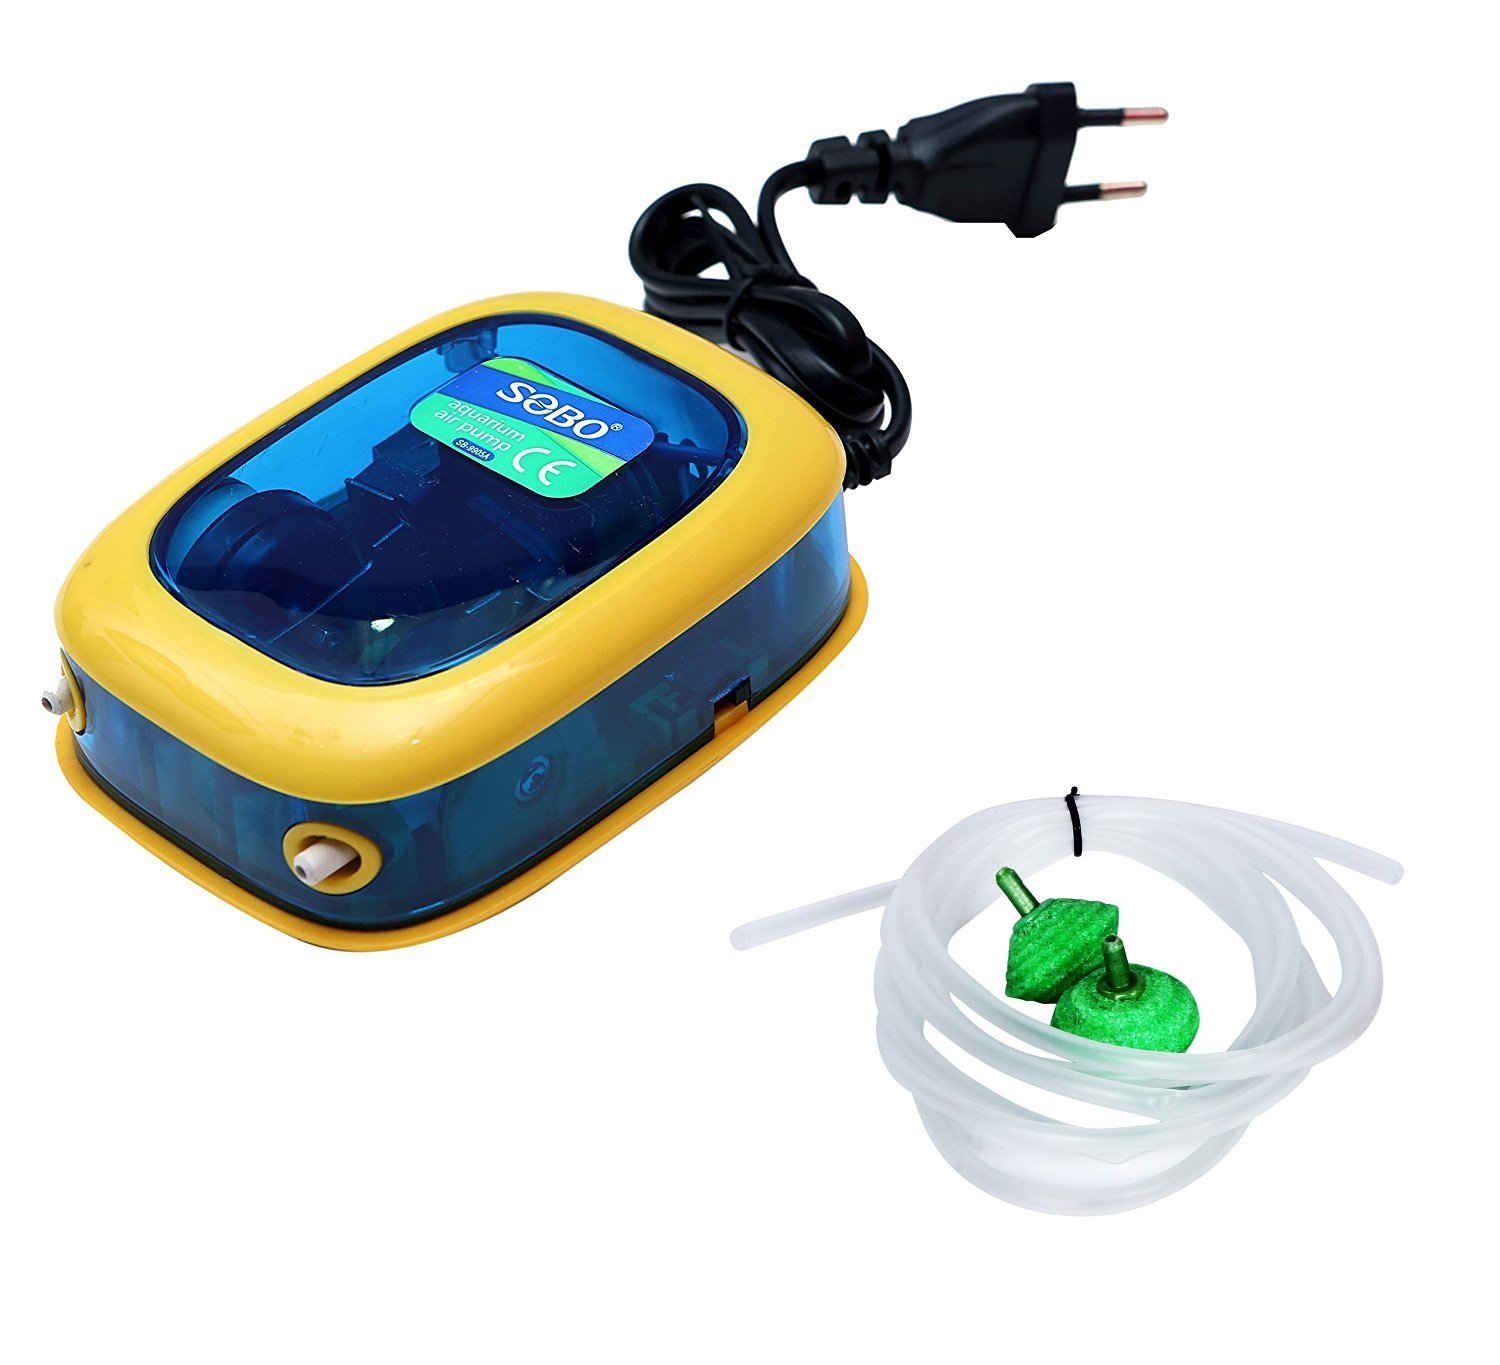 |
| LED Waterproof Hydroponic Plant Grow Strip Light | 12V DC | 1 | Growth Lights for Plant | 800 Rs | 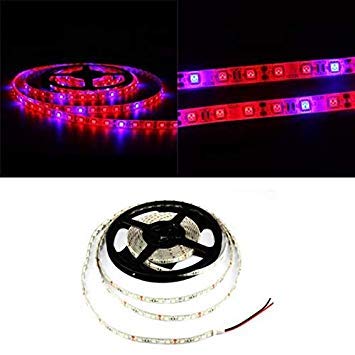 |
| Grow Bed | Water Proof Tray | 1 | To Hold Pump and Plant | 900 Rs |  |
| Relays | Switch, 5v DC | 4 | Switch to turn on Pump, LED light for food computer | 200 Rs | 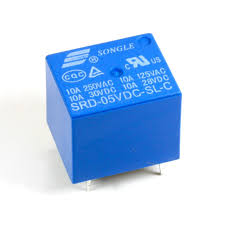 |
| ULN2003 a | SMD Package | 1 | Part of Fab Lab Inventory | 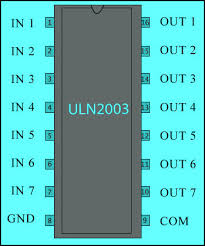 |
|
| Cable Bundle | 0.75 mm | 1 | Wiring all electrincal and electronics component | 300 Rs |  |
| Zip Ties | 1 Pack of 100 ZipTies | fastener, for holding items together | 100 Rs |  |
|
| PVC Panel Box | IP66 Water Proof | 1 | Enclosure for Electronics | 200 Rs | 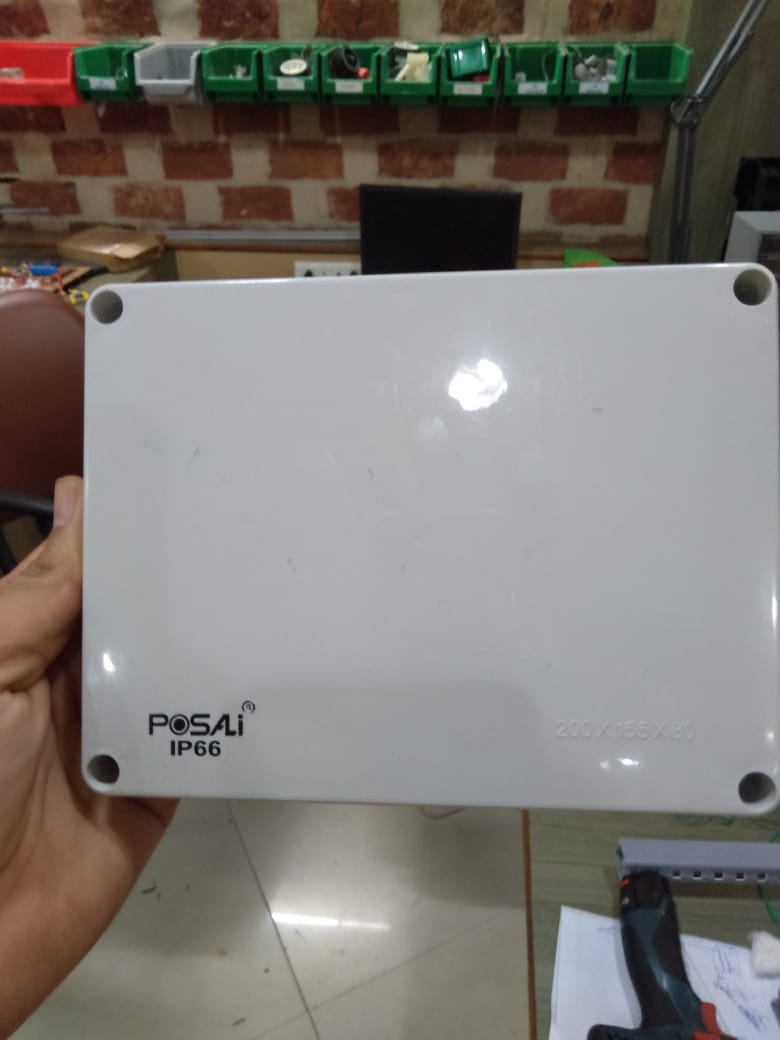 |
| Din Rail & Din Rail Screw Terminals | 1 Din Rail, 50 Din Rail Screw Terminals | Used for Wiring and Connecting Components in Electronics Enclosure | 800 Rs | 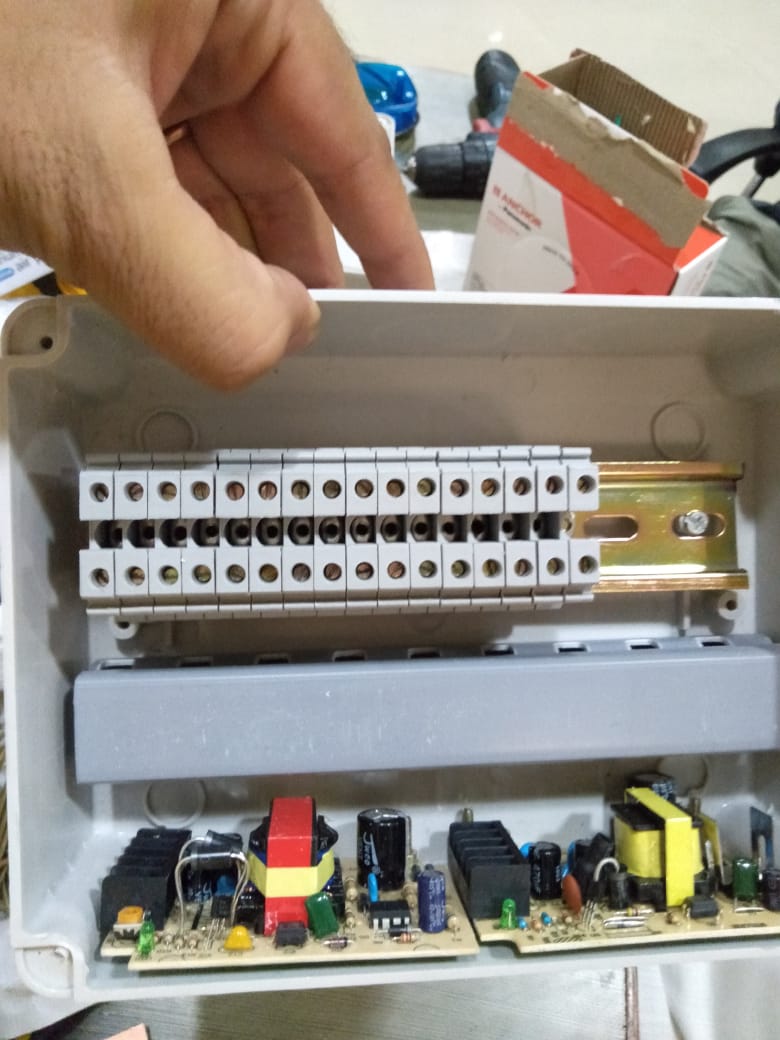 |
|
| Cable Tray | 1 | To Enclose Wiring | 200 Rs | 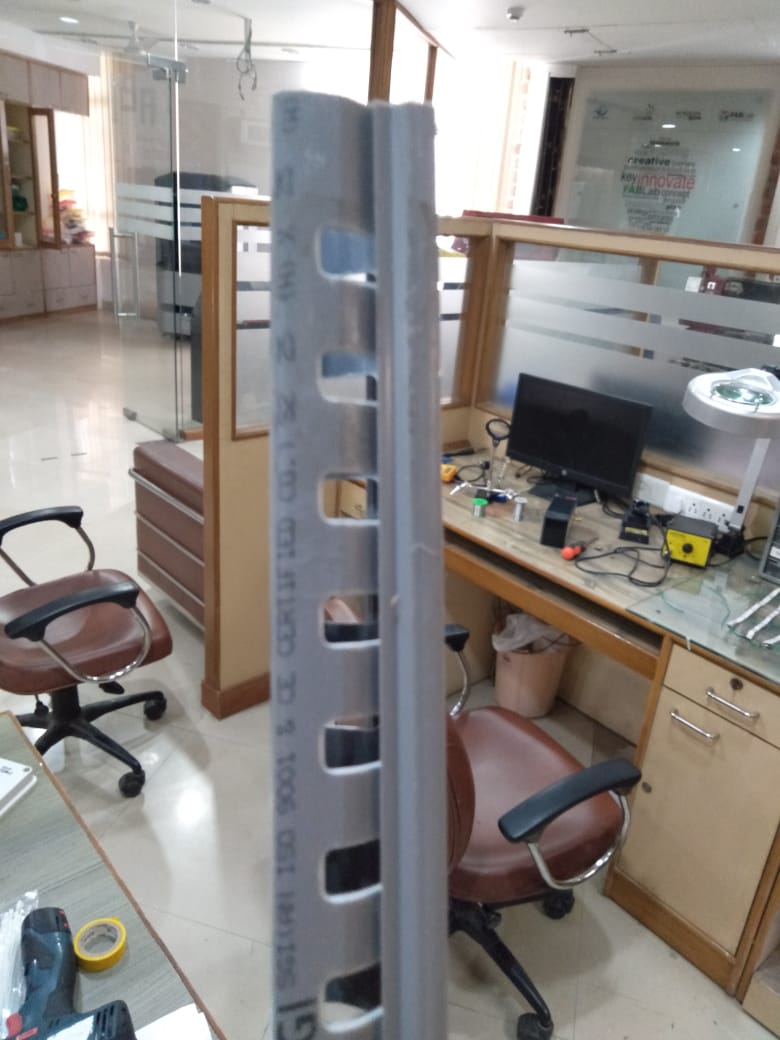 |
|
| Nuts and Screw Terminals | 2 inch and 0.5 mm diameter | 100 | To Assemble the Electronics and Wiring | 200 Rs |  |
| Alexa or Alexa App | Voice Enabled Speaker | 1 | To Control Food Computer Using Voice Command | 4000 Rs |  |
| Aquarium | 1 | To Hold Fish | 400 Rs | 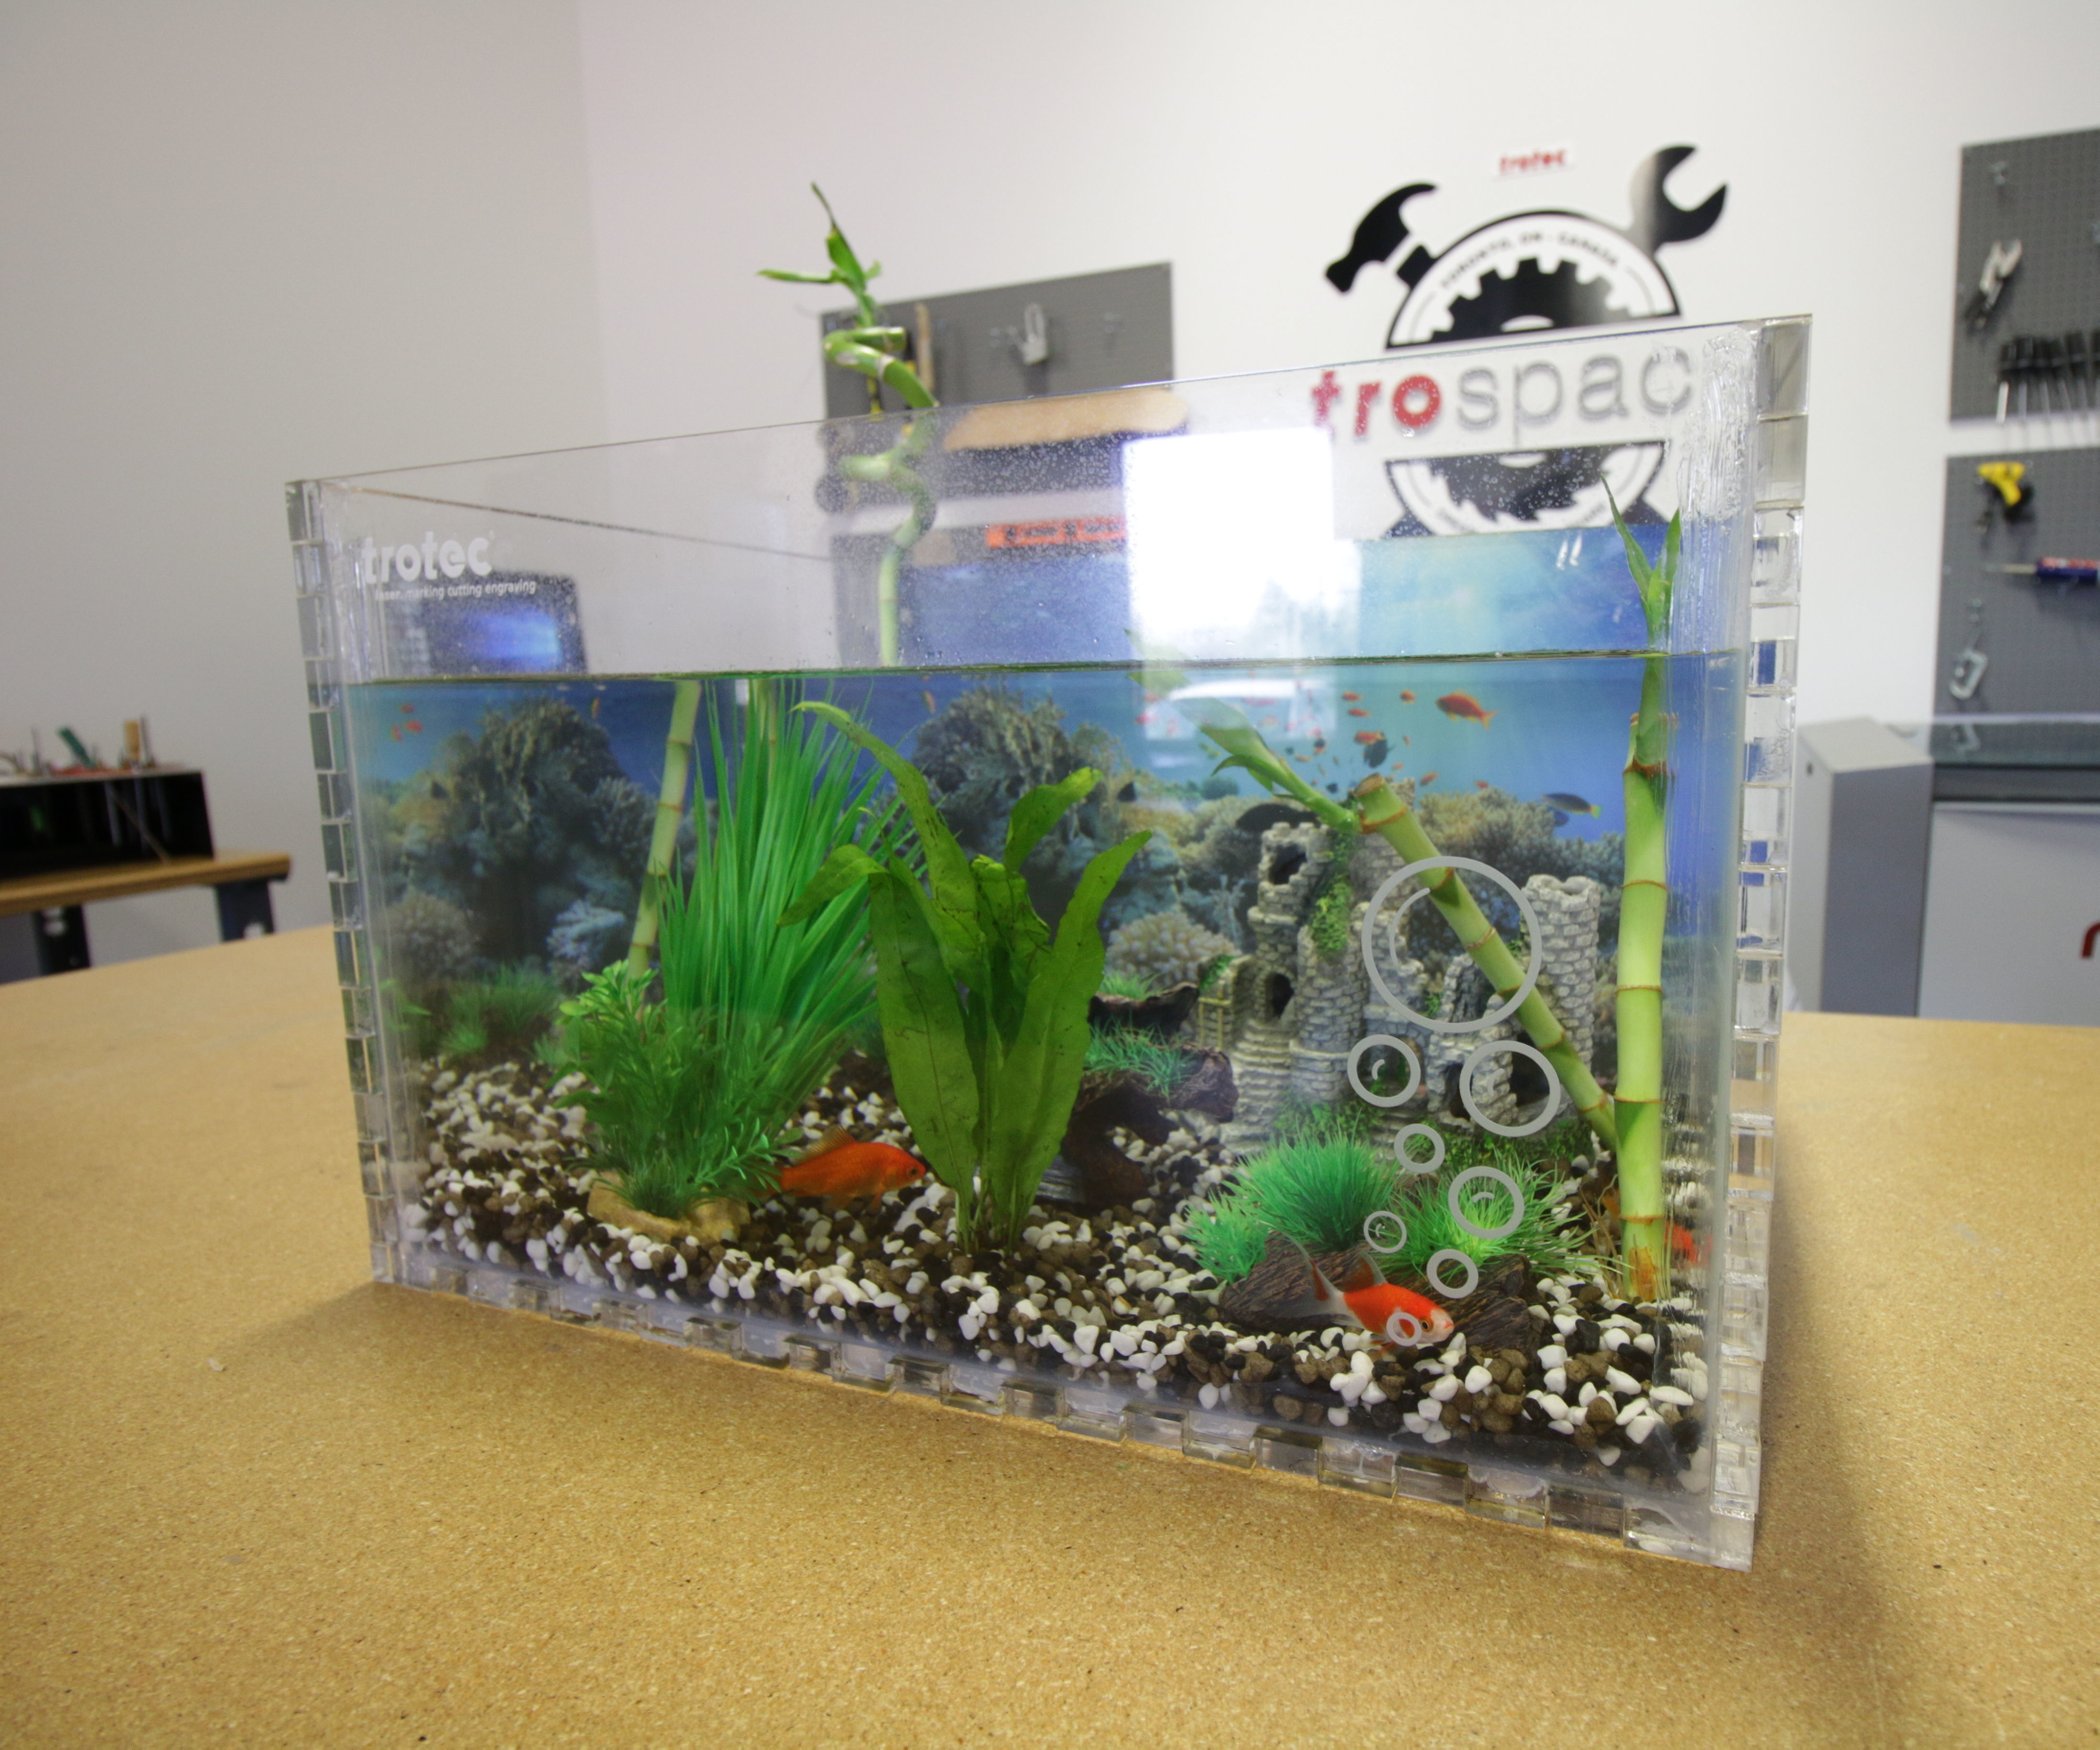 |
|
| Aquarium Filter | 230 V AC | 1 | To Provide Oxygen | 200 Rs |  |
Week 14 Networking
This week i tested out the Alexa integration with my food computer. Please refer to Week 14 Networking and Communications for more details on I2C protocol and Sinric interface through which i have integrated the Alexa with my final board.
Below is the final code for NodeMCU.
Code for NodeMCU
// Load Wi-Fi library
#include <ESP8266WiFi.h>
#include <ESP8266WiFiMulti.h>
#include <Wire.h>
#include <ArduinoJson.h>
#include <StreamString.h>
#include <WebSocketsClient.h> //  https://github.com/kakopappa/sinric/wiki/How-to-add-dependency-libraries


ESP8266WiFiMulti WiFiMulti;
WebSocketsClient webSocket;
WiFiClient client;

#define MyApiKey "7127c370-fc11-4d52-a586-4f634529b1d9"
#define HEARTBEAT_INTERVAL 300000 // 5 Minutes

uint64_t heartbeatTimestamp = 0;
bool isConnected = false;

// Replace with your network credentials
const char* ssid = "Airtel-xxxx"; // Input your wifi network name
const char* password = "XXXX"; // Input your wifi password

// Set web server port number to 80
WiFiServer server(80);

// Variable to store the HTTP request
String header;

// Auxiliar variables to store the current output state
String relay1State = "off";
String relay2State = "off";
//String relay3State = "off";
//String relay4State = "off";

// Assign output variables to GPIO pins
//const int relay1 = 5; // GPIO5 D1
//const int relay2 = 4; // GPIO4 D2
//const int relay3 = 0; // GPIO0 D3
//const int relay4 = 2; // GPIO2 D4

void setup() {
  Serial.begin(115200);

  // Connect to Wi-Fi network with SSID and password
  Serial.print("Connecting to ");
  Serial.println(ssid);
  WiFi.begin(ssid, password);
  while (WiFi.status() != WL_CONNECTED) {
    delay(500);
    Serial.print(".");
  }
  // Print local IP address and start web server
  Serial.println("");
  Serial.println("WiFi connected.");
  Serial.println("IP address: ");
  Serial.println(WiFi.localIP());
  server.begin();
  Wire.begin(D2, D1); /* join i2c bus with SDA=D1 and SCL=D2 of NodeMCU */

   // server address, port and URL
  webSocket.begin("iot.sinric.com", 80, "/");

  // event handler
  webSocket.onEvent(webSocketEvent);
  webSocket.setAuthorization("apikey", MyApiKey);

  // try again every 5000ms if connection has failed
  webSocket.setReconnectInterval(5000);

}

// deviceId is the ID assgined to your smart-home-device in sinric.com dashboard. Copy it from dashboard and paste it here

void turnOn(String deviceId) {
  if (deviceId == "5ccexxxxxxx") // Device ID of first device
  {
    Serial.print("Turn on device id: ");
    Serial.println(deviceId);
     Wire.beginTransmission(8); /* begin with device address 8 */
     Wire.write("{\"gpio\":14,\"state\":1}");  /* sends hello string */
     Wire.endTransmission();    /* stop transmitting */
  }
  else if (deviceId == "5ccexxx") // Device ID of second device
  {
    Serial.print("Turn on device id: ");
    Serial.println(deviceId);
    Wire.beginTransmission(8); /* begin with device address 8 */
    Wire.write("{\"gpio\":15,\"state\":1}");  /* sends hello string */
    Wire.endTransmission();    /* stop transmitting */
  }
  else {
    Serial.print("Turn on for unknown device id: ");
    Serial.println(deviceId);
  }
}

void turnOff(String deviceId) {
   if (deviceId == "5cce8axxxx67db581ce") // Device ID of first device
   {
     Serial.print("Turn off Device ID: ");
     Serial.println(deviceId);
     Wire.beginTransmission(8); /* begin with device address 8 */
     Wire.write("{\"gpio\":14,\"state\":0}");  /* sends hello string */
     Wire.endTransmission();
   }
   else if (deviceId == "5ccexxxxxb581d4") // Device ID of second device
   {
     Serial.print("Turn off Device ID: ");
     Serial.println(deviceId);
     Wire.beginTransmission(8); /* begin with device address 8 */
     Wire.write("{\"gpio\":15,\"state\":0}");  /* sends hello string */
     Wire.endTransmission();    /* stop transmitting */
  }
  else {
     Serial.print("Turn off for unknown device id: ");
     Serial.println(deviceId);
  }
}

void webSocketEvent(WStype_t type, uint8_t * payload, size_t length) {
  switch(type) {
    case WStype_DISCONNECTED:
      isConnected = false;
      Serial.printf("[WSc] Webservice disconnected from sinric.com!\n");
      break;
    case WStype_CONNECTED: {
      isConnected = true;
      Serial.printf("[WSc] Service connected to sinric.com at url: %s\n", payload);
      Serial.printf("Waiting for commands from sinric.com ...\n");
      }
      break;
    case WStype_TEXT: {
        Serial.printf("[WSc] get text: %s\n", payload);
        // Example payloads

        // For Switch or Light device types
        // {"deviceId": xxxx, "action": "setPowerState", value: "ON"} // https://developer.amazon.com/docs/device-apis/alexa-powercontroller.html

        // For Light device type
        // Look at the light example in github

        DynamicJsonBuffer jsonBuffer;
        JsonObject& json = jsonBuffer.parseObject((char*)payload);
        String deviceId = json ["deviceId"];
        String action = json ["action"];

        if(action == "setPowerState") { // Switch or Light
            String value = json ["value"];
            if(value == "ON") {
                turnOn(deviceId);
            } else {
                turnOff(deviceId);
            }
        }
        else if (action == "SetTargetTemperature") {
            String deviceId = json ["deviceId"];
            String action = json ["action"];
            String value = json ["value"];
        }
        else if (action == "test") {
            Serial.println("[WSc] received test command from sinric.com");
        }
      }
      break;
    case WStype_BIN:
      Serial.printf("[WSc] get binary length: %u\n", length);
      break;
  }
}

void loop() {
  WiFiClient client = server.available();   // Listen for incoming clients

  if (client) {                             // If a new client connects,
    Serial.println("New Client.");          // print a message out in the serial port
    String currentLine = "";                // make a String to hold incoming data from the client
    while (client.connected()) {            // loop while the client's connected
      if (client.available()) {             // if there's bytes to read from the client,
        char c = client.read();             // read a byte, then
        Serial.write(c);                    // print it out the serial monitor
        header += c;
        if (c == '\n') {                    // if the byte is a newline character
          // if the current line is blank, you got two newline characters in a row.
          // that's the end of the client HTTP request, so send a response:
          if (currentLine.length() == 0) {
            // HTTP headers always start with a response code (e.g. HTTP/1.1 200 OK)
            // and a content-type so the client knows what's coming, then a blank line:
            client.println("HTTP/1.1 200 OK");
            client.println("Content-type:text/html");
            client.println("Connection: close");
            client.println();

            // turns the GPIOs on and off
            if (header.indexOf("GET /14/on") >= 0)
            {
              Serial.println("GPIO 14 on");
              relay1State = "on";
              //digitalWrite(relay1, LOW);
              Serial.print("Switch 1 turn off ...");
              Wire.beginTransmission(8); /* begin with device address 8 */
              Wire.write("{\"gpio\":14,\"state\":0}");  /* sends hello string */
              Wire.endTransmission();    /* stop transmitting */
            }
            else if (header.indexOf("GET /14/off") >= 0)
            {
              Serial.println("GPIO 14 off");
              relay1State = "off";
              //digitalWrite(relay1, HIGH);
              Serial.print("Switch 1 turn on ...");
              Wire.beginTransmission(8); /* begin with device address 8 */
              Wire.write("{\"gpio\":14,\"state\":1}");  /* sends hello string */
              Wire.endTransmission();    /* stop transmitting */
            }
            else if (header.indexOf("GET /15/on") >= 0) {
              Serial.println("GPIO 15 on");
               relay2State = "on";
                Serial.print("Switch 2 turn off ...");
                Wire.beginTransmission(8); /* begin with device address 8 */
                Wire.write("{\"gpio\":15,\"state\":0}");  /* sends hello string */
                Wire.endTransmission();    /* stop transmitting */
                //digitalWrite(relay2, LOW);
            }
            else if (header.indexOf("GET /15/off") >= 0) {
              Serial.println("GPIO 15 off");
              relay2State = "off";
               Serial.print("Switch 2 turn on ...");
                Wire.beginTransmission(8); /* begin with device address 8 */
                Wire.write("{\"gpio\":15,\"state\":1}");  /* sends hello string */
                Wire.endTransmission();    /* stop transmitting */
              //digitalWrite(relay2, HIGH);
            }
            /*else if (header.indexOf("GET /0/on") >= 0)
            {
              Serial.println("GPIO 0 on");
              relay3State = "on";
              digitalWrite(relay3, LOW);
            }
            else if (header.indexOf("GET /0/off") >= 0)
            {
              Serial.println("GPIO 0 off");
              relay3State = "off";
              digitalWrite(relay3, HIGH);
            }
            else if (header.indexOf("GET /2/on") >= 0) {
              Serial.println("GPIO 2 on");
              relay4State = "on";
              digitalWrite(relay4, LOW);
            }
            else if (header.indexOf("GET /2/off") >= 0) {
              Serial.println("GPIO 2 off");
              relay4State = "off";
              digitalWrite(relay4, HIGH);
            }*/

            // Display the HTML web page
            client.println("<!DOCTYPE html><html>");
            client.println("<head><meta name=\"viewport\" content=\"width=device-width, initial-scale=1\">");
            client.println("<link rel=\"icon\" href=\"data:,\">");
            // CSS to style the on/off buttons
            // Feel free to change the background-color and font-size attributes to fit your preferences
            client.println("<style>html { font-family: Helvetica; display: inline-block; margin: 0px auto; text-align: center;}");
            client.println(".button { background-color: #195B6A; border: none; color: white; padding: 12px 24px;");
            client.println("text-decoration: none; font-size: 20px; margin: 2px; cursor: pointer;}");
            client.println(".button2 {background-color: #77878A;}</style></head>");

            // Web Page Heading
            client.println("<body><h1>NodeMCU Web Server</h1>");

            // Display current state, and ON/OFF buttons for GPIO 17
            client.println("<p>Relay 1 - State " + relay1State + "</p>");
            // If the relay1State is off, it displays the ON button
            if (relay1State == "off") {
              client.println("<p><a href=\"/14/on\"><button class=\"button\">ON</button></a></p>");
            } else {
              client.println("<p><a href=\"/14/off\"><button class=\"button button2\">OFF</button></a></p>");
            }


            // Display current state, and ON/OFF buttons for GPIO 16
            client.println("<p>Relay 2 - State " + relay2State + "</p>");
            // If the relay2State is off, it displays the ON button
            if (relay2State == "off") {
              client.println("<p><a href=\"/15/on\"><button class=\"button\">ON</button></a></p>");
            } else {
              client.println("<p><a href=\"/15/off\"><button class=\"button button2\">OFF</button></a></p>");
            }

            client.println("</body></html>");

            // The HTTP response ends with another blank line
            client.println();
            // Break out of the while loop
            break;
          } else { // if you got a newline, then clear currentLine
            currentLine = "";
          }
        } else if (c != '\r') {  // if you got anything else but a carriage return character,
          currentLine += c;      // add it to the end of the currentLine
        }
      }
    }
    // Clear the header variable
    header = "";
    // Close the connection
    client.stop();
    Serial.println("Client disconnected.");
    Serial.println("");
  }

  webSocket.loop();

  if(isConnected) {
      uint64_t now = millis();

      // Send heartbeat in order to avoid disconnections during ISP resetting IPs over night. Thanks @MacSass
      if((now - heartbeatTimestamp) > HEARTBEAT_INTERVAL) {
          heartbeatTimestamp = now;
          webSocket.sendTXT("H");
      }
  }

}
Code for Atmega 328p Microcontroller
#include <Adafruit_SSD1306.h>
#include <Adafruit_GFX.h>
#include <dht.h>
#include <Wire.h>
#include <ArduinoJson.h>

// OLED display TWI address
#define OLED_ADDR   0x3C

#define SCREEN_WIDTH 128 // OLED display width, in pixels
#define SCREEN_HEIGHT 64 // OLED display height, in pixels

// Declaration for an SSD1306 display connected to I2C (SDA, SCL pins)
#define OLED_RESET     -1 // Reset pin # (or -1 if sharing Arduino reset pin)
Adafruit_SSD1306 display(SCREEN_WIDTH, SCREEN_HEIGHT, &Wire, OLED_RESET);

dht DHT;

void setup() {
 Serial.begin(115200);           /* start serial for debug */
 pinMode(5, INPUT);
 pinMode(13, OUTPUT);
 pinMode(14, OUTPUT);
 pinMode(15, OUTPUT);
 pinMode(16, OUTPUT);
 pinMode(17, OUTPUT);

 Serial.begin(9600);

  // initialize and clear display
  display.begin(SSD1306_SWITCHCAPVCC, OLED_ADDR);
  display.clearDisplay();
  display.display();

  // display a line of text
  display.setTextSize(1);
  display.setTextColor(WHITE);
  display.setCursor(27,30);
  display.print("Food, Computer!");

  // update display with all of the above graphics
  display.display();

  delay(6000);
  display.setTextSize(2);

   Wire.begin(8);                /* join i2c bus with address 8 */
   Wire.onReceive(receiveEvent); /* register receive event */

}

void loop() {
  // put your main code here, to run repeatedly:

  delay(100);
  digitalWrite(13, HIGH);   // turn the LED on (HIGH is the voltage level)
  delay(1000);                       // wait for a second
  digitalWrite(13, LOW);    // turn the LED off by making the voltage LOW
  delay(1000);

  int chk = DHT.read11(5);
  Serial.print("Temperature = ");
  display.clearDisplay();
  display.setCursor(6,30);
  Serial.println(DHT.temperature);
  display.print("Temp:");
  display.print(DHT.temperature);
  display.display();
  delay(2000);
  display.clearDisplay();
  display.setCursor(6,30);
  display.print("Humi:");
  display.print(DHT.humidity);
  display.display();
  Serial.print("Humidity=");
  Serial.println(DHT.humidity);
  delay(2000);

}

void processCall(String command){
      DynamicJsonBuffer jsonBuffer;
      JsonObject& root= jsonBuffer.parseObject(command);

       if (root.success()) {
          int gpio = atoi(root["gpio"]);
          Serial.println(gpio);
          int state = atoi(root["state"]);
          Serial.println(state);

          //set GPIO state
          digitalWrite(gpio, state);
       }
}

// function that executes when data is received from master
void receiveEvent(int howMany) {
  String data="";
 while (0 <Wire.available()) {
    char c = Wire.read();      /* receive byte as a character */
    data += c;

  }
    Serial.println(data);           /* print the request data */
    processCall(data);         /* to newline */
}
Final Outcome
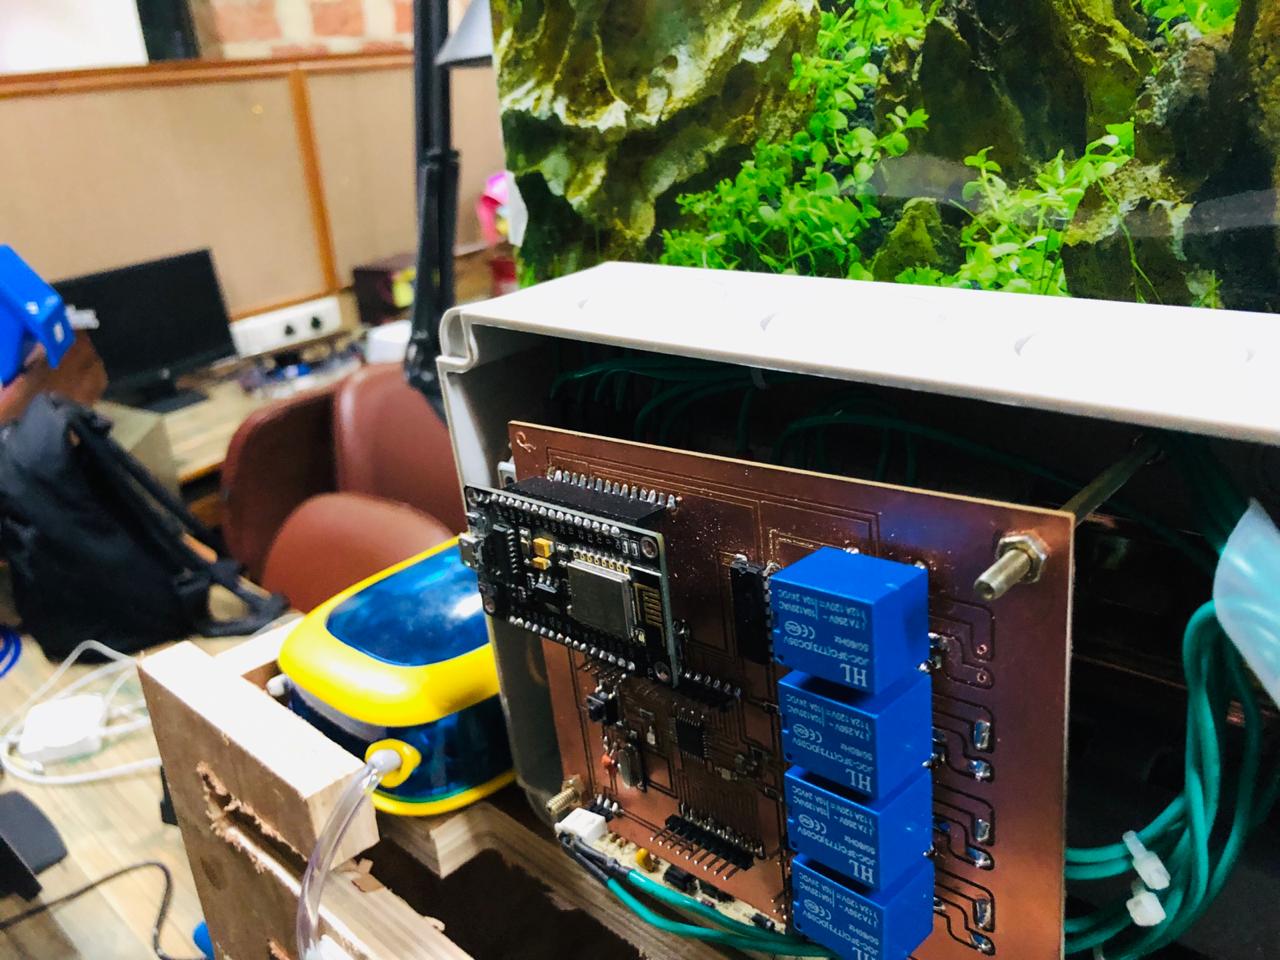
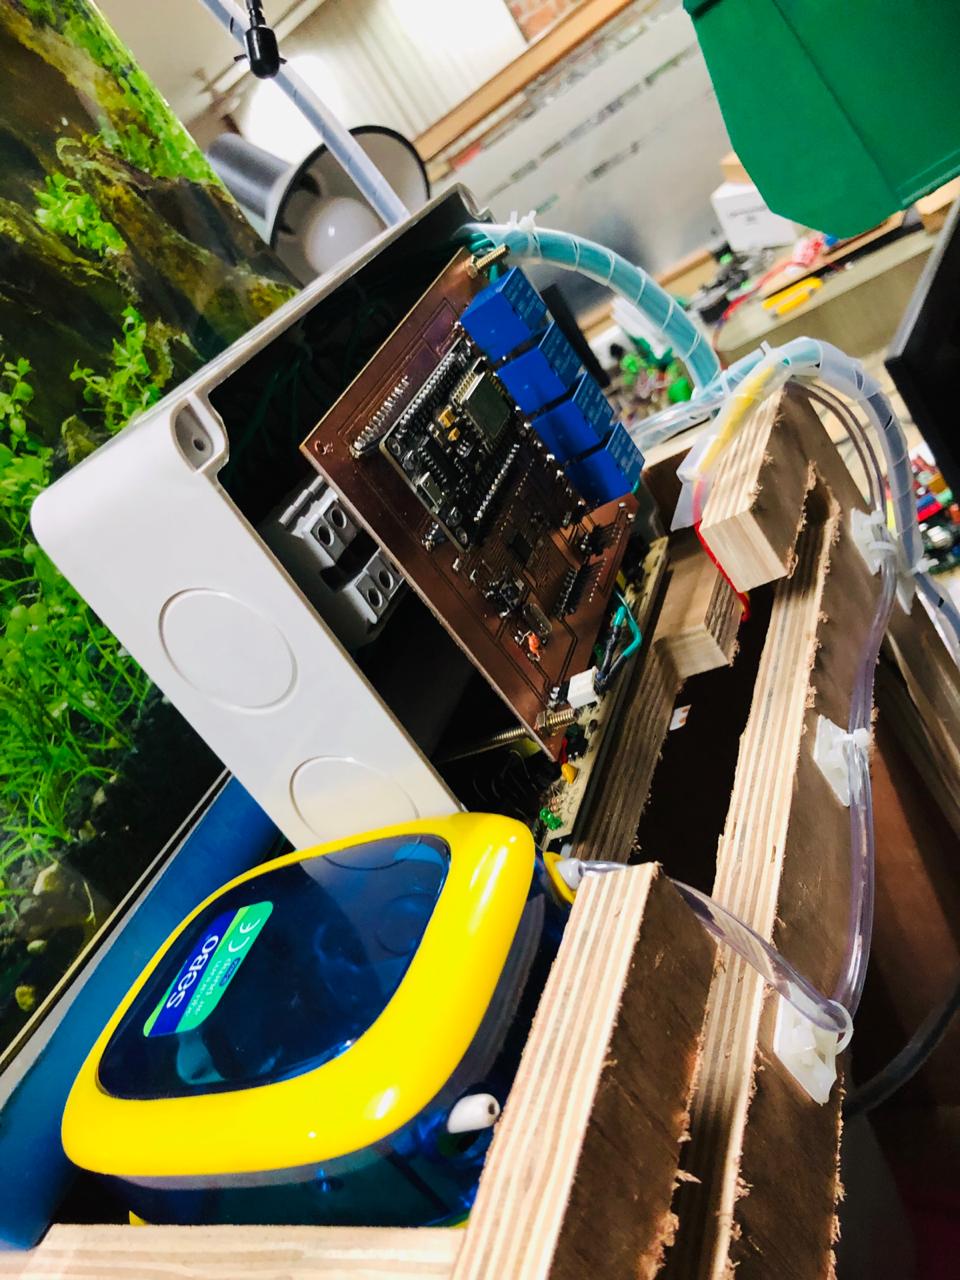
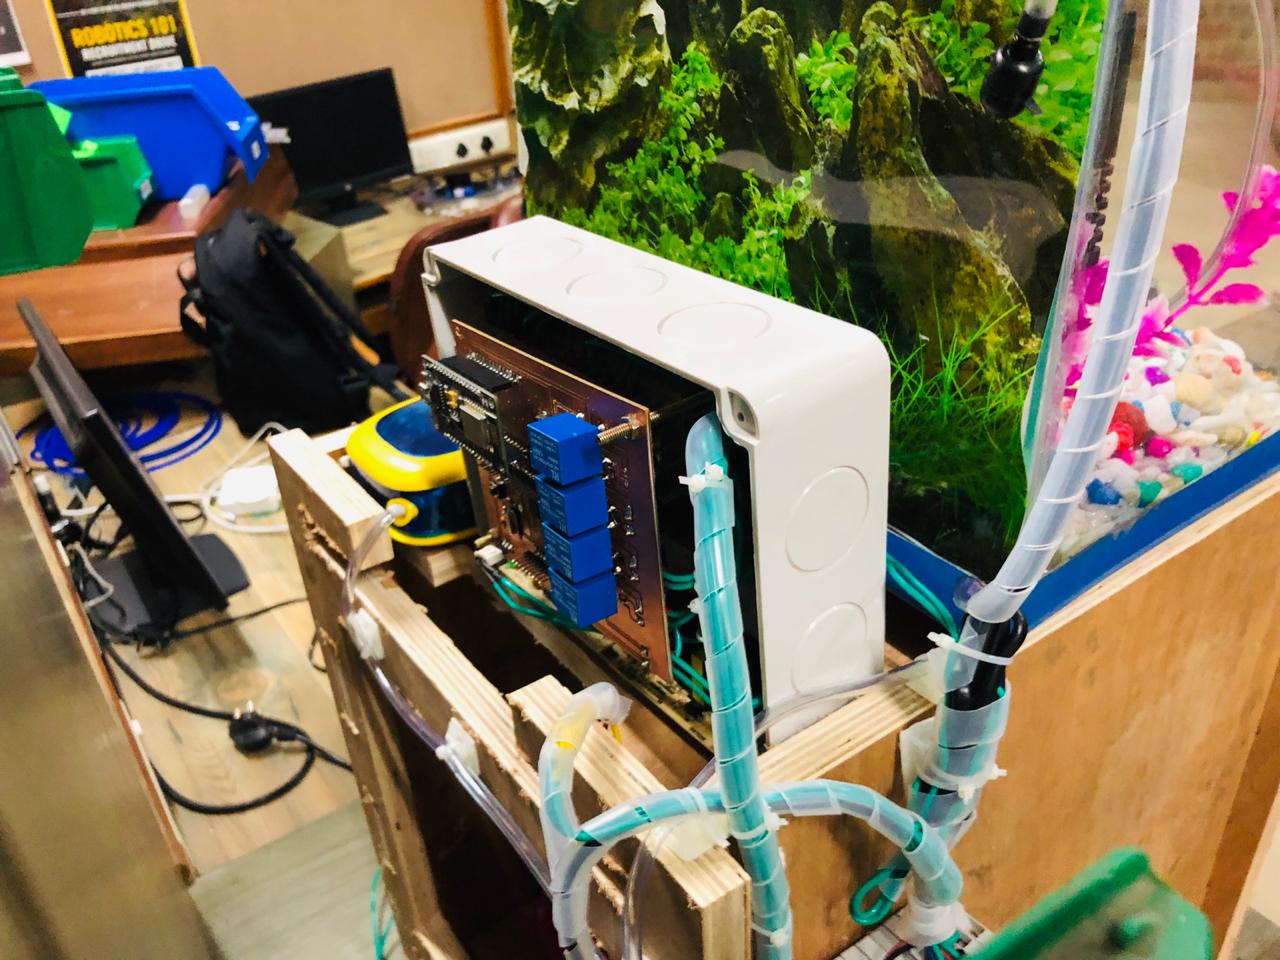
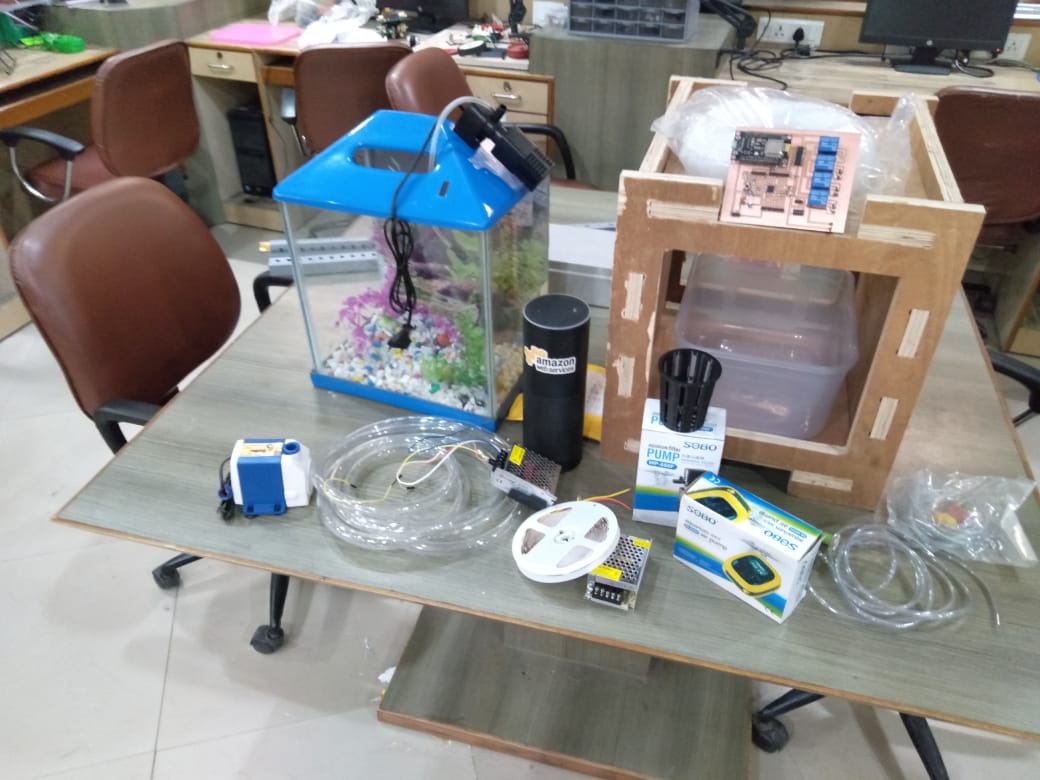
Final Project Assembly
Getting Started (Putting everthing at one place)
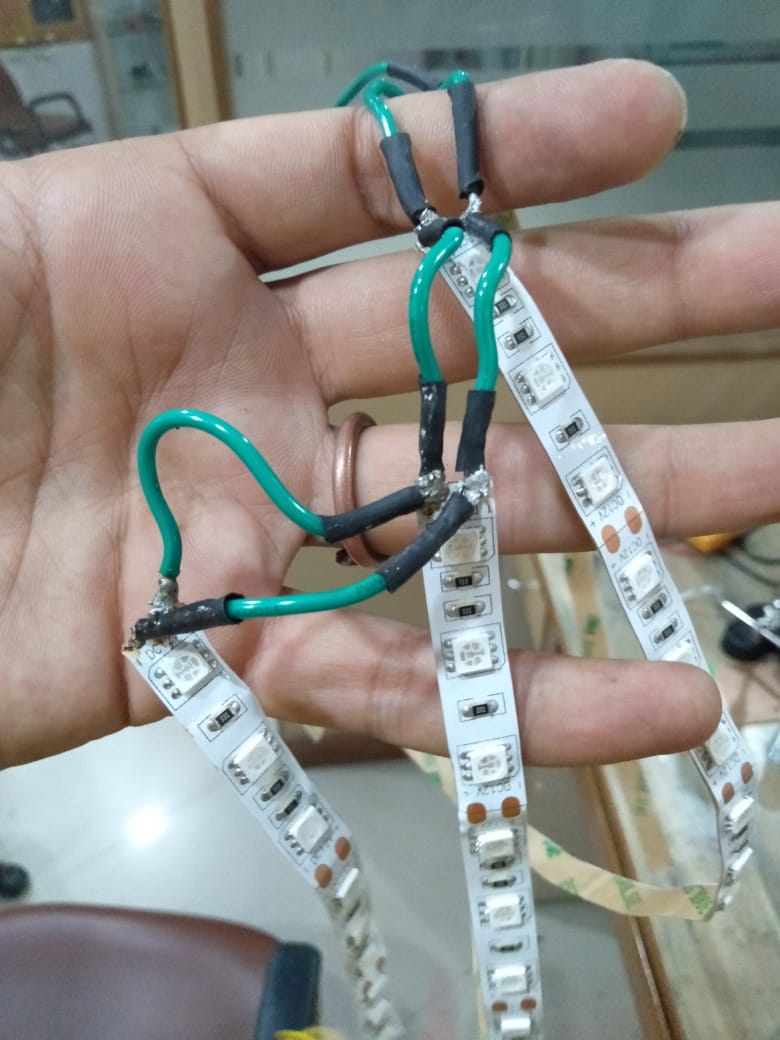
Parallel Connecting LED Strips using Soldering
Pasting LED Strips on Food Computer Enclosure

Getting Started Electronics Enclosure
-
Get PVC Panel
-
Assemble Din Rail, Din Rail Screw Terminals,Cable Tray and SMPS into PVC Panel
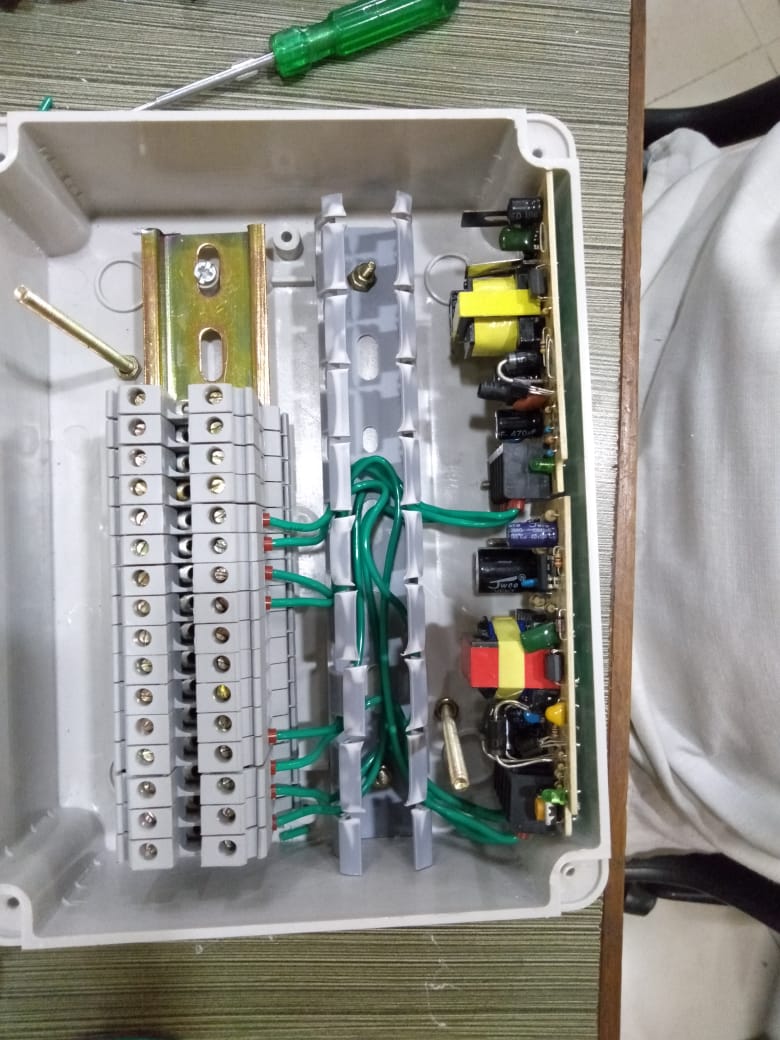
Fully Assembled Electronics Enclosure