18.1. Laser Welding
A former Fabacademy student here in Barcelona, Javier Albo visited us some weeks ago to give us a very interesting masterclass about Laser Welding, a technique he developped on his course last year.
So I went through it, and tried to make my first figure. I wanted to create the "brusier me", so keeping attention to the steps, I decided to make a simple smooth organic outline shape to prevent from future silly failures.
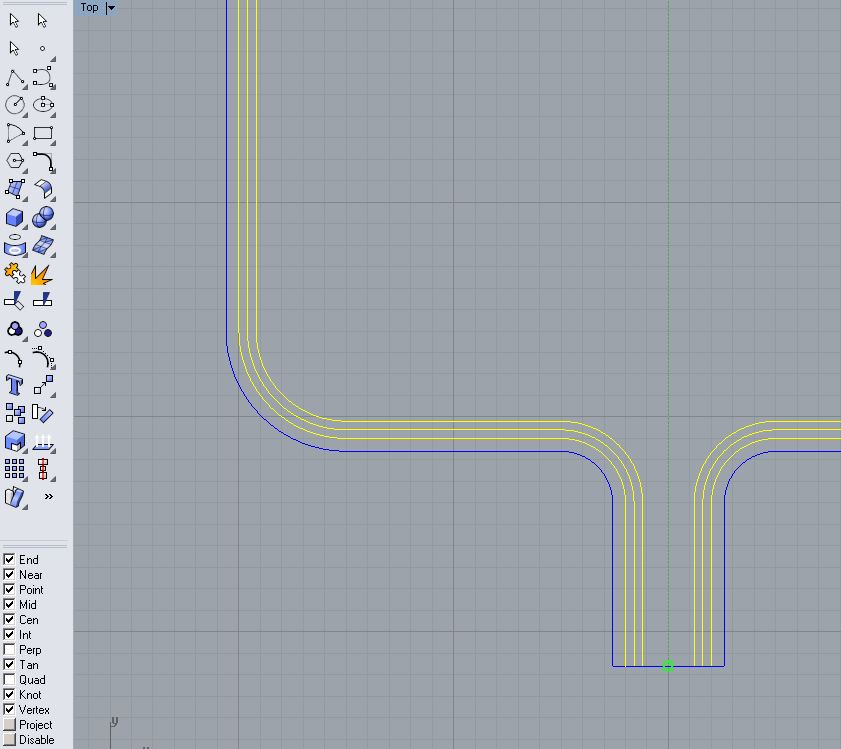
I started designing the drawing on Rhino. I made the outline of the figure, and made a 0.4mm offset twice to the inside to create the 3 welding outlines; and 0.6mm to the outside to create the cutting line.
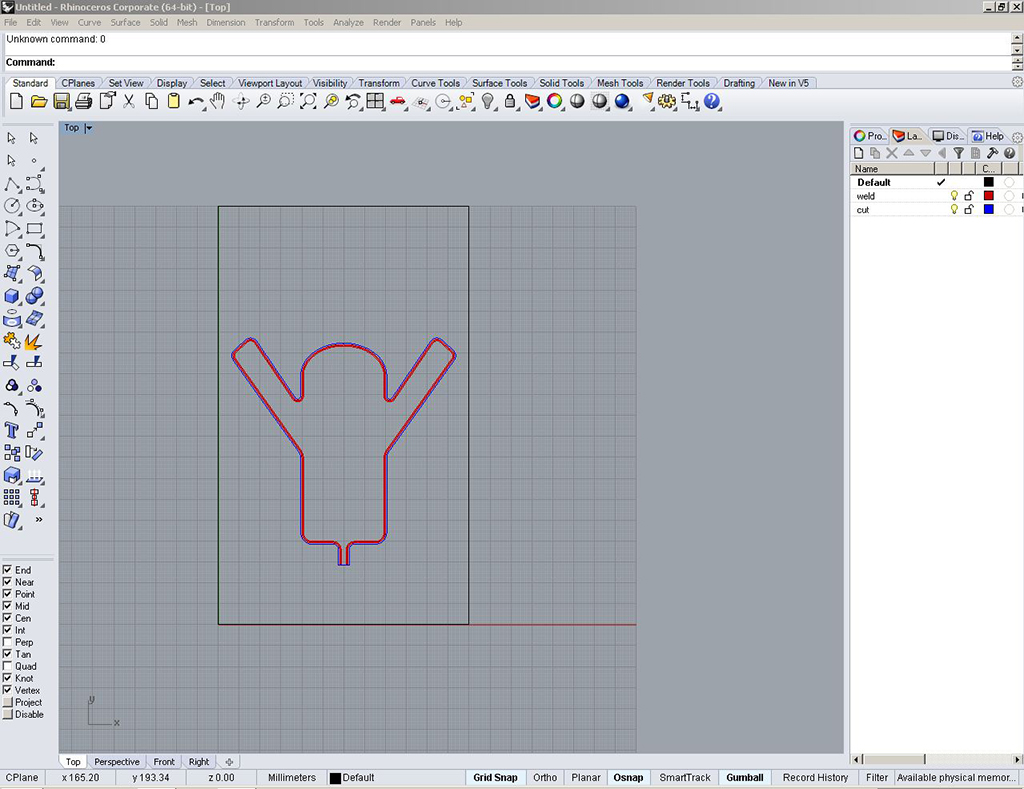
I gave more space to the outline offset than to the welding as the piece is a bit small and I wanted to ensure that the cut wouldn't go through the welding in some angles. So as I did in the Wk.4 Computer-controlled cutting assignment, I put the welding lines (inners) in the red layer, and the cutting line in the blue one. I didn't close the welding outlines in the bottom, as it will be the entrance for pumping the figure, and it will be cut later anyway.
Then I sent the file to JobControl, and set the parameters. I selected the welding plastic parameters and made some variations, giving the following values:
- Welding (red). Power: 2.70 | Speed: 1.10 | Hz: 1000 (zOffset: 16)
- Cutting (blue). Power: 5.00 | Speed: 1.00 | Hz: 1000 (zOffset: 5)
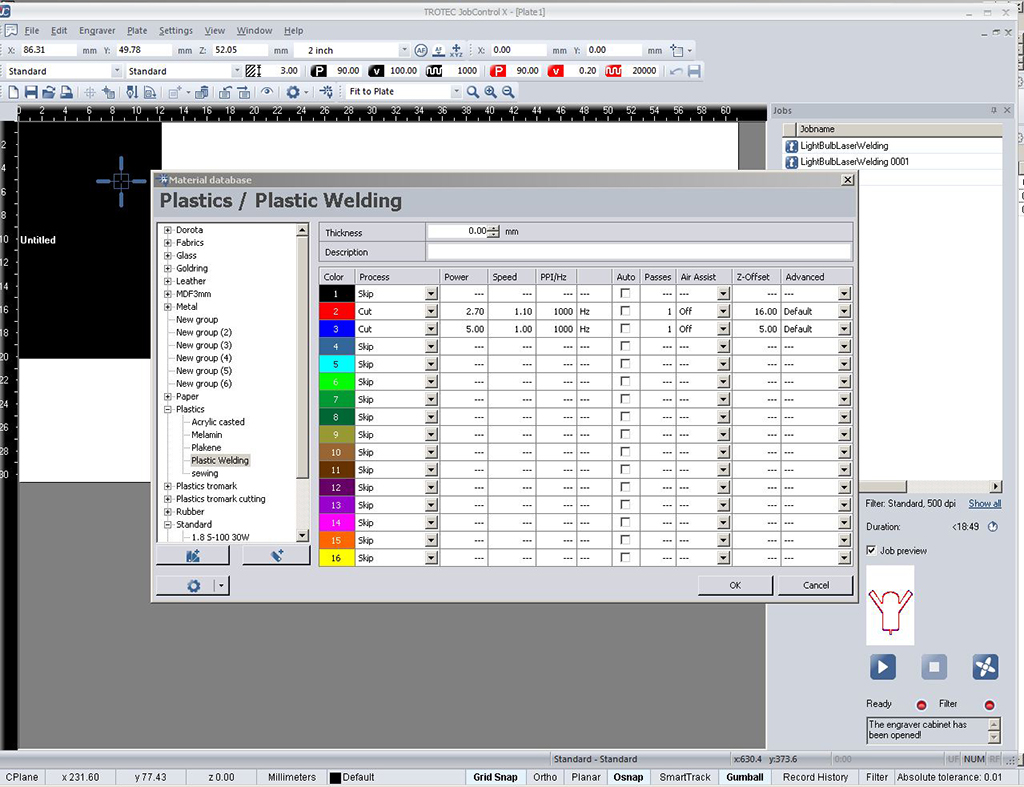
It is very important to make sure of straightening as best the plastic to the wood, as it is a very thin material, any wrinkle would affect either to the welding or the cutting process. Even using hairspray is very recommendable to stick well the plastic on the board so that the figure doesn't pop out while cutting from one side. This is the cutting process:
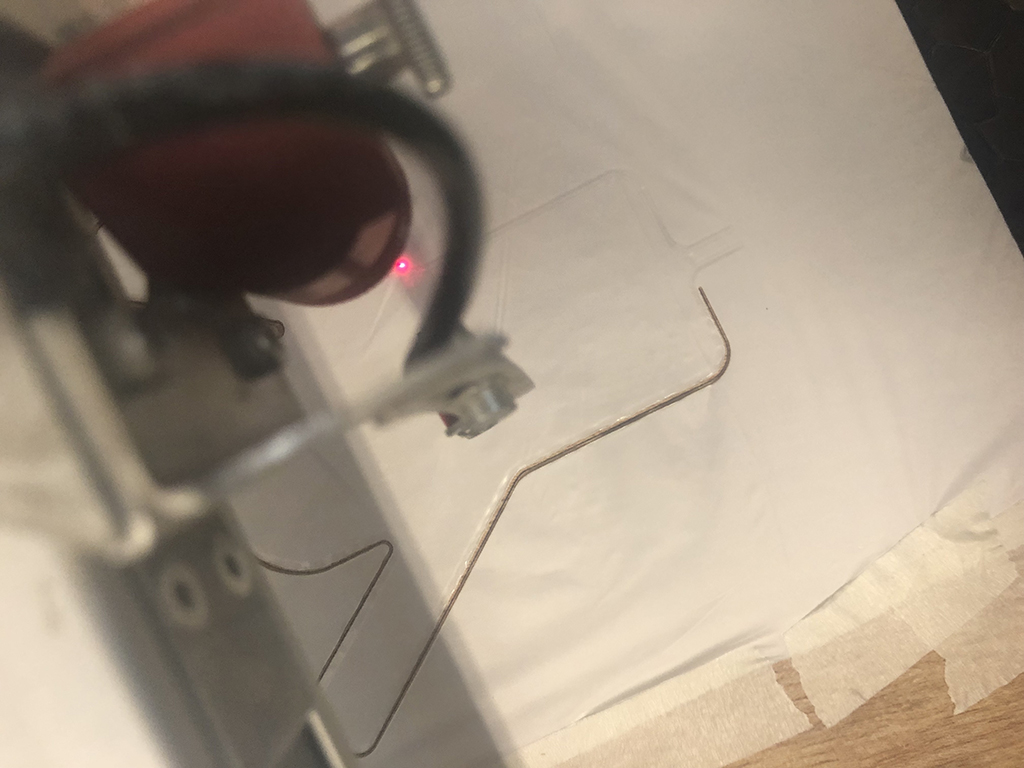
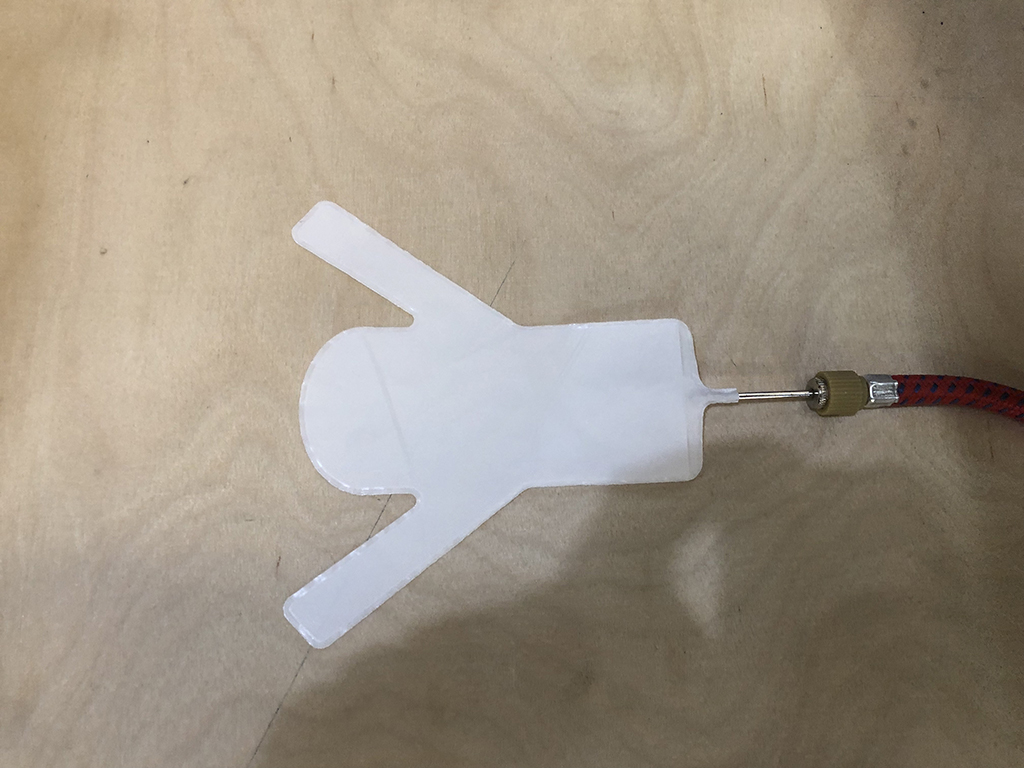
Here we have the piece already cut, staying on its place.
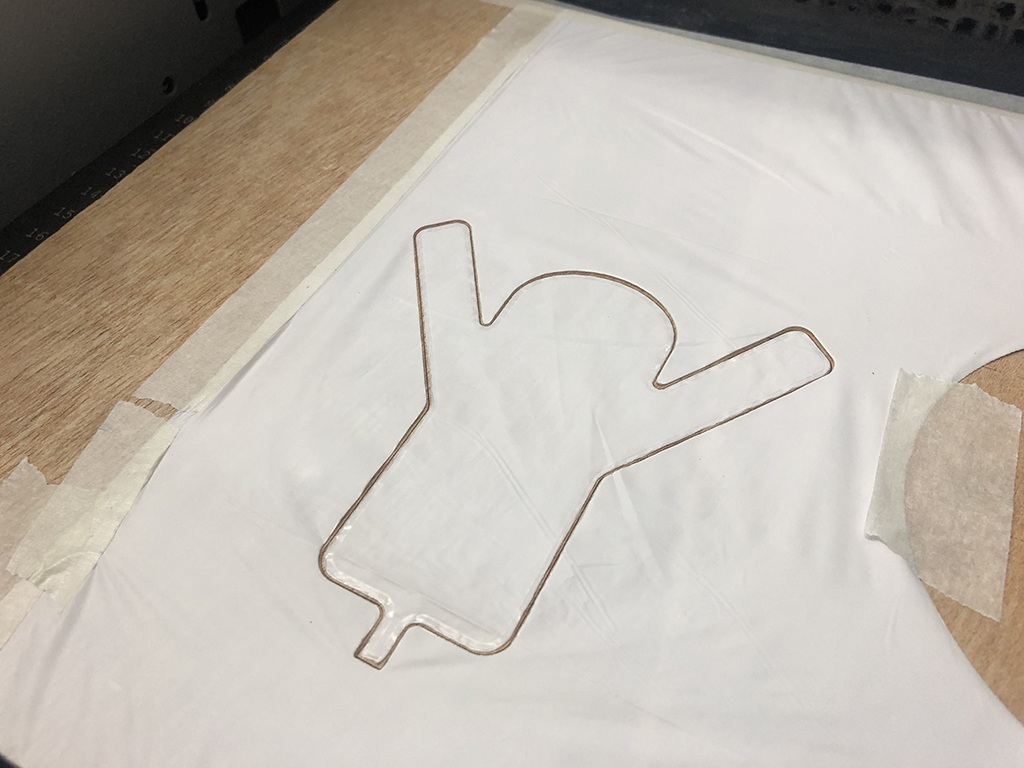
Then I cut the tip through which the air will go through to inflate it.
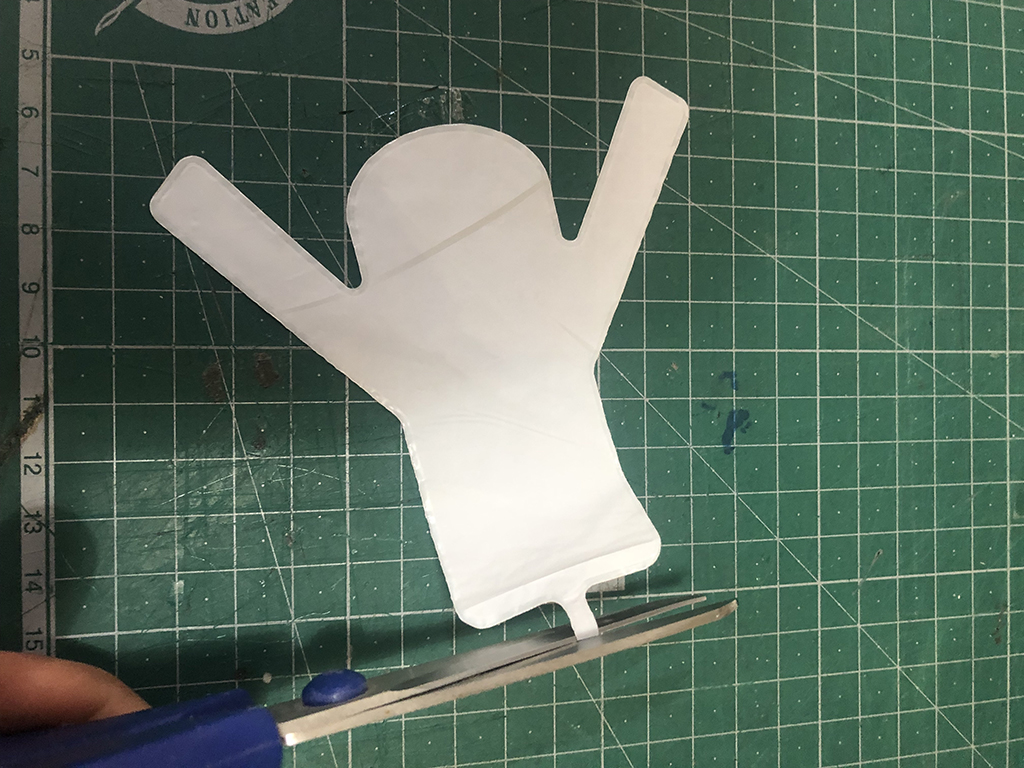
And finally I intruduce the pump's needle. A bigger hole would leave space to introduce a straw easily.
So here it is how it is working.
The final piece works perfectly, it doesn't leak any liquid or air. A more complex shape would have different effects, but actually works better than I expected.
Here you can find the welding and cutting layouts in rhino.
18.2. Group classes
Welding
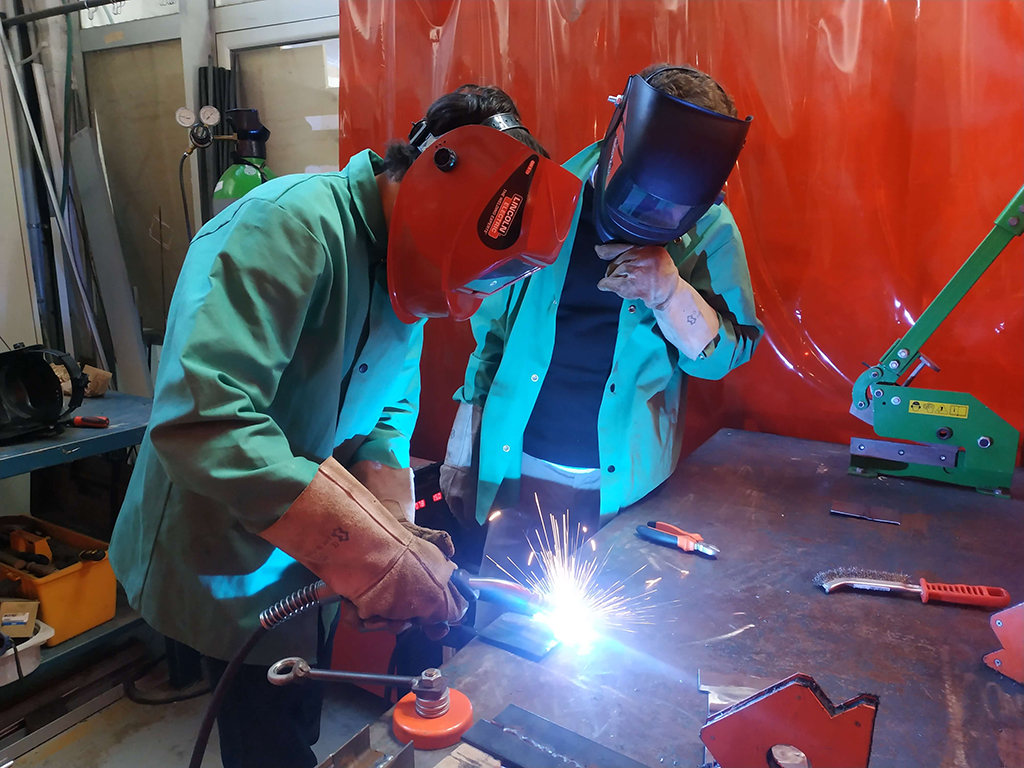
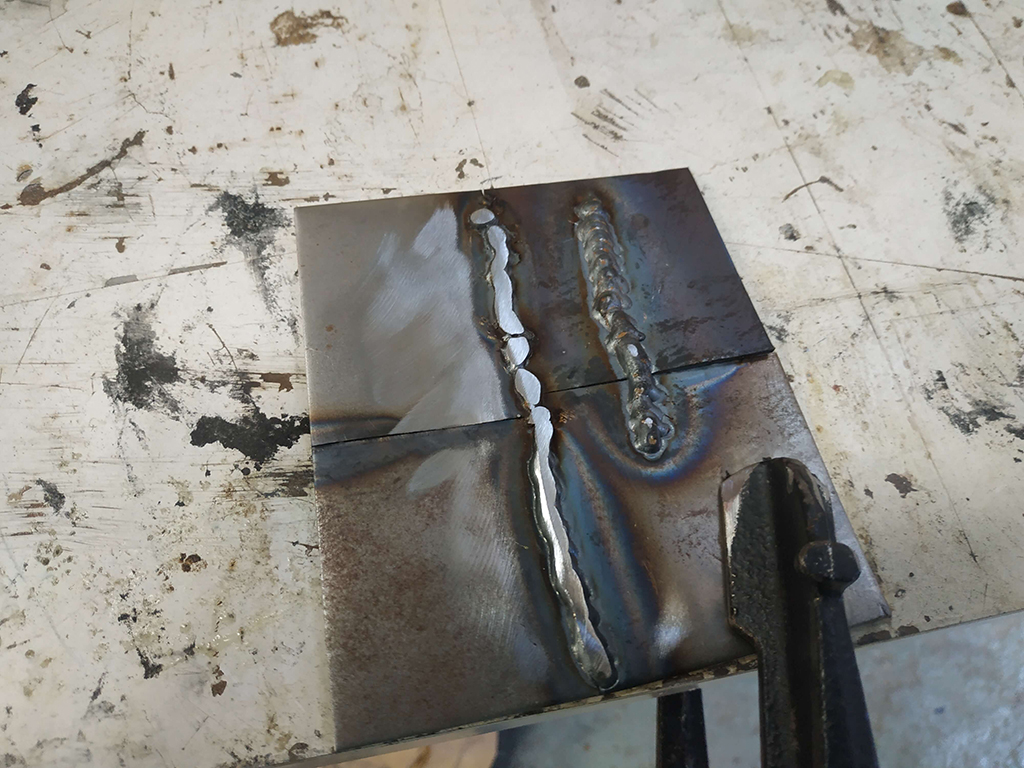
The first technique we worked this week was iron welding. Mikel, our lab manager, gave us some tips and warnings while using the TIG soldering equipment. We were equipped with electronic and manual soldering masks to prevent from eye injuries due to the welding sparks along the process, as well as protection gloves, fireproof coats.
We learnt how to weld propperly, holding the tool firmly and with the tip close to the material, making movements in circles and with a constant movement, making sure that the welding track has a homogeneous long bulge, that we had to flatten later.
Wood bending
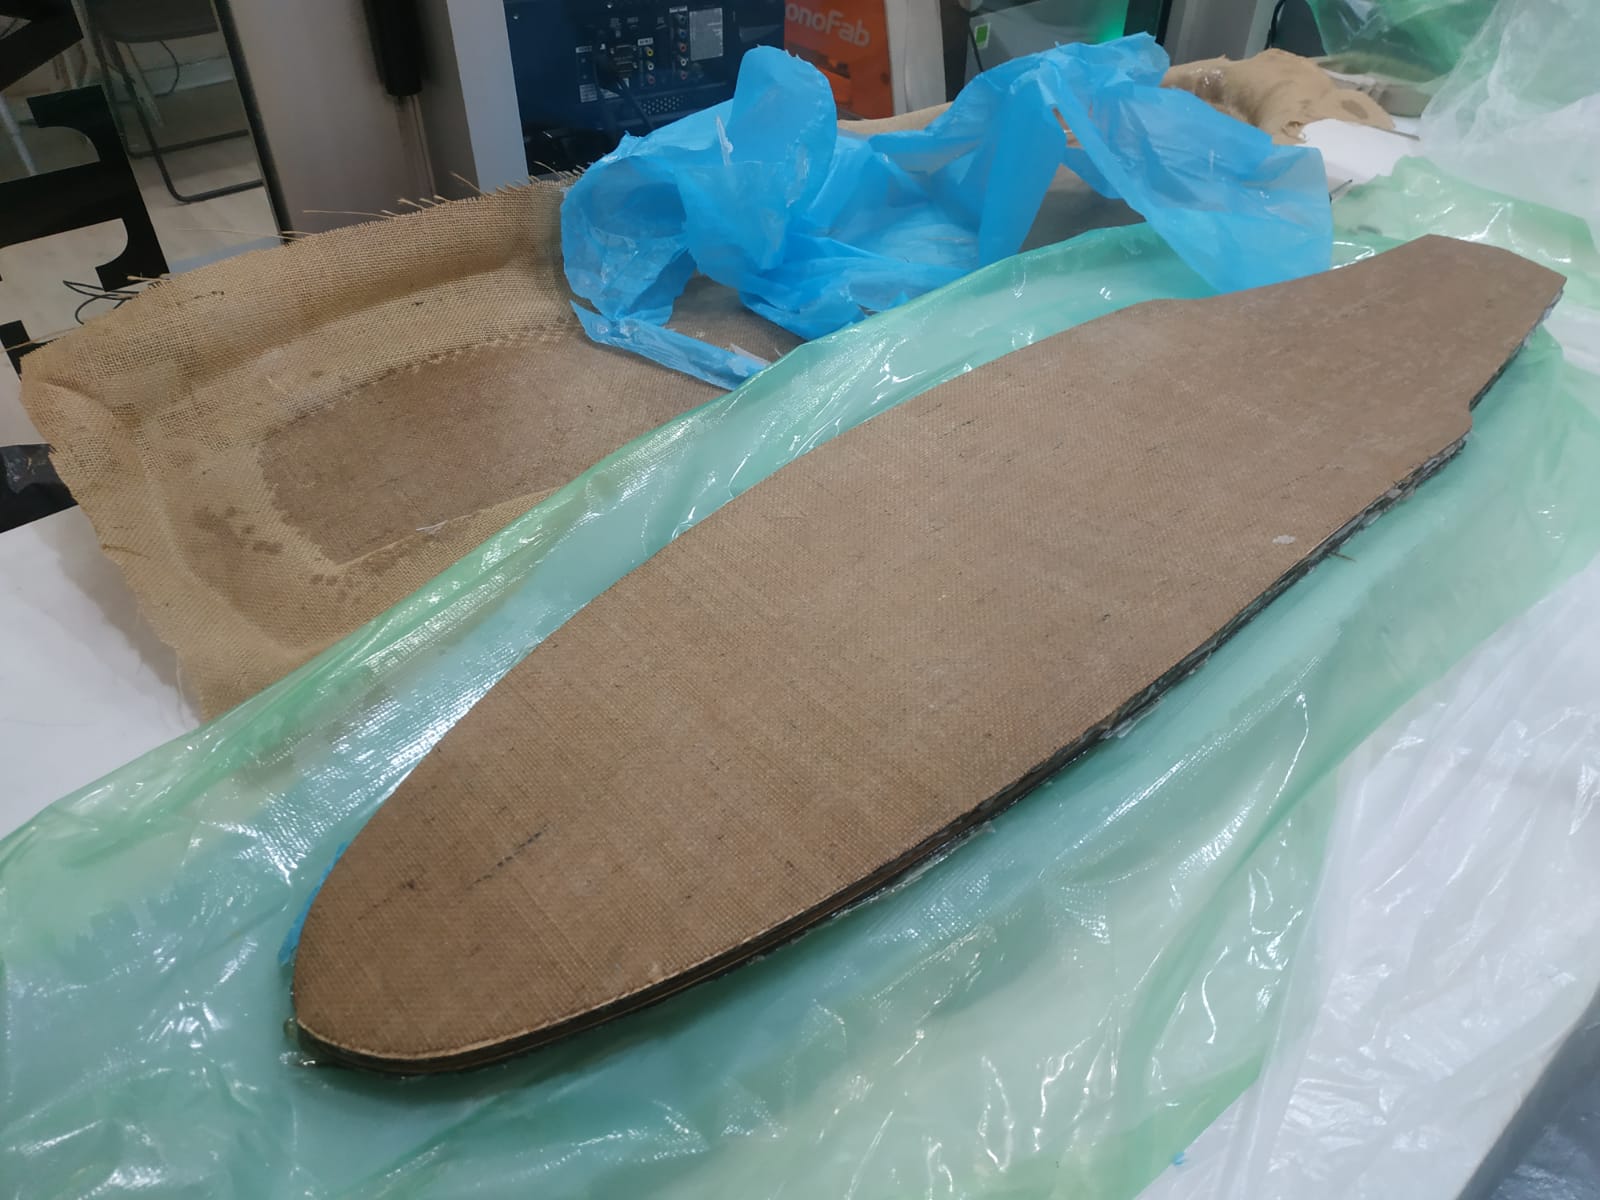
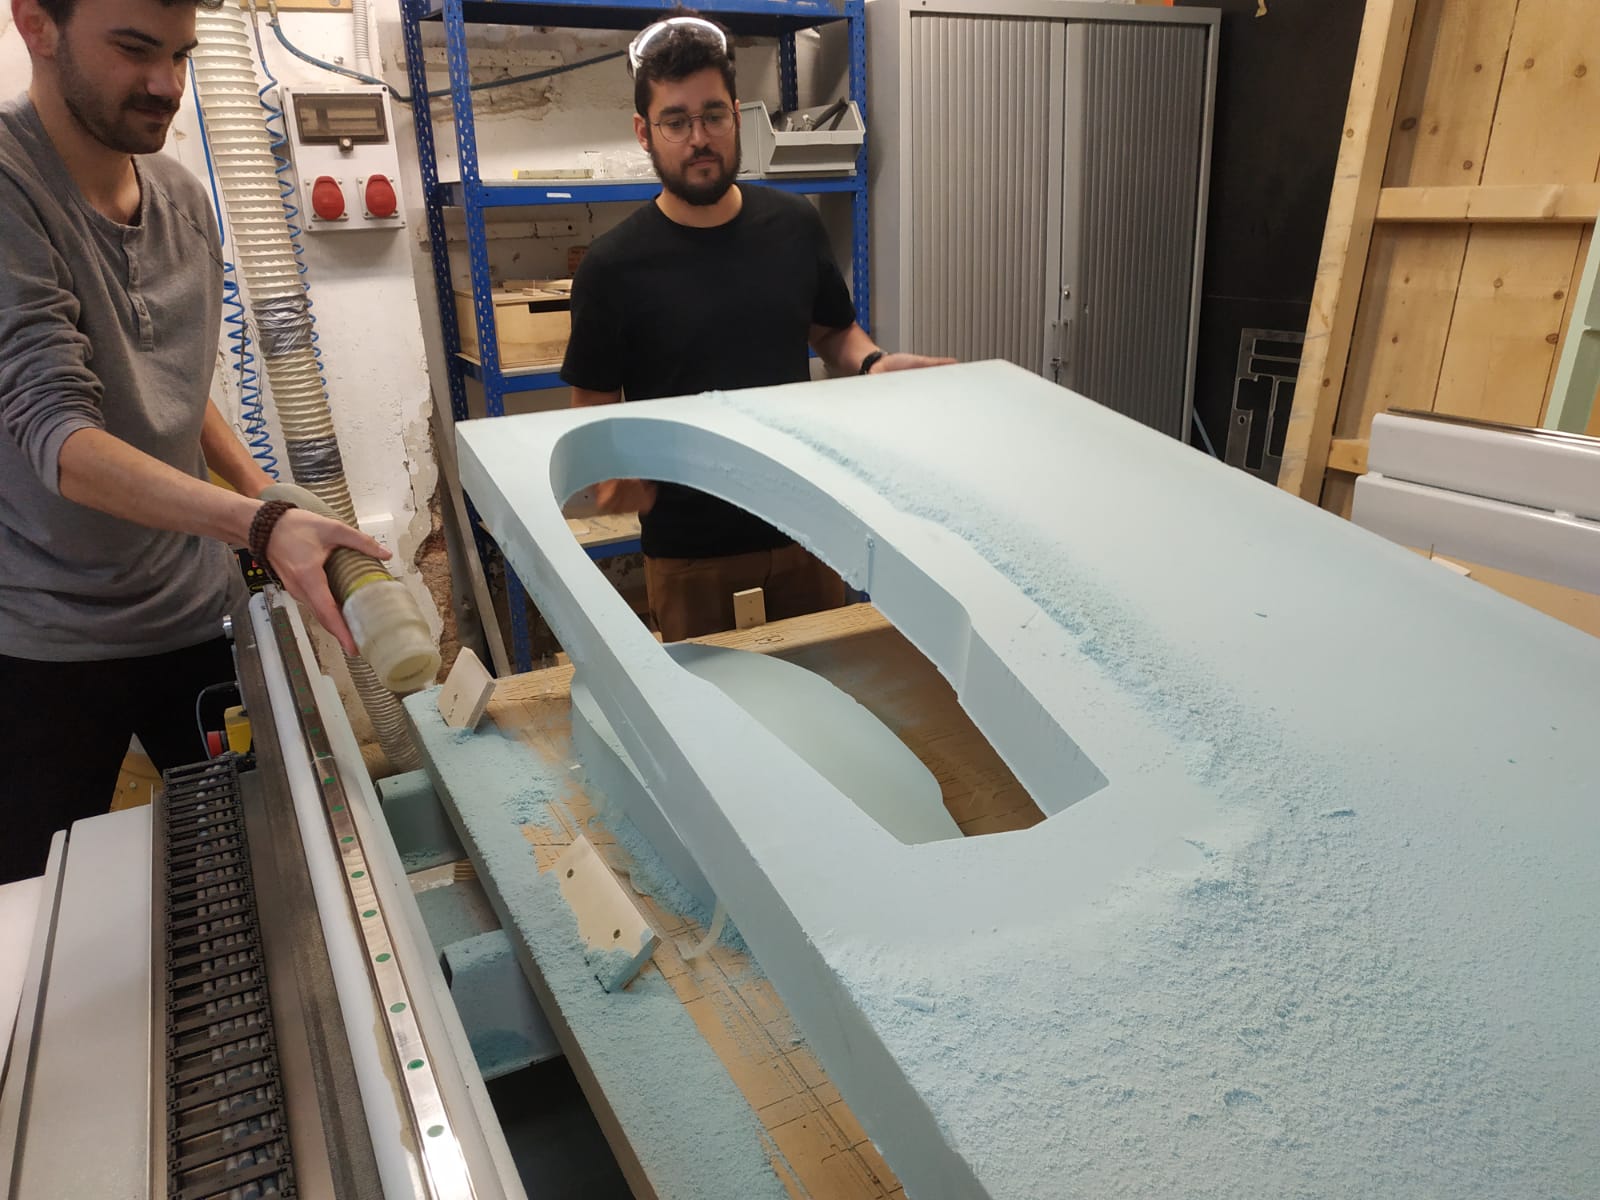
Another technique we worked is the wood bending by pressure. In this case we made a skateboard with a multilayer raftwood structure. This kind of wood has very good bending properties in one direction, but to keep the shape we want, we need to apply epoxy between the layers. As it takes around 1 day for the epoxy to get dry, we will need to keep the piece inside a mold for the whole process.
For this reason, making the mold in XPS foam will be the first step to take. So we start creating the CAM file for the CNC machine, we will need the upper and lower cases to close the mold with the piece inside. So we milled the mold with a 10mm ball-endmill:
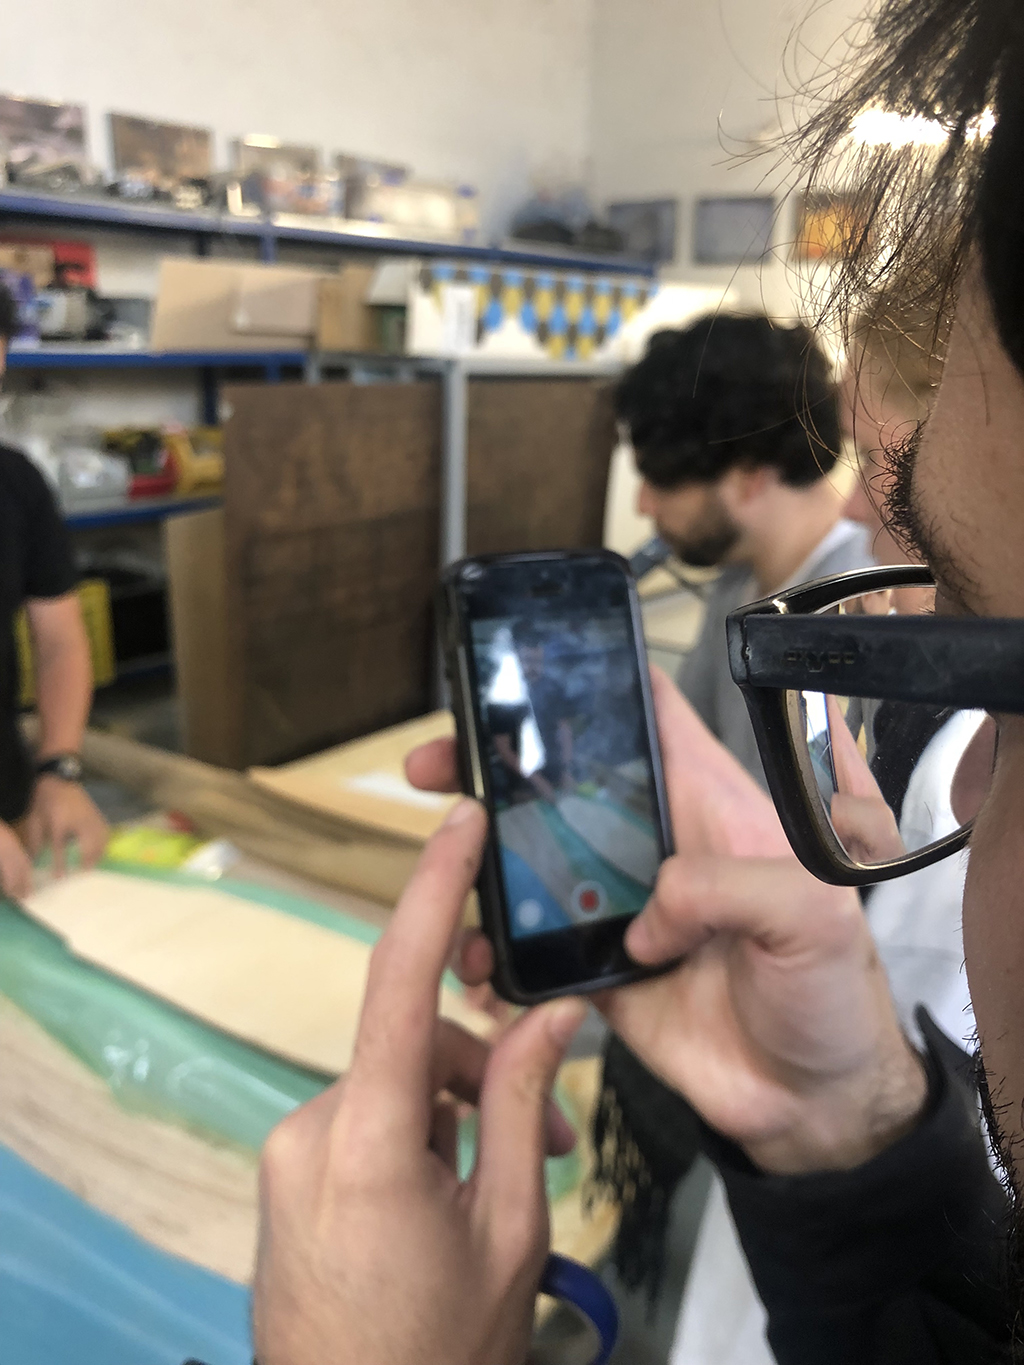
Later we cut the 3mm wood layers in our Multicam 2000 lasercutter. Then we have the epoxy applying. We need to cover all te surface first with a LDPE plastic to prevent from dirt in workspace, and also to cover the material inside the mold.
To apply the epoxy we need to mix it first with a hardener in a 2:1 proportion. Then we spread the mix smoothly between layers (3 in total) plus a top cover of raffia cloth (also lasercut) for the rough surface.
After 24h of curing (around 37ºC), this is the final result: