3. Computer-Aided Design
assignment:
- model (raster, vector, 2D, 3D, render, animate, simulate, …) a possible final project, and post it on your class page
Researching and choosing a program.
For a while I have been wanting to use only open-source software for my lab work. The main goal is to be able to teach and create content that everyone can reproduce without having to buy expensive licenses.
So, for this week and probably the whole course, I’ll be out of my comfort zone with every software I use.
After going through Neil’s class, I wanted to try mainly 3 softwares:
Installation
All of them where just download, drag and drop to install. Except Inkscape, it needs to be ported with mac ports. I had to:
Download Xcode in the App store Install xcode cli tools with:
xcode-select --install
Download and install macports and then I could finally get inkscape with:
sudo port install inkscape
Line breaks in markdown
Fun fact, I just learned how to add a line break without a paragraph in markdown. Instead of hitting enter, you should add two trailing spaces (⋅⋅) at the end of the sentence.
 Normal line break
 Without break or spaces
 With two spaces at the end
Inkscape
Steps
I decided to start with a simple top view of the prototype, and then from it, I’ll be able to extrude the shape in the 3D softwares. And since I still don’t know which components I’ll use (specially the screen), I’ll start drawing a credit card size case and adjust as needed.
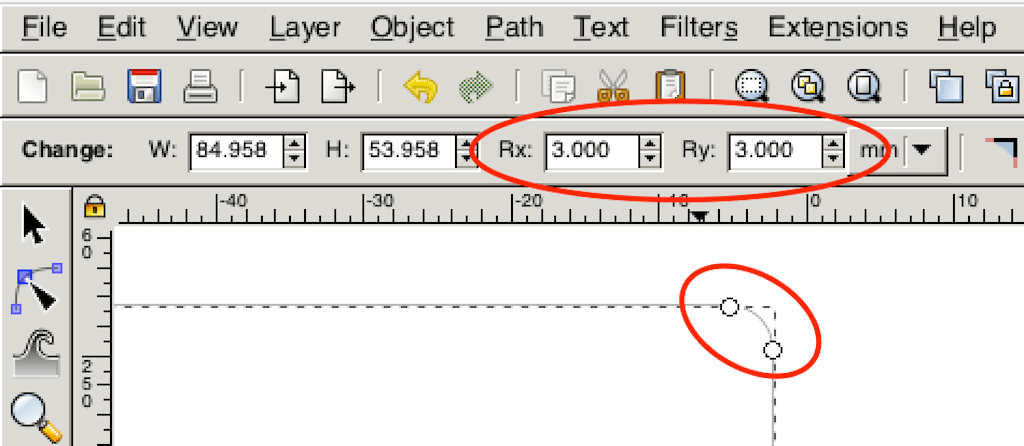
First struggle was to find the round corner option after creating the rectangle. To do it you need to select the object with the rectangle tool. From there you can drag the circle at the corner of it or just type in the Rx or/and Ry boxes.
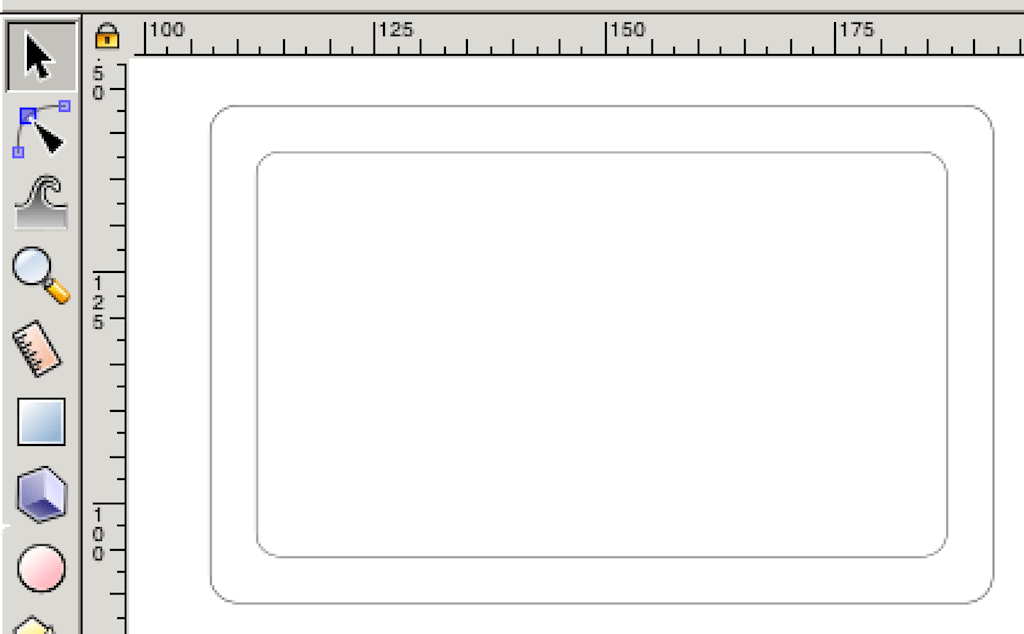
After that I just duplicated the form, resized and aligned it.
Since I’ve been working with Corel Draw and Inkscape is really similar. I’ll jump into FreeCAD for now. Specially trying to focus on the constraints and parametric design.
Conclusion
Inkscape has many features and seems to be a complete vector drawing program. Since I’m used to CorelDraw the workflow was pretty simple to get used to. As I said, since I’m jumping into open-source, I’ll stick with Inkscape for simple vector drawings.
FreeCAD
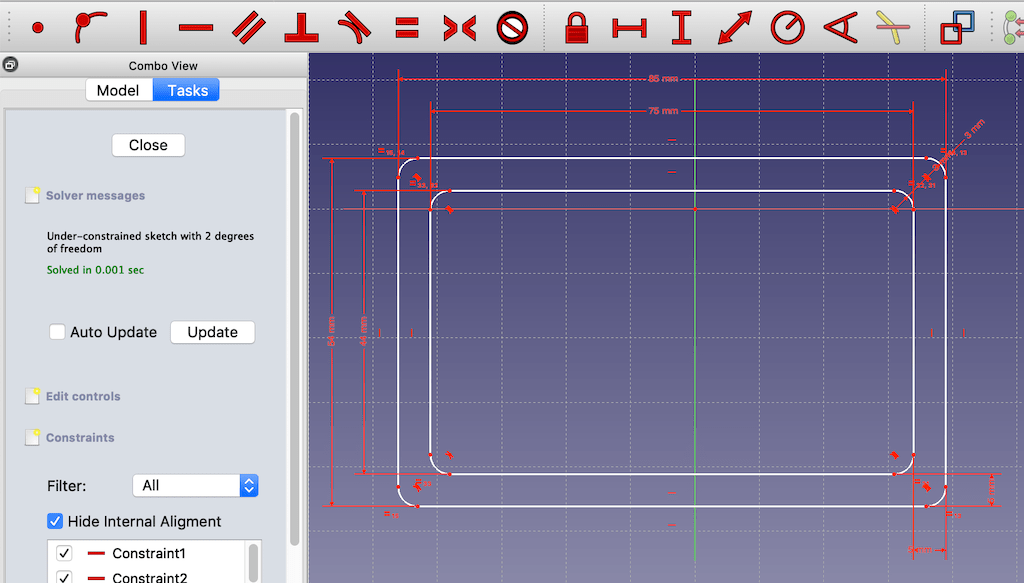
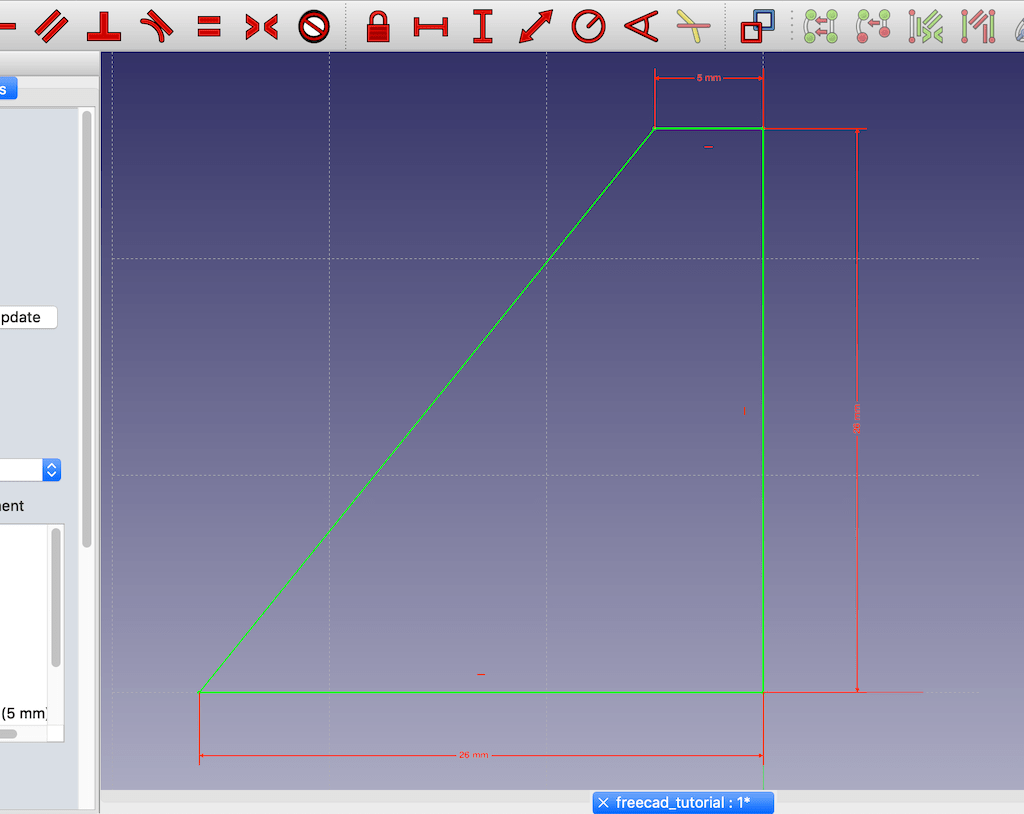
Started my journey into FreeCAD by creating a new sketch and trying to recreate what I did in Inkscape before. The workflow is fairly different, so it is a bit painful to adapt, but I think I’m starting to get it now.
Still not sure if it was the best way to do it, but I created two rectangles, rounded the corners, created constraints of distance and radius.
I was hoping to do a kind of offset on the first drawing, but was unable to find it.
Quick note, version 0.17 is unstable on MacOS Mojave. I had a couple of crashes. Someone recommended opening the application from the terminal, so that’s what I’m doing right now.
After jumping in the 3D workbench, I was overwhelmed and couldn’t do anything I wanted. Very frustrating. So, I decided to step back and do a tutorial in part designs.
Tutorial
In the oficial wiki, a found the Basic Part Design Tutorial. And that’s what I’m going to follow for now.
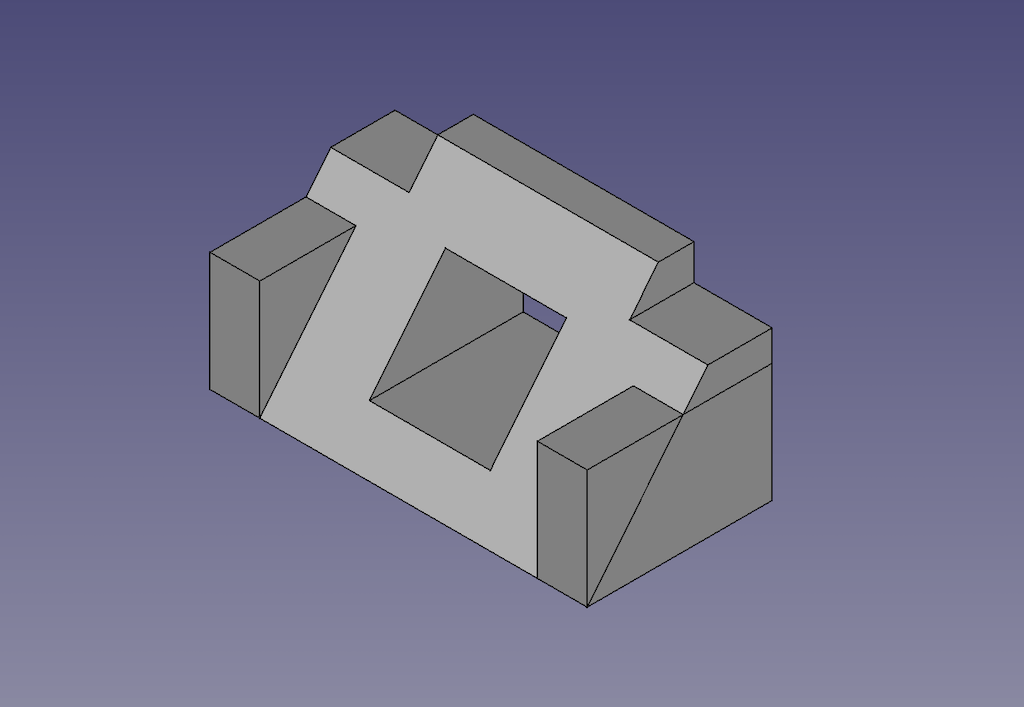
All the steps were given to get to this final result:
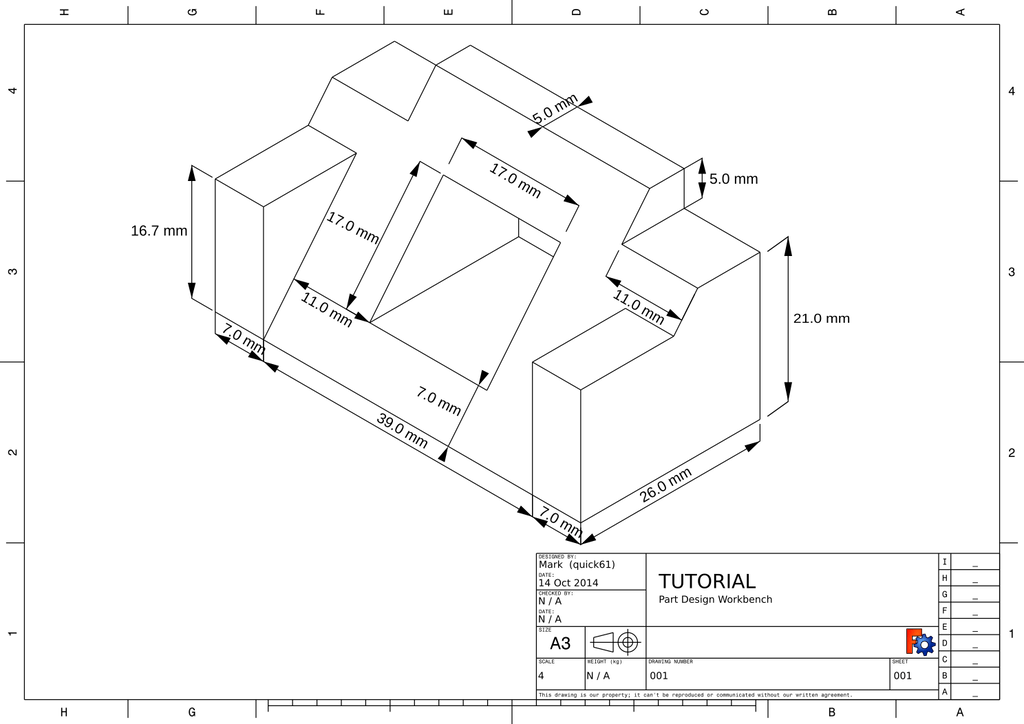
Started with a lateral view sketch, adding constraints of size and direction.
Then, exiting the sketch, did a pad operation. (Note: Had to select symmetrical positioning to be able to mirror future operations)
Created another sketch from the back, made a pocket operation and then mirrored it.
Then, sketch, pad and mirror.
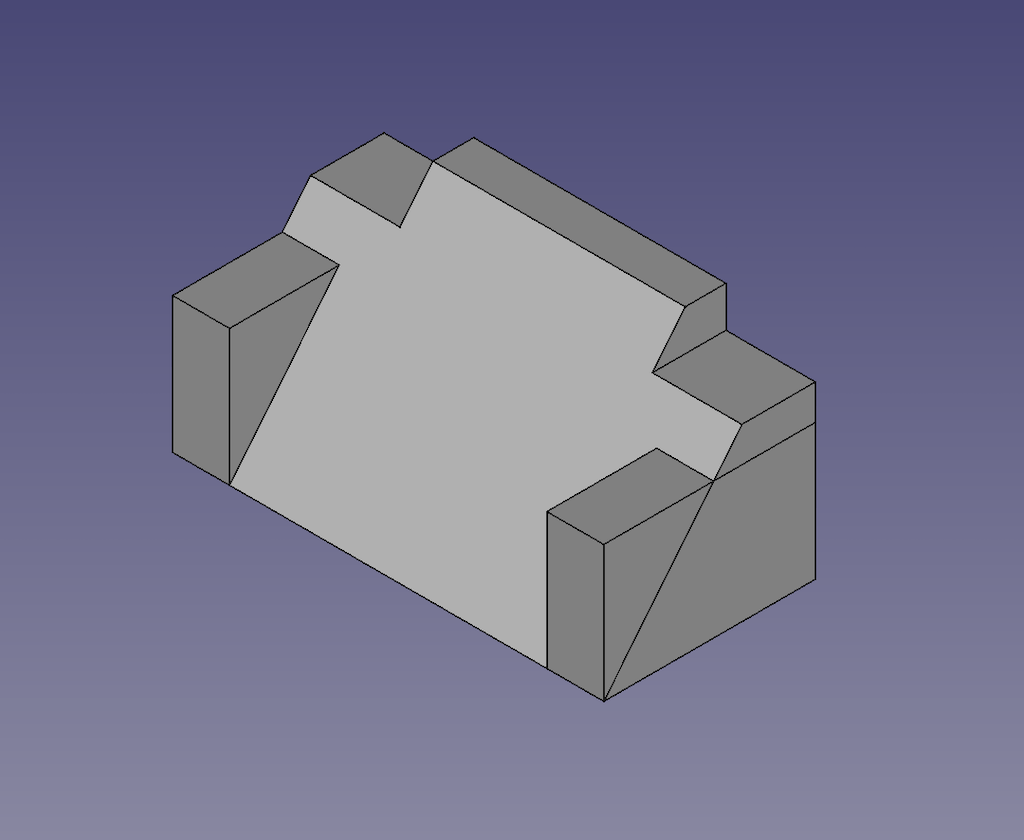
To finish, a pocket in the middle.
Part design
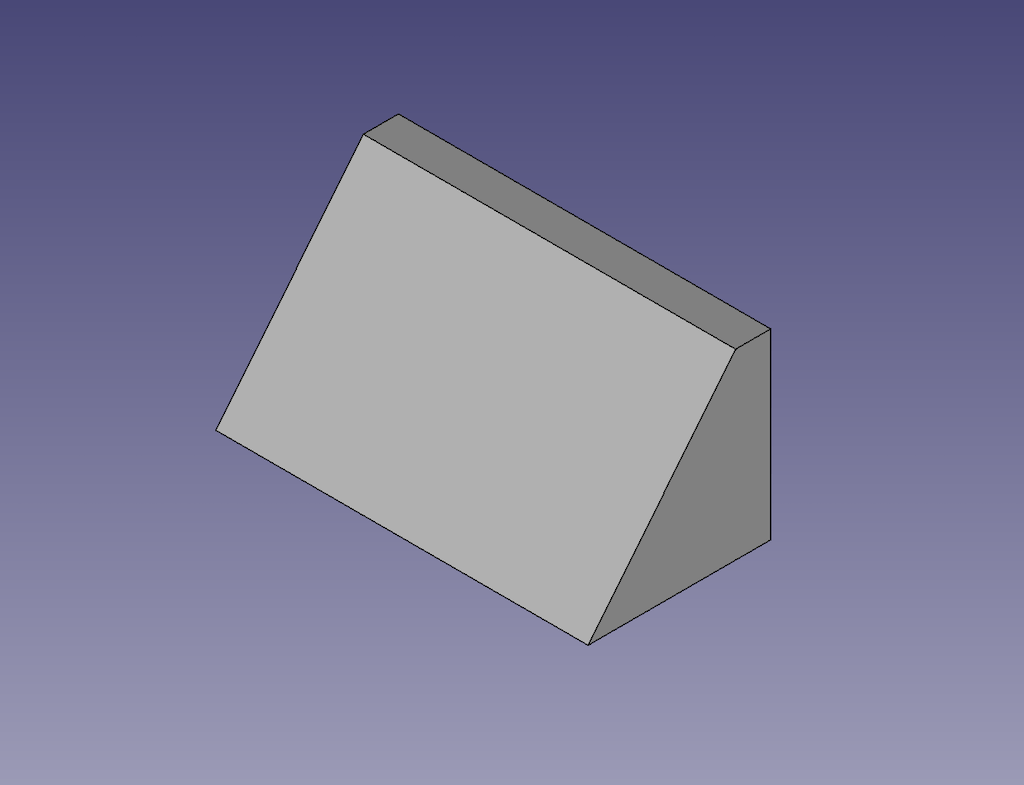
After the tutorial, instead of spending an hour banging my head on the keyboard, I made the part in 5 minutes. (Pro tip: always do a basic tutorial before starting a new software!)
Started with a simple sketch
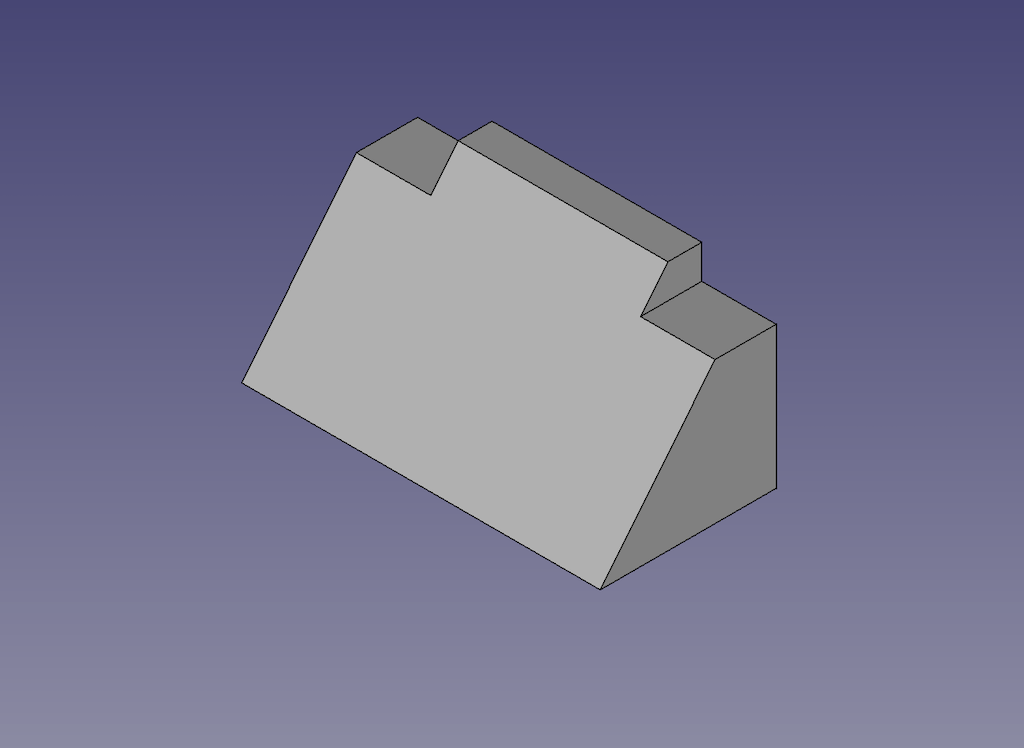
Added a pad and pocket operation for the display
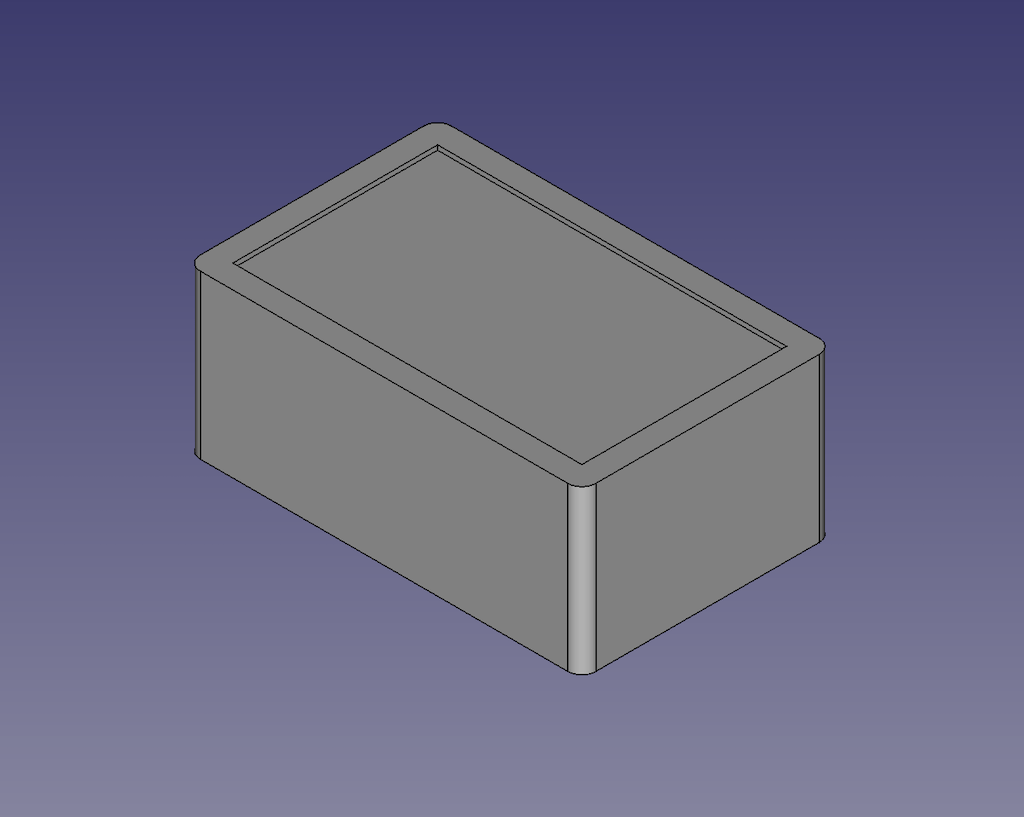
Added another pad to create the power button
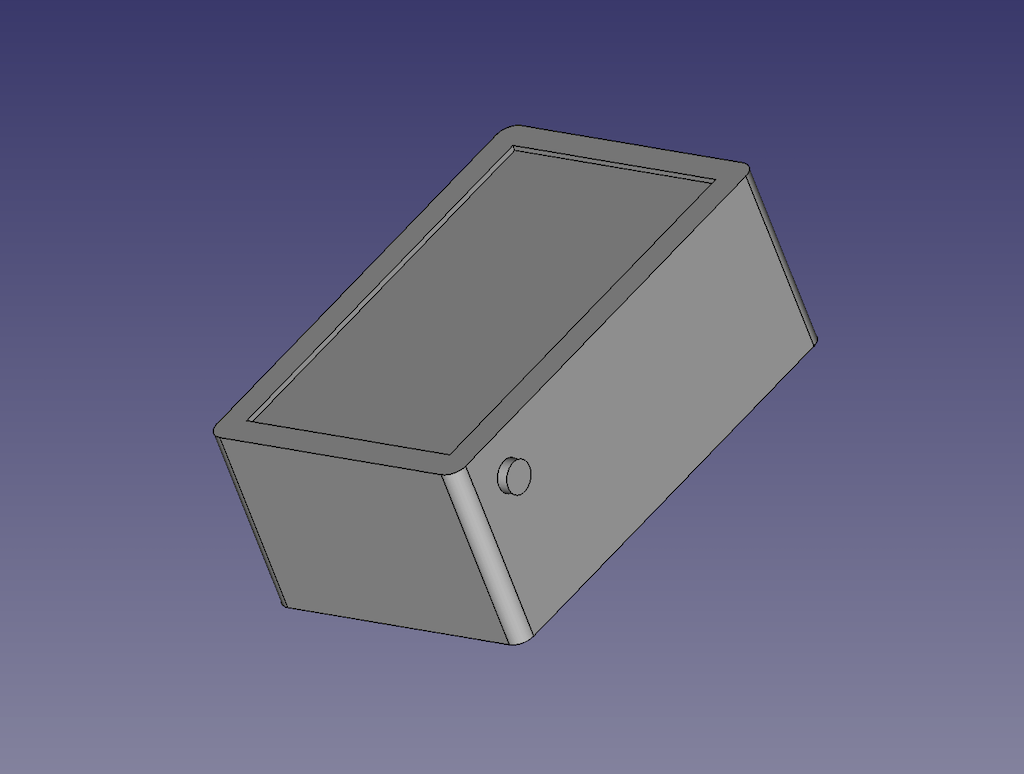
For now, I’m happy with the result. And I’m going to jump into blender to learn how to render it with some material texture.
Conclusion
After banging my head on the keyboard a couple of times, I decided to do a tutorial and it really helped me to get a sense of the workflow of CAD. I’m really not used to it. Bot now, I kind of got a sense of it and actually liked it. It seems to be very powerful. But I’m having a few crashes eventually. If I get to fix it, I’m definitely sticking with FreeCAD to do parametric sketches and 3D design.
Blender
I was really interested to learn blender to render and animate projects. So, taking knowledge from my previous mistake, I jumped into the official tutorials.
To be honest, it is a little bit overwhelming how much the software can do. So I’ll try making my work here as simple as possible. Just to get close to the result of the other softwares. But, including rendering.
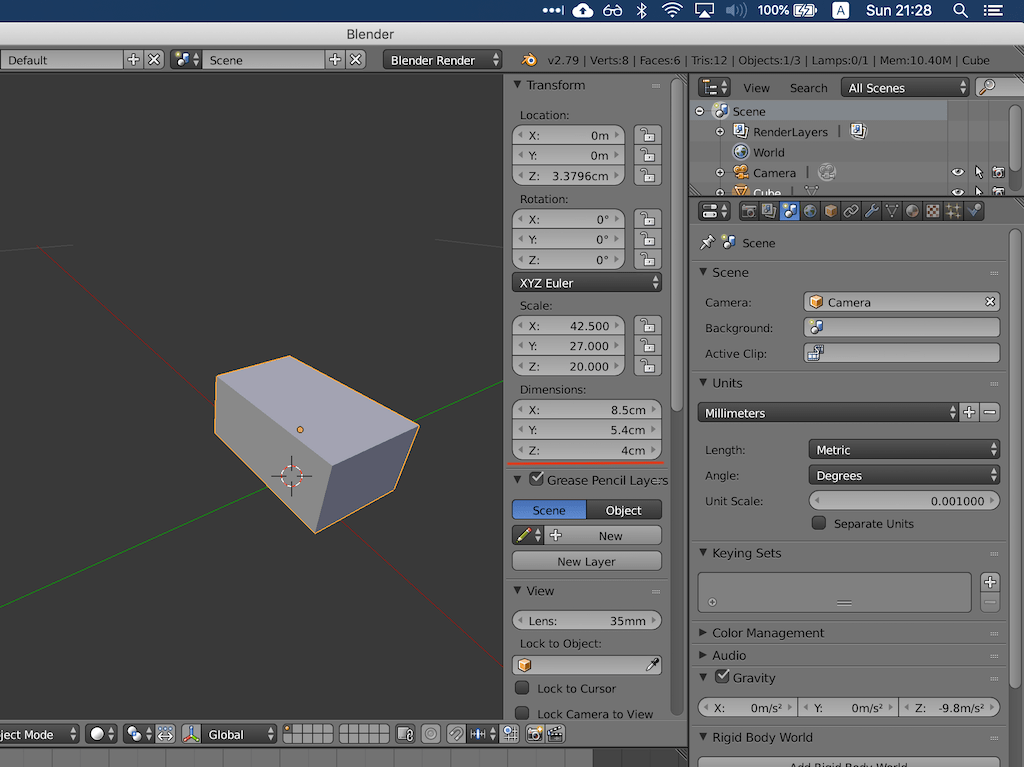
There are a lot of ways to go about this. The one I took was adding the correct dimensions to the cube we start with and then applying the features and display.
The first step is make sure the scene units are adequate.
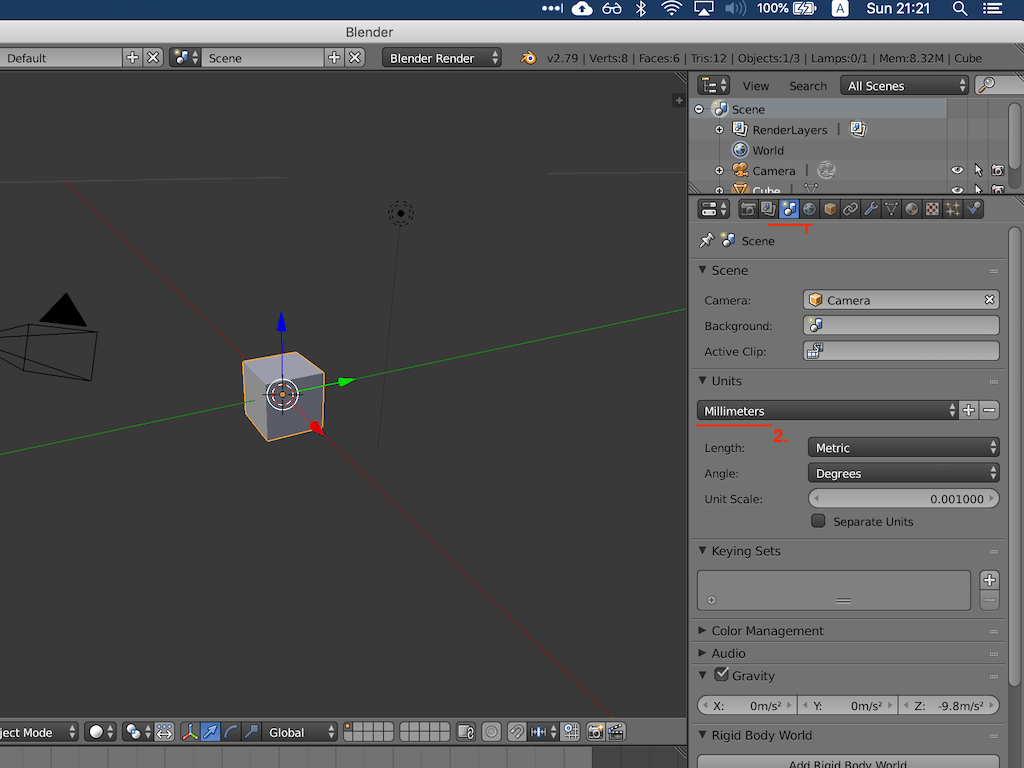
Then, still in object mode, pressing N opens the properties of the object and we can change the dimensions.
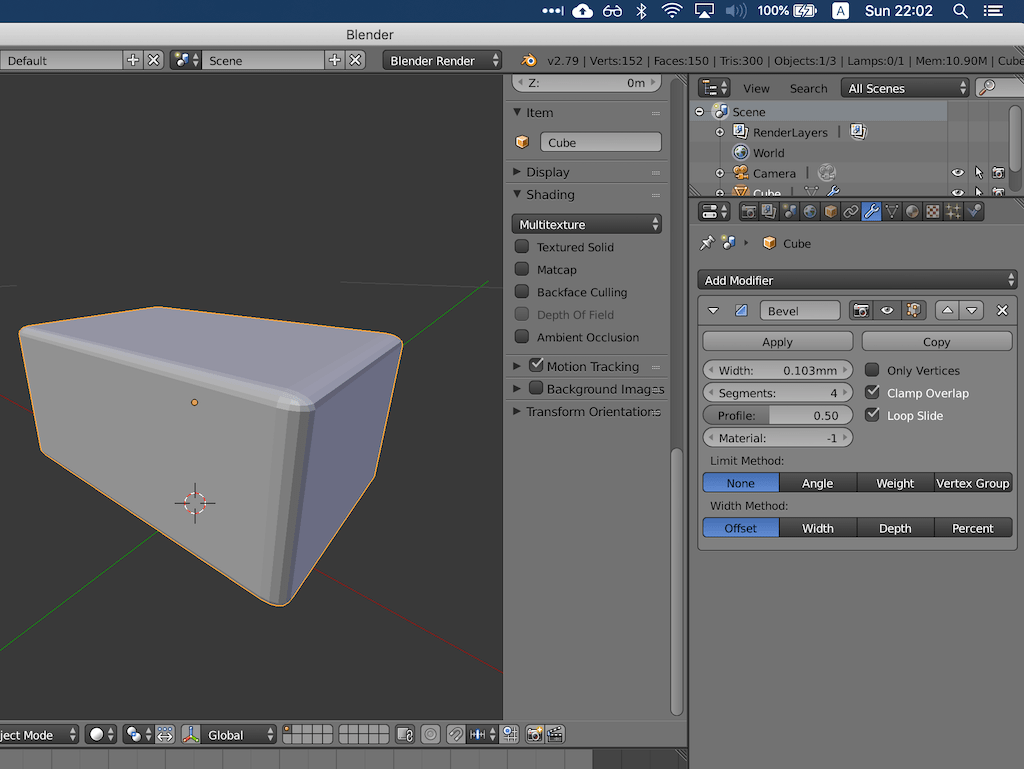
As for the fillets, they’re called bevels edges on Blender. The shortcut for it is Ctrl+B in edit mode.
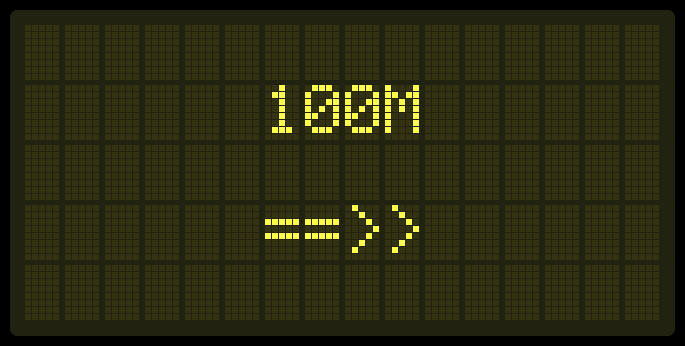
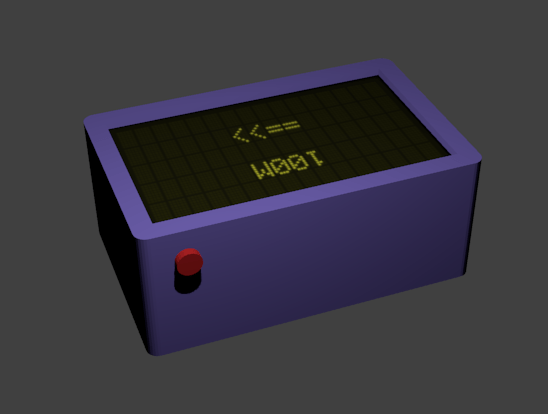
Used an online tool to simulate a LCD screen for the model. LED Screenshot Generator.
After doing the tutorial, I was able to get to this point. I’m still trying to troubleshoot why the display is broken. Will update as soon as I get to it.
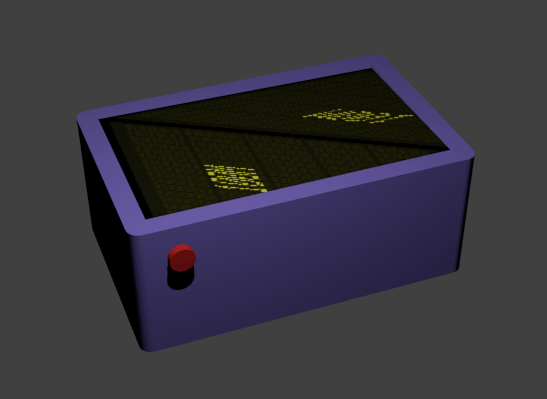
So, there were two problems.
The first one is I was applying the texture on two selected faces. I had to merge them with F. The second is that if you just press F12 on the same screen it doesn’t update for some reason. Maybe cache. After I did it in another screen it worked.
Conclusion
Blender has A LOT of resources. But I found the learning curve to be a bit large. I hope to get more used to the workflow in the next couple of days. But I’m probably sticking to it to do rendering and animations.