3D Design

In this page I will explain how I designed the FabKulele, witch softwares I've used and why I did it like this.
First of all I think that I have to divide the project into two main parts, the structure and the body. Let's start for the structure:
The Structure
When I was thinking on designing a modular Ukulele I had a clear idea in my mind, I want an instrument really easy to be dissembled and mounted with different components. But the biggest problem was the string tension, if it is modified it will get out of tune really easy, so I had to try to keep the tension. For this reason I realized that the best solution is to keep the tunning pegs and the bridge in a single solid piece. Thats why I started designing the main structure like this. This was the first diagram I made:
First tests
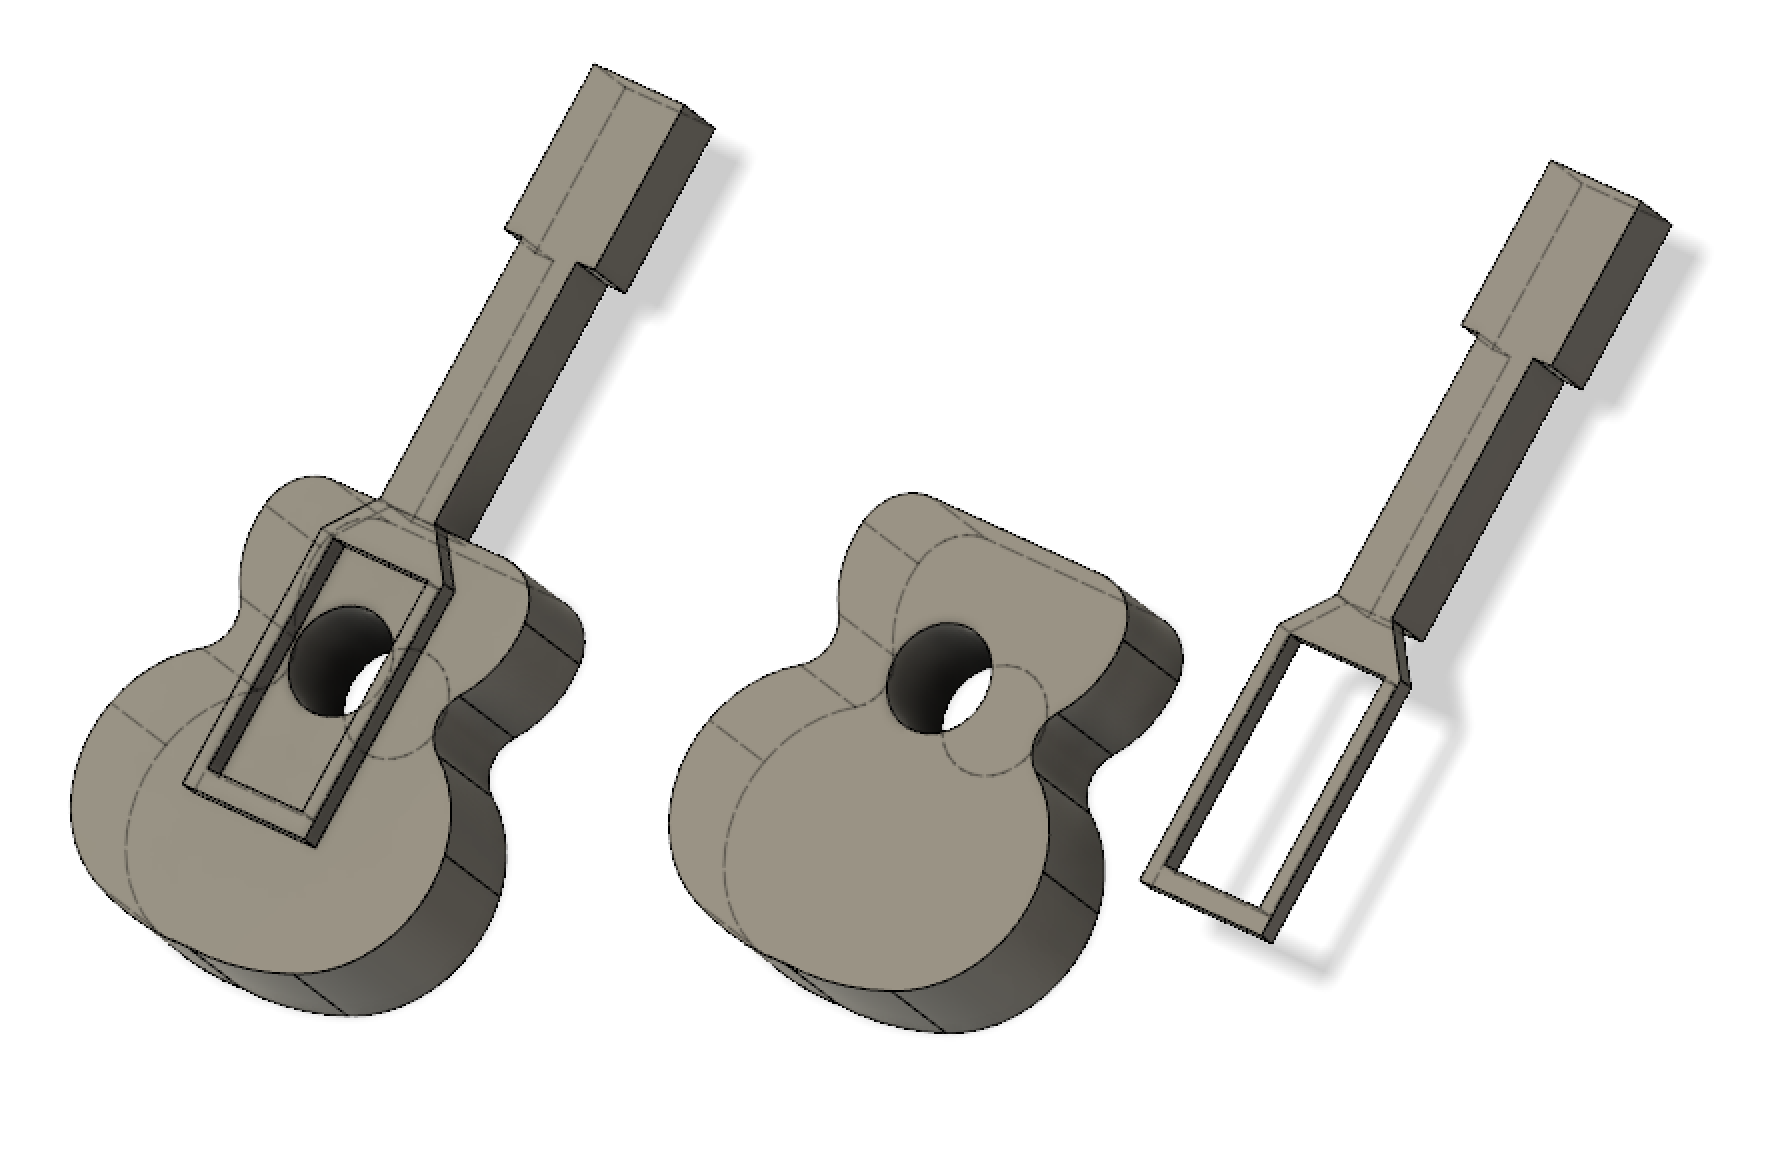
The first idea was to make it with wood in the CNC like I did during Make something big week, so I designed the model in Fusion360 and exported as an STL to import it to Rhino and mill it with the CNC.
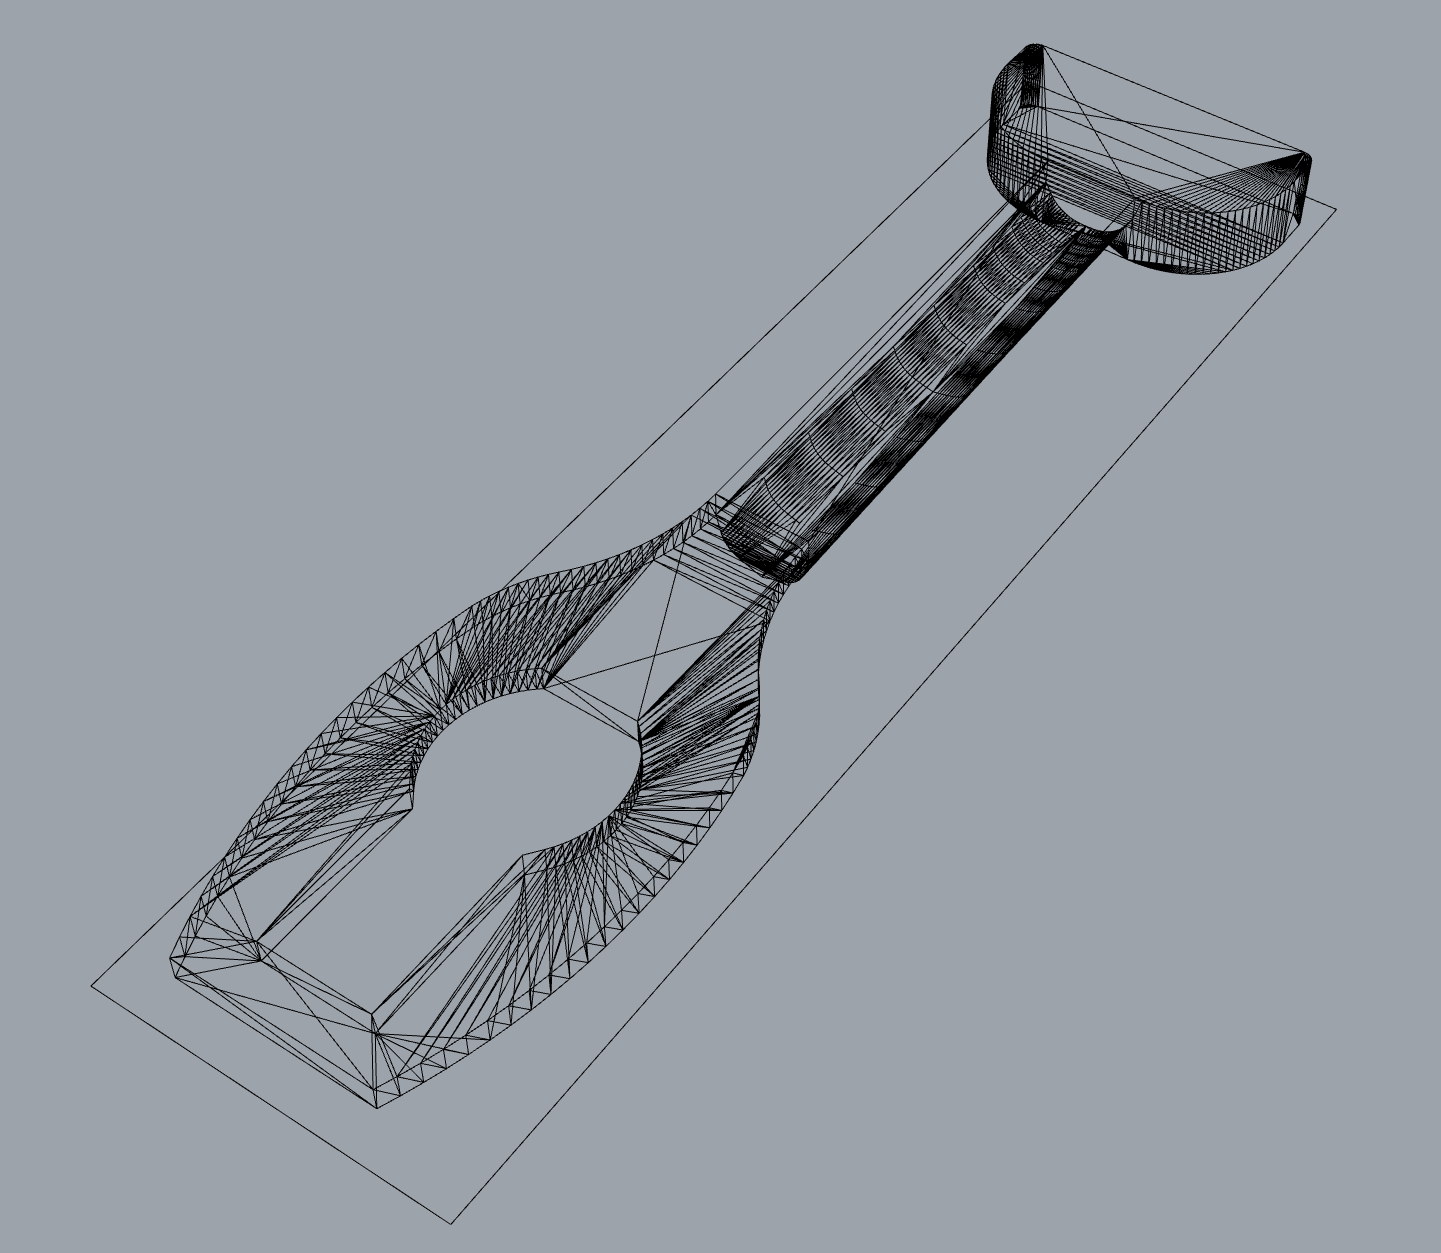
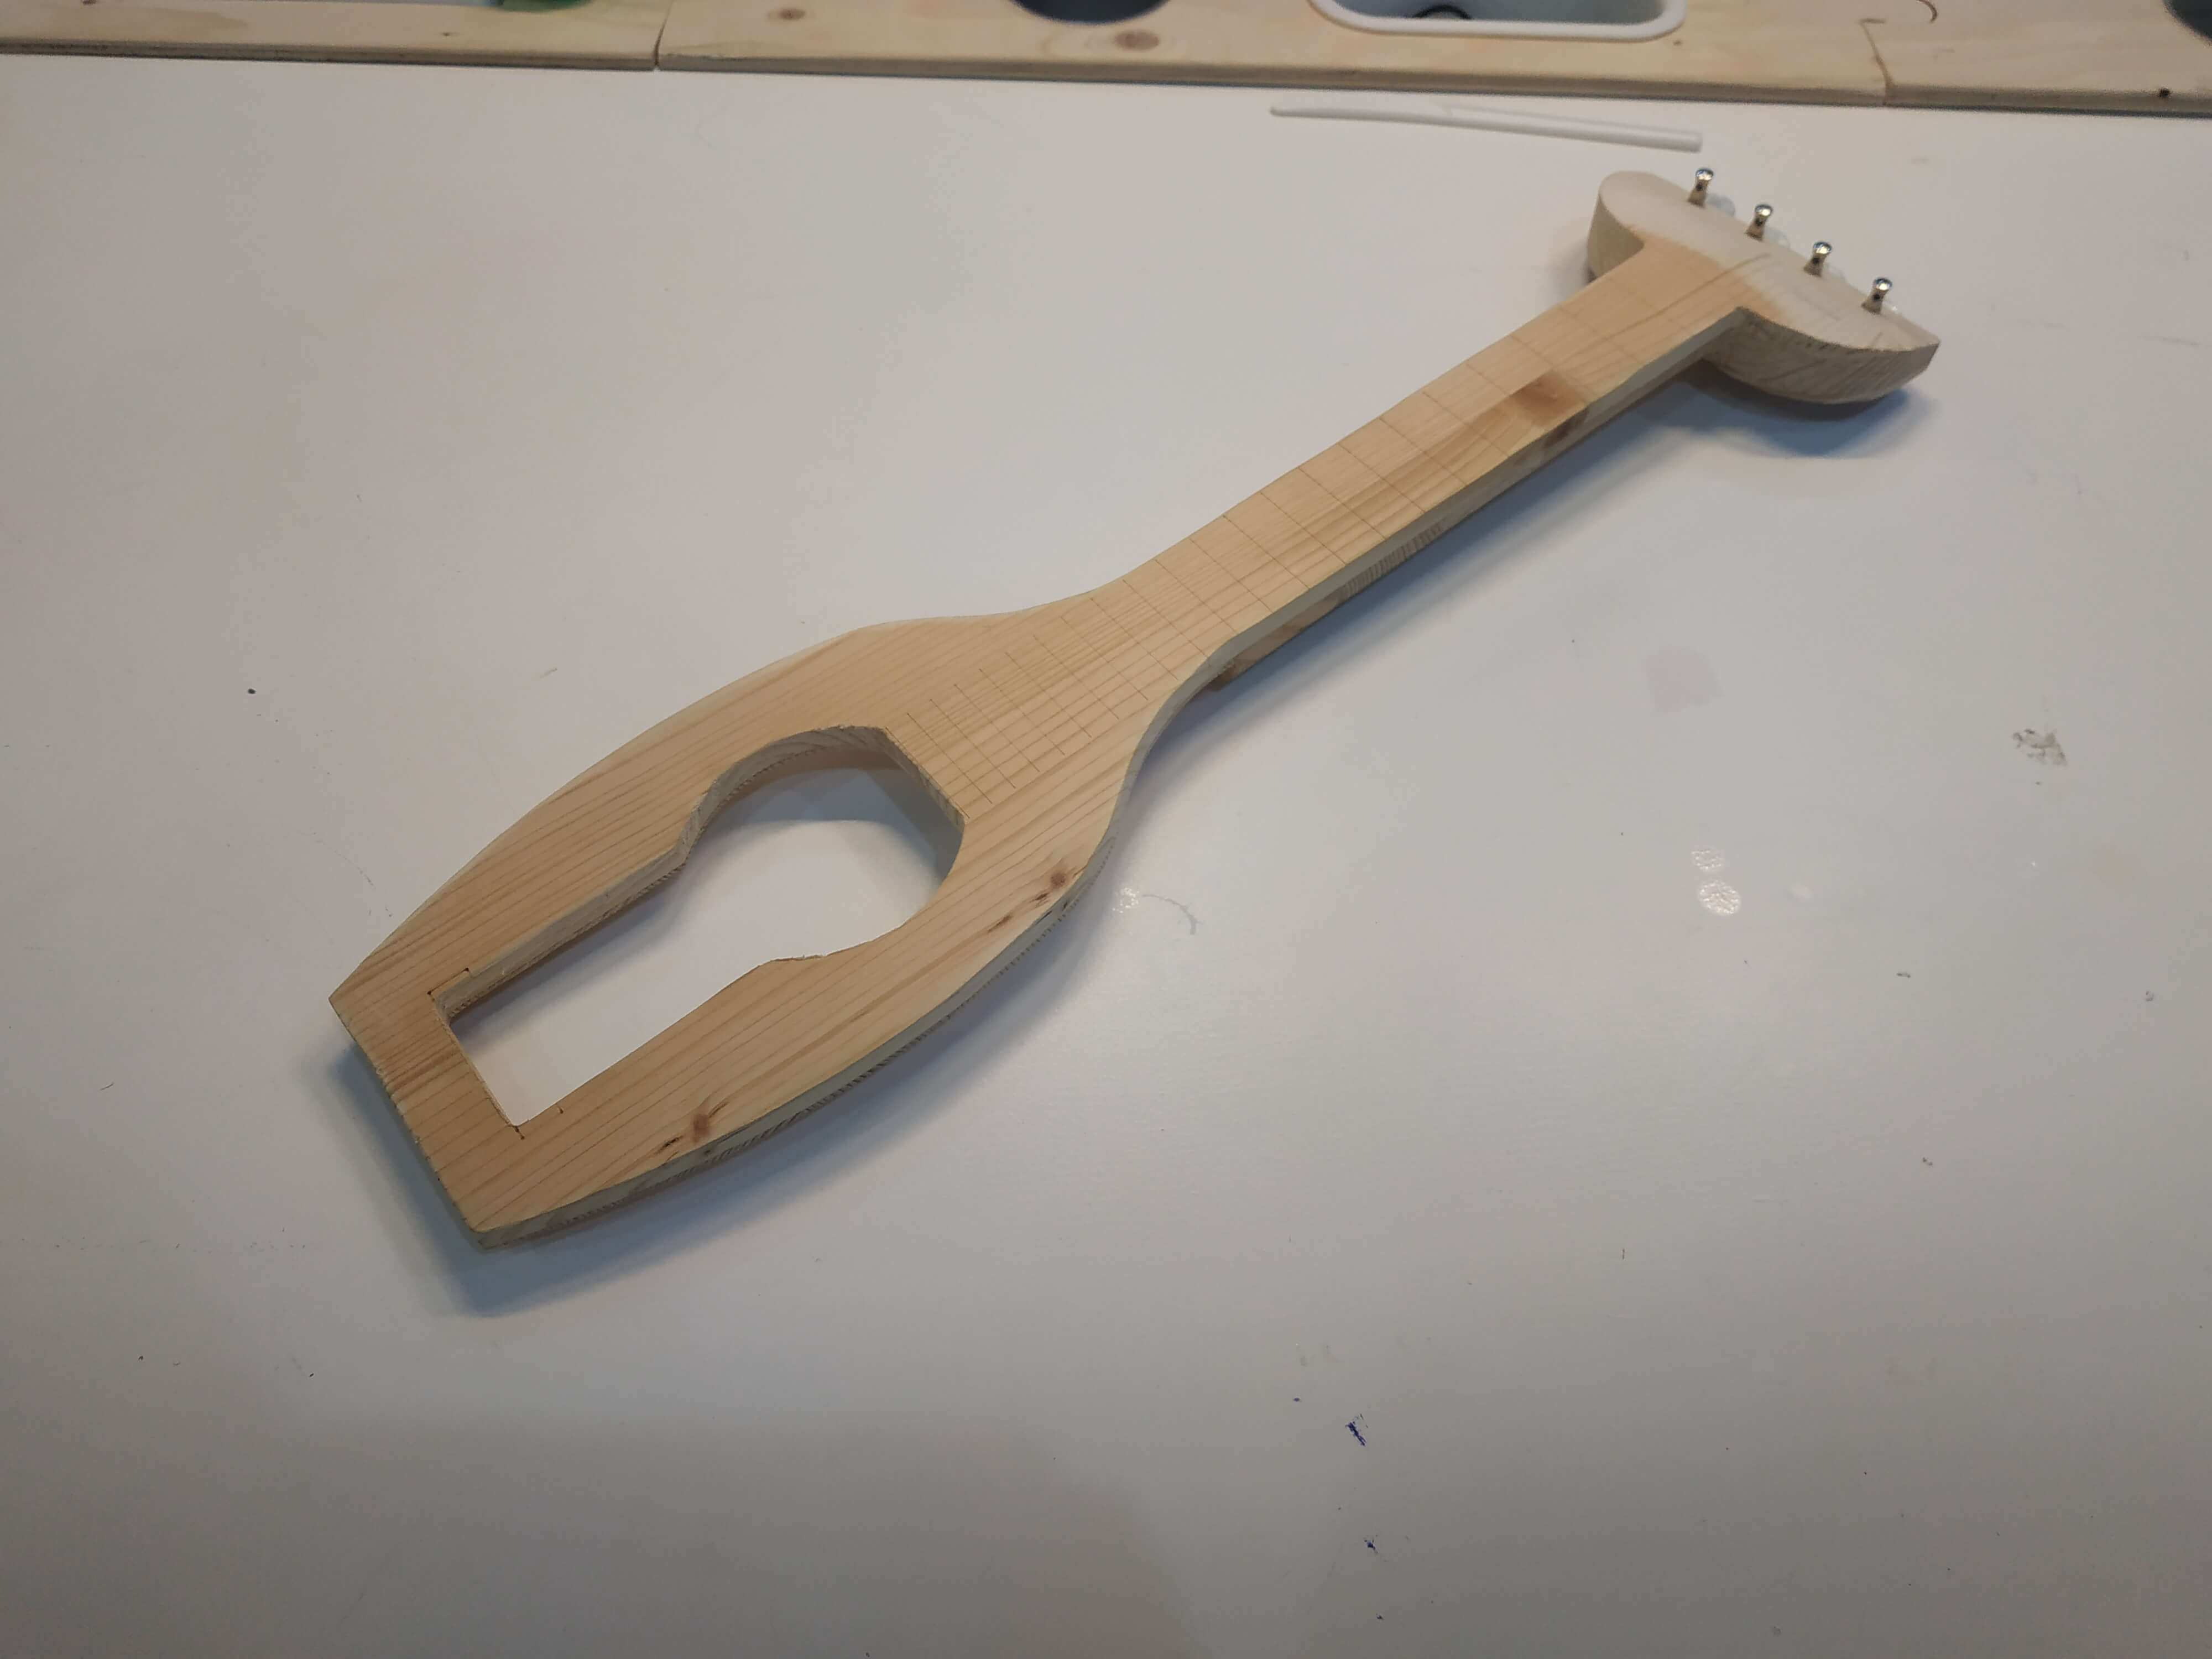
This prototype was really good, I just sand the top part to get an inclination. Then I start developing the electronics, and I realized that it is difficult to embed electronics inside it. For this reason I decided to design a new one that I could 3D print with PLA, to test the strength and make it much more fabalbe.
Modular design for electronics
I started designing the new model after finishing the boards, so I knew the dimensions of the boards. This gave me the opportunity to build a model where I could put everything inside. For this design I used Fusion 360 and it is composed of 4 main parts and some extras. I did it like this because it was to big for a 3D printer, so I decided to go for an assembled kit.

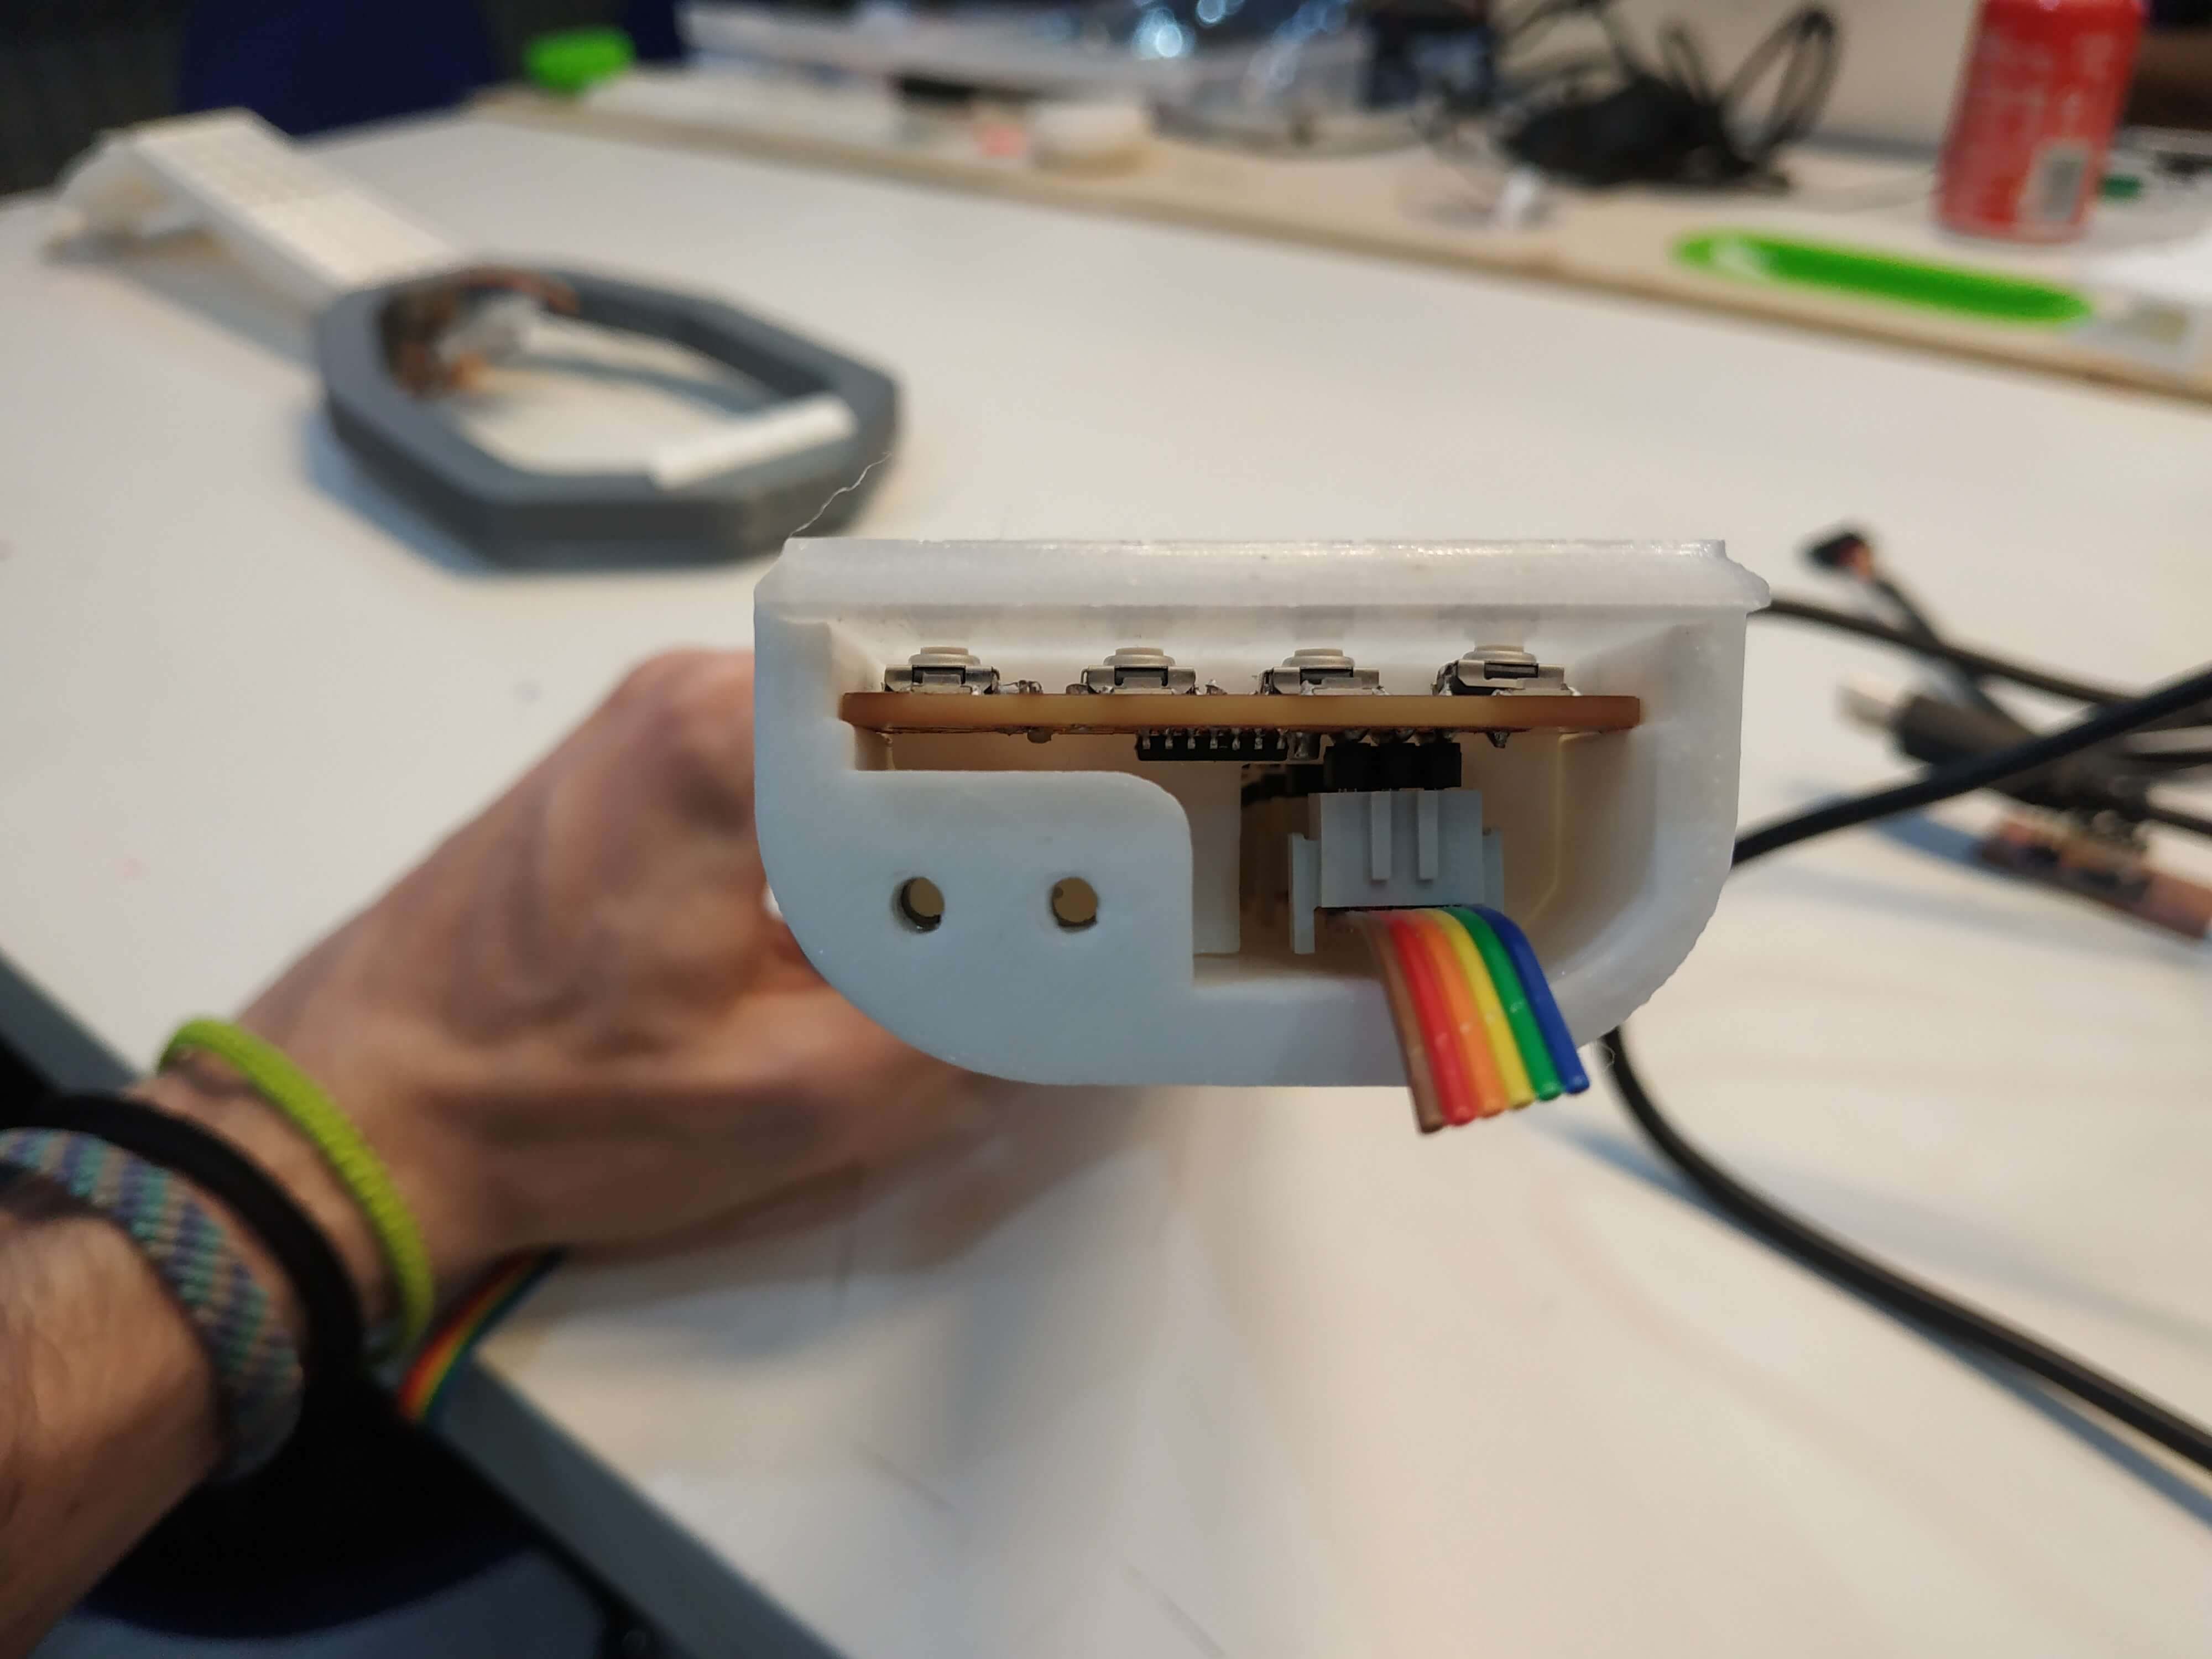
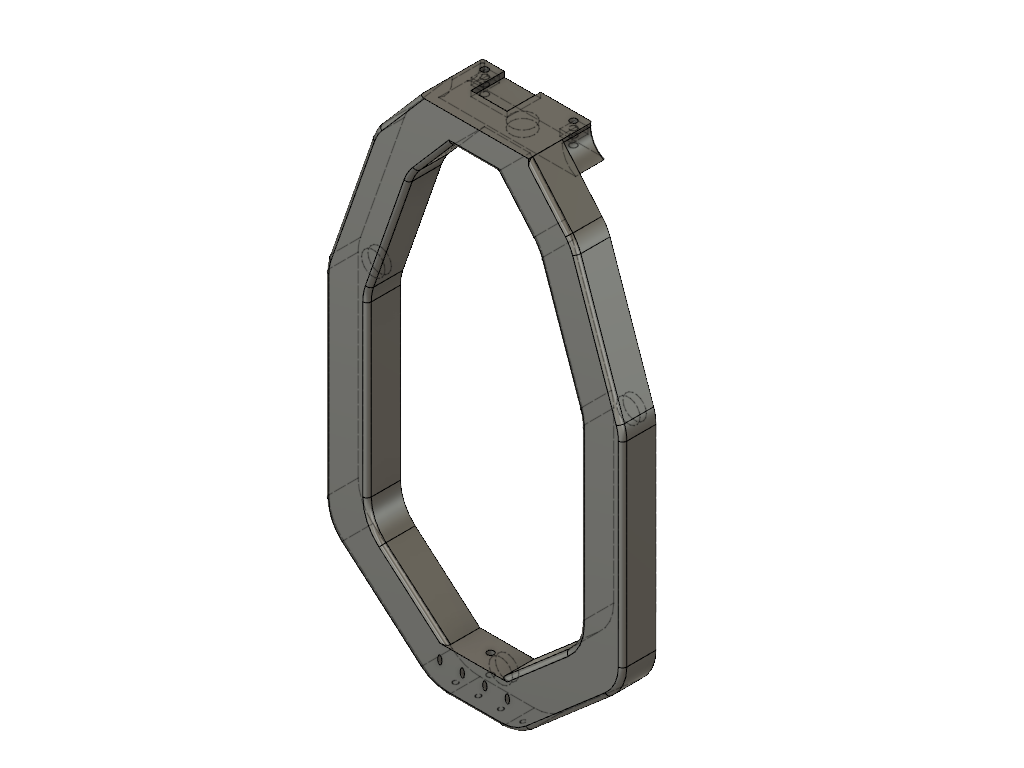
The Neck
This part was designed to fit exactly with the electronics boards of each fret, and to fix the Frets in place.
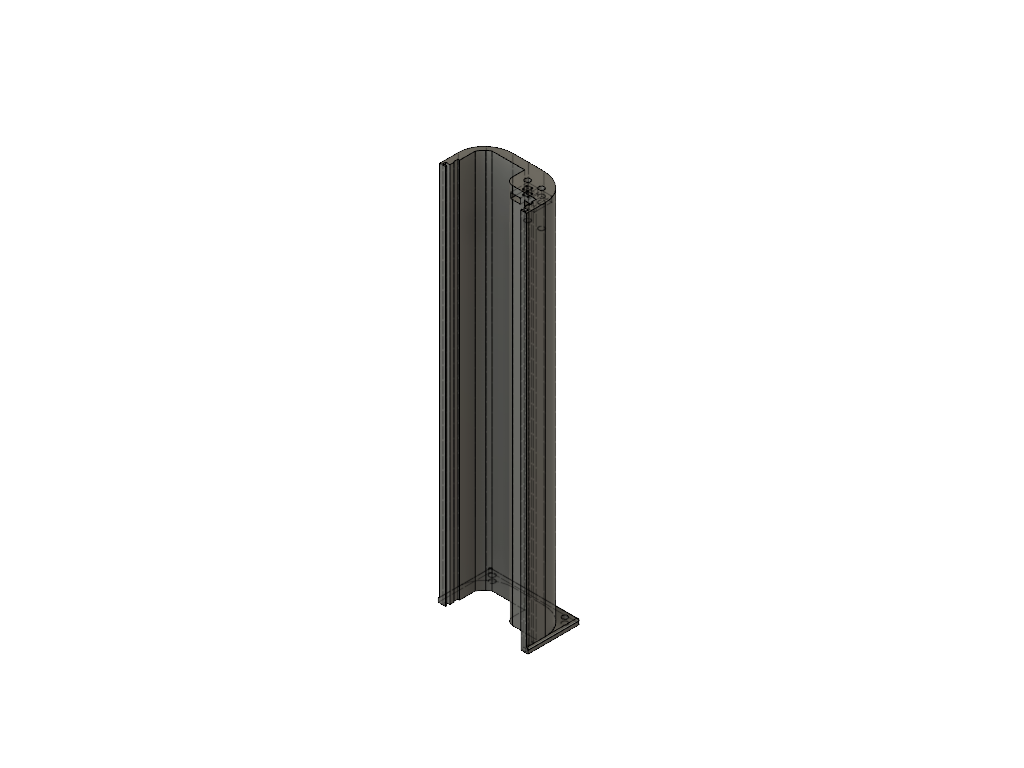
It has this specific shape to fit all the components, the fret board slides through the outer rail and the boards slide inside. There is a big hole on it to fit the I2C bus and the ISP connectors of the boards. Also it has some holes on the top and the bottom to join the other parts of the Ukulele as I will explain latter.
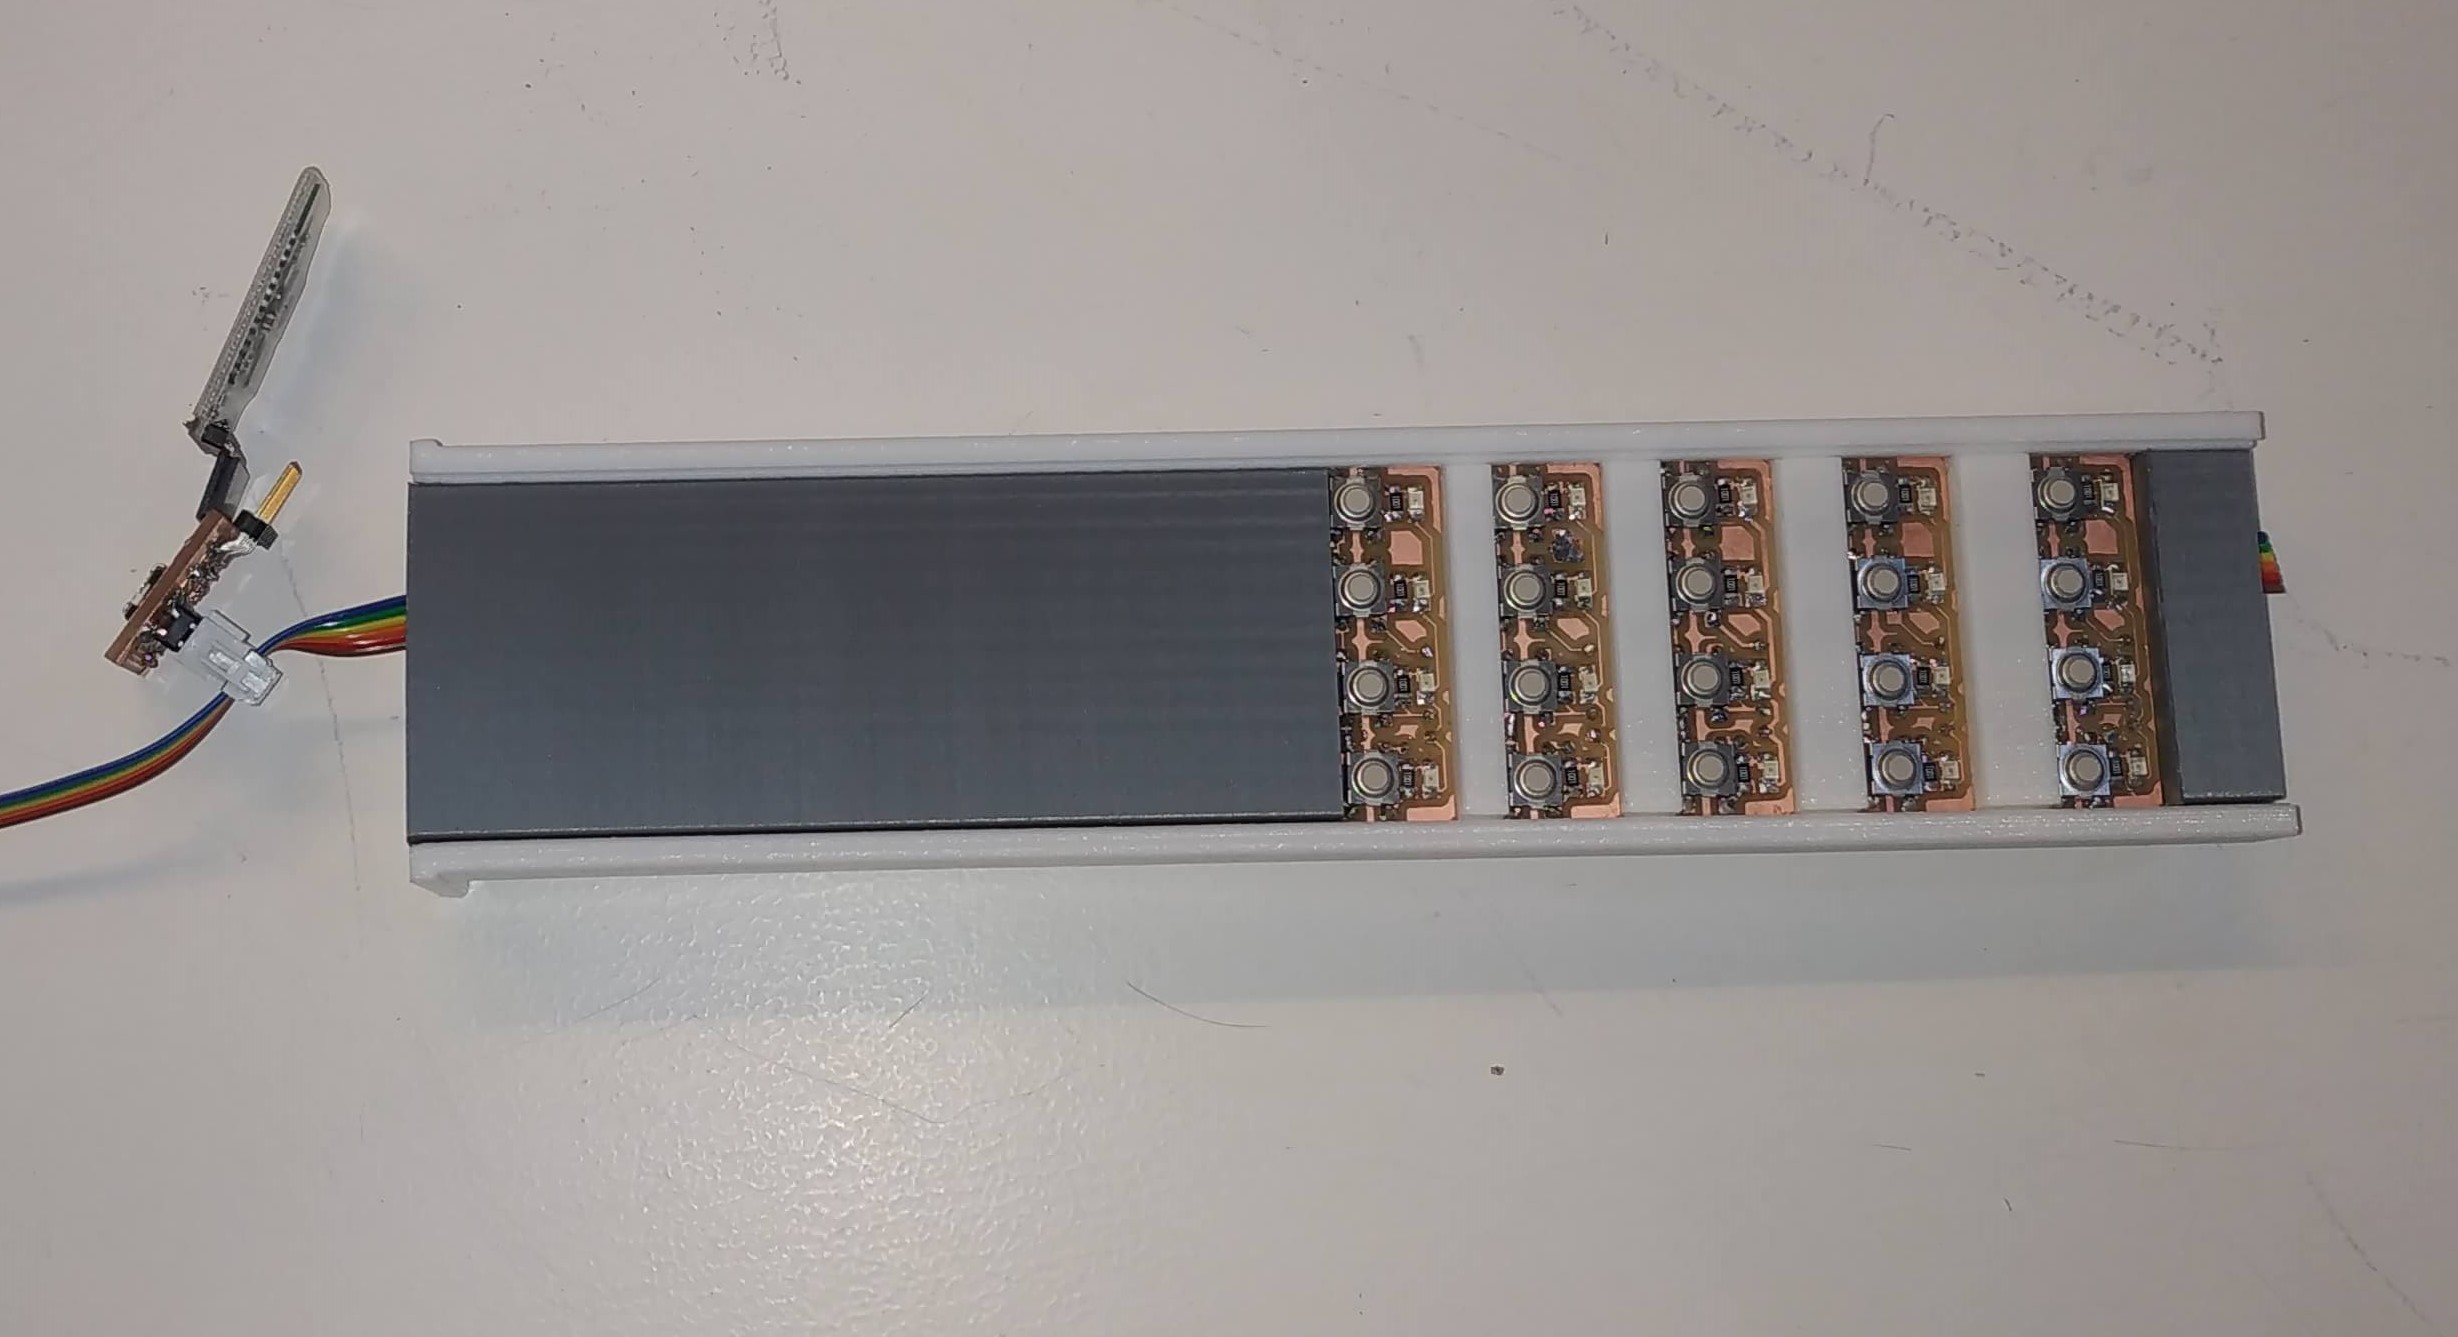
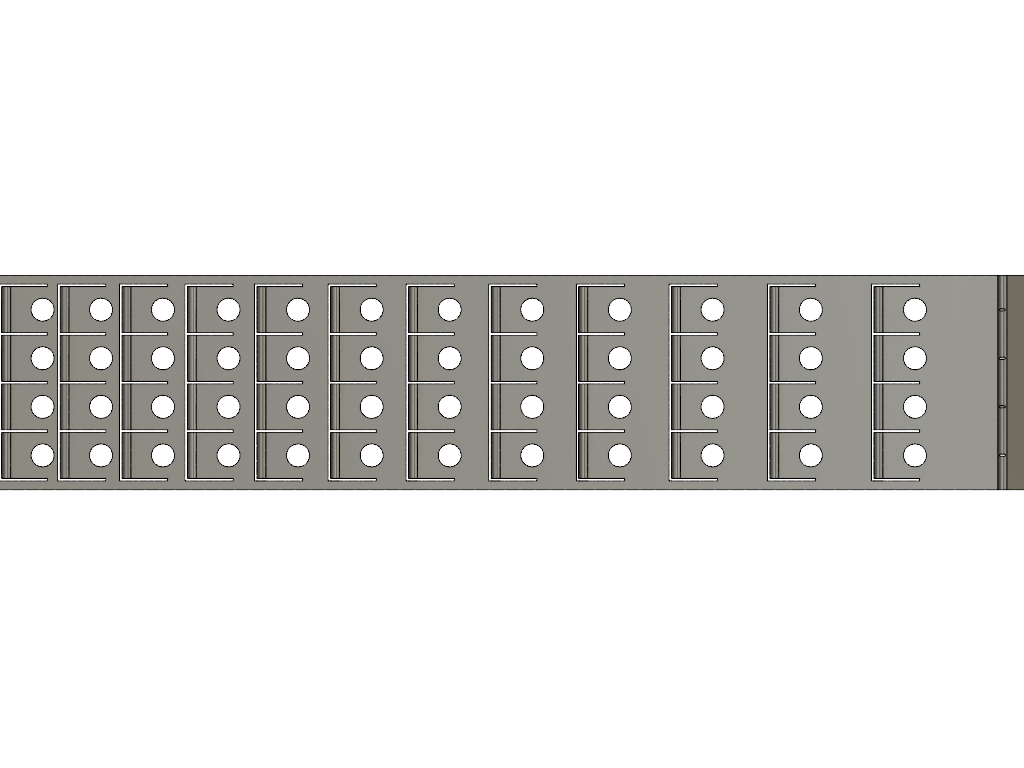
To fit the boards, make them slide and distance them the exact distance of each fret, I designed some inside dividers that fits between boards. This allows the slide movement of the entire block, keeping the distance between frets.
The Frets
This part it's a special part. I decided to design a whole piece with all the frets instead of mounting each fret apart as normal Ukuleles, because I wanted to have the exact distance between them and also because I decided to create a system of hinges that allows the player to press the buttons of the electronics boards bellow the frets. It has a width of 1 mm to allow the flexible movement of the hinge, as it is a cut in the piece.
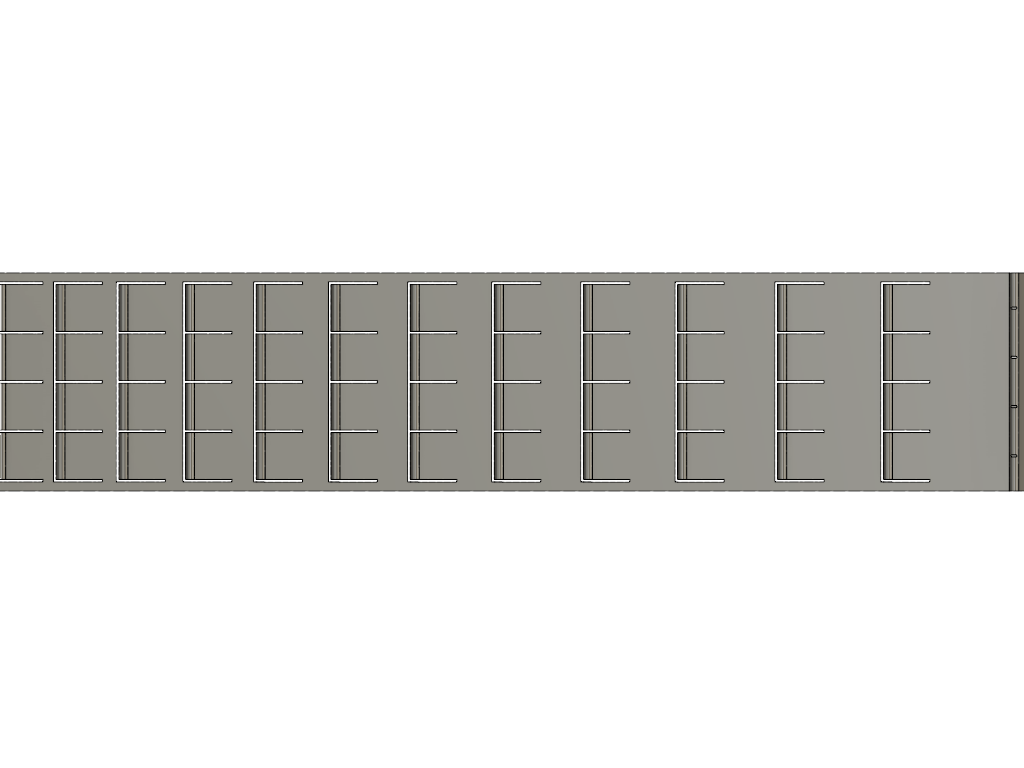
Note that I did 2 versions, one with holes and one without them because I decided to try the translucent PETG for a better design.
The nut is also incorporated to the design, to have the correct distance and also it fix the fret board with the string tension. You can adjust the string height adjusting the bridge.
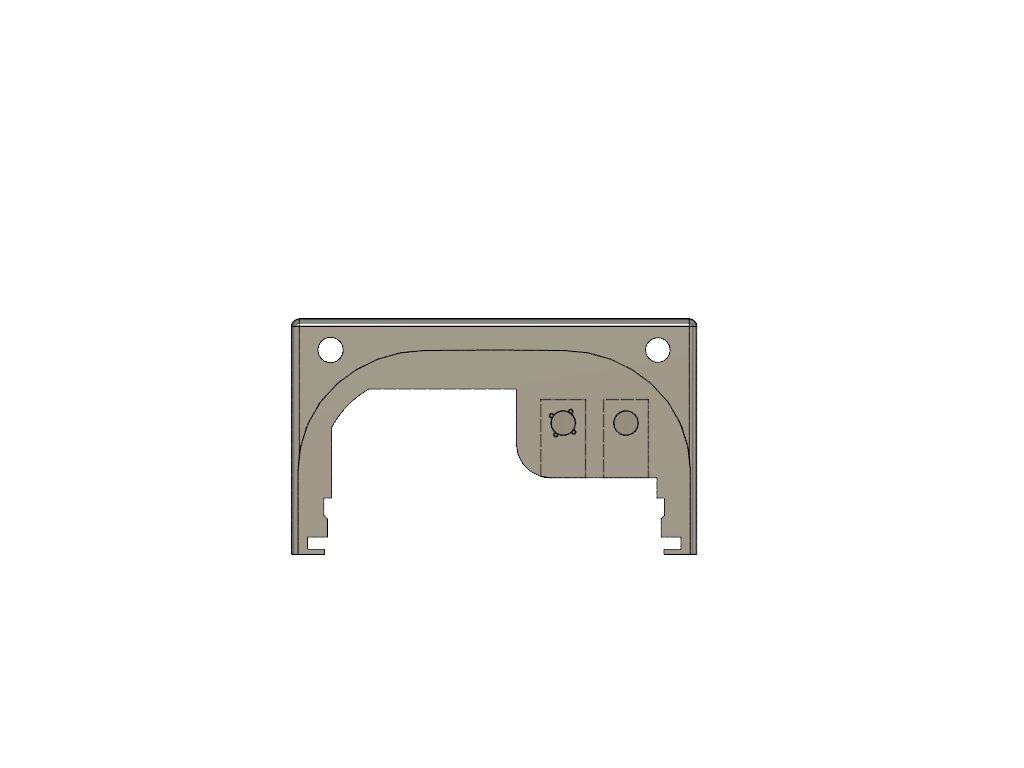
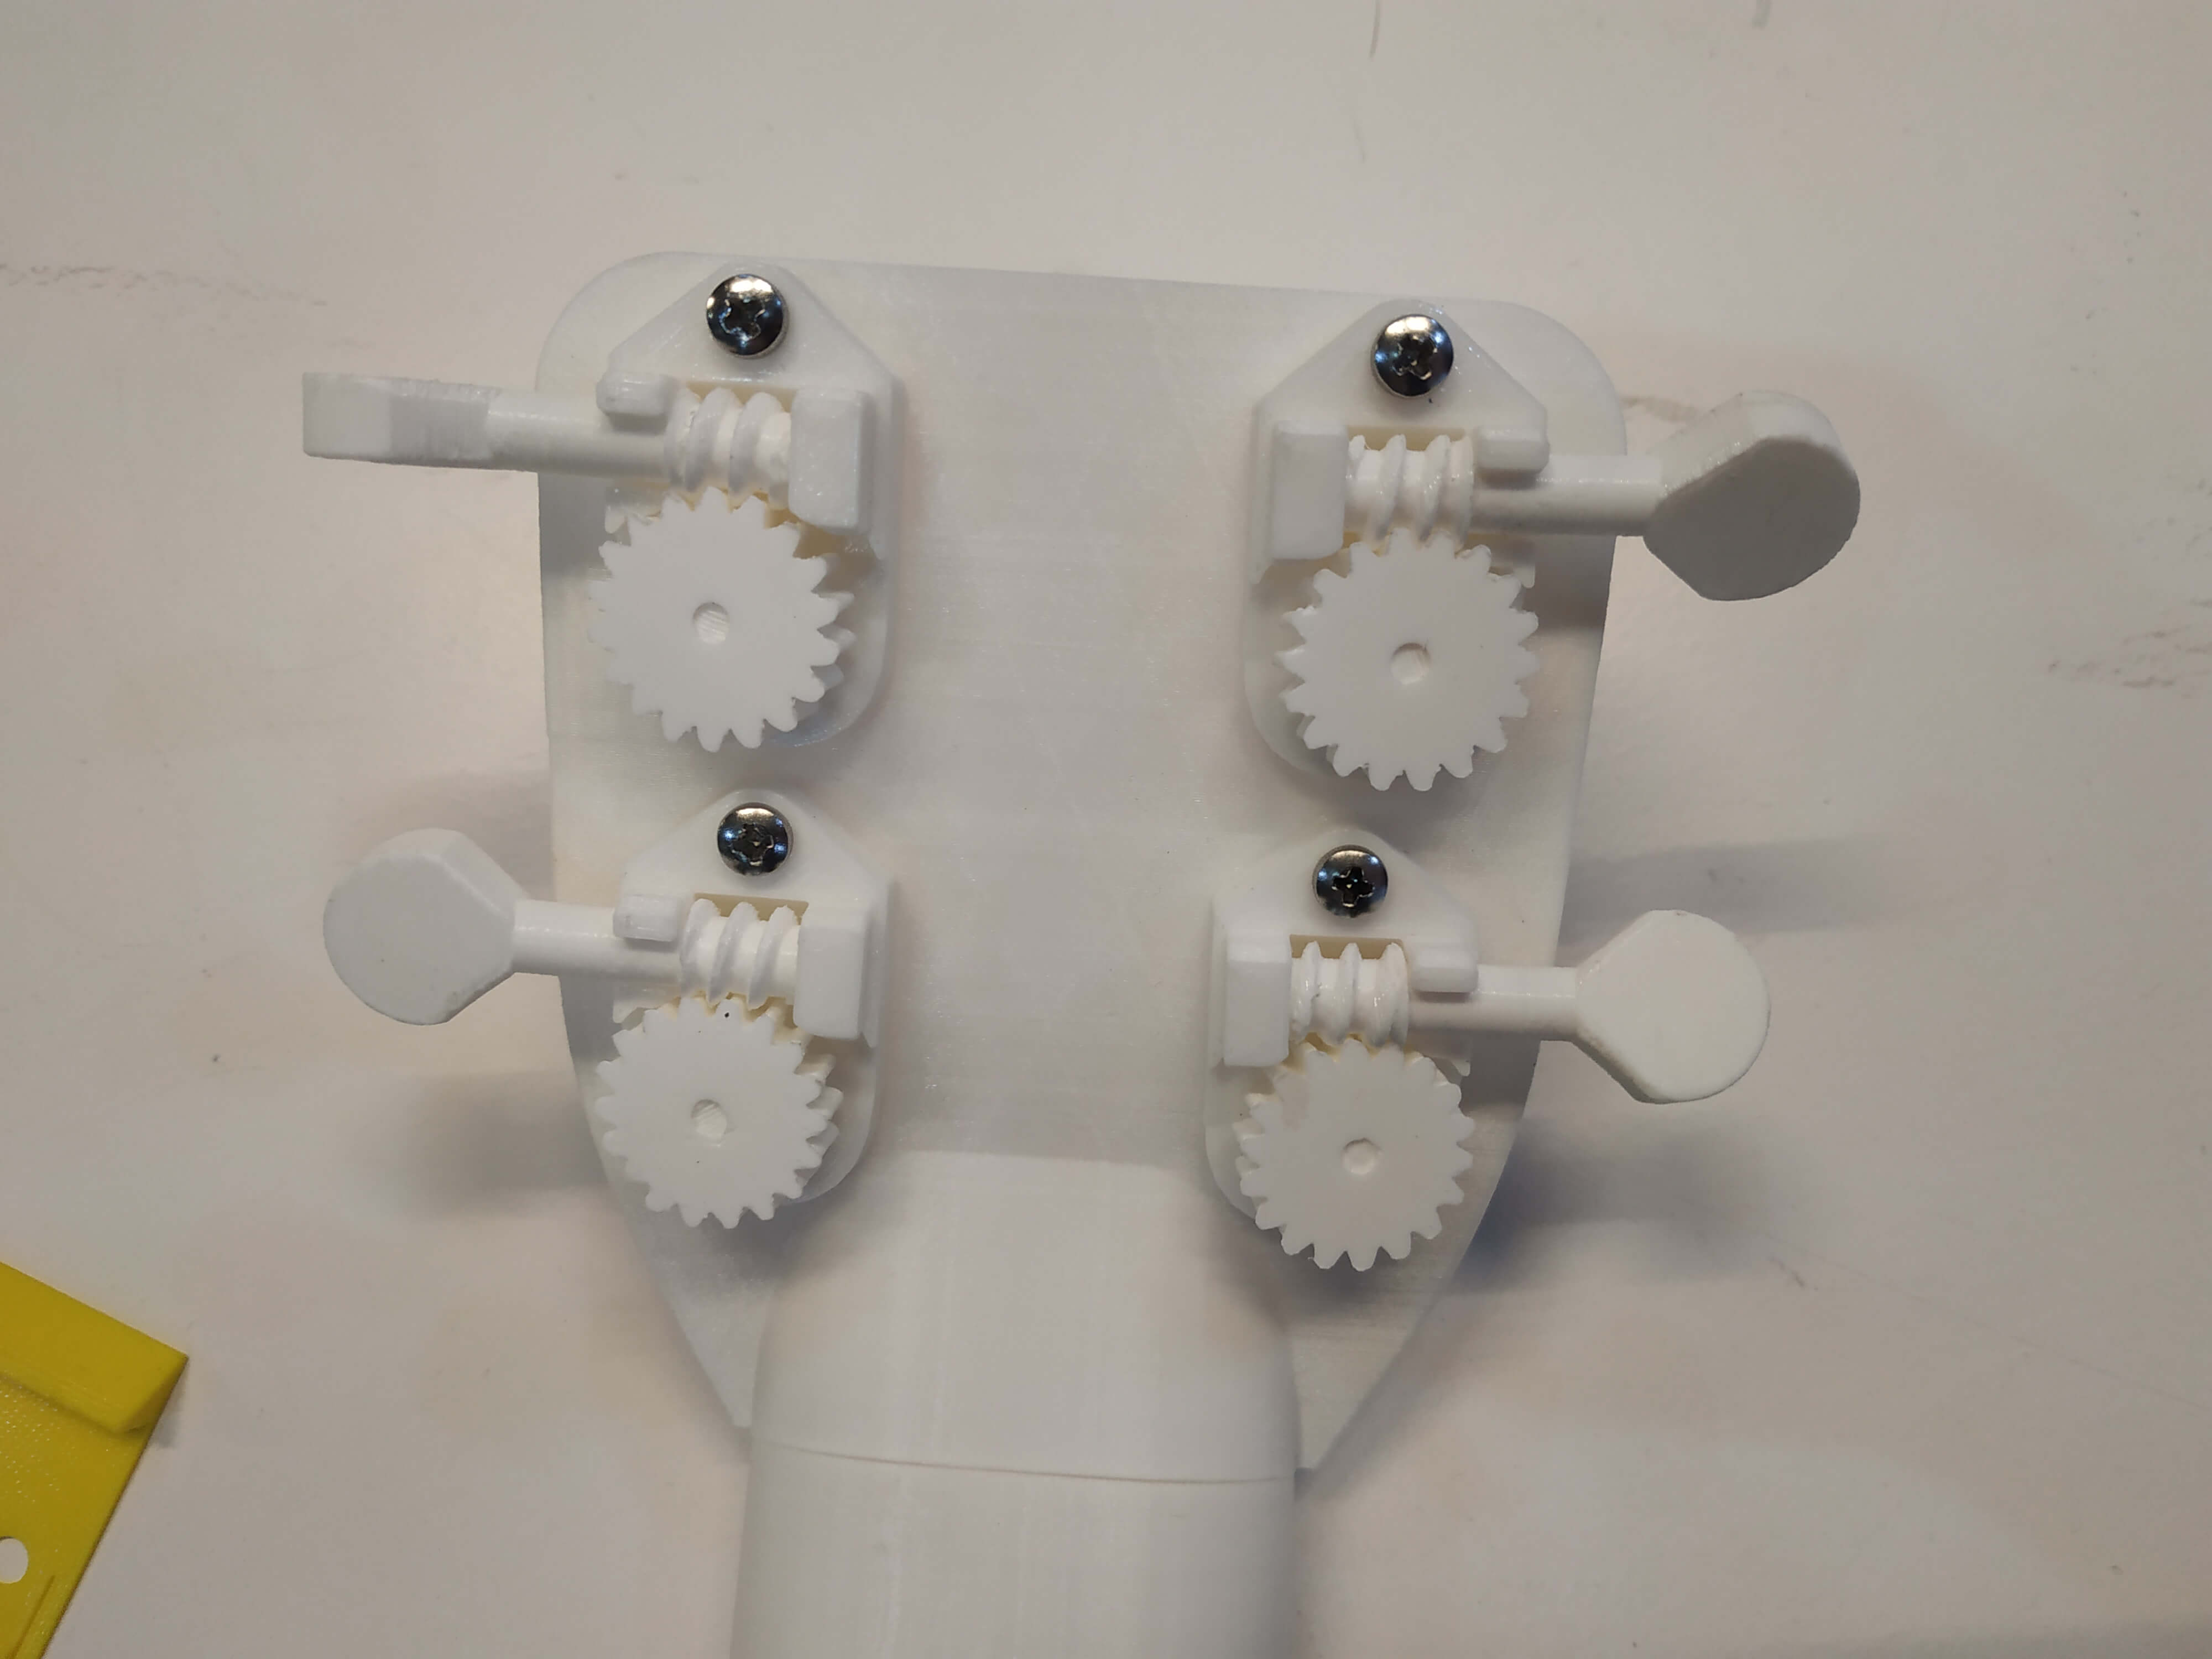
The Head
This piece is the top part of the instrument, and it is prepared to be mounted to the neck with two screws. Also, it is equipped with the holes prepared for the tunning pegs and the holes to screw them. The design was also done with Fusion 360.
The tunning pegs are the only part that I didn't design, I decided to look for some files in Thingiverse, and I found this files by JoeKer. I modified the original files to add a little stop in the knob to make it more solid and a hole to screw it to the Head. Here are some photos of the completed head:

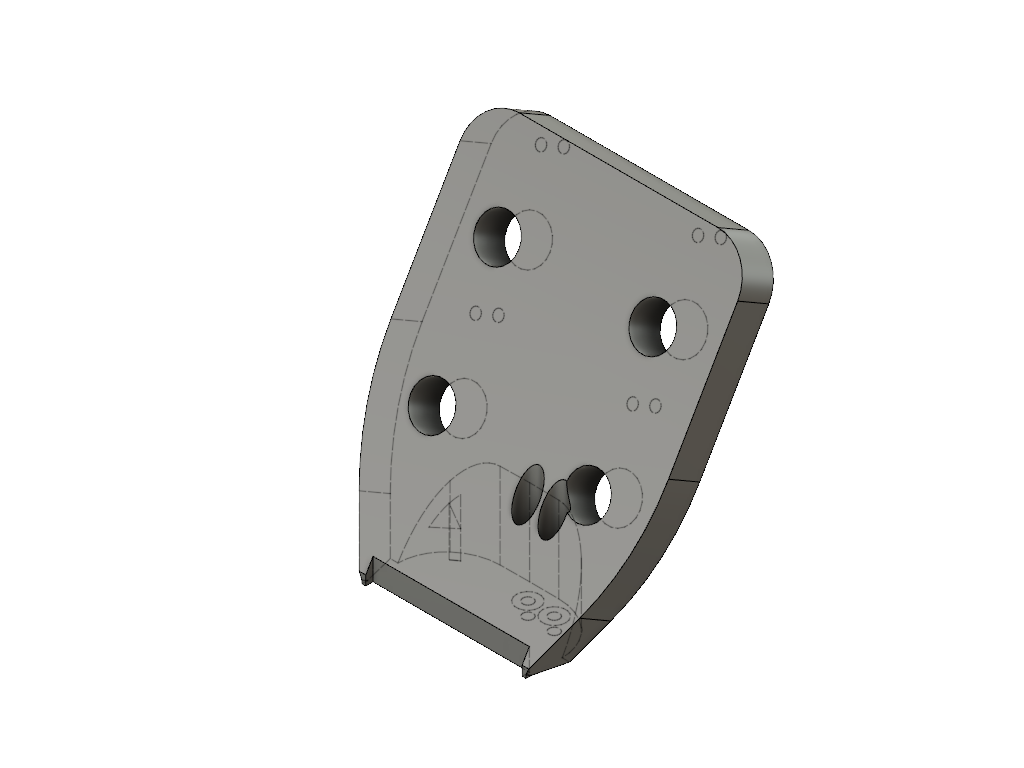
The Bridge
This is the last part, but it is really important. It has to be strong enough to resist the tension of the strings and also have to transmit the vibration of them to the body. Here it is the design I made:
This piece is prepared with 2 holes for the screws on the top to join the neck, 4 holes at the bottom for the knob of the strings and some holes in the back part where some magnets are attached to join the structure and the body. I did different tests with magnets to see which is the best option, I tried first gluing them outside the piece, but the vibration was not transmitted well. Then I embedded the magnets to the 3D print, but the plastic layer between the two pieces make the magnets lose force. Then, I decided to design the piece with the exact holes and stick the magnets with string glue, this is the best way to do it.
Also, I decided to design the bridge in a different file, first of all for having an easier print, and second because like this, anyone can adjust the bridge without having to print the whole piece again.
Note that at the top, it has a square pocketing. This hole is made for the I2C cable and the master board, to have it outside the neck and being able to connect it and disconnect it. This can be optimized and redesigned to fit everything, but for the prototype worked fine.
Different Bodies
With the full main structure designed, it was time for the body. The main objective of the modular Ukulele is to have different bodies to be able to exchange them. I didn't have enough time to do all the bodies I wanted during the Academy, but I decided to do at least 2 of them to show it's capability.
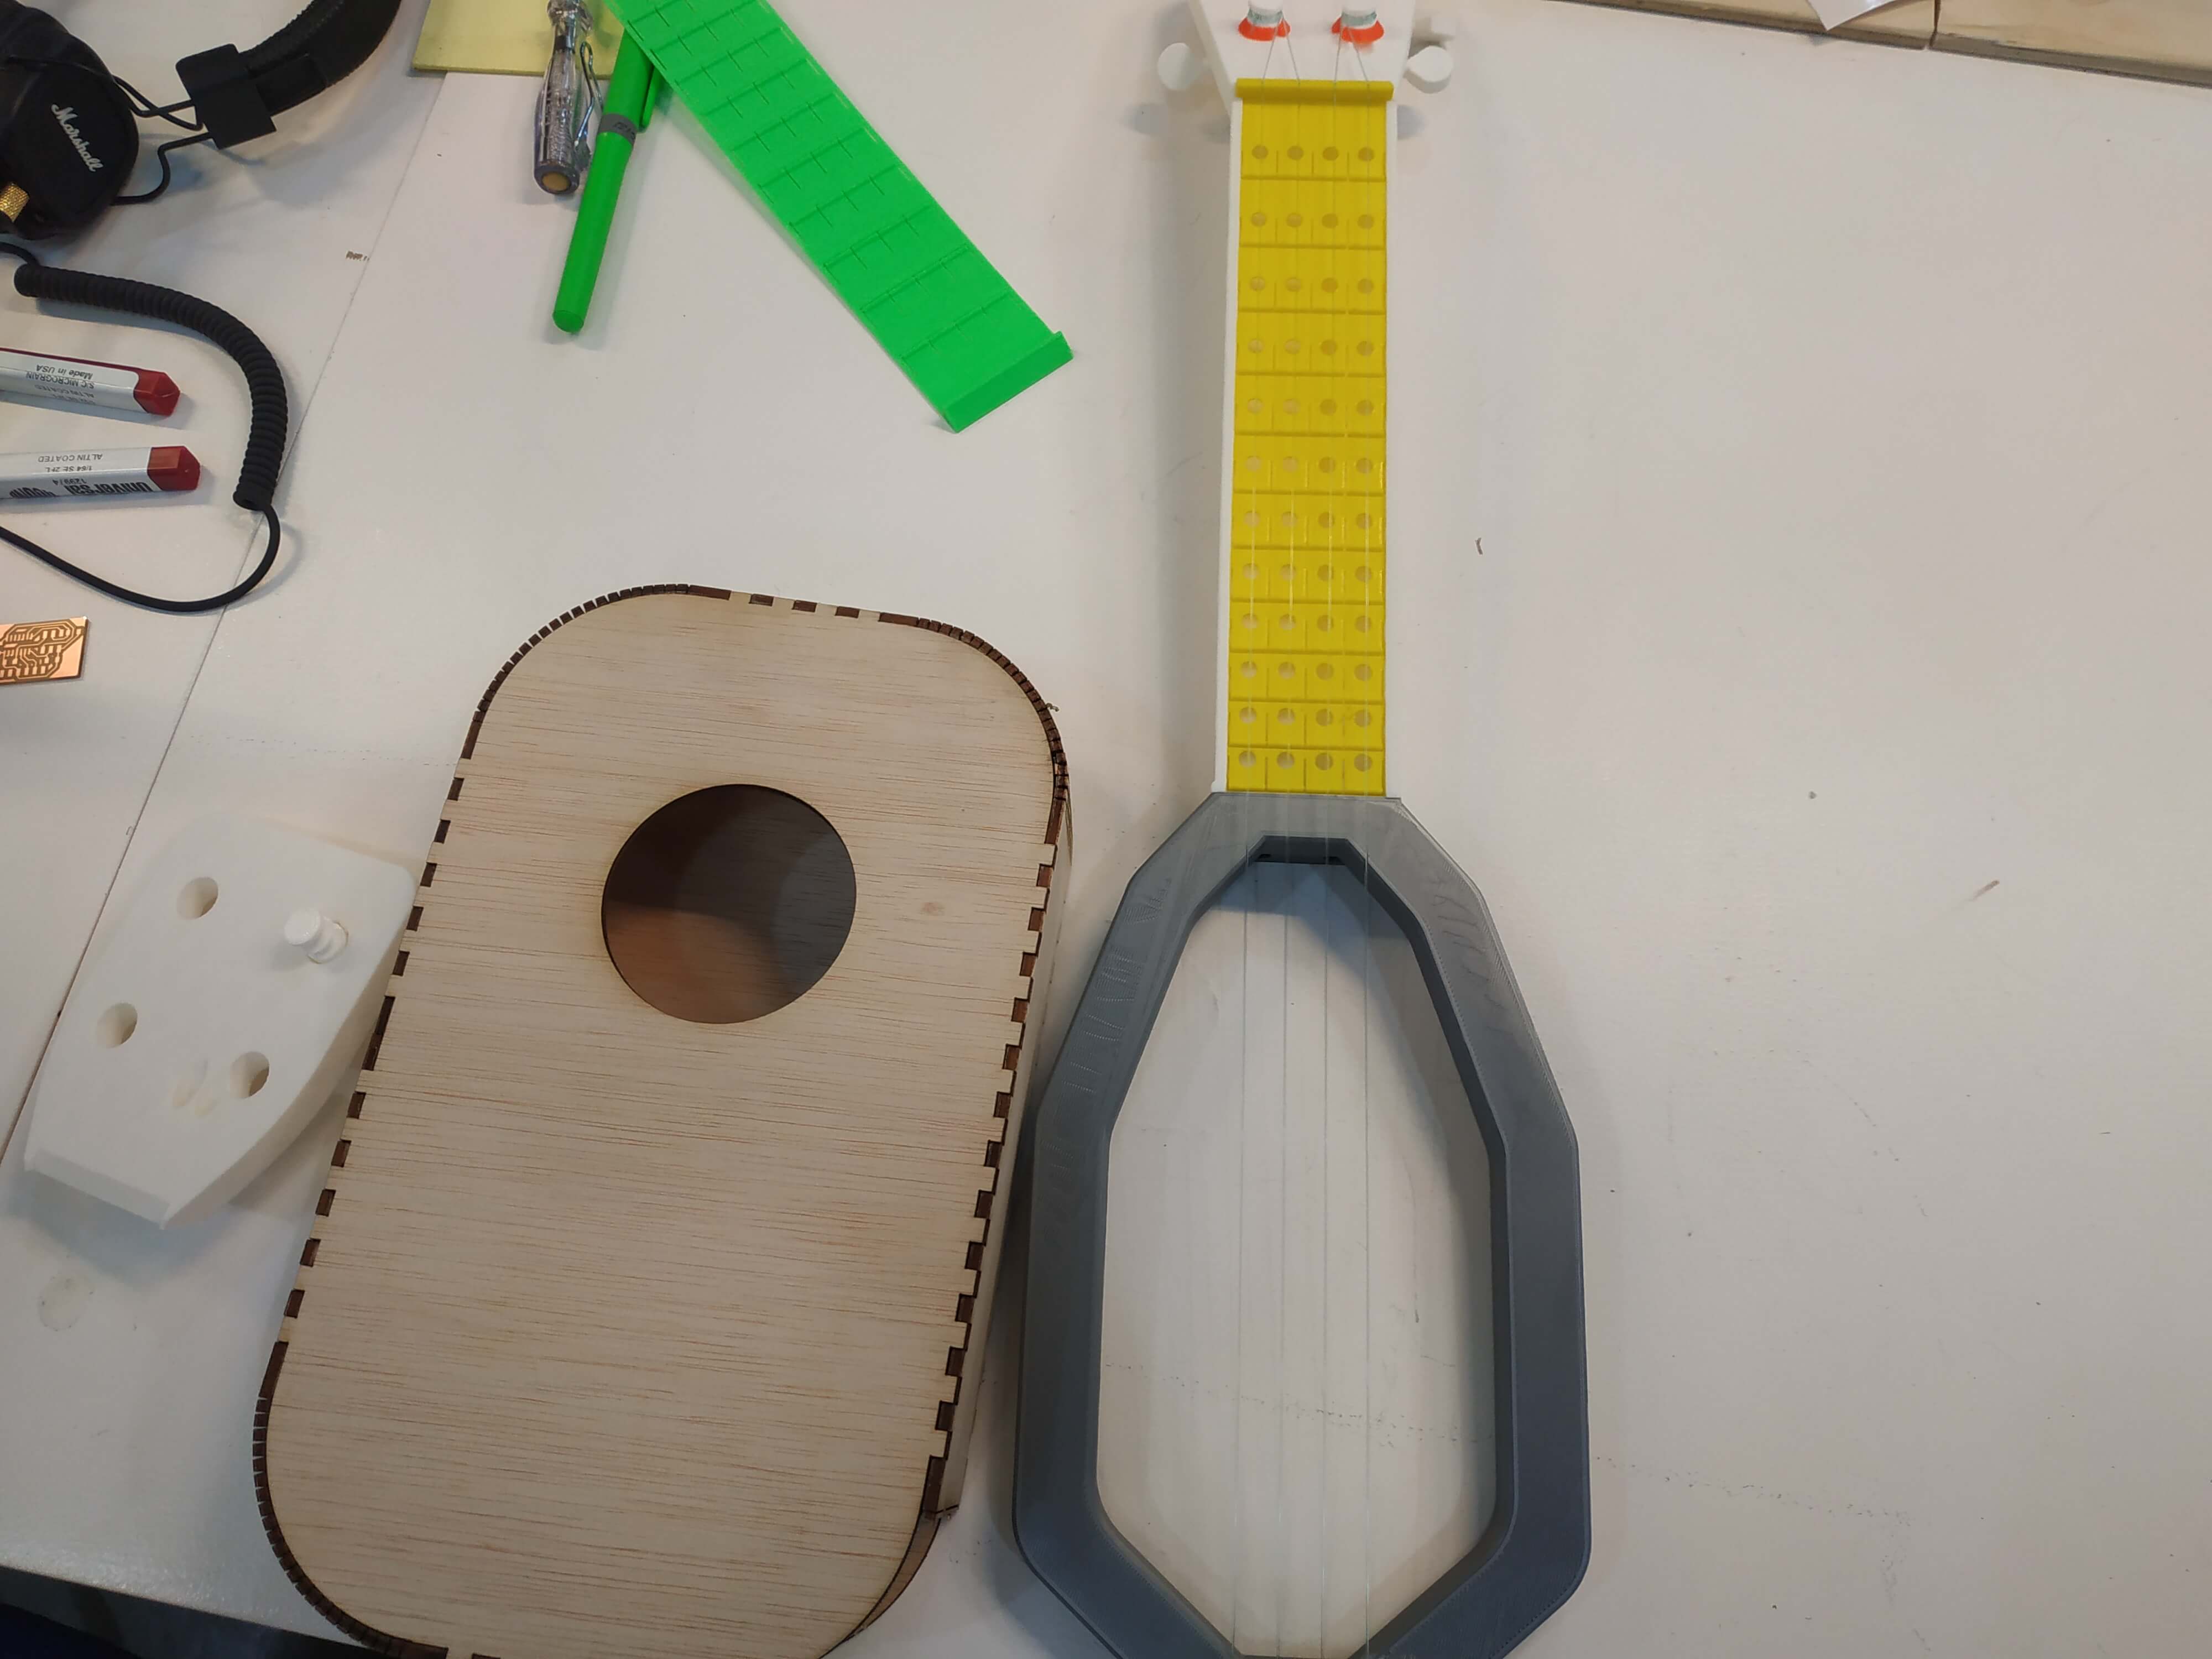
Laser Cut Box
The first body I tested was a simple laser cutted box. I decided to go for this option because it was easy and fast to be done, I just downloaded a model from Boxes.py and adapt it to my needs, with a hole in the middle. The result was great, but the sound was poor, maybe because I didn't made the holes for the magnets, so the wood was not in contact with the structure.
Wood Bended Body
During Wildcard Week I decided to make a bended body using the vacuum machine. All the process is documented here, and the result was amazing:

The only problem of this body is the weight, as the bended part are 2 sheets of 5 mm flexible plywood, the piece is really heavy, so the sound is not super good and the magnets are not able to support fast movements.