I. Coding with HTML
The project required developing a website and uploading it to the GitLab sever. For my first website I preferred to write it using HTML rather than using a template to get familiar with this widely used coding language. I used BRACKETS for the HTML editor and amply used the w3school tutorials and examples to build my website. To navigate in the website, I used a dropdown navbar. An example of a
dropdown navbar
is provided in the w3school tutorial in the "How to section". In the home page and the about page text is written over a background image. Again an example of how to
set a background image
is provided in w3schools as well as an example on how to
write and position text over an image.
It takes a bit more than copy-pasting the examples and editing the inputs to get it working because the examples don’t exactly fit what you’re trying to do. So the first one should go through the HTML and the CSS tutorials to get familiar with the language and then get back to it to seek more specific information about the commands and the parameters needed to understand the examples. Particular attention is needed to manage the style parameters. In HTML the CSS style commands can be written internally on the same page the code is written or externally on a different file which is referenced in the HTML code file. Each section referenced in the menu is a different HTML file. In the examples provided by the W3School site all the style commands are written internally. To better manage the code, I found it practical to write the CSS codes which are common to all folders on an external file. So, for example, the style commands for the navigation bar which is common to all folder is on a separate CSS files which is called by the different HTML files. We also added a CSS file that refers to a url for icons. For the moment, the style commands that are specific to each folder are written internally.
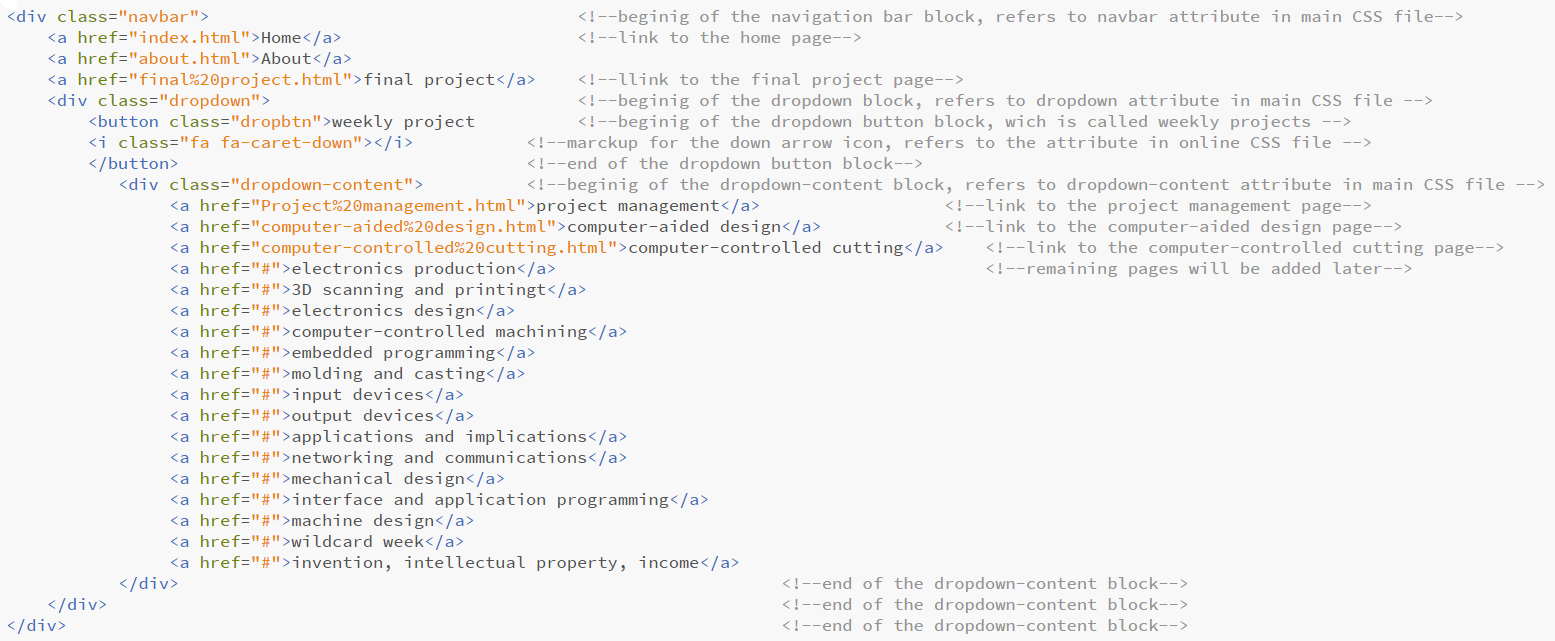
A detailed explanation of the navbar code is shown below
The steps taken to create my website were:
- Store the graphic files referenced in my HTML files in a local repository
- Create HTML files for each web page in my local repository
- Create a CSS style file referenced by the html files in the same local directory
II. Uploading with GIT
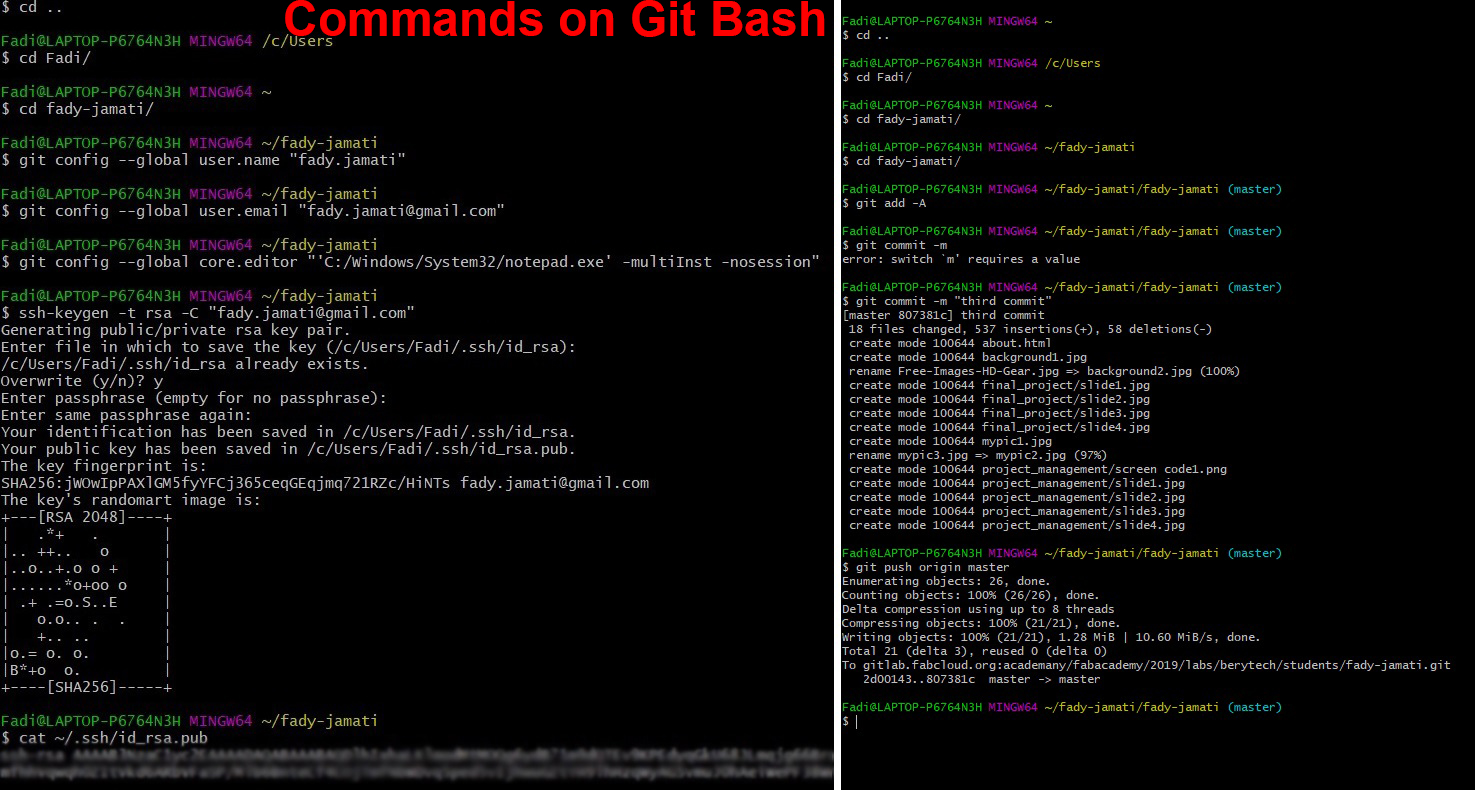
Once the website is done it was uploaded to the GitLab server using the GIT version control system via the Git Bash command terminal. The steps taken were:
- Configure the user name and email
git config --global user.name "my name
git config --global user.email "my_email"
- Choose the editor in which Git will operate (in my case notepad for windows)
git config --global core.editor "'C:/Windows/System32/notepad.exe' -multiInst -nosession"
- Generate and enable the ssh key (to identify my computer and repository to Git)
ssh-keygen -t rsa -C "my_email"
cat ~/.ssh/id_rsa.pub
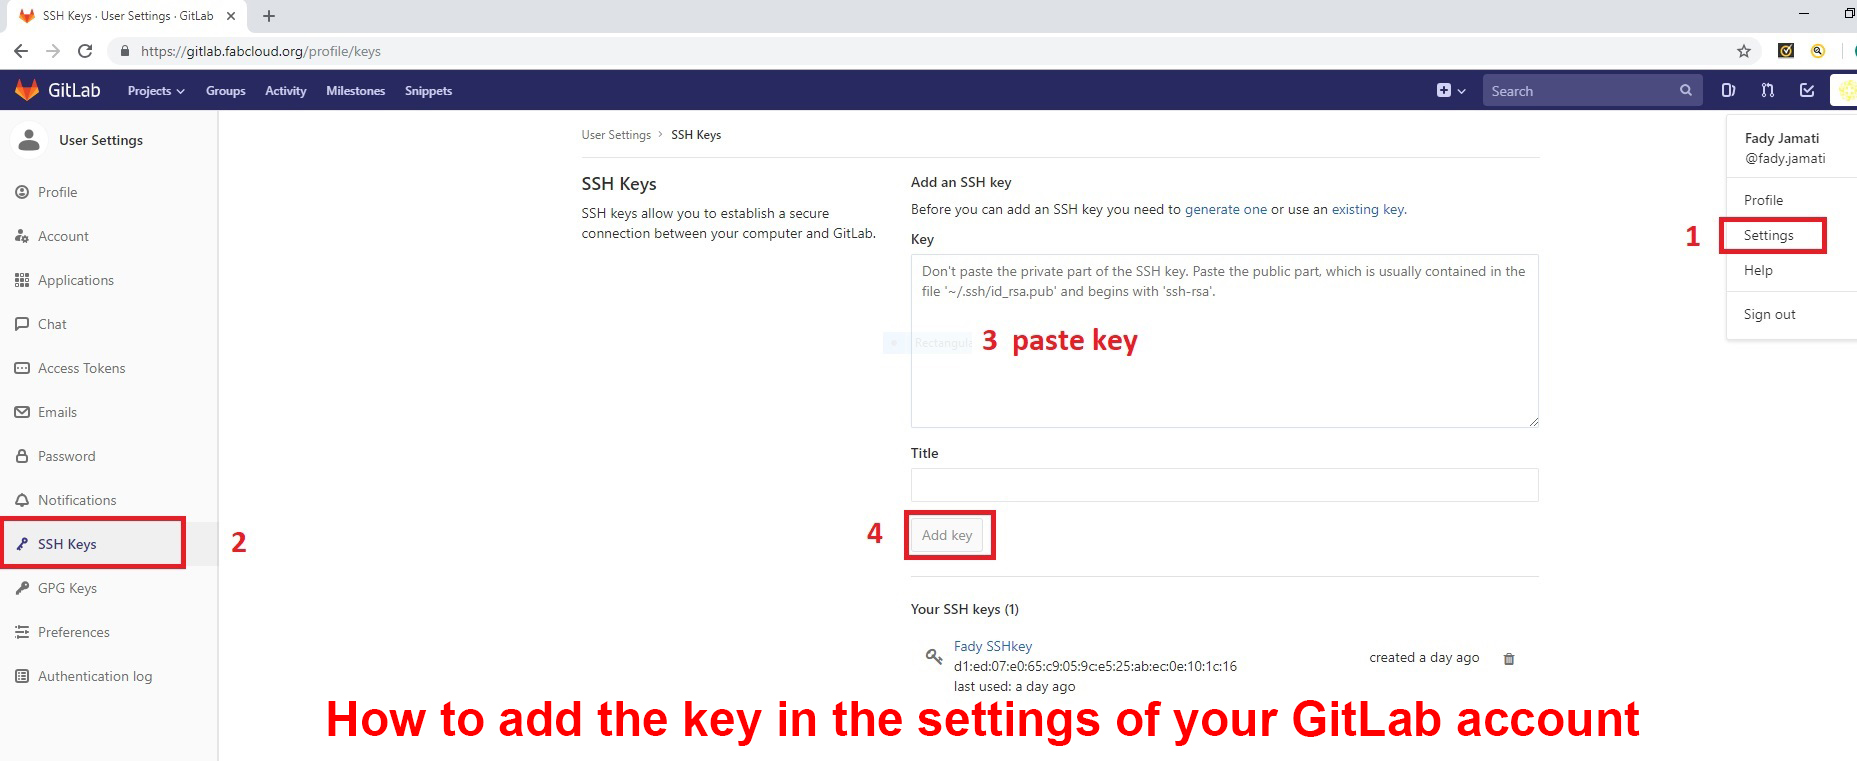
- Retrieve and add the key in the settings of my GitLab account
Your project -> Settings -> SSH keys ->paste key -> Add key
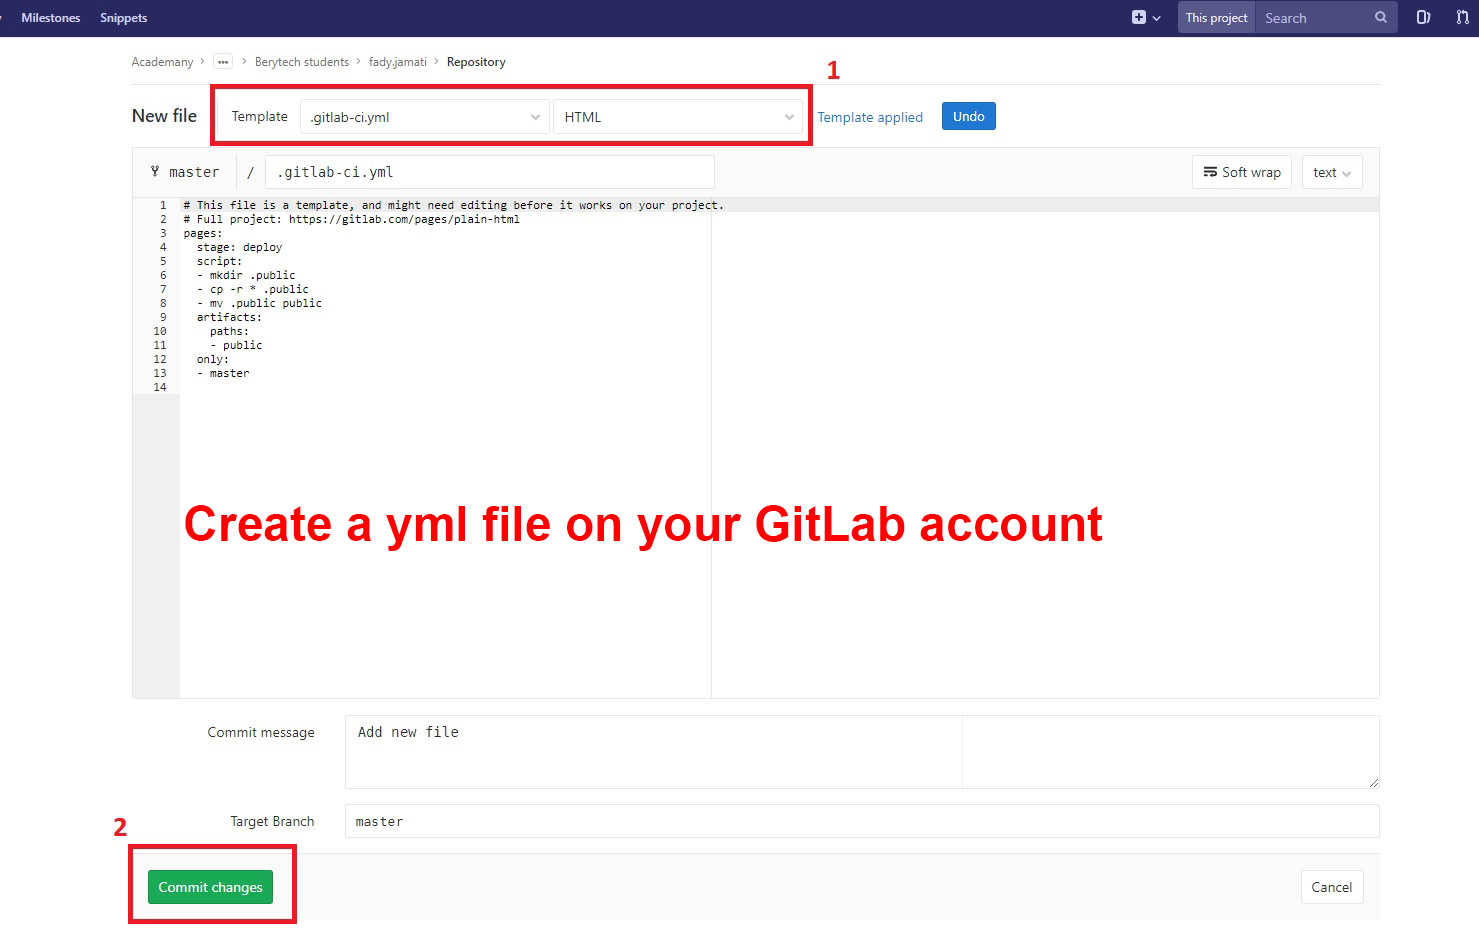
- Create a yml file on my GitLab account (to identify my coding language to Git)
Your project -> Repository ->New file -> .gitlab.yml -> commit changes
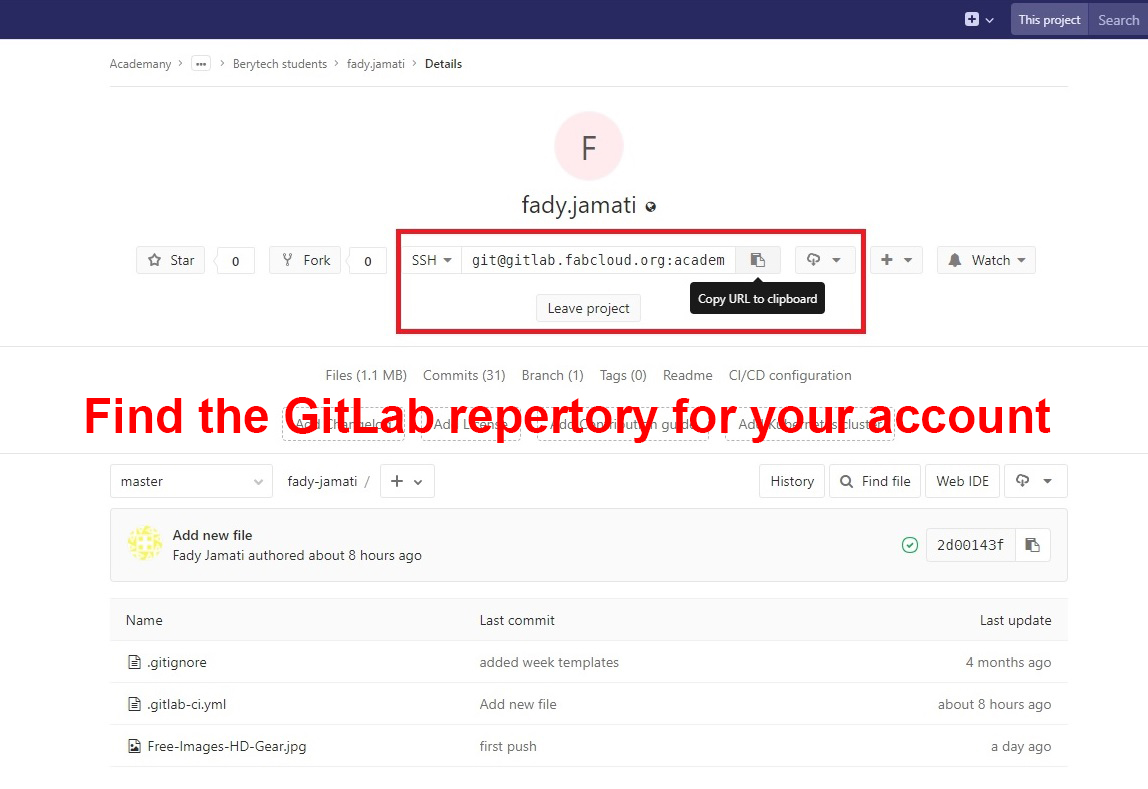
- Retrieve the GitLab repertory for my account
Your project -> copy url to clipboard
- Create a working copy of my local repository
Git clone username@host: paste url
- Upload my working repository to a temporary online repository
git add -A
- Send my working repository to a local server
git commit -m
- Send my working repository to a global server
git push origin master