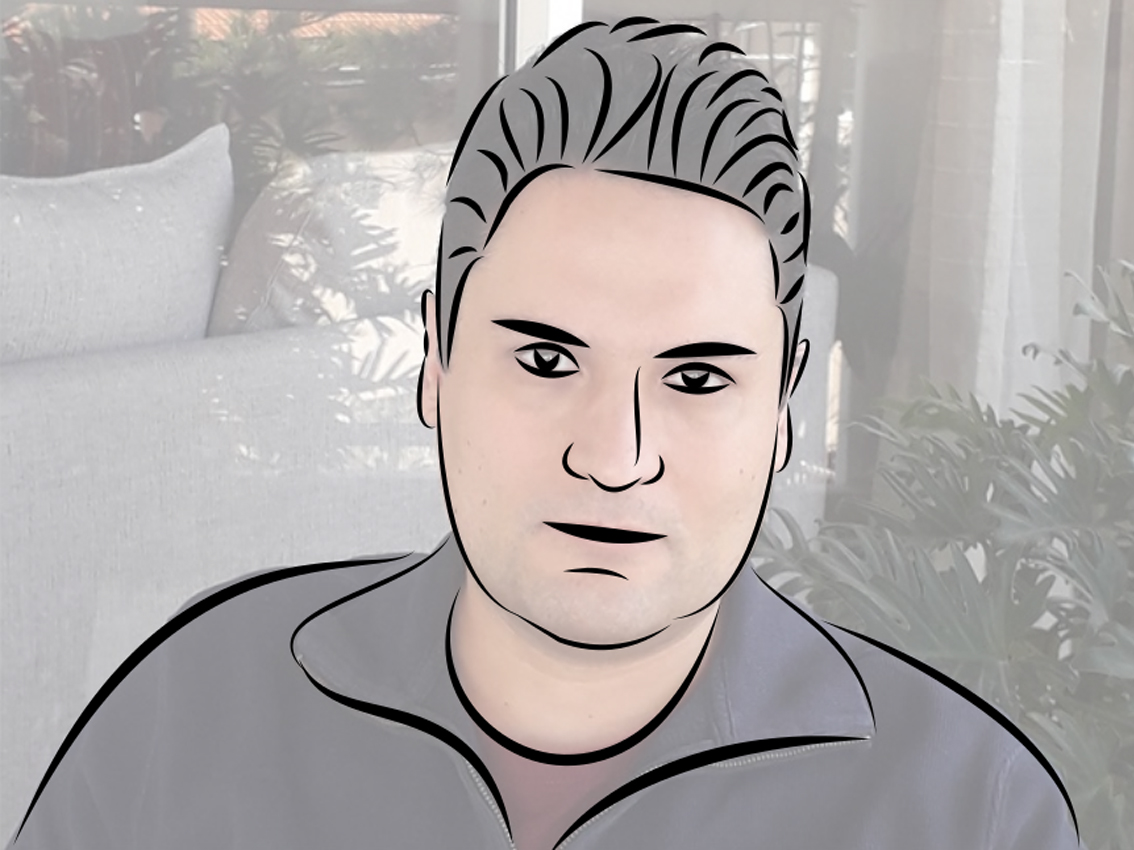
This week we have to design using 2D and 3D CAD tools. For 2D I used Photoshop and Inkscape. I had never used Inkscape before and it was quite fun to discover this tool but I had already used Photoshop before. I downloaded Gimp as an alternative to compare with Photoshop and I was hoping it could be and equivalent freeware but I was a bit disappointed. The Gimp interface is similar to Photoshop and if you've used Photoshop before you can get started right away, but you'll quickly notice some missing options. The drawing tools are similar and but the blending options for the layers is more limited. There a large numbers image filters in Gimp but not more in what I've seen that Photoshop. So personally, I'll stick with Photoshop. Since I've already used Photoshop before (not professionally or extensively) I tried to do something new with it this time. In the previous week I build this website which included my picture in the home page and the About page. So I tried to edit this picture using Photoshop to enhance the looks of this site since this is a good tool to make this kind of work. I also used Inkscape to draw my portrait with a different technique. The result can be seen in the images below.
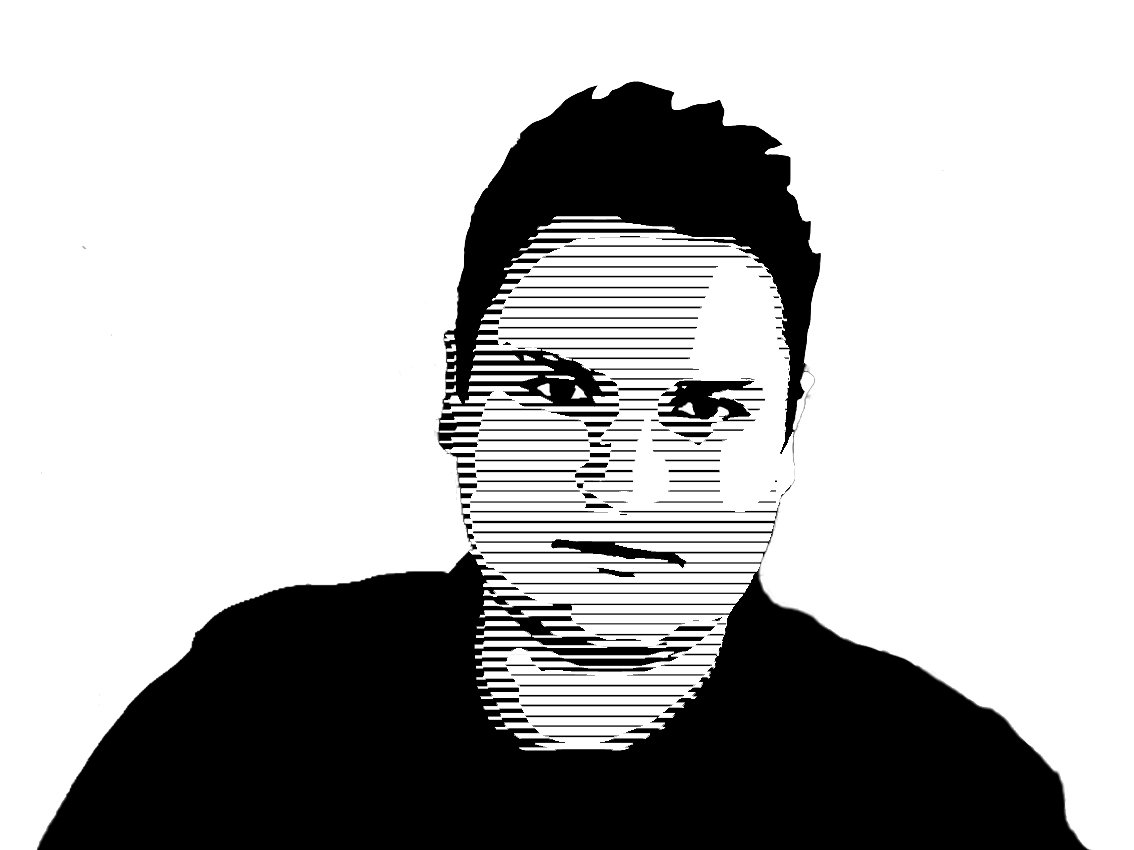
My portrait
My portrait with Photoshop
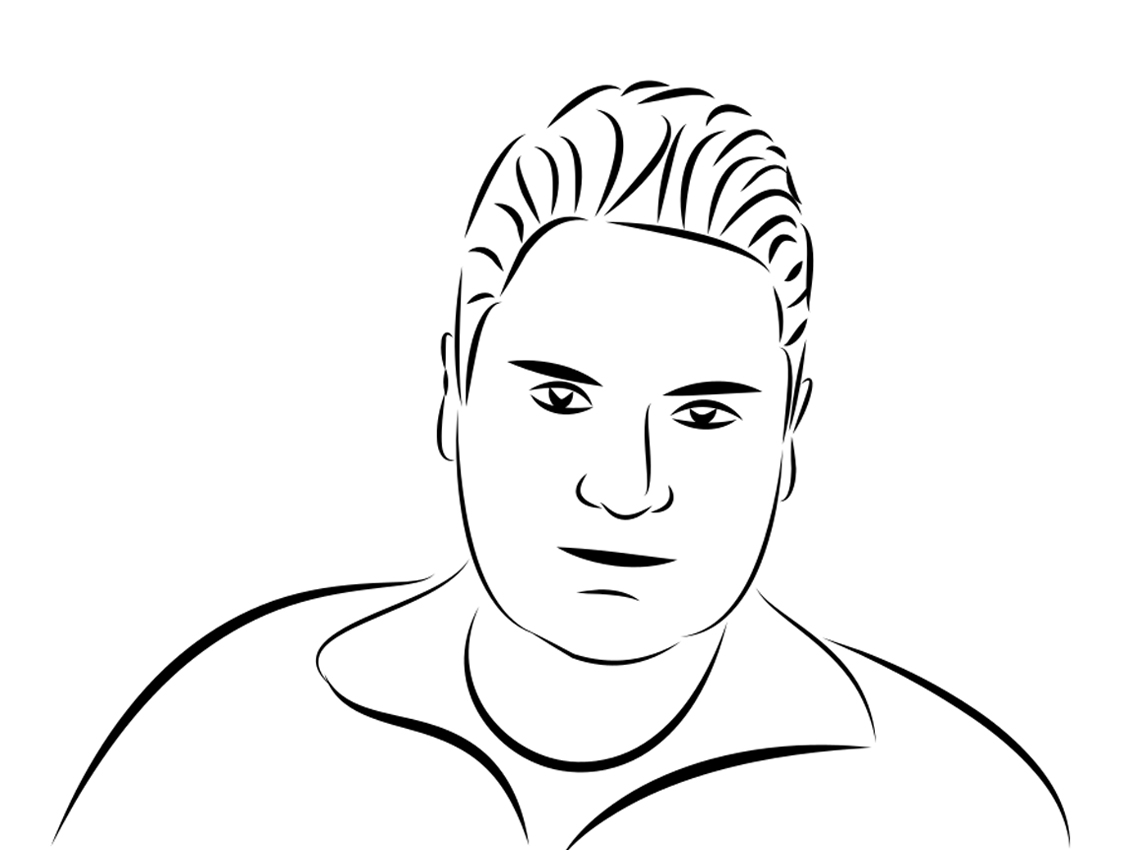
My portrait with inkscape
Photoshop
The second image is my portrait edited with Photoshop. This kind of design is a classic and, and there is probably different was to do it. But here is the simplest way I fond to achieve this:
First step: Open a portrait picture with Photoshop and clean up the background using the feather tool and the eraser tool (The feather tool allows you to select an area of a single colour with a complex shape).
Second step: apply the "cutout" filter in the Artistic filters category. This filter will transform a picture with a full range of colours to a pictures with a limited number of colours. You can control several parameters to set the number of colours (or levels) and the simplicity of the shapes of the different coloured areas. There is a compromise to reach between simplicity and accuracy to get the right style.
Third step: Clean up the filtered image because the filter does not give a perfect result. If the accuracy parameter is to high the shape will be too complex, and if it is too low you will lose some important features of the face such as the eyes. So once the best compromise is reached you'll have to clean up the output image manually using the paint brush tool and the colour sample tool. Then select each coloured area with the feather tool and right click and select “layer via copy” to create a new layer for each colour.
Fourth step: Crate a line pattern file for each colour. This can be done by drawing parallel lines in a separate Photoshop file (or draw it with another tool and open it with Photoshop) and save this drawing as a pattern (in Edit->define as pattern). A different pattern has to be defined for each colour. The thickness of the lines should vary according to the darkness of the colour it will replace. You can use the “stroke” tool in the blending options to change the thickness of the lines. Then apply the patterns to the different layers with "pattern overlay" in the blending options.
step1
step2
step3
step4
Inkscape
I also drew my portrait with Inkscape. I very much enjoyed to discover this tool and use it for the first time. It's a much more power tool that paint and it is vector type software which implies no loss of resolution. There is a number of tool to discover in Inkscape. I just used a few to begin with, looking forward to learn more in the future. I simple and classic application of Inkscape is sketching with a user defined brush shape. You can draw over an existing picture for a model.
The steps do sketch a portrait is the following:
First step: Import a picture just by dragging the picture file in the inkscape screen, then reduce the opacity to 50% to have some transparency. Then draw the brush shape you want to use. A simple way to do that is to draw two intersecting circles and use a Boolean operation to get an eye shape: This is done with the circle/ellipse tool (holding ctrl shift to get a circle) and the "intersect" command in the "path" menu (select the two circles and then press intersect). Scale the brush shape relatively to the size of the face (it should more or less fit the size of an eye). Copy the brush shape you've drawn, then select the Bezier pen tool, and then select “from clipboard” in the mode menu of the selected tool to define the copied shape as the brush shape.
Second step: Using the Bezier pen tool, draw lines along the face shape and features. This will draw brush strokes with roughly the shape previously defined. To have control over the bending of the strokes you should draw by clicking on starting point, and click and drag on the end point. Afterwards, if you click on the strokes, control points will appear which will enable you to play with the thickness of the strokes and add additional bending. You need to do this for each brush strike, until the sketch is completed.
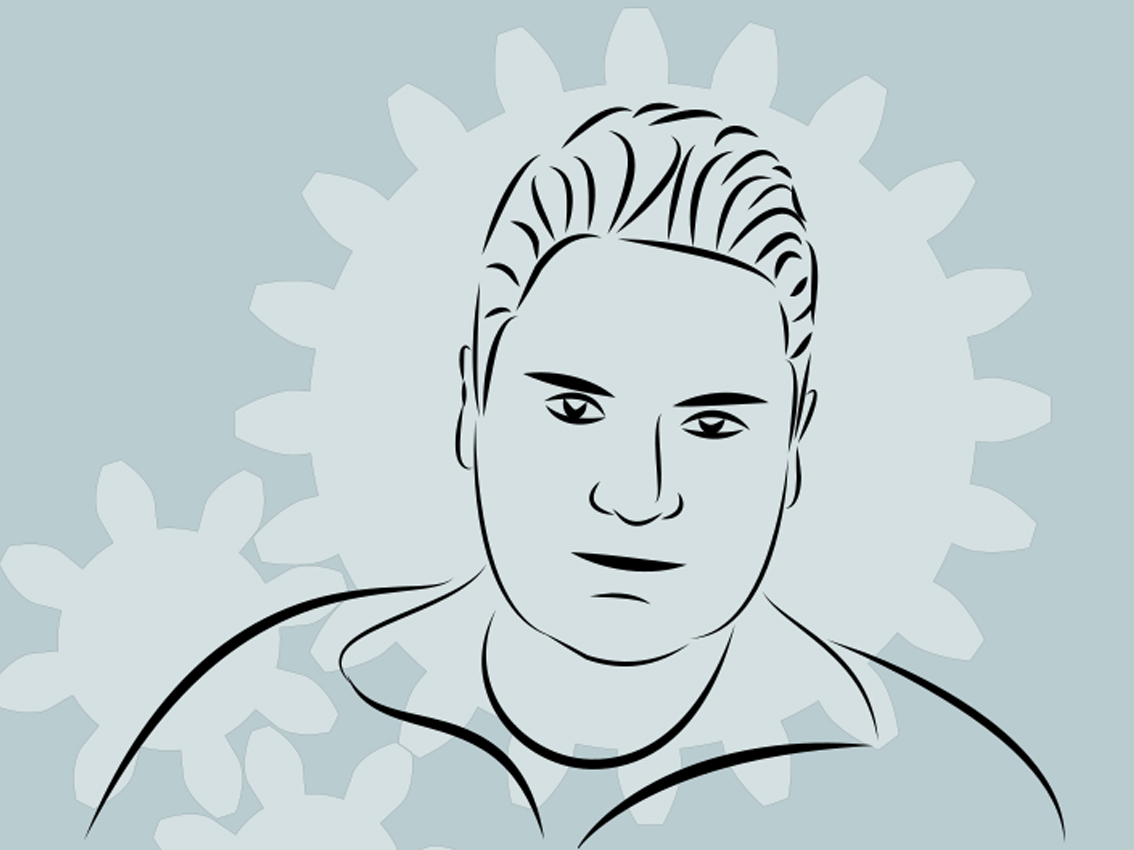
Third step: You can add a background colour and decorative elements with an ample choice tools. Here's an idea: Let's draw gears in the background to fit the theme of my website design. You can easily do that with Inksape by drawing a random path with the Bezier pen tool, then go the path menu and select path effect. A box will open, add effect (+ button) and select gears among the many options. This will generate gears. It is possible to change the gears parameters to set the shape of the teeth and if you click on the gears control points will appear which will allow you to move the gear and change their size. In the layer window you can move the layers up and down to superpose the images in the right order, and the colour palate in the bottom offers a wide range of colours.
step1
step2
step3
Autocad
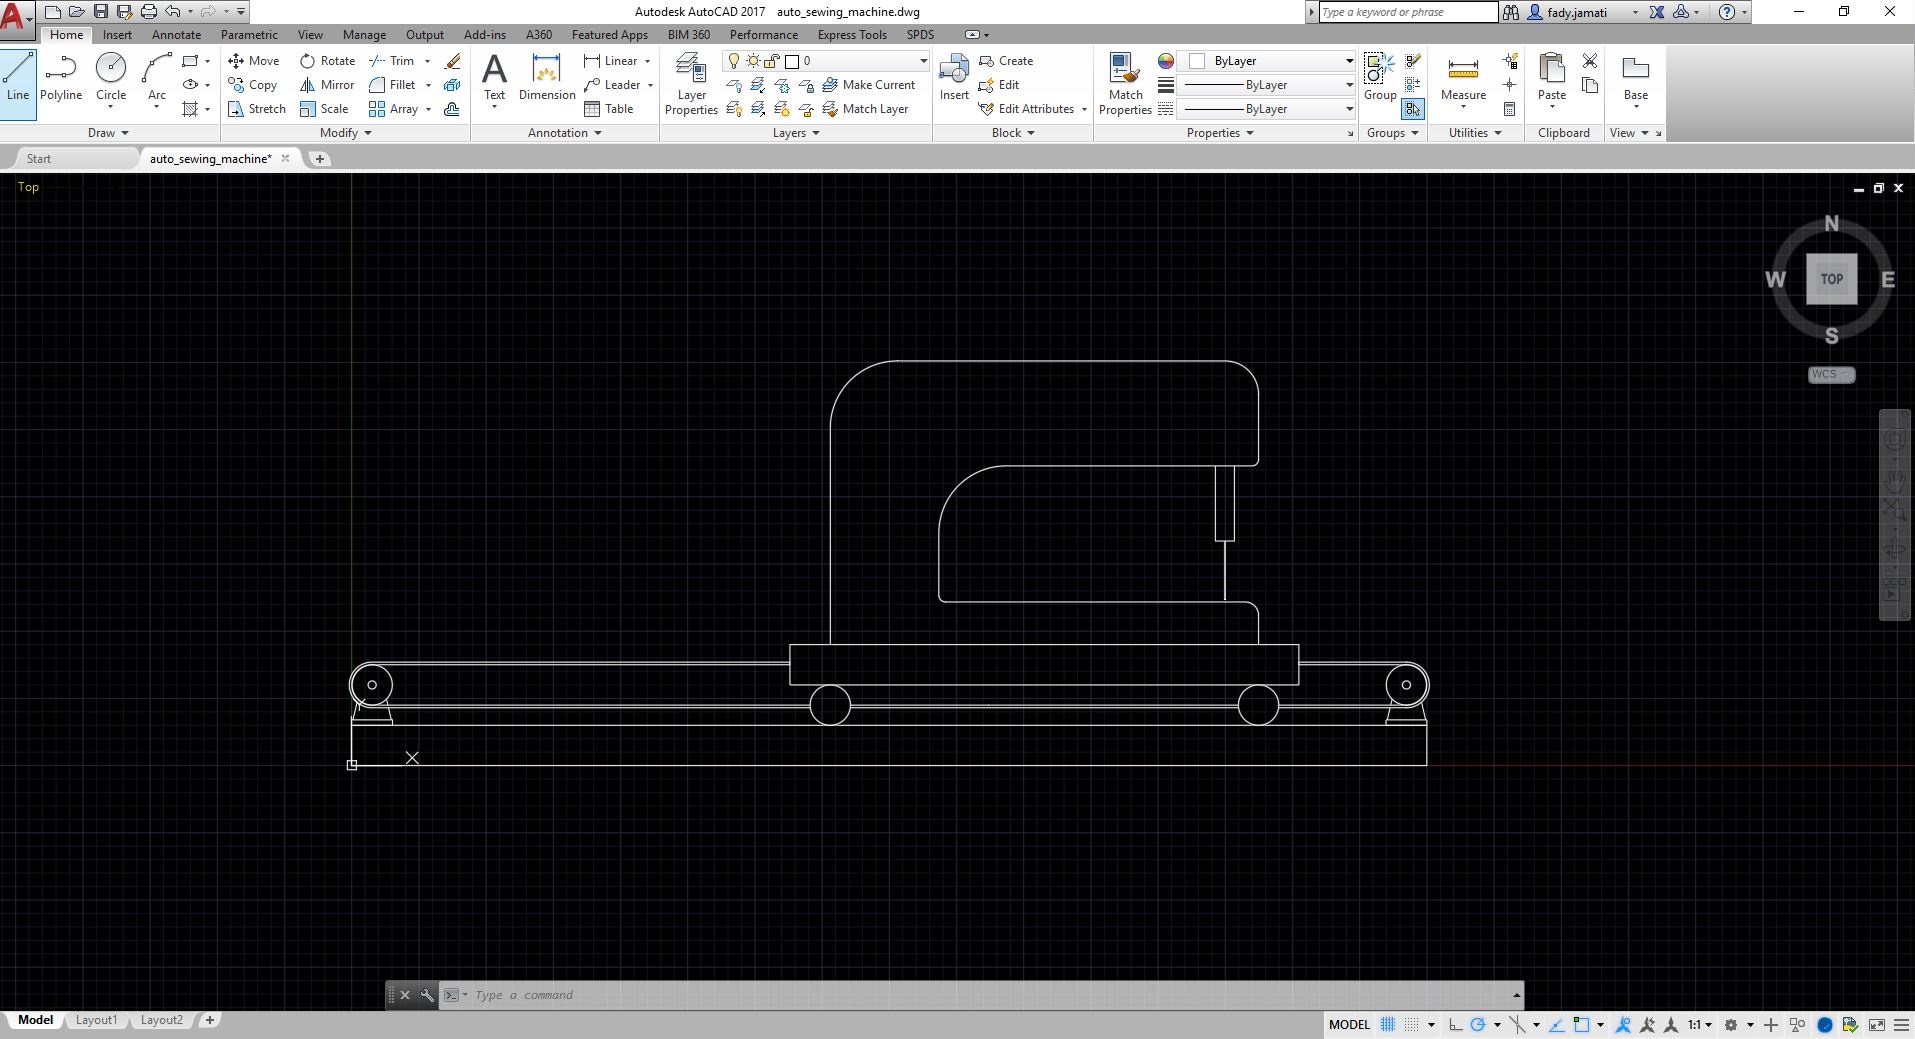
A 2D drawing of a possible project: A sewing machine moving on rails for automated sewing. A more detailed 3D drawing displays the idea mode clearly in the following section.
3D Design
Fusion 360
For 3D design I first used Fusion 360. I have already used it before, but I'm not proficient yet. I've taken the opportunity to do deigns for my final project and to learn using animation with this tool. The designs are not meant to be very precise at this point since I'm not sure of what is the best way to achieve my idea or if it is even feasible. And at this point I do not yet know what components are available to me in order to build machines. So in relation with my final project I have design and animated a plotter an automated sewing machine. Fusion 360 is a quite complete CAD which includes several working frames such as "Model" for designing mechanical parts and assembly, "sculpt" to shape 3D surfaces, "Patch" for constructing 3D surfaces, "sheet metal" for designing patterns "simulation" for mechanical performance, "Rendering", "animation", and others. For this design, I've just used the Model and Animation work frames. The first 2 videos describes a plotter that plots the pattern of tailor fitted size on a pair of trousers of general size. The following videos describes an automated sewing machine equips with camera (in red) which is an input device that allows the automated sewing machine to sew along the plotted line. For the model work frame, the steps I have taken to design with Fusion 360 are the following.
First: I defined key parameters in my project so that I can change the dimensions without redoing the design or editing the commands one by one in the timeline (fusion 360 provides a timeline of all the commands to keep track of what has been done). For example, in the plotter the dimensions of the table and the plotter frame are defined as parameters.
Second: I created a 2D sketch in a plane I selected (Select "create sketch" and select the plane). The drawing tools are straightforward, one should note that Fusion is a parametric design tool unlike Autocad, so you do not need to specify any coordinates while drawing. One can start sketching without specifying dimensions but rather specifying constraints (in the sketch palette) and then define dimensions afterwards (in the sketch tab: specify dimensions). So if the lines and curves are all constraints changing the dimensions of one line will change the dimensions of the other lines accordingly. The dimensions can be the parameter we previously defined. I've run with some trouble in my design, at some point I forgot to define some constraints so some elements do not scale properly when I change my parameters.
Third: I defined joints to allow parts to move relatively to each other. Before doing that you need to change the body parts previously drawn into components (just right click on the body and select transform to component). To define the joints, I used the "As-built joint" in the "Assemble" menu, and selected the components meant to move relative to each other, the movement type and the direction. After that, I edited the limits of the joint to define a maximum and a minimum position (just right click on the joint in the browser and select "edit joint limits").
Fourth: In the Animation work frame, there is a timeline that tracks the movement of each component separately. So you can click on a component select "transform component" and then define the starting point and the end point of each translation in xyz. I did this for every moving component and each translation (I don't know if there is a smarter way to do this). The movement of each component is recorded in a different track, so you can edit the animation by moving the shots in the timeline to coordinate the movement of the components, or stretching by stretching the length of the shots to slow down or speed up the movement.
Rhino 6
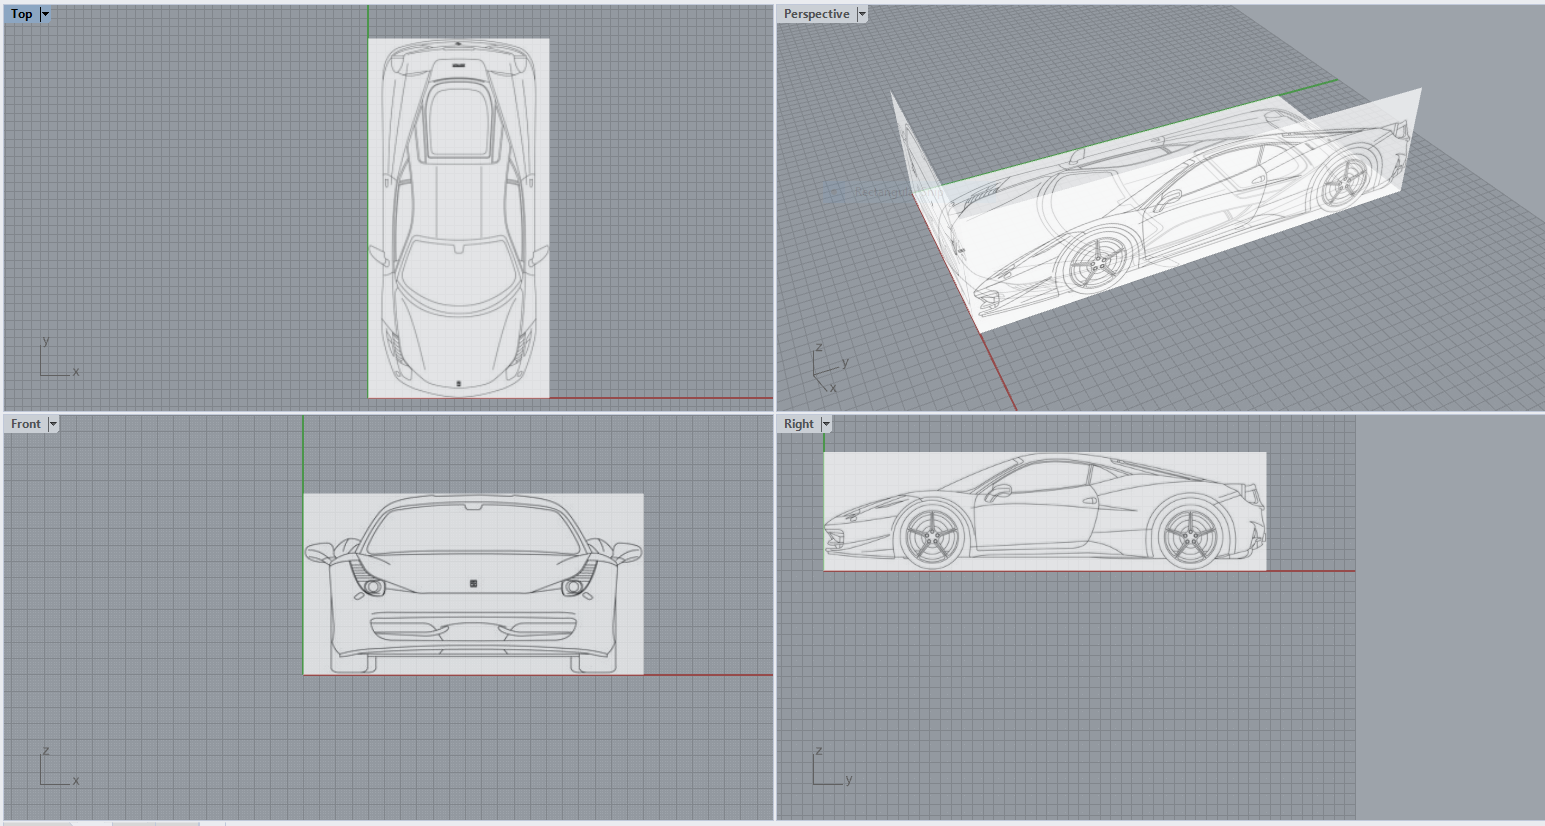
I've also tried to design with rhino for the first time. Rhino is reputable for surface design, so I tried to model a car using a Ferrari blueprint as canvas. This work is still incomplete because I didn't have time to finish the design but I got a good feel of how it works. Surface design is also available in Fusion and last week I tried to design surface with Fusion using a different tool. Fusion has a free form tool that allows to sculpt a 3D shape starting from a mesh cube. It’s trickier than it looks though and I found it frustrating. This time, with Rhino I used a more straightforward method drawing curves in different planes following a canvas and then connecting the curves to make surfaces. It my first try at this, and it's a bit frustrating but I find this method more manageable than the free form sculpting. Here's how it goes:
First step is to find a blueprint of an existing car (drawing one would be too long this time). You need a blueprint of each view, at least a side view a top view and a front view (back view if available). The image of the blueprint should be trimmed to the edges. Then import the blueprints in Rhino using the "picture" command in the command prompt. Stretch the first canvas to dimensions and enable the "end" snap mode at the bottom of the screen so the corner of the next canvas will snap to the corner of the first. Once the canvas is in place, reduce the transparency in material properties in the material properties window.
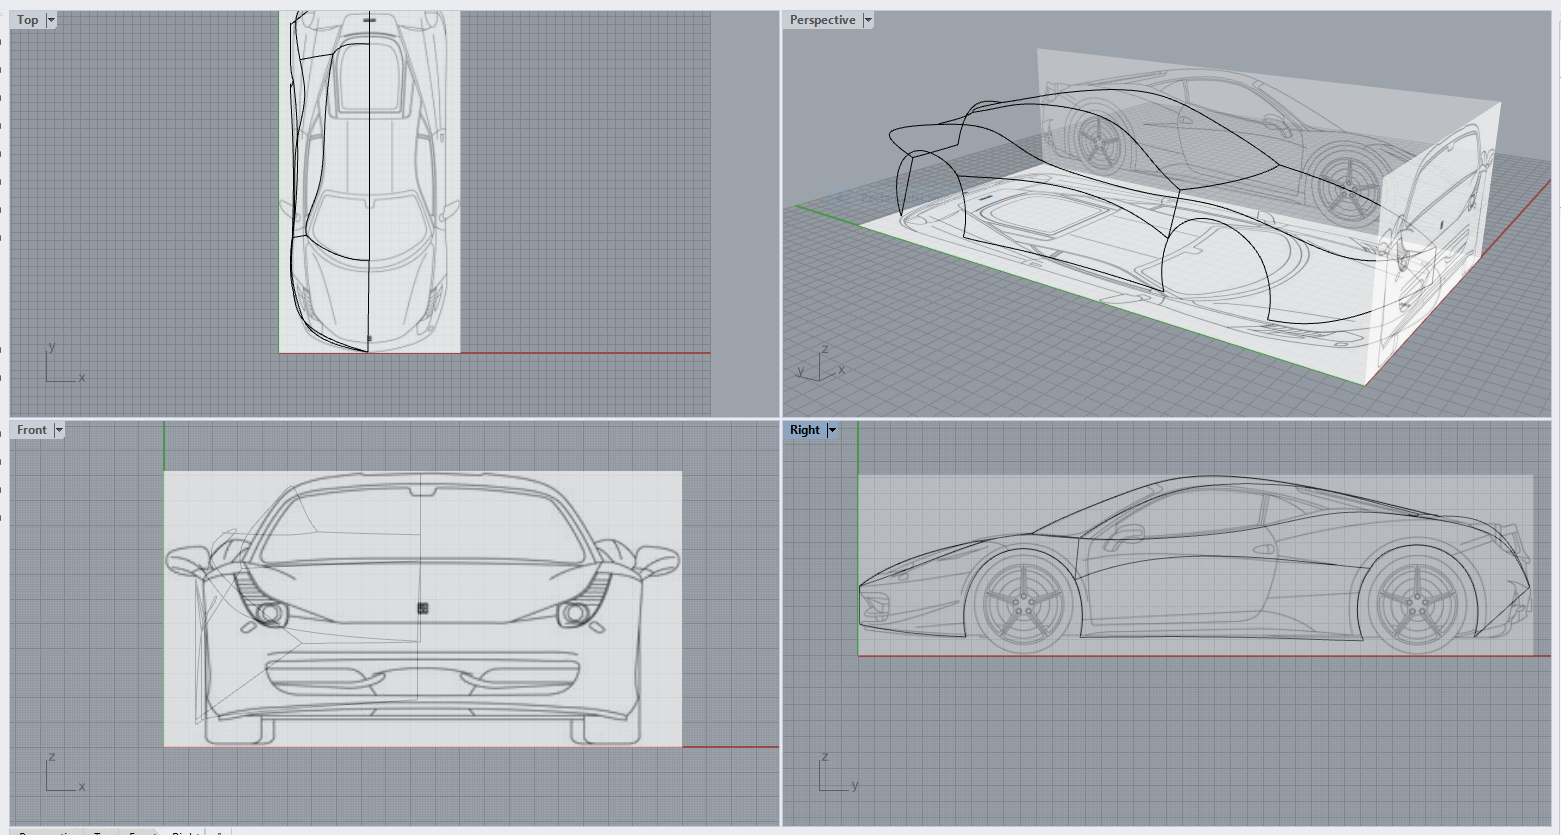
Second step is to draw curves following the blueprint lines starting with the first plane, like the side view plan. This is done by drawing a control point curve (in the toolbar) and drag the control points to the right position. To change the number of control point you can click on the curve and type rebuild in the command prompt. Once the curve is drawn in the first plane, you can displace the curve in the second plane and drag the control plane to match the second view (like the top view). Rhino allows you to see the three planes on the same screen as well as switching from one view to the other.
Third step is to build surfaces with the curves previously drawn. This can be a bit tricky because you need to make sure the planes and the vertices are well connected. You'll also find out that you can't interpolate too complex curves so may have to add some curves to better segment the design. To build a surface you can use the "surface from network" tool in the main tool palette. I didn't have time get to the end of the process but I'm looking forward to better learn using this powerful tool.