1. Principles and practices
Summary
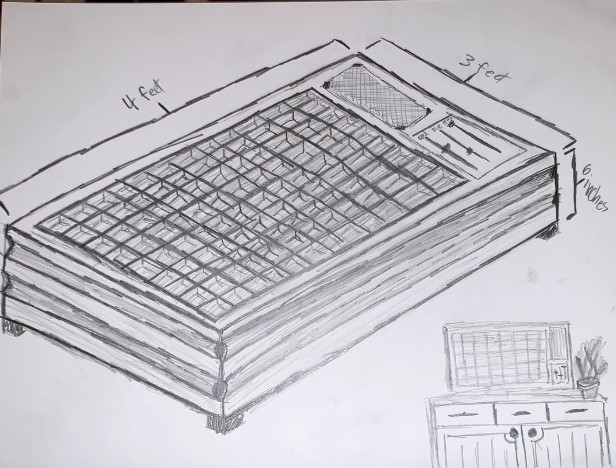
I began my first week of Fabacademy by planning out what I wanted to do for my final project. We were required to create a sketch of what we wanted it to be, and in the sketch, I tried focusing on certain aspects of my idea individually, as well as considering how my project would fit into the environment that it was intended for.
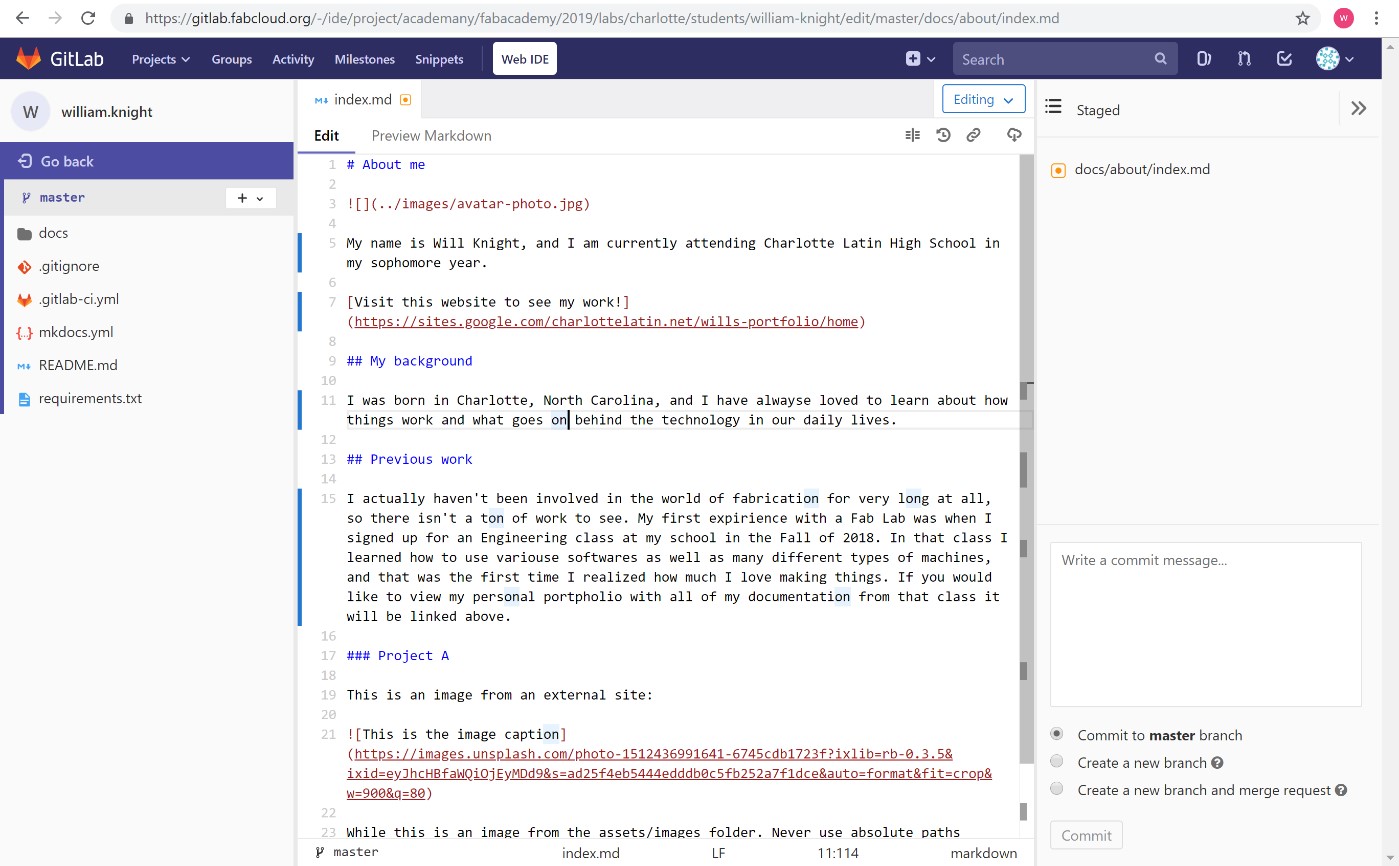
Over the course of this week, I also began familiarizing myself with the documentation process. All of my documentation will be handled through the GitLab interface.
Research and Inspiration
When I first started thinking about it, I knew that I wanted my project to be based off of a solder kit I had recently gotten on a site called Adafruit. This kit was founded off of the relationship that exists between infrared-light LEDs and infrared photodiodes. When light from one of the LEDs is received by the photodiode, that photodiode can react in a way that turns on another larger LED light.
I don’t want my final to be exactly like that kit, though. I’d like to have a unique piece that will be both functional and aesthetically pleasing, and I want it to really stand out in a way that the other kit doesn’t. For these reasons, I intend for my piece to be much larger with a solid case around it, and I’d like to be able to change the colors of the LEDs however I want.
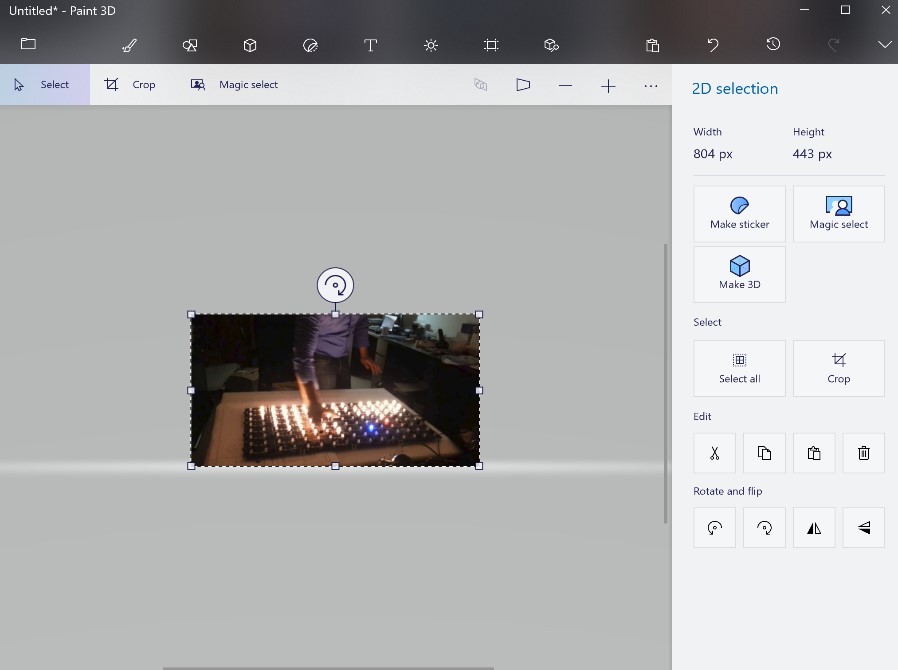
To give an idea of what I mean when I say much larger, I’ve linked a youtube video that shows what it looks like when you connect a bunch of those kits together and use them all at once.
Photos
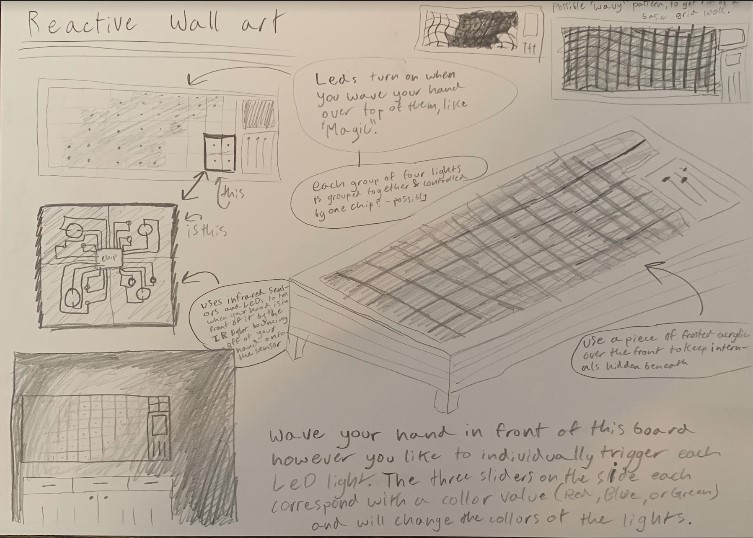
Bellow, you will find the two sketches I made to help me plan. The one above is a larger version to give you a better general idea of how my project will look, it includes estimated dimensions and a sketch of how it may look in my room once it is finished. The one below is more diverse to show off multiple aspects of the project. It includes things such as design considerations and possible variations that I may make to my project in the end.
Documentation
To help us keep track of our work, we will be recording all of our Fabacademy activity on this site. It was set up by the Fabacademy team to help us organize our work and have something to look back on for help when this class ends. This way, if we ever forget how we worked through a specific week, we can go back and look at our sites to see exactly what were missing.
After taking things in and trying to figure out how to navigate gitlab in the first place, I finally made my first changes which are pictured bellow.
While working on my site, I referenced this Markdown guide to help me better understand how the Markdown language works. It has all kinds of helpful information ranging from just getting started in markdown to embedding video links in images.
Another thing that I need to keep track of when working on this is the file size of the images that I upload. If I were to just add in the unedited images, then by the time I finished the course the size of my site as a whole would be far too large. For this reason, I’ll be using Paint 3D to help compress the images down to a manageable size. One thing I’ve liked about Paint 3D so far is how it displays the actual number of pixels that are in your compressed images off to the side of the page. This has been helpful to me when determining how much I actually need to shrink down an image.
Final thoughts
One thing to note from this week is that I have actually been updating the wrong index file this entire time. Due to the layout of files on my screen when editing in Gitlab, I didn’t notice that there were two index files to work on, not one, so when I went to finally look at my published site with the rest of my group, my home page was actually still in its basic template format. I intend to work on the rest of my site and wrap things up on the editing side within the next few days.