10. Molding and casting
This week, our group assignment was to review the safety data sheets for each of our molding and casting materials, and then to make test casts for each of them for the sake of comparison. My individual assignment this week was to design a mold around the stock and tools that I’ll use to mill the mold out with, and to be sure to mill it with a rough cut as well as a three axis finishing cut. Then, lastly, I had to use it to cast parts.
Group Assignment
We had a bit of trouble coming together for our group assignment this week. Everyone’s schedules were pretty crazy and some people could hardly be here (myself included) so we didn’t accomplish as much as we would have liked to. Still, though, we did read the safety data sheets and we made a mold and cast of something, which were the group requirements for this week.
Starting with the data sheets, we read through the sheets for the most common mold material that we will use, Smooth On Mold Star 30.
Both of these were full of good information, and the info sheet especially had a lot of tips for how to get a really good mold made. The safety sheet reminded us about things like wearing gloves and goggles, and that the molding material can get pretty warm when you work with it.
For our test mold and cast, we used a small metal gear. Because we saw how other people last year had trouble with their object floating up in the mold, we figured metal was a good choice because of how dense it is.
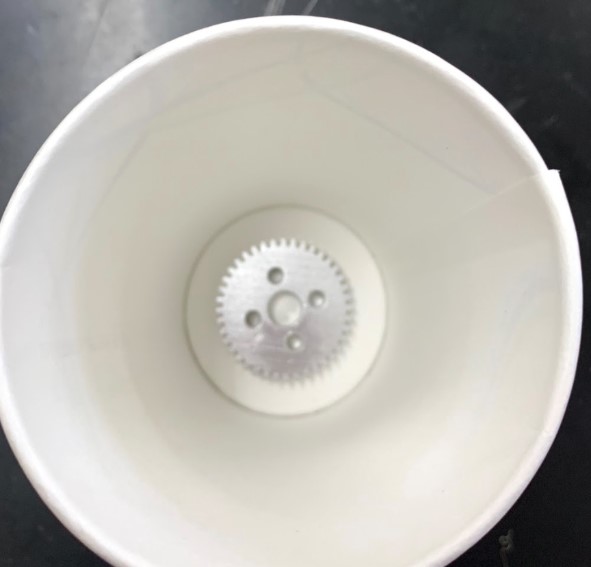
I poured the mold material into the cup and let it sit overnight, once I came back in the morning it had set so I took it out. It didn’t look too great but it was all we had at the time.
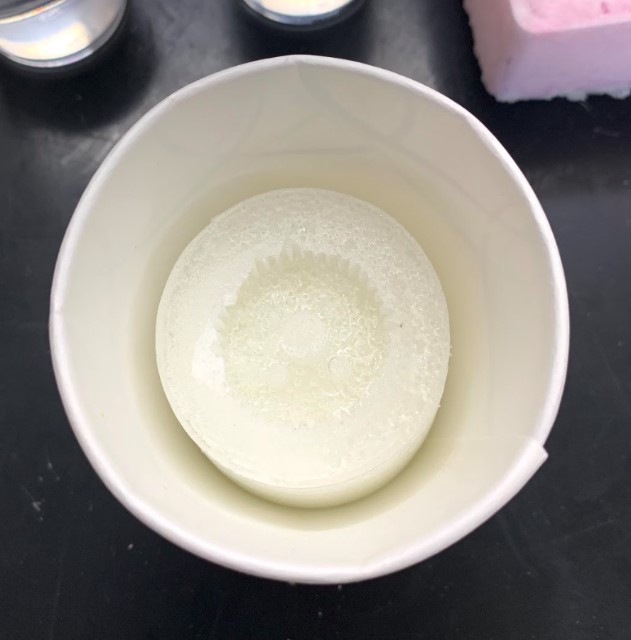
I poured our first test cast in and let it set for the recommended time of 45 minutes.
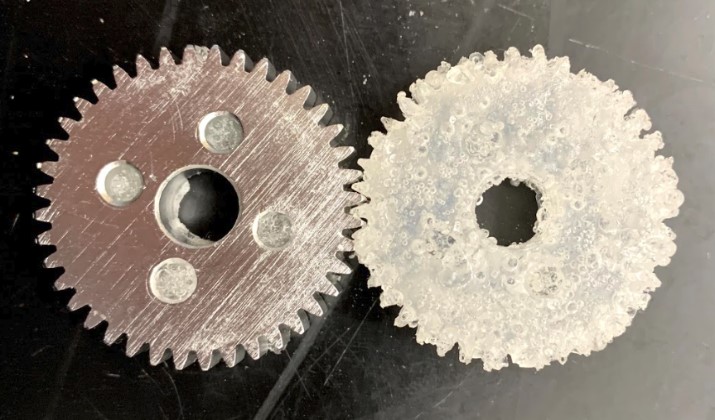
It doesn’t look all that great, but you can see the definition in most of the gear teeth, and the cast gear does fit in with the real gear that we made the mold from originally.

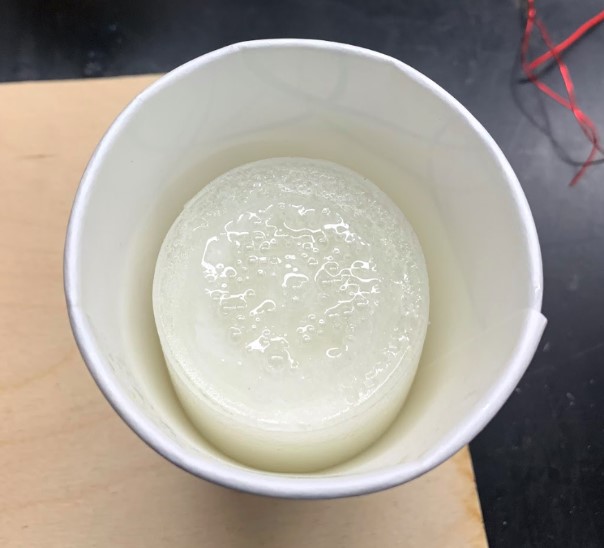
I decided to try to use a different casting material. This time I used the Smooth On 305 hard white plastic cast. I mixed up both parts, then I poured it into the mold.
It came out looking a bit better than the last one, but it still wasn’t great overall.
Individual Assignment
Fusion 360
My individual assignment was, at the most basic level, to make a mold and then cast parts with it. I’ve had absolutely no experience with any of this, but I found it to actually be really fun. One of the things I particularly liked was getting to go back into fusion 360 for some CAD and CAM work.
I started by designing my mold in Fusion 360. I spent a while trying to decide what to do, and eventually I kinda had it in mind that I wanted to make something geometric with a hexagonal pattern. I started making a few different designs without any real purpose to them, I just thought they looked cool. Soon after, though, I realized that none of the designs I was making would ever end up incorporating any sort of 3rd axis when finishing the milling process.
It’s important that all three axes are used at once when I do the finishing cut for the mold, so I went back to the drawing board and thought about it some more. Eventually, I decided I just wanted to make something that I could use in my final project, so along that train of thought I realized I could make the four “feet” for my light box.
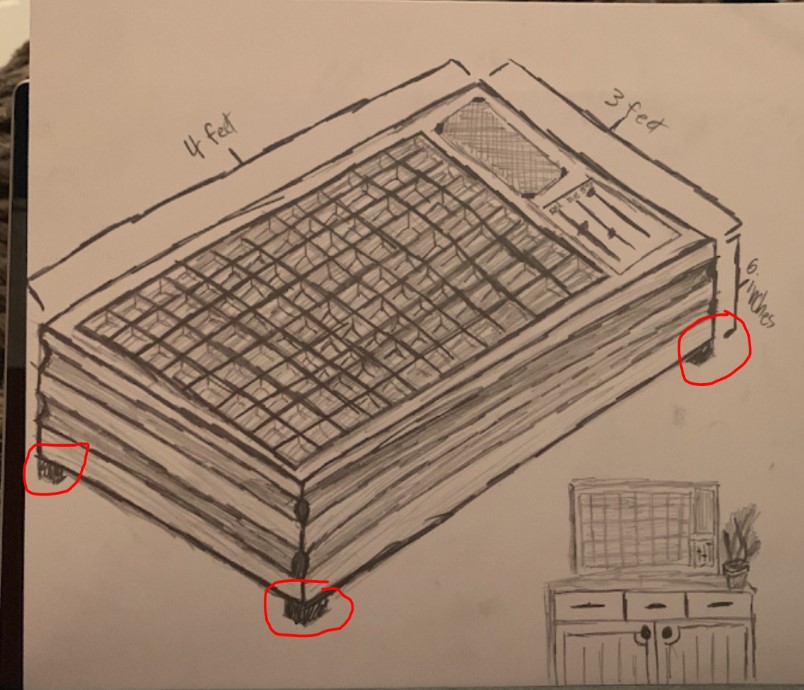
Because all four of them will look exactly the same, this is a great opportunity to take advantage of casting and molding’s ability to quickly make multiple of the same objects with ease. I was also keeping two other things in mind; one was how I could get the x, y, and z axes to all run at once during my finishing cut, and the other, more recent revelation, was how I needed to account for the size and limitations of our cutting tool.
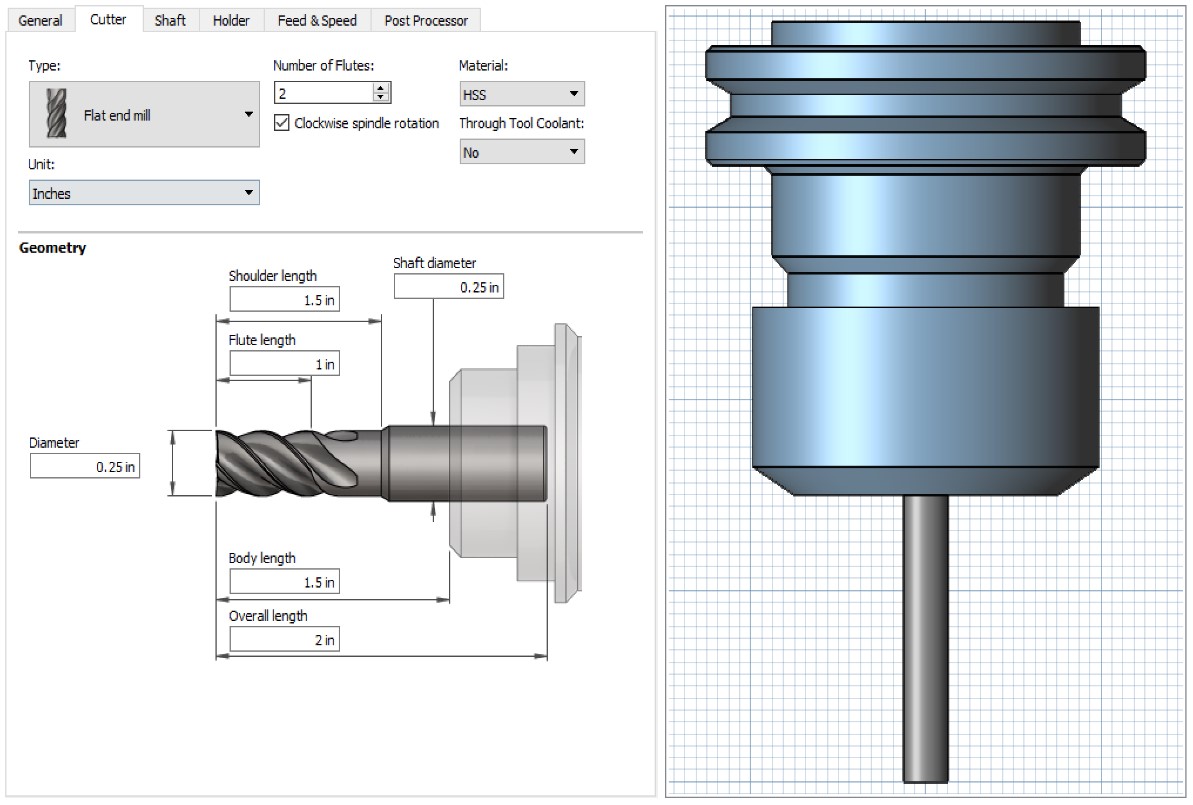
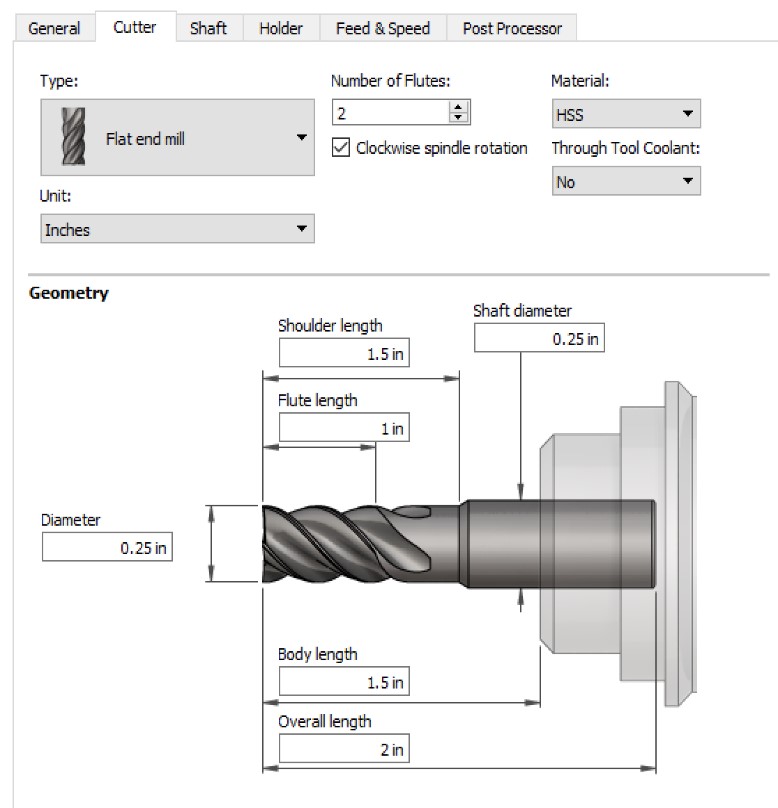
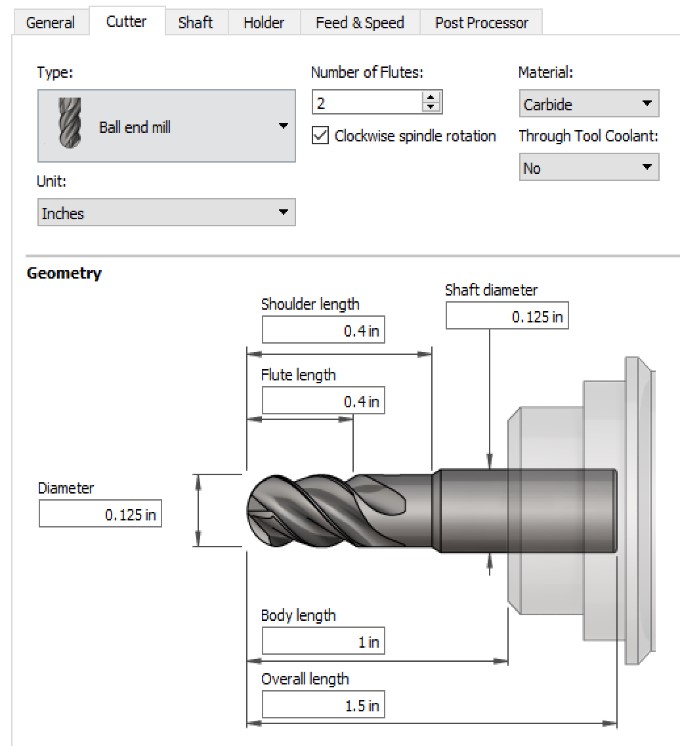
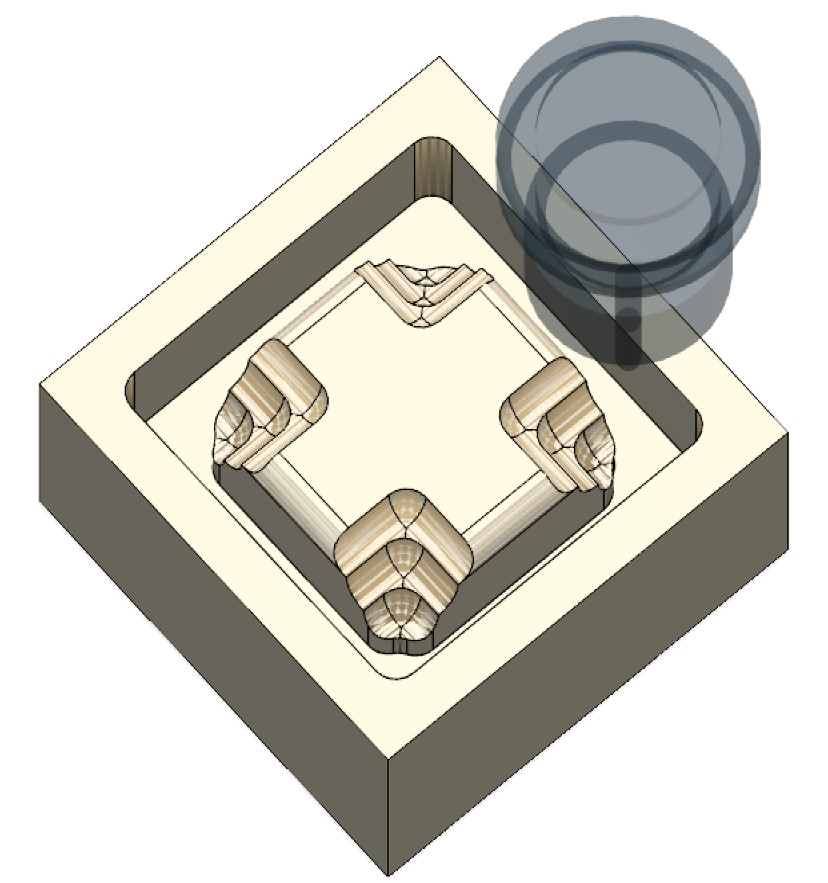
The CNC cutter comes with its own limitations, too. Things like the bit length, collet width, the width of the bit, and other various dimensions can all determine whether or not a cut will run successfully. For example, if the collet that holds the bit in is 1.5 inches above the tip of the bit, then I can’t run any cuts lower than an inch and a half into the material without being sure that the collet won’t run into the sides of the mold around it and cause a collision. This image generated through the CAM workspace in Fusion 360 does a great job of laying out all the dimensions to keep in mind.
Anyways, back to the mold design. To get my 3rd axis incorporated in the milling, I just decided to use a horizontal to vertical slope somewhere on my part, or rather, everywhere.
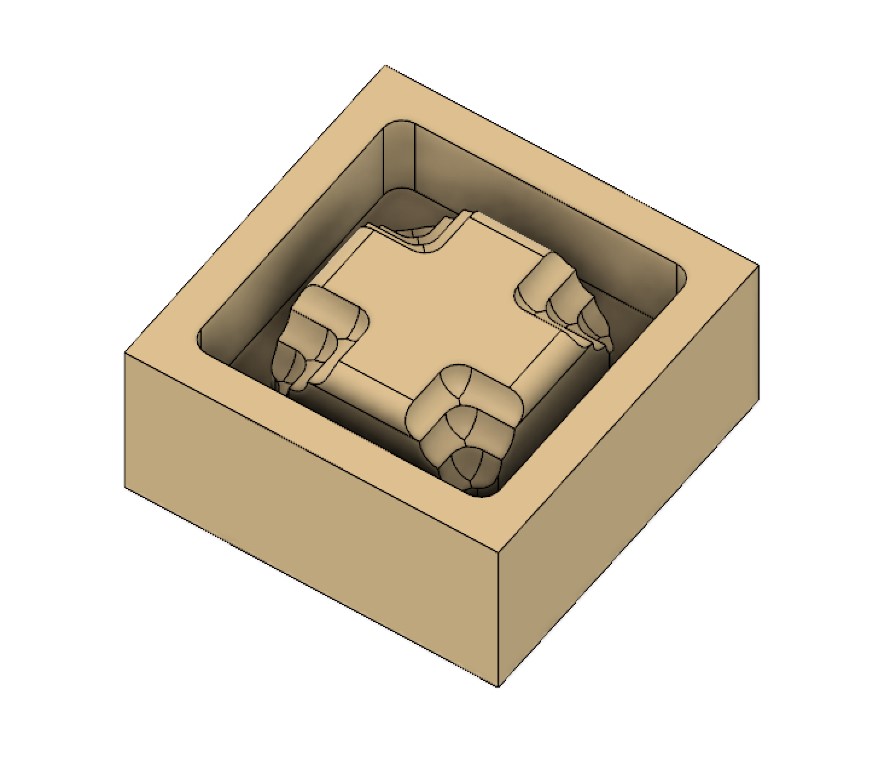
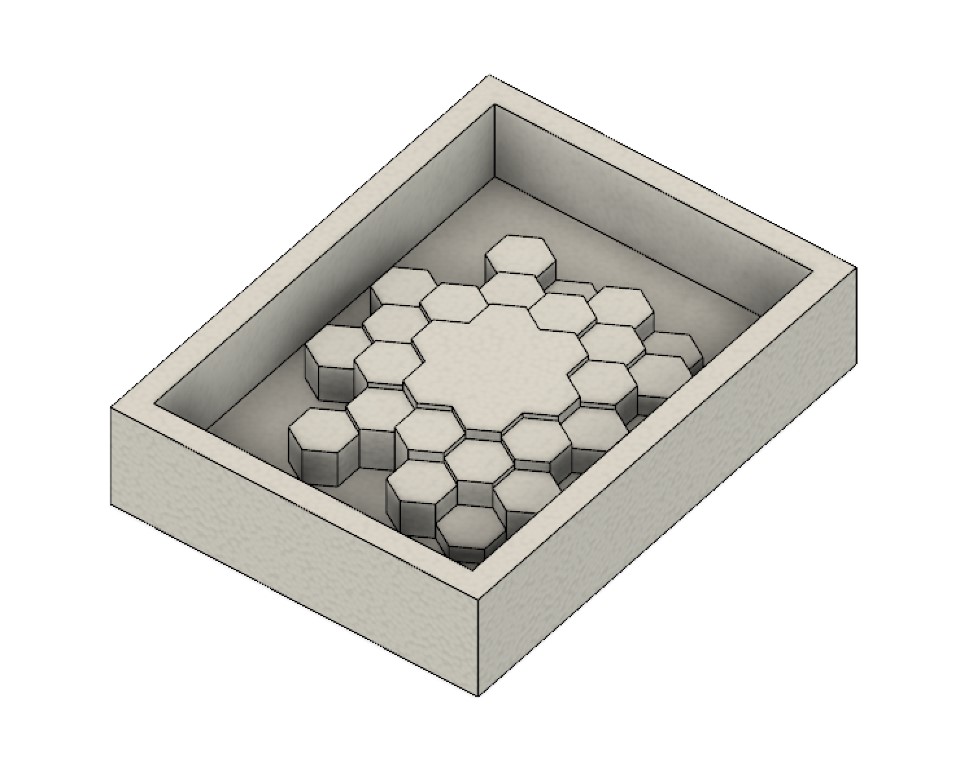
As you can probably see, I used the center point arc tool from the sketch menu quite a bit in this design. I liked the look of this allot, especially for the feet of my light table, and it really wasn’t all that hard to design. I just used the same sketch pattern on both of the inside walls of my mold box and extruded them both all the way to the opposite side, making for a pretty cool looking shape in the center.

Then, I got rid of the parts that connected to the inside of the mold box and added a couple of fillets in on various edges to give it a softer look.

I made sure that the bit would be able to mill out my design without any issues by using an, (admittedly excessive), tolerance of .5 inches between any parts other than the flutes and shaft of the bit itself.
Once the mold was made, my next step was to make toolpaths for it in the Fusion 360 CAM environment. I had never used fusion’s manufacturing workspace before so this was a bit challenging, but in the end I was glad to have learned how to use a new aspect of one of my favorite softwares.
I really had no idea what I was doing in the manufacturing environment at first. I thought that maybe I could figure it out for myself, but after about 30 minutes with no progress I started looking around for some tips to help. There were three different resources I ended up using to get this finished, all of which I’ll link bellow.
Fusion 360 CAM For CNC Beginners
With the help of all three of these as well as some tips that I got out of this week’s lecture, I was eventually able to make it happen.
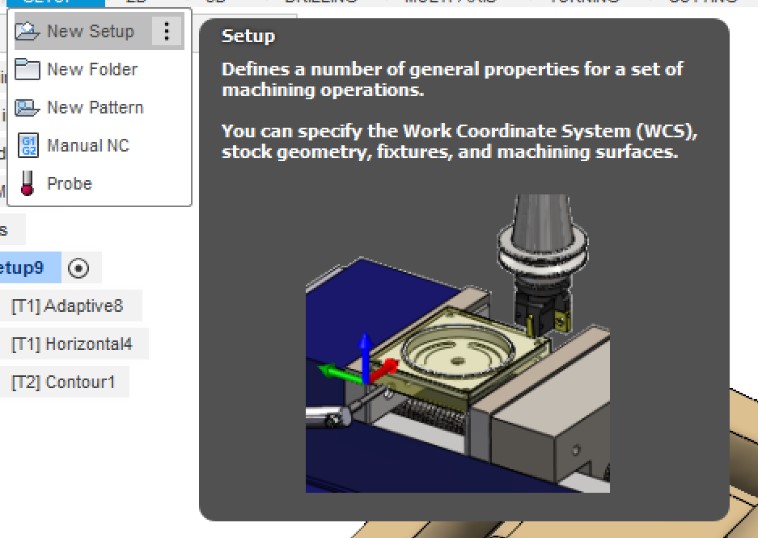
I started by creating a new setup.
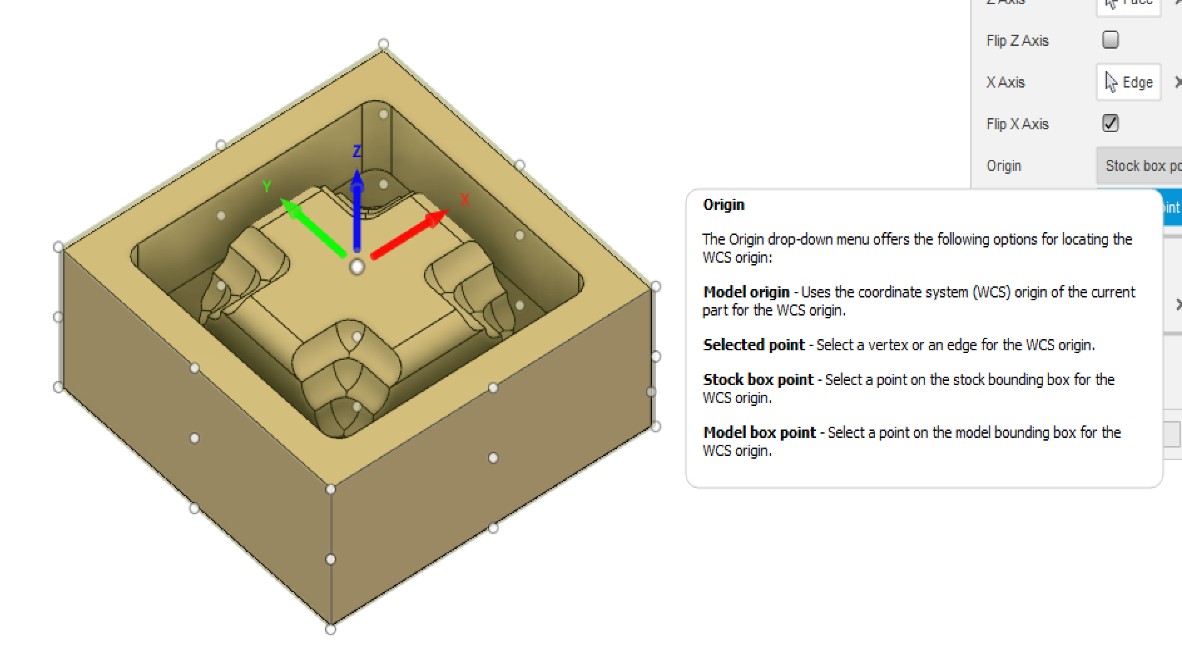
For the orientation, I chose to select a Z plane and an X axis.

Then, for the second part of the orientation, I chose the top middle box point.
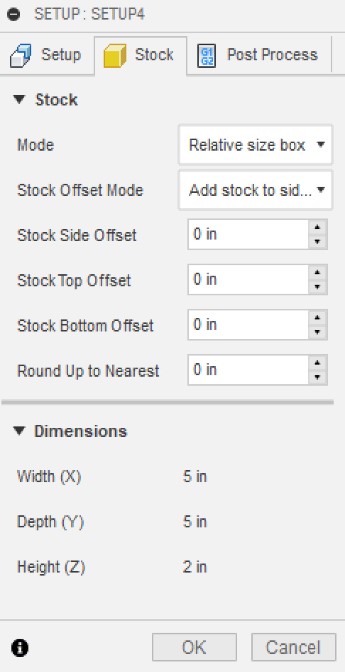
Once that was set, I went under the “Stock” tab, (still in the same setup menu) and changed the size of my piece of stock material to match that of my model.
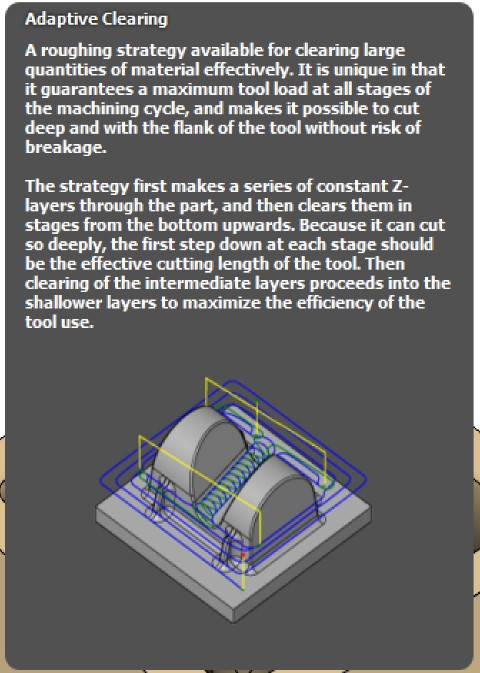
Once this was done, I went to the “3D” tab on the top toolbar and chose to use the “Adaptive clearing” roughing strategy.
First, I selected the tool I was going to use to run the cut. I actually had to add in my own tool that had the same dimensions as the bit and collet we use in our lab for our 4x8 CNC machine. To do this, I went under “manage” in the top toolbar and clicked on ”tool library” below it.

Then, I clicked on “new mill tool” in the top right corner.

Under the “cutter” tab, I put in the correct dimensions for our 1/4th inch flat end mill.
Then, I entered in the correct speeds and feeds for cutting out the insulation foam we have in our lab, which is the stock material I will be using to cut.

Once this was done, I could go back to the adaptive clearing box and select my newly added tool.
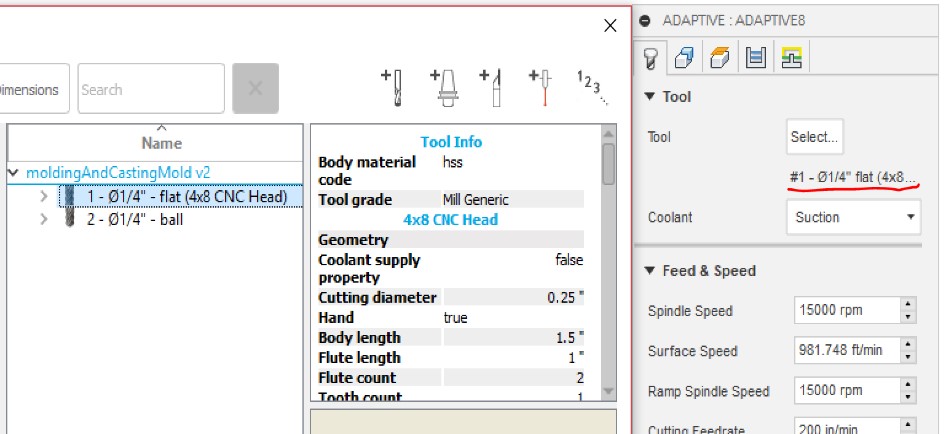
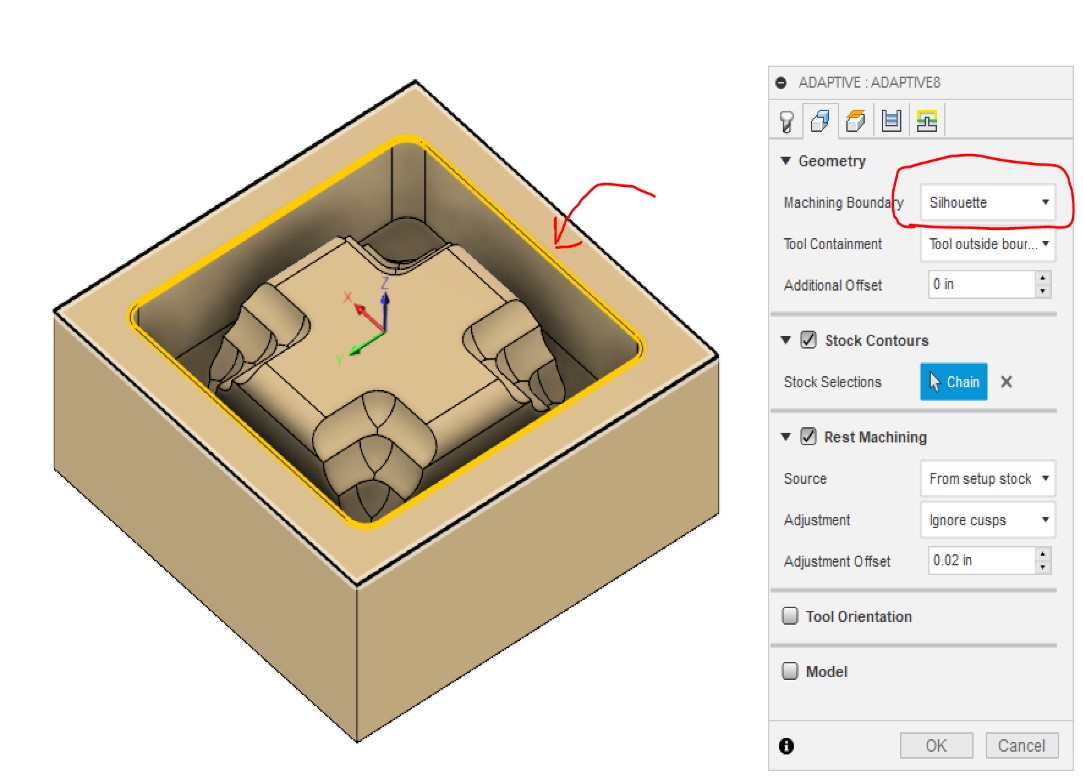
After selecting the tool, I set the coolant to “suction” because the shopbot in our lab just uses a big shop vac/fan thing hooked up to the CNC to suck up all of the material shavings that get cut off. Then, since I had already set the speeds and feeds under the tool profile, I went to the “geometry” tab at the top (still in the adaptive clearing box).

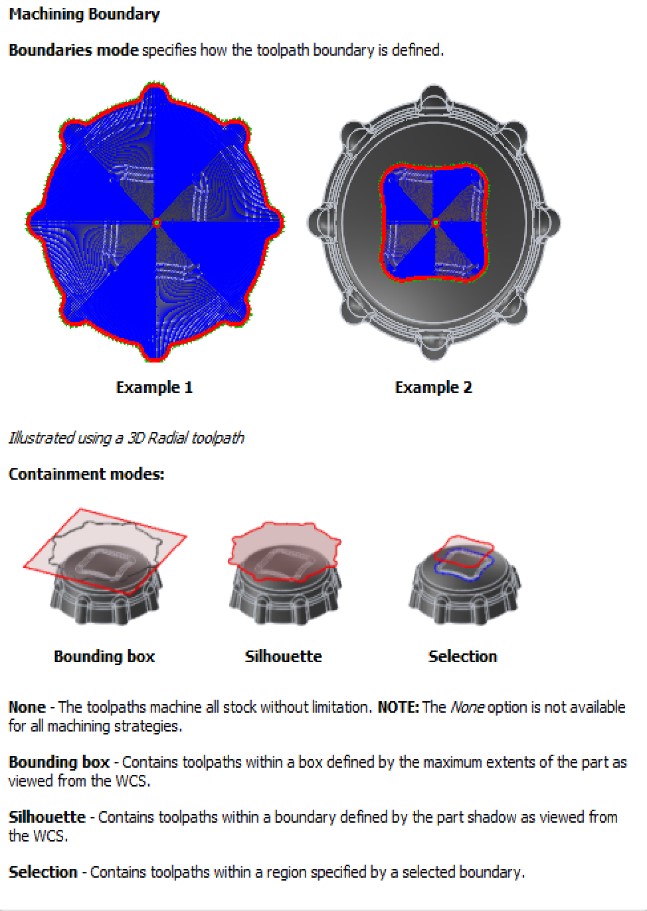
For the machining boundaries, I chose to use “silhouette” and just selected the top inside edge of my mold.
Then, lastly, under the “passes” tab, I checked the box that said “smoothing” on it to remove any excessive data points.

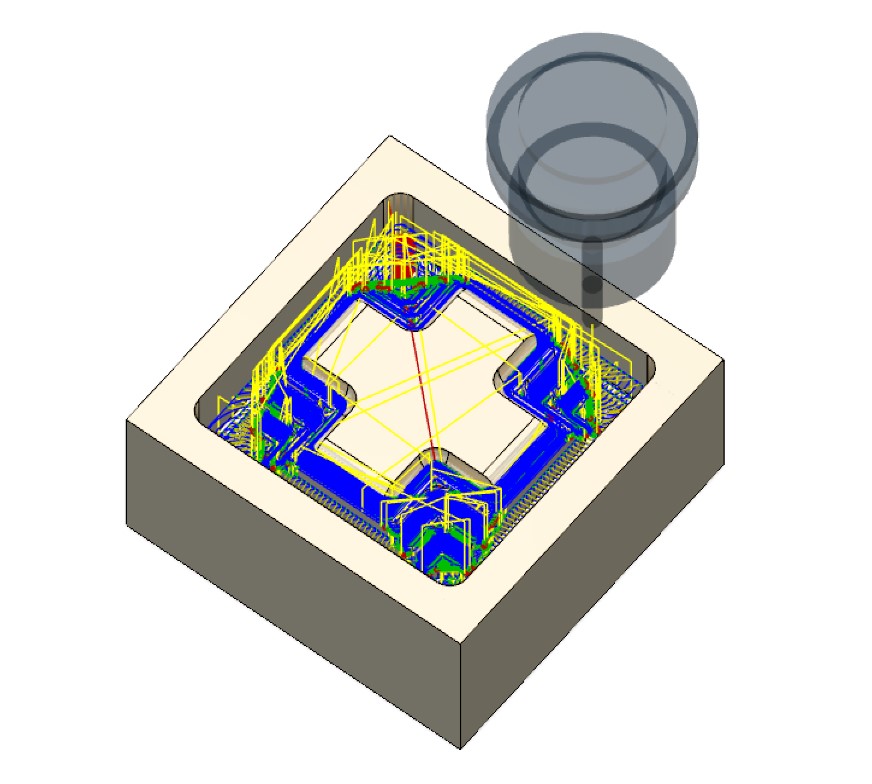
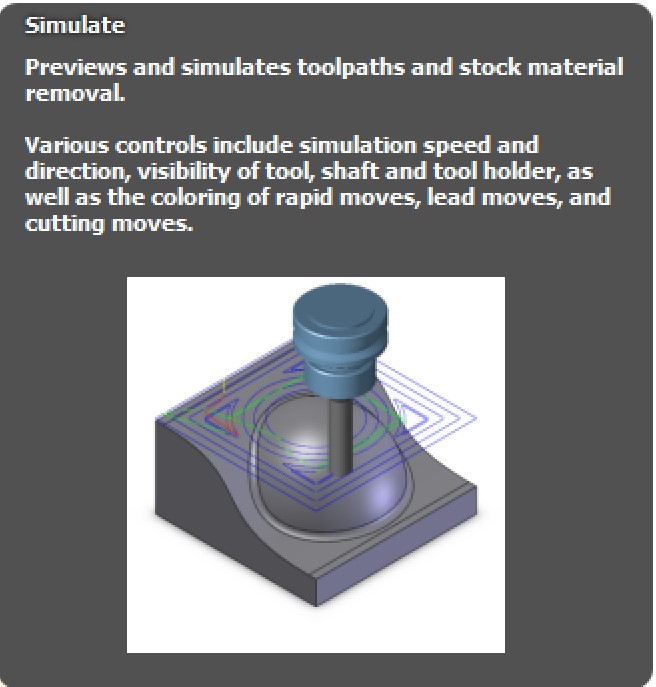
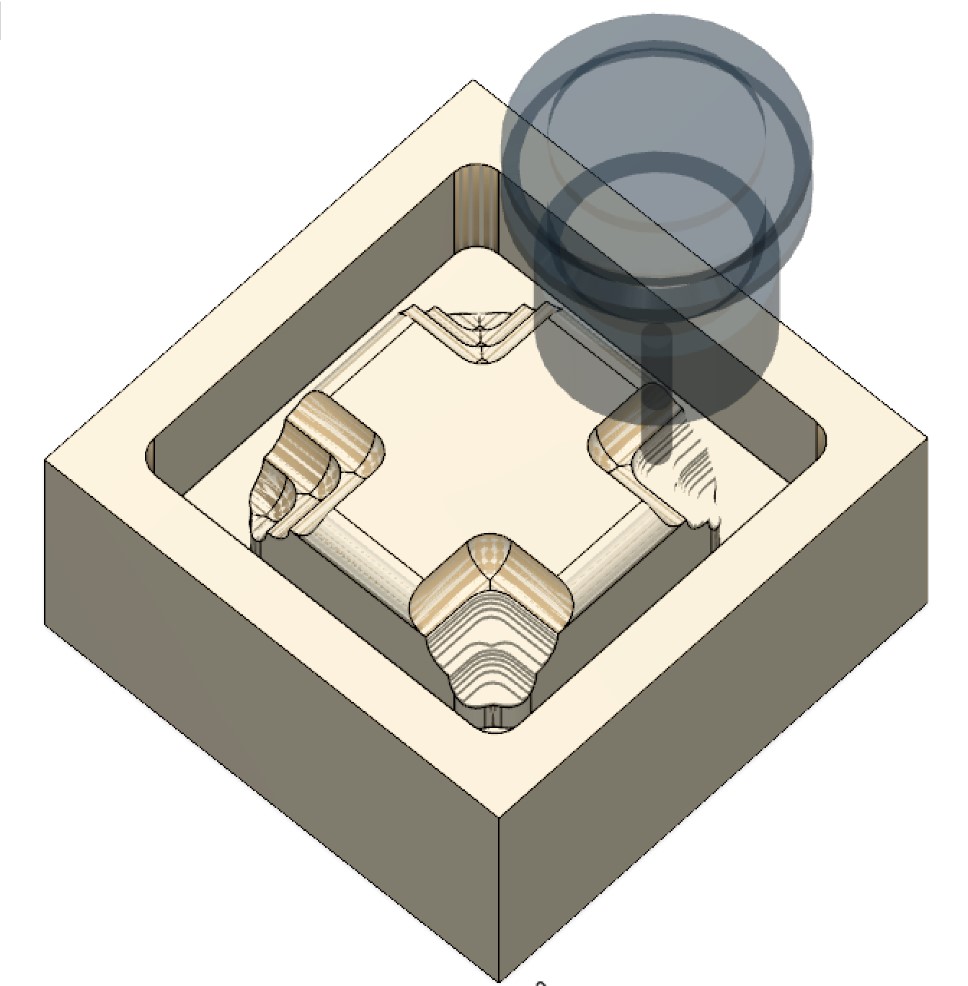
I hit ok, and the software calculated my new toolpath. Then, wanted to simulate the toolpath to be sure everything looked ok. To do this, I right clicked on my new toolpath and chose the “simulate” option.

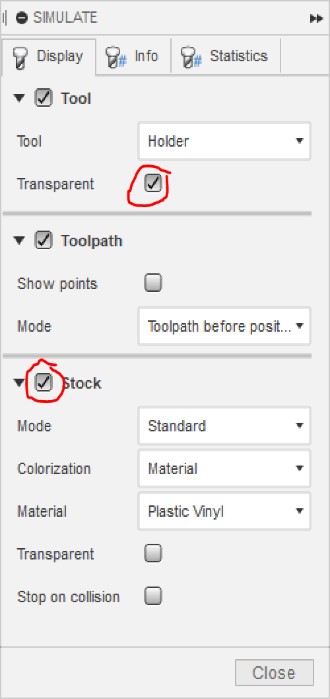
Then, I checked the box that said “transparent” to make the tool head see-through, and turned on the stock so I could see how well the milling would actually go.
Then I simulated the cut.
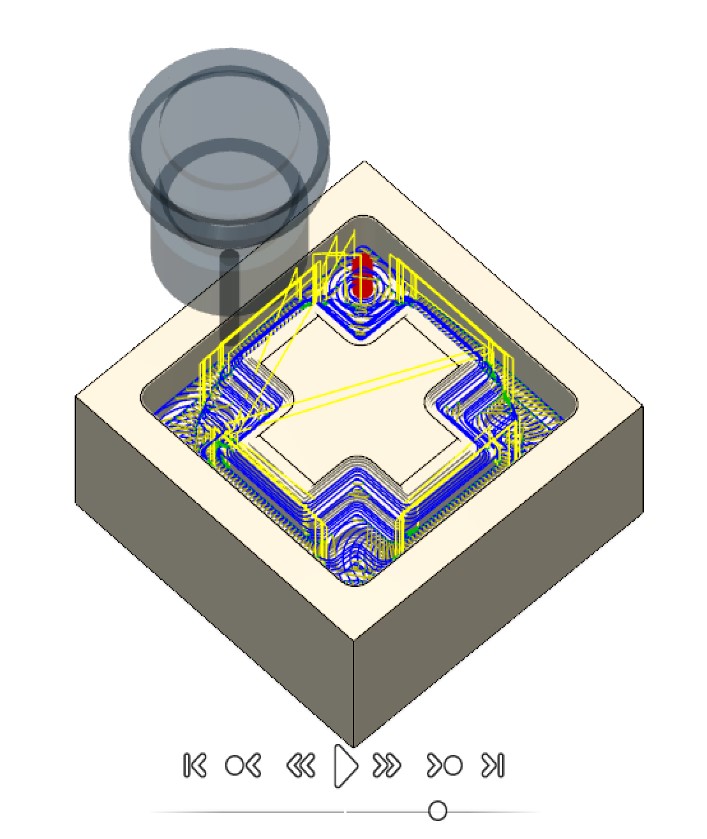
The cut went well and everything looked as expected. Because this was just a clearing cut, meant to take away as much material as quickly as possible, it didn’t come out very high-res. Making it look ultra smooth is still up to the other toolpaths.
The next toolpath I made was a horizontal toolpath to help remove some more of the excess material around my mold. Once again, I went under the “3D” tab along the top toolbar, and this time I chose “horizontal”.
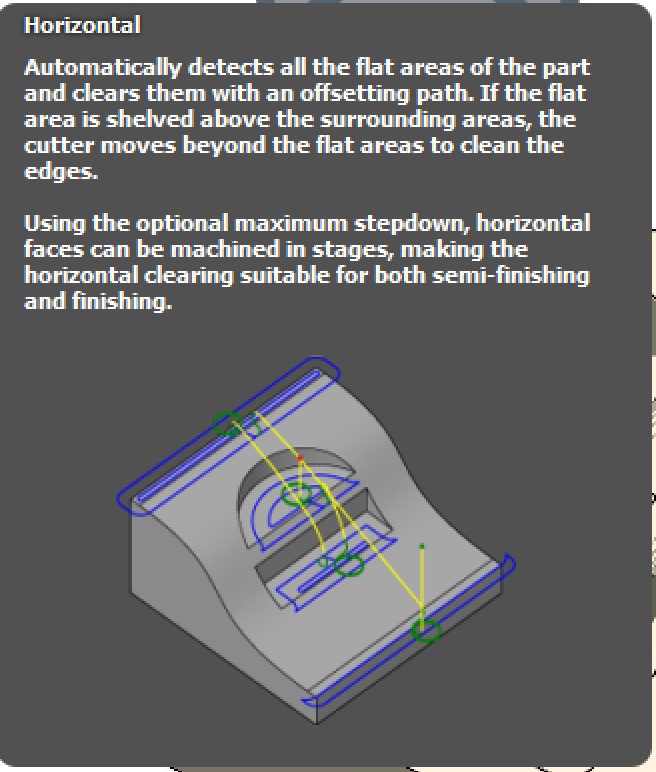
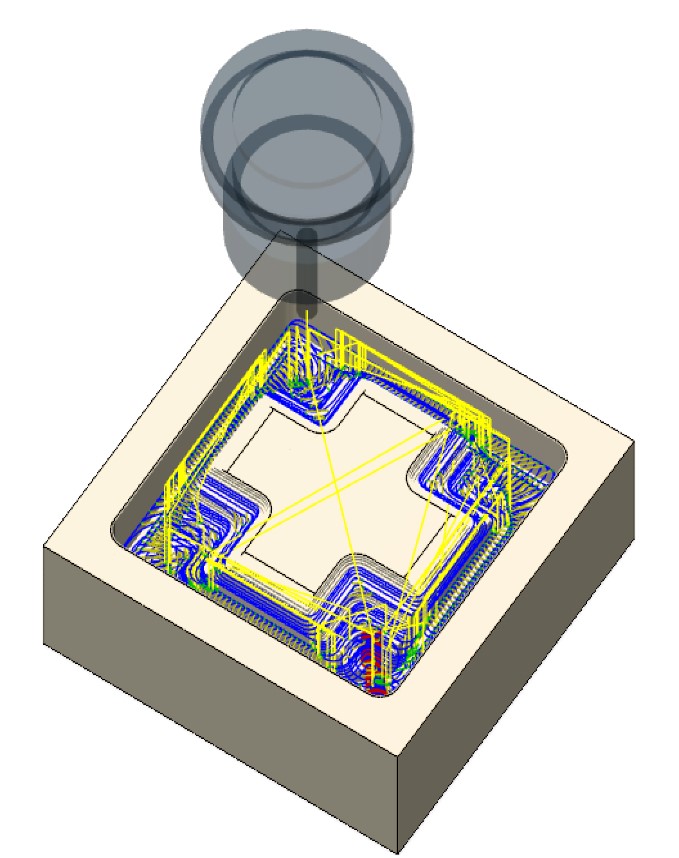
I used the exact same settings under the “tool” and “geometry” tabs that I had earlier, and all I had to changed under “passes” was the smoothing option yet again. I hit ok and then I simulated this new tool path along with the one that I had just made earlier. To do this, I made sure that none of the toolpaths were selected individually, then I clicked on the big “simulate” button along the top toolbar.
All that’s left to do after that is press the play button and watch it go.

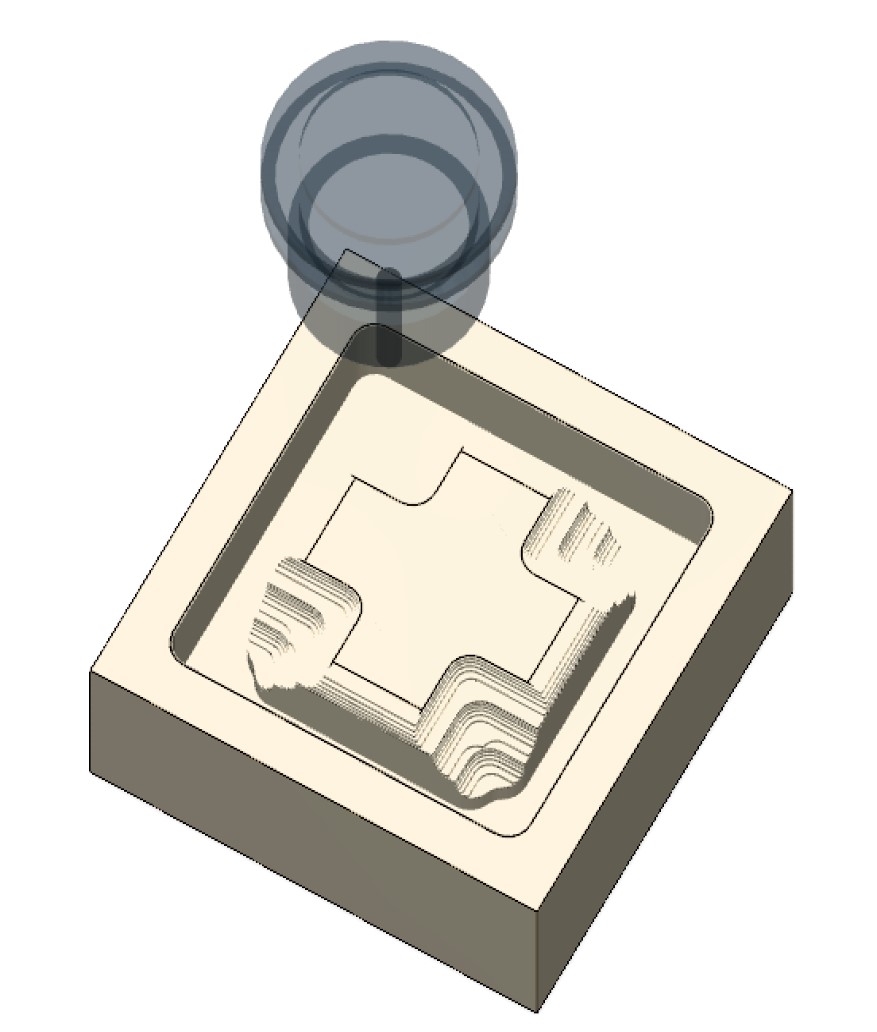
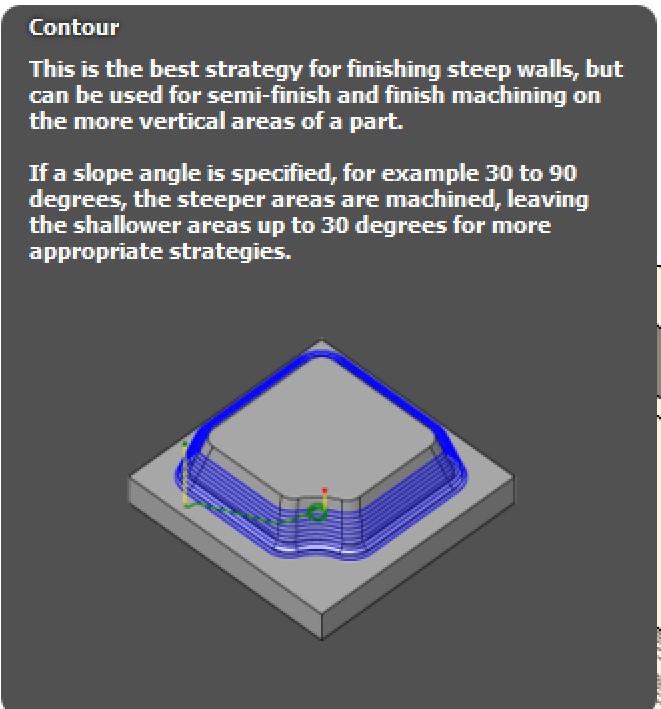
It doesn’t look a lot different from before, but this cut helped chip away at some more of the material. The last thing I did was make a contour cut with a 1/4th inch ball end mill.
Since I was using a different end mill for the finishing cut, I had to add in a new tool again. I basically used all of the same settings as before with a ball end mill this time rather than a flat end mill.
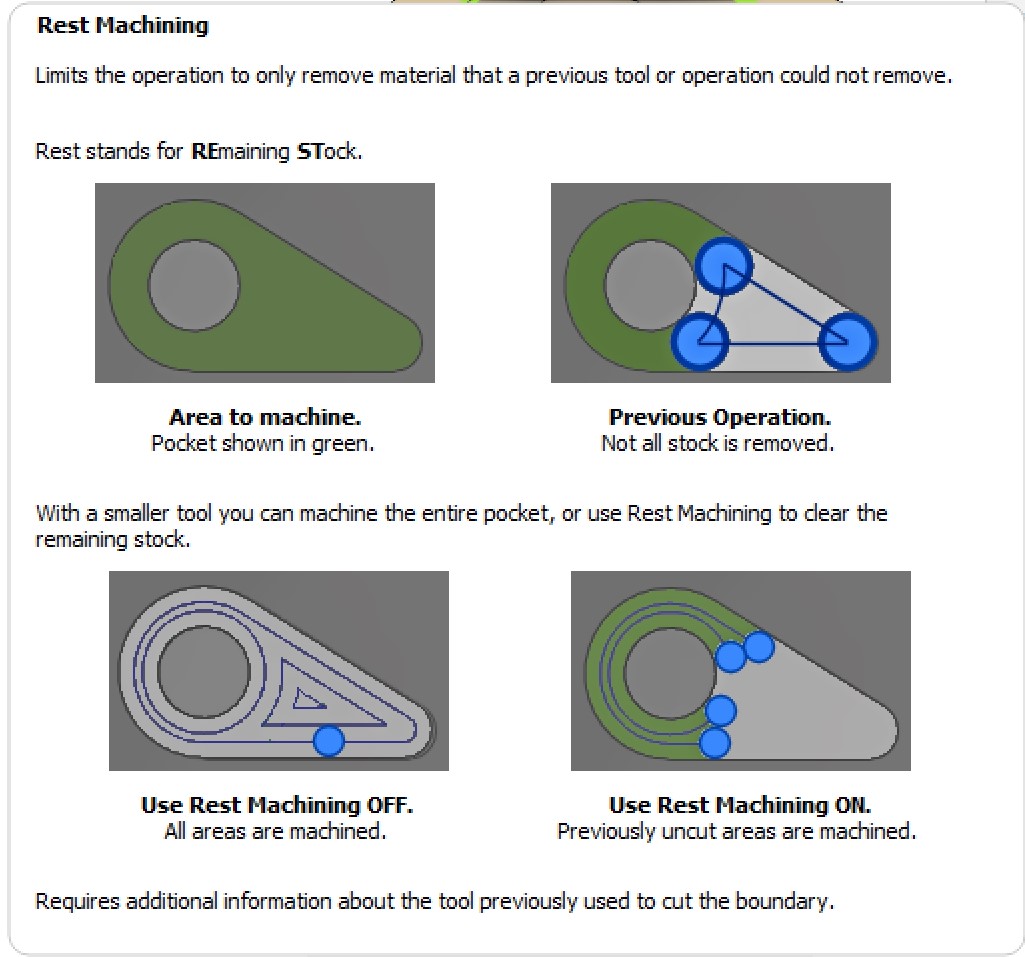
Edit – When I got back to the lab, I saw that we don’t have any ball endmills, just the flat endmill. In the end I just used the flat endmill with “rest machining” turned off, and it came out fine.
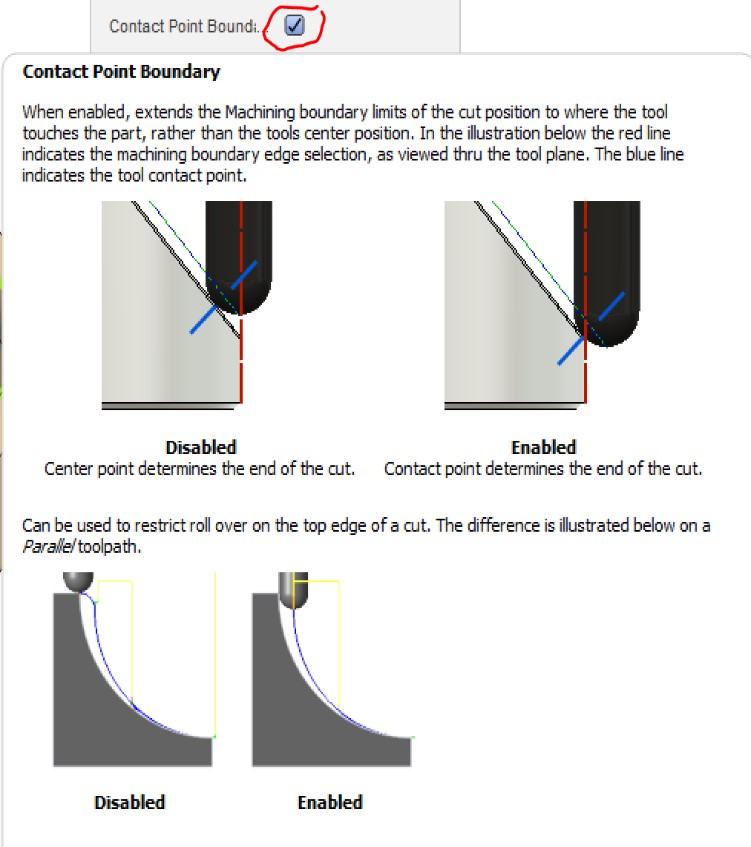
I selected my newly added tool, then I set the machining boundary under the geometry tab. There were a few new things I changed this time for the finishing cut. I checked the “contact point boundary” box.
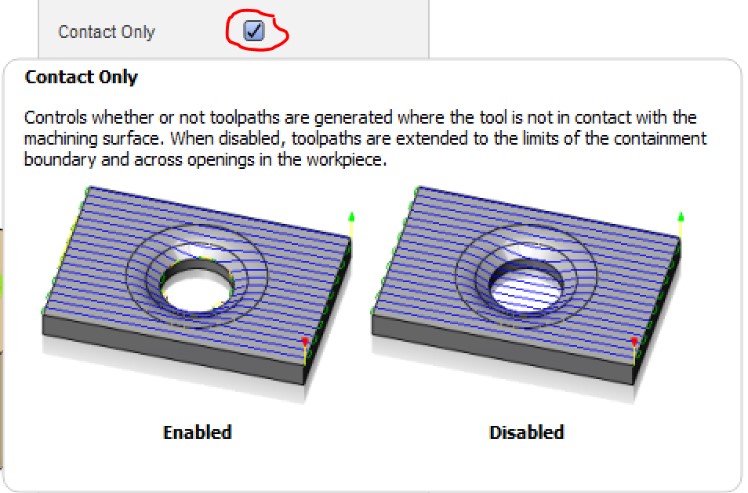
I checked “contact only” to keep the machine from running toolpaths over empty space.
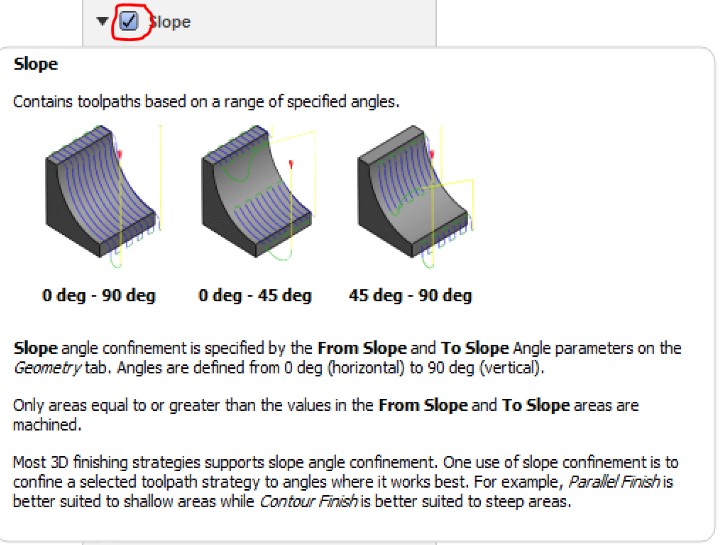
I checked the “slope” box.
I checked the box saying “rest machining” to keep the toolpath from going over areas that had already been cut previously, this helps to reduce the cutting time.
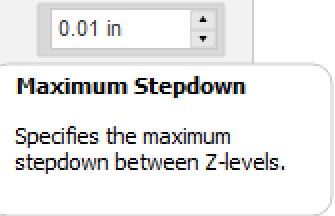
Then, under the passes, I changed the maximum step down to .01 inches to give it a smoother finish.
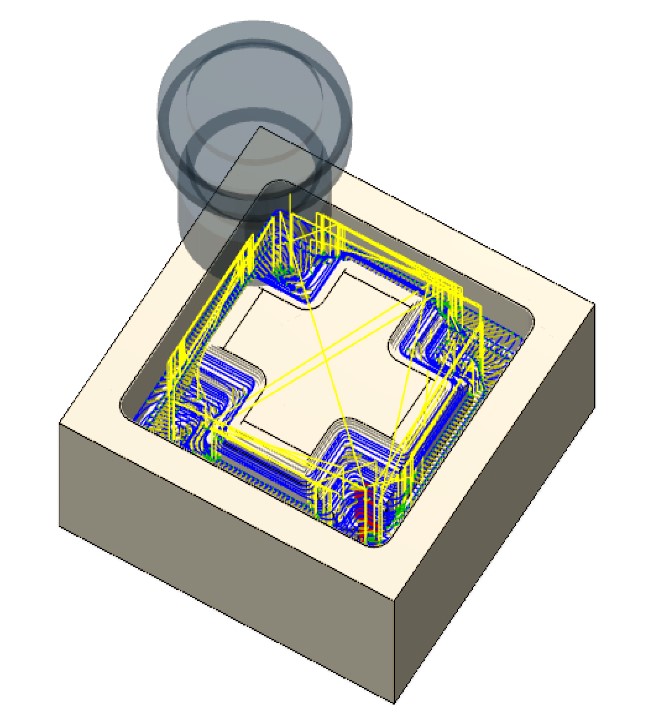
Then, lastly, I turned on smoothing again and hit ok. The software calculated the toolpath and once it was finished, I simulated all three toolpaths at once to see how it would come out in the end.
As you can probably imagine, there were quite a few toolpath lines by the end of it all.
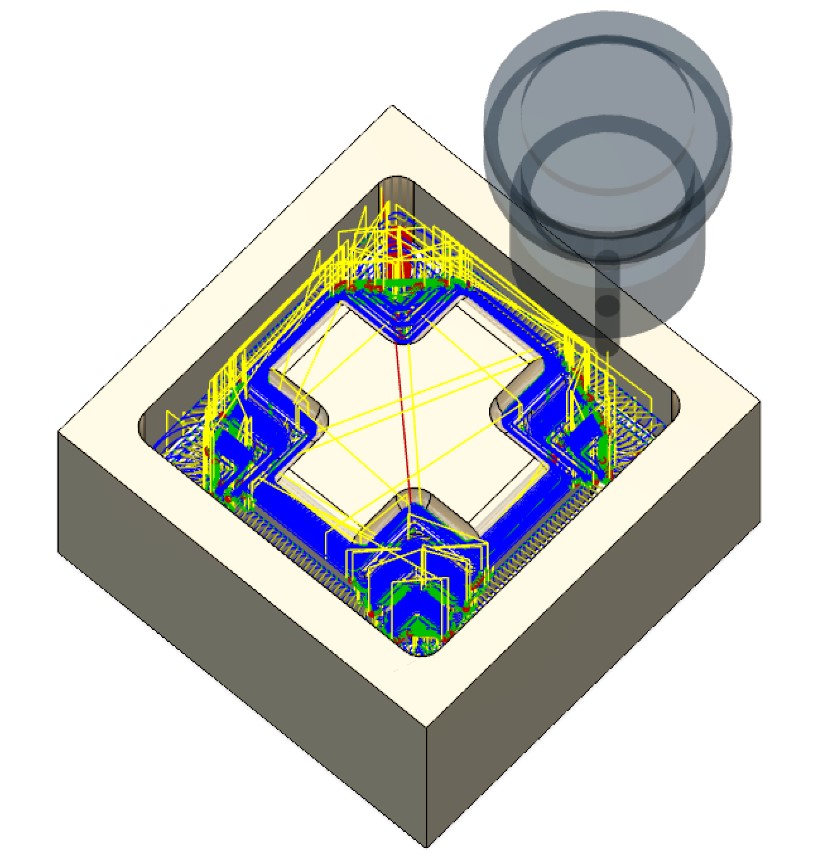
But it looks like it will come out nicely once I am ready to machine out my mold.
Making the GCode
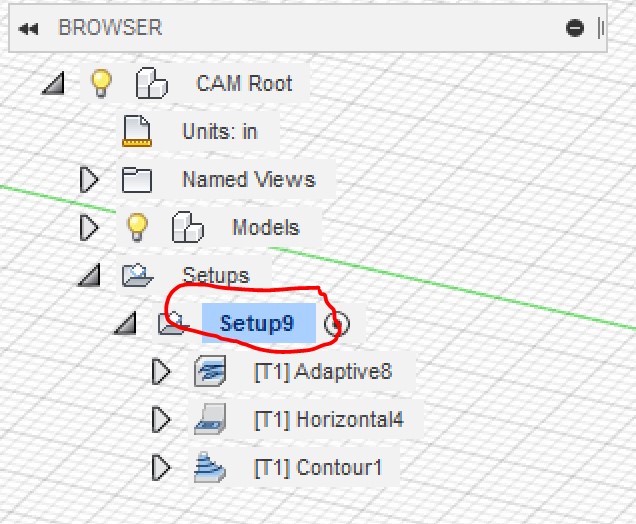
So, now that I have all of my toolpaths made, I need a way to get them over onto the shopbot. To do this, I just right clicked on the setup button in the top left hand corner.
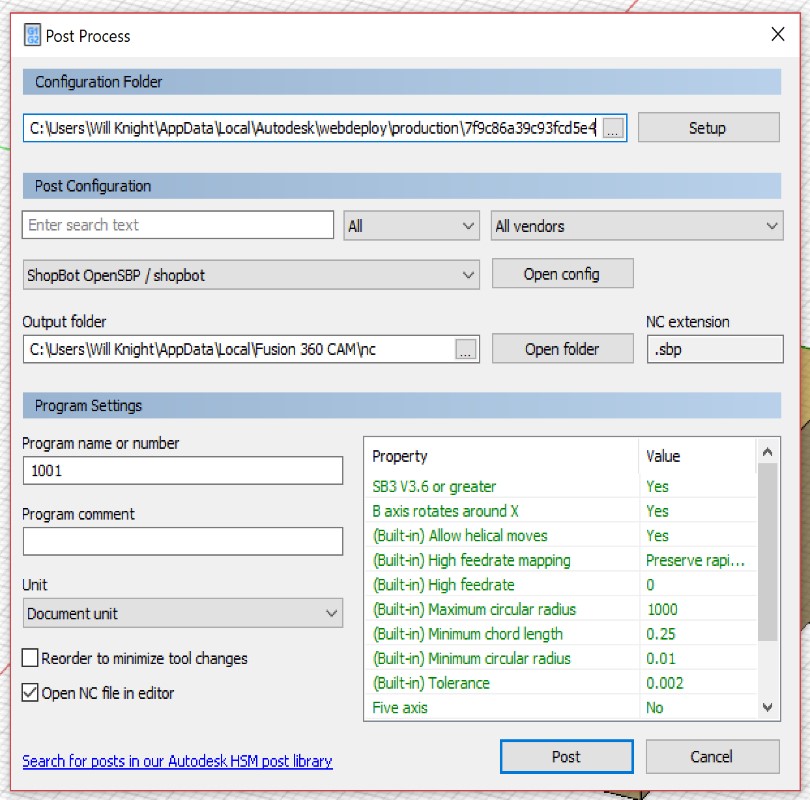
Then I clicked “Post Process” in the window that appeared and was taken to this screen.
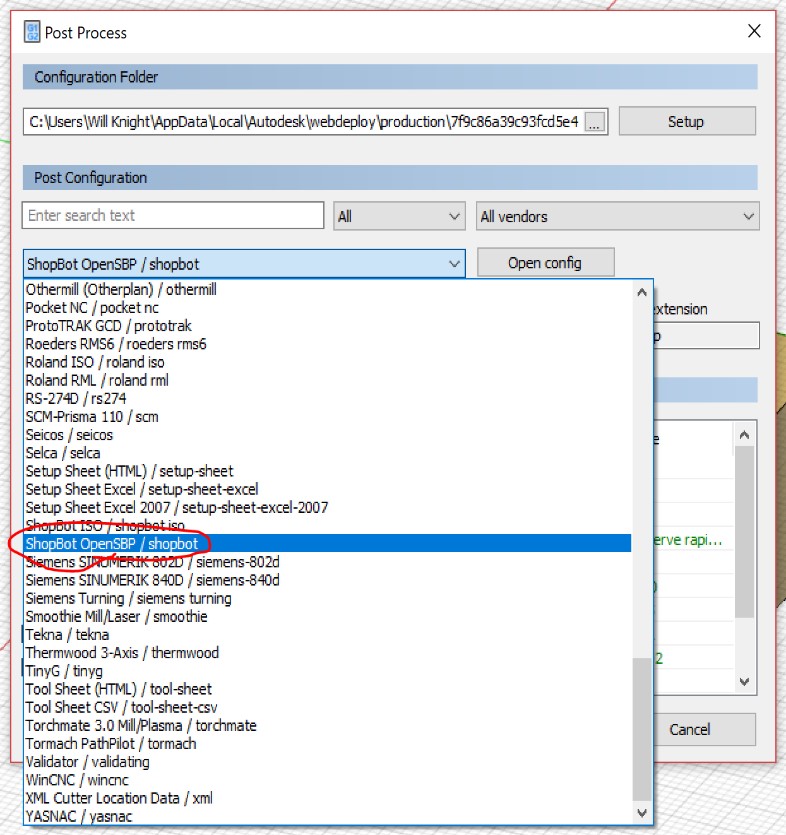
Then, I chose the correct file type to export my toolpaths as, which was the shopbot SBP file.
All I did then was hit “Post” and the Gcode was ready to be sent over to the shopbot to cut.
Shopbot Work
After all of my Shopbot work from the “Make Something Big” week, this week’s cut was a breeze. I started by getting my piece of stock material screwed into the cutting bed. I cut my mold out of a piece of 1.9 inch thick insulation foam that we had in the lab, and getting it screwed in was pretty easy because of how soft the foam is.
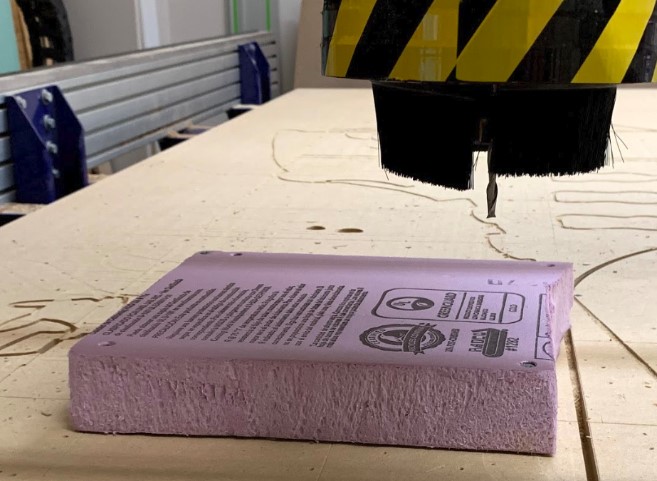
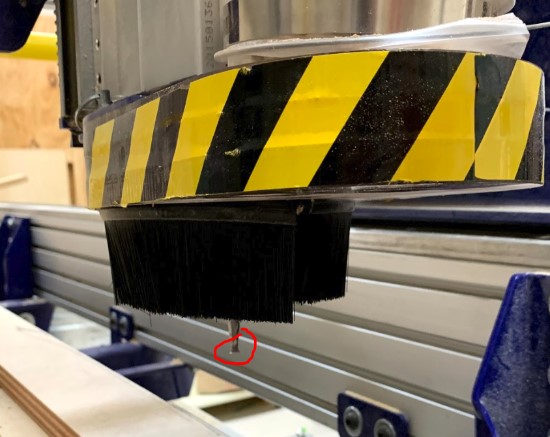
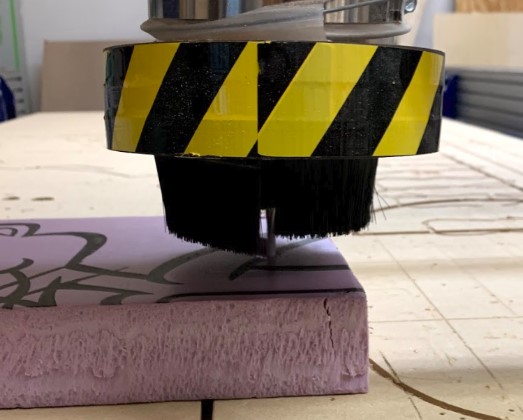
Next, I zeroed the X and Y axes at the corner of the piece of foam, and then I homed the Z axis off of the material surface. After getting everything set up, I opened my GCode in the Shopbot software and ran an aircut with a 3D offset to be sure the cut would run correctly. Note the blurring of the bit which indicates that the spindle is on while doing the aircut.
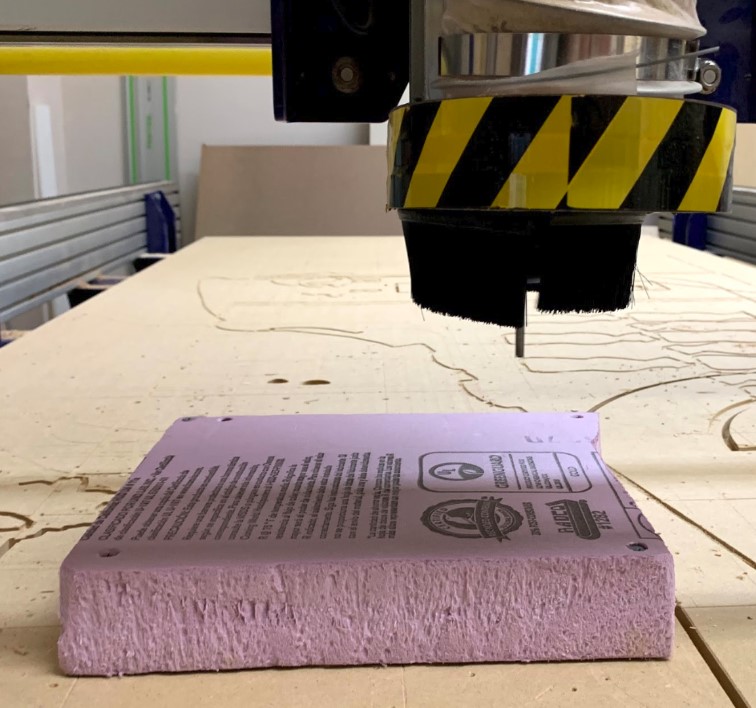
The aircut looked good, the tool didn’t seem to be cutting anywhere that it wasn’t supposed to, so I went ahead and ran the real cut next.
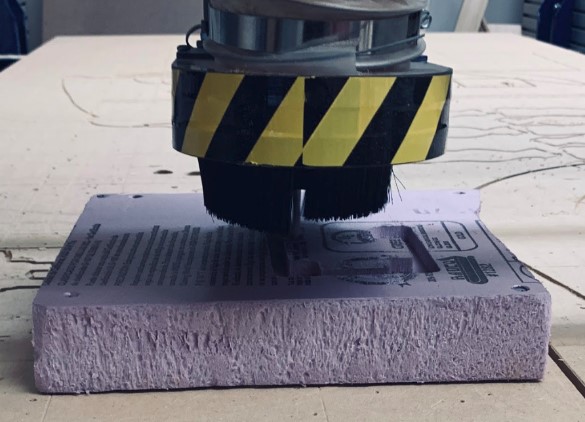
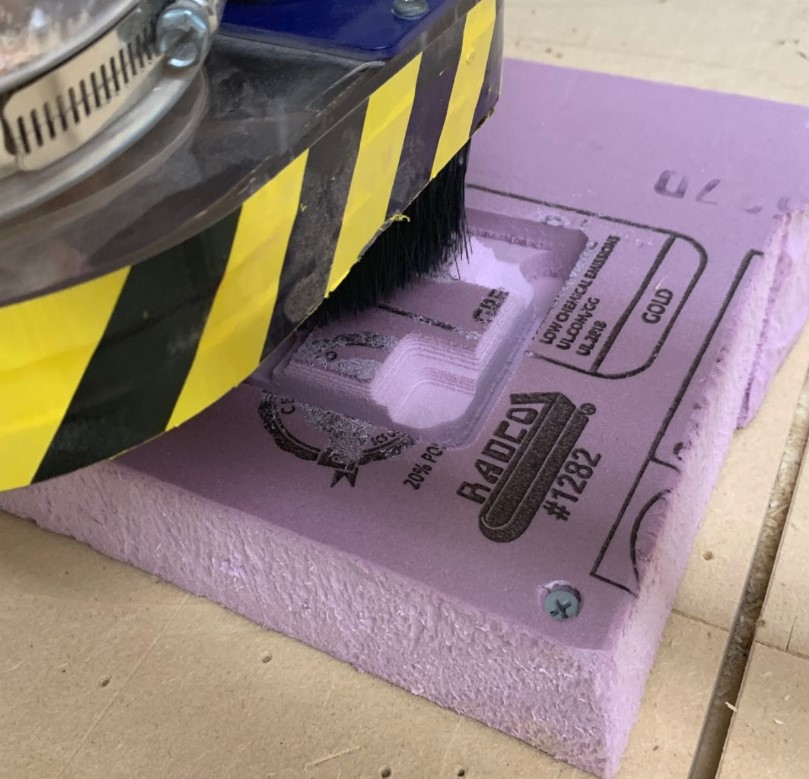
The cut went well, everything looked good.
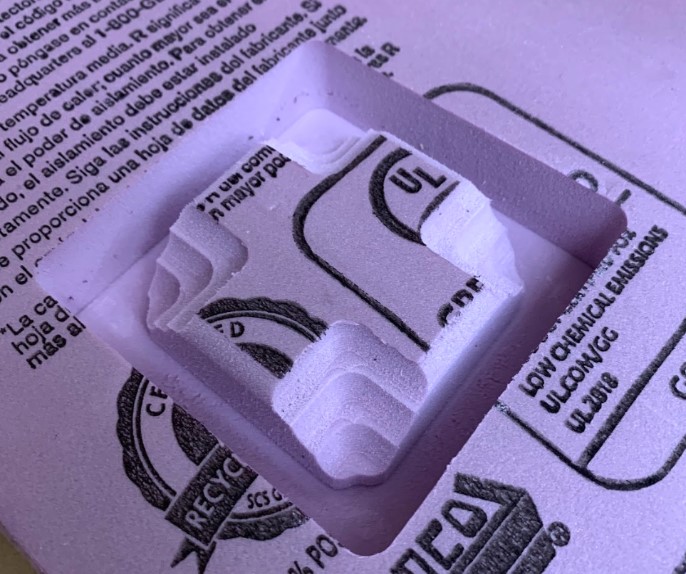
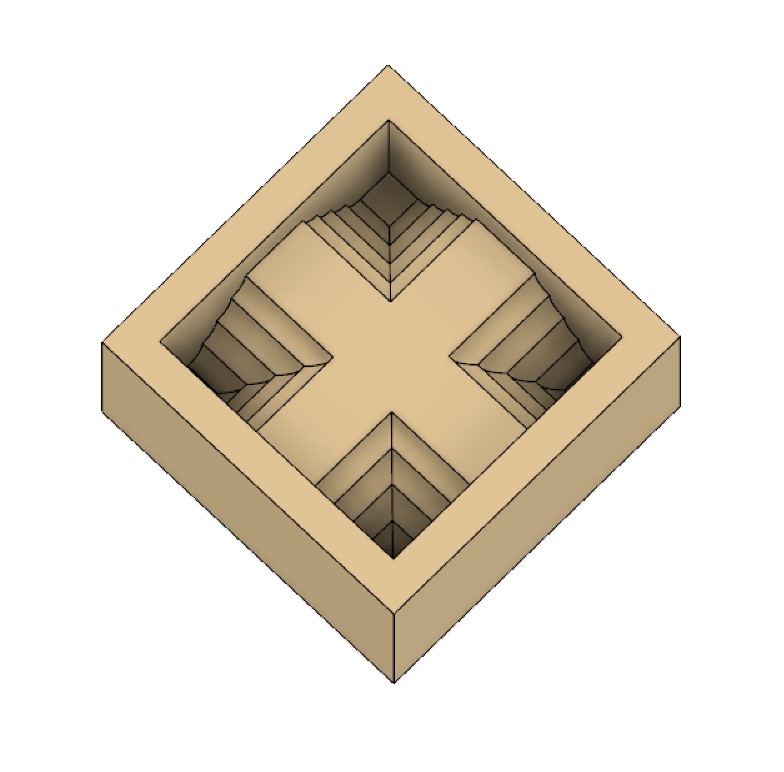
It was only after I had ran the cut, though, that I realized my rubber mold that I was pouring into the foam would have no lip to set on because the top of the shape of my footer was at the same height as the top of the edges of the mold. If I had tried to pour a mold in there, there would be a “+” shaped hole in the bottom of it and I wouldn’t be able to cast any hard materials in it because they would just leak out through the bottom.
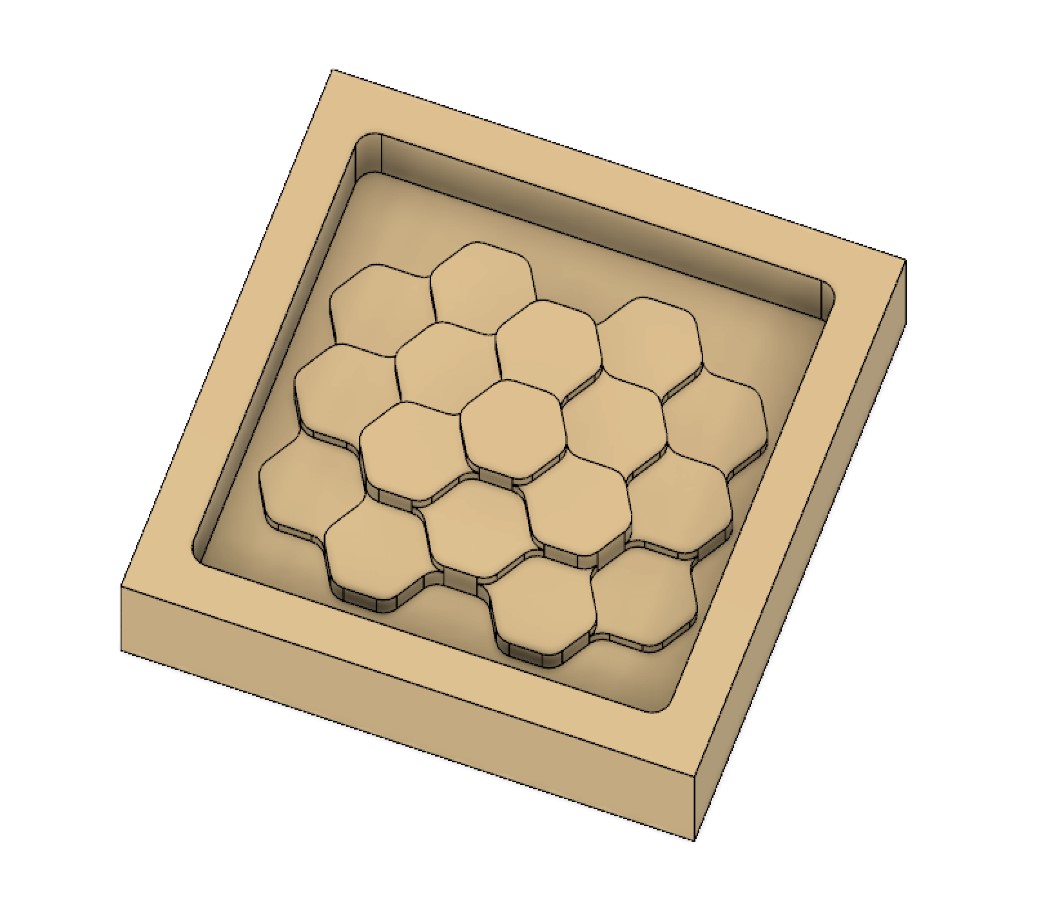
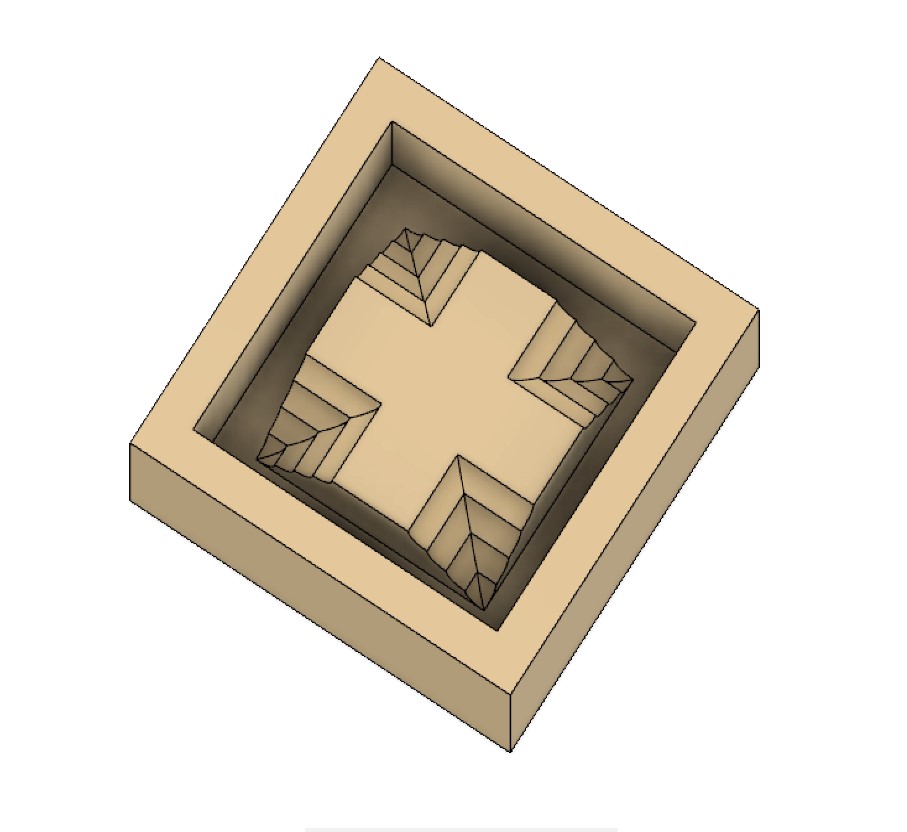
So, I went back into fusion and changed my model to have a lip around the edge of the mold, as you can see below.
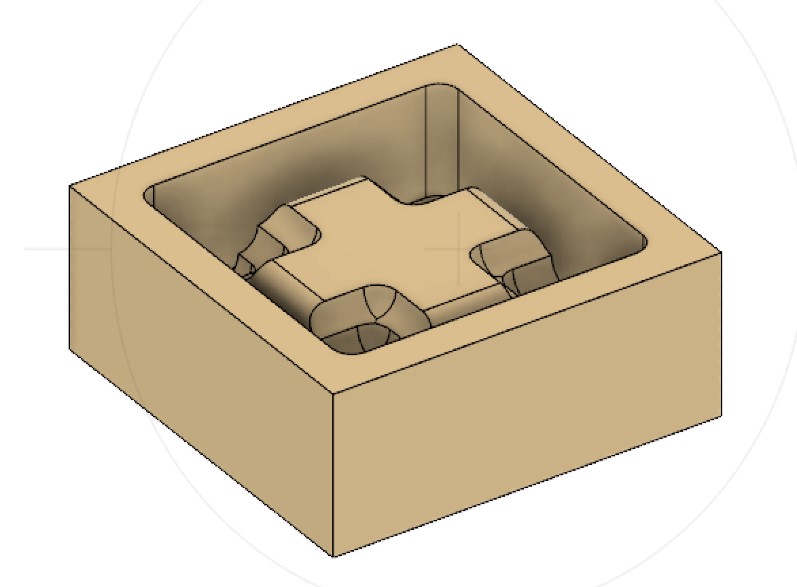
I recalculated all of my toolpaths for this slight adjustment, then I sent the GCode over to our shopbot. I got another piece of the insulation foam put down, zeroed the X, Y, and Z axes again, ran another aircut, and then finally started the real cut.

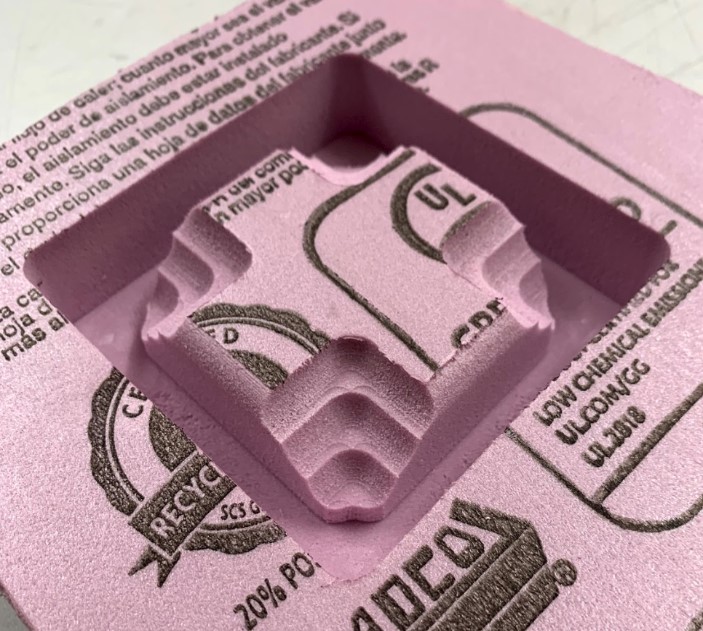
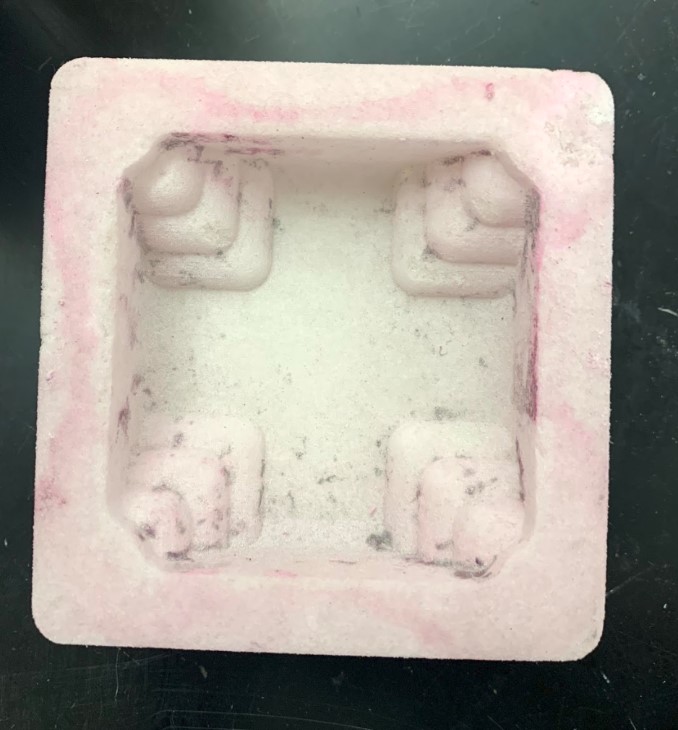
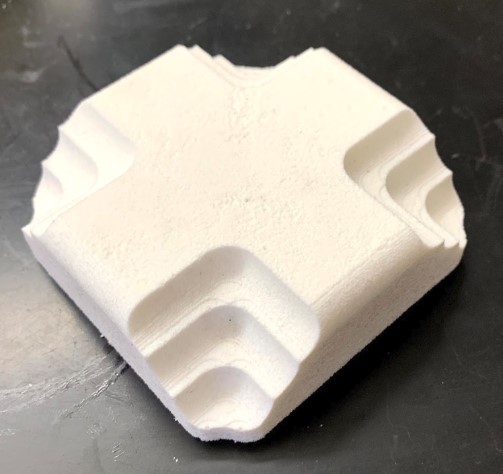
It went really well. Once the cut finished up, I took it off of the cutting bed and cut off some of the excess material around the edges, then I used our shopvac to get any small excess material out from between the cracks. It looks really good, and now I’m ready to pour my mold.
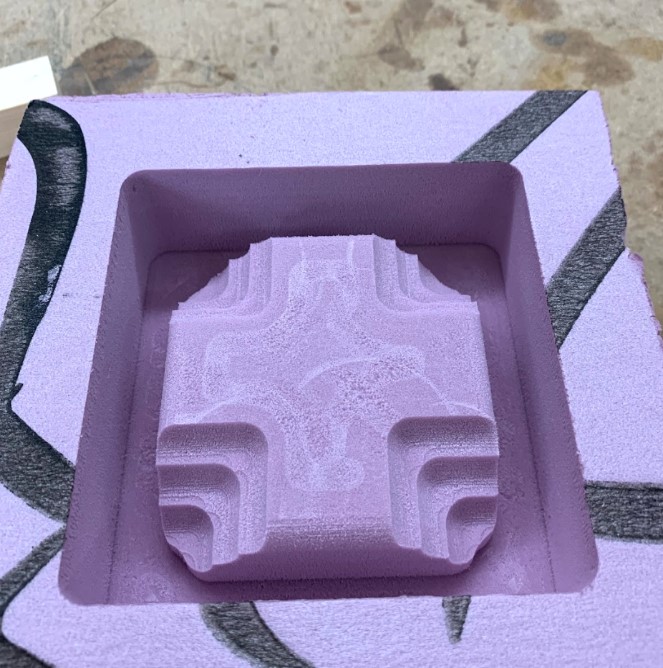
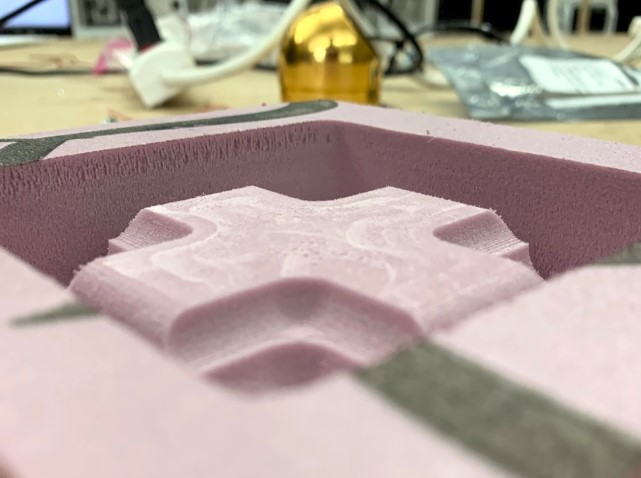
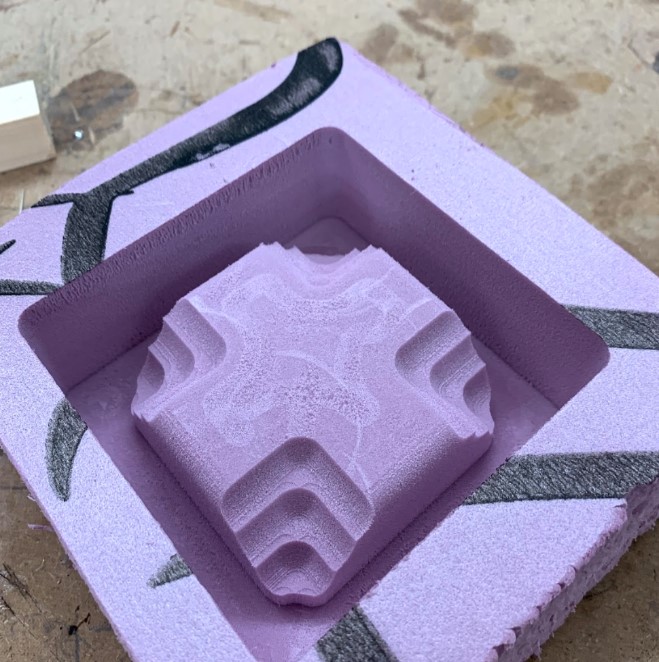
Molding/Casting Attempts
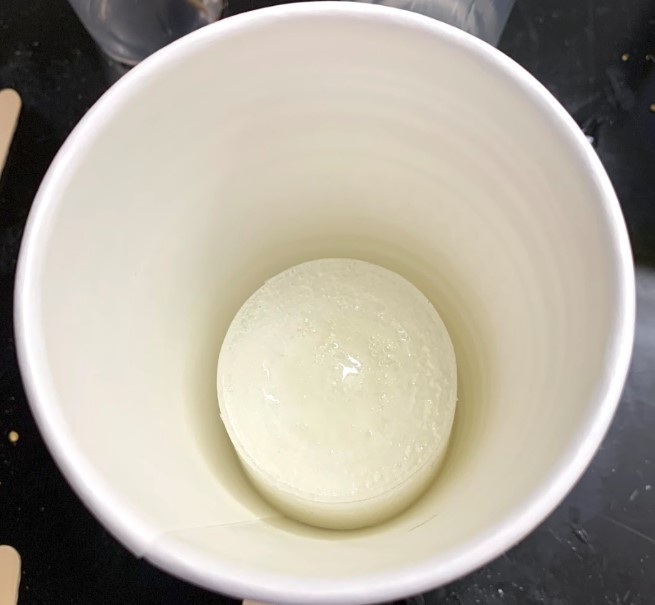
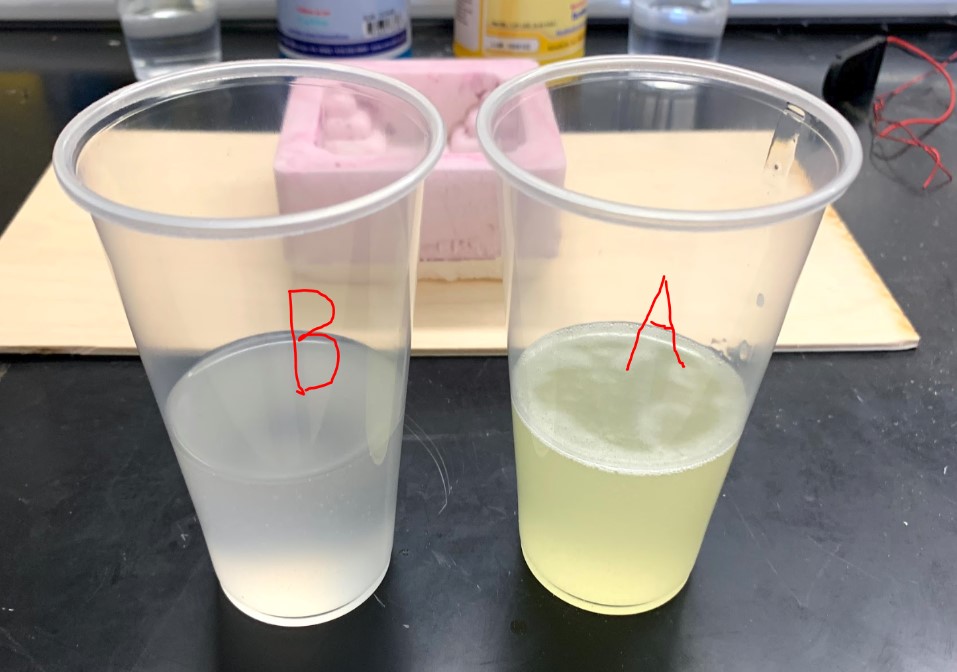
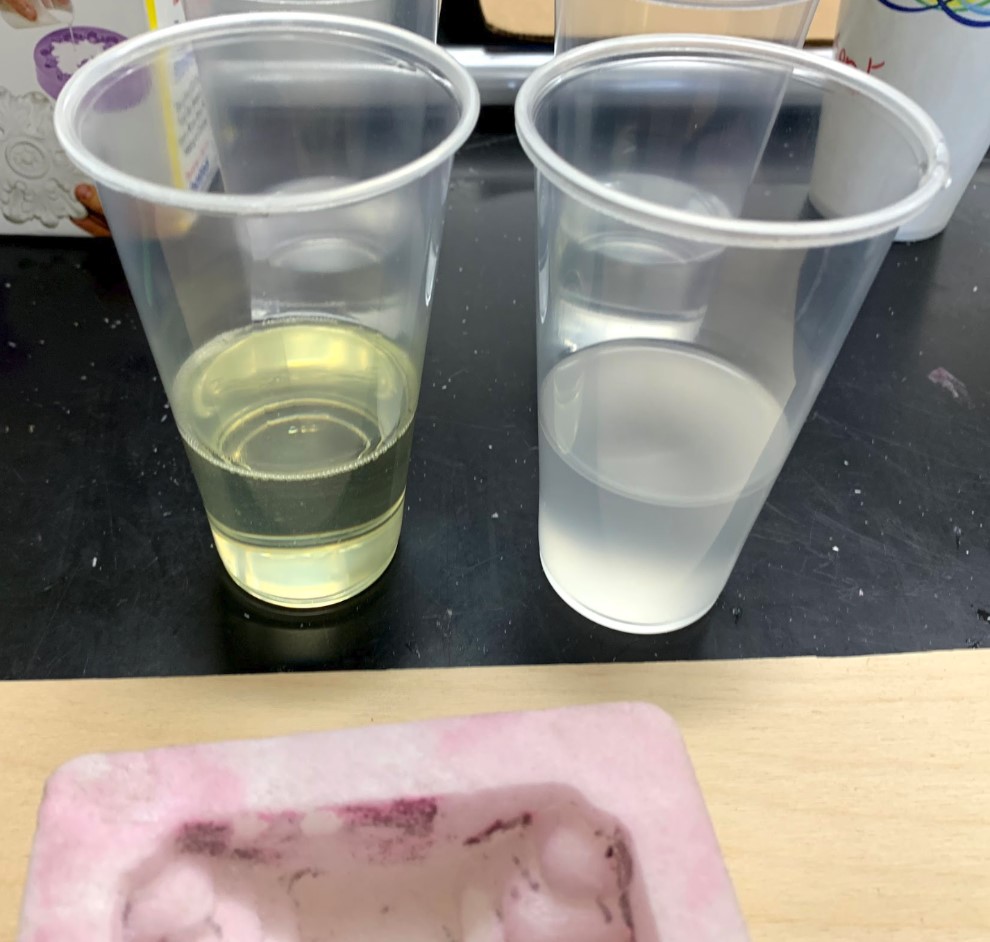
I didn’t want to waste any of the rubber mold material, so I went ahead and measured out how much material I would need by using water. I took my pattern and filled it up to the brim with water in the same way that I will with my rubber mold material when I pour in the real thing. Then, I poured the water that was in there into a clear cup, that way I could physically see how much material I would need to fill up my pattern. Because the rubber material is made of a mixture of two parts, I poured my water into two cups with equal amounts in each to see just how much I would need for part-a and part-b.

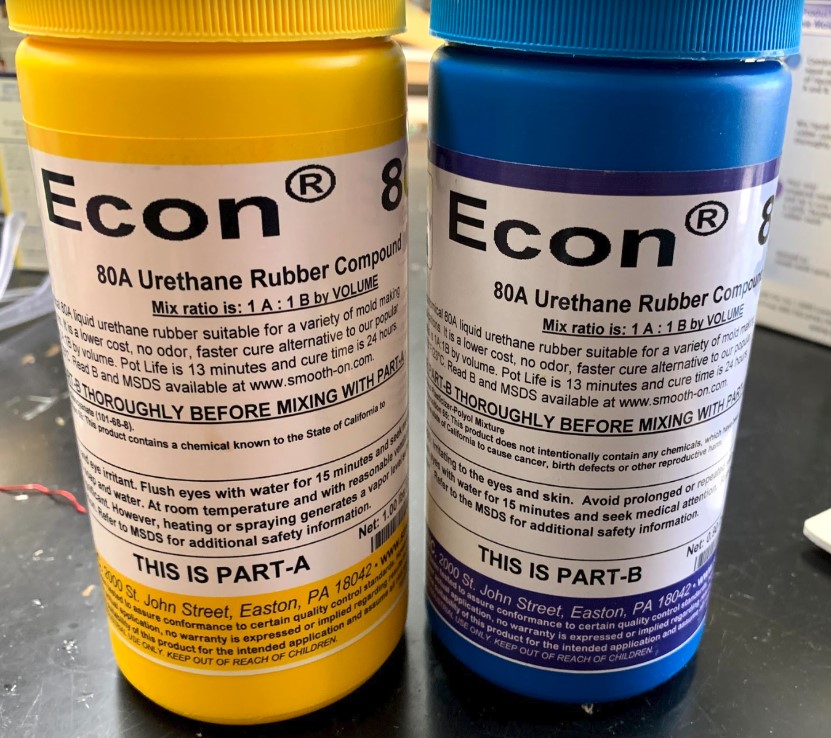
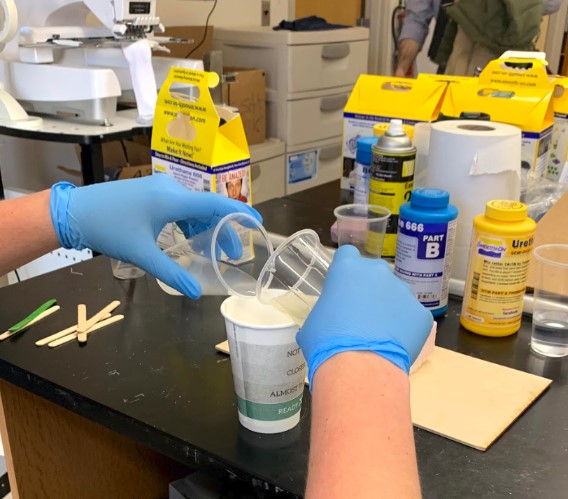
Here is the mold material that I am using to make my rubber mold. It is the 80A Urethane Rubber Compound.
I mixed equal amounts of both part A and part B.

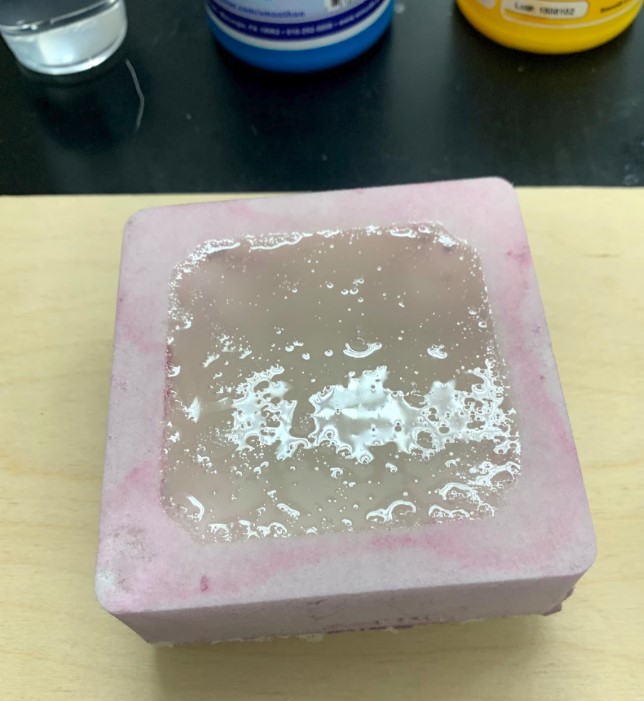
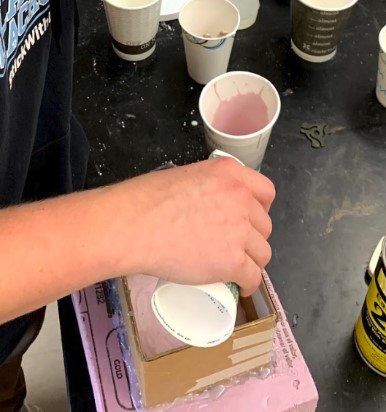
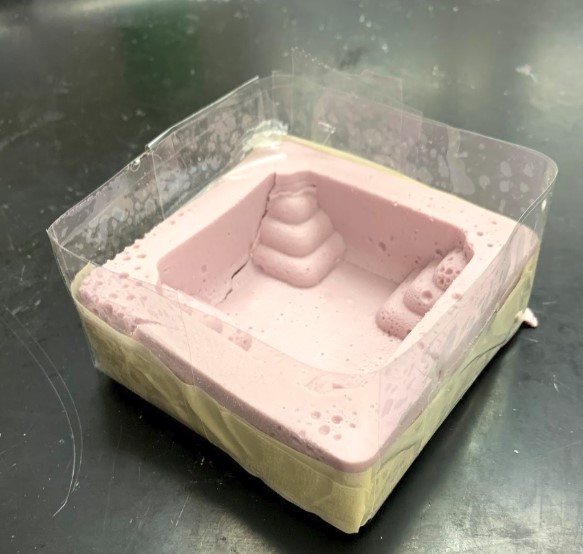
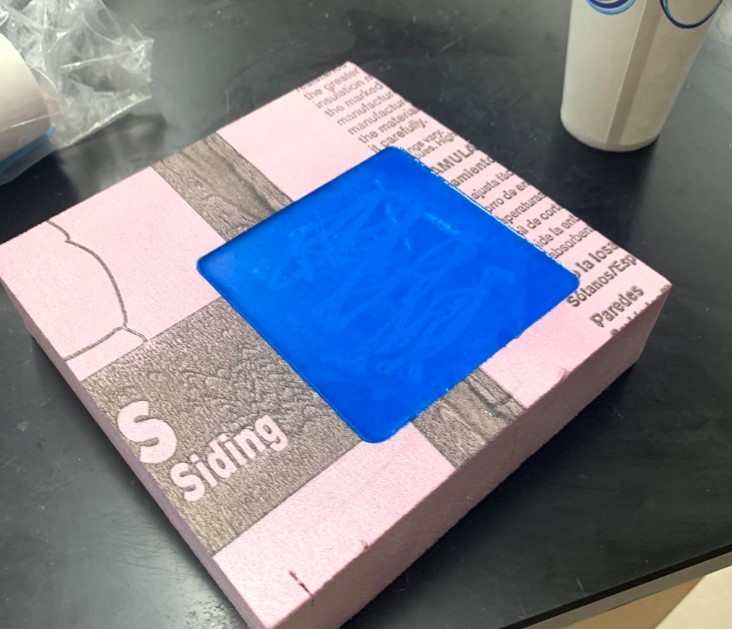
Then once it was ready, I poured it into my pattern.

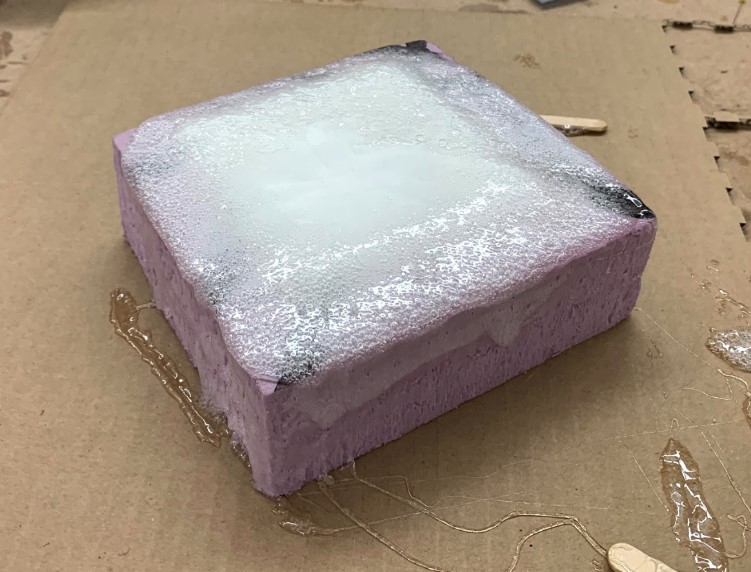
It seemed to be setting well for a little bit, but then I realized that this stuff expands a good bit after being poured. However, the part that expanded out of the pattern was full of bubbles and wouldn’t have been good for casting anyways.
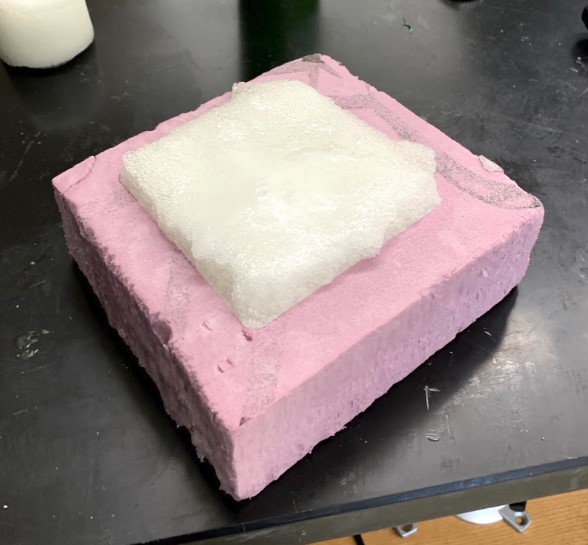
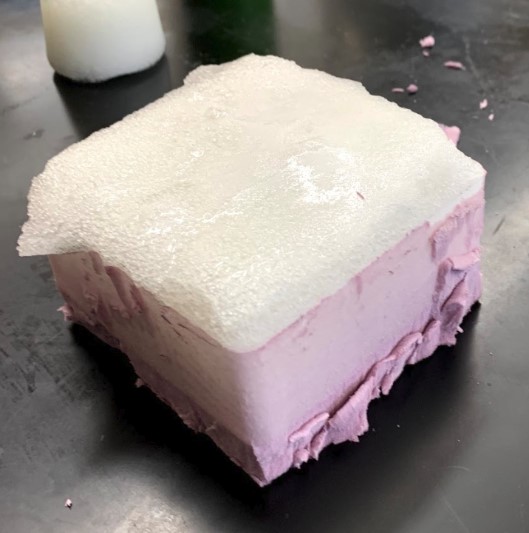
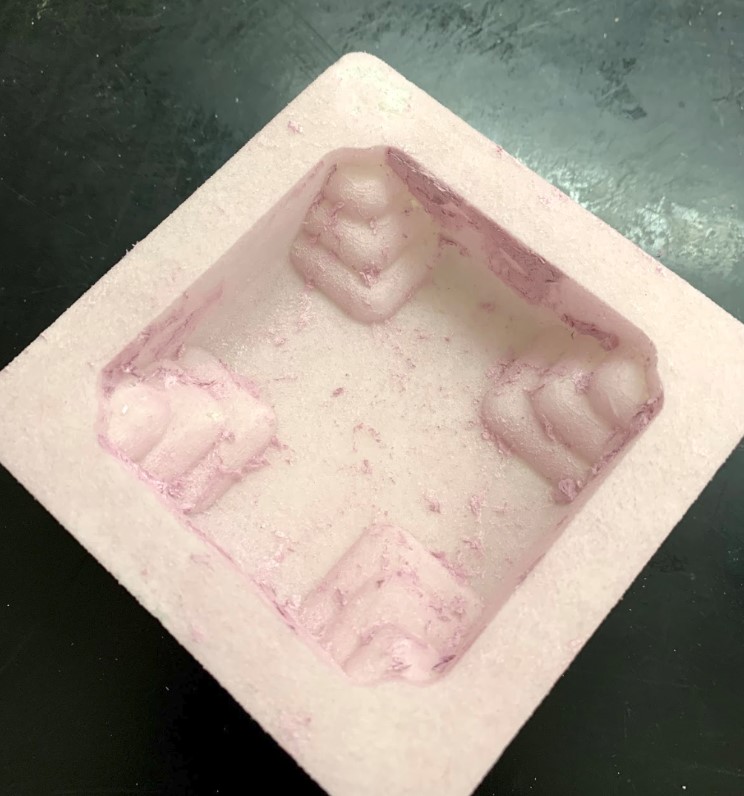
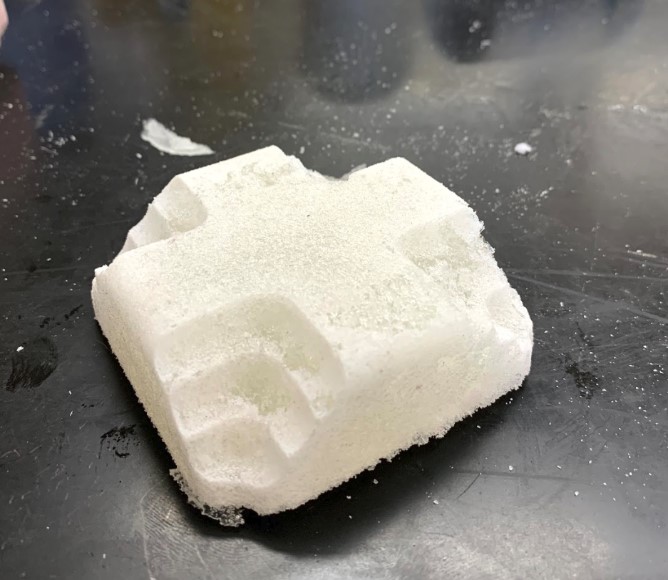
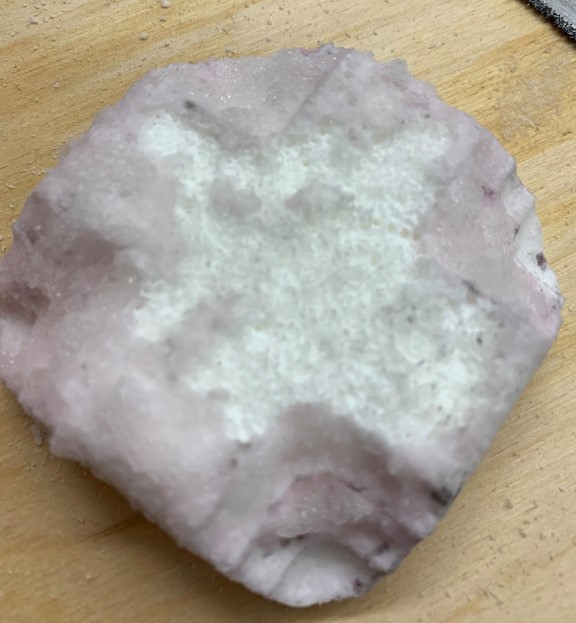
I came back to it the next morning, and after tearing off the extra pieces of bubbly expansion around the edges of my newly made mold, this is what I had.
I think the chemicals inside of the foam insulation must have reacted strangely with the chemicals in my urethane rubber mold compound, because the mold really didn’t want to come out of the pattern. I finally got it out, but I had to destroy the pattern in the process because of how well it was stuck on there.
edit — The molding material I used for this was the Econ 80 from smooth on. It is important to note that this material was well past its shelflife when I tried using it, but I didnt know this at the time. Also, this molding material reacted in a strange way with the inslation foam I used, and I’m not sure if it was due to the inherent properties of the material or if it was just due to the product being out of date. Either way, it is good to know that this material has a chance of reacting with the foam.
Then, I had to tear away all of the foam on the inside.
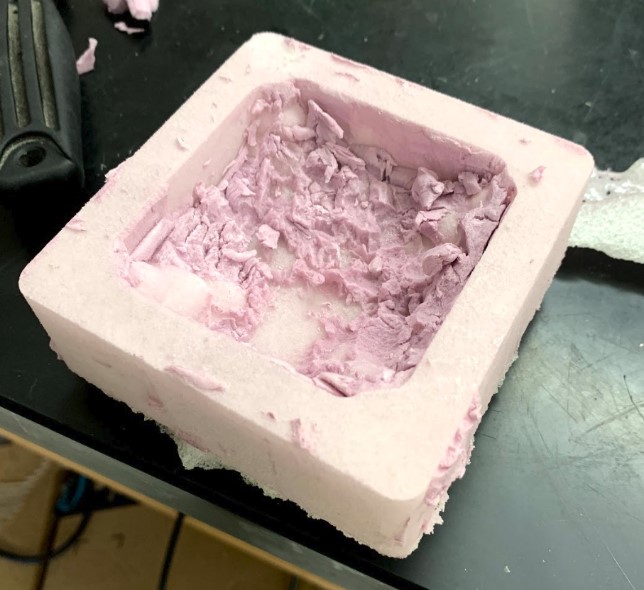
Eventually, though, I had it pretty well cleaned up.
This was just what I could get out by hand, I still had one more idea to get it fully cleared out. I figured that maybe I could use acetone to get the rest of the tiny bits of foam out of there because of how good of a solvent it is. I didn’t want to just dump acetone onto my precious mold without any idea of what could happen, though, because what if it just ate through the mold itself!
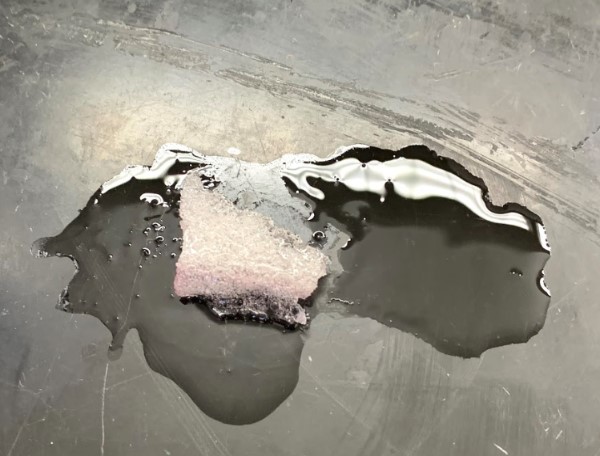
To be sure this wouldn’t turn into a disaster, I did a few tests. I grabbed a small piece of the insulation foam, and I tore off some of the extra bubbly stuff that came out off of my mold, because it’s not important to the actual mold itself. I tried pouring acetone on these two materials individually to see what would happen, and I was glad to see that the acetone dissolves the foam but doesn’t affect my mold at all.


Once I knew it wouldnt destroy my mold, I poured in some acetone and slowly tilted it around all of the edges until it looked like most of the pink stuff was gone, then I kept going for good measure until the acetone itself evaporated.
It came out pretty well, at least it was better than I expected it to be at first when I tried pulling the mold out of my pattern and nothing budged. There are still a few foam remainders on it, and the mold itself looks slightly pinkish, but I think that’s because of how the molding compound reacted with the foam more than anything else.
Now I was ready to start the casting process with my mold. As I’m writing this now, I’m actually letting my third cast dry in my second mold while waiting for the second pattern to cut on the CNC machine. Basically what I mean by that is that this week took me a while to work through, and I had quite a few failures along the way, which is why I needed multiple molds, patterns, and casts.
The material I tried using first was Urethane 666 from Smooth On, a great vendor that we actually get all of our molding and casting products from here in the lab. I read through the safety data sheet first, then I got to work pouring and mixing the two parts. This casting material takes equal parts of A and B by volume.

Then, I poured my two parts together into one larger cup and began stirring them for about five minutes until it seemed to be thoroughly mixed into one homogenous material.
Then I poured it into my mold and waited the estimated 45 minutes for it to harden.
After a while, this stuff started to bubble up on the top in a similar manner to how my mold material did, but just not nearly as much this time.
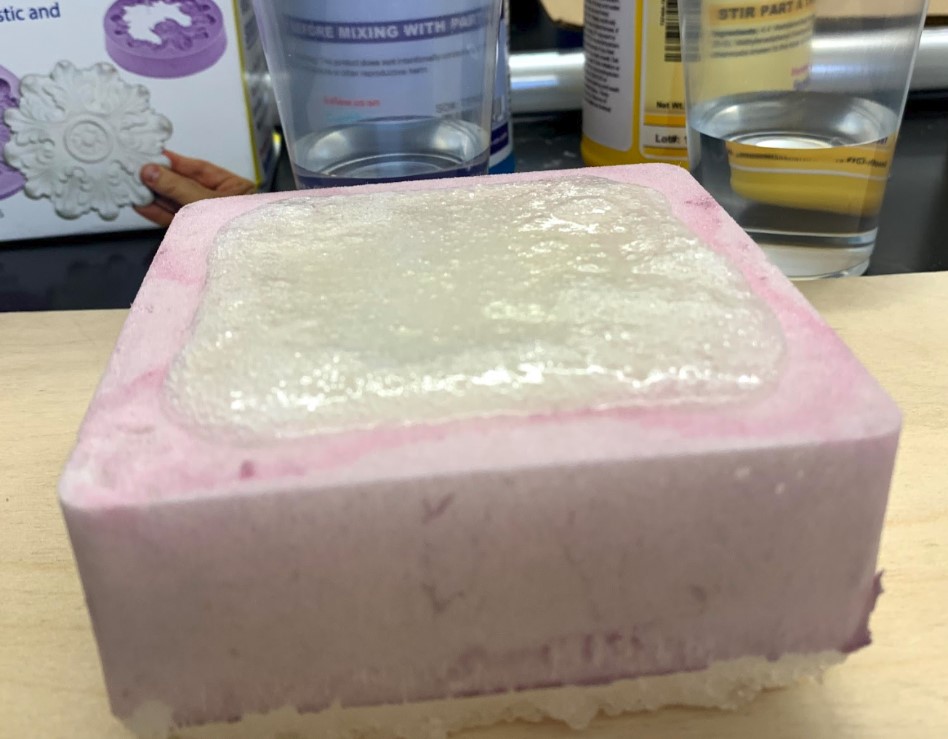
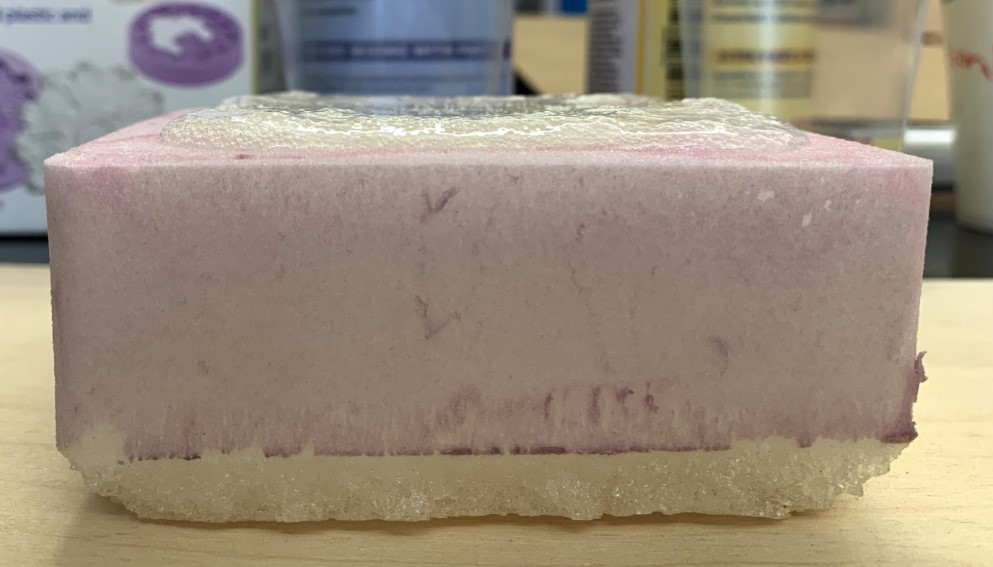
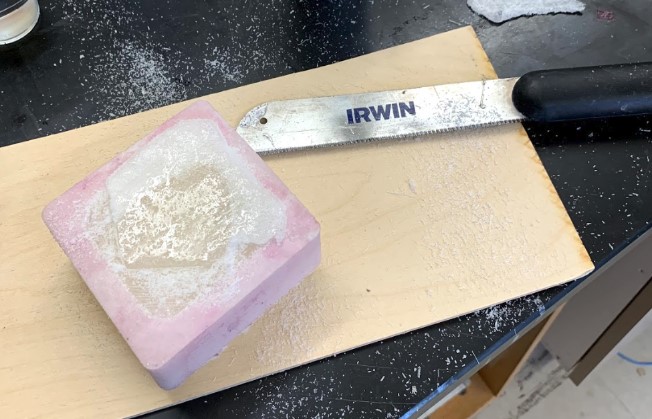
I didn’t want the four feet of my table to be all bumpy and bubbly, so I used a special saw that’s meant to cut something flush with a flat surface to get the extra stuff off of the top after it cured.
I got my cast out, aaaand it was pretty much a failure. At this point I’ve determined that the materials I was using to make the cast were expired, but at the time I really had no idea what caused it to look so bad. The rubber was full of air bubbles everywhere, and it was starting to flake off in some areas.

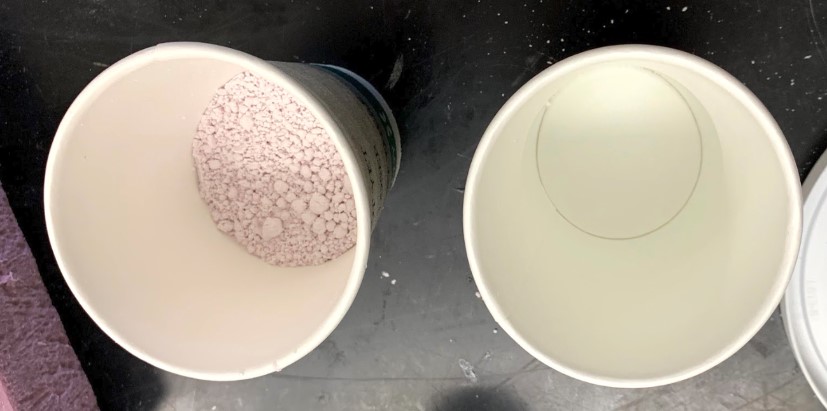
I decided to try using a different material. This time I went for a smoother, hard white plastic that other people in the lab had used before. This was the Smooth Cast 305 from Smooth on. Because of all the good reviews it had from my other labmates, I figured that it was my best chance at getting a good result when I did another cast. Like before, this material is mixed with equal parts A and B, so I got my volumes measured out.
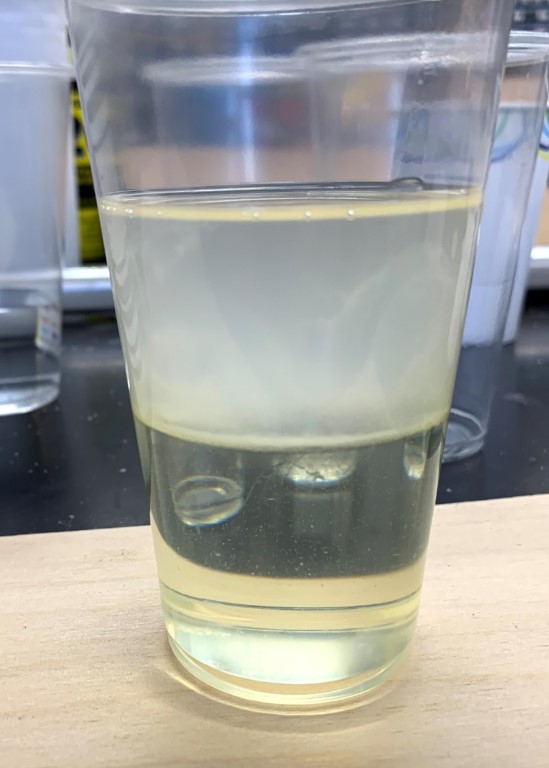
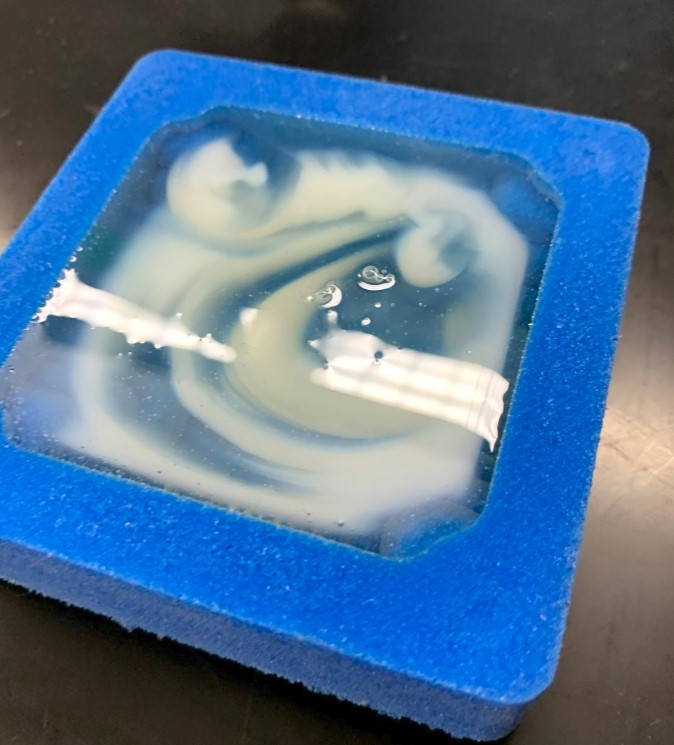
It was actually pretty cool what happened when I poured them both in. Due to the two liquids having different densities, one of them floated right on top of the other before I began stirring and mixing the two together.
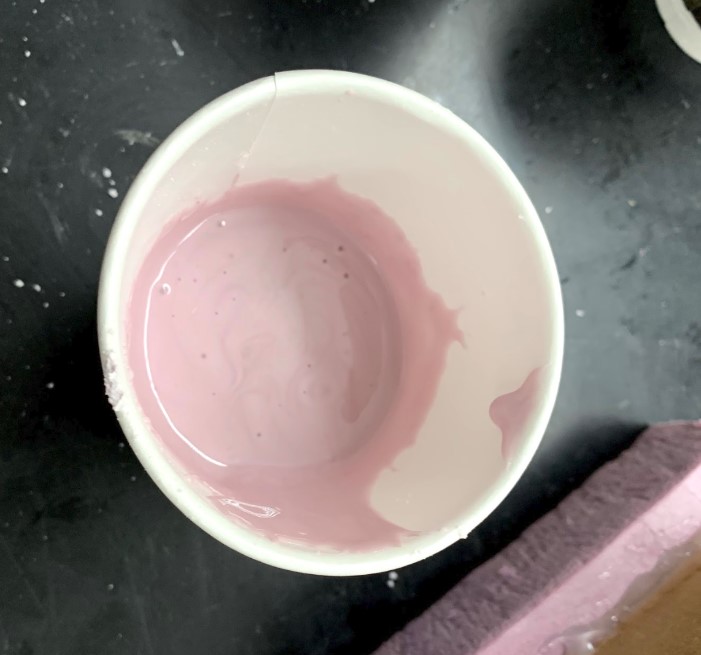
I mixed them up and then I poured the material into my mold.
Eventually it started getting more and more opaque and the bubbles started to form…

The material kept rising, but rather than just spilling out over the sides as it had before, it actually stayed within the shape of the walls of the mold.

I used that flat saw from earlier again to get all of the buildup off of the cast piece.

When I tried taking the cast out, though, it tore the mold because it had adhered to the walls of the mold somehow even after I had used an adequate amount of mold release spray.
This was really annoying, especially because now I didn’t have a mold to make all of my sub-par casts in. Regardless, here is the cast that I got out of it after cleaning it up as much as I could by tearing off any of my mold that I could that was still stuck on there.
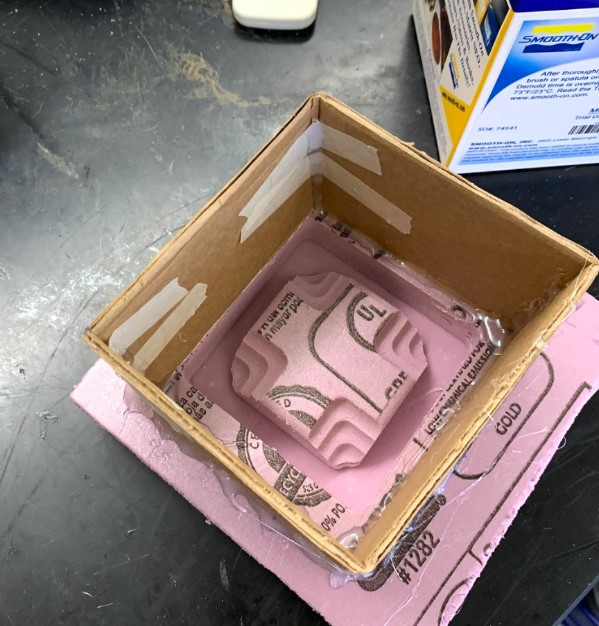
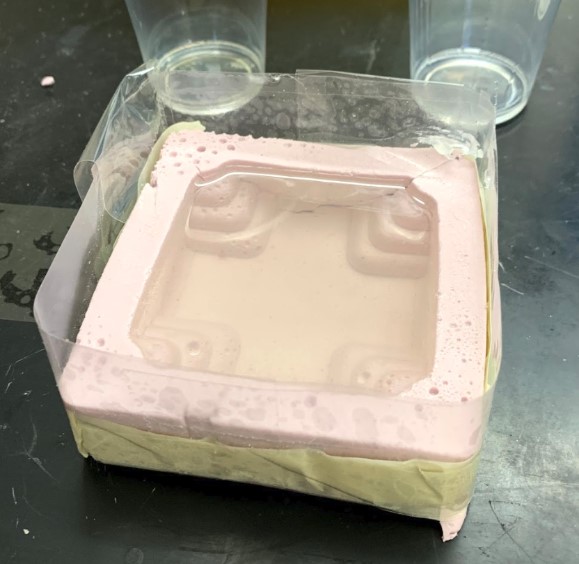
I didn’t really know where to go from here until I remembered that I had the other pattern from before with the really low walls. Originally I didn’t want to use it because the sides were the same height as my cast piece itself, so there wouldn’t be any way for the mold to form a solid bottom. However, in my time of need I just decided to go for it and I built up walls around it with cardboard, then I hot glued all of the possible openings where my casting material could leake out around it.
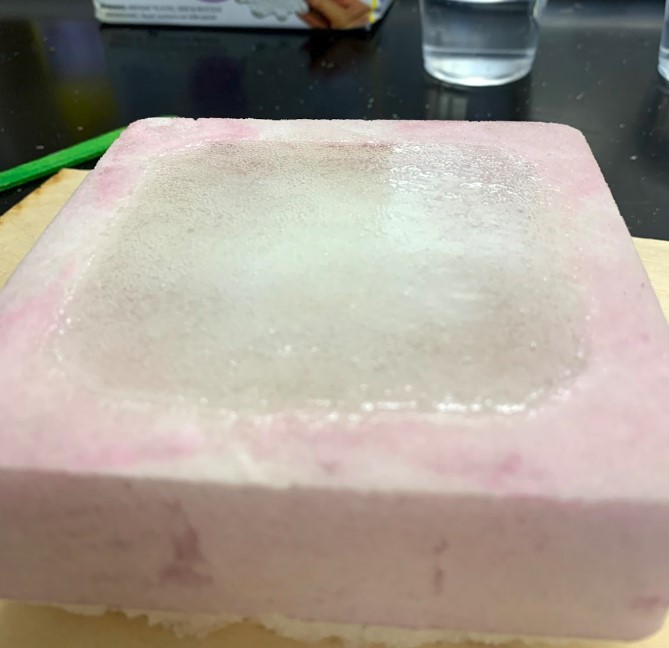
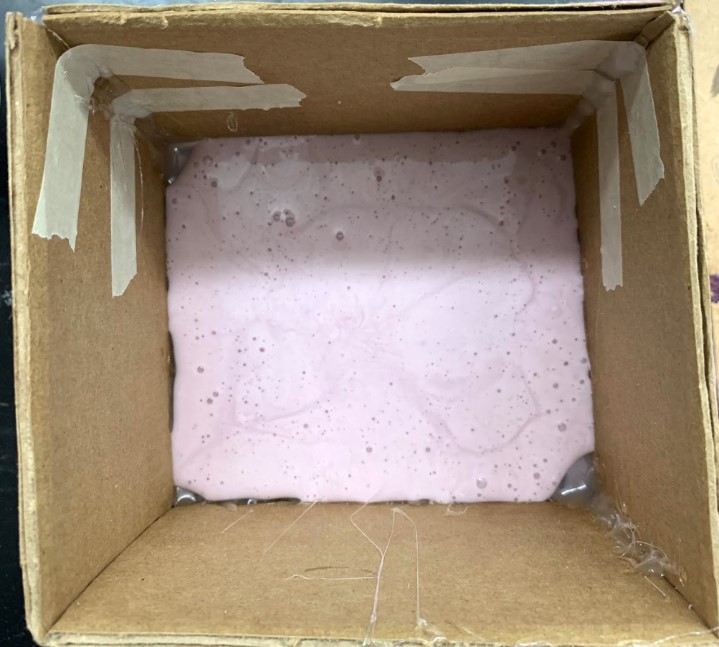
I didn’t want to use the same mold material that I did before because of how it bonded with the foam and stuck to the walls, so this time I used a different molding material that’s mainly powder based, and as an added bonus it’s totally skin safe at any step throughout the process. I measured out equal amounts of the mold powder and water because it needed to be mixed in a 1 to 1 ratio.
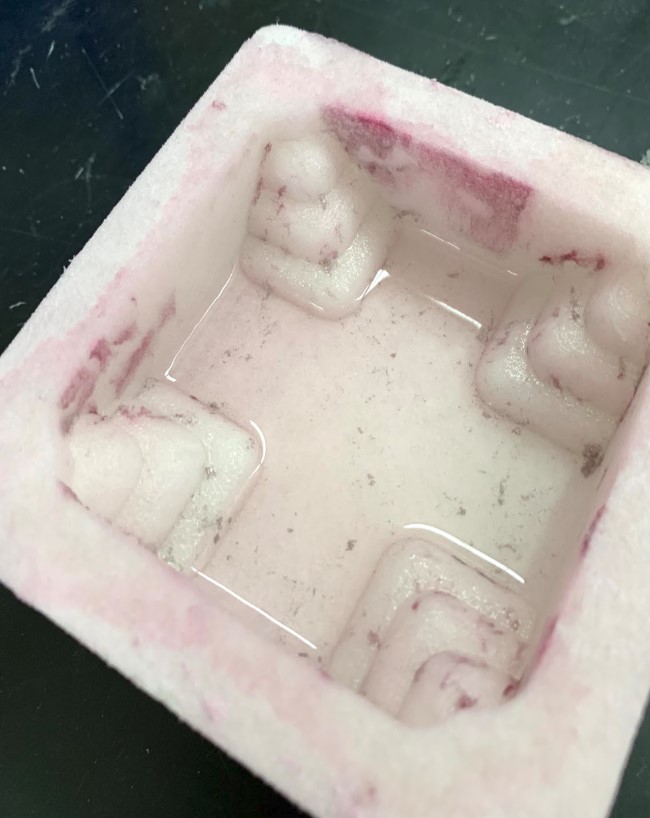
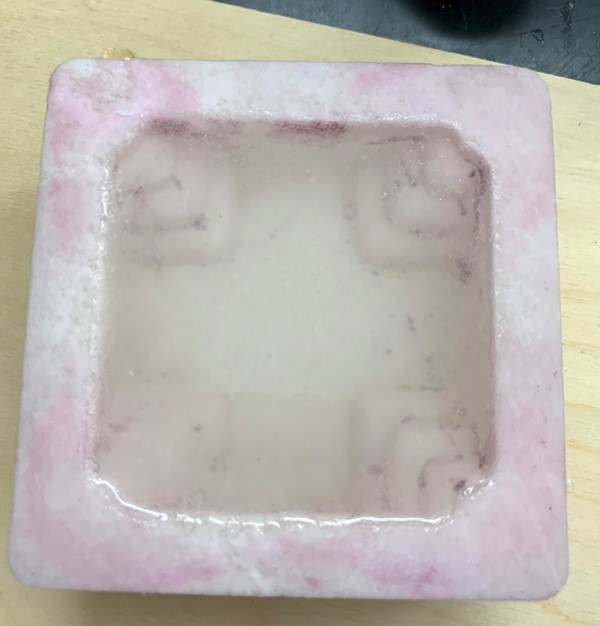
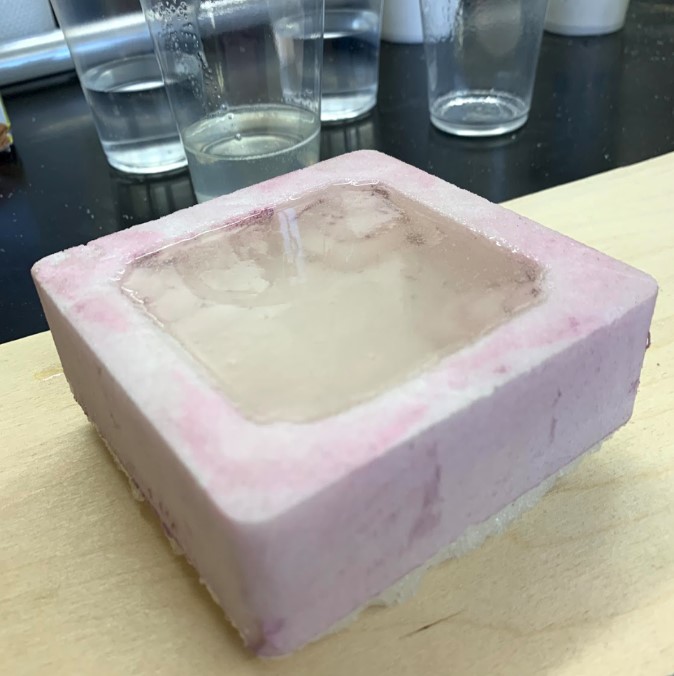
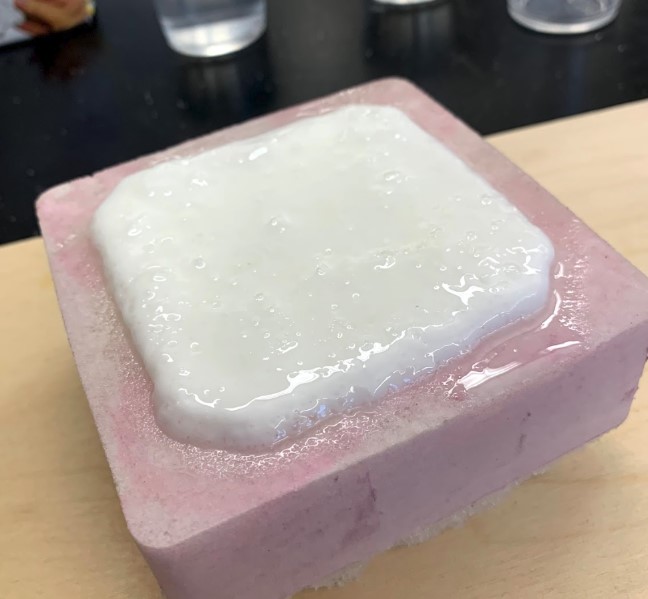
Then I poured my material into the pattern.
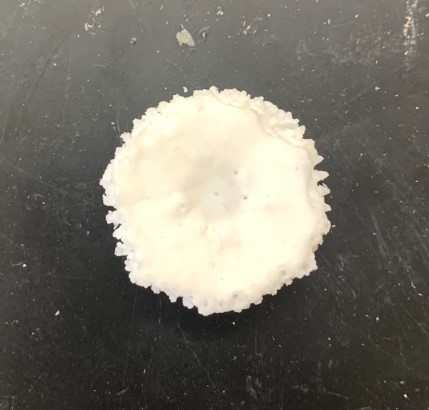
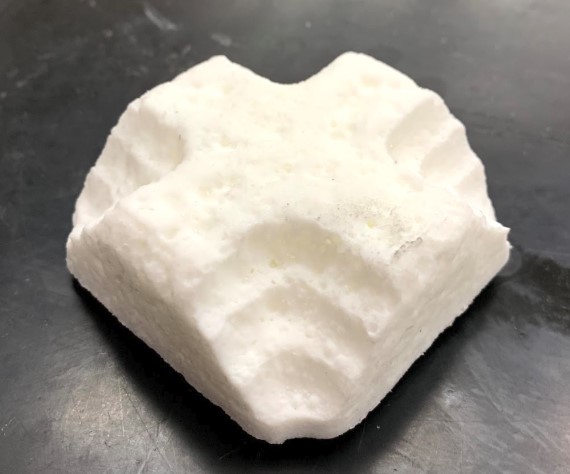
I let it cure overnight, and when I came back to it I started trying to take it out. The first corner I tried lifting up tore off almost immediately, though, which wasn’t the best sign.
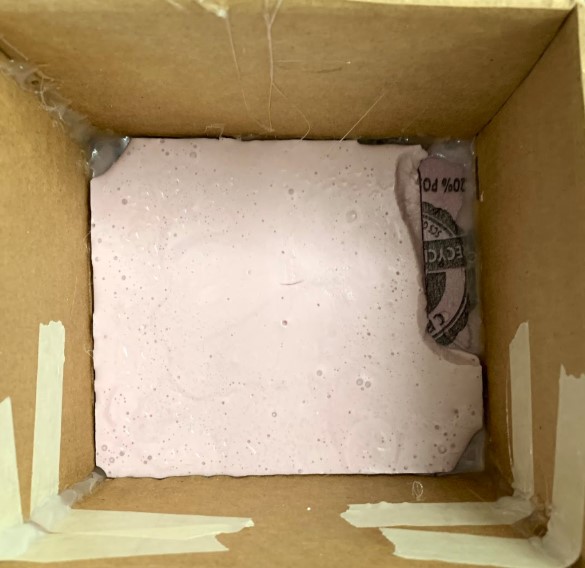
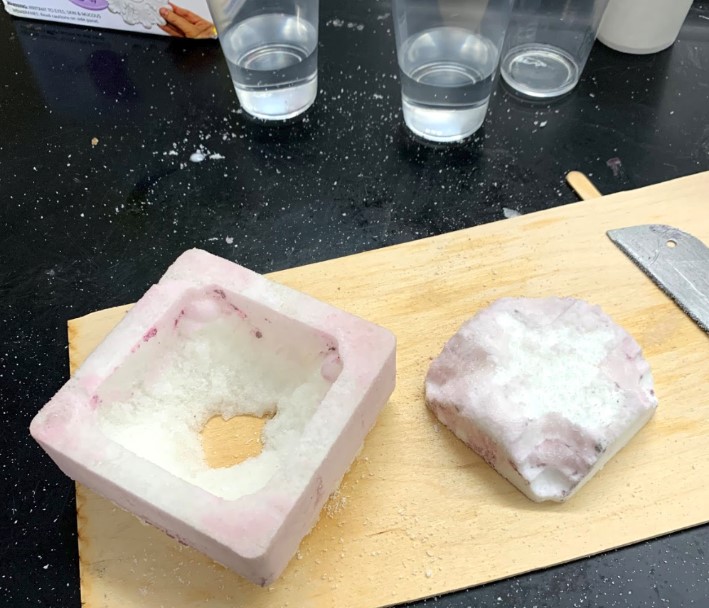
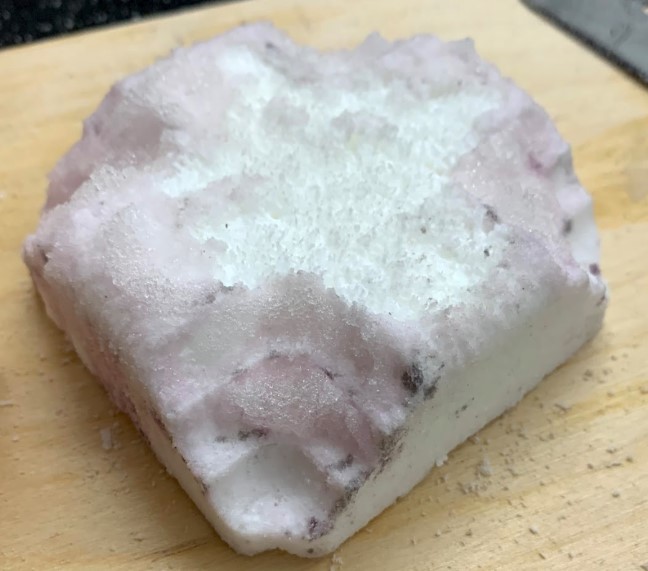
I took the cardboard off from around the sides, and this somehow managed to tear off even more of the molds edges. The center remained intact, though, which is all that was important at the time.
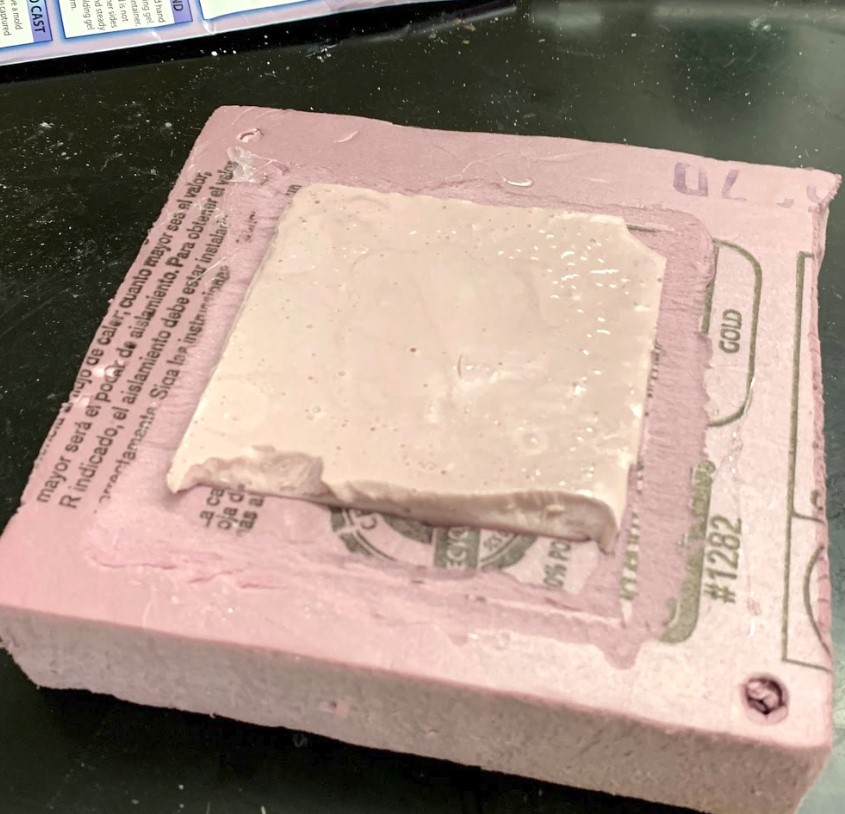
I was eventually able to work the mold out of the foam, but even though I was being as careful as possible, one of the walls ripped.


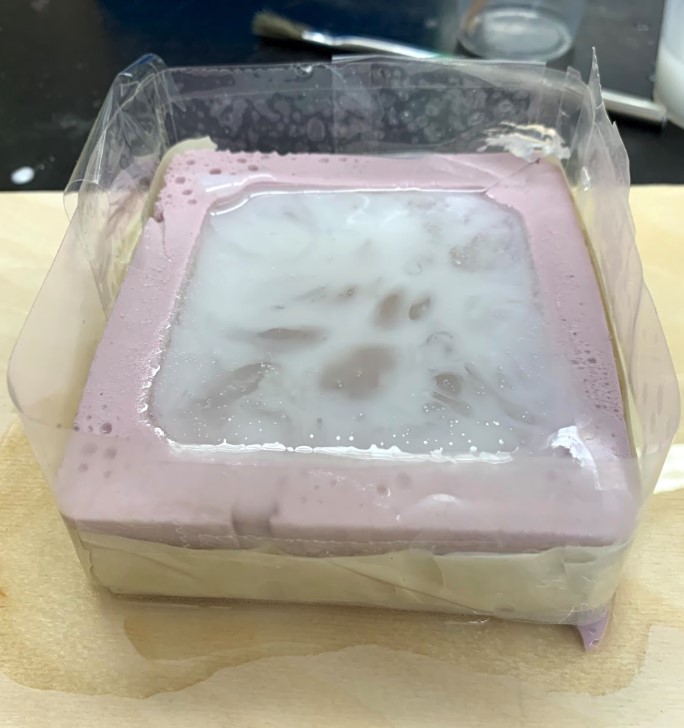
I thought that maybe I could still make it work, even with the ripped wall. I tried taping the outside of the mold to hold it together, and even though the tape wouldn’t stick to the mold it did stick to itself, so I just used a long piece and wrapped it around a bunch. Then, to try to keep anything from leaking out, I used masking tape on the bottom of it. After taping it all up this is what I had.
I used the Smooth Cast 305 casting compound again for this mold that I had tried to use previously to make my other cast. I mixed up both parts just like before, then I poured it in and watched as it ever so slowly leaked out from the sides, my tape must not have been very secure…
However, it wasn’t enough to be all that big of a deal, so I slid my mold onto a spare piece of plywood and let it cure. Eventually, the casting material started to harden.
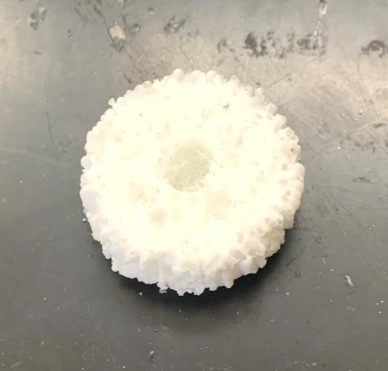
Somehow, the bubble filled cast that I got out of it was my best one yet. It still had way to many bubbles and other deformations, but at least there was some definition to the edges of the shape where there had barely been any before.
Molding/Casting Success
Back to the drawing board. I wasn’t really happy with the quality of either the mold or the cast in that situation, and I was all out of usable foam patterns at that point, so I had to make another pattern on the CNC machine. I did the same thing again to cut it out by taping it down, zeroing the axes, and getting the cut done. I’ve already explained this whole process previously so I won’t include more of the same thing here.
This time I used a molding material that was literally bought that same day, and I remembered the mold release, so hopefully it will come out nicely. The molding material I used was the Mold Star 30 from Smooth On. Here are some pictures of my work along the way as I mixed and poured the mold material.


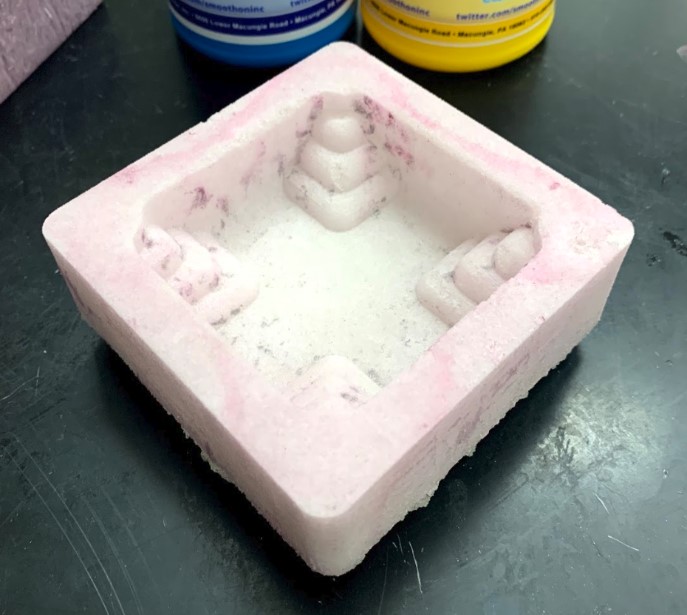
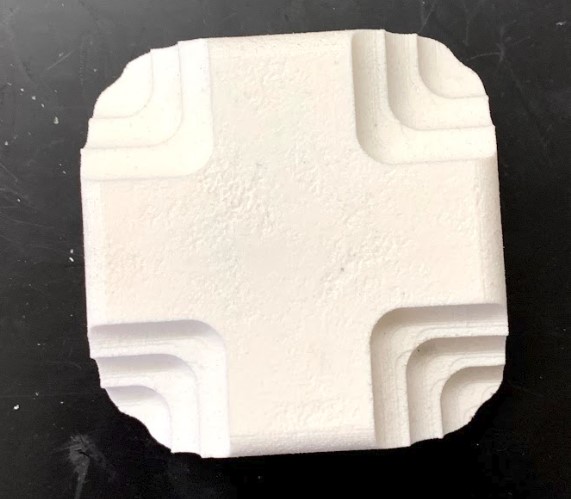
When I came back the next morning, my mold was already cured so I took it out of the foam. It looked much better this time. There weren’t any noticeable air bubbles at all, and it seems like the surface of the insulation foam gave it a slightly fuzzy or velvety feel.
Now, I’m ready to pour in a few casts and wrap up this week. I started by getting even amounts of my casting material, the Smooth Cast 300 from Smooth on, mixing it, and then pouring it into my mold after spraying on some mold release.
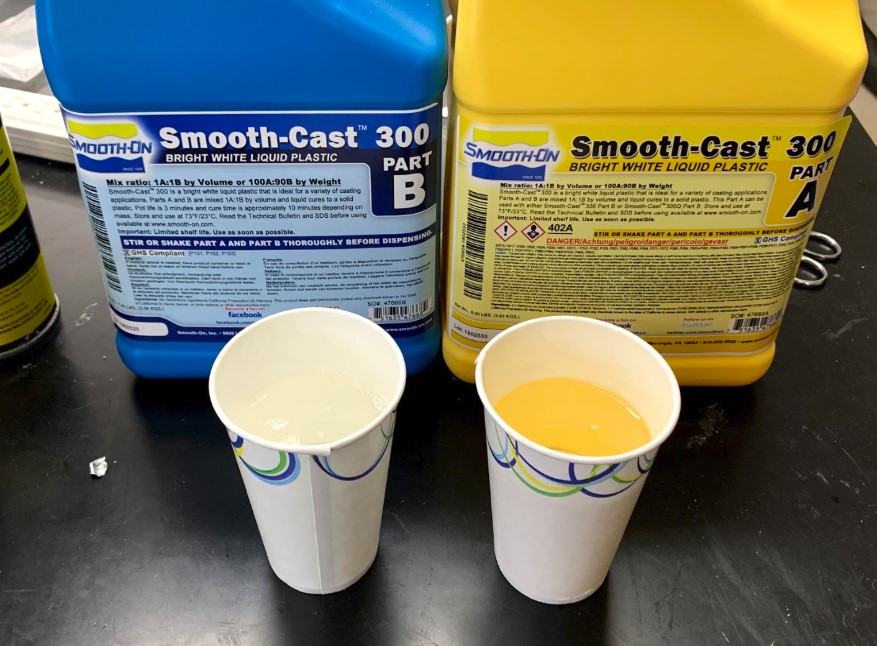
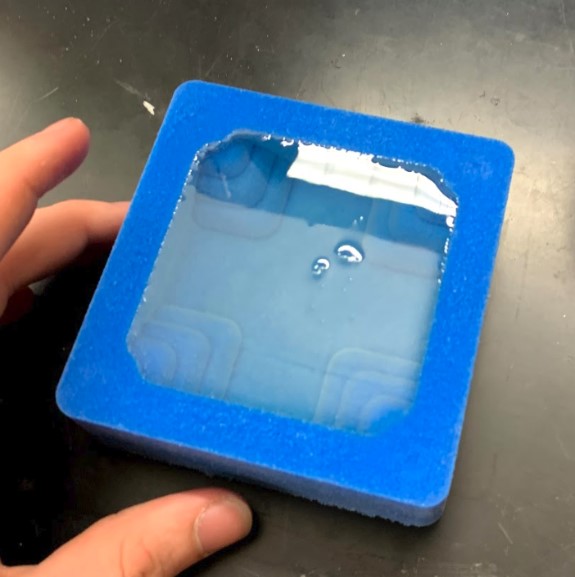
This material cures much faster than the casting material I tried using before. I only had to wait about three minutes to see it change color to the white shiny look that the box promised. Overall it had to cure for ten minutes.
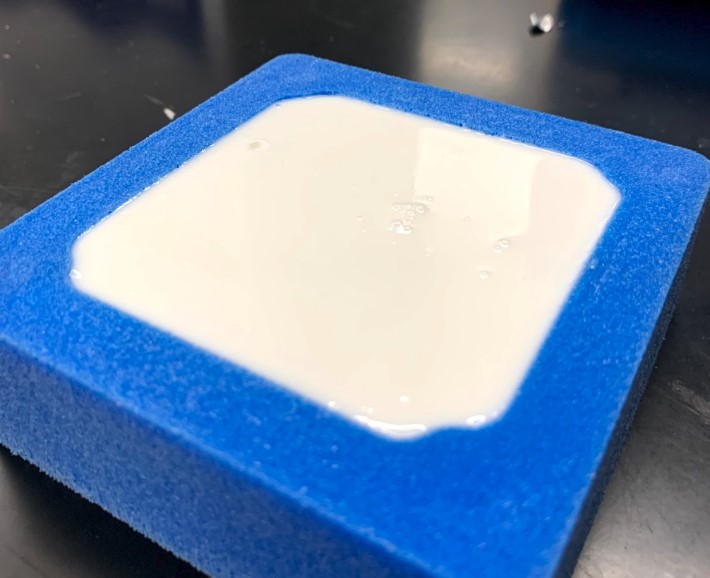
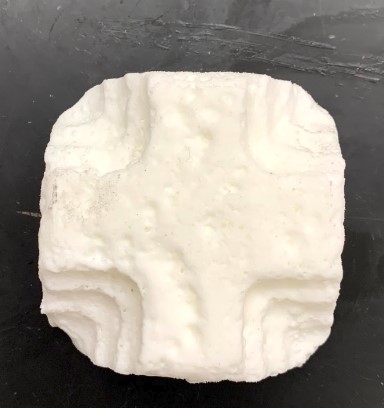
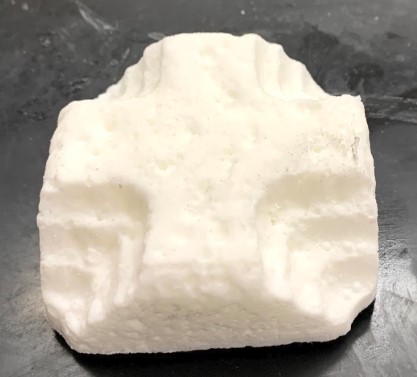
Once it was done, I took my cast out and was very happy to see that this time, it looked great!
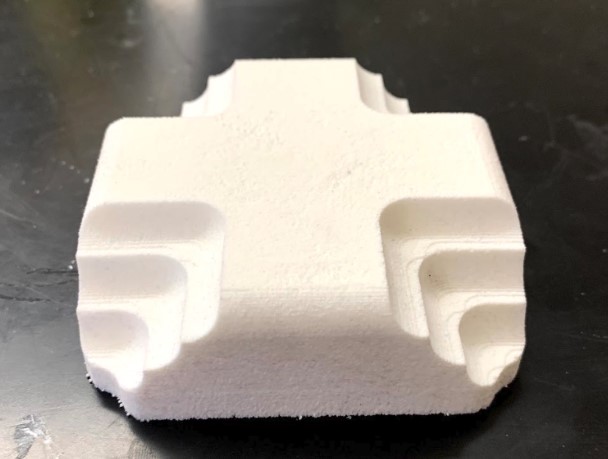
I went ahead and made the other three pieces with the same mold and casting materials. At one point, I caught a picture of the cast right as it was starting to harden up. It goes from liquid to mostly solid in about four seconds.
I got the other three made, and they all came out looking great. Now that I have all four casts made, I’m officially done for this week.
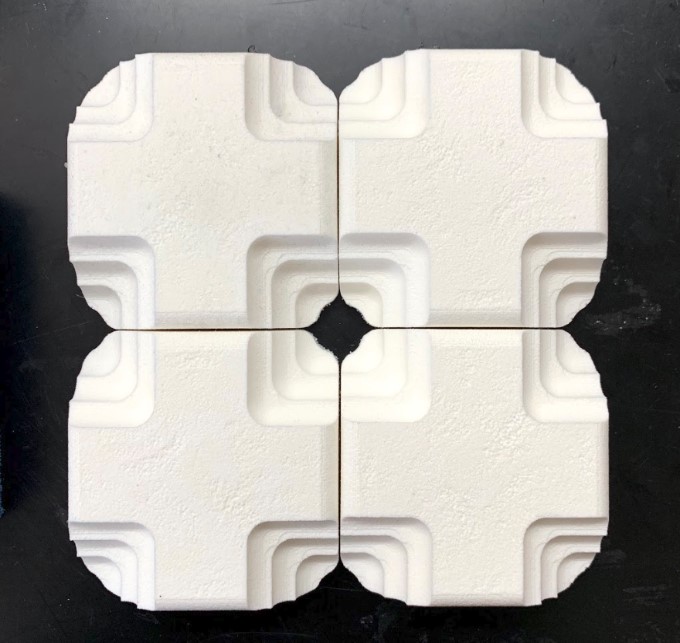
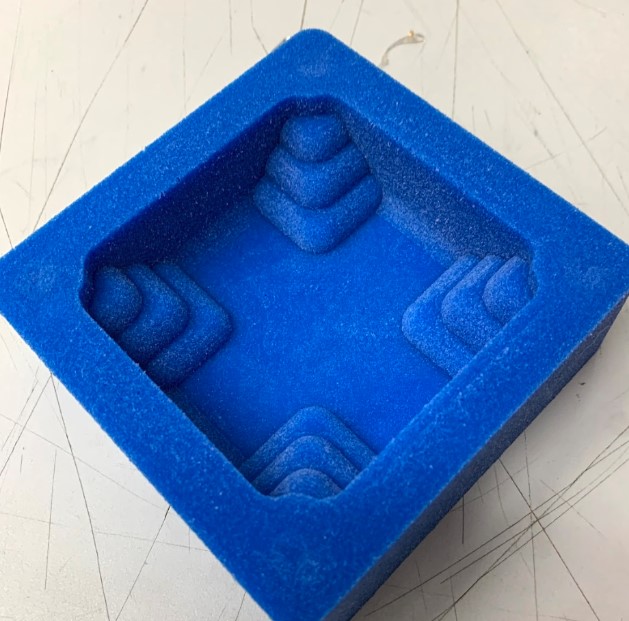
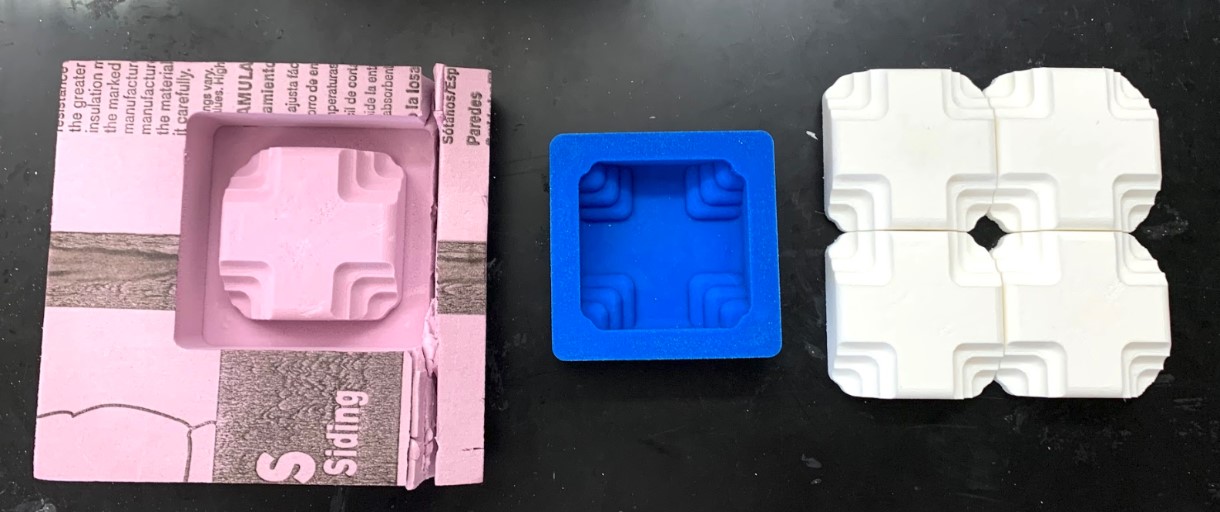
The picture below shows all three of the main steps in my molding process. From left to right there is my original foam pattern that I cut on our CNC, my blue rubber mold that I made from the foam pattern, and all four of my casts that I made in my mold.
Here are all of my files from this week.