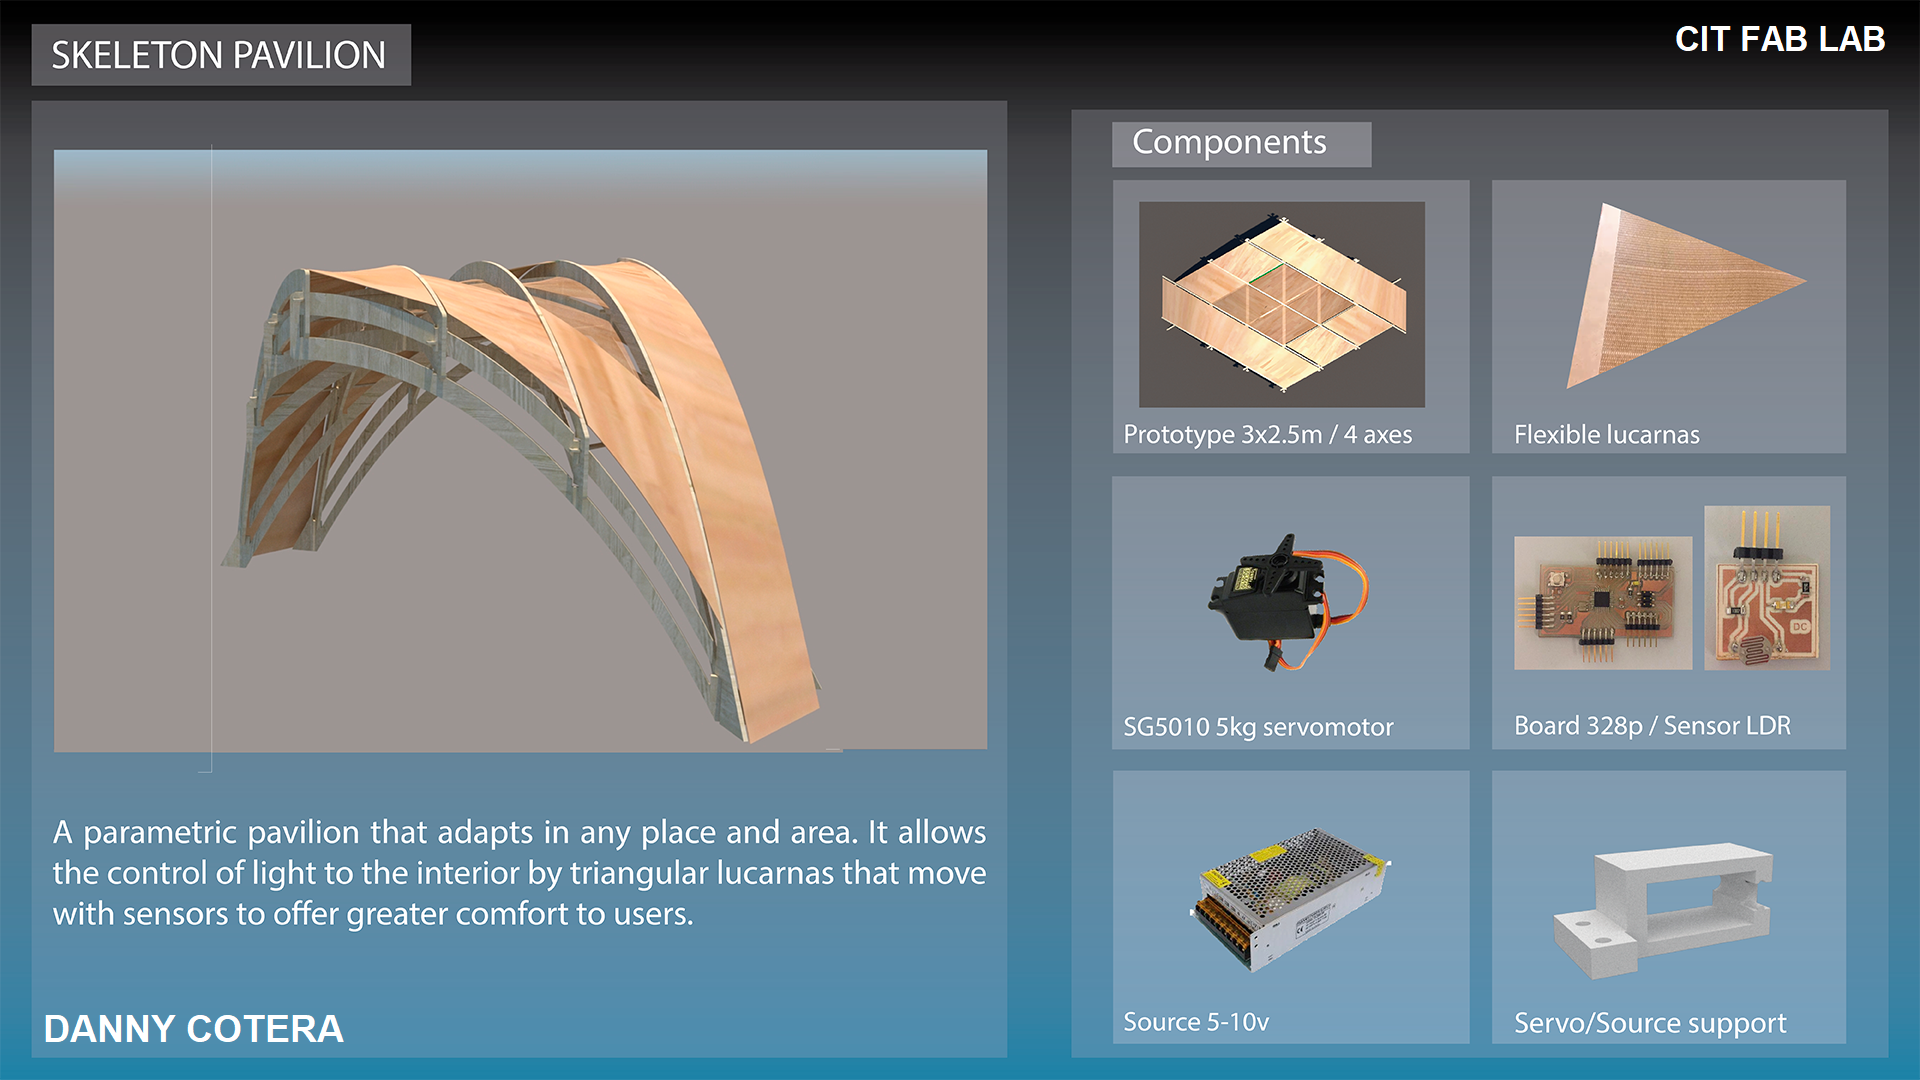
Final Project
Idea
Design 2D & 3D
To generate the design of the structure of the pavilion I will opt for the use of the catenary, since it is an ideal curve that is subjected to a uniform gravitational field. This geometry will help to minimize the load weight produced by the materials to be used.
When increasing the height of the catenary this does not vary in the structural behavior, which would happen in the geometry of the parabola.
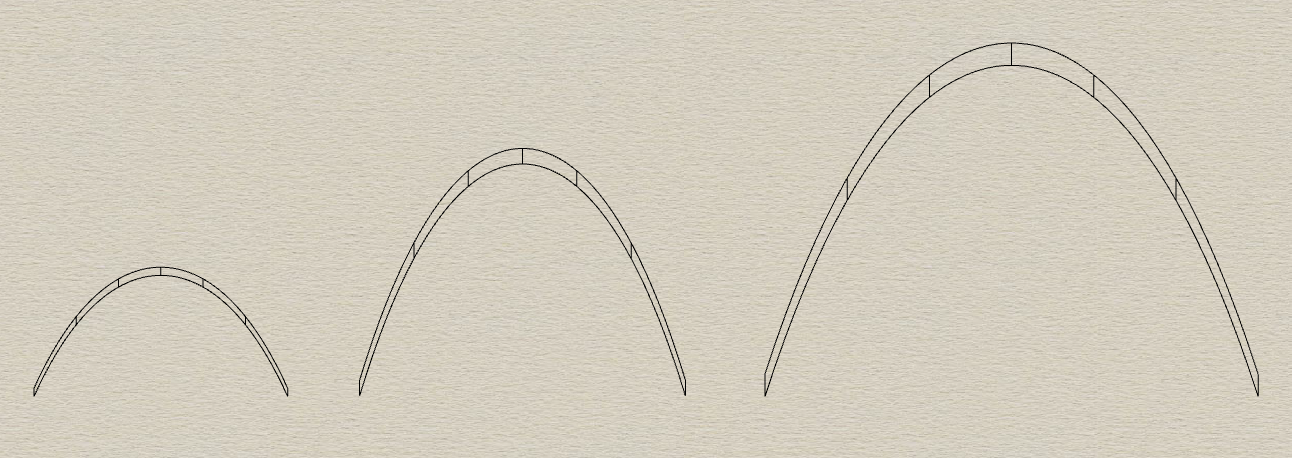 Fig.02 - Catenary
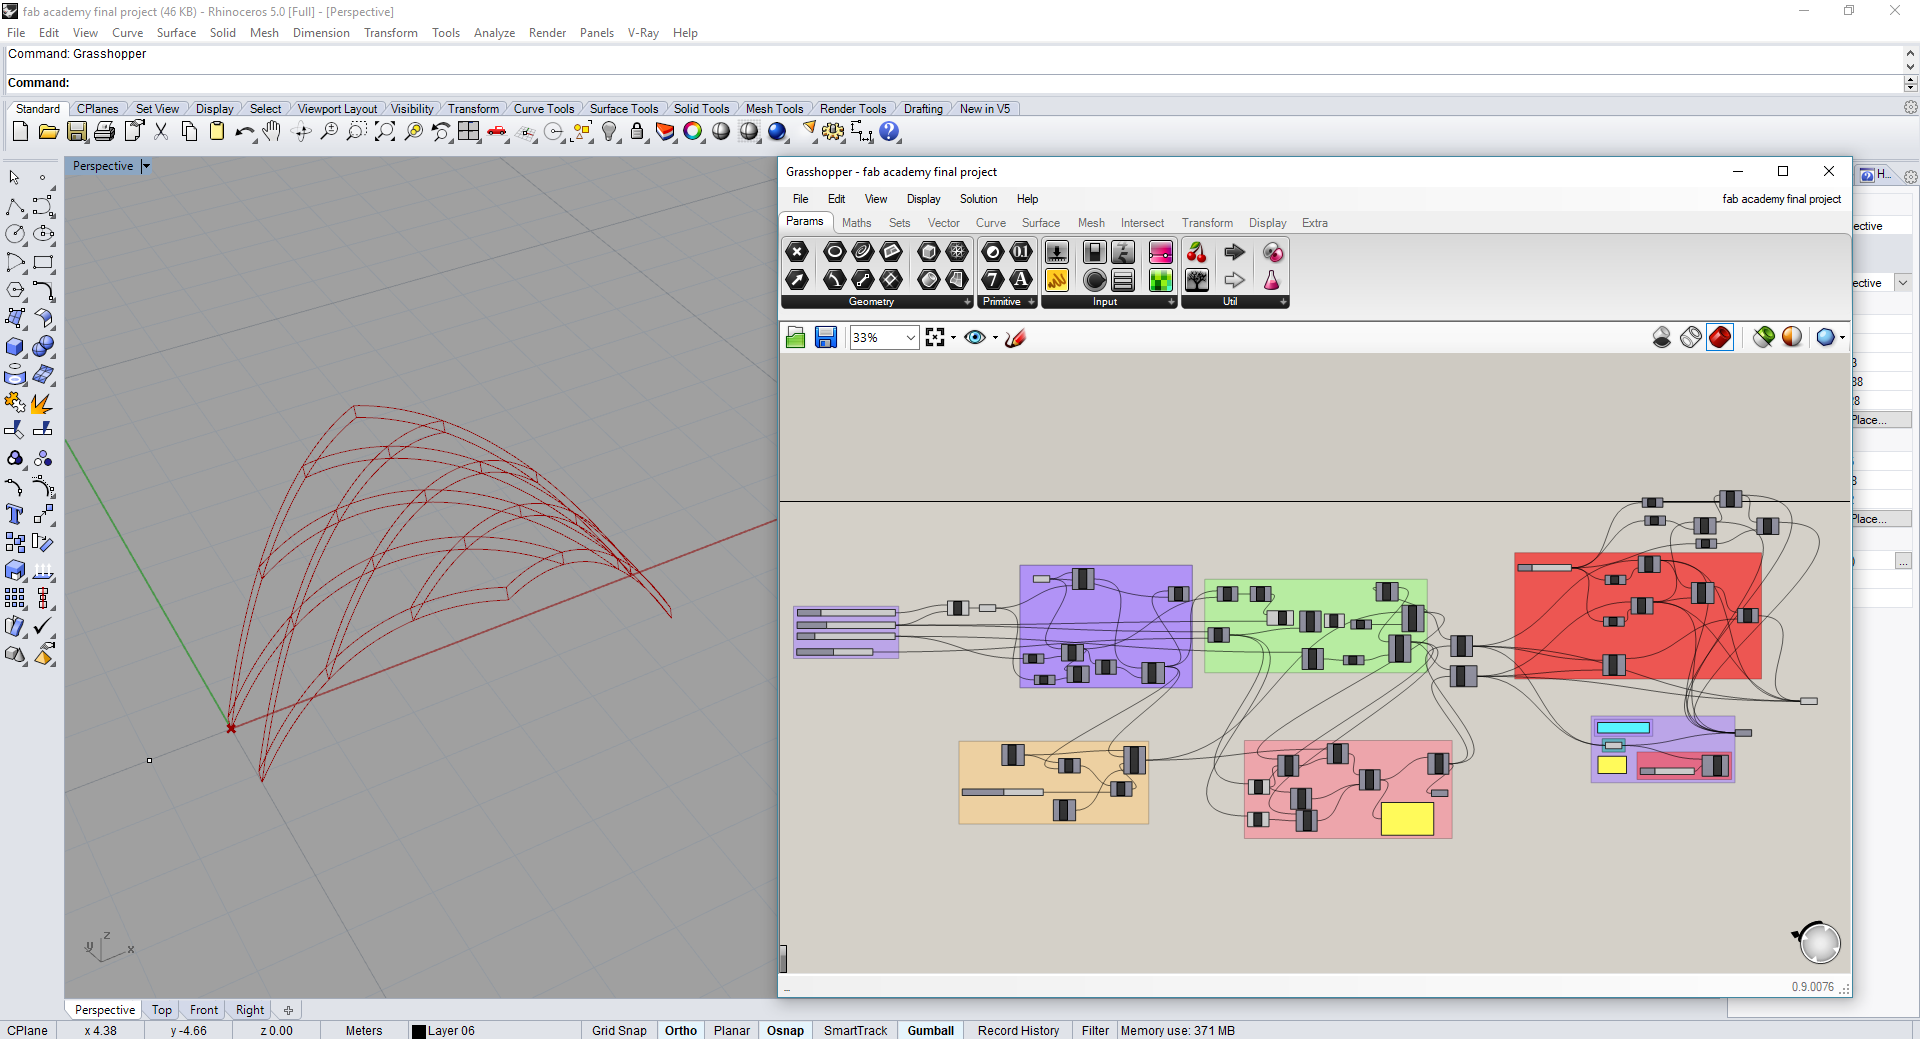
 After a few days, I managed to define the geometry in grasshopper. The parameters in principle were to be area by height; However, the initial idea is to generate the union of several pieces so that one can build the pavilion without the help of industrial machinery.
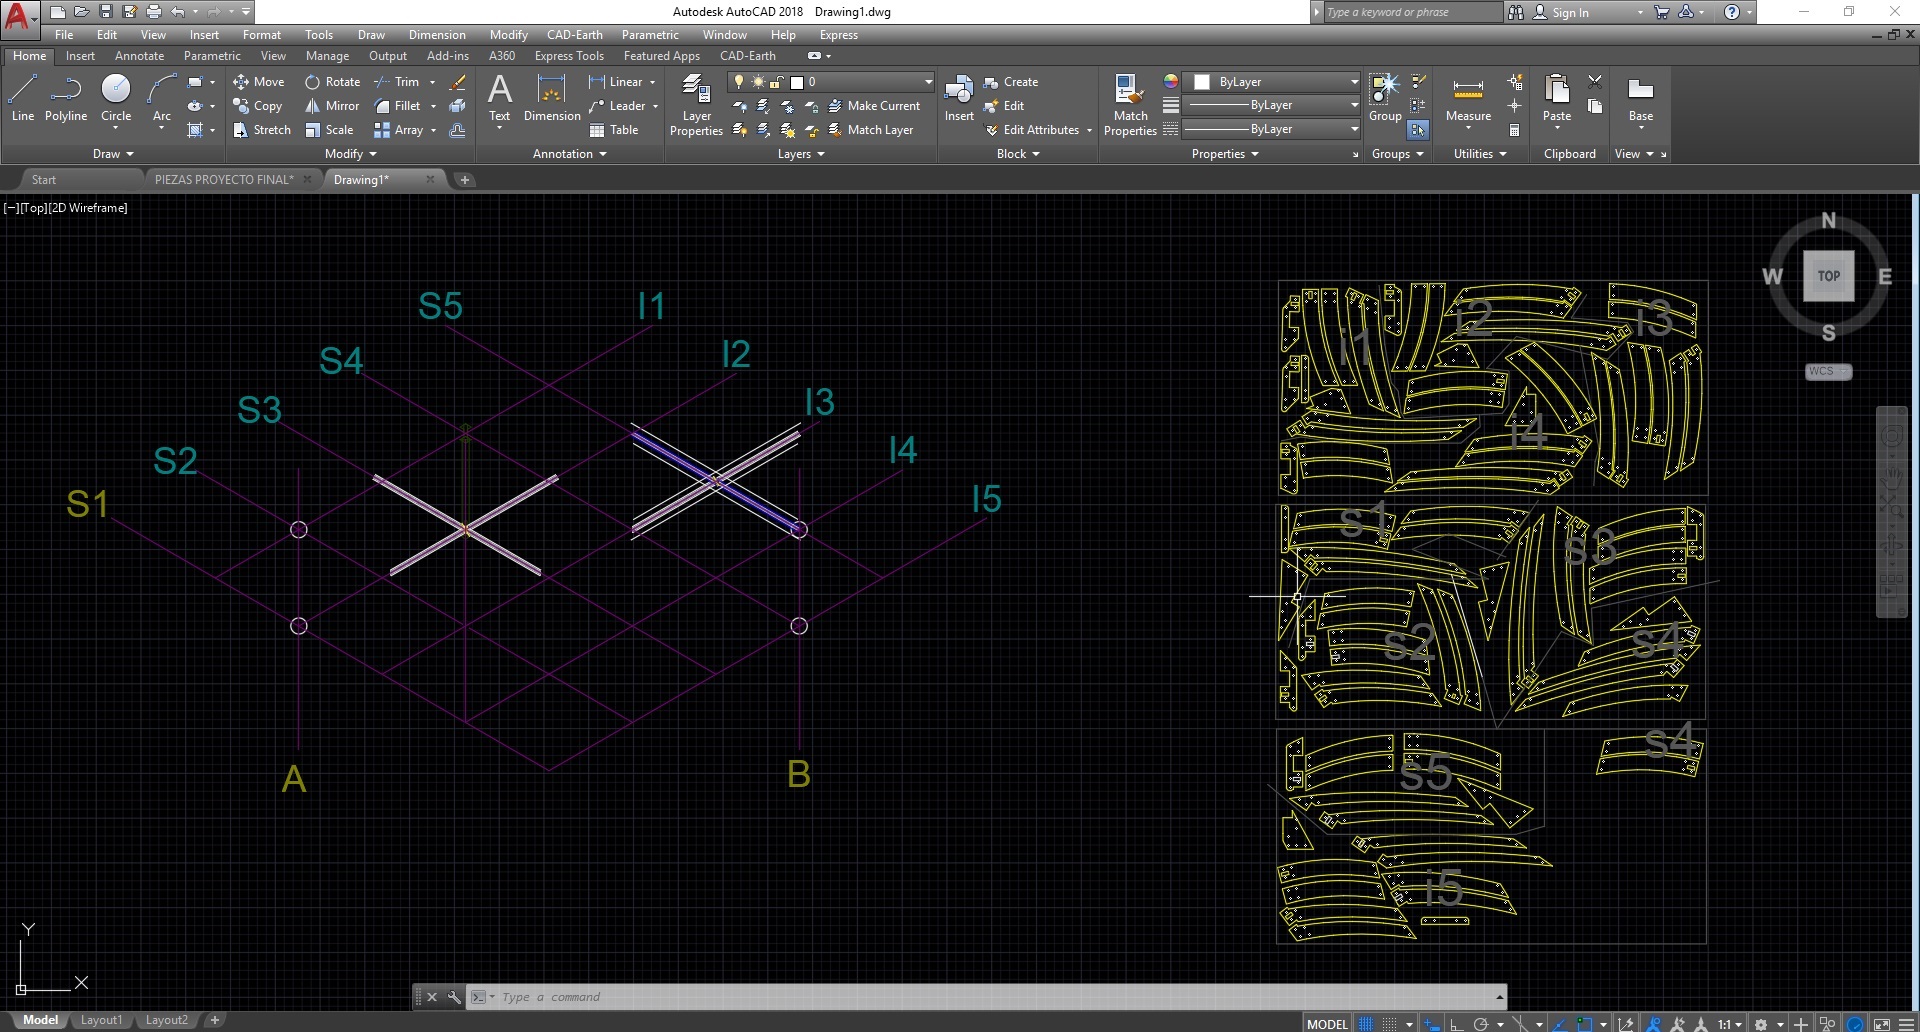
In the process I have defined the following parameters: Part length, number of axes, distance and number of supports.
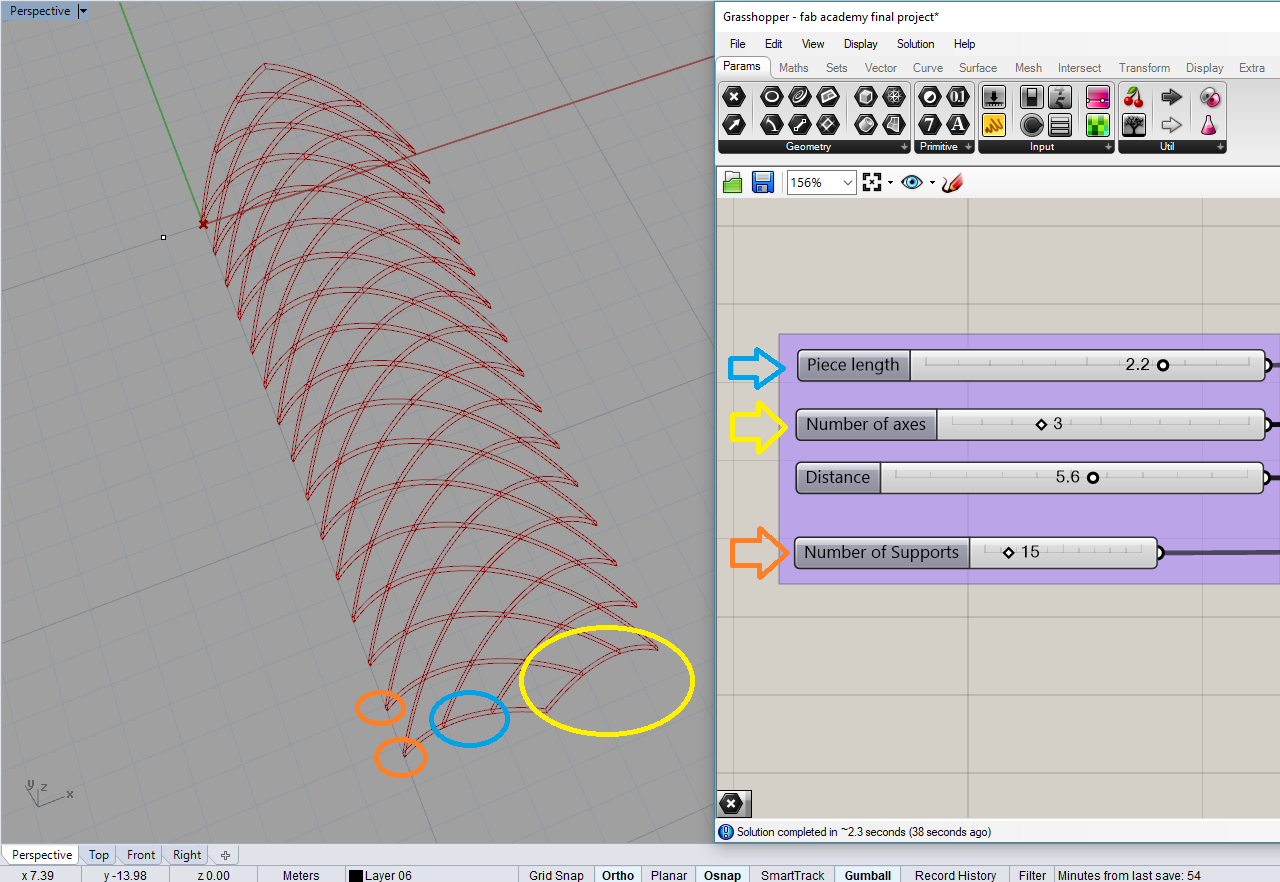 Fig.03 - Parameters
 To demonstrate the functionality, the pavilion will have 2 supports and four axes.
 Download gh Files
 Download rhino Files
Fig.01 - Pavilion
The pieces were modified in autoCAD to allow the routes of the cables between the joints.
 Download Files
 Fig.01 - Case File
To test the structure, a model was designed in a scale of 1: 5
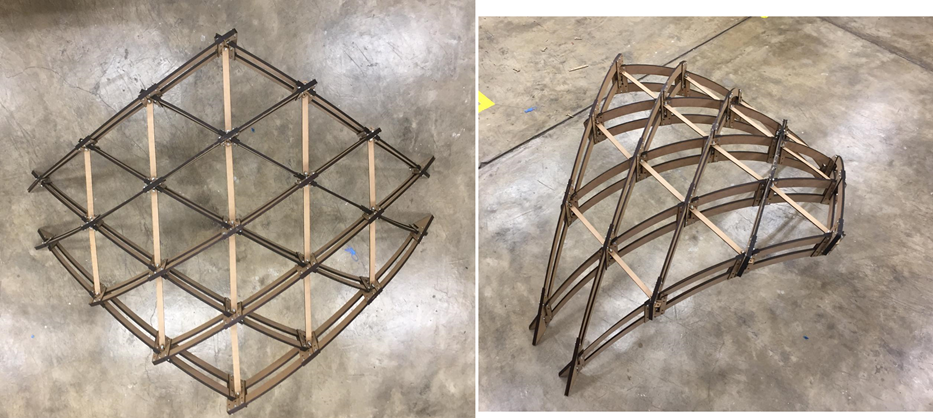 Fig.04 - Pavilion
 For the final project, I built the pavilion in scale 1: 2 with the help of a hydraulic arm, the joints are given with 6mm bolts.
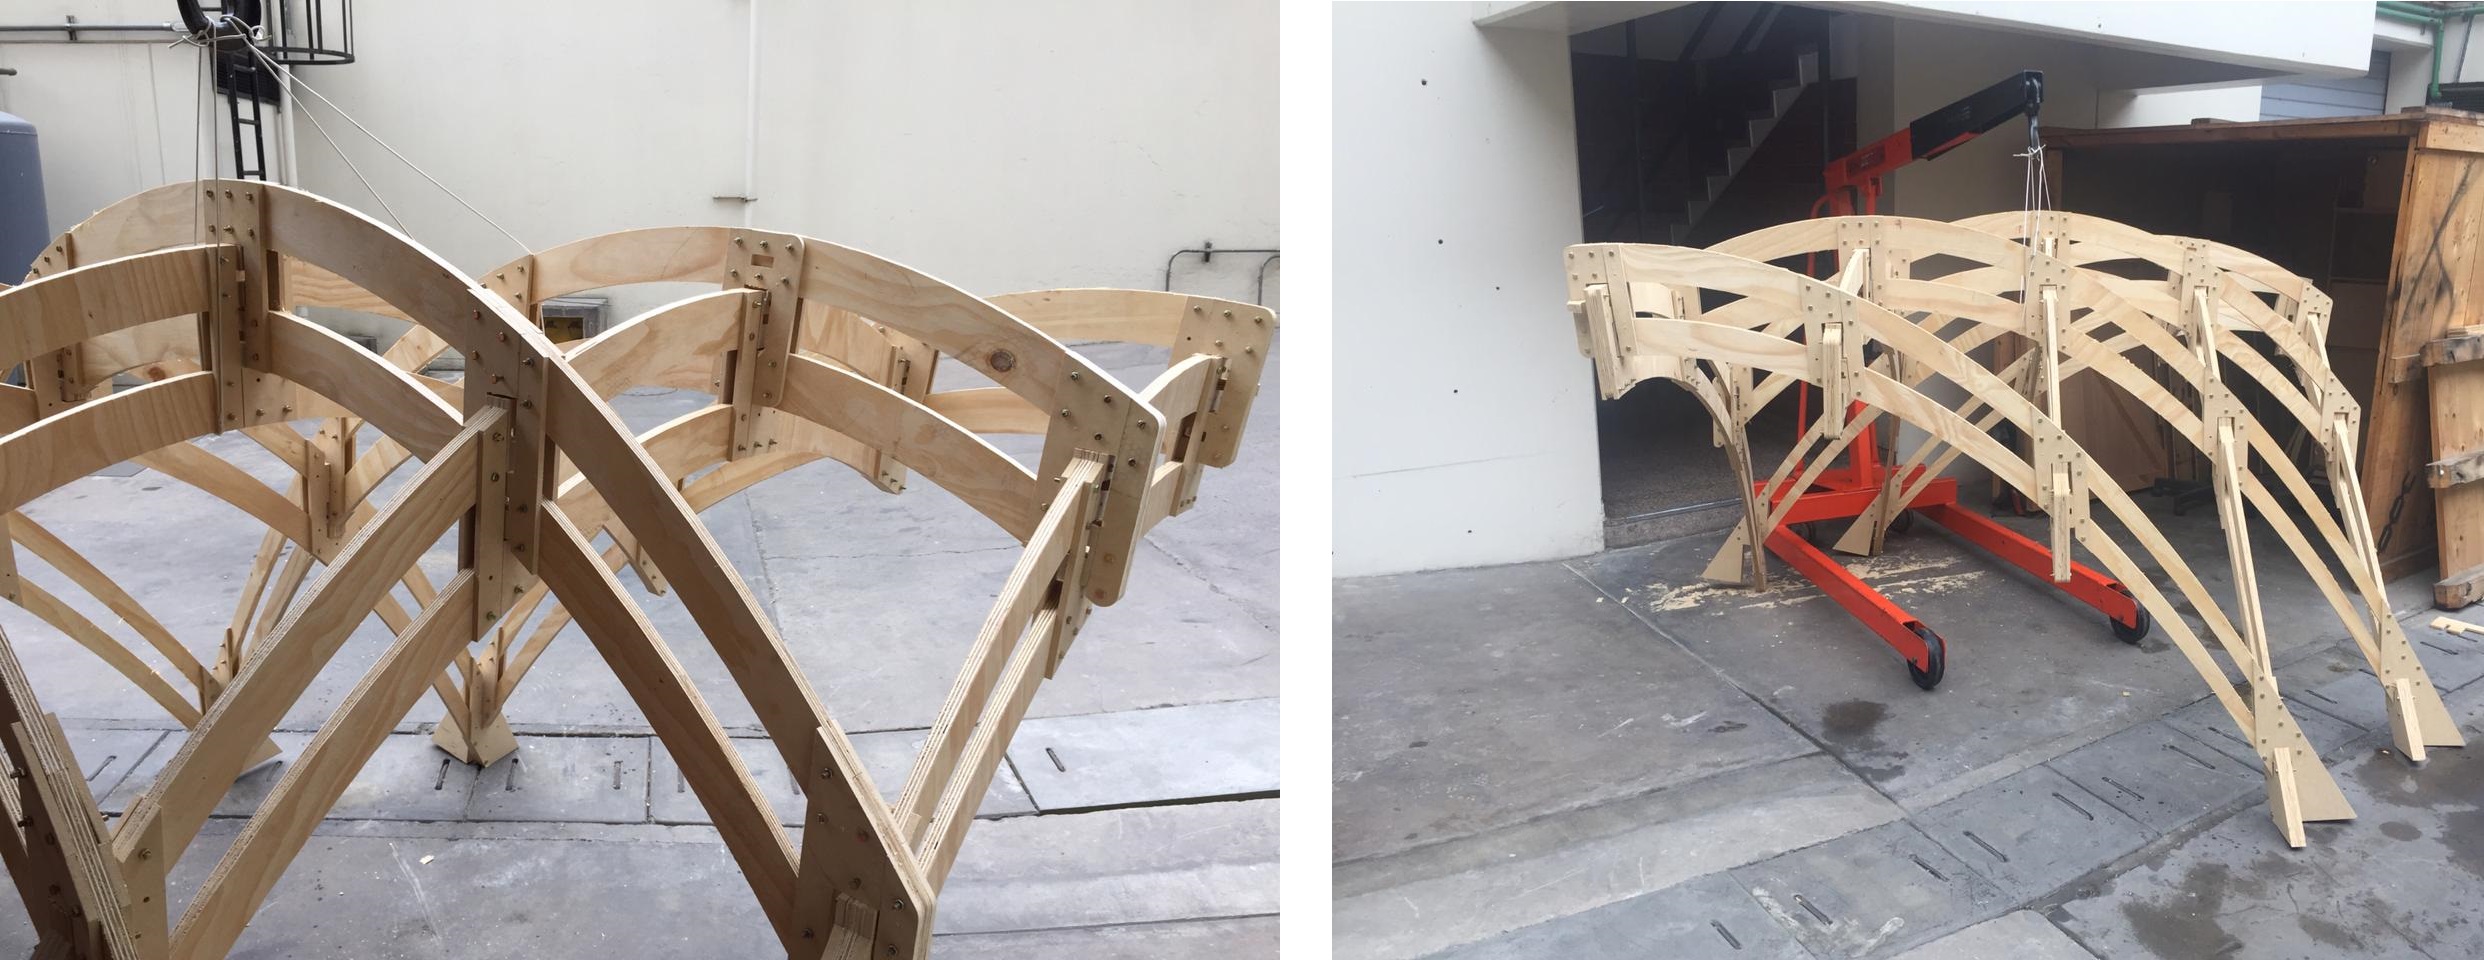 Fig.04 - Pavilion
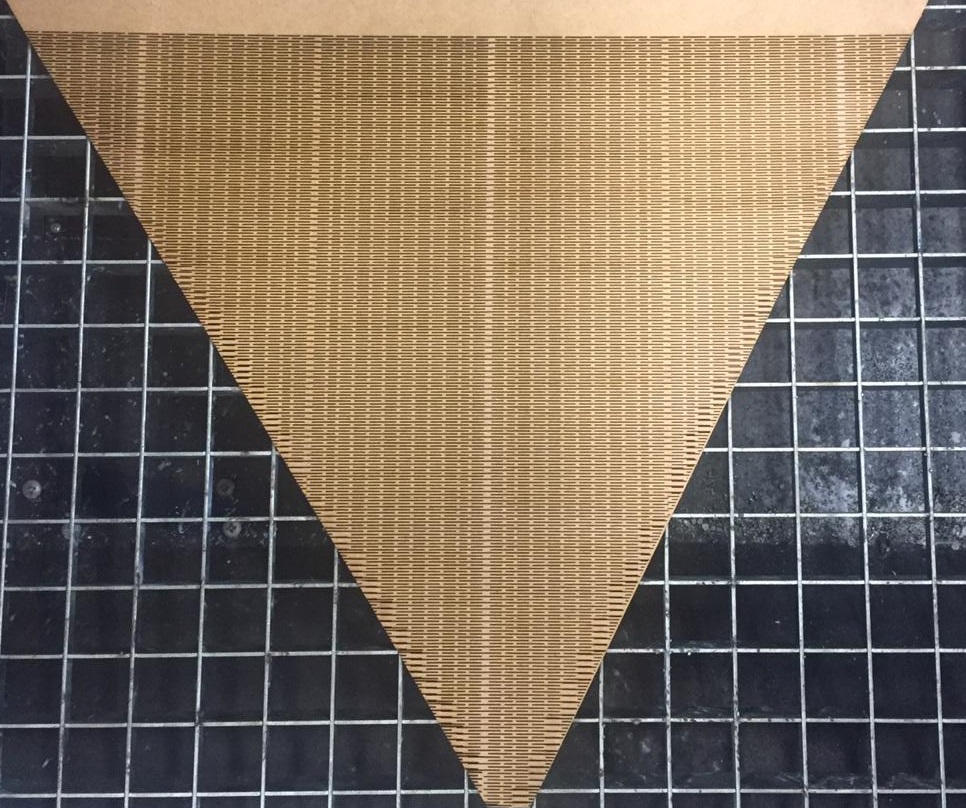
 For the coverage laser cut will be used to create a curvature with the kerf pattern.
 Download Files
 Fig.01 - Case File
Electronic
The movement of the coverages will be done with servomotors that will generate a vertical movement
The board that I will use will be an atmega328 which I made in my week of Interface and Application Programming,
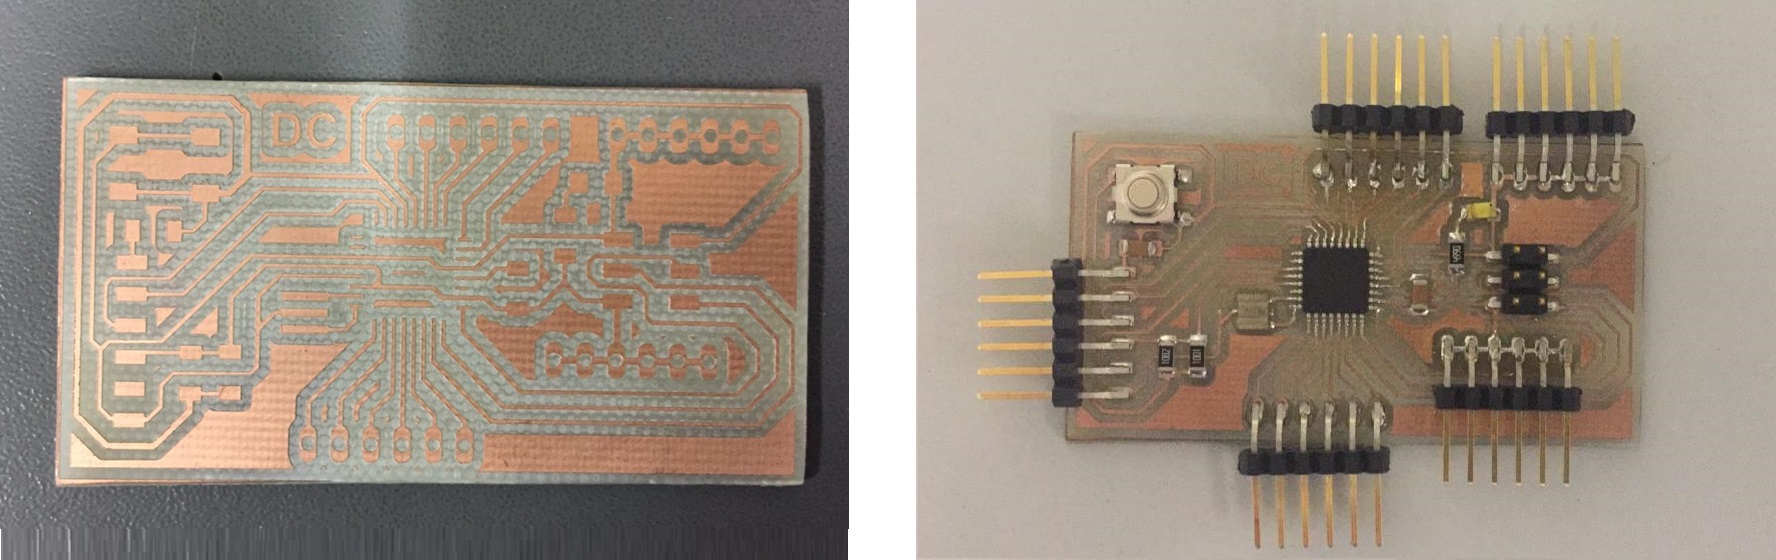 Download Code-G ATmega328
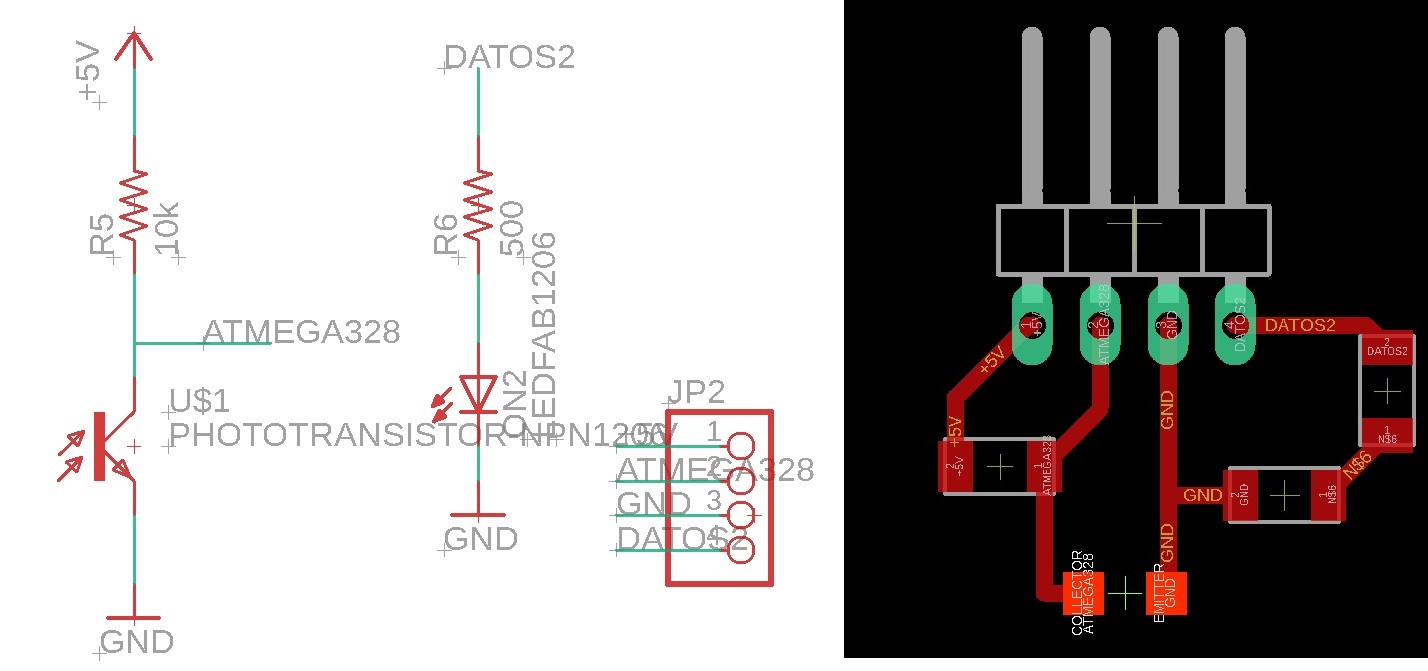
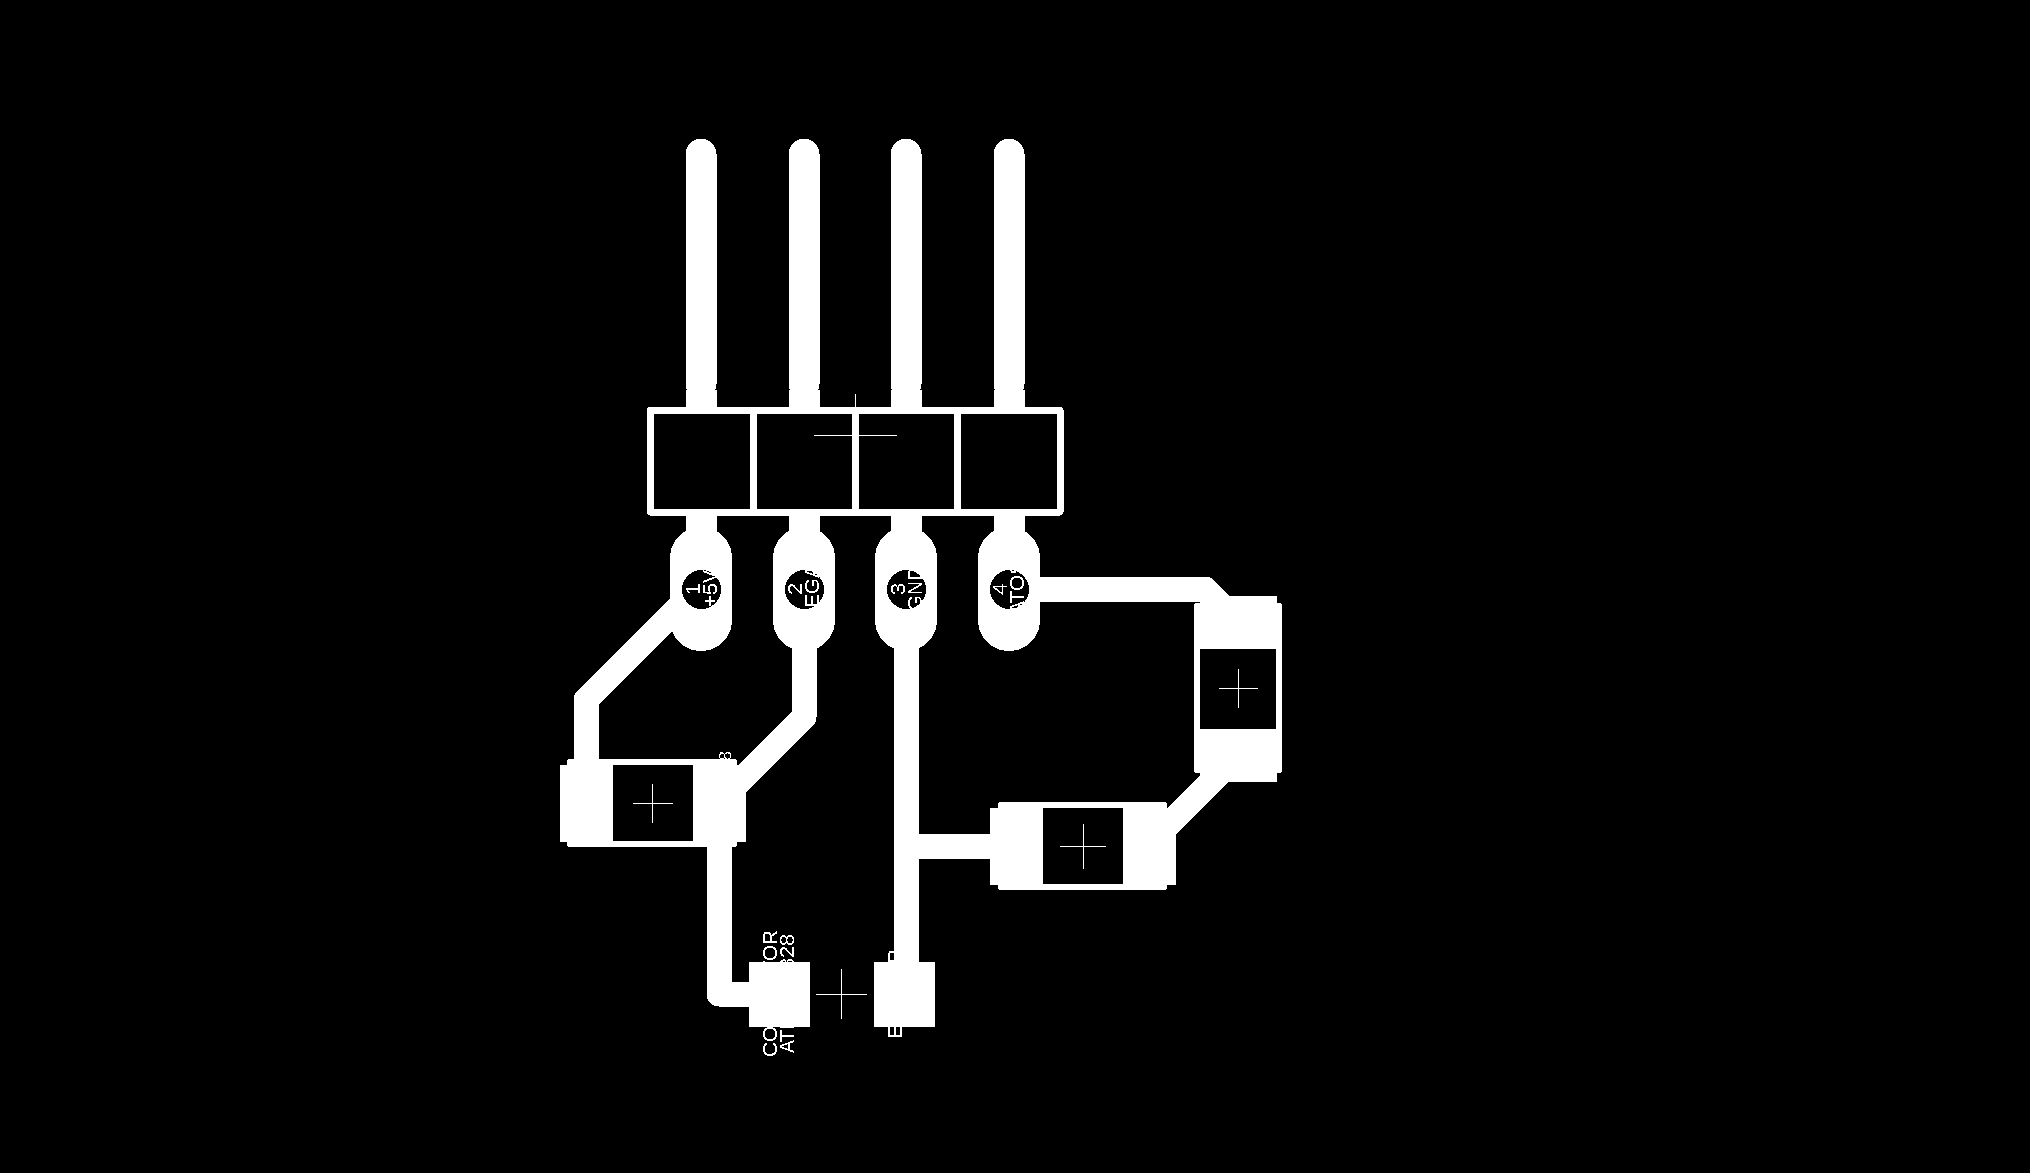
 The connection between the atmega and the sensor would be the following
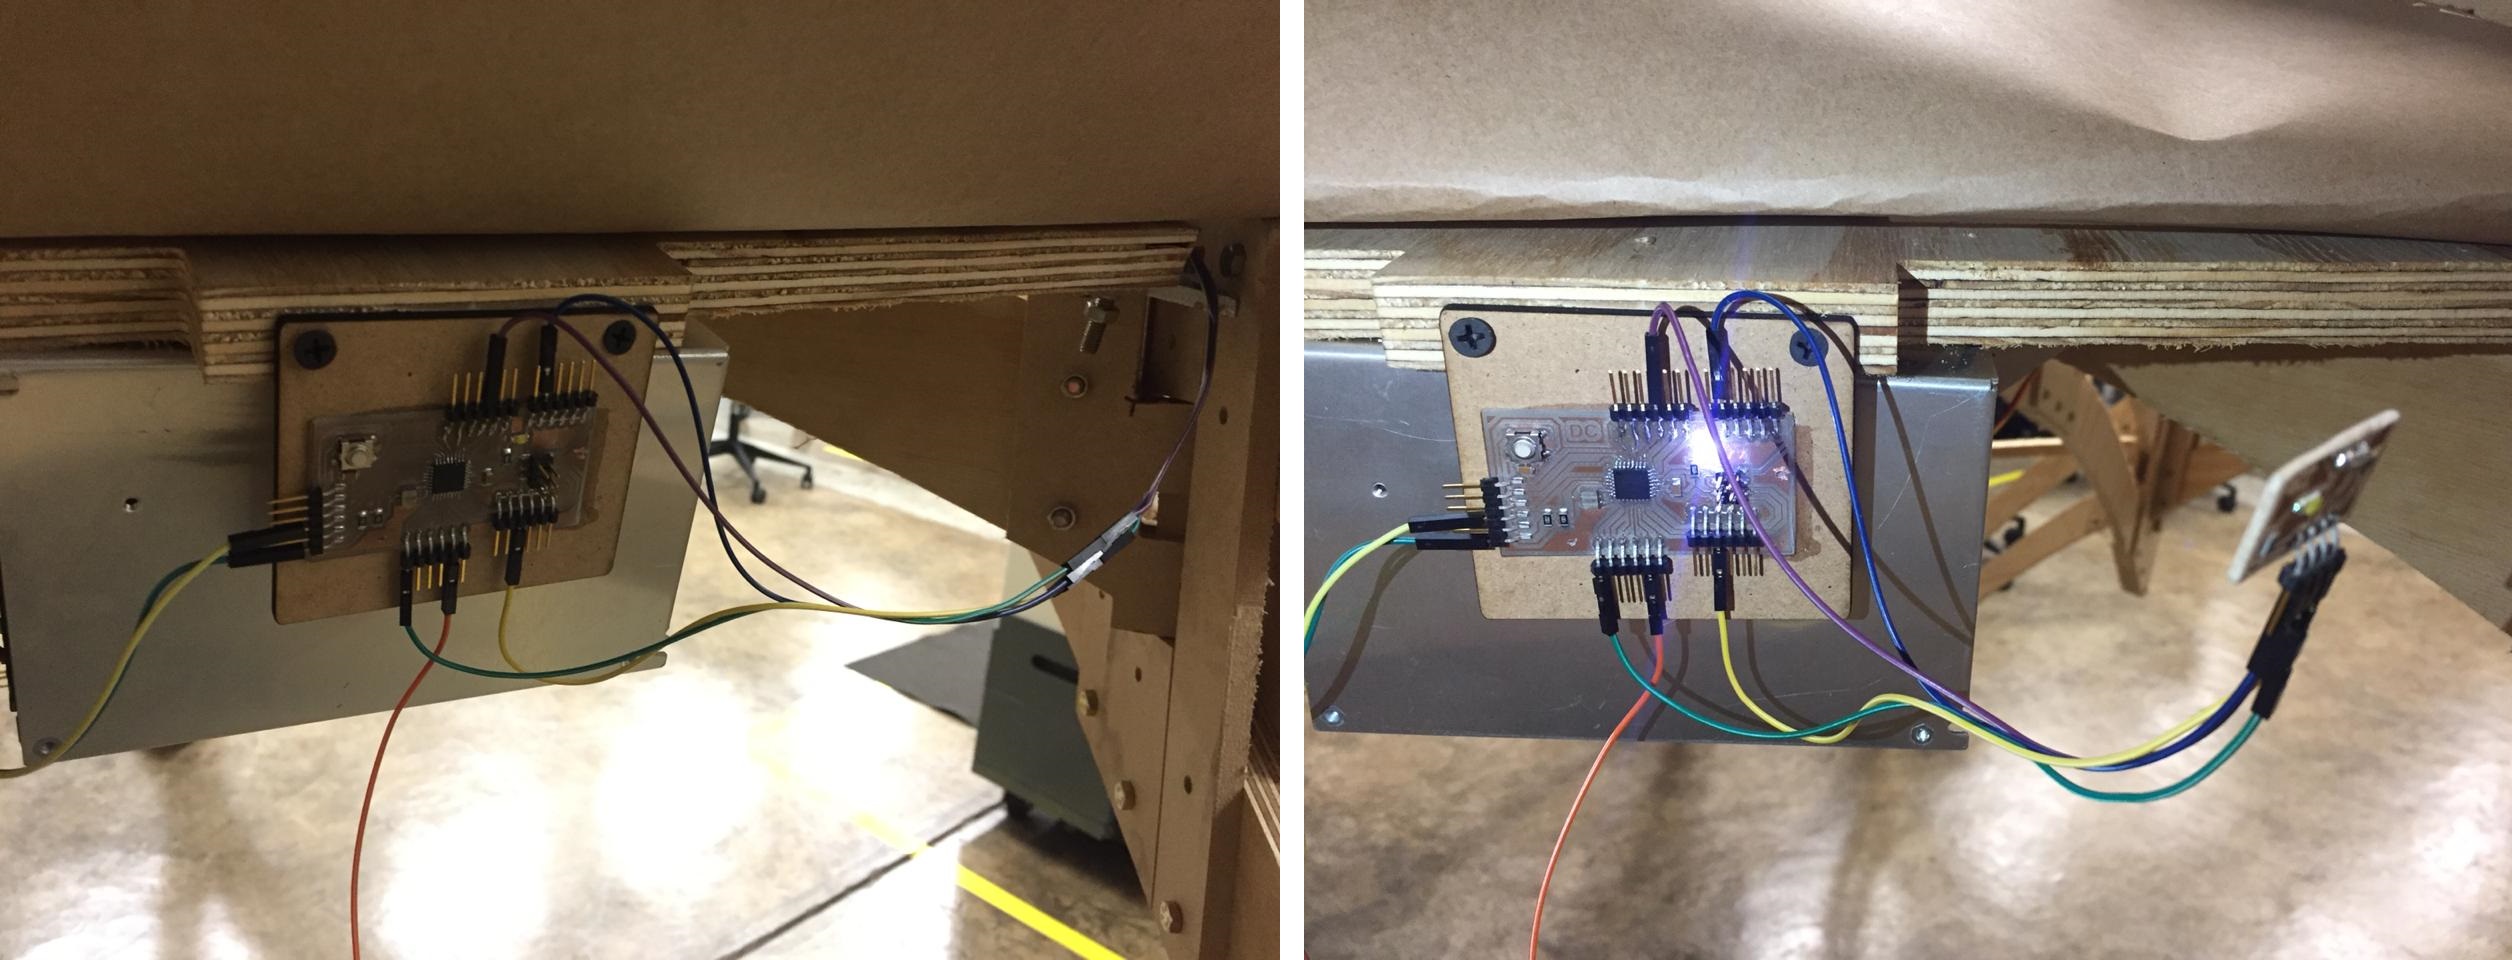 Fig.04 - 328
 To hold the light sensor, a base made with 3D printing was created and adjusted to one of the slots of the cover
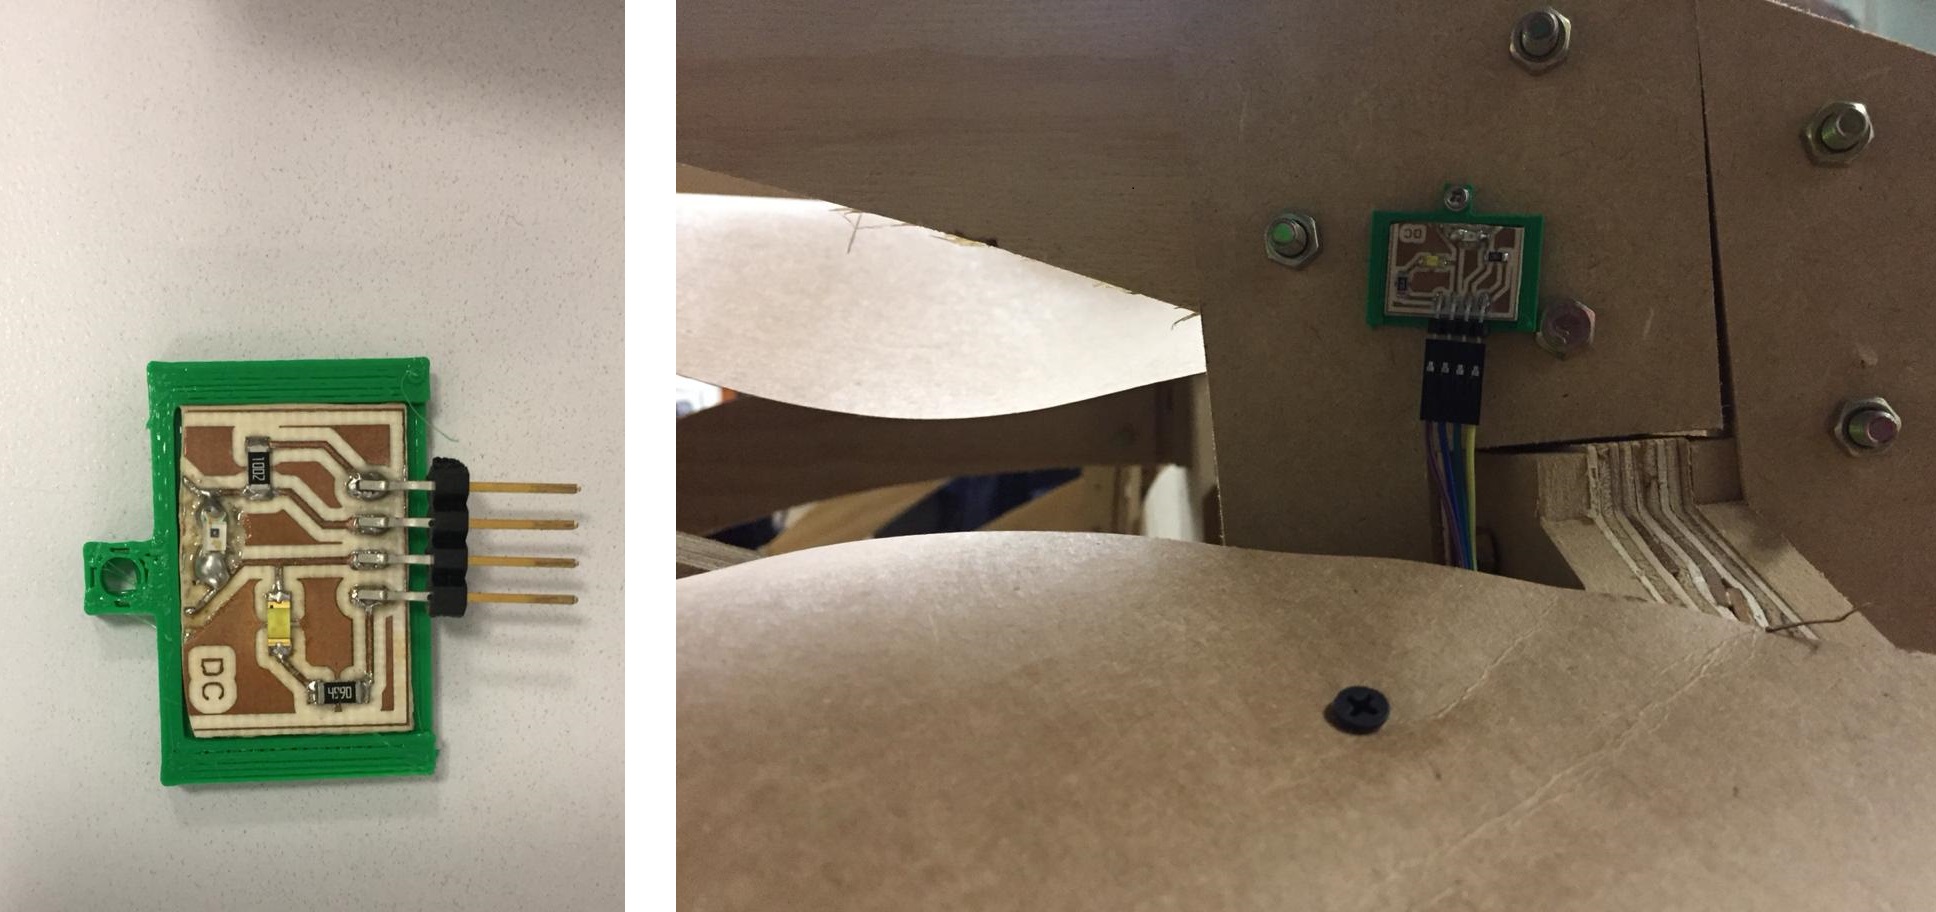 Download Sensor support
 I will use a light sensor that allows me to generate the movement that we want in the interface. For this I will create a board that has an LED that tells me if the amount of light exceeds the configured and an LDR sensor.
 Download G-Code LDR,LED
 Fig.07 - Code
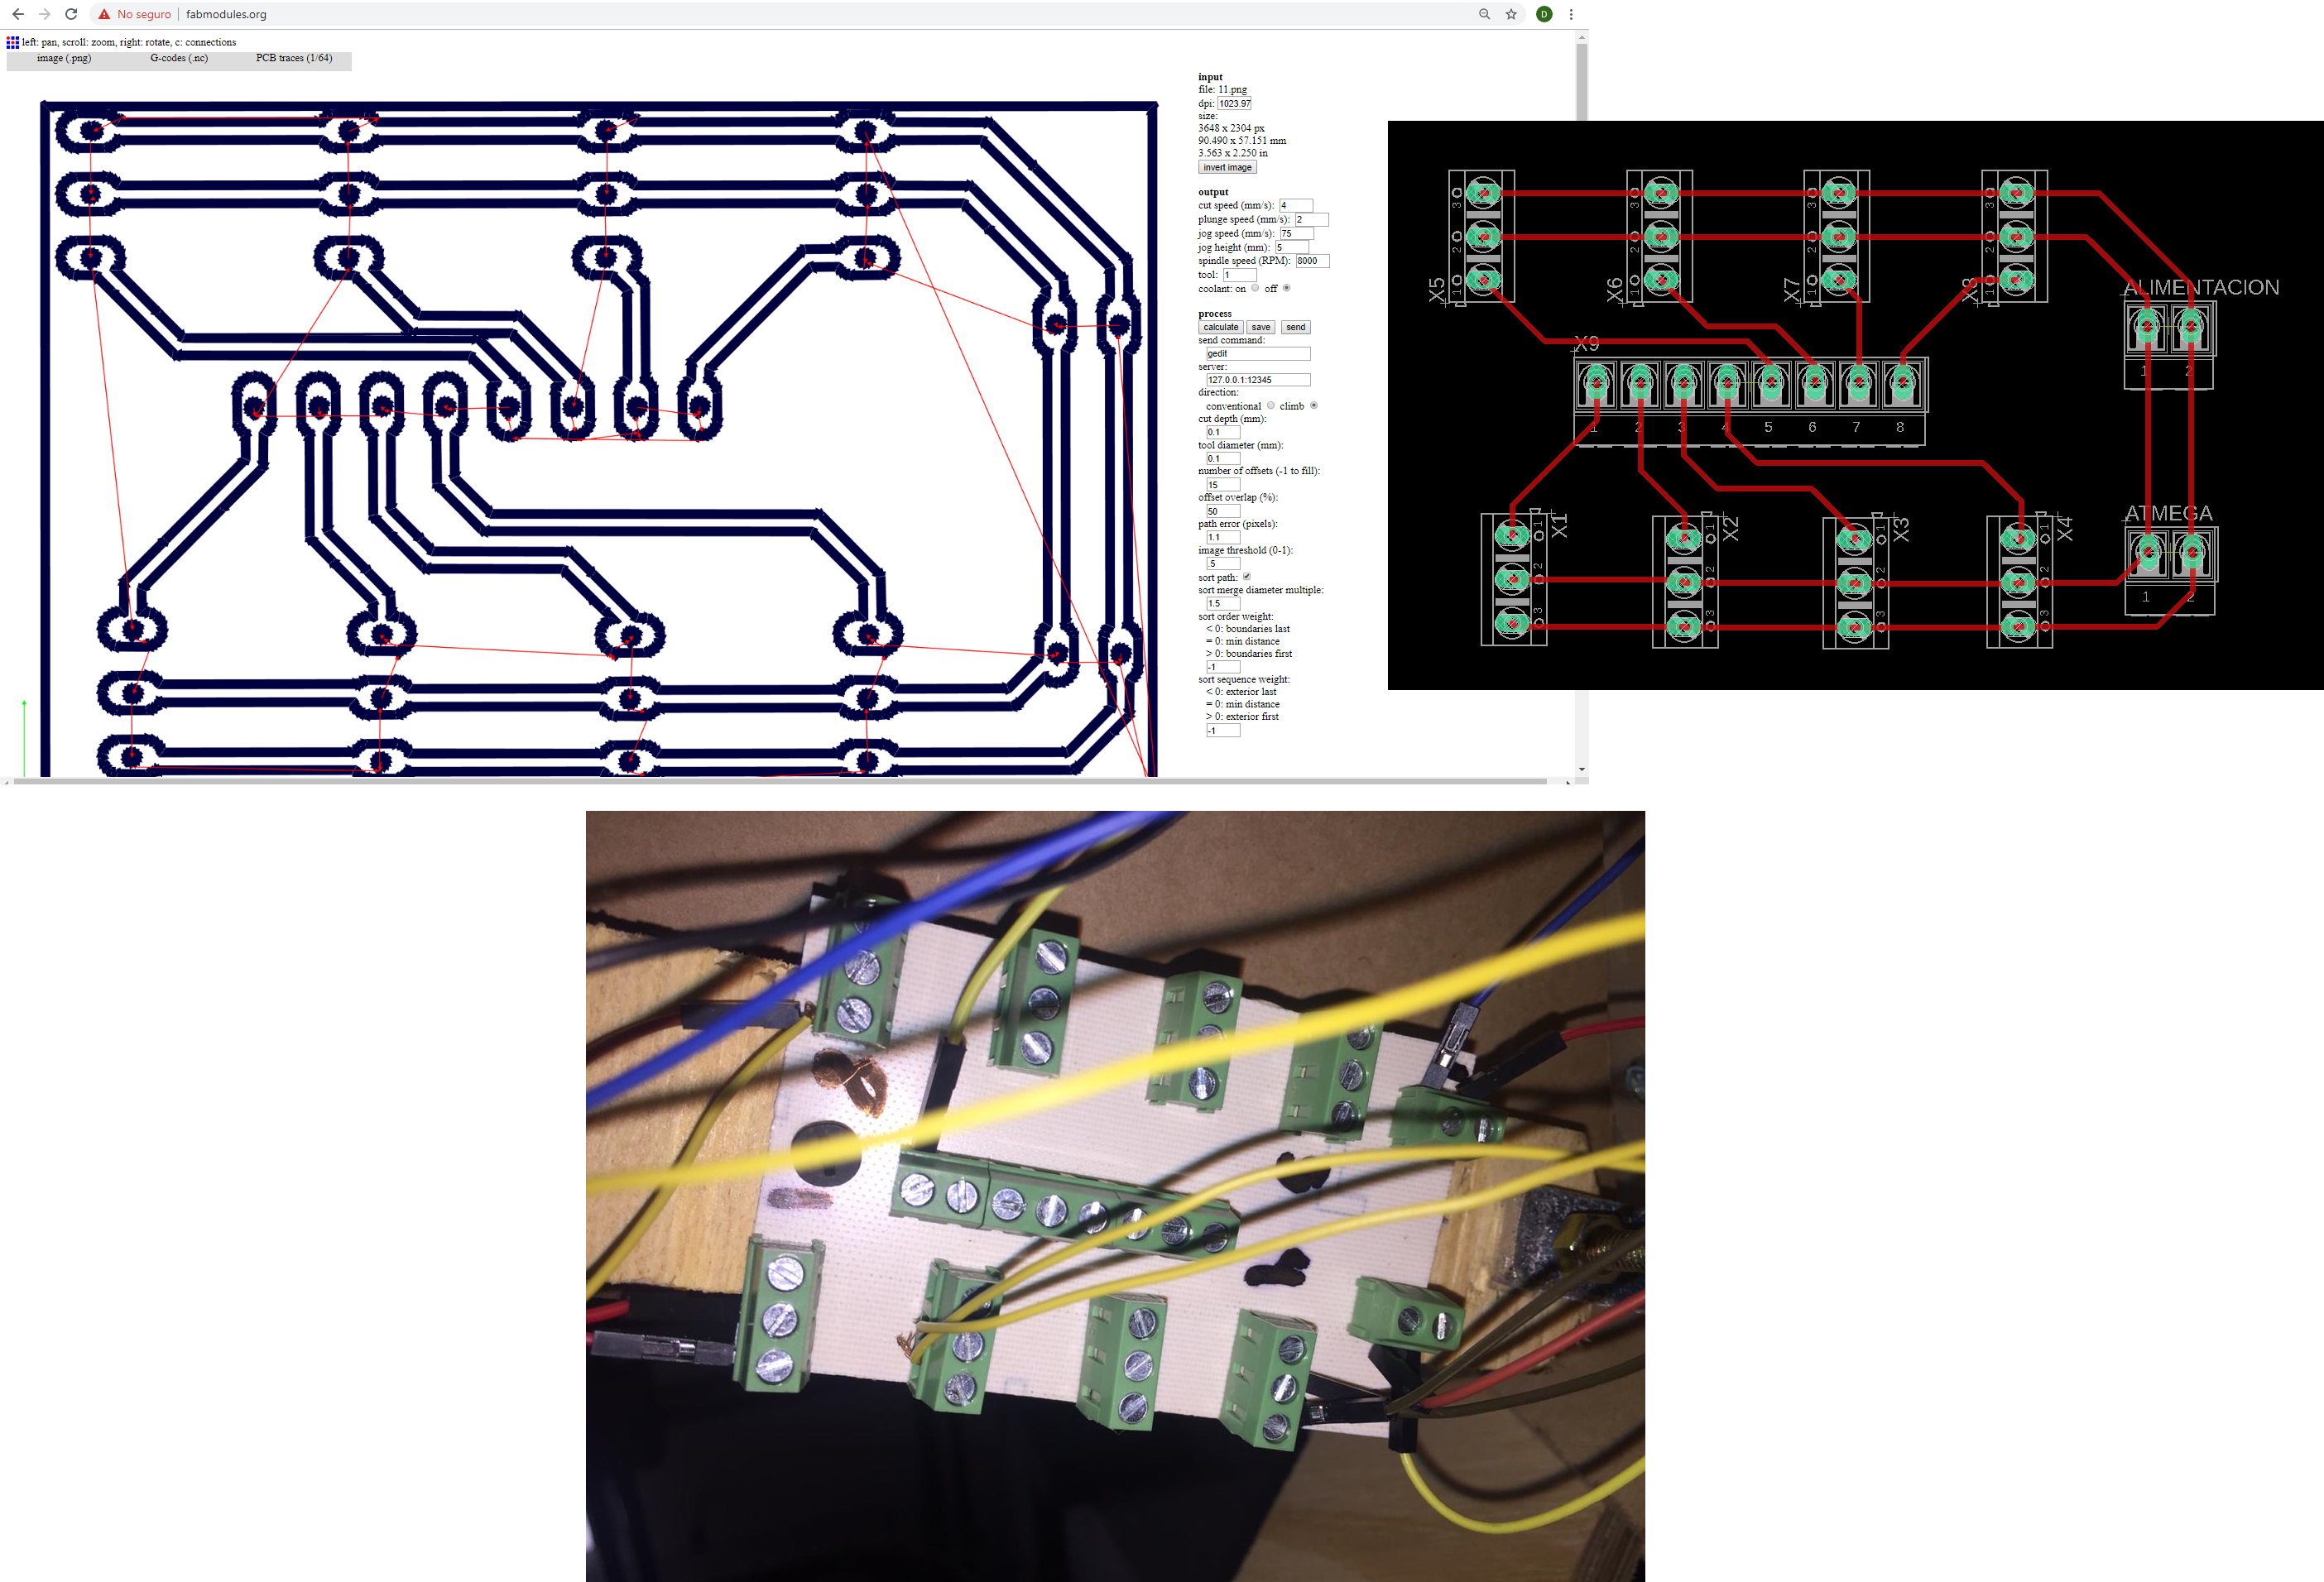
Like the ATMega I'm going to cut it with the same parameters: Spindle speed (8000RPM), tool diameter (0.1mm) and numer of offsets (15).
 Download PNG - LDR,LED
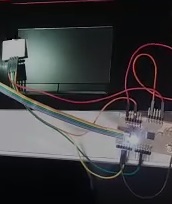
For a better distribution of cables, a board with terminals was created, which allows to integrate the 8 servomotors to the atmega328 board. The parameters to export the g-code were tool diameter 0.1 mm, number of offsets 15mm and 8000 RPM
 Download Borneras files
 Fig.06 -
The programming allows to integrate the movement of the servomotors with a led that allows to visualize when it is turned on or off.
 Download PNG - LDR,LED
 Fig.06 -
The case will be located on one of the horizontal axes, which will allow better communication with the board. This will avoid losing signal between the board and the servos.
Fig.06 -
3D Print
A support for the servo that supports 5kg was designed
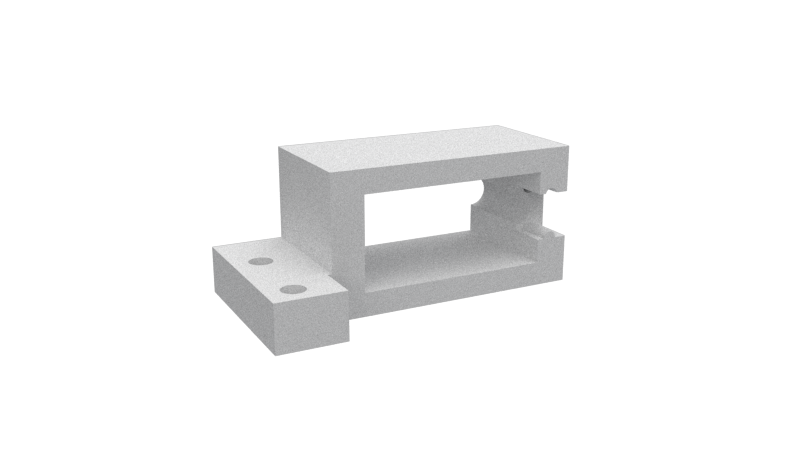 Download servo STL
 Fig.06 -
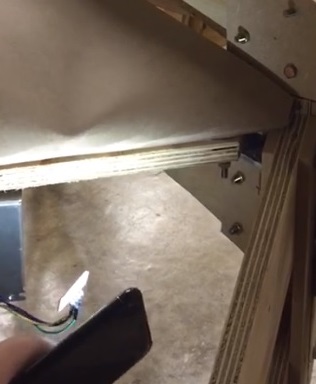 Fig.03 - light
 Here we can see how to illuminate the covers of the coverage make the turn, for it is considered a value so that it can move without being affected by diffused light
The cables go through the pieces of mdf, this way you can see a clean structure, the diagonal grooves serve as support, rail so that the cover rests without adding any extra support.
BOM
The price of the project covers 156 dollars
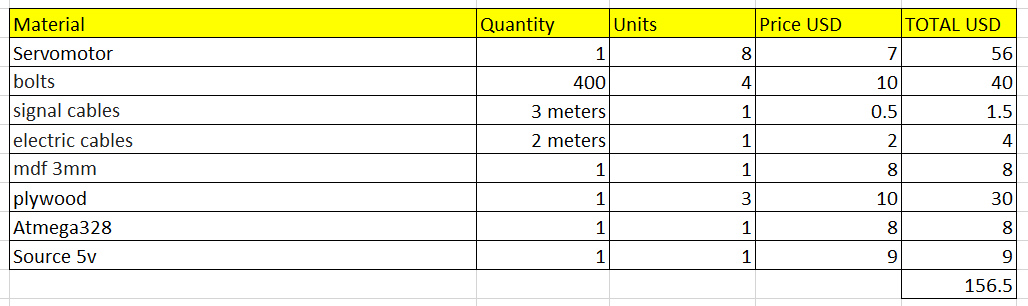 Fig.04 - Cost
 However, I will use the license Creative Commons (CC) . In Peru most of these licenses are used by private institutions such as universities or public entities such as the Congress of the Republic, Ministry of Education, Ministry of Housing and Construction, etc.
I will share the first prototype of the project as non-commercial open source, documenting each step to make a functional pavilion that is built by any person or entity. The future steps to make a commercially viable product would be to refine some elements such as structural anchoring, design of the roof with new architectural materials.
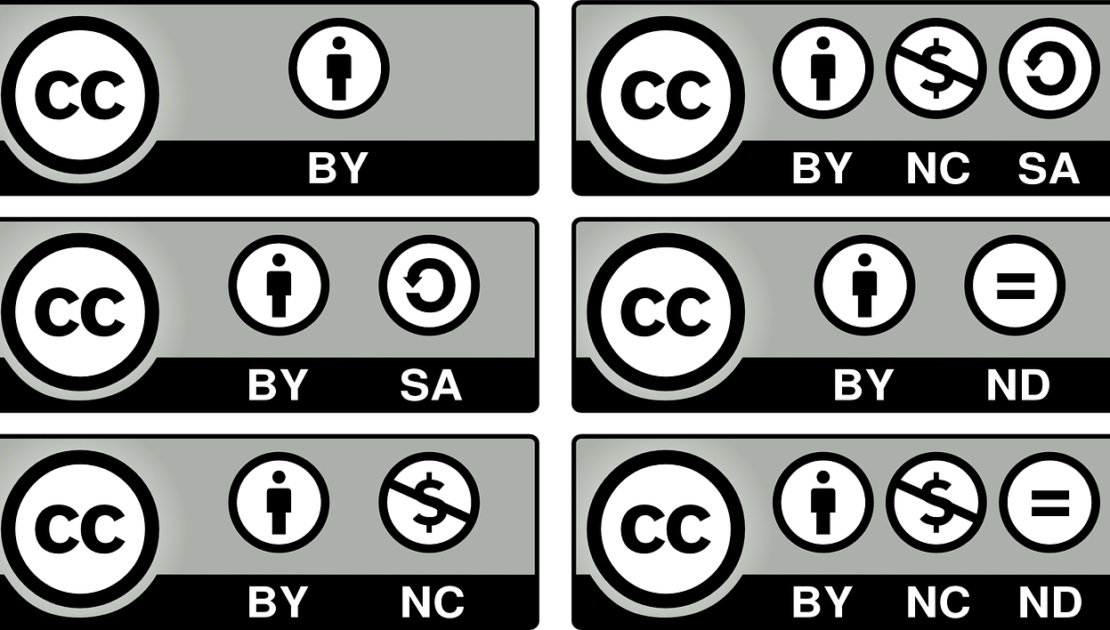 Fig.03 - CC