Week 02: Project Management
This week we will learn to build a personal site in which we will describe the tools that we will use to develop the final project and we will learn to work through a git tutorial.
Developed my website
To edit images, I used the Paint3D platform which is one of the new applications included in the Windows 10 operating system.
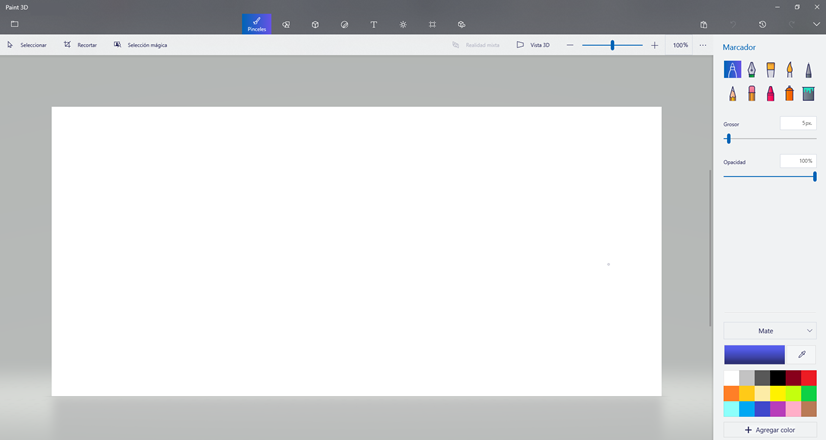 Fig.01 - Paint3D interface
I like this application since I can cut images quickly
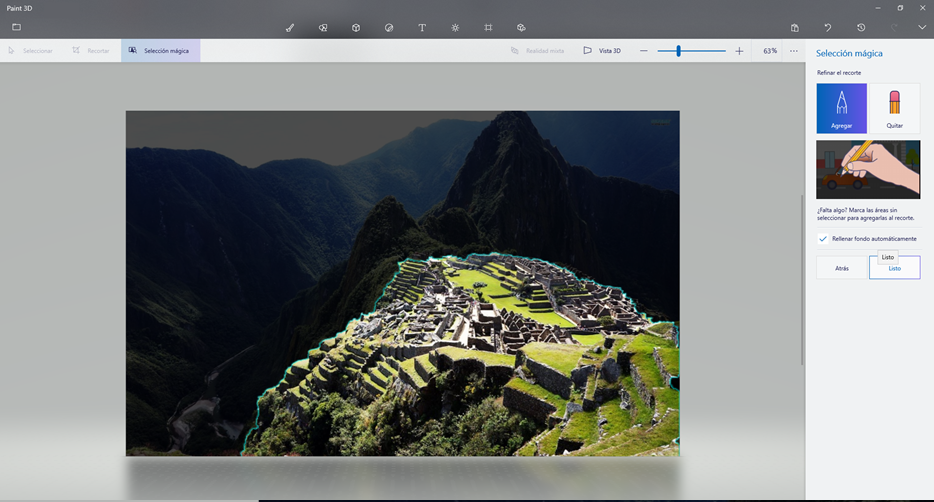 Fig.02 - Paint3D drawings
Also, from completing the cut by default, it also has effects and 3D designs. I prefer this over another advanced editor since to achieve the editing in photoshop I need time, while in this program I achieved it with a click on the tool magic select.
Each day the library is increased with designs and templates that can be useful if you are looking for a quick job.
 Fig.03 - Paint3D options
I looked for a suitable template to show my weekly works in the website HTLM5UP , I found one that I liked a lot for the minimalist design called Phantom.
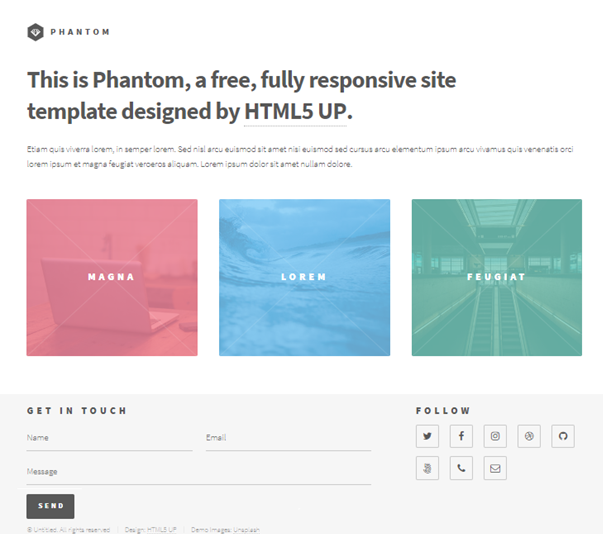 Fig.04 - Phanthom Design
 I prefer the designs of the web page htlm5, it already has the feature of fully responsy that allows to visualize the template according to the user's screen.
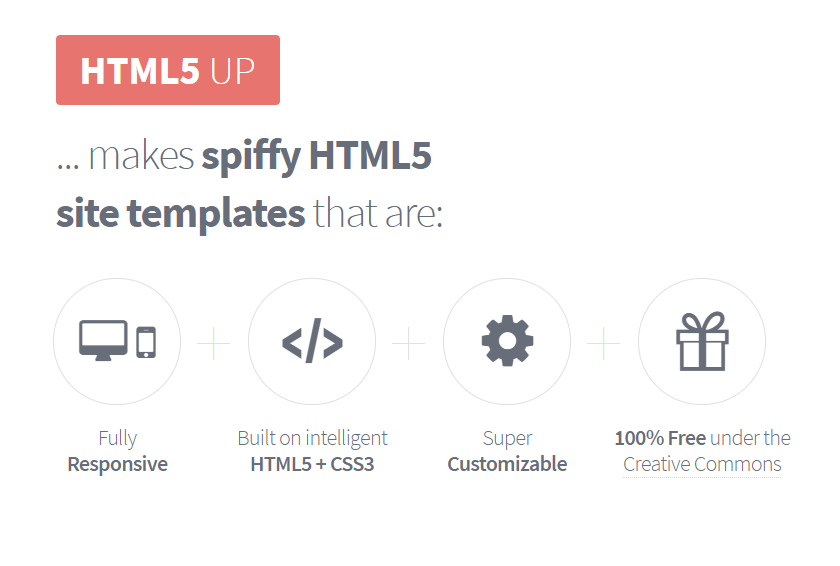 Fig.05 - HTML5 UP features
 A good support to understand the practical and basic practical labels in real time was the w3schools web development site.
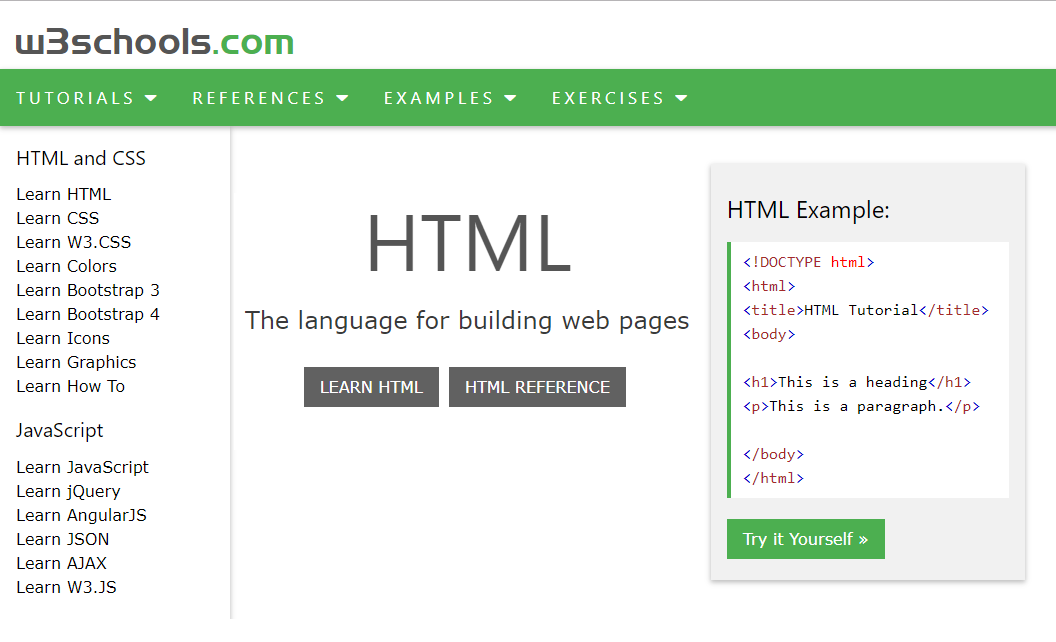 Fig.06 - W3schools website
To build the personal site, I used the Sublime Tool: the sophisticated text editor for code, markup and prose.
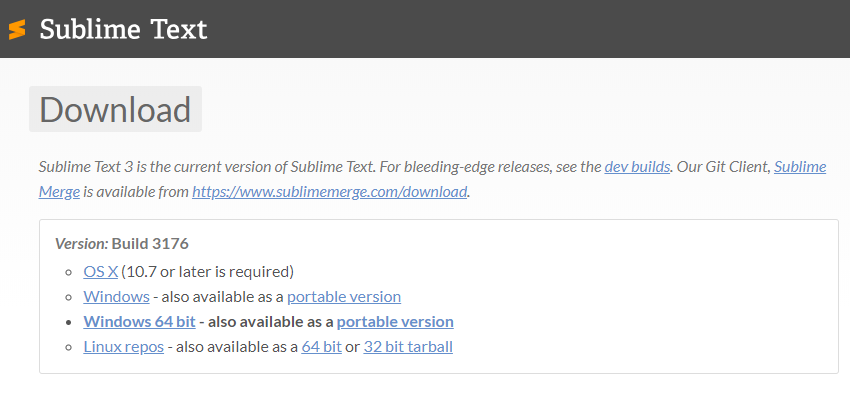 Fig.07 - Sublime version
It has a clean and simple interface that does not show toolbars and configuration dialogs.
Its interface is divided into tabs, this implies that you can open many files.
 Fig.08 - Sublime interface
Its autocomplete feature makes programming simpler and faster.
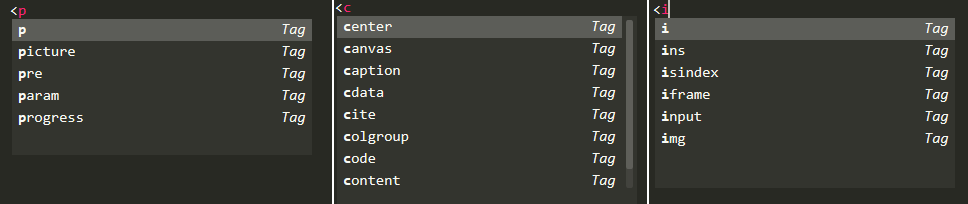 Fig.09 - Sublime autocomplete feature
 You can use your spelling tool to check errors in your code while you keep writing your codes, so you save time.
You can activate and deactivate the dictionary with the F6 key.
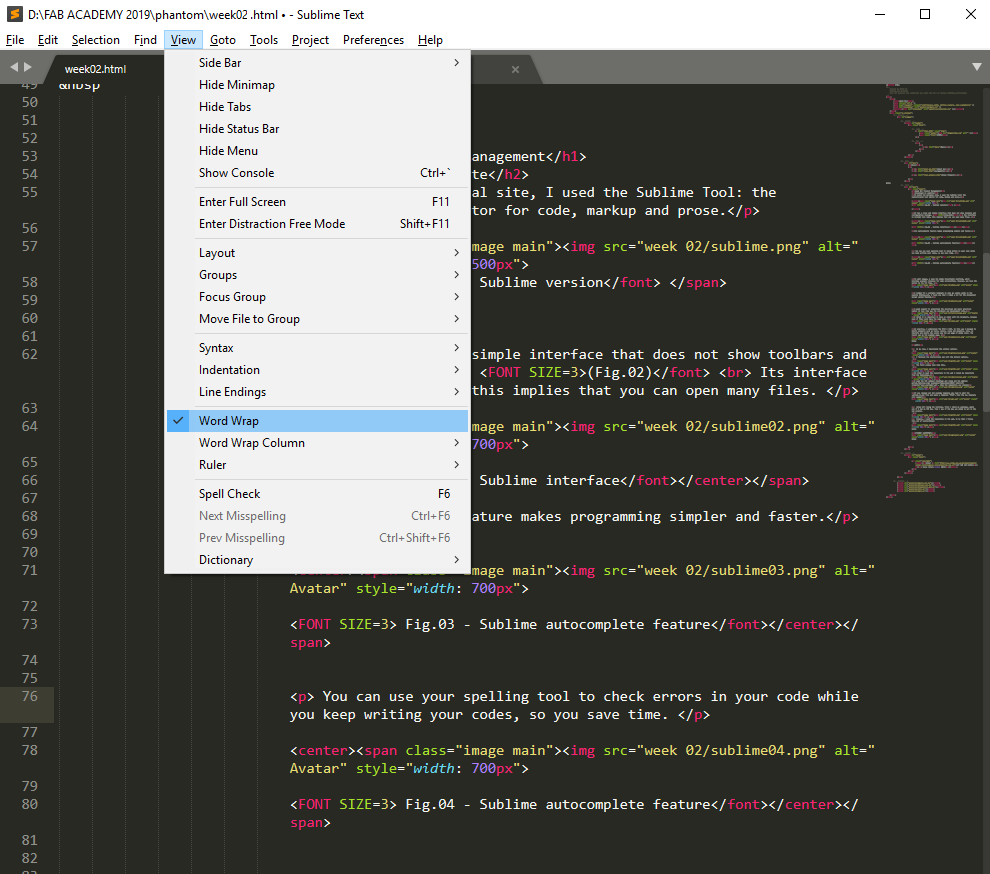 Fig.10 - Sublime autocomplete feature
Using the tutotial, I learned some commands like centering, controlling the size of the letter and importing images.
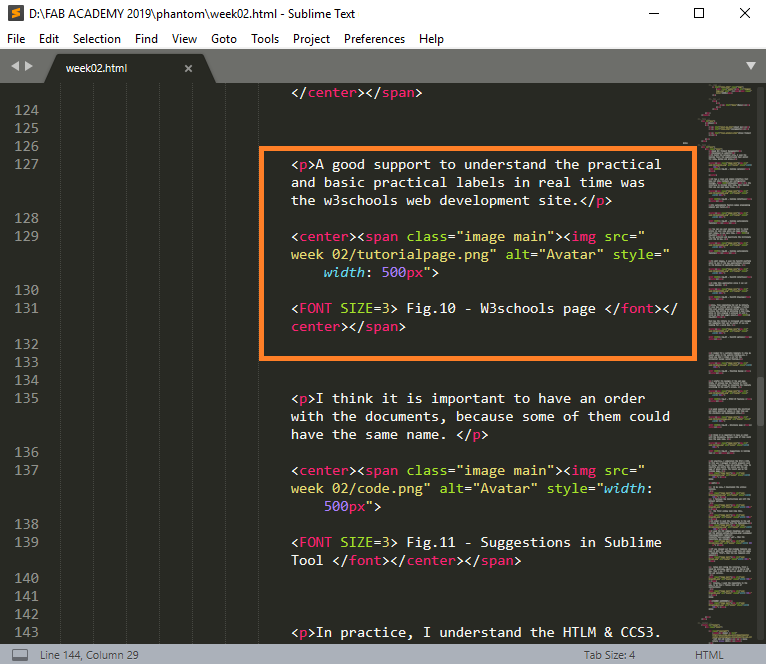 Fig.11 - Example
 I think it is important to have an order with the documents, because some of them could have the same name.
However, be careful with the uppercase and lowercase in the edition of the extensions.
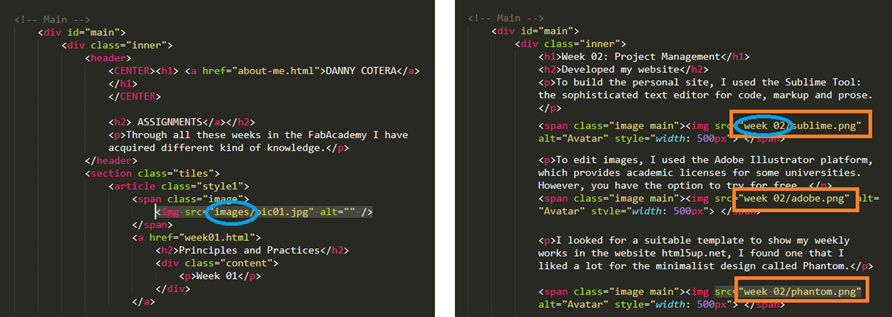 Fig.12 - Suggestions in Sublime Tool
 To identify and modify the colors use the web page of adobe color.
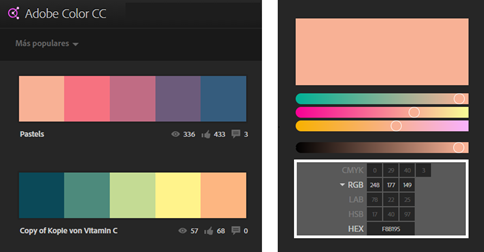 Fig.13 - Adobe Color CC
 In practice, I understand the HTLM & CCS3. In this way I managed to modify elements such as texts, colors, icons and graphics. Also, to identify and modify the colors use the web page of adobe color. The result was my fab academy page.
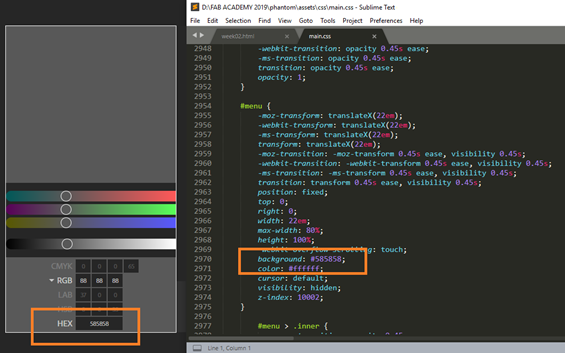 Fig.14 - Change menu background
 GIT
Git is a fast, scalable, distributed revision control system with an unusually rich command set that provides both high-level operations and full access to internals.
We have the Git Documentation . It is a section in which we will understand the meaning of GIT and the fundamentals of how it works.
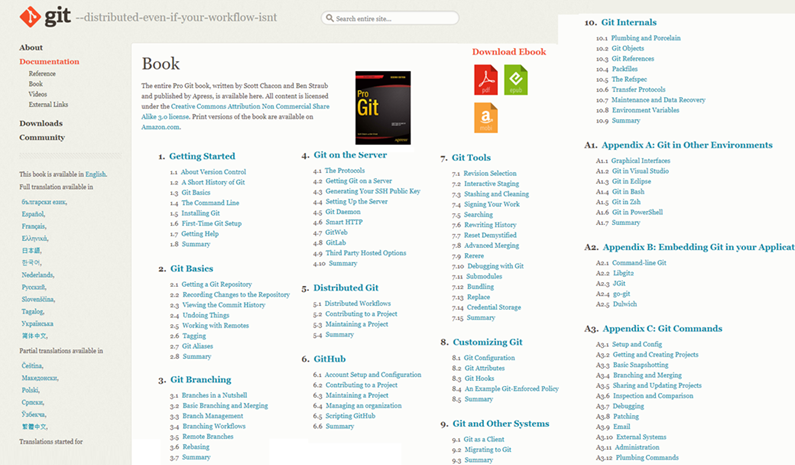 Fig.15 - GIT Documentation book
 Fundamentals of the GIT
The main difference between Git and any other VCS (including Subversion and their friends) is the way they handle their data. Conceptually, most other systems store the information as a list of changes in the files over time.
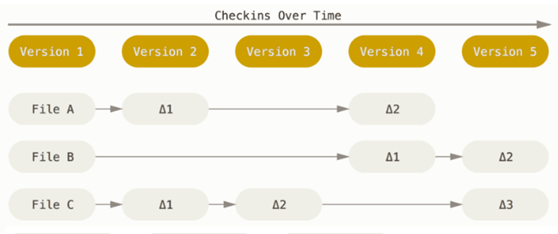 Fig.16 - Storing data as changes to a base version of each file
 Git handles your data as a set of snapshots of a thumbnail file system, if the files have not been modified Git does not store the file again, but a link to the previous identical file that you have already stored
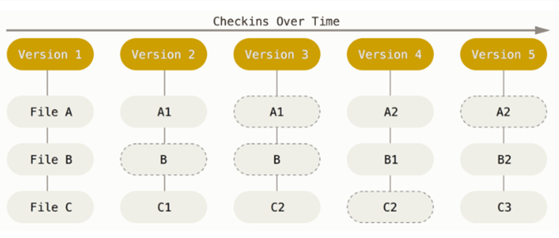 Fig.17 - Storing data as snashots of the project over time
 Git has three main states in which you can find your files: "Confirmed" means that the data is stored securely in your local database; "Modified", "means that you have modified the file but you have not yet confirmed it to your database." Ready "means that you have marked a modified file in its current version to go in your next confirmation.
The basic workflow in Git is developed in the following way, you modify a series of files in your working directory, you prepare the files, adding them to your preparation area and finally if you confirm the changes, it stores an instant copy in a way permanent in our Git directory.
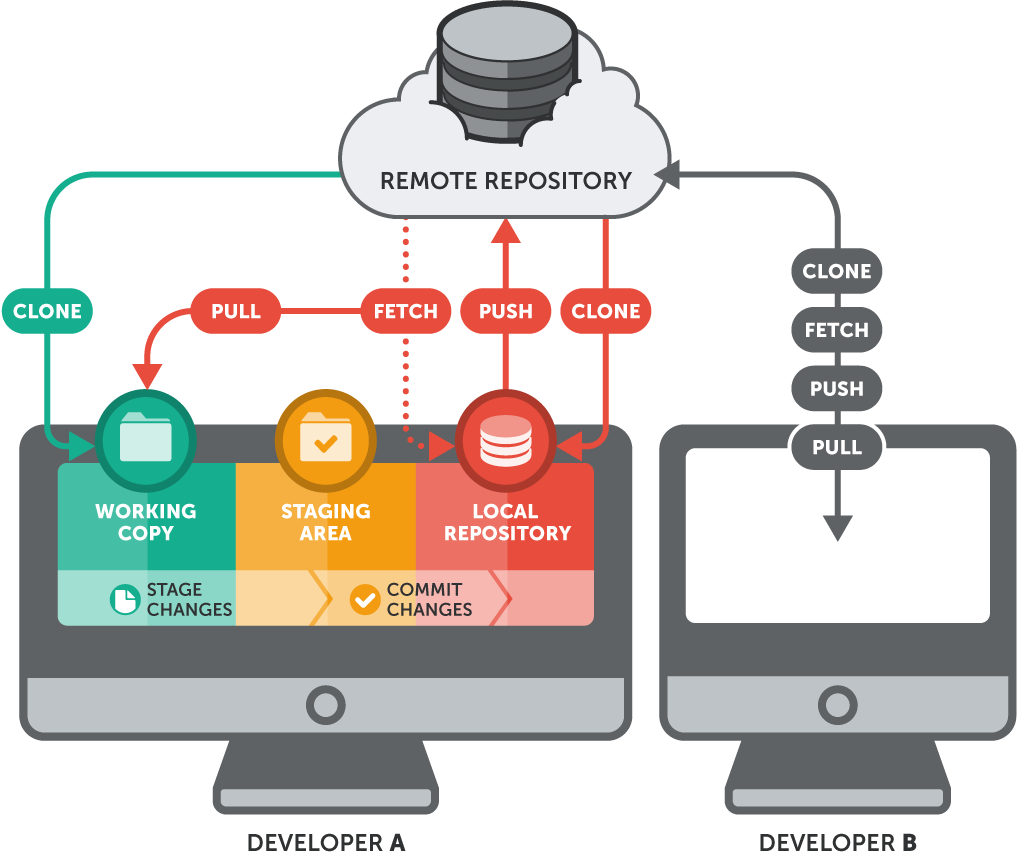 Fig.18 - Working tree, staging area, and Git directory
 GIT Tutorial
Before downloading GIT, we have the Git Tutorial , in which explains how to import a new project in Git, make changes and share changes with other developers.
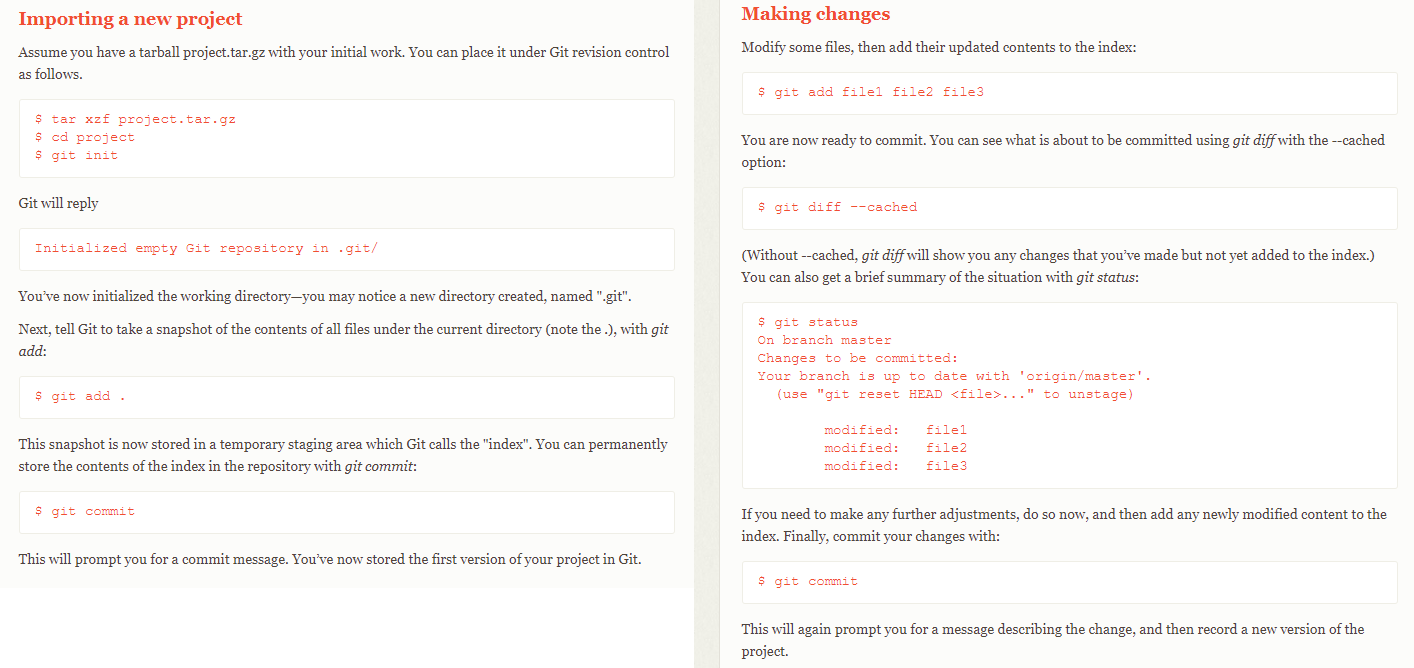 Fig.19 - GIT Tutorial
 After reading the tutorials, In my case, I downloaded the windows version.
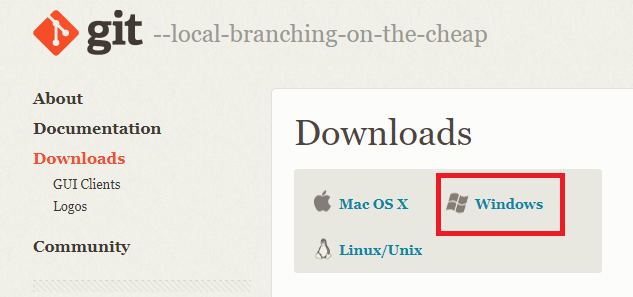 Fig.20 - GIT Downloads
 I followed the instructions and left the default options.
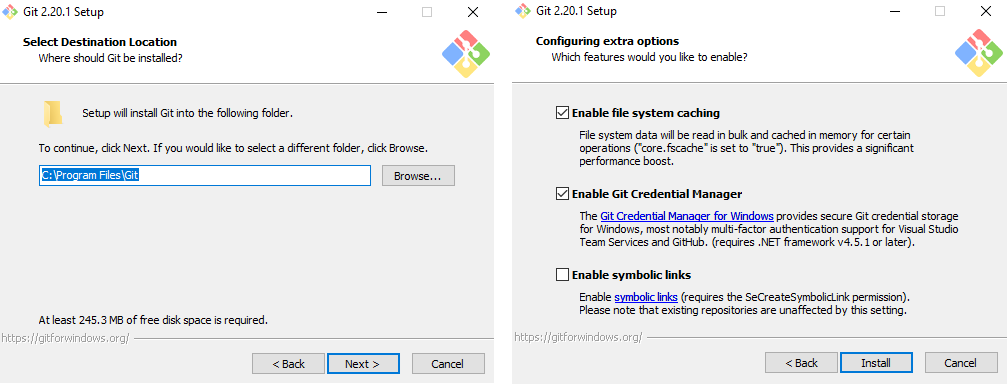 Fig.21 - GIT Downloads
 The first window look like this.
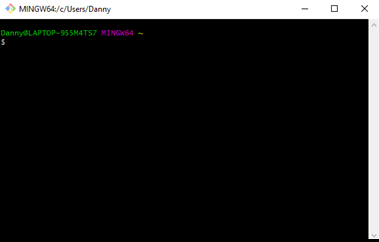 Fig22 - GIT Downloads
 After reading the quick reference guides , exactly "Setup and Config", I noticed that the git help command displays a list of the most used commands in GIT.
So I wrote "git help" to see what could happen, more commands appeared than the tutorial showed us. Like reset, rm, show, merge, fetch, etc.
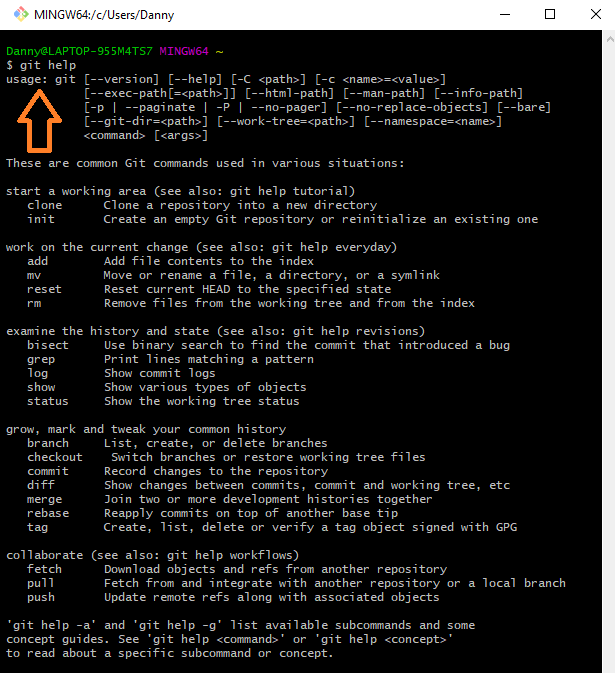 Fig.23 - GIT Help
 After knowing some GIT commands, we need to send our repository to the web. For this we will follow the tutorial of Eduardo Chamorro called "GIT SIMPLE CHEAT SHEET". We will copy our address in the GitLab.
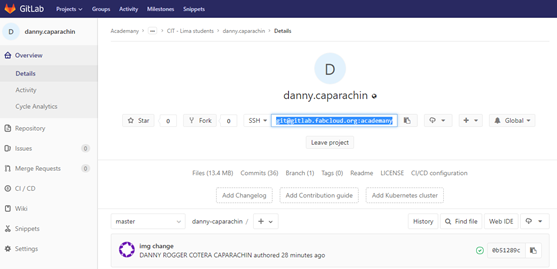 Fig.24 - GITLab Details
 I used the CMD command \Desktop> git clone and the address gitlab.fabcloud.org: academany/fabacademy/2019/ labs/cit/students/"your_username".git , then the repository was cloned.
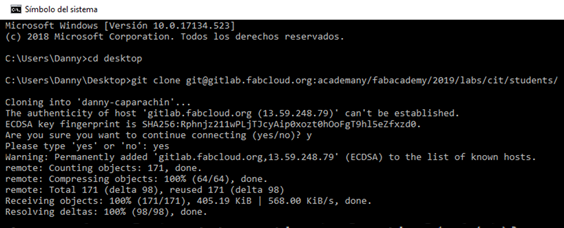 Fig.25 - CMD
 If you changed our Fab Academy template you need to edit the .gitlab-ci.yml file and apply a template "HTLM", then the new template will appear
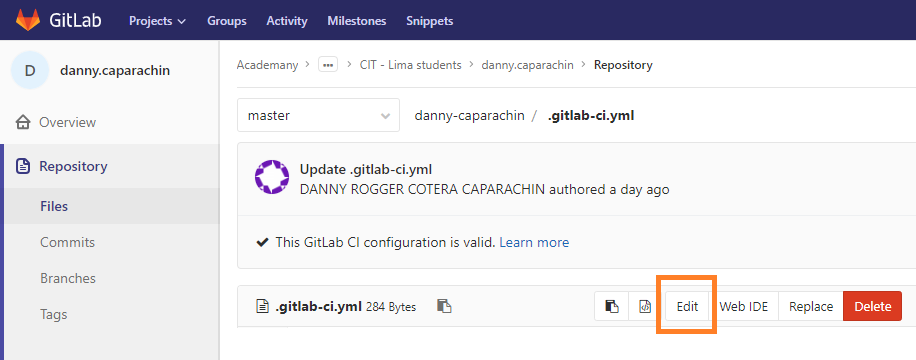 Fig.26 - GITLab Repository Files .gitlab-ci.yml
 After reading a little more git documentation book, the commands are familiar to me so the Git configuration was not complicated. First i check my username and email estos deben ser los que fueron proporcionados al fabacademy.
Many Git servers authenticate using SSH public keys. To provide a public key, each user in your system must generate one, if it does not already have one. This process is similar in all operating systems. If you have problems, you should consult this tutorial SSH Public Key . Finally, if we type the correct commands as in the image, the key will be added in GIT in the web version.
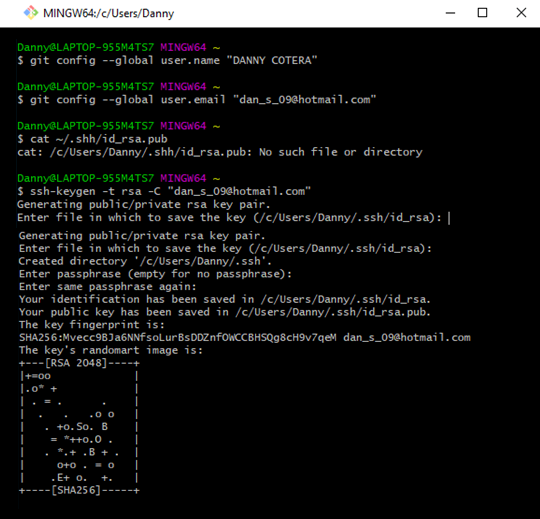 Fig.27 - GIT Configuration
 I push the repository to the web, to do that and follow this set of instructions: We write git add, to add file contents to the index; then git pull, to fetch from and integrate with another repository or a local branch; the command git commit -m "...", to record changes to the repository; finally, write git push, to update remote refs along with associated objects.
 Fig.28 - Upload files to the repository
 Finally, I discovered that it could be uploaded and edited from our repository in GIT LAB, for this it is necessary to click on the file to be edited.
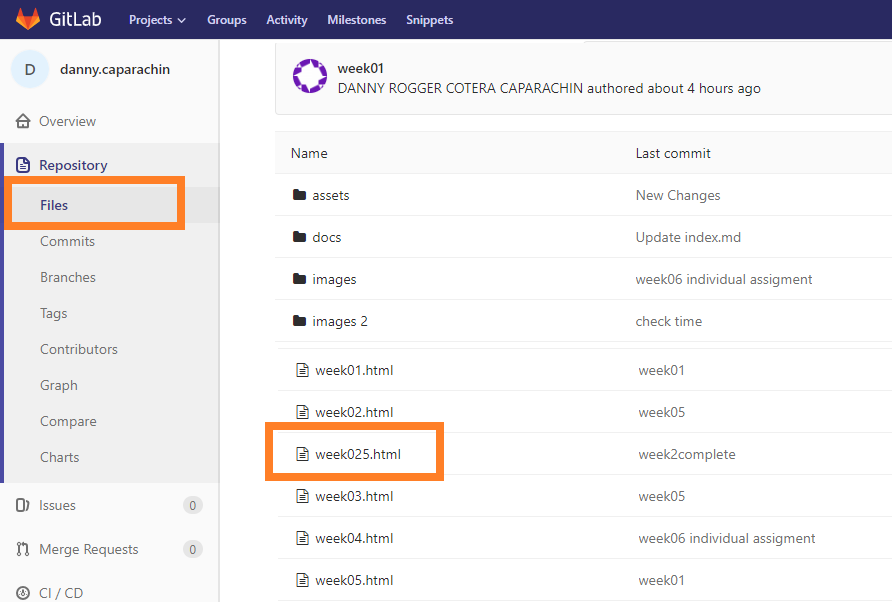 Fig.29 - Git Lab
 A box will open in which we will observe the option to "edit", we will click and another box will open.
In the Edit File box, we can modify in the same way as in our web page editors and to save the changes we click on "commit changes". If something is wrong in the edition, gitlab will show us a symbol like an "X".
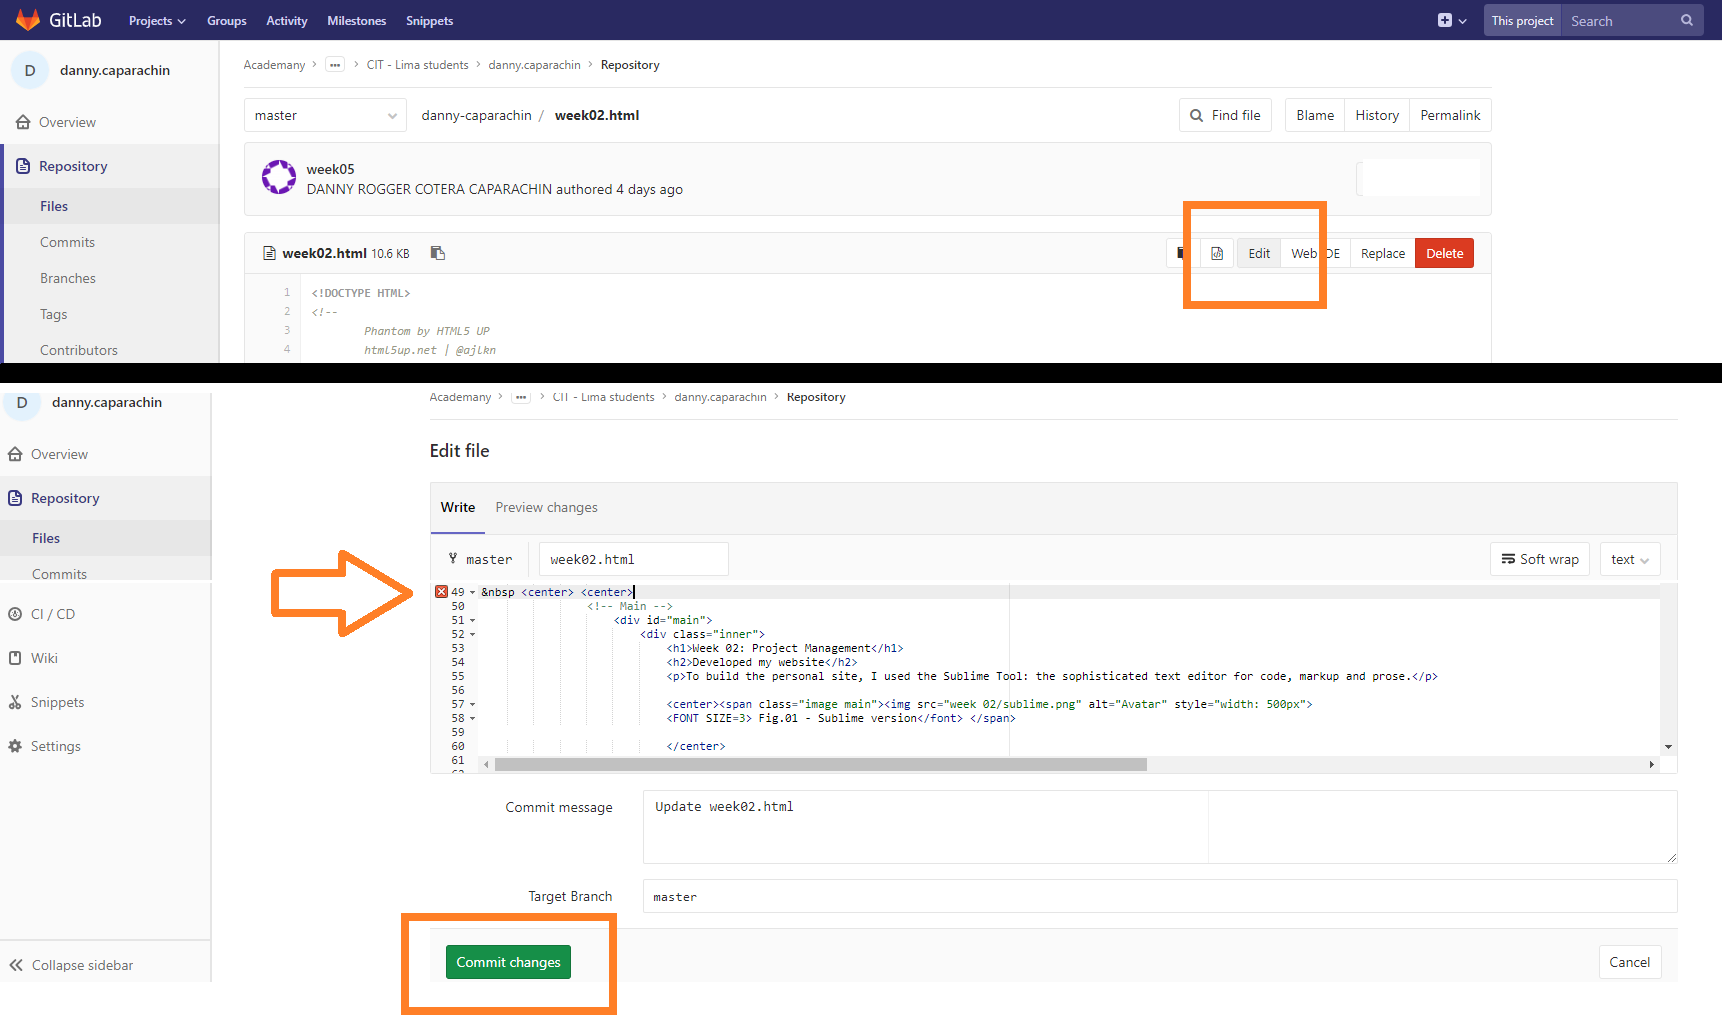 Fig. 30- Git Lab Edit
 STUDENT AGREEMENT
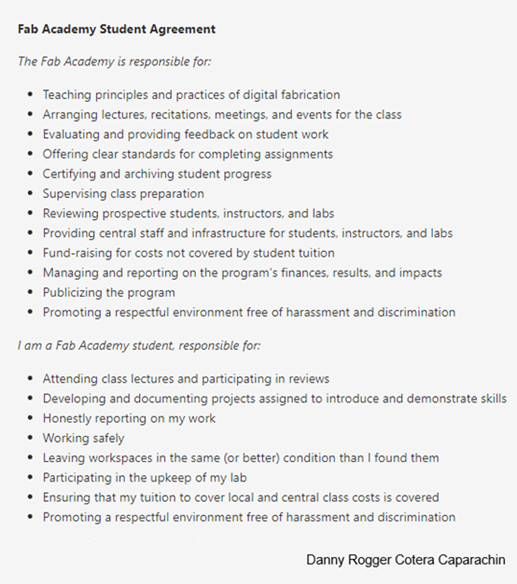 Fig.31 - F.A.S.A