
SENSORS
Temperature
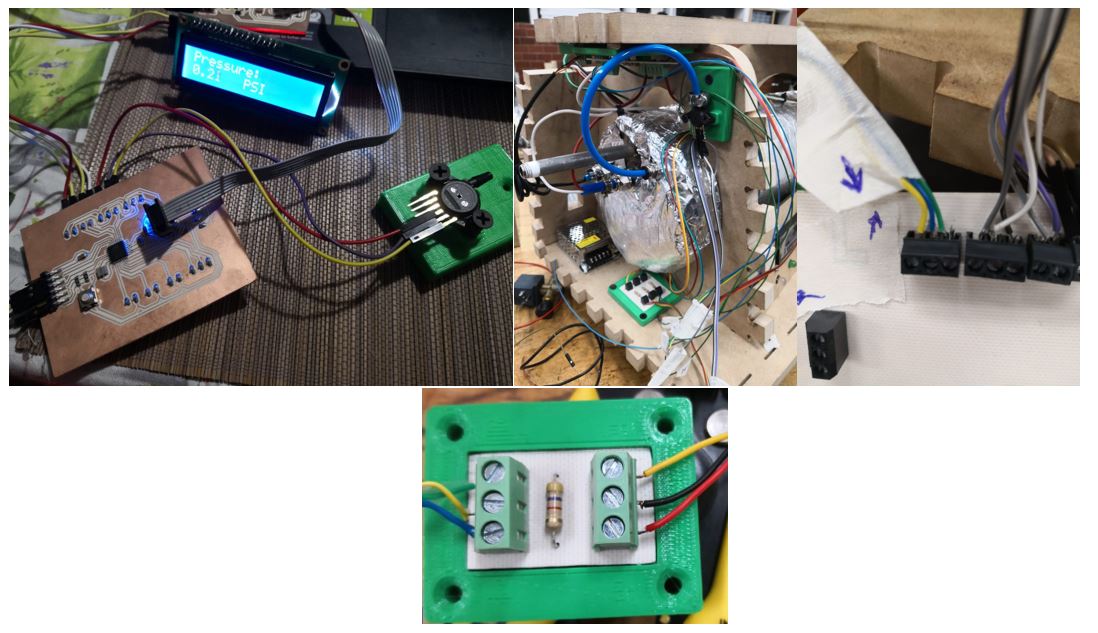
The temperature sensor used is the ds18b20 and a resistance of 4.7Kohm will be needed. The connection scheme is as follows
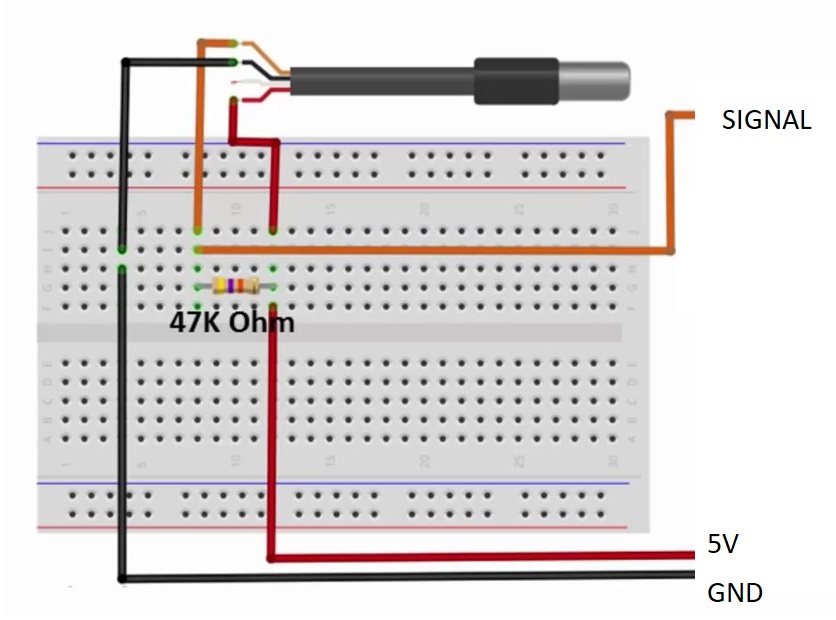 Since the sensors will be close to the tank, they must withstand high temperatures, which is why it is decided to use 1 / 2W resistors and small terminals to hold the sensor well.
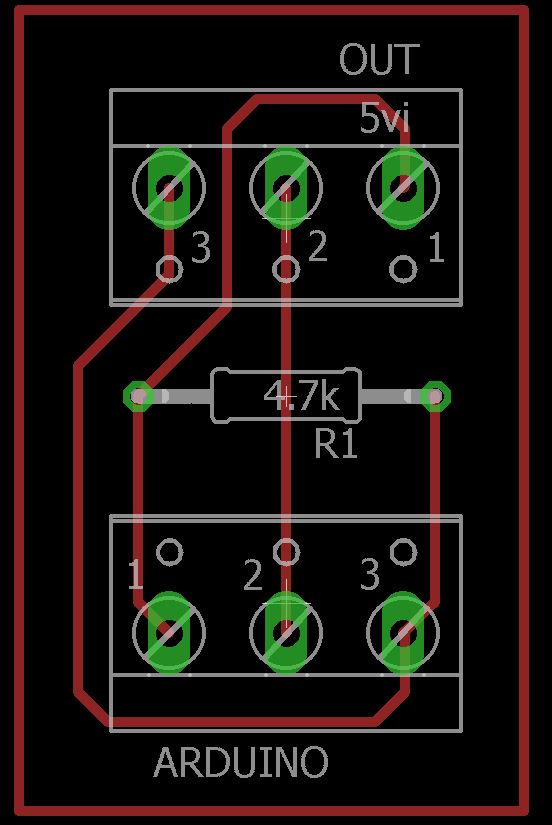
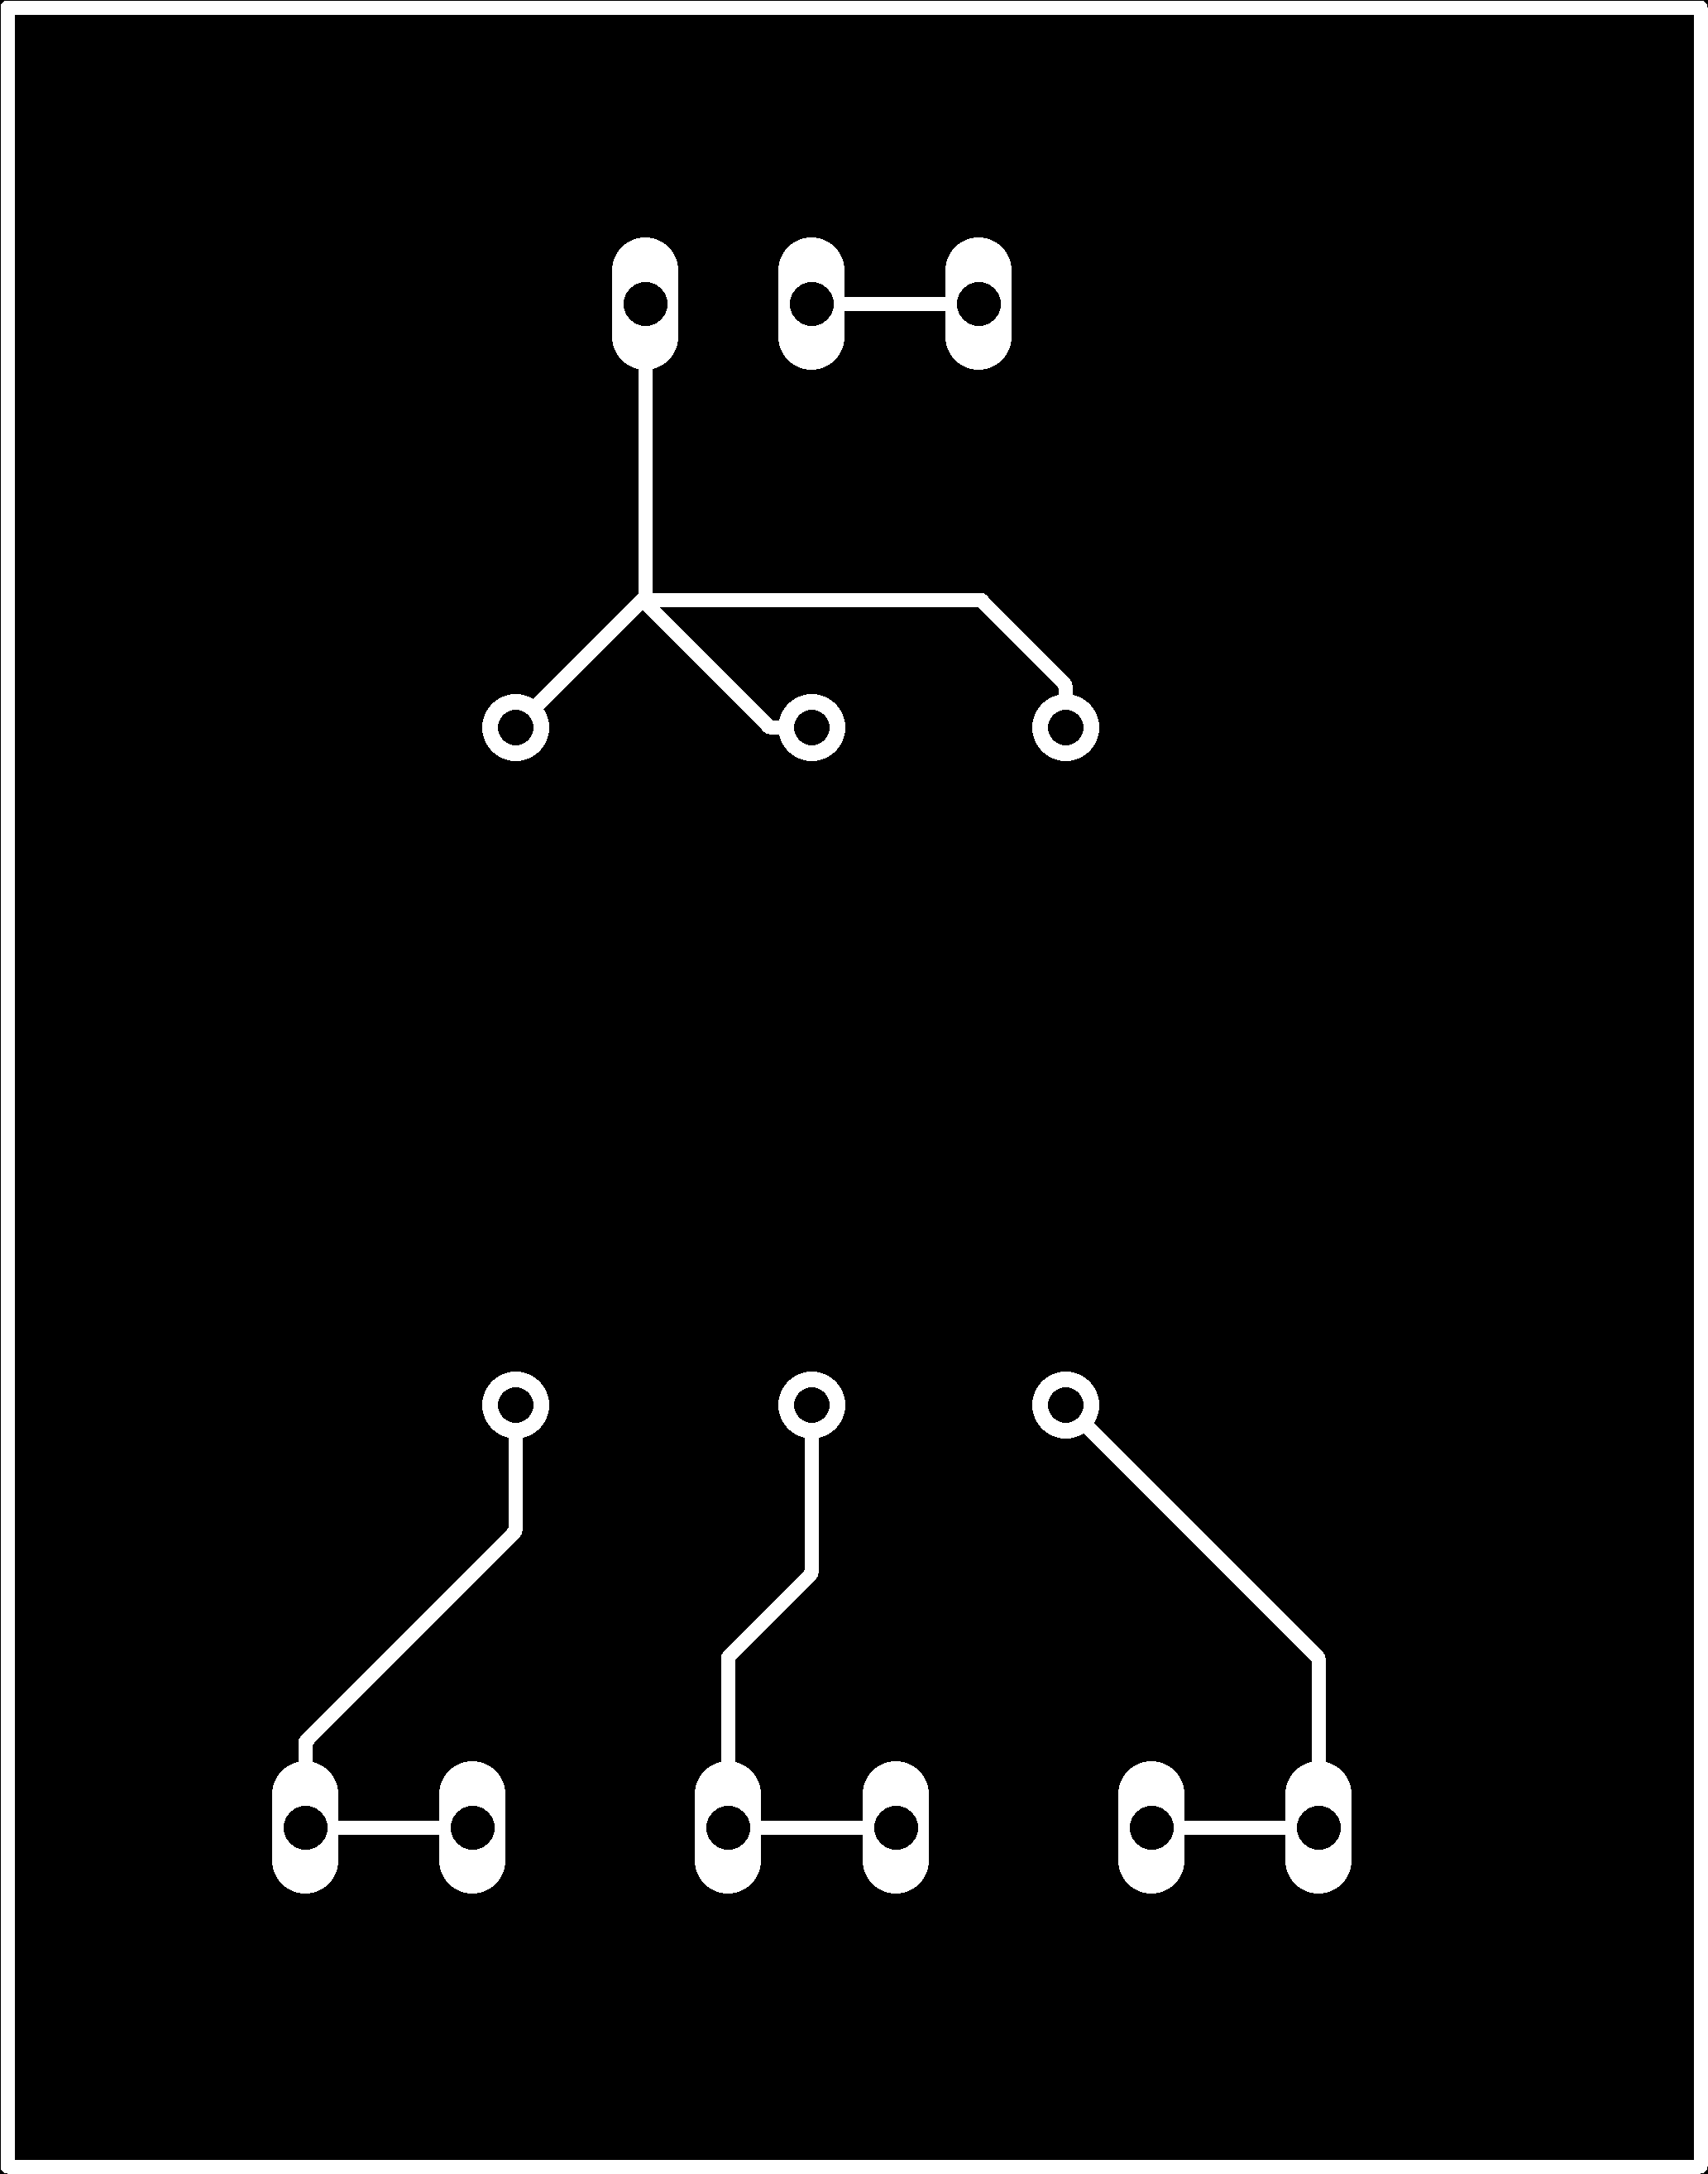
We say carry out a design of the board is the following:
Since the sensors will be close to the tank, they must withstand high temperatures, which is why it is decided to use 1 / 2W resistors and small terminals to hold the sensor well.
We say carry out a design of the board is the following:
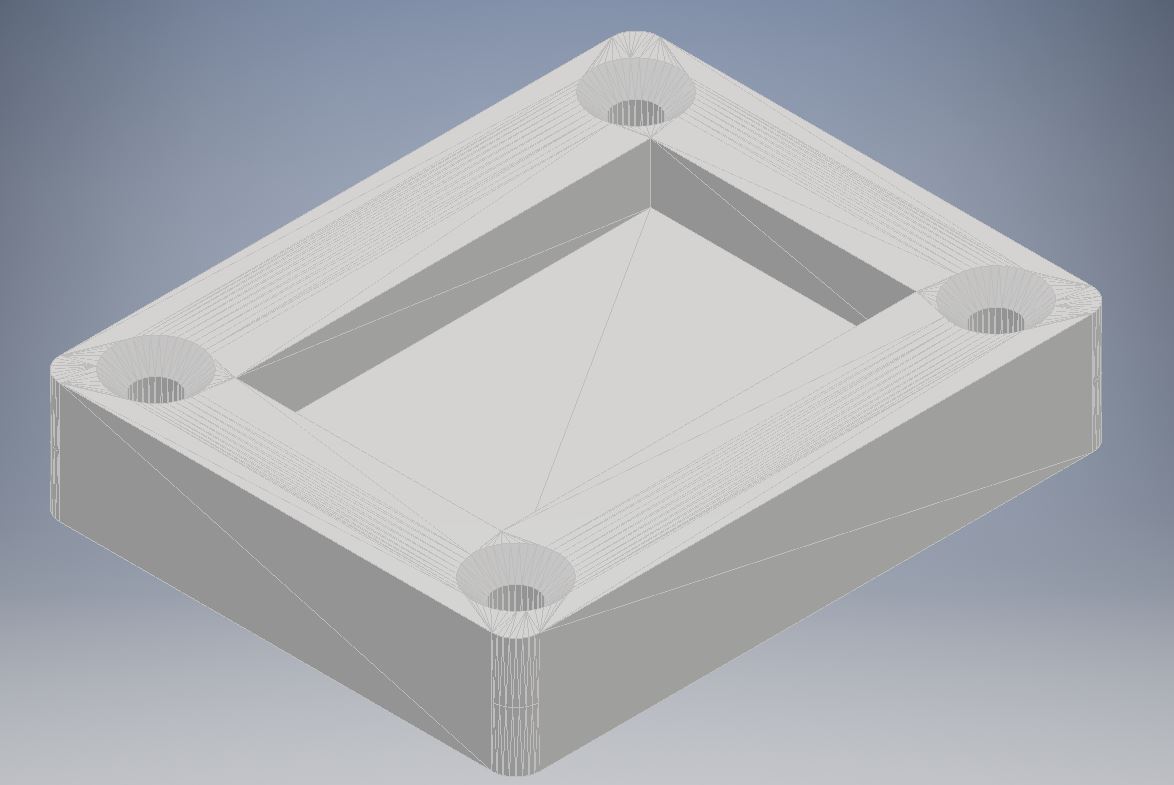
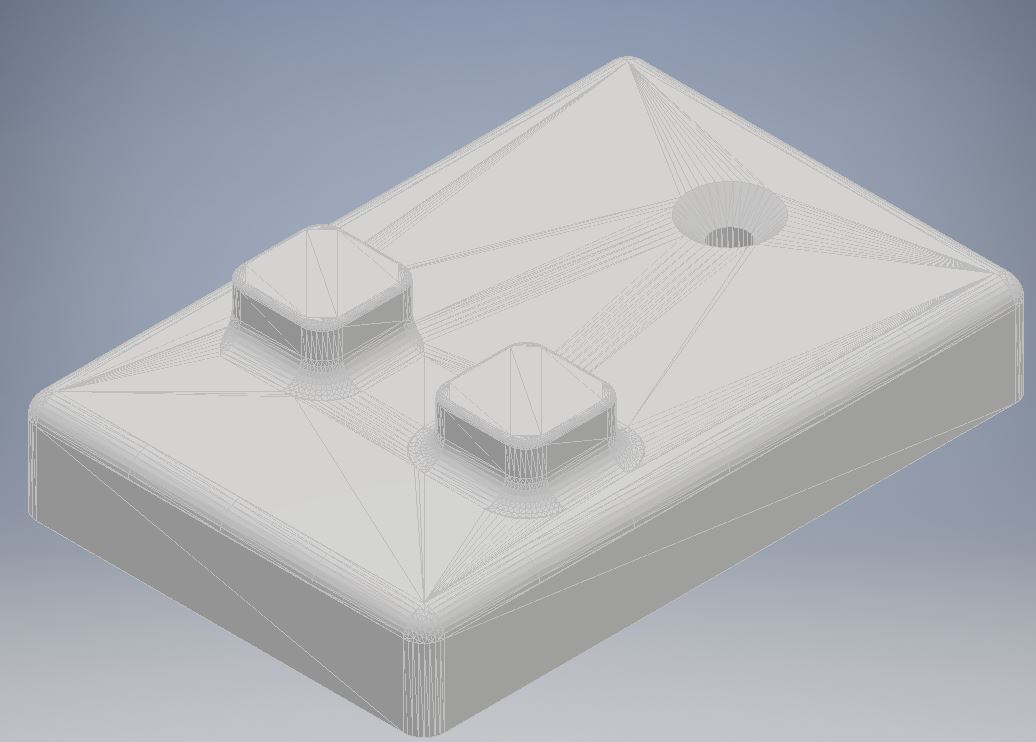
 This plate will have a small support made in 3D printing, then the design
 The main characteristic of the sensor is its degree of impermeability and resistance to high temperatures up to 125 °. It is a digital sensor, so we will need to connect it to the digital pins and use libraries for its correct operation.
The test code is as follows.
#include "OneWire.h>
#include "DallasTemperature.h>
#include "SoftwareSerial.h>
SoftwareSerial mySerial(0,1);
// Data wire is conntec to the Arduino digital pin 2
#define ONE_WIRE_BUS 16

// Setup a oneWire instance to communicate with any OneWire devices
OneWire oneWire(ONE_WIRE_BUS);

// Pass our oneWire reference to Dallas Temperature sensor
DallasTemperature sensors(&oneWire);

void setup(void)
{
  // Start serial communication for debugging purposes
  mySerial.begin(9600);
  // Start up the library
  sensors.begin();
}


void loop(void){
  // Call sensors.requestTemperatures() to issue a global temperature and Requests to all devices on the bus
  sensors.requestTemperatures();

  Serial.print("Celsius temperature: ");
  // Why "byIndex"? You can have more than one IC on the same bus. 0 refers to the first IC on the wire
  mySerial.print(sensors.getTempCByIndex(0));
  mySerial.print(" - Fahrenheit temperature: ");
  mySerial.println(sensors.getTempFByIndex(0));
  delay(1000);
}
Pressure
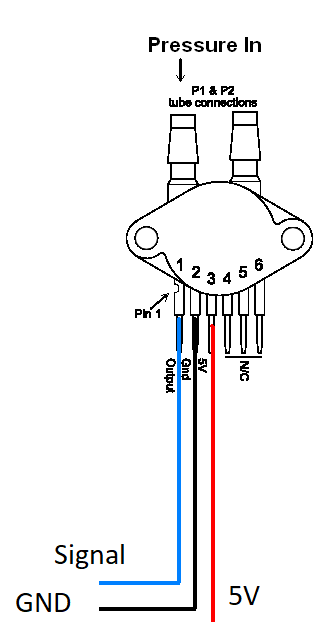
The chosen pressure sensor is the mpx5510dp, like the temperature sensor if it supports high temperatures and up to a pressure of 7BAR.
This sensor is of the analog type, so I will need the use of analog pins.
 Tests were carried out with compressed air to be able to calibrate the sensor having the following code:
#include "SoftwareSerial.h>
SoftwareSerial mySerial(0,1);
const float offset=1.0;
//2 bares son 2,16V
//1 bar son 1.45
// the setup routine runs once when you press reset:
void setup() {
  mySerial.begin(9600);    // Inicializa el puerto serie para ver datos en el Monitor
}

void loop() {
  float sensorValue = (analogRead(A3)*7.0/1023.0)-offset;
  mySerial.print("Presion: ");
  mySerial.print(sensorValue,2);  // Imprimir el valor que ese lee
  mySerial.println(" bar");

  delay(1000);        // demora entre lecturas para estabilidad.
                            // Para mejores valores reducir este valor y promediar
}
Water Level
We must avoid that the tank is filled with excess water, so I investigated how to measure water being the simplest the following scheme.
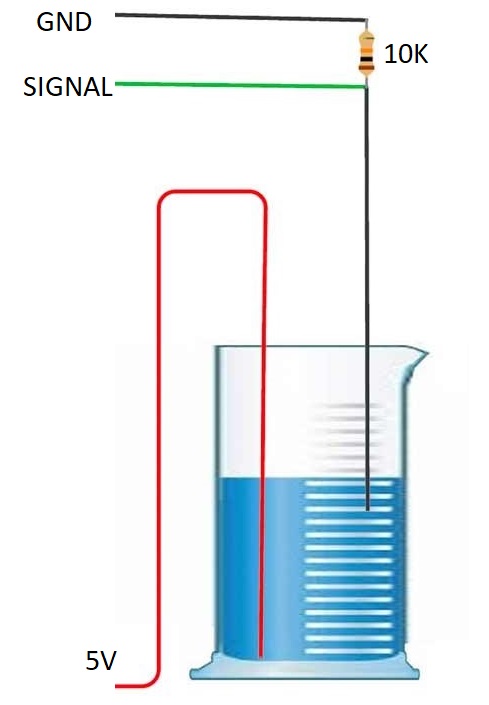 We will use water conductivity to measure the levels.
Once in contact with the water the reference cable and the cable that will indicate if it is full, medium or empty, will give us a voltage of the continuous type.
We will use water conductivity to measure the levels.
Once in contact with the water the reference cable and the cable that will indicate if it is full, medium or empty, will give us a voltage of the continuous type.
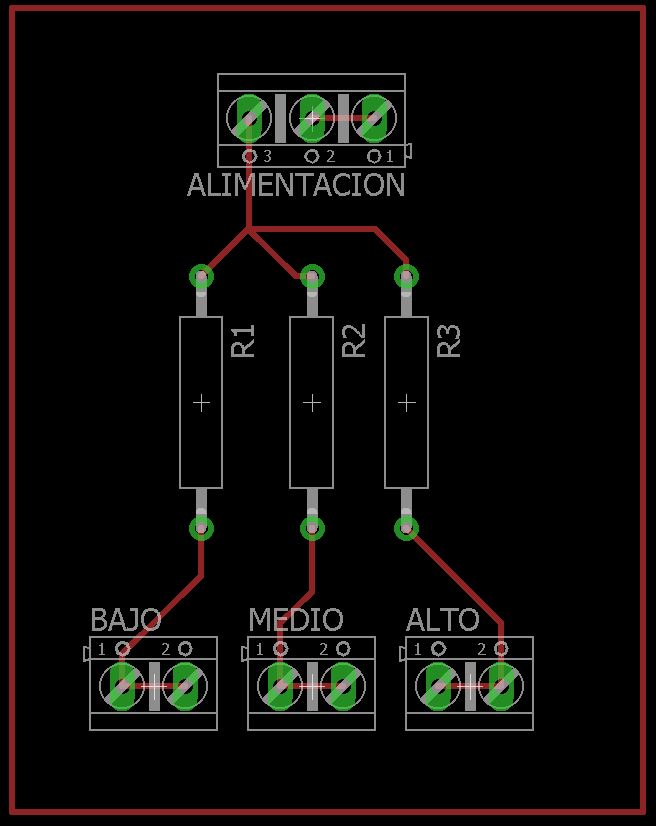
A small electronic plate is designed to measure water.
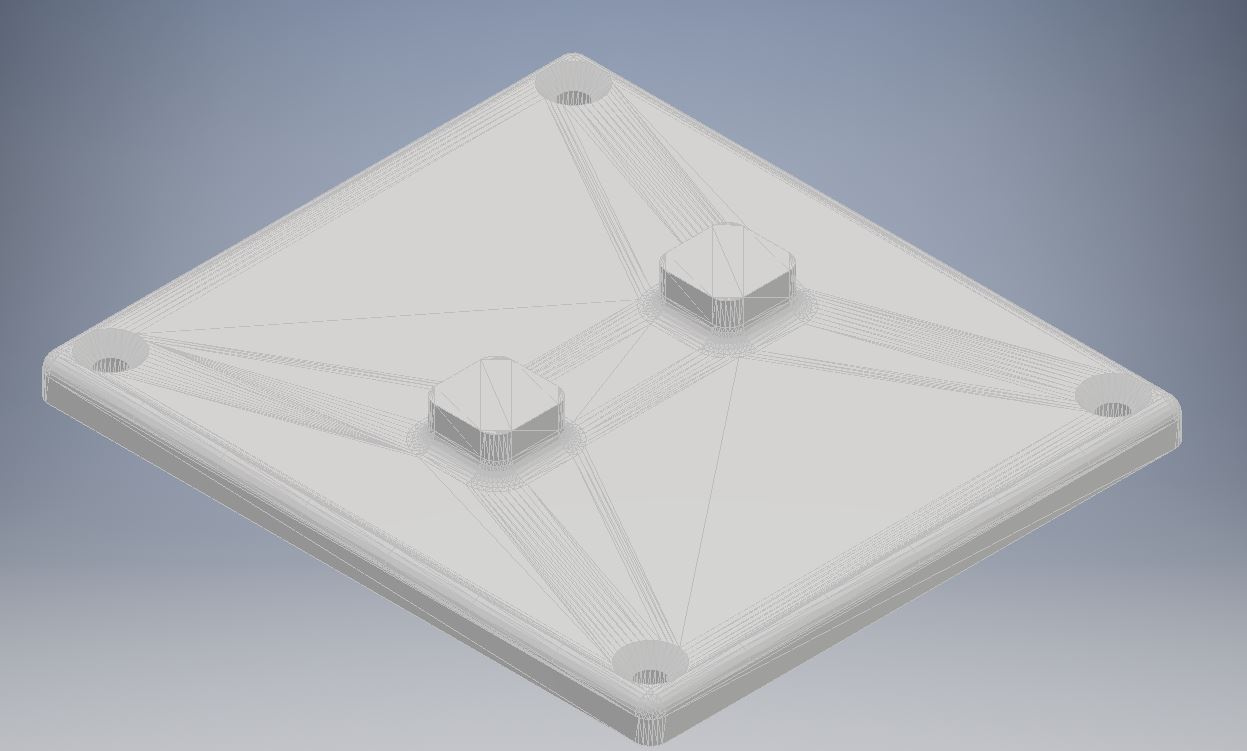
 As well as the other sensors, a design is made to place the plate securely.
 Here is a test code:
//Pin que nos da el nivel
int pinNivel1 = 4;//BAJO
int pinNivel2 = 5;//MITAD
int pinNivel3 = 6;//LLENO
int rojo=5;
int blanco=6;
int verde=7;
//Variable para almacenar el estado de nivel
int estadoNivelAgua1 = 0;
int estadoNivelAgua2 = 0;
int estadoNivelAgua3 = 0;
//Tiempo que debe esperar para la siguiente iteración del bucle
int tiempoEspera = 500;//1 segundo

void setup()
{
//Iniciamos el pin el pin que nos da el nivel
pinMode(pinNivel1, INPUT);
pinMode(pinNivel2, INPUT);
pinMode(pinNivel3, INPUT);
pinMode(rojo,OUTPUT);
pinMode(blanco,OUTPUT);
pinMode(verde,OUTPUT);
//Nicializa el serial
Serial.begin(9600);
}

void loop()
{
// Leermos el pin que nos da el nivel
estadoNivelAgua1 = digitalRead(pinNivel1);
estadoNivelAgua2 = digitalRead(pinNivel2);
estadoNivelAgua3 = digitalRead(pinNivel3);
//Dependiendo del estado muestra un mensaje u otro.
if (estadoNivelAgua1 == HIGH && estadoNivelAgua2 == HIGH && estadoNivelAgua3 == HIGH) {
Serial.println("El deposito esta lleno");
digitalWrite(rojo,LOW);
digitalWrite(blanco,LOW);
digitalWrite(verde,HIGH);
}
if (estadoNivelAgua1 == LOW && estadoNivelAgua2 == HIGH && estadoNivelAgua3 == HIGH) {
Serial.println("El deposito a la mitad");
}
if (estadoNivelAgua1 == LOW && estadoNivelAgua2 == LOW && estadoNivelAgua3 == HIGH ) {
Serial.println("El deposito esta al minimo");
}
if(estadoNivelAgua1 == LOW && estadoNivelAgua2 == LOW && estadoNivelAgua2 == LOW){
Serial.println("Debes llenar el deposito.");
}
delay(tiempoEspera); //Espera el tiempo indicado
} Return to final project
Download
You can download this files Here:
3D design (.ipt)
Water level 3D
Pressure 3D
Temperature 3D
3D design (STL)
Water level 3D
Pressure 3D
Temperature 3D
Code
Water level code
Pressure code
Temperature code
Board
Water level traces
Water level out traces
Water level brd
Water level sch
Temperature traces
Temperature out traces
Temperature brd
Temperature sch