Wildcard week
Introduction
This week we should design and produce something with a digital fabrication process (incorporating computer-aided design and manufacturing) not covered in another assignment, documenting the requirements that your assignment meets, and including everything necessary to reproduce it. Possibilities include (but are not limited to) composites, textiles, biotechnology, robotics, folding, and cooking. I decided to try make a tshirt, as was interested in silk screen printing Before I started I read some tutorials and watched vodeos about the silk screen printing. This tutorials helped me to remember some important parts, which I didn't rememeber.Activities
• Make a design. I should make a vector file as the vinyl cutter works with such files.• Choose the material
• Prepare the necessary materials and tools
• Cut the sticker
• Start printing on the tshirt
Step 1 - design and cut
For this assignement I am going use vinyl cutter machine, silk frame, paints, durometor, stick/transfer tape.This week I will make a tshirt for Dilijan football club. Our Fab lab is located in Dilijan, there are different projects, which should develope some fields in this city. One of this prjects is Fab lab, Dilijan football club (DFC), MAID center etc. All these projects callaborate with each other. Some of our friends are involed in DFC and we were discussing to make tshirts for the team by ourselves. At that time I suggested to make Tshirt and I will do my assignement too. So I asked them to give me logo and a sample of their tshirts. They didn't have Vectro file of a logo, they had only .png format file. I told, that I will draw it by myself and make some changes. In this picture you can see the difference, I indicated it by red circuls. You will see spaces, different angles, other font...
 (1).jpg)
I draw the logo by Corel draw software. I chose it because I used it before, when I was student and designed some logos for my taht time projects, etc.
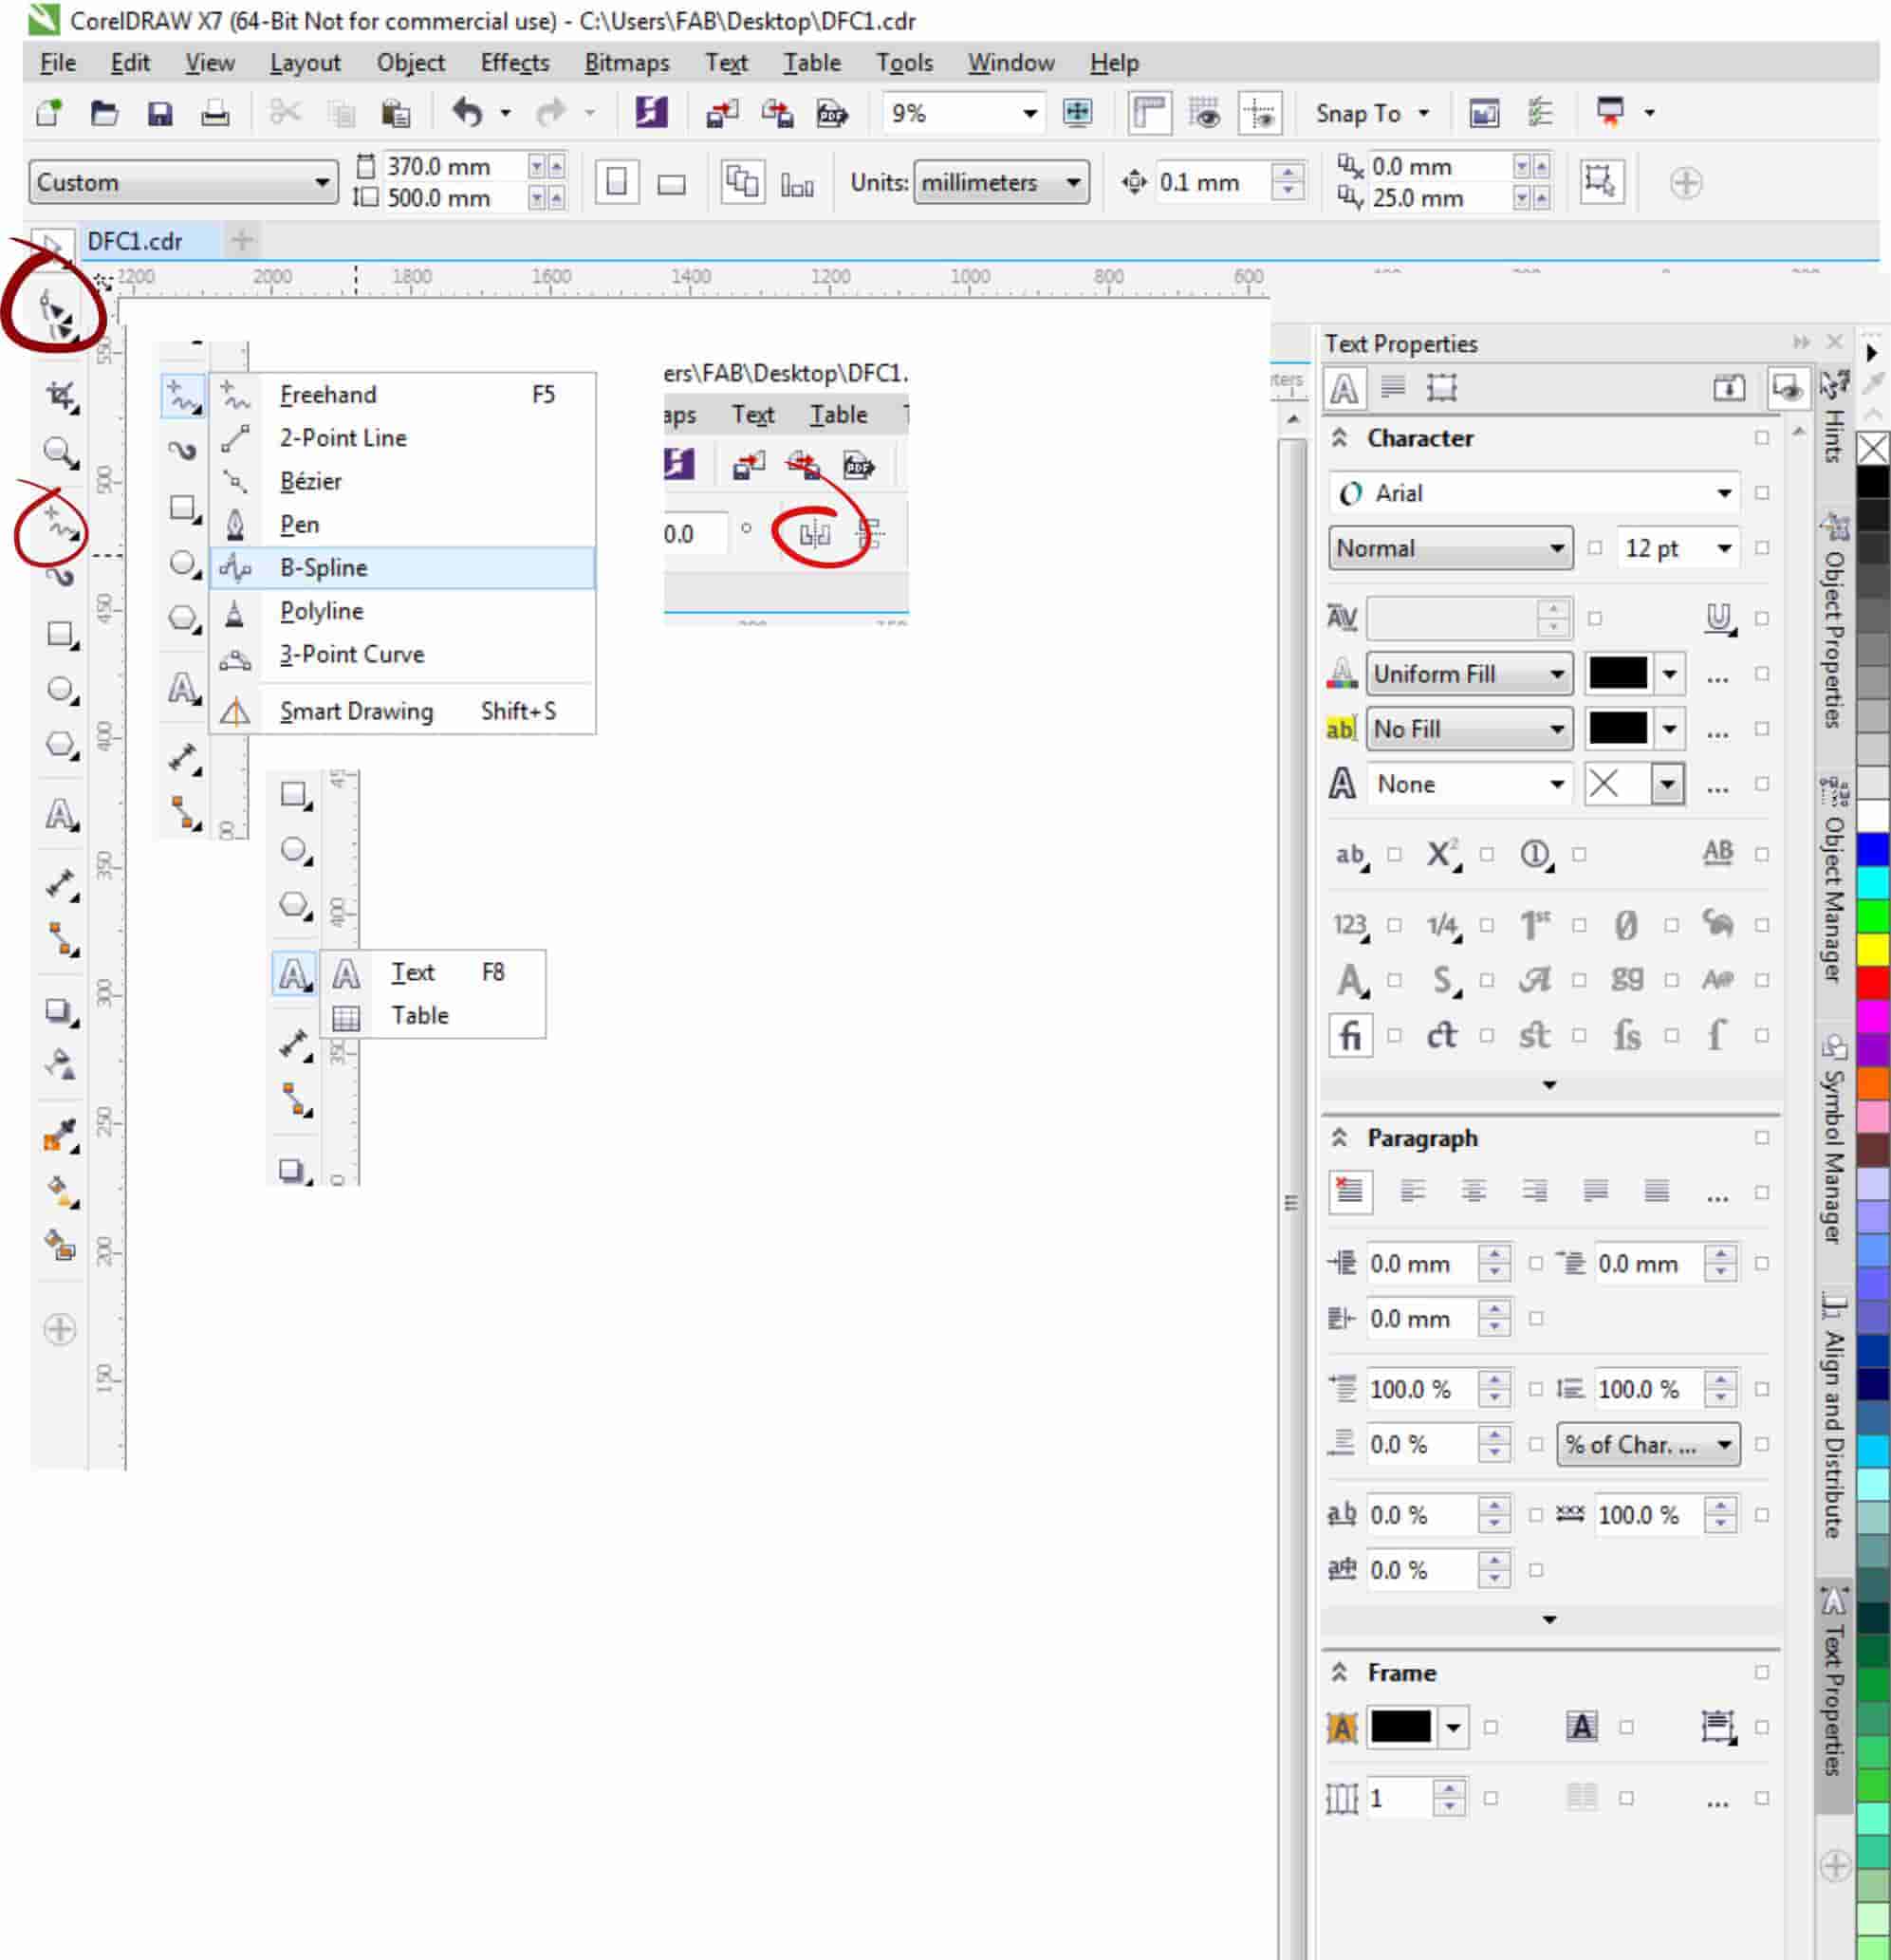
Corel draw is a vector graphics editor developed and marketed by Corel Corporation, which includes the bitmap-image editor Corel Photo-Paint as well as other graphics-related programs. My educational background is Mechanical engineer in printing technology. That's why during my university years I have used Corel draw, designed logos, flyers.. and of course I learned silk screen printing technology. And I was very excited with this assignement, bacause I started remembering some parts of my specialization and had a nostalgie. So I am going to describe how I did it. During desing process I used "shape", "freehand - B-spline", "A-text", "mirror", "interactive fill", "outline pen" tools.

I started drawing the lion part - part, but that wasn't a good idea, as after the drawing I had to group it and will have unnecessary lines. So I started drawing again and draw it as one body.
Here you can see the process
.jpg)
The first step was to open "Lion. JPG" file in corel, for using original lion picture as an example. I started from nose, after went to head and so on. I used "B spline " tool as it is very easy to use, it is like pencil, you hold in your arms and draw on the paper. After drawing the lion of course I had a lot of imprecisions, not good angles, etc. For improving the angles I used "shape tool". Here you can see a short video about how I draw the lion, the video isn't a good quality and it shows only basic parts of drawing, I spent a lot of time for editing the first shape of the lion, shaping the angles and so on, you can see the tools I used, processes I did, start and finish.
I improved all that by "Shape tool". After all these I wrote the text by "A text" tool. I used "Vinyl cut bold" font and wrote "Dilijan Football Club". For vinyl cutting we need to outline all objects we want to cut. That is why I used "interactive fill tool" removed fill, select "outline pen" tool, chose "width" "hairline" and my text was outlined. After I mirrored the text for printing the tshirt. After I make "hairline" all lines of the lion, as I mentioned before we needed it for vinyl cutting.
.jpg)
When I finished file preparation I went to the machine for cutting the logo by vinyl cutter. I send the file to machine and started cutting, the first try was failed, because I was careless when sent file to machine and gave wrong measures for cutting. My second try was succeed.

Step 2 - Printing process
I seperated cut parts from paper and left only outline. Put the transfer tape over tha image, after separated red part from the white paper and sticked it on the frame, then carefully removed the transfer tape too. After I put a cardbord in the t-shirt and fixes it by 2 sided stick for getting smooth surface.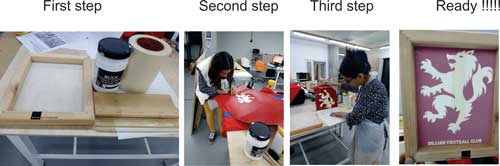
• Put the frame on the tshirt
• Filled the paint on the frame and spread it on the surface very carefully.
• After took away the frame from the tshirt.
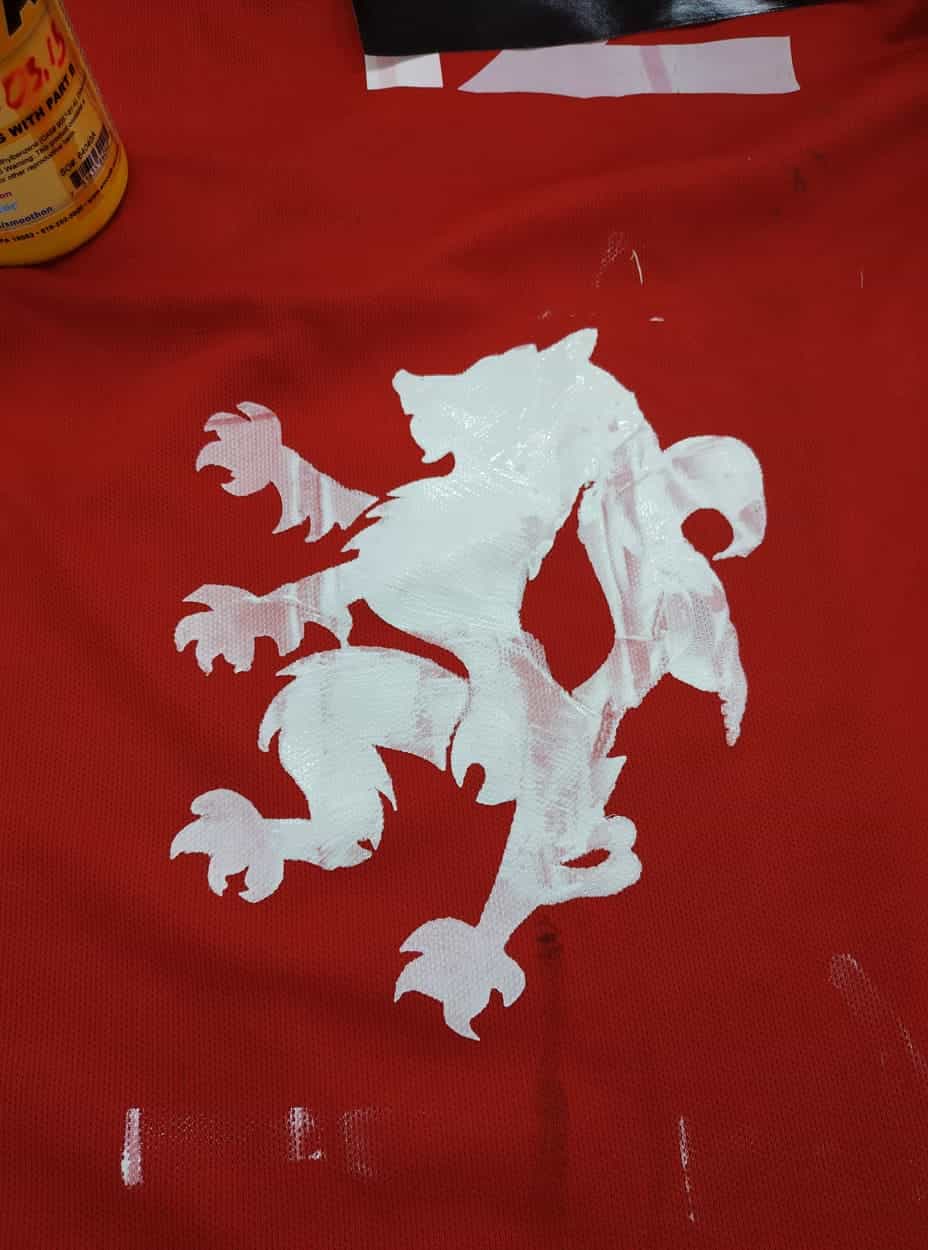
In the photo below you will see a very bad printed T shirt, I put paint with a thick layer and failed. Before starting this week's assignement I decided to test the paint and all tools. I found an old vinyl of the lion logo (which I have cut some weeks ago) and started the printing. Looking at this picture you will see thick layer of paint and some spaces between lion's body parts and blurry paint․ It is result of wrong processes. The mistakes were bad design, wrong cut vinyl, thick layer of paint. That is why I draw a new lion logo, I have described it above.
After I took another tshirt and repeated the precess and at this time I put thin layer of the paint and succeed. The tshirt is ready and need a time to dry, for washable printing we needed 6 days for drying (read it on the can with paint) After printing process, I washed all used tools and put them to dry.
Tshirt printing process is very amusing and I liked it. I learned how to make different designs on the textiles and I would develope my skills in it.
Here you can find the file of the Lion