Don't do the same job over and over. Do it just once.
How many time did you create de same piece over and over because some details didn't fit to a specific context? In most of the cases, we should create with the mindset that we will reproduce that item a little bit different each time. The parametric design is, in my opinion, one of the solution to be more reproductible.
Parametric design, interconnected sofware
My challenge of this week was to create:
- A 3D parametric form
- Unfold that form to make it flat in a parametric way
- Create a parametric 2D texture
- How can you prepare a raster pictures in batch or to prepare them to be vectorise.
- I decide to experiment the 3D parametric modeling with Fusion 360 because I used this software sometimes, but I never went deeper in. I was wondering if it was possible to create a parametric and curvy shape on it. I used to use Solidworks, and both are very easy to use with regular geometry and complicated with organic and irregular shapes.
- To unfold the final shape, there is a plug-in called Slicer on the app store of Fusion. It can take the 3D form and decompose it in different ways and techniques that you can easily cut it on the laser cutter and then assemble it in a 3D shape (A little bit like a 3D puzzel). This parametric software use the thickness of the material that you create in it and adjust every slot to have a good assembly. One technique particularly interesting for me was the origami one to unfold my 3D fusion shape.
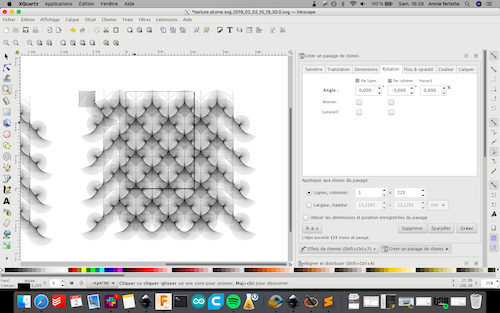
- Inkscape open source software is very similar to Illustrator and I was struggling to figure out what was the opportunity with the clone tools in it. I saw the clone tiles fonction and after a while generating some weird random stuff, it looked like nice pattern was more a lucky hasard thing. I was controlling nothing at all. Can I generate a texture that I actually control? I went on Youtube to see what the community was able to create in term of graphic design on it with the clone fonction. Suprise!!! I found really impressive results so I give it a shot. I found this tutorial on making a regular fish pattern and I understood that it work like the moroccan porcelain tiles. The pattern on your tile is actually ¼ of your pattern and it can be repeated endlessly.
- Preview is a software integrated in Mac devices to quickly modify raster files or images like PDF, JPEG and PNG. There are other ones who do the same job but not quick as Preview. I try Bimp with Gimp, but it was not compatible with mac, so it was a little bit time consuming to change computer, open the software, make the changes and let it run. On mac, this free solution is so fast and easy that most of my images manipulation are done during the travel in buses. A lot of basic fonctions are integrated in this software and let you add things to a picture: change the colors gradiants, increase the constrast, change the sizes of a picture and more. In few minutes you can prepare a picture to put on a web site, add information to it or prepare it to be vectorise. I personaly do handmade sketch or drawing that I can scan and work from there. When you scan something, your paper is not exactly white or you have some shade on it. Before, I had to use a software like photoshop to adjust it but it was long for nothing. Apperçu let me do this king of basic change in one minutes max wich is very usefull when you have alot to deal with. You can apply the same change on a batch of image.
Steps
1-Fusion 360
Fusion 360 has a very great tool to draw with parameter and constraint. Regular geometric form are great and easy to constrain and change parametrically, but what about a more organic shape.Spline and Conic curve can they be parametric too. I decide to create a bird body that I can easely change the size.
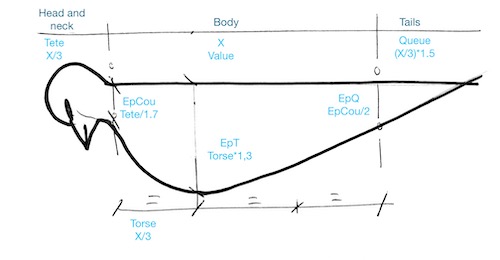
- I start by making a small sketch on parameters that can be essentials. I apply the same technique as the one use to draw humain body proportionaly. We use the size of the head to make all the proportion. In my case, the most important dimension is the length of the body. The head and the tail can me completly different, but the body stay similar and this lenght will be relative with my future electric circut.
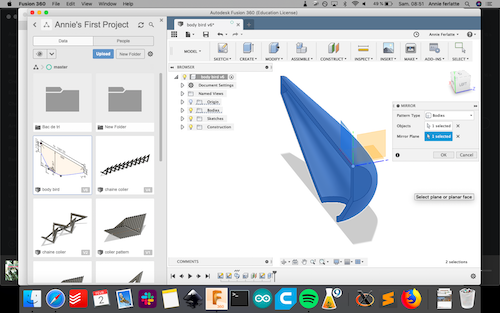
- On Fusion, I start by drawing the profil of the body. (This animal is symetric so I plan to draw half of it and do a mirrorfonction at the end. This result of the mirror fonction stays link to the first part, so all future changes will follow)
- What was the most complicated was to constrain the curve factor. (the deepnest and the direction of it) I put some dimension and try to put has much has constrain without a dimention (ex.: this construction line need to be horizontal and tangent to this other line)
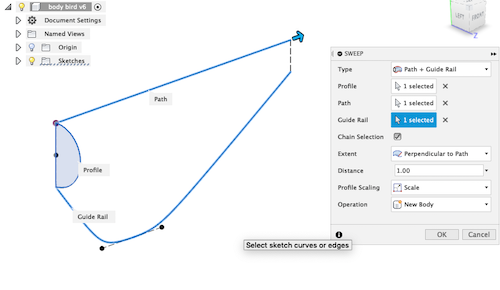
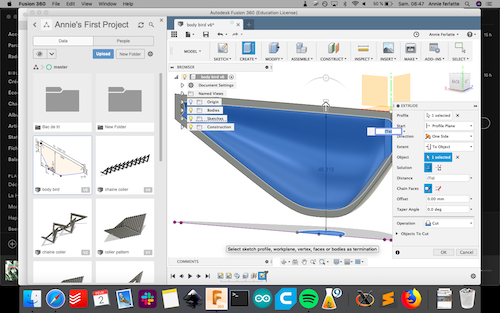
- After few tries, the sweep seem to be the best option. I try to generate a surface with Patch but it look too heavy and too well responsive so I plan to stay in the model section. To do the sweep fonction, you need a profile and 2 guidlines. The first drawing of the bird was closed at both end with construction line. For the sofware, a construction line is not a real line so the profile is technically open. Conclusion: I have my tow guidlines.
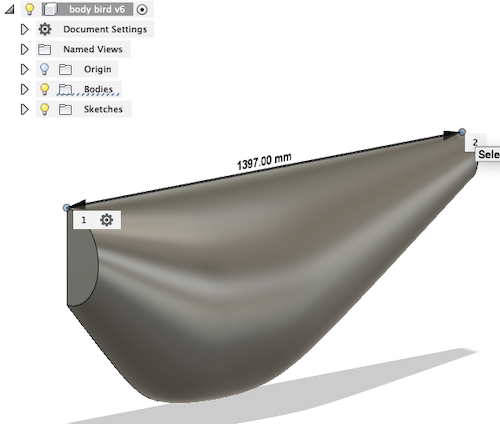
- On a perpendicalar plan, I draw the front profile of the bird. To constrain that part was a little more challenging. I try first to snap on point on the sketch of the first drawing, but when I try to sweep it and change the dimension, nothing follows. The only point that I can snap was the origin. I snap on the origin and constraint it on a vertical contruction line alined with the first drawing. At this point magic happened and the shape was created.
- To imbed the future electonic, the body of the bird needs to be empty so I create a shell of a specific thickness.
- I create another plan.
These are some website very helpful: Parametric modeling, the base
Schetch of the propotion
Schetch of the profile of the shape

Sweep fonction
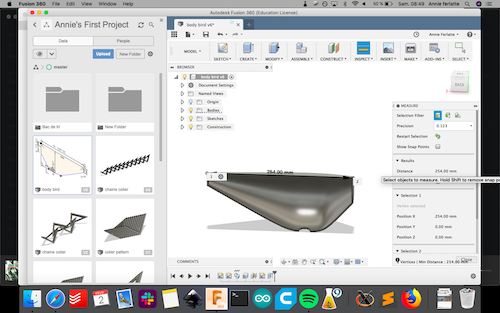
3D shape
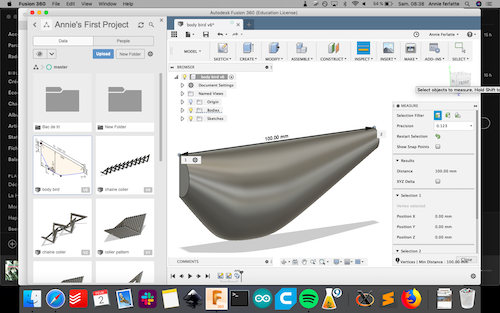
Parametric test
Make a shell and a sensor hole
Parametric test

Parametric test
Make a mirror
2-Unfold your shape on Slicer
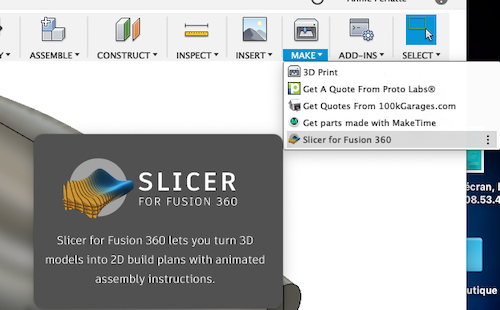
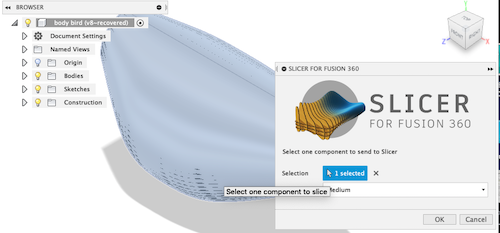
- In the Fusion interface, when you have a final shape, you click on Make and than choose your Slicer app
- Select all your shape (you can click on the higher parent in the fusion tree) and the quality of the resolution. It's a little bit like when you need to export it in stl
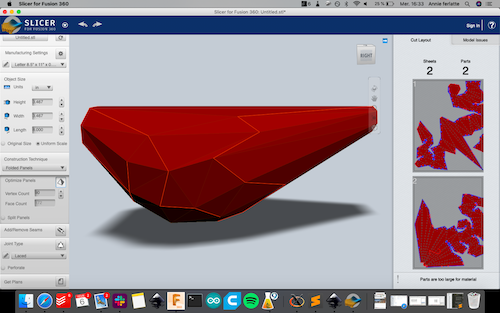
- When you arrive in Slicer, you can create or select your material (Manufaturing Settings). The size of your material will influence the size of your final plan and the spaces of the slots
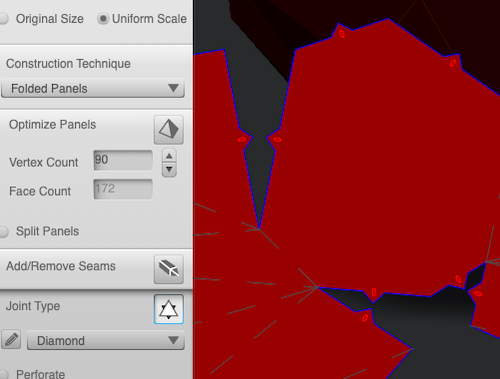
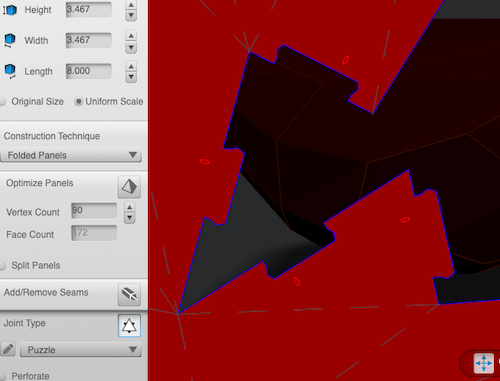
- In the construction technique, you can choose different way to assemble your volume. In my case the Folded Panels is the best for my purpose
- The parameter Optimize Panels influence the quality of the resolution.
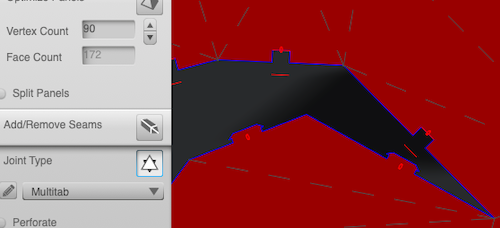
- Choose in Joint Type your type of assembly (see pictures)
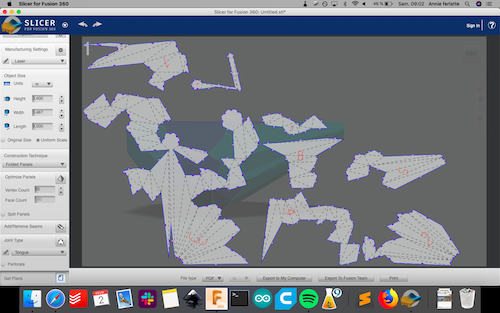
- Last step is to download your plan. You can choose DXF or PDF. I take the PDF option.
It was really easy and intuitive, but I have a hard time to figure what goes where and why it has so much pieces. In the sofware you can highlight each of them if you click on the piece on the reference plan, and than you can understand well were each piece goes.
Fusion to Slicer
Select all your body
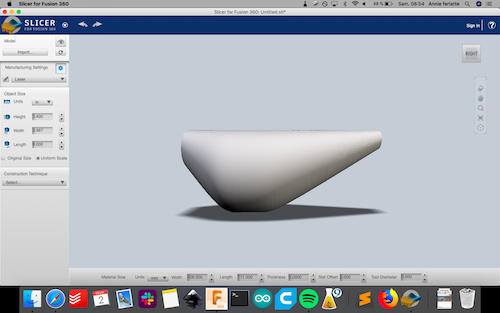
What you will see in slicer when you will open it
Select a technic (Folded Panels)
Some joint types
Get the plan
Export in pdf on your computer

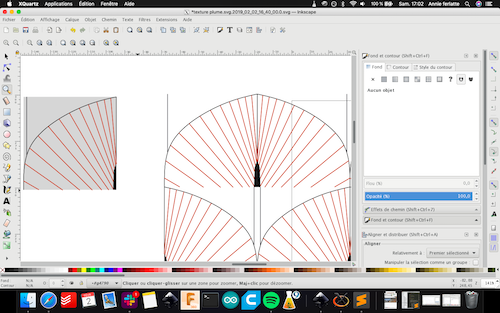
3-Make a parametric texture in Inkscape
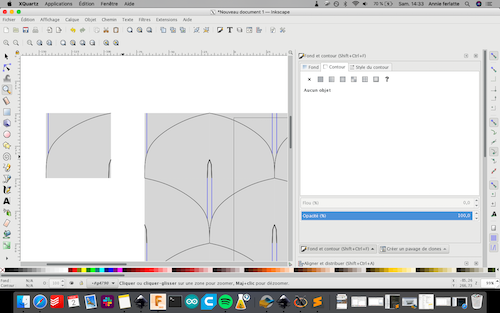
- Create a square with a 50% opacity
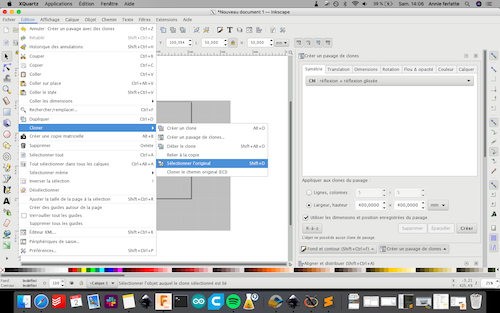
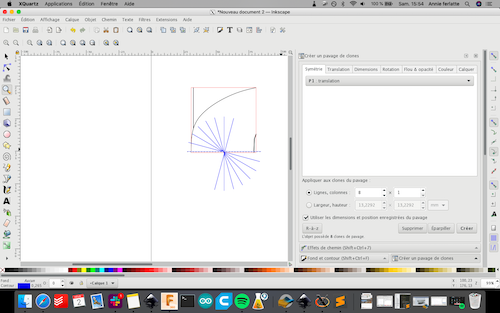
- Choose clone tile and make a translation
- Clone the original square and move it aside to be your reference pattern
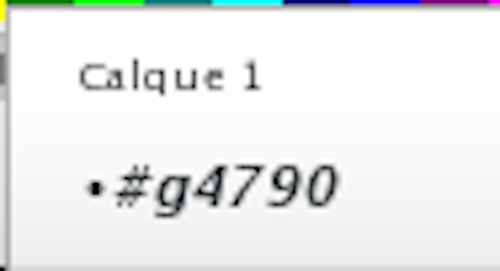
- Technically, all your squares should be on the layer 1 by default. If you double click on the tiles that you put aside, you should see another name instead of Layer 1
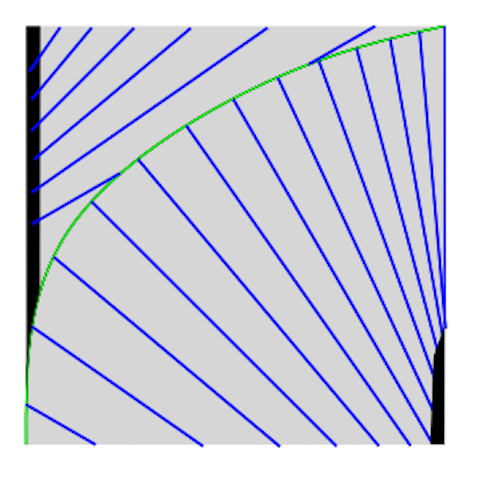
- At that point you can draw lines in the reference square and it should copy automatically in each of the clone square.
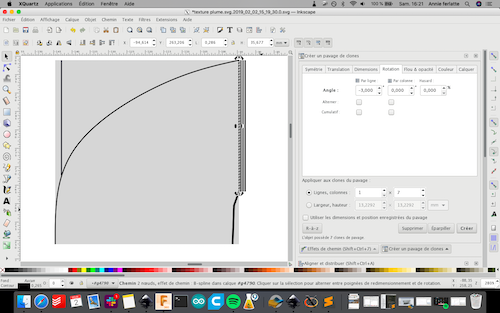
- Go back to the Layer 1 and create another layer under your layer 1(I chose the Layer 4).
- Copy the reference square on this new layer.
- Double click on the reference copy square and delete everything except the square.
- Aline it exactly under the original reference square.
- Go back to layer 1 and double click on the original reference square.
- Delete the square (the line you made should stay) and the pattern you create should not have a background anymore.
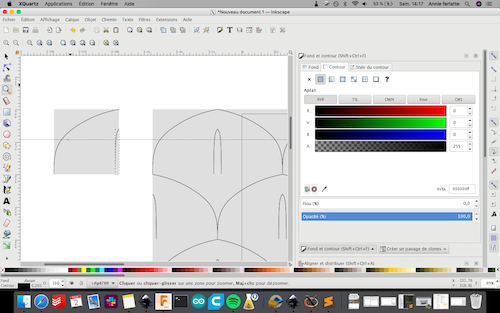
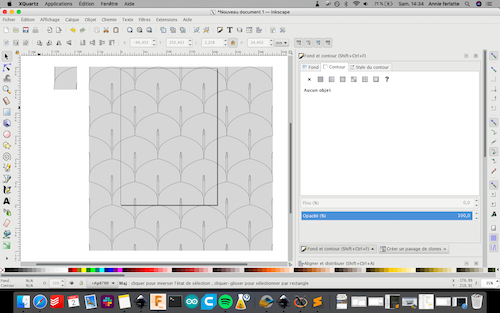
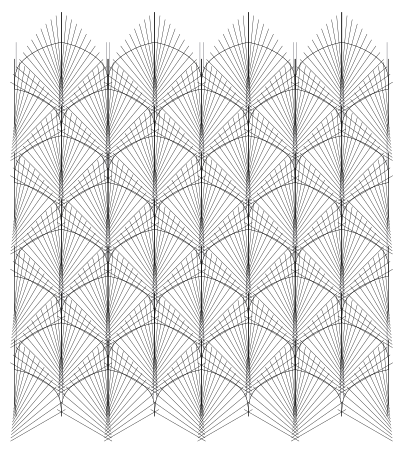
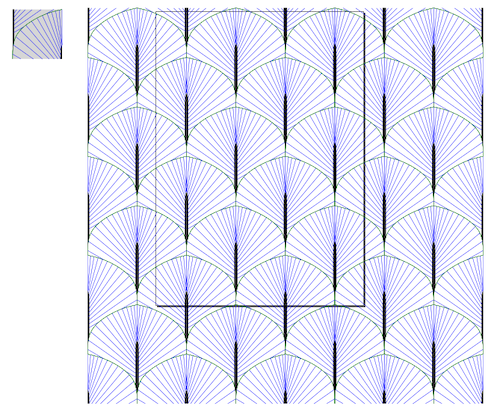
I start by making a easy pattern first and complexify it after. I was concentrated to generate the smaller feathers on the belly of a bird. To make it richer, the second texture I draw some lines to detach every piece of the feather. I try to generate a regular parametric line pattern. After few try and fails (somes fails were very nice), I found good parameters.
These are some tutorial very helpful
Make a clone tiles with the symetry Reflexion + glide reflexion.
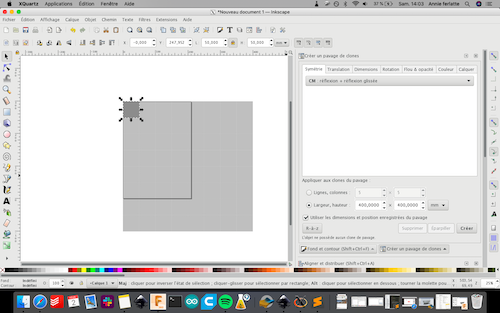
Select the original square and clone it
Double click on the original square to enter in your layer one.Draw line.
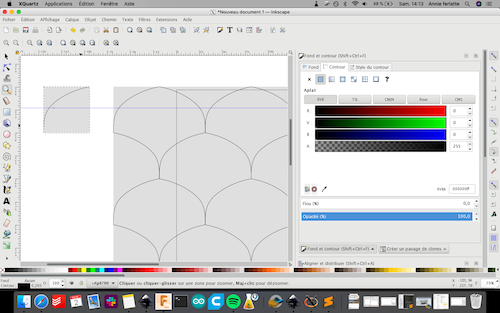
Each square is a 1/4 of your pattern. Complete the square
The 1st pattern complete
Make a layer under and copy the original square on it (I copy it on layer 4)

Aline both square, inter in your fisrt layer and delete the fill but not the lines
2 squares patterns toghetter
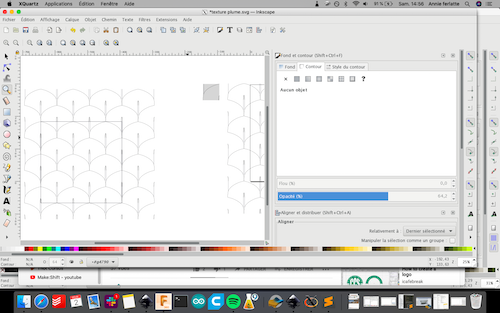
Starting to understand the corelation with the colons and lines with the angles
How to make the line rotate
How to put the center point at the end of the line
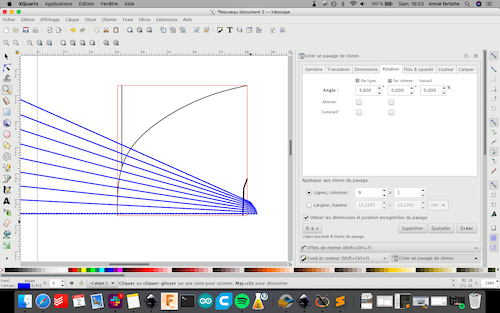
Instead of being in the line categorie can it do the same thing in the column
Oups, 123 lines it's a little bit to much
Figuring the corelation bettween the angle and the translation
![]()
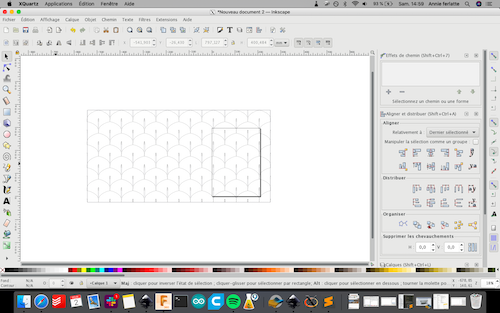
Good parameters
![]()
...But it's too long
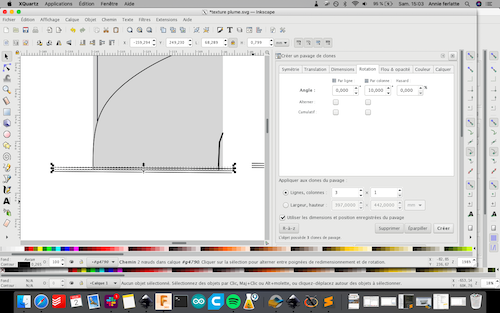
Duplicate the lines and make them shorter by hand
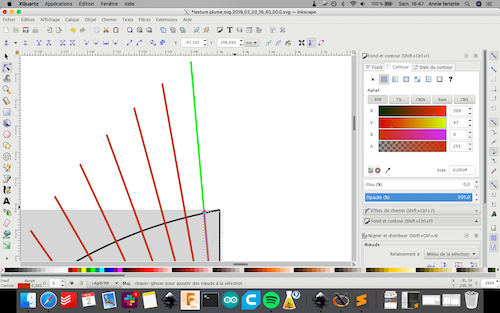
Using 2 differents colors to see easily what I'm doing
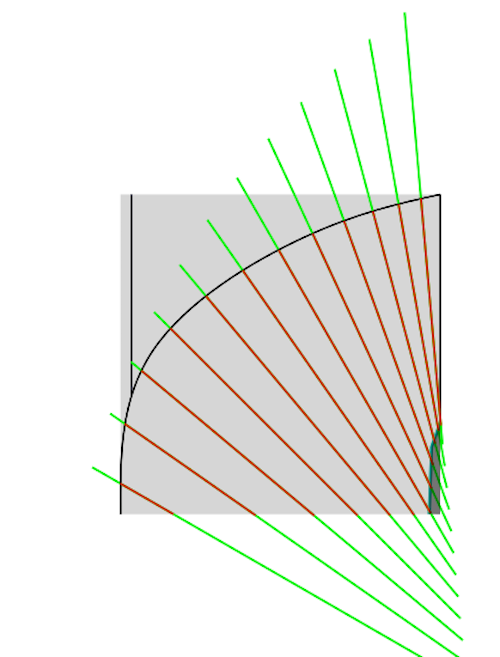
Complete the first part of the pattern but not completely
Complete square pattern
Complete square
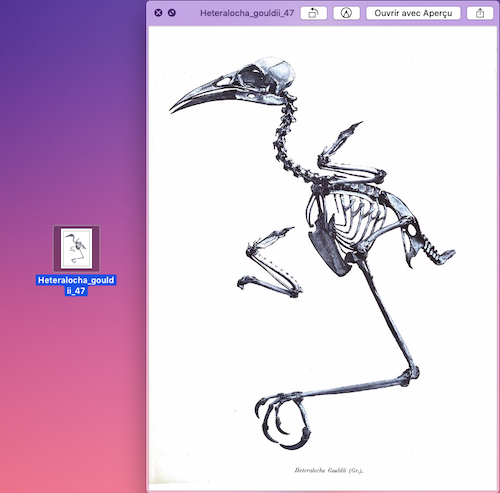
4-Modify quickly a raster picture
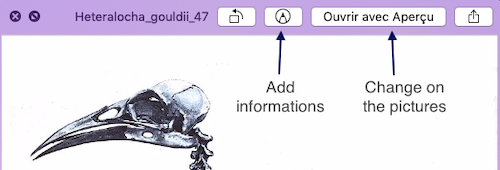
- Select your picture that you want and press the space bar. You will see a preview of it and few quick choice. The first logo to your right is to share the picture (with mail for exemple), after you have Open with Preview, the pen is for anotating the image and last one is to rotate it.
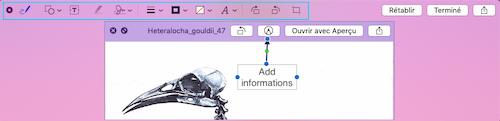
- When you click on the pen you have acces to the menu in the blue rectangle (see picture) You can add things on the picture. It can be text, drawing, anotating, signature, etc.) or you can make realy basic change like cropping it or change the orientation. This menu is for 30 seconds changes (it's a shortcut of Preview to be more quick)..The time..it's a very precious resources. Let's use it wisely
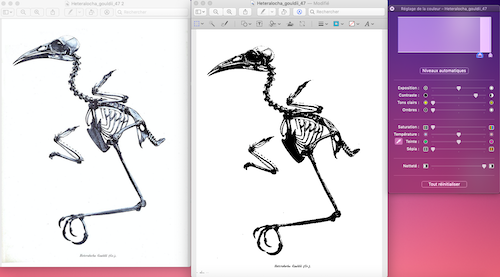
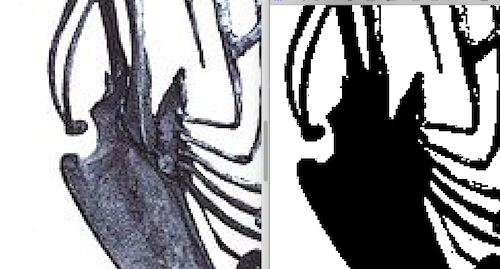
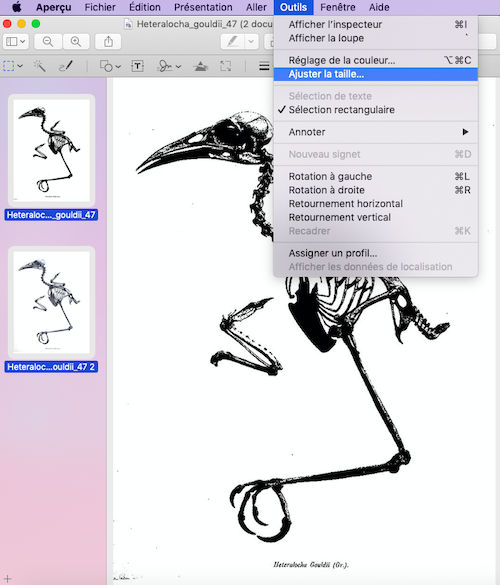
- Then when you click on the button Open with Preview or double click on the image, you enter in the Preview software. You can do a hole bunch of things, but the two main fonction I liked the most is adjusting the size of images and change the gradiants of colors. So when you click alt+cmd+C, you can change the color to make it easier to vectorise or make a buch of colors with the same tone or make it prettier. Don't under estimate the power of a nice image...Instagram is based on that. That 1 minute raster image manipulation can save you alot of work after the vectorise step. You can vectorise it directly in Inkscape or use a web site for more complexe work like Vectorizer.
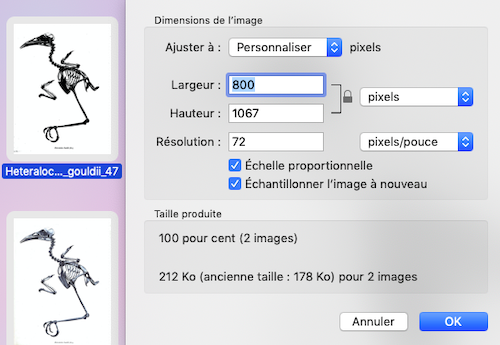
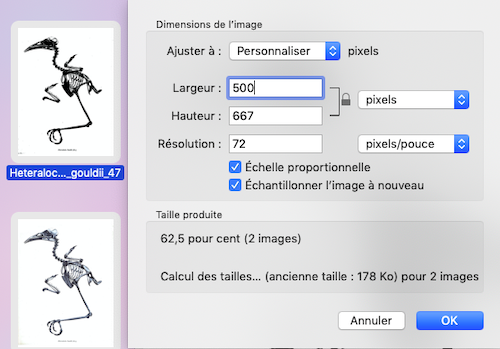
- You can also change the size of one or more images.
- When you select multiple images, click right on your mouse and open with Preview, all your images will show in your left bar (sometime the bar is hidden, make it appear.) Then choose the parameter that you want and click ok. The really useful information is that you have the size of the total images and you can know that by reducing the size, how much smaller is your folder. For the Fabacademy website, I found it very useful.
At the beggining, I found it long and complicated working with raster and vectorise drawing, but if you find a easy flow, you can now play with that and vectorise handmade work like watercolor or a microscope image from a bacteria, all sort of weird and interesting images that you can take has a base of something before putting them in laser cutter for exemple.
Select the image on your office and do space bar
Double click on the original square to enter in your layer one.Draw line.
Add information button: add form, texte, signature, etc.
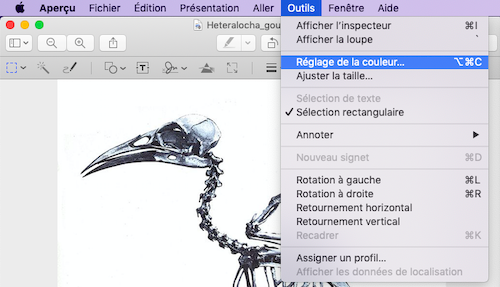
If you open with Preview, you can modify the color for any purpose
If you open with Preview, you can modify in the same time multiple images like the sizes
You can take standard format or you can decide your own format and see how much smaller or bigger you make the change.
The moral of this story
Parametric design is longer and a bit more complex, but very useful and impressive. If I want to do my project in any material or any size it's now possible. I really enjoyed this week.Files
Contact
Annie Ferlatte
ferlatte.annie@gmail.com
Montreal, QC, Canada