Project management
week 2
January 23, 2019
This week we need to instal software to be able to create and upload the website and to follow a git tutorial and to design our website. As part of the Fab Academy, we can use the template provided in our git or to use a template online. I prefer to use a template online because it must represent me.
Softwares installation
For the Fab Academy, we will need some softwares, in order to be ready for next week it is a good idea to install it. It's important to understand that it's not a mandatory list.
If you want more details about Git, I suggeste you to read this description .
Here a link to download Git Bash.
Here a cheat sheet for all command you will need to manage your file with git. I really suggest you print it and to have it with you. If you want all the description of these commands and some examples, you can go directly on Git website in the documentation section you will see all the references .
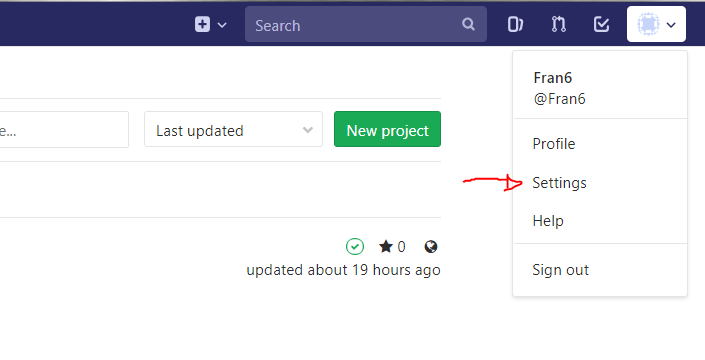
In the right top corner you will see your profile logo. Click on it and select setting.
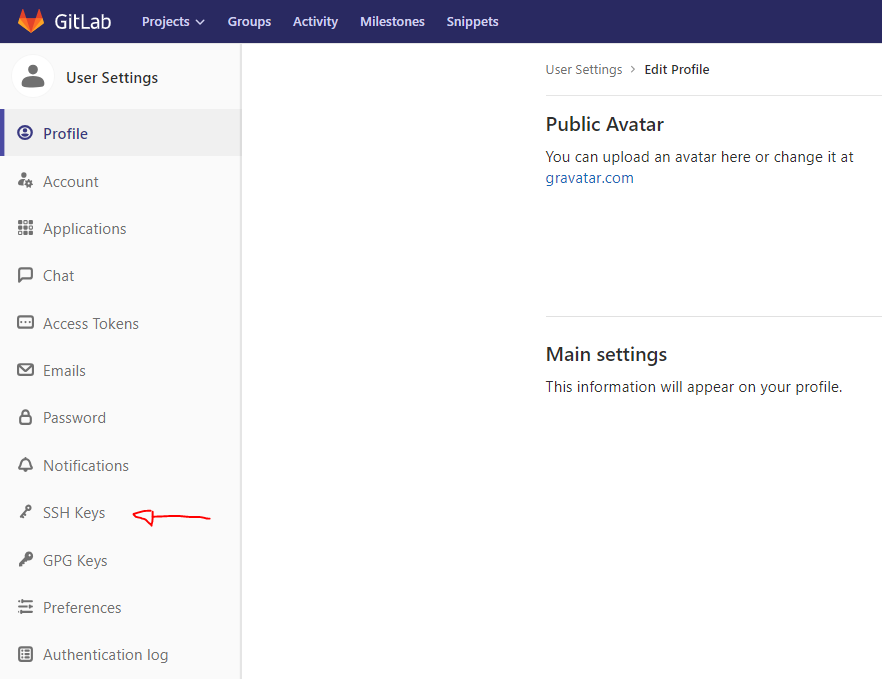
In the left menu you will see SSH keys section. Click on it.
In the middle top of the page you will see the link to generate one SSH key. Click on it.
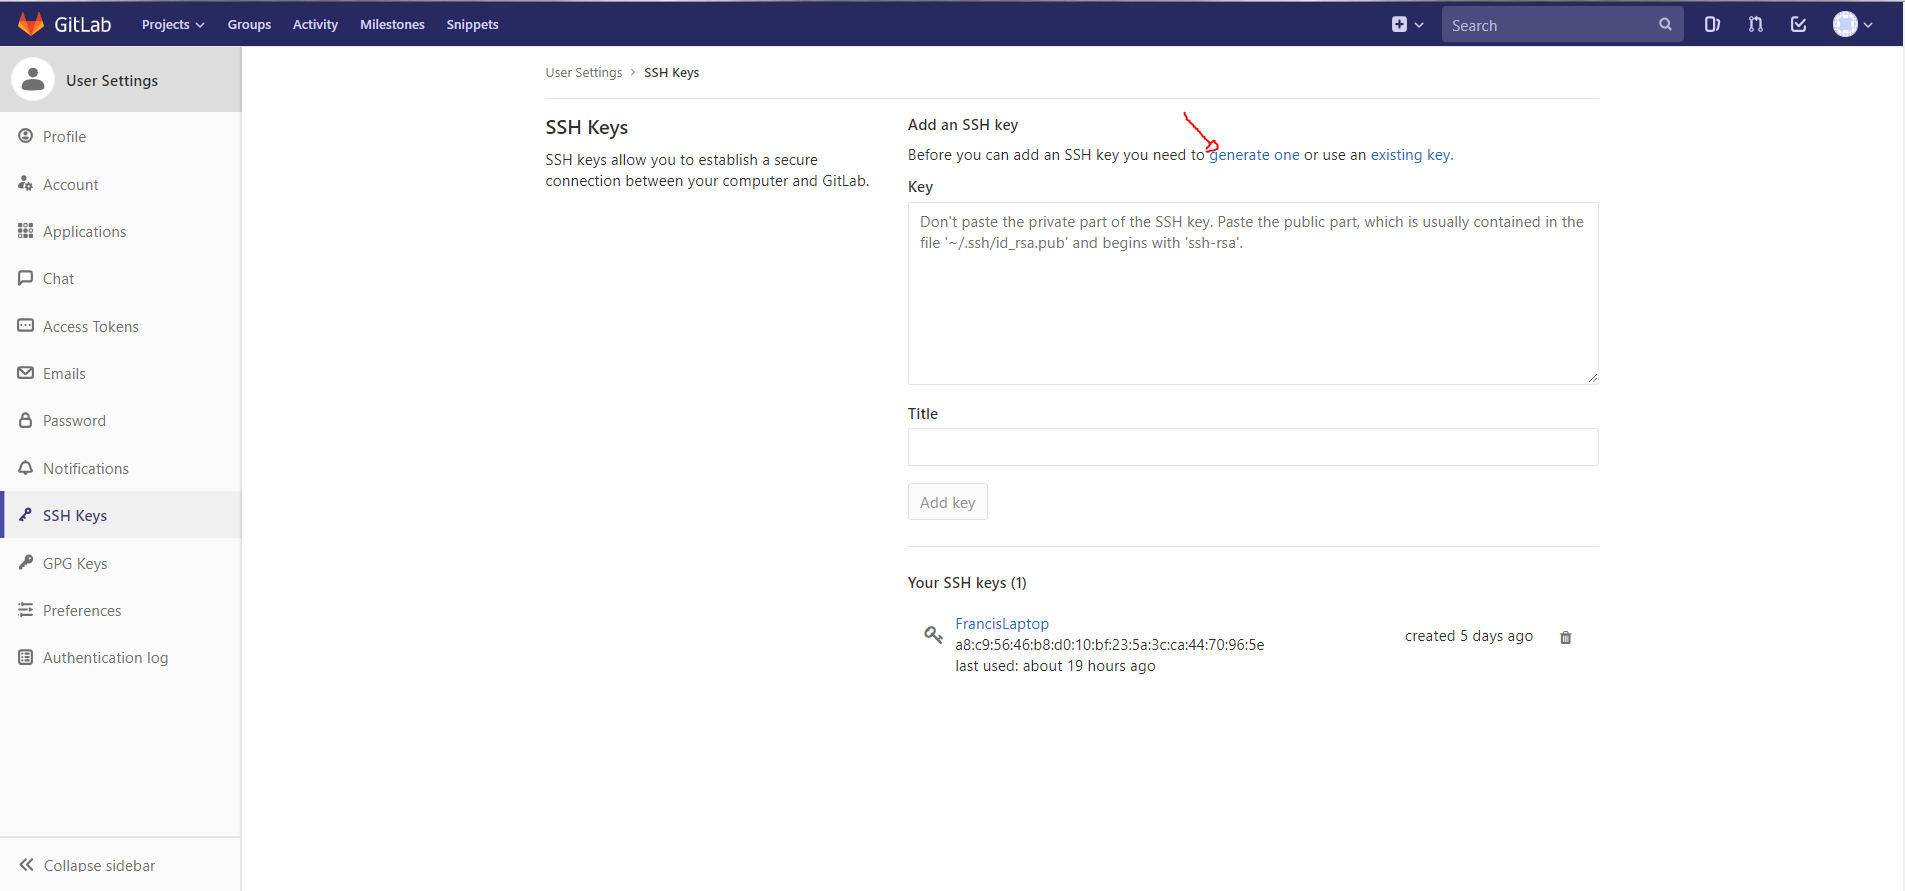
Follow instructions.

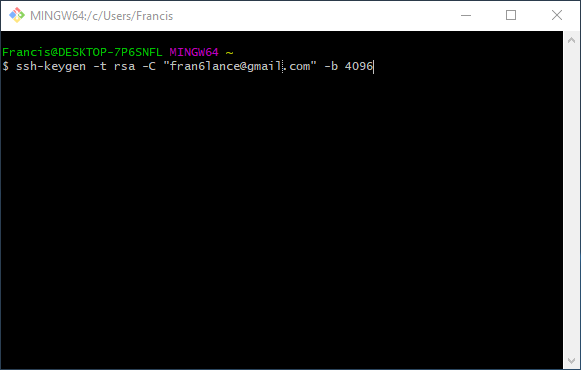
The first step to generate a ssh key pair is with the command ssh-keygen.
The next step is to enter the file in which to save the key and press enter.
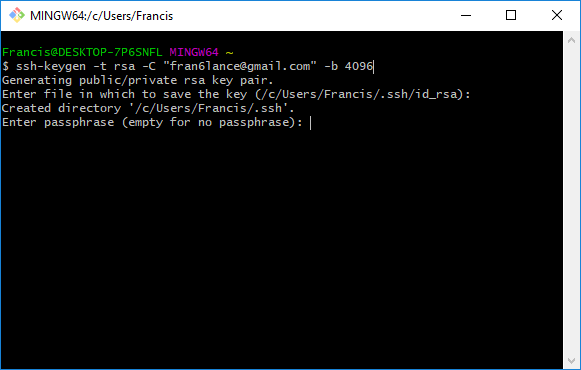
The next step is to enter a passphrase and press enter.
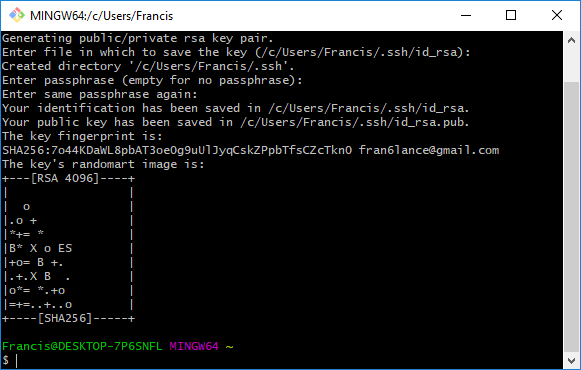
The next step is to use the cat command with the public key.
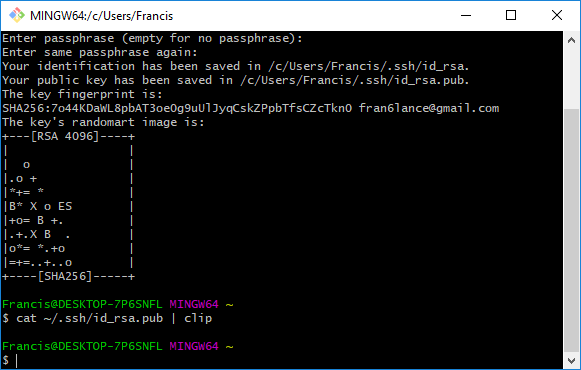
The next step is to go in the folder where you save the key and to copy the content of the public key file.
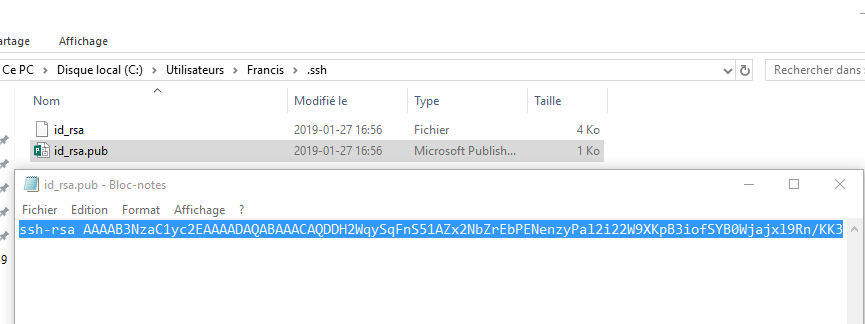
Go back on the GitLab website, in the ssh key section.
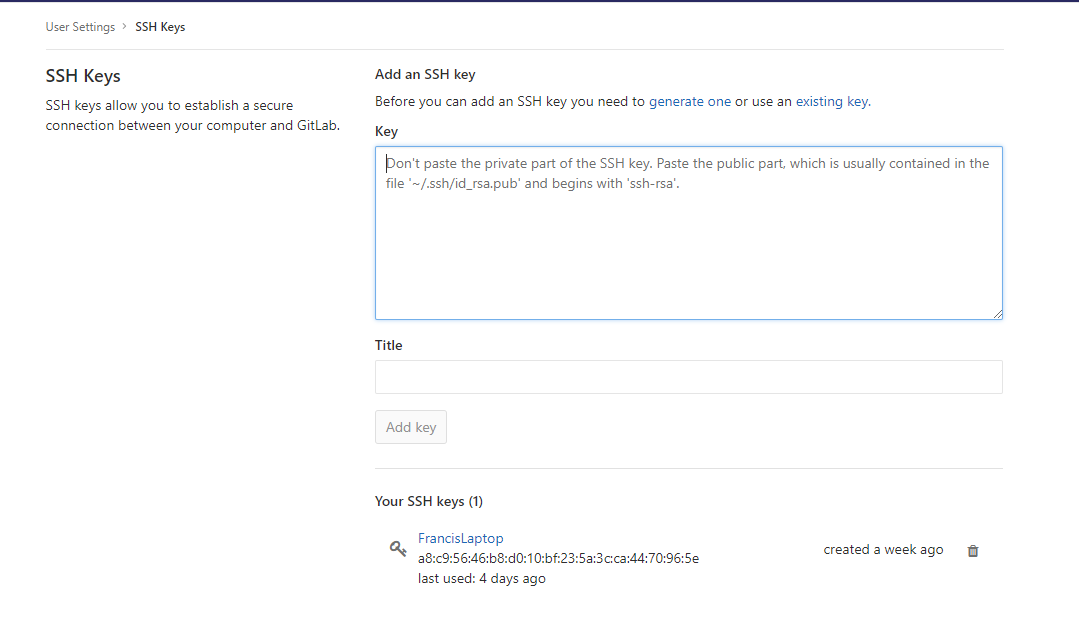
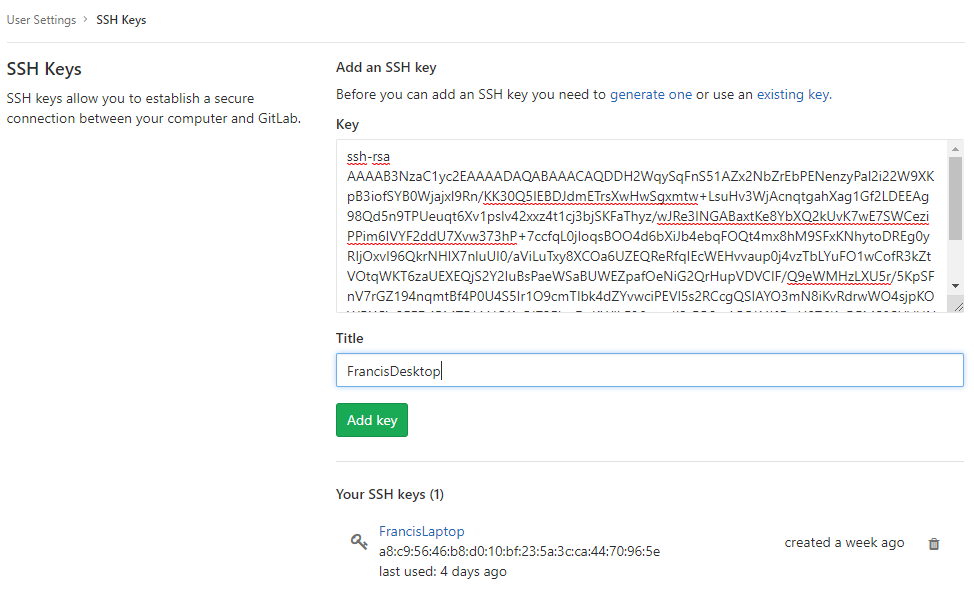
The next step is to paste the public key in the box and to give a name to this key.
The next step is to initialize the git. You need to go to the folder that you want to clone the git repository and use the init command.

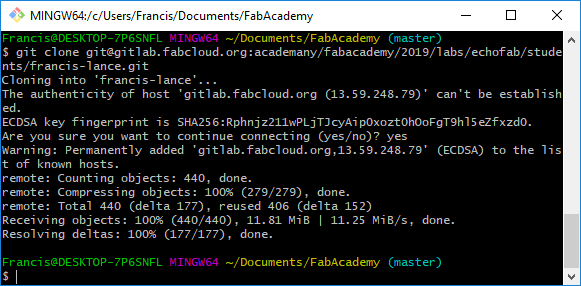
The next step is to clone the repository in your folder with the command clone.
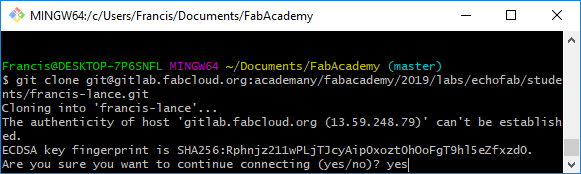
The next step is to answer are you sure you want to continue connecting and you say yes.
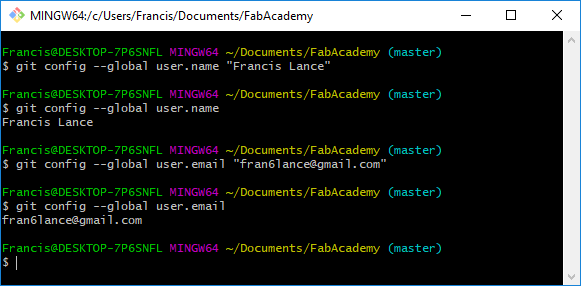
The last step for this section is to enter your name and your email in the configuration file.
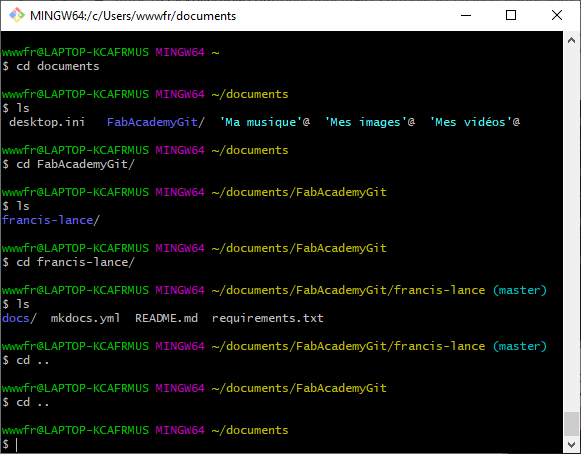
In the Git Bash termninal, you need to be in the git repository folder that you choose during the installation. To browse in your local folder you will use the command cd to change directory and ls command to list files and folders in the actual folder. This last command help you to find your directory. If you want to come back in the previous directory you can use cd.. command.
When you want to do an action in Git Bash it's really important that your git repository and your local file are at the same version. For that, you need to use the pull command. The command is git pull.

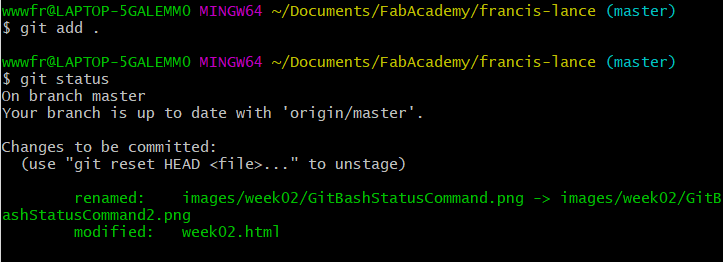
When you are up to date, you need to add files to synchronize it with the git repository. In my case I want to add all files in my local folder to the git repository. You use the add command. The command is git add "FileName" or "." for all files. You do that command only once and it's only when you just create or add a new file in your local folder.
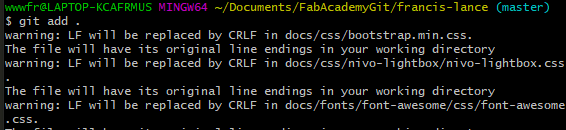
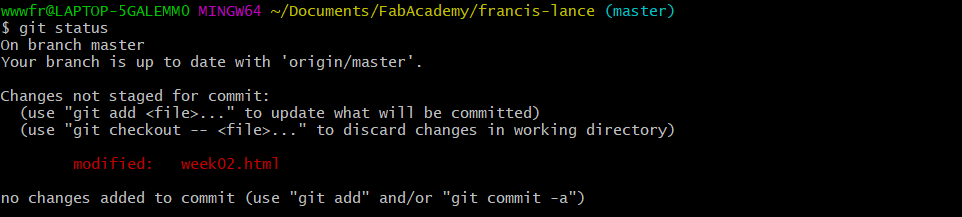
You can use the command status before the add command and it will show in red the modified files that are not added.
After the add command you can see the files in green that have been added or modified in the git repository. This is a way to ensure that you have save the files and have them in the right folders. It is important to check the files before committing and pushing.
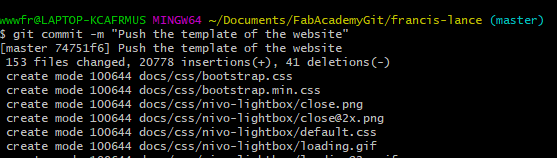
The commit command is a way to prepare the push command. It takes all the files that you modified from the last pull command and you need to add a comment to this modification. It's really important to commit every time you change something in a file. It will be easier to track your modifications if you do that. The command is git commit -m "your message".
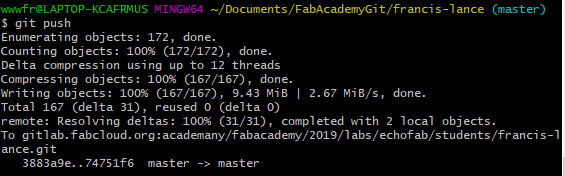
The push command is the most important one. It will push your local modifications directly in your git repository. The command is git push.
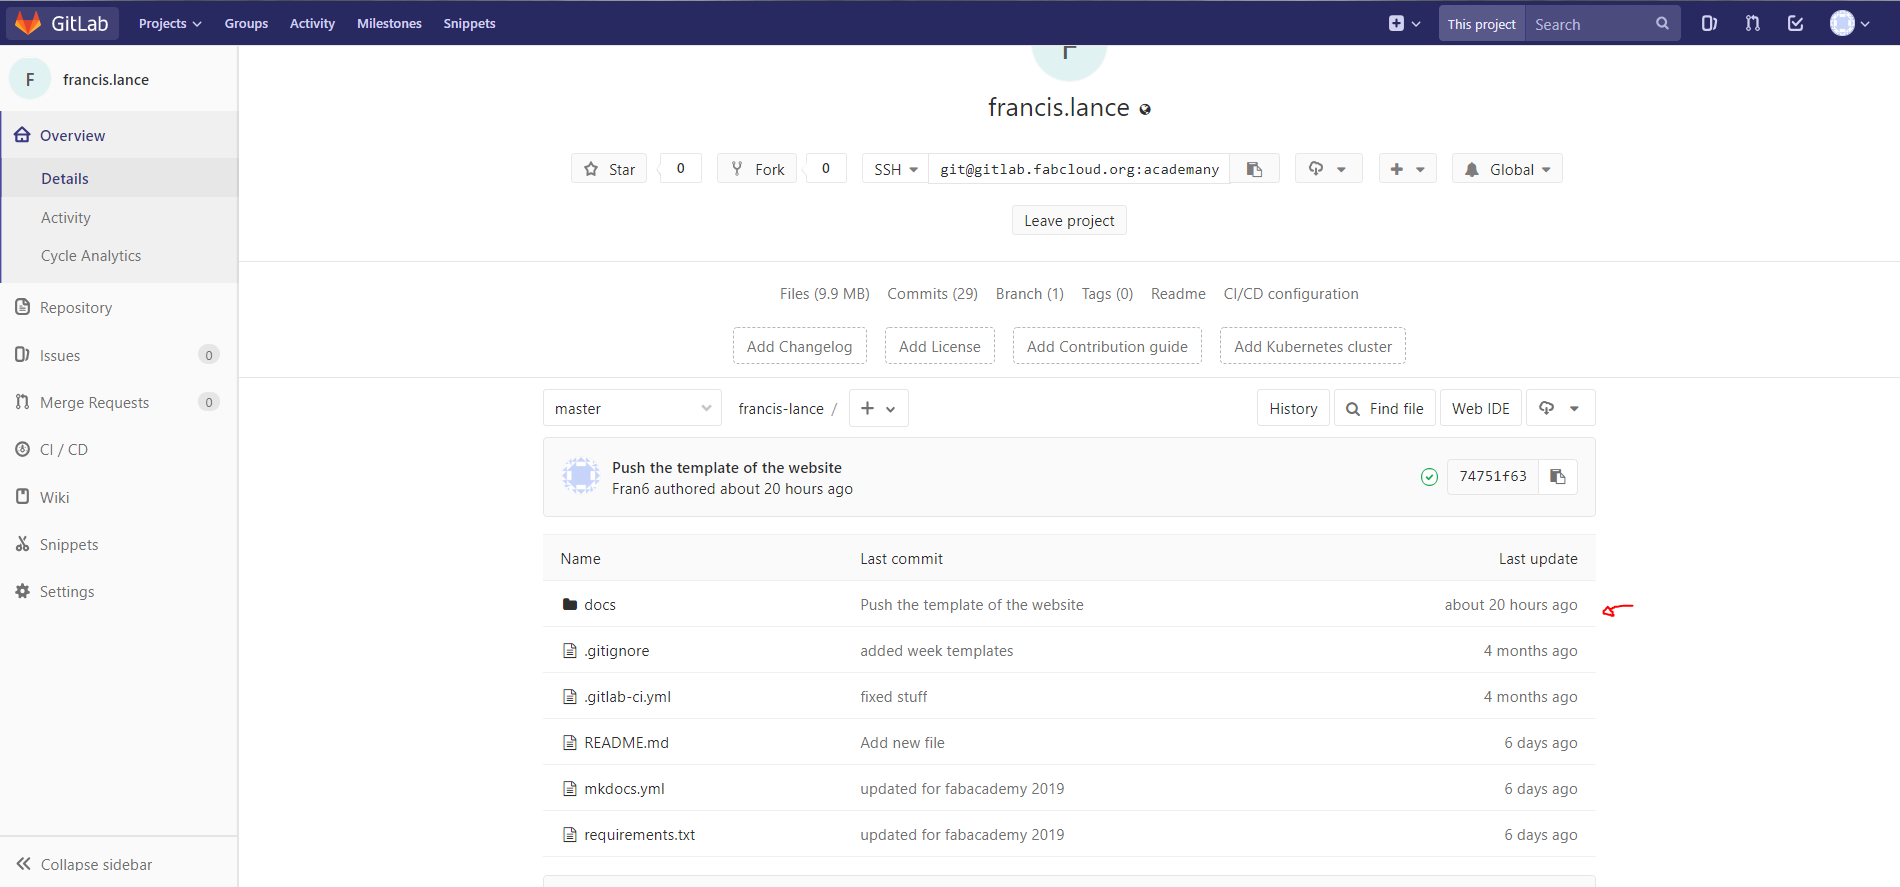
If you want to see your updates history and your modifications, you need to go back on the Fab Lab website in the project section and click on your project.
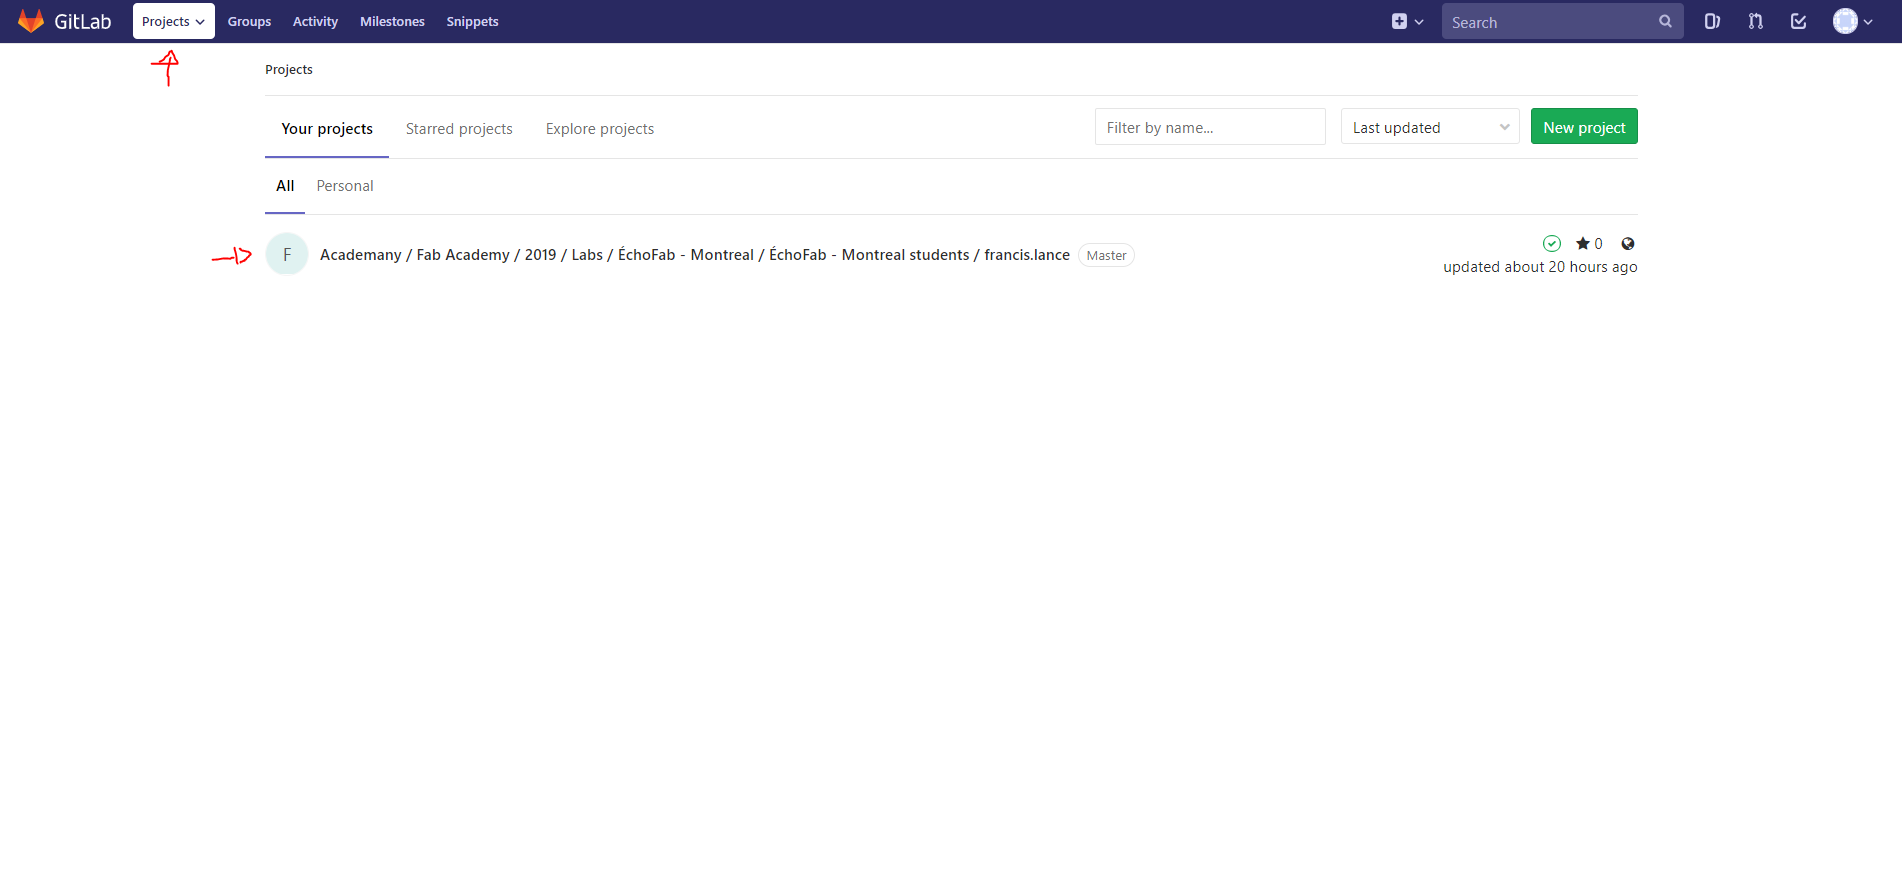
Now you can see all updates you did and if you want to have more details just click on the folder or the file and you will see all modifications.
You can download it right here .
Git Bash
Git Bash is the software that looks like a terminal and helps you to manage all versions of your work. It connects your local files directly to your remote git repository.If you want more details about Git, I suggeste you to read this description .
Here a link to download Git Bash.
Here a cheat sheet for all command you will need to manage your file with git. I really suggest you print it and to have it with you. If you want all the description of these commands and some examples, you can go directly on Git website in the documentation section you will see all the references .
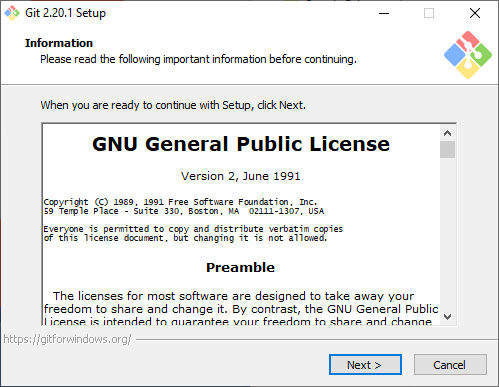
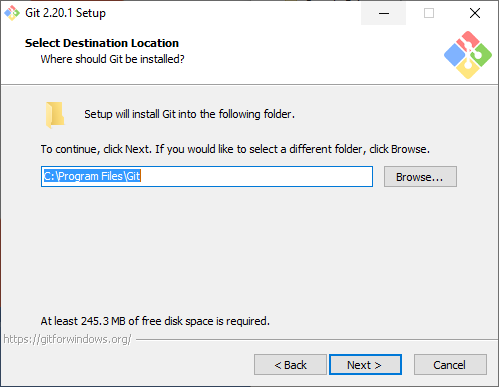
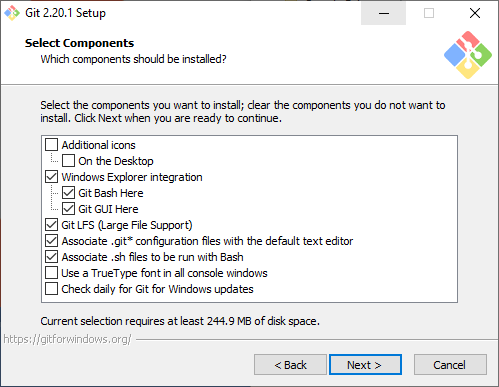
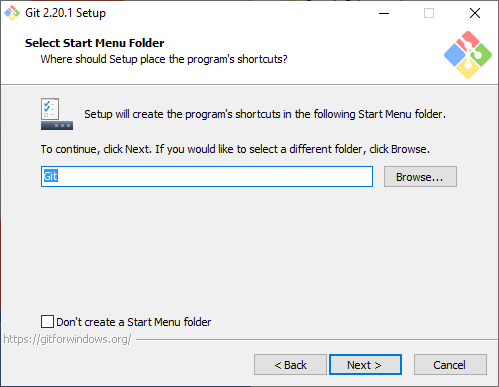
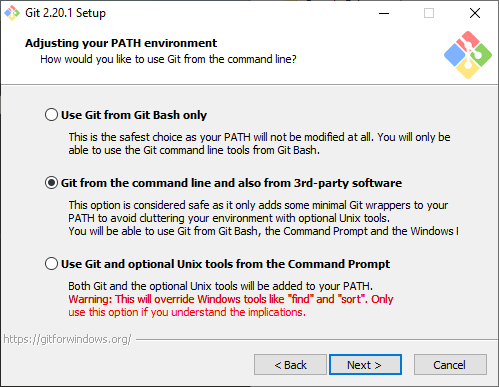
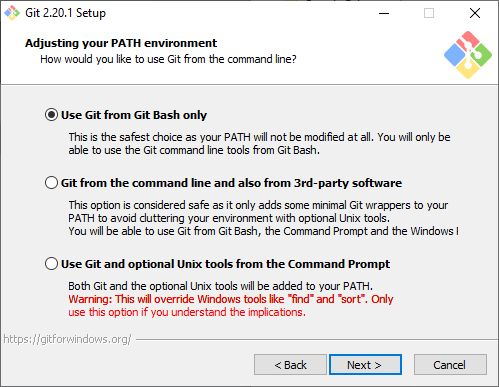
Installation
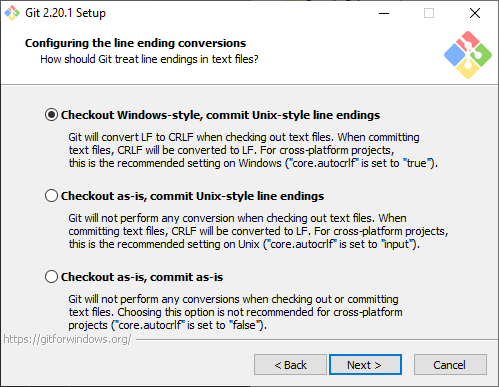
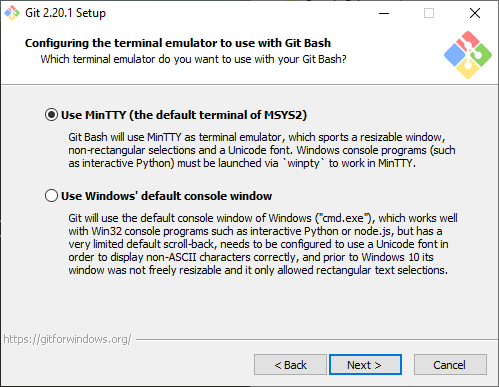
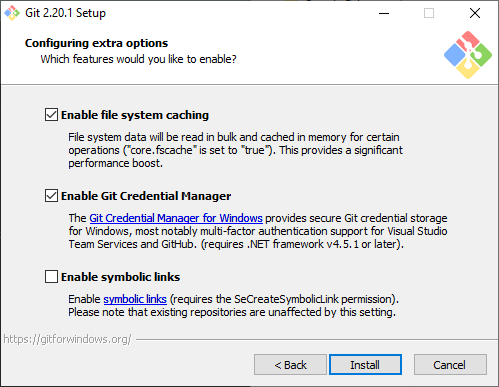
Click and run setup.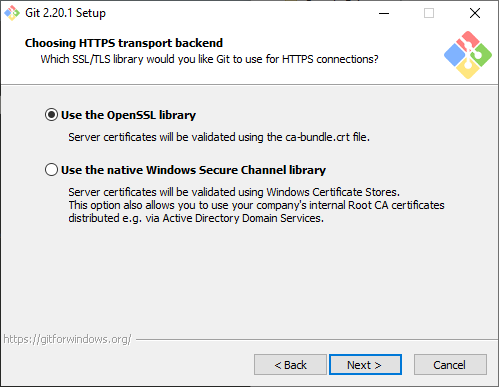 |
 |
 |
 |
 |
 |
 |
 |
 |
 |
 |
Generating a new SSH key pair
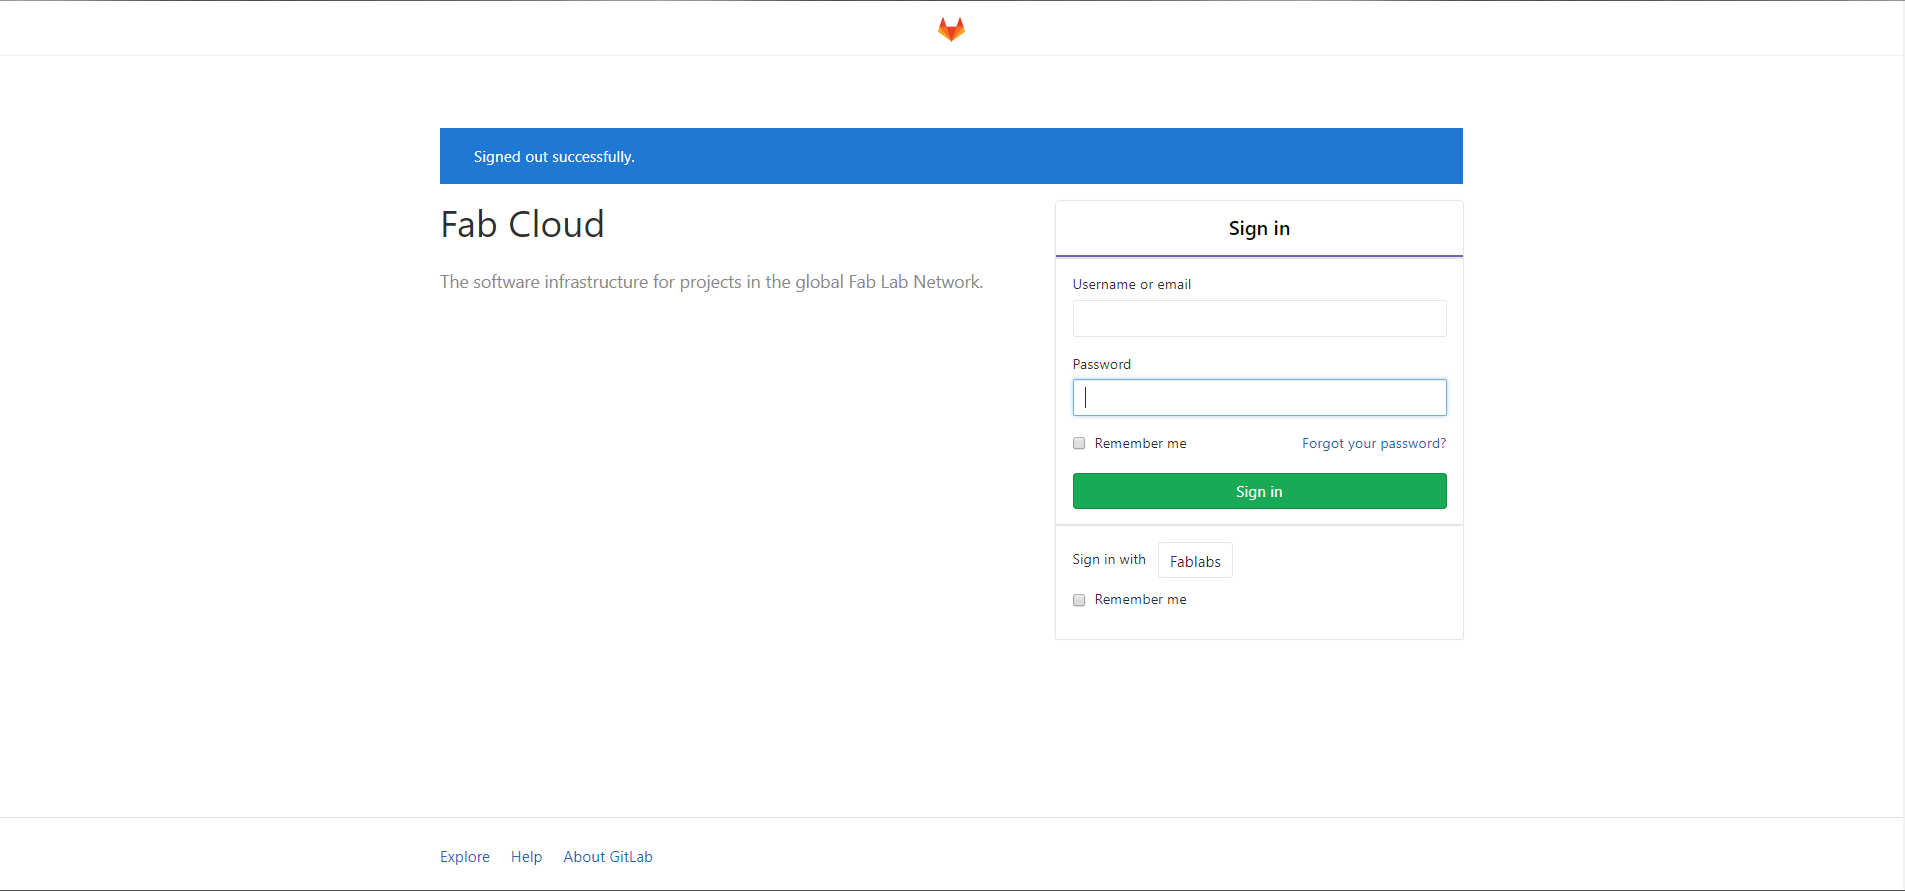
The way to link your local file and your git repository is with an SSH key. The first step to generate one is to login in your Fab Cloud account.
In the right top corner you will see your profile logo. Click on it and select setting.
In the left menu you will see SSH keys section. Click on it.
In the middle top of the page you will see the link to generate one SSH key. Click on it.
Follow instructions.
The first step to generate a ssh key pair is with the command ssh-keygen.
The next step is to enter the file in which to save the key and press enter.
The next step is to enter a passphrase and press enter.
The next step is to use the cat command with the public key.
The next step is to go in the folder where you save the key and to copy the content of the public key file.
Go back on the GitLab website, in the ssh key section.
The next step is to paste the public key in the box and to give a name to this key.
The next step is to initialize the git. You need to go to the folder that you want to clone the git repository and use the init command.
The next step is to clone the repository in your folder with the command clone.
The next step is to answer are you sure you want to continue connecting and you say yes.
The last step for this section is to enter your name and your email in the configuration file.
The first push
To test if all is working we will push file on the git repository. the following commands are the basics one to know for Git Bash.In the Git Bash termninal, you need to be in the git repository folder that you choose during the installation. To browse in your local folder you will use the command cd to change directory and ls command to list files and folders in the actual folder. This last command help you to find your directory. If you want to come back in the previous directory you can use cd.. command.
When you want to do an action in Git Bash it's really important that your git repository and your local file are at the same version. For that, you need to use the pull command. The command is git pull.
When you are up to date, you need to add files to synchronize it with the git repository. In my case I want to add all files in my local folder to the git repository. You use the add command. The command is git add "FileName" or "." for all files. You do that command only once and it's only when you just create or add a new file in your local folder.
You can use the command status before the add command and it will show in red the modified files that are not added.
After the add command you can see the files in green that have been added or modified in the git repository. This is a way to ensure that you have save the files and have them in the right folders. It is important to check the files before committing and pushing.
The commit command is a way to prepare the push command. It takes all the files that you modified from the last pull command and you need to add a comment to this modification. It's really important to commit every time you change something in a file. It will be easier to track your modifications if you do that. The command is git commit -m "your message".
The push command is the most important one. It will push your local modifications directly in your git repository. The command is git push.
If you want to see your updates history and your modifications, you need to go back on the Fab Lab website in the project section and click on your project.
Now you can see all updates you did and if you want to have more details just click on the folder or the file and you will see all modifications.
Sublime Text
Sublime text is a text editor used for programming. It looks basic at the first view but it's very powerful for a text editor. This program will be useful to code the Fab Academy website. What is practical with this software is that even if you close the program, when you reopen it, the files you had opened will still be opened. This saves a lot of time when you don't have to reopen all the files one by one.You can download it right here .
Design our Fab Academy website
Find a template
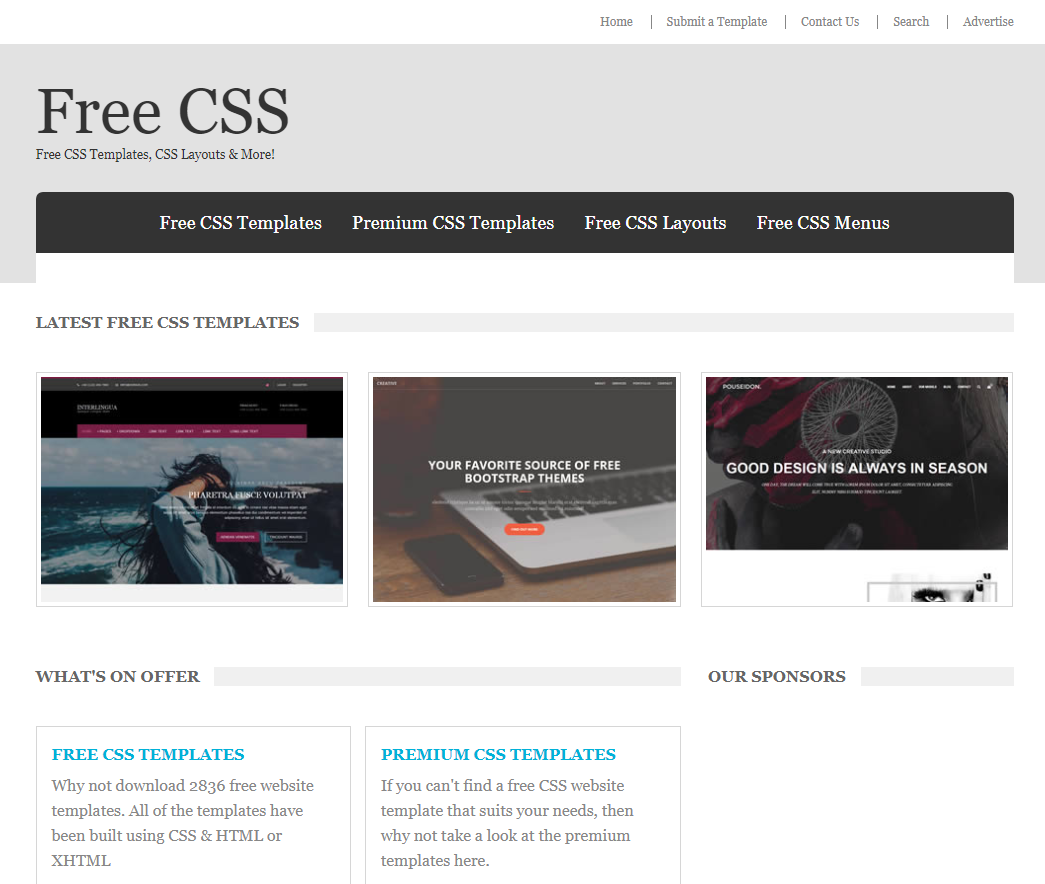
To find a template, I was on a site specializing in the template the website called free css .
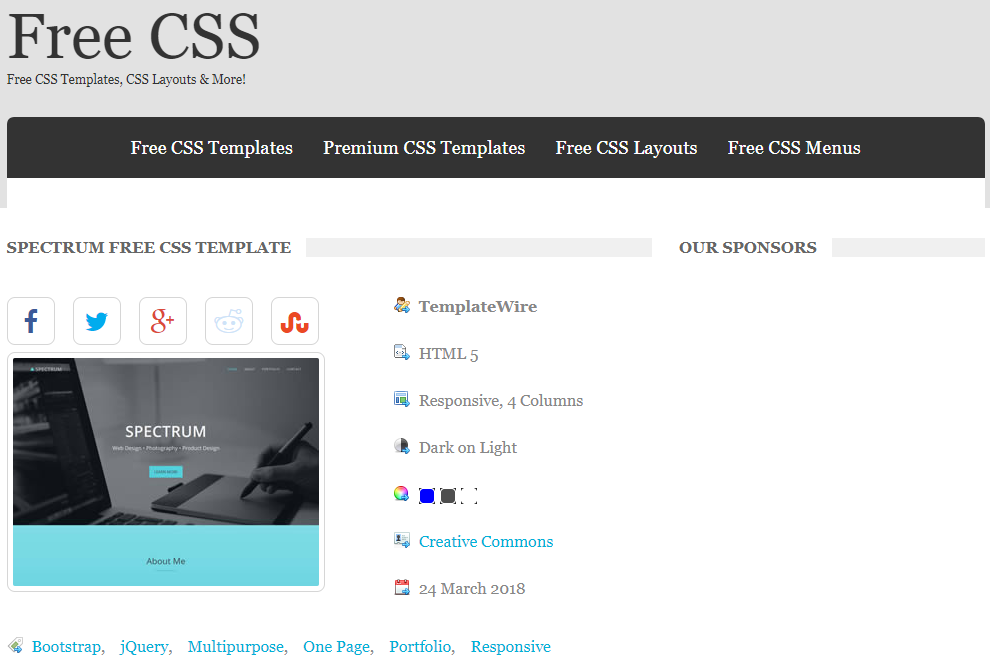
After browsing in the free template section, I found a template that interested me. The template is called spectrum and you can download it right here.
I removed all the unnecessary stuff for my website. The most important or you can go directly on your GitLab account and see all the logs.thing when you download a template is to clean it first before to put your content.
Upload the template website on the git
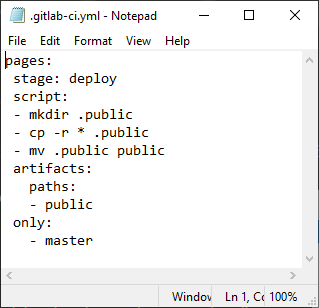
When you use a custom template, you have to make a change in the document .gitlab-ci.yml to upload it. This document tells the Gitlab the actions to take after a push. The most important thing to do is to copy our website on the Fab Academy website. You can write all the modification manually or you can copy the text from here.
If your .gitlab-ci.yml is not correct, you will receive and email like that after you push it.
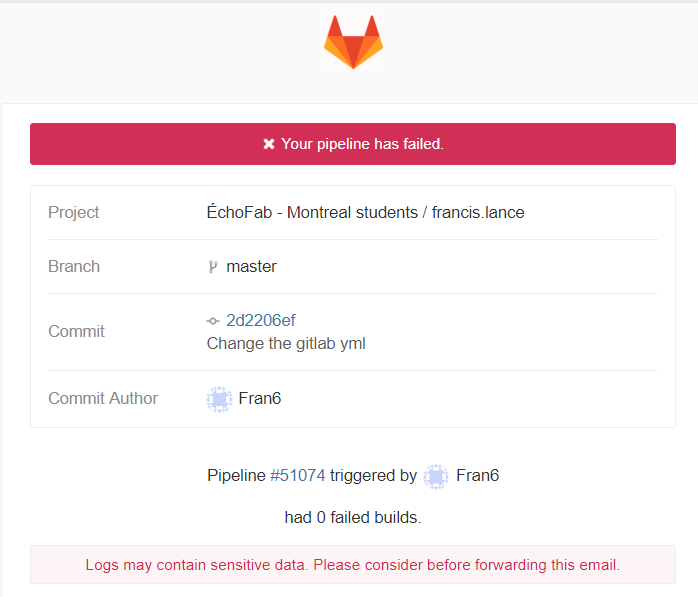
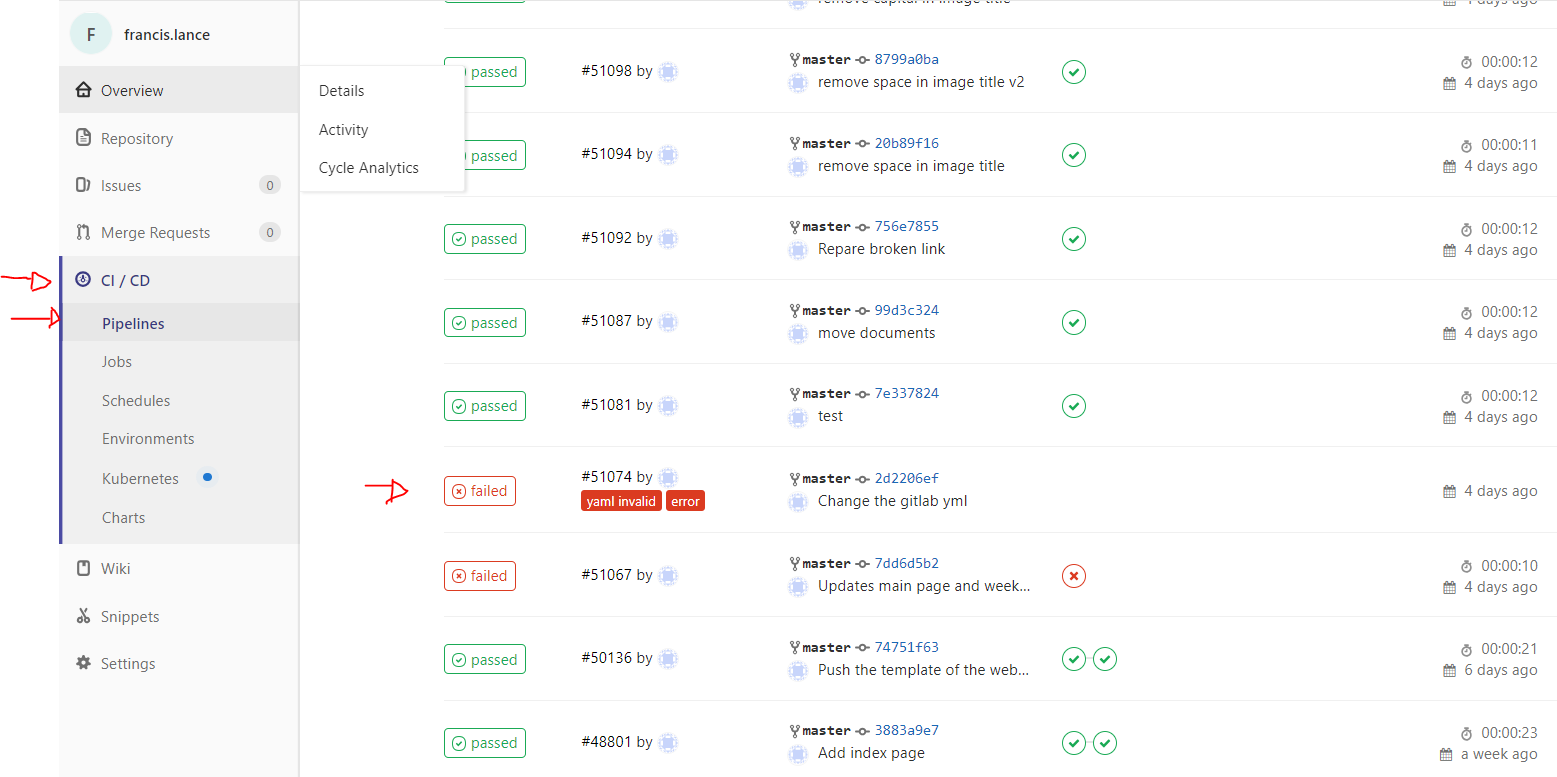
You can also go directly on your GitLab account and see all the logs.
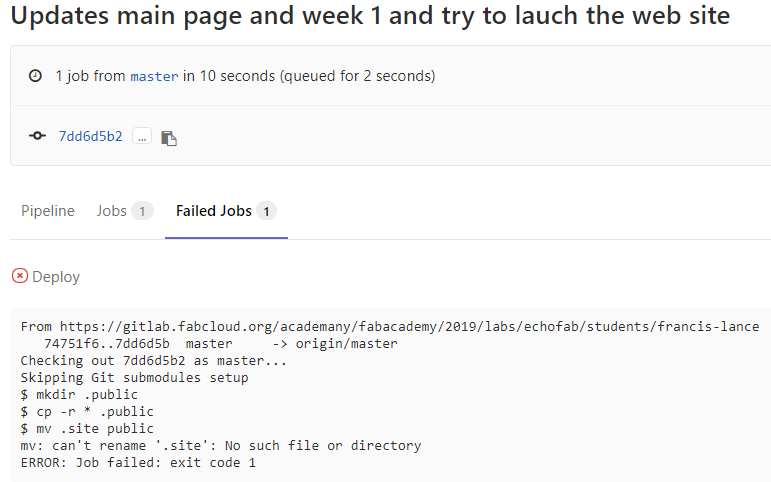
You can also click on the issue to see what happened.
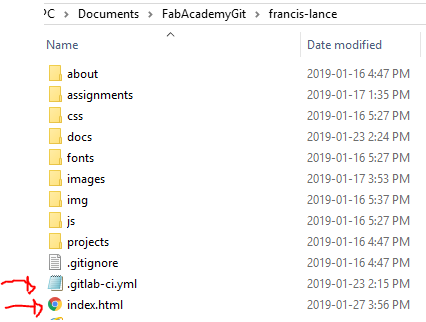
Your main page from the website needs to be name index.html and need to be at the same place as the .gitlab-ci.yml.
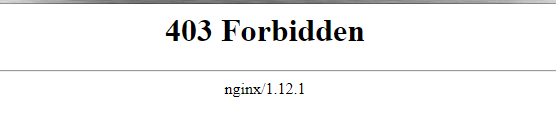
If your index.html is not in the right place or was not found for a reason, you will see an error 403 when you click on your name on the Fab Academy website.
If you have the same issue like me with your images on the website and the images appear like this.
The reasons is Windows is not case sensitive, so when you test your website directly on your pc is work fine. When you upload your website, the system is case sentive so it's can't find the image.
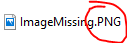

Another issue who is the exactly the same problem then previously. I want to change the .PNG to .png and push the modification but Git Bash don't see any modification because Windows is not case sensitive. The solutions is to remove the image and push the modification and put back the picture and re-push it.
You can find the HTML5 tutorial here.
You can find the CSS tutorial here.
When you build a website is good to know the difference between these two tutorials. HTML is for the content of the website and CSS is the format of your content.
Clean and modify the template
The first thing I have to do is to remove the elements that are not necessary for my web page. A tool that really helped me to create my site and especially to identify the elements of a page is the tool inspected in google chrome but which is also found in other nagivateur. It even allows you to edit the code directly on the page to get a preview of the result. It also allows you to modify css elements.
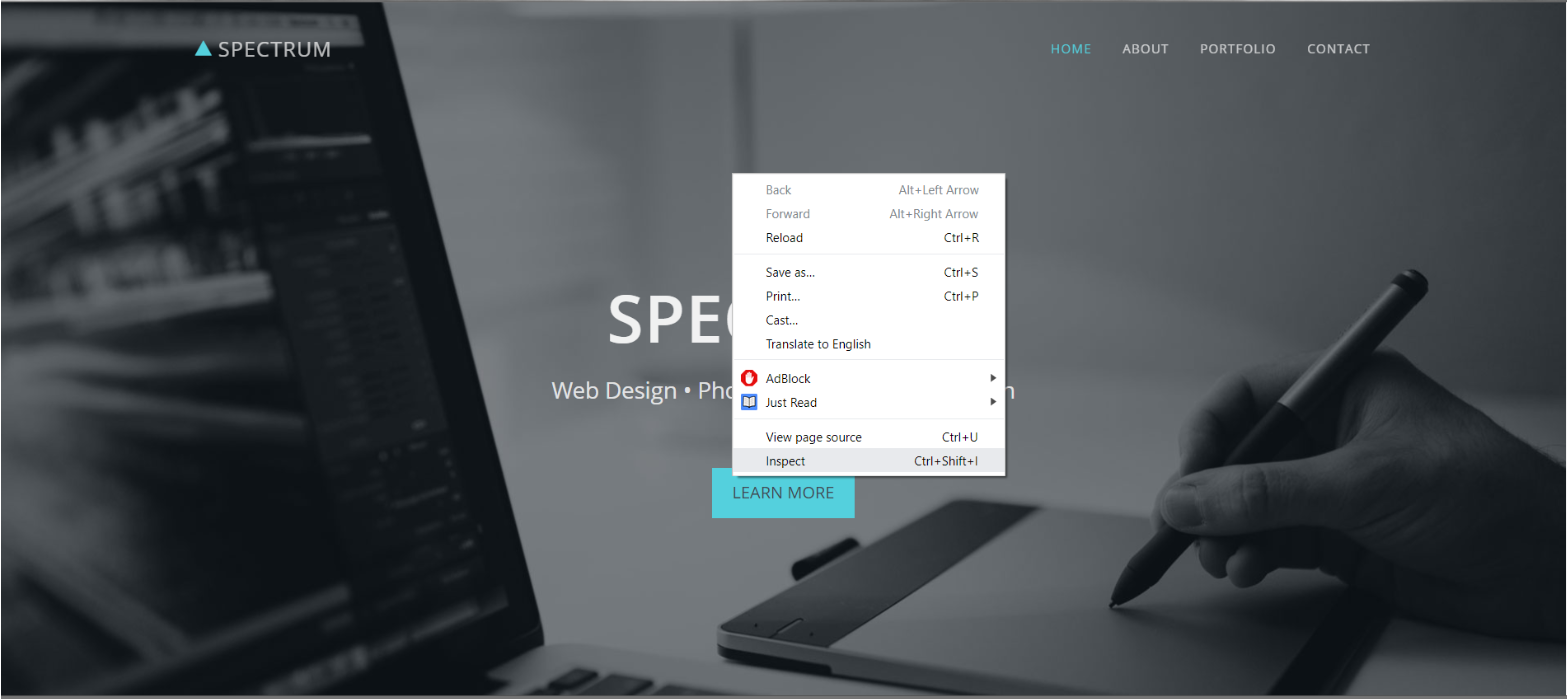
When you put the cursor on the code you can see what sections in the website it represents. It is also possible to do the opposite by placing the cursor on an element of the website to see the corresponding code.
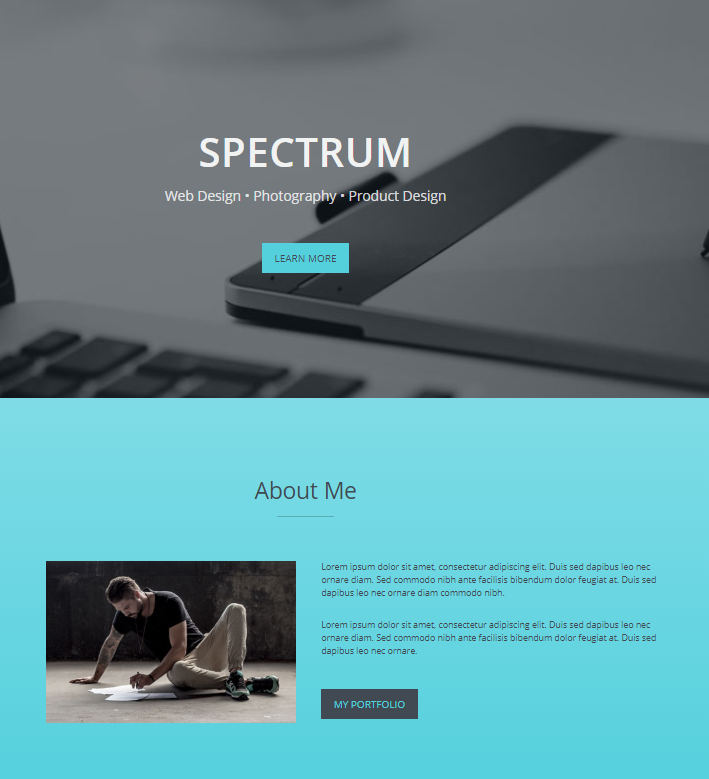
I started by removing the logo at the top left of the page. Afterwards, I changed the background photo of the banner. I also modified the text of the menu and the banner. I also had the button directed to the about section instead of learn more.
Template:

My website:
I moved the about section to the bottom of the page.
Template:
My website:

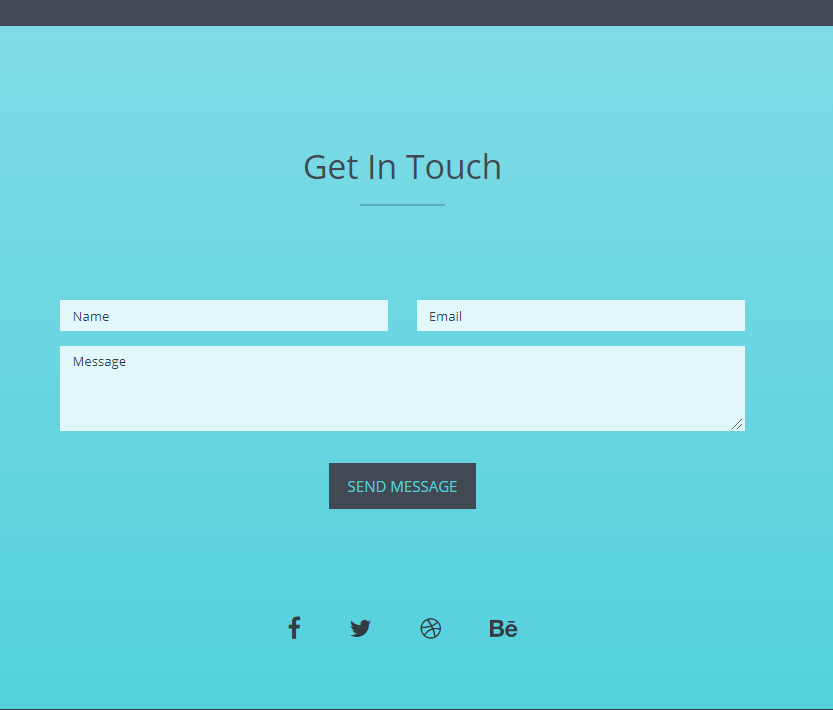
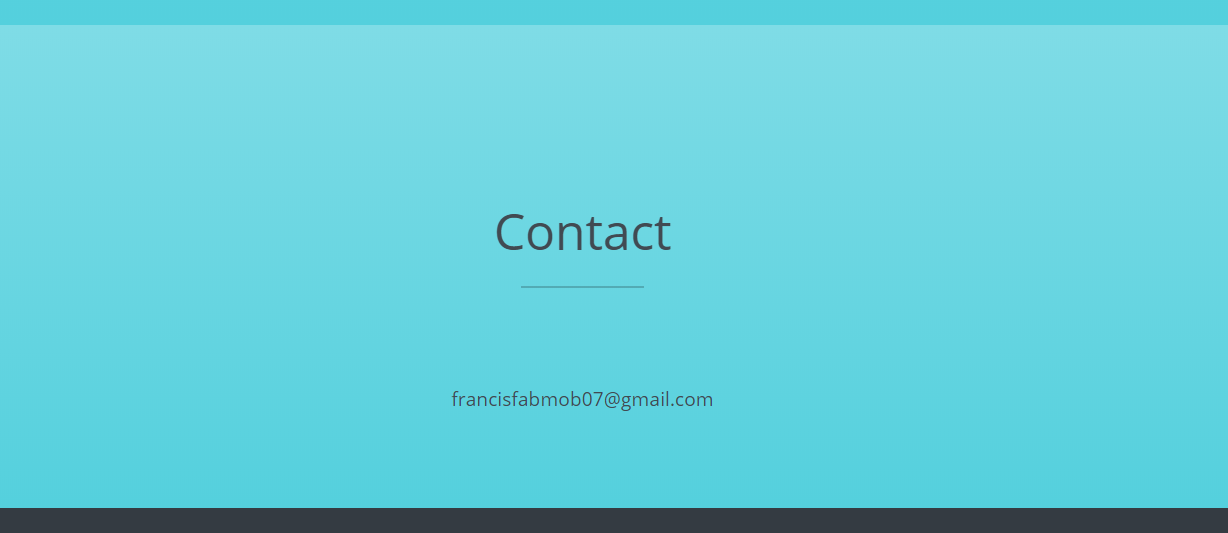
I removed most of the stuff from the get in touch section to make it a simple contact section.
Template:
My website:
I also adapted the footer.
Template:
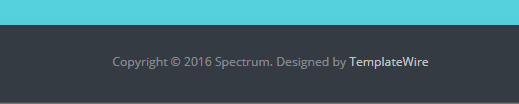
My website:

I ended up removing the filter at the top of the porfolio section and added the right number of sections for the number of weeks and made the link to the appropriate page.
Template:
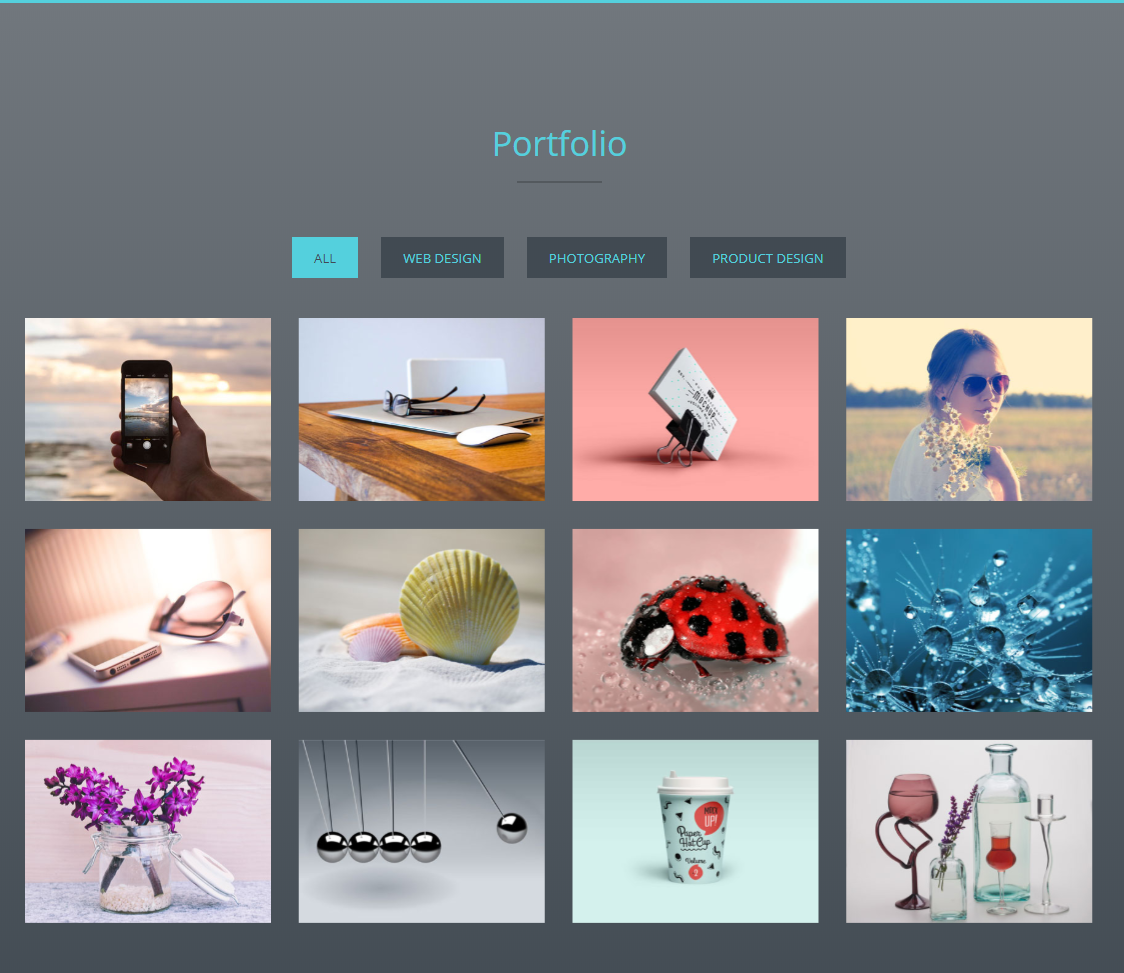
My website:

Now to make a page template for my weeks, I took the index page from the template and deleted it all. I only kept the main sections and added an image instead of the button in the header. Here is the result of my weekly page template.
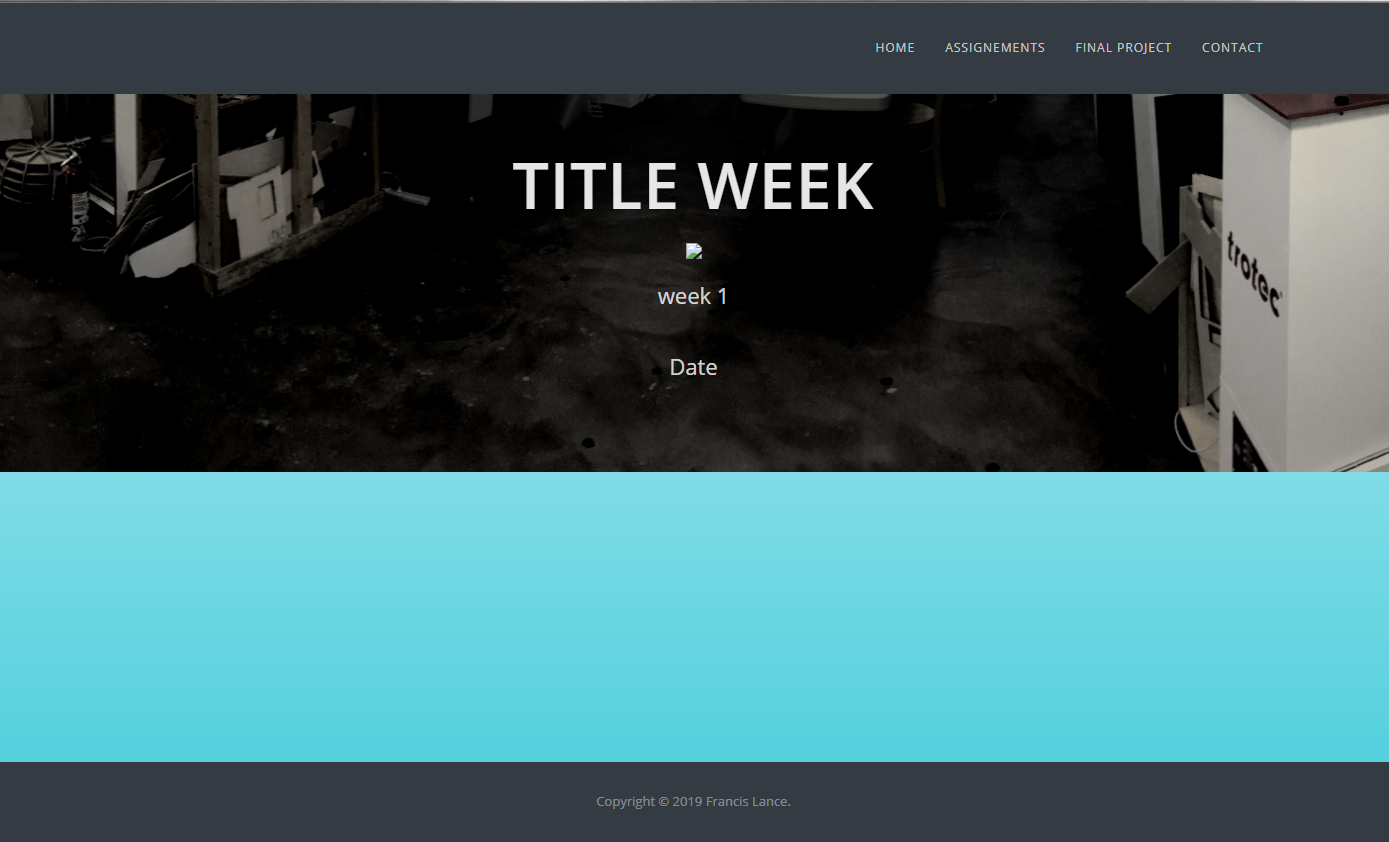
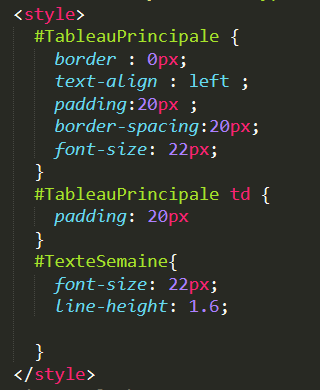
To format my text correctly in my week template, I added CSS styles directly at the beginning of the week file.
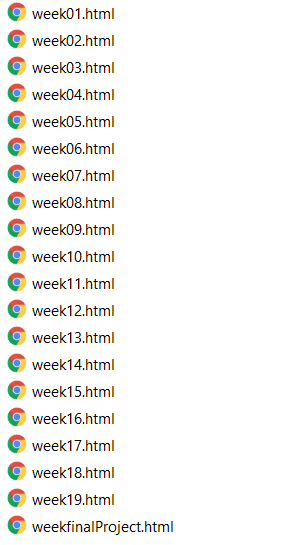
I duplicated the template 20 times to get one template page per week. This way, I can already make all the links between my web pages instead of having link errors during the construction of my website.
This concludes the steps I have taken to modify the template to my liking and thus create my own template for the next few weeks. Now, it only remains to document the weeks by adding text and photos.
If your .gitlab-ci.yml is not correct, you will receive and email like that after you push it.
You can also go directly on your GitLab account and see all the logs.
You can also click on the issue to see what happened.
Your main page from the website needs to be name index.html and need to be at the same place as the .gitlab-ci.yml.
If your index.html is not in the right place or was not found for a reason, you will see an error 403 when you click on your name on the Fab Academy website.
If you have the same issue like me with your images on the website and the images appear like this.
The reasons is Windows is not case sensitive, so when you test your website directly on your pc is work fine. When you upload your website, the system is case sentive so it's can't find the image.
Another issue who is the exactly the same problem then previously. I want to change the .PNG to .png and push the modification but Git Bash don't see any modification because Windows is not case sensitive. The solutions is to remove the image and push the modification and put back the picture and re-push it.
Build a website
To be able to modify the template, I followed some tutorials including one on HTML5 and one on CSS. My favourite website for any kind of tutorials is w3schools.com.You can find the HTML5 tutorial here.
You can find the CSS tutorial here.
When you build a website is good to know the difference between these two tutorials. HTML is for the content of the website and CSS is the format of your content.
Clean and modify the template
The first thing I have to do is to remove the elements that are not necessary for my web page. A tool that really helped me to create my site and especially to identify the elements of a page is the tool inspected in google chrome but which is also found in other nagivateur. It even allows you to edit the code directly on the page to get a preview of the result. It also allows you to modify css elements.
When you put the cursor on the code you can see what sections in the website it represents. It is also possible to do the opposite by placing the cursor on an element of the website to see the corresponding code.
I started by removing the logo at the top left of the page. Afterwards, I changed the background photo of the banner. I also modified the text of the menu and the banner. I also had the button directed to the about section instead of learn more.
Template:
My website:
I moved the about section to the bottom of the page.
Template:
My website:
I removed most of the stuff from the get in touch section to make it a simple contact section.
Template:
My website:
I also adapted the footer.
Template:
My website:
I ended up removing the filter at the top of the porfolio section and added the right number of sections for the number of weeks and made the link to the appropriate page.
Template:
My website:
Now to make a page template for my weeks, I took the index page from the template and deleted it all. I only kept the main sections and added an image instead of the button in the header. Here is the result of my weekly page template.
To format my text correctly in my week template, I added CSS styles directly at the beginning of the week file.
I duplicated the template 20 times to get one template page per week. This way, I can already make all the links between my web pages instead of having link errors during the construction of my website.
This concludes the steps I have taken to modify the template to my liking and thus create my own template for the next few weeks. Now, it only remains to document the weeks by adding text and photos.