18. Wildcard week
This week I worked on 2 tasks reffered to Wildcard week in order to ‘demonstrate workflows used in the chosen process‘ and ‘select and apply suitable materials and processes to create your project’.
This was the assignment:
-
Individual assignment:
- Design and produce something with a digital fabrication process (incorporating computer-aided design and manufacturing) not covered in another assignment, documenting the requirements that your assignment meets, and including everything necessary to reproduce it. Possibilities include (but are not limited to) composites, textiles, biotechnology, robotics, folding, and cooking.
SUMMARY
Have you?
- 1. Shown how you made your project > DONE
- 2. Described problems and how you fixed them > DONE
- 3. Included your design files and ‘hero shot’ photos of the project > DONE
Pending tasks
- 1. I would like to cut the engrudo material on laser
ASSIGNMENT | Trying other processes
Thermoforming parabolic surfaces for input/output devices
Idea
I decided to make a mold in MDF to obtain parabolic surfaces in acetate <1mm by thermoforming.
For this, I reviewed the past Fab Academy student (Luis Díaz) work who used this surface to make a directonial microphone and used his parabolic .stl file, resizing (downscale) and milling it to obtain the mold.
These are the final .stl file used and the materials (to be milled and for thermoforming). I glued 2 MDF pieces and milled it with the CNC machine.
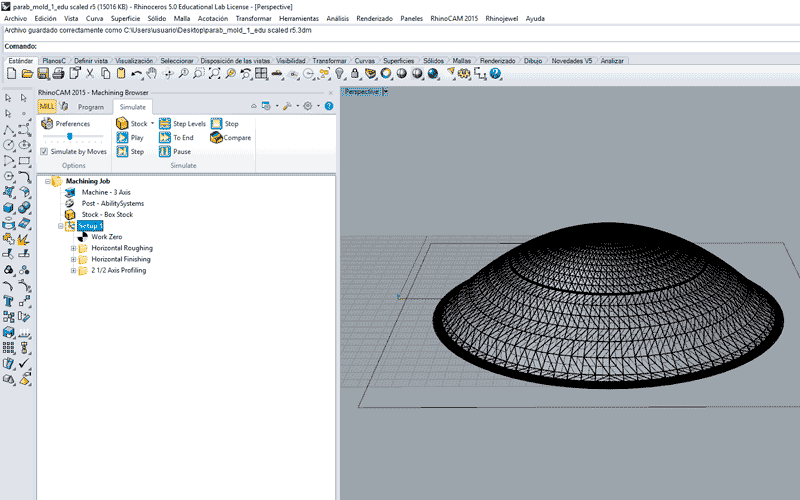
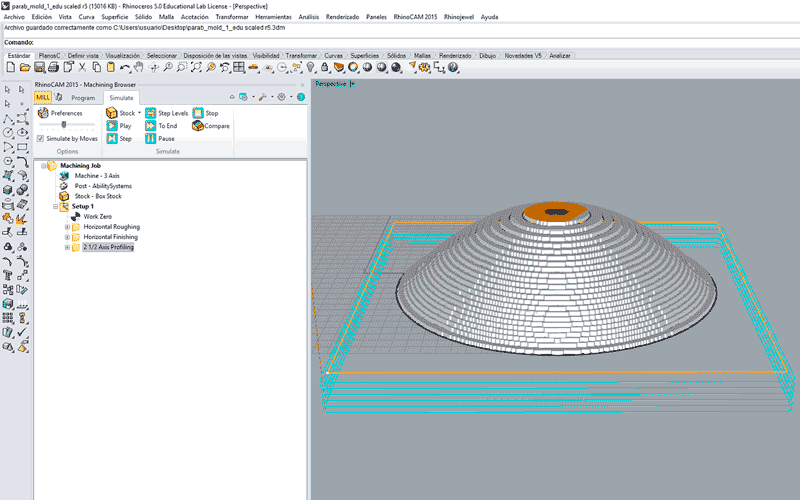
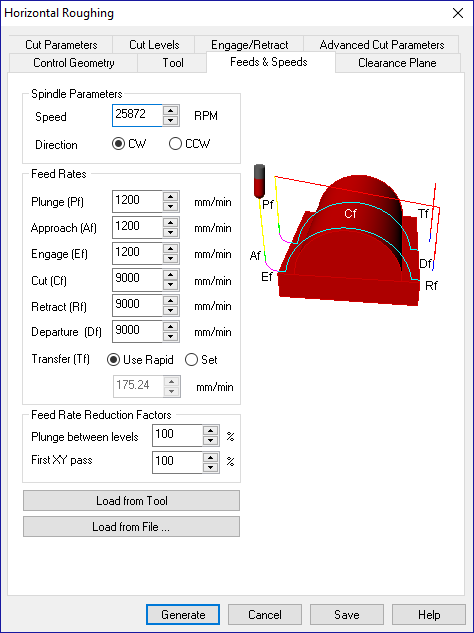
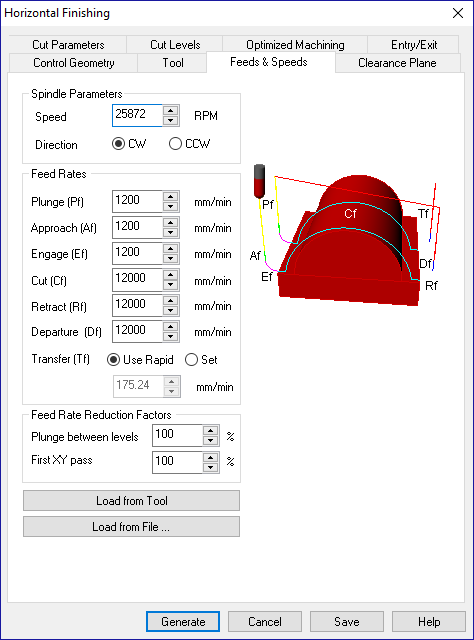
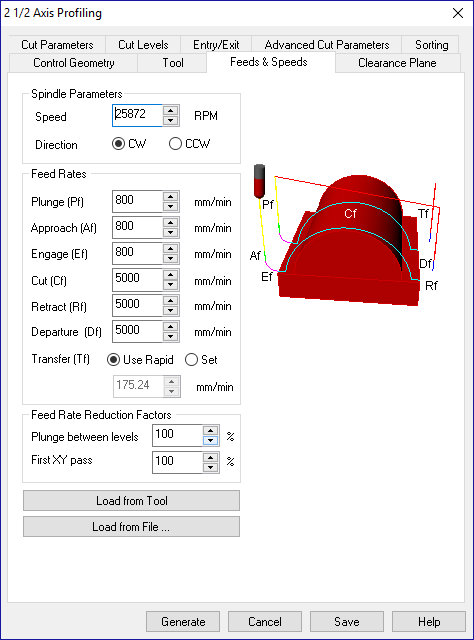

RhinoCAM jobs with their preferences
5 cm height glued MDF
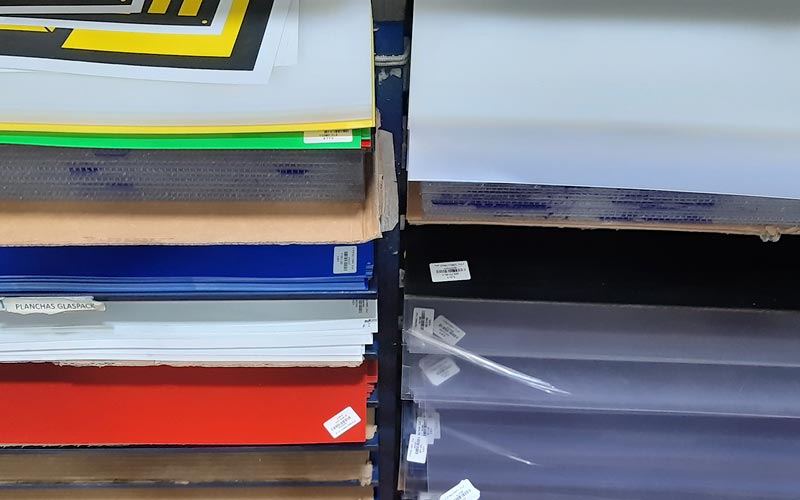
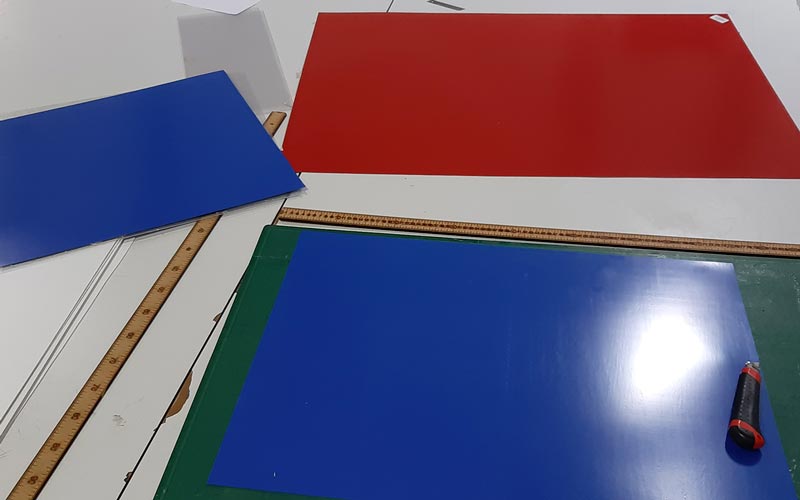
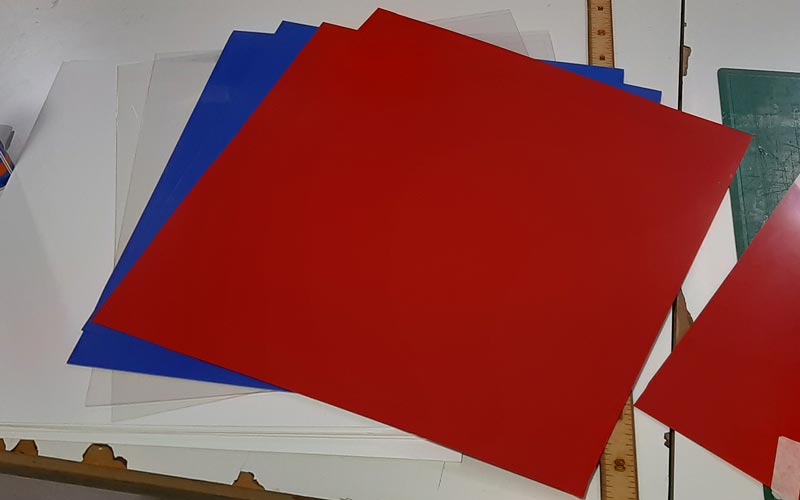
Glaspack materials for thermoforming in 50x50 cm sheets
The idea with the obtained parabolic surfaces is to use them in my final project with the input devices (a microphone, a photoresistor and also try it with the sonar) and the output ones (speakers).
Process
This was the milling process:
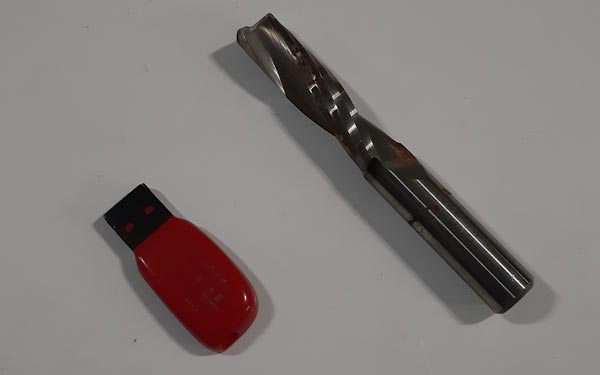
Used a 12 mm mill
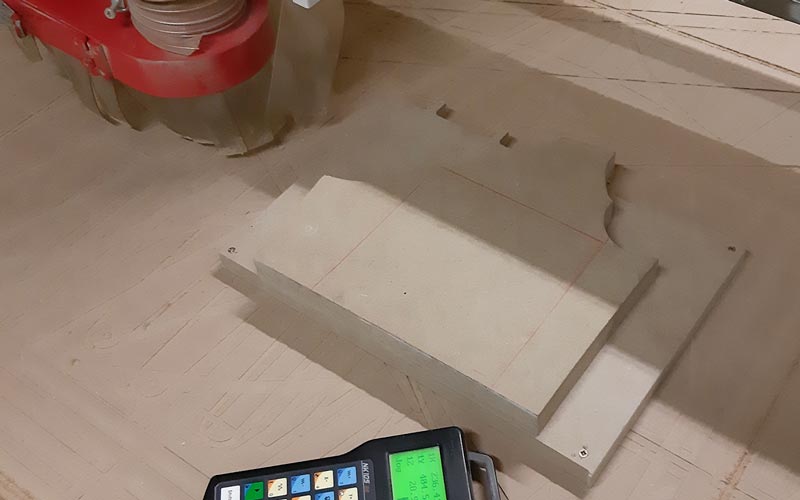

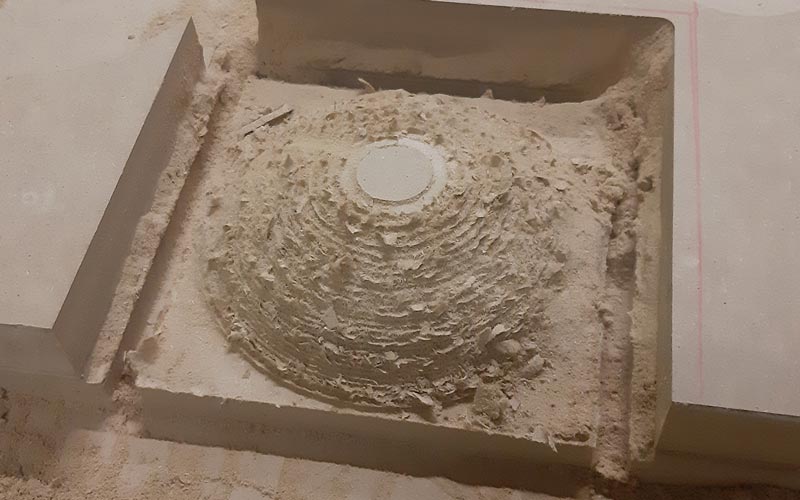
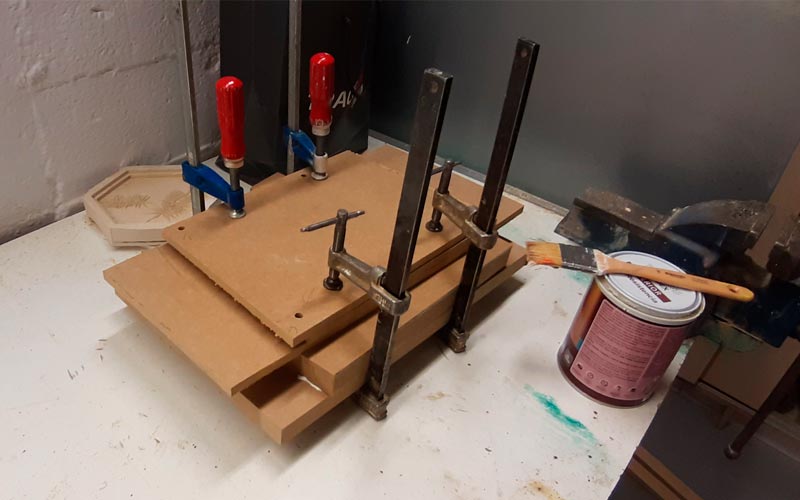
The resulting MDF after milling process (about 15 minutes)
The parabol after a first sandpaper cleaning process
And after a sandpaper finishing job
Note: It would possible to refine the surface more with other RhinoCAM jobs but it wasn’t the choice because of the free times of the CNC (that it was so busy)
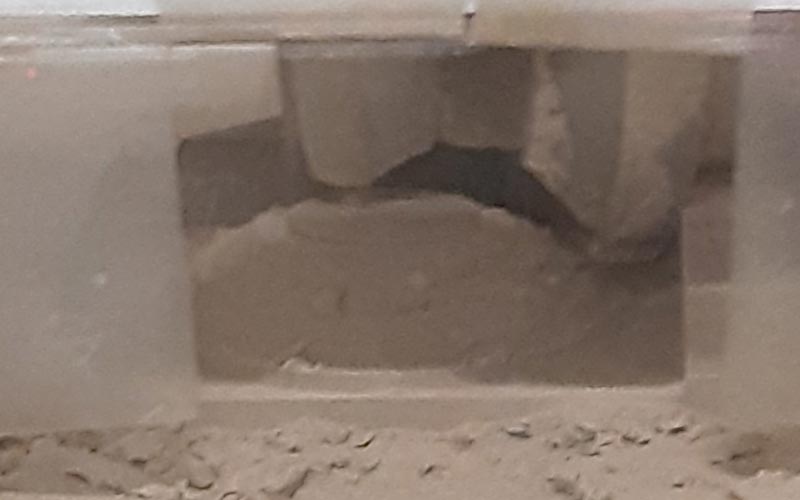
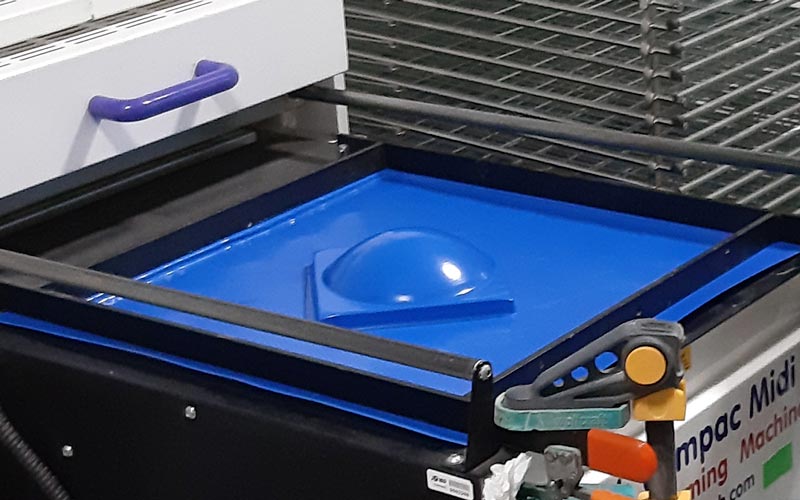
This is the thermoforming process:

I used the Formech Compac Midi 343 machine
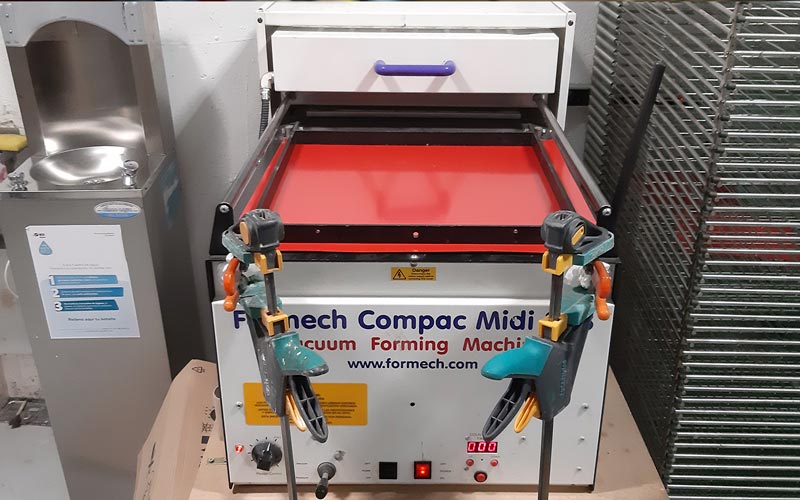
After heating the machine for about 15 minutes, the mold is placed on the bed into the machine, and the material is placed and fixed by pressure with the help of silicon ribbons to avoid the air to scape from the inside of the machine (under the plastic piece).
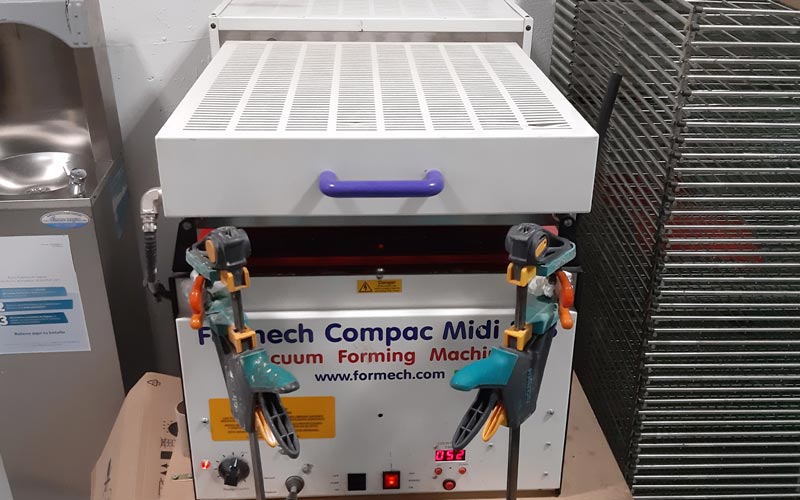
The resistance is then placed over the material to heat it about a minute. Then, it is retired and the bed with the mold is put up in contact with the heated plastic piece (under it).
The plastic piece becomes to get the mold shape but it needs higher forces to adapt to the details of the mold, so the vacuum system is activated for less than a minute and to suck the air inside between the plastic piece and the mold.
The plastic piece now should have the mold’s same shape. The thermoforming is done.
To help the material to be unmolded, the vacuum system could be inverted to put pressure, introducing air between the material and the mold.
Here you can see an example of the process:
Note: Audio is disabled because of the big audio noise differences than can destroy your hearing system. The full explanation on this video is done here, a few lines before.
Tips
-
Valleys into the mold must be considered as a risk of uncomplete thermoforming jobs because of the vacumm system to be unable to extract the air on those parts. To avoid this, 2 methods can be used:
-
Use porous mold materials
-
Make holes (or any kind of openings) into that parts
-
Plastic material to be molded musn’t be porous and it must be well fixed at every part of it to avoid the external air to be filtrated into the machine while applying vacuum. This will ensure the vacuum to mold perfectly the plastic.
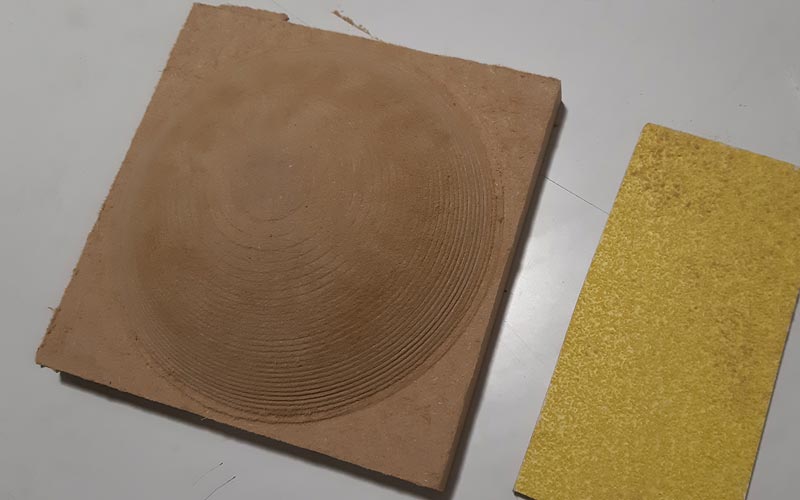
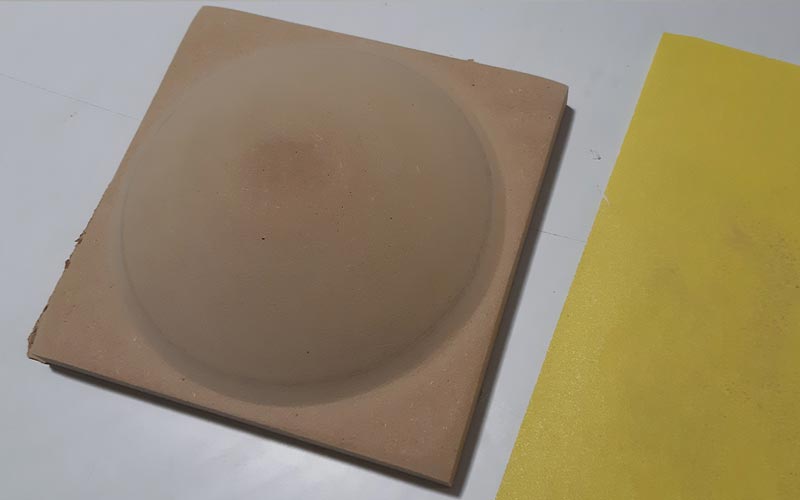
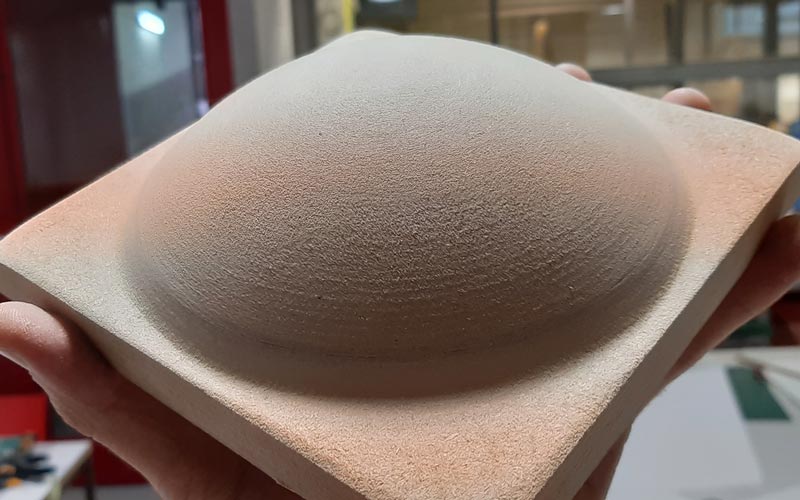
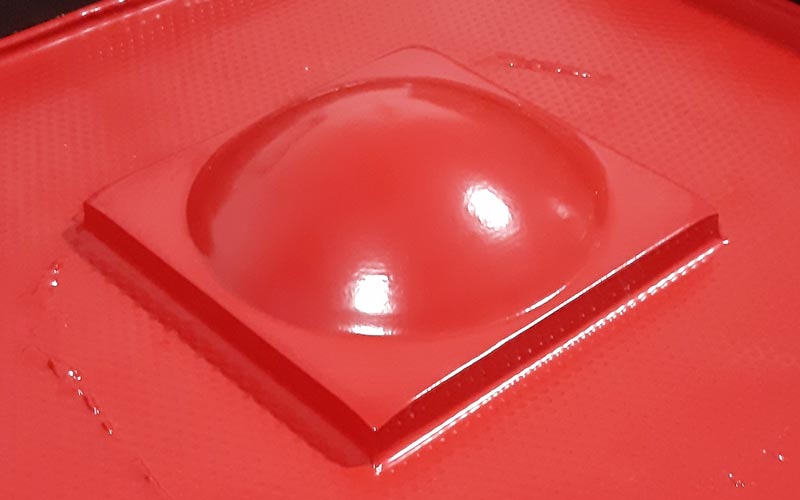
Results
These are the results:
The main idea with this parabolic surface is that every surface place point to the parabol focus when receiving a source directly straight to the parabol origin.
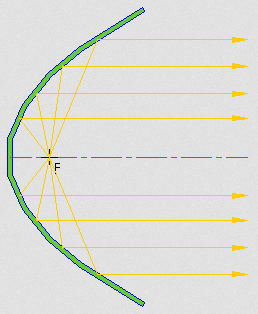
The effect works on the inverse case.
Source (image)
By this way, sound or light could be captured at the focus.
In the case of the light, a reflective material can be placed into the internal surface to send the light to the focus. With a photoresistor input device, light variations could be registered, both with any kind of luminance or in the case of RGB differences.
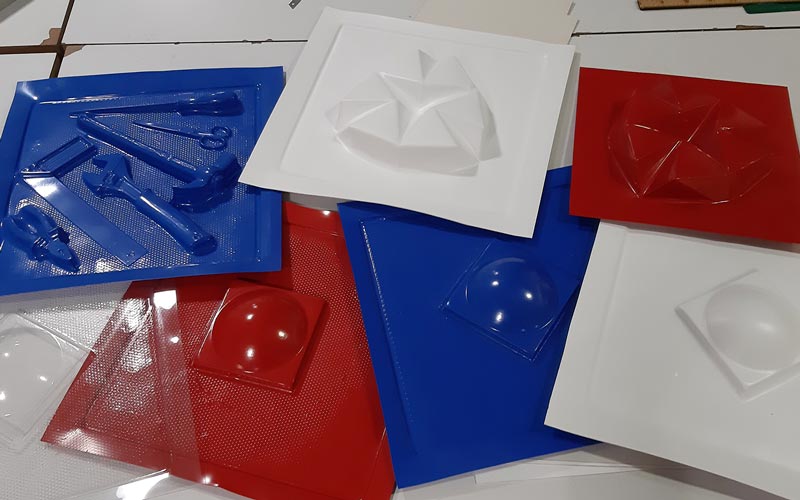
These are the results of the whole thermoforming process
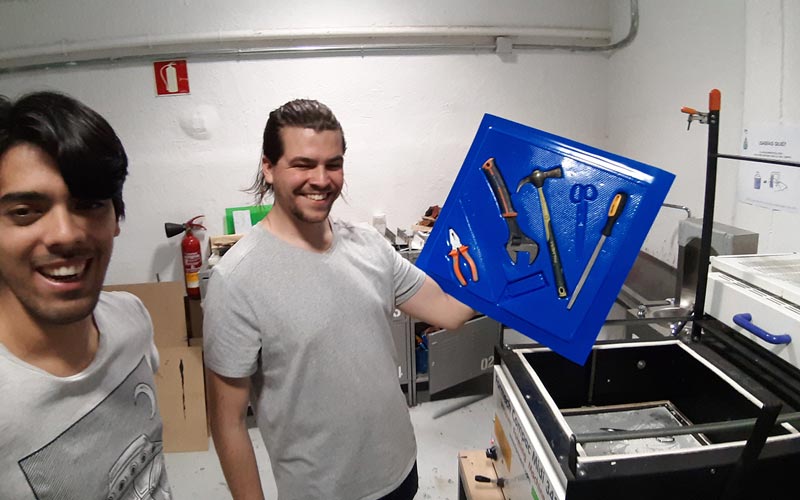
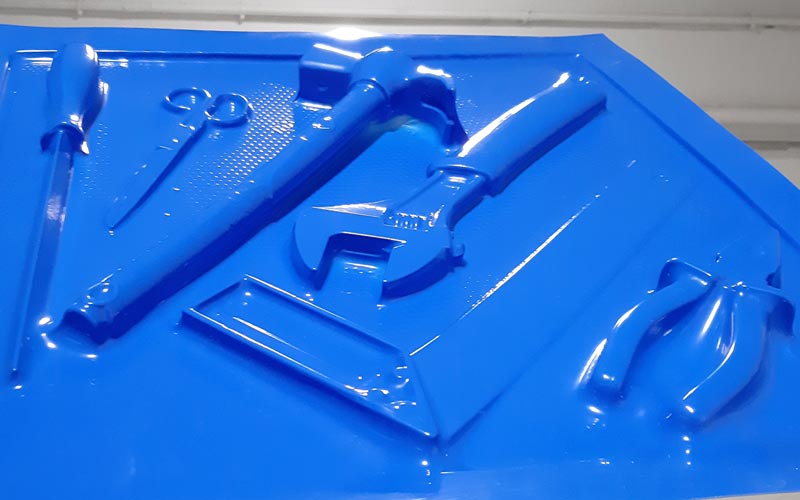
Also, we tried with friends to make a toolkit mold :)
Composites
Idea
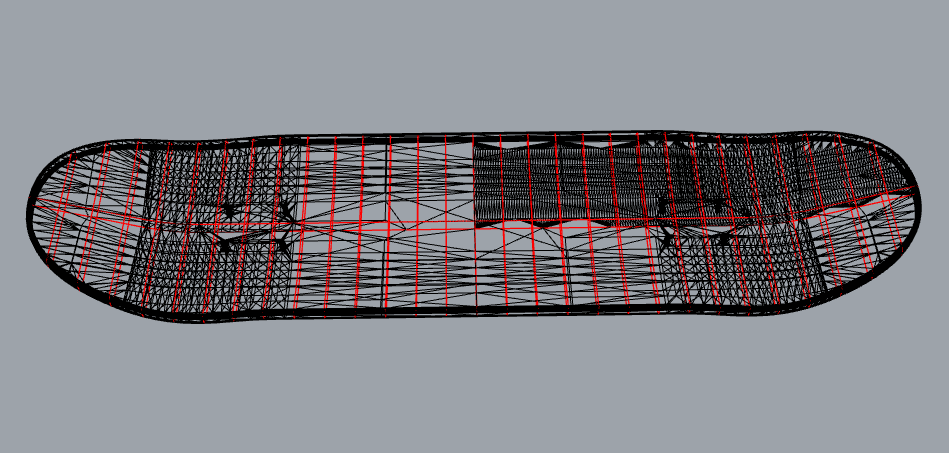
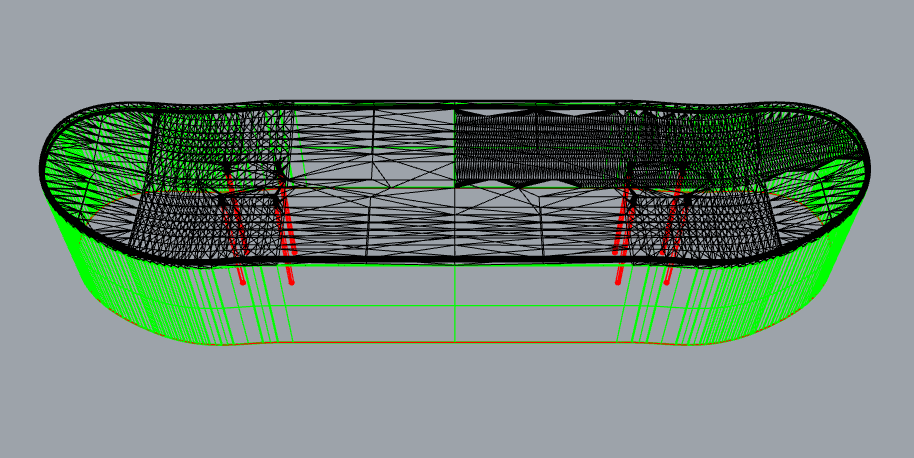
The first idea on composites was to make a skateboard with denim and glue.
For that, I searched for some skateboard .stl files and downloaded one.
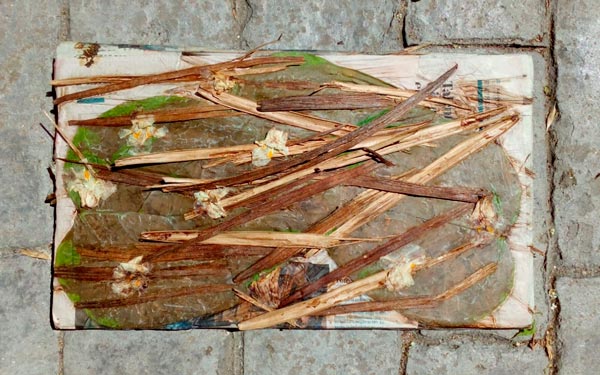
I also tried a kind of composites with a classic technique called ‘engrudo‘ in Spanish. It is made by mixing floor and water, also with sugar and salt. Giving it heat, it becomes a kind of glue that was commonly used on traditional masks creation and applied as an easy and fast glue at home for manual works and other kind of needings.
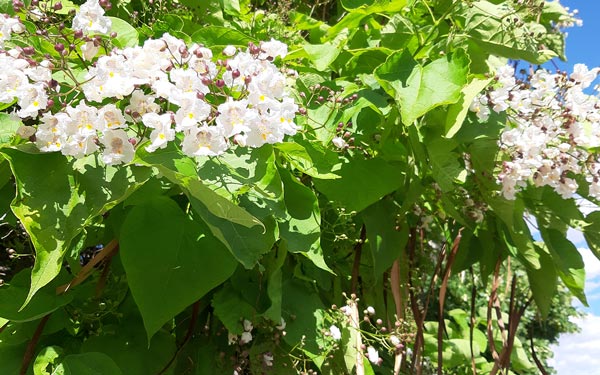
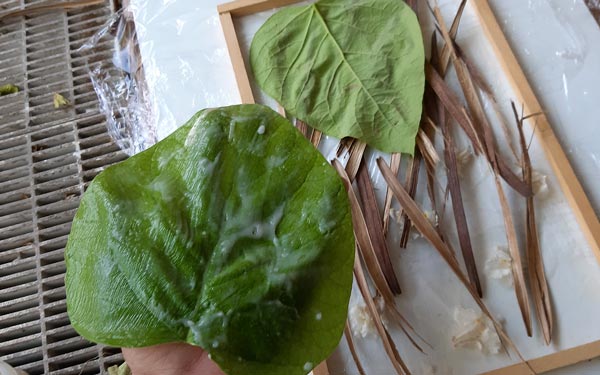
The idea with this process is to use natural materials as paper, tree leaves, flowers and fibers.
With the help of engrudo, I made a natural material board to be cut with lasercutter.
Process
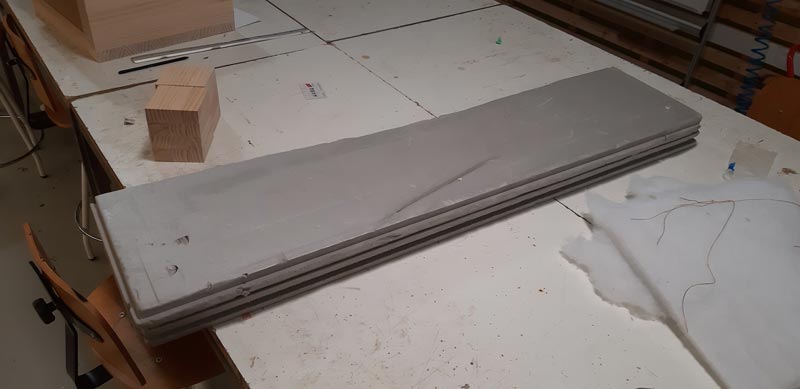
For the skateboard I began to prepare the mold to be milled in foam, but after having some dificulties while working with meshes in Rhino and wasting more time than desired, I decided to discard this option.
Then, I started the process by preparing the engrudo.
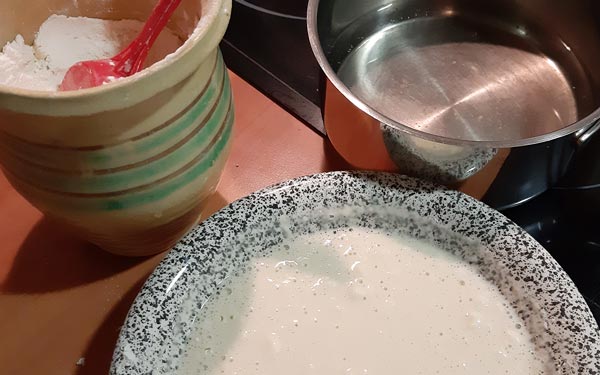

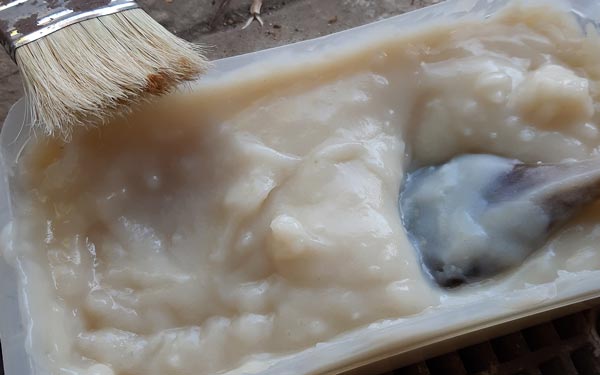
Once the engrudo has lost the cooking heat, it’s ready to use. It’s possible to add some water later to help to the application with a bush.
I prepared the vegetal materials separating the hardest parts and cutting them.
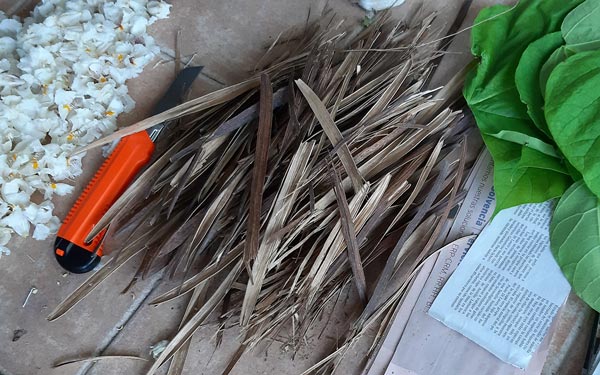
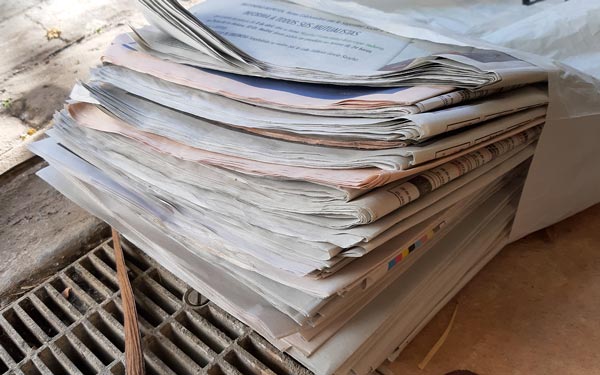
I also cut some newspapers while I reviewed some past news
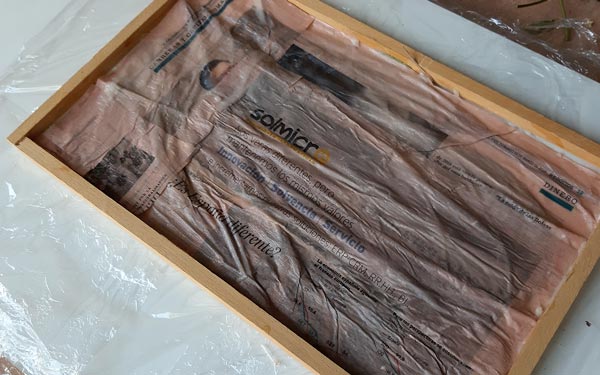
I set the workspace by preparing a 12 mm wood frame in which add materials to obtain a specific size board to work later with the lasercutter. I added some plastic to allow easy un-molding process
Then, I started to add layers glued with the engrudo until I over-reached the frame height limit, in order to finally press it.
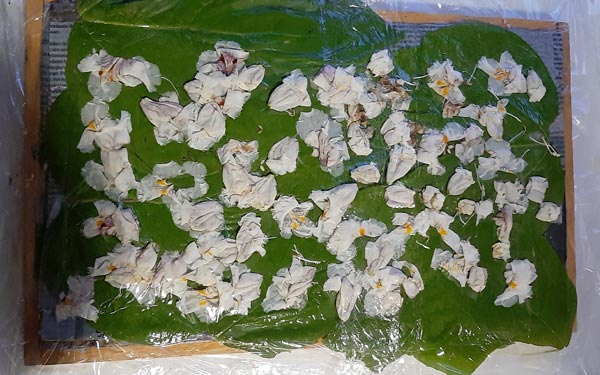
With the new material dry, I can cut a design with the laser cutting machine. The idea is to make some kind of selve, support or just an art piece.
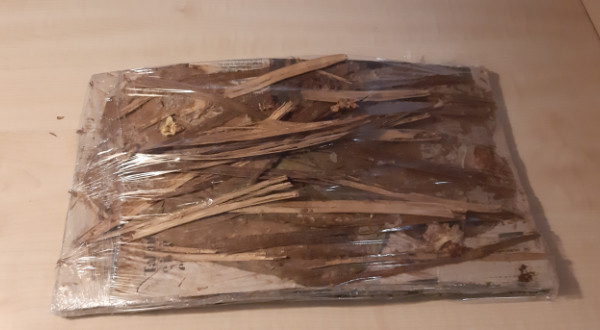
The new material created appears to be fine, solid and uniform, but it is not dry yet at all, so I’ll have to wait a little bit more to send it to the lasercutter.
Once the material is dry, is hard like a stone, but it began to bend, so the lasercut will not be possible until the piece would be made again.
Original design files
Thermoforming > (Parabola (3D model + RhinoCAM))