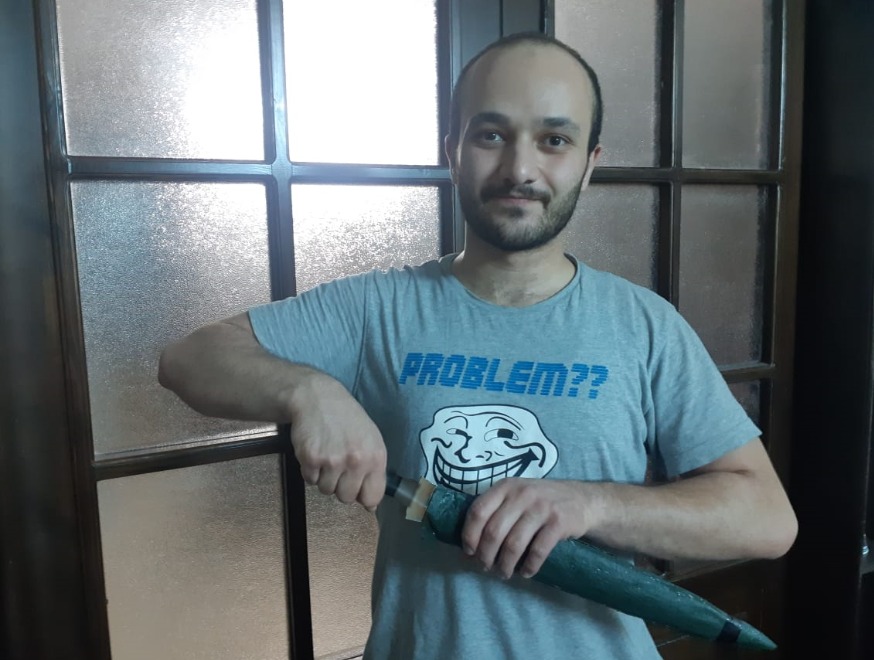


For this week, I am creating a scabbard for a short sword I designed. This is to apply the use of composite material as I am using leather and resin to create the scabbard.
A composite material is a material that consists of two or more materials with different properties (physical or chemical). combining them creates a material with new characteristics.
In my case, adding the leather to the resin. I can get a product that has the looks of leather while being hardened because of the resin, which makes it practical for its usage.
I have used Fusion 360 to design a wooden mold manufactured on the Shopbot CNC.
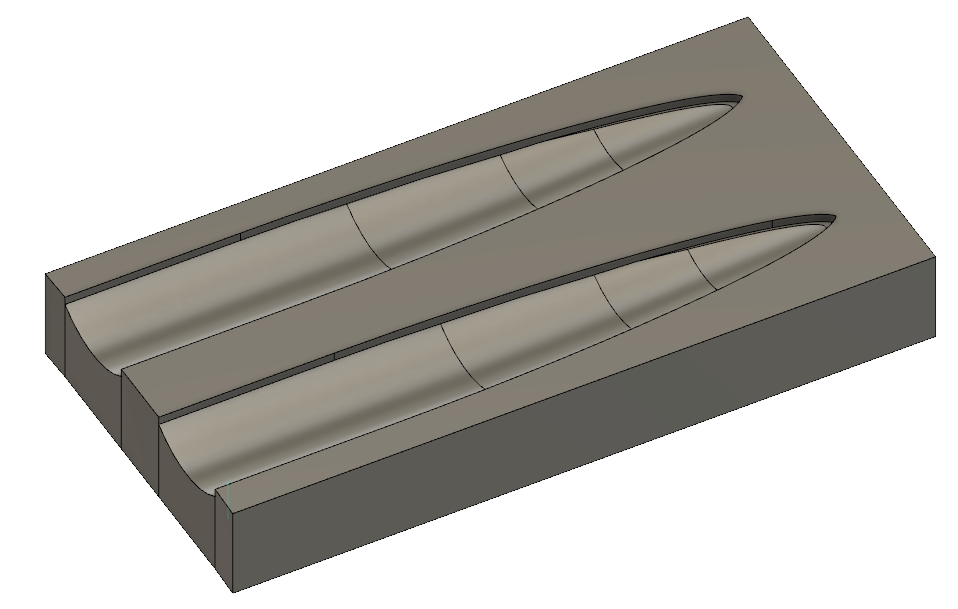
Saving the file as STL then openning it on the V Carve, I could edit the setting and get the G-code for the shopbot to create the 3D mold.
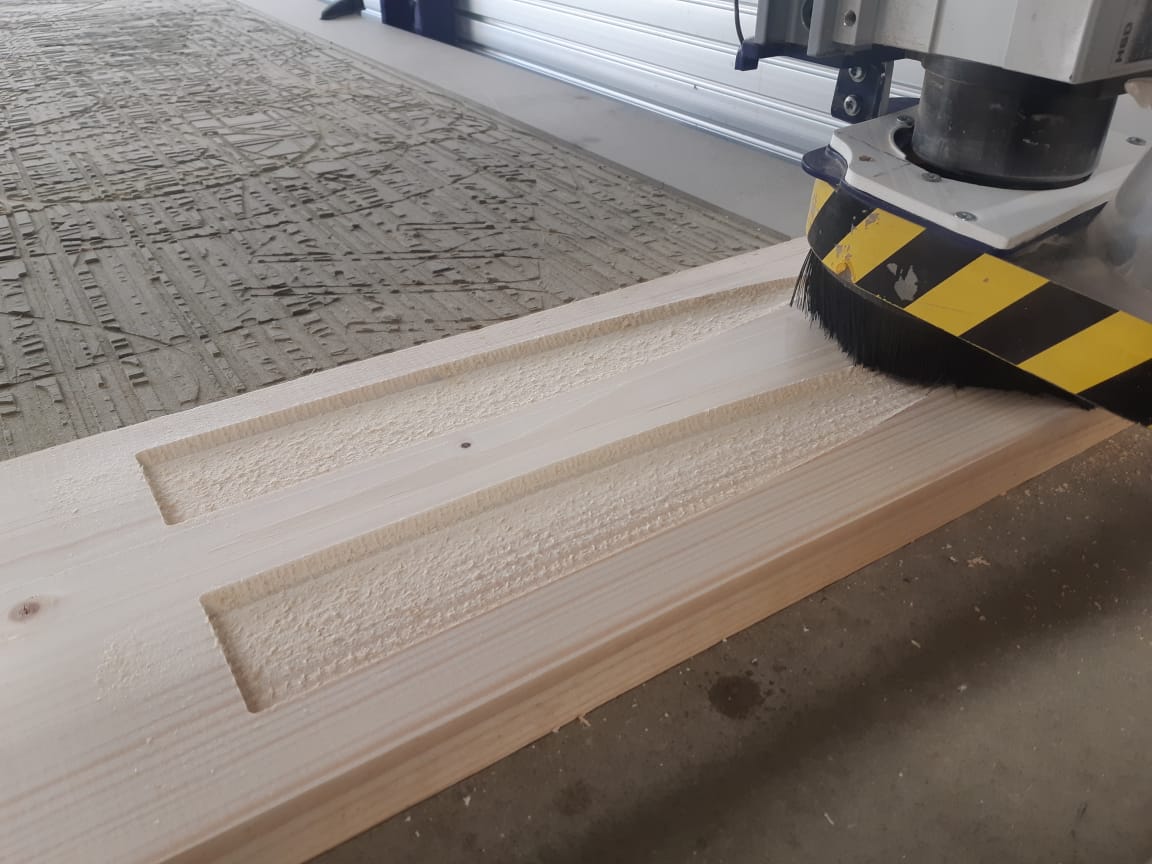
On V-Carve, after opening the stl file, we can select the toolpath as a milling machine, to roughen the object. The process here is similar to Molding and Casting week as the tool mills the part till it reaches the desired shape. But here, as I was short on time, I decided that it would be enough to do only the roughing and skip the lightening.
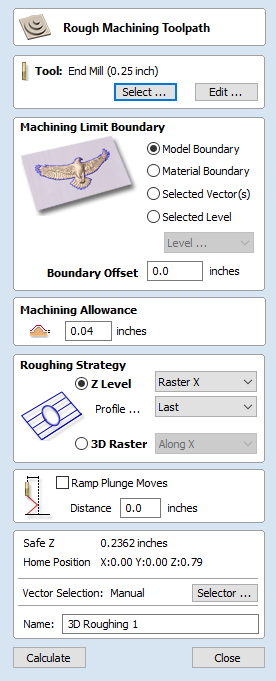
I have used 1/4" endmill to cut my mold. And then on the second setion, I selected Machine Boundaries because it combines boundaries of all the components in this job. And then, in Machine Allowence, I kept it on a low value because I am not going to do a lot of post processing. The machine allowance, leaves a small thin layer of the job so it would be taken care of in the finishing processes like sanding. And I knew that I am only going for roughing, hence I will need some post processing done.
In the Roughing Strategy section, I selected Z level strategy because uses a series of 2D Pocket toolpaths which take into account the 3D model and hog-out the material around it within the specified boundary.
After having the mold ready, I gathered all the equipment I need for my creation; The mold it self, resin, dryer, wood glue, brsuh, leather, and safety tools (gloves, mask...).
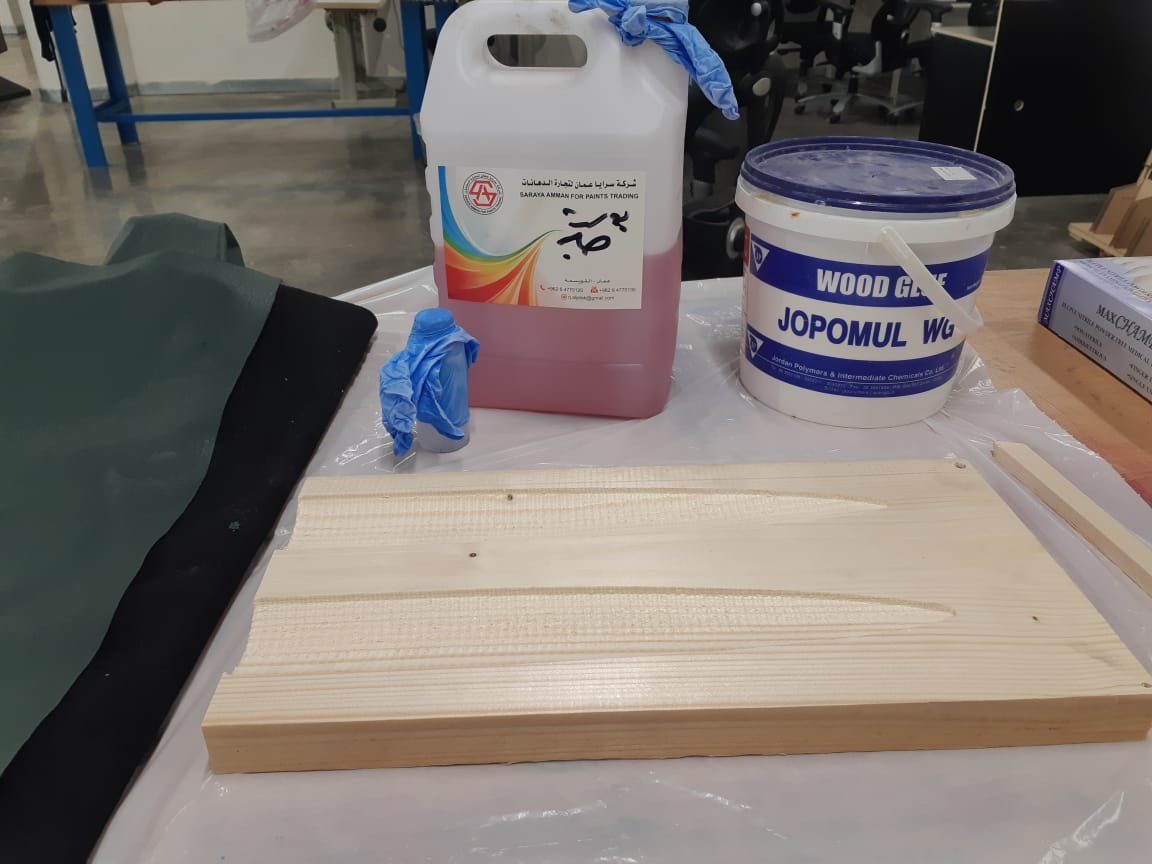
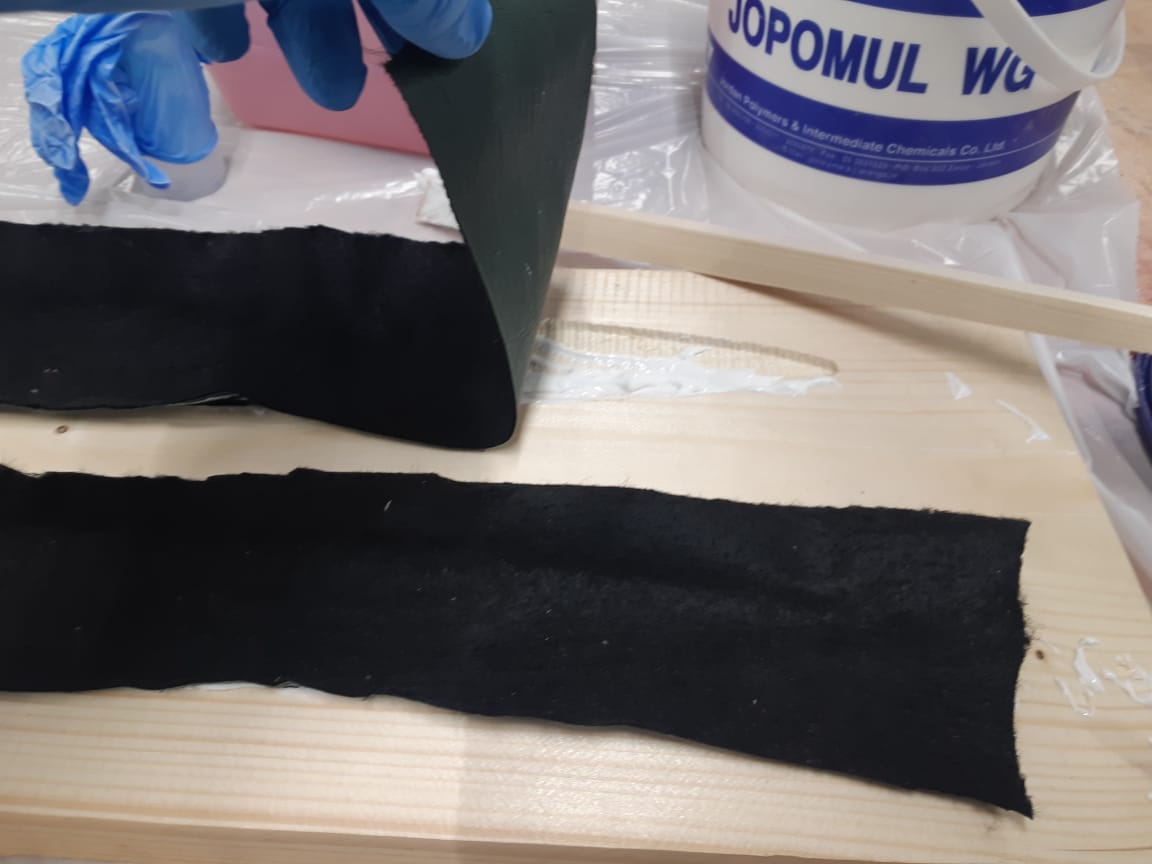
I started by gluing the mold then carefully placing the leather stripes so they take the shape of the mold.
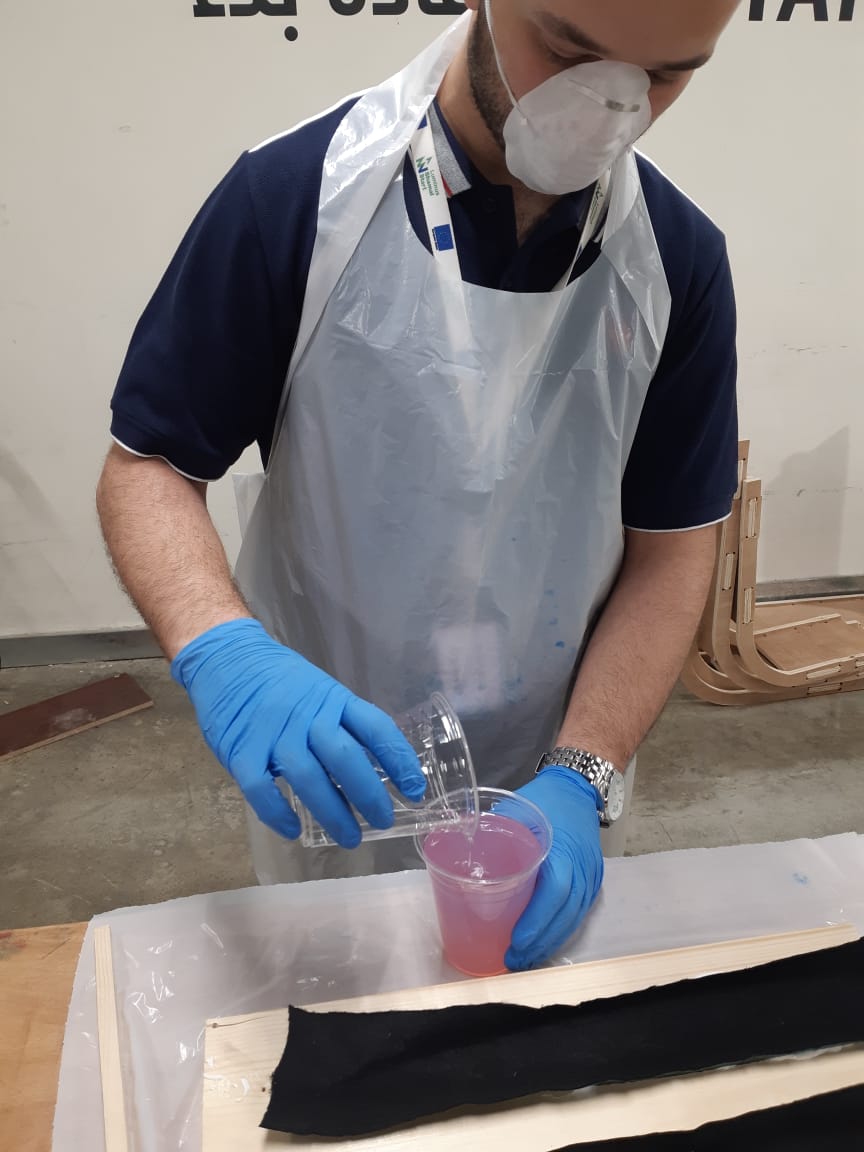
Then comes the secong component of the composite material (the first being the leather), which is the resin.
Although the resin available in our lab came from a local store with no datasheet, but by trial and error we figured that the ratio we need approximatily 15 gram dryer to each litre of resin. And as the cup I am using for mixing is a 400 ml cup, then I needed 6 gram of the dryer.

I poured 6 grams carefully then added them to the resin and mixed.
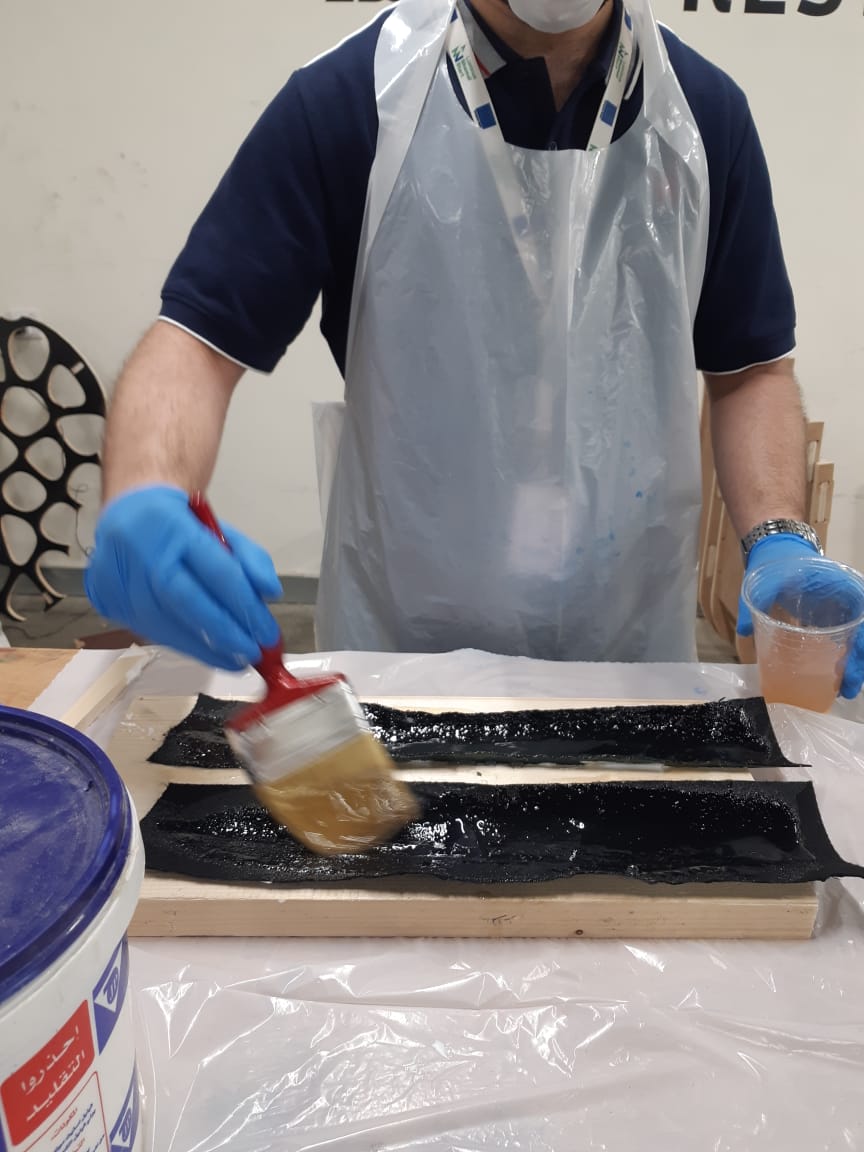
After mixing the solution, I used the brush to add the resin to the molded leather.
Now the components of the composite material are added and we need to wait for them to dry. But to ensure that the solid material will have the shape of the mold, I needed to use vacuum bags.
Fearing that the resin might ruin the vacuum bag, I added a layer of nylon sheet then placed the the mold inside a vacuum bag.
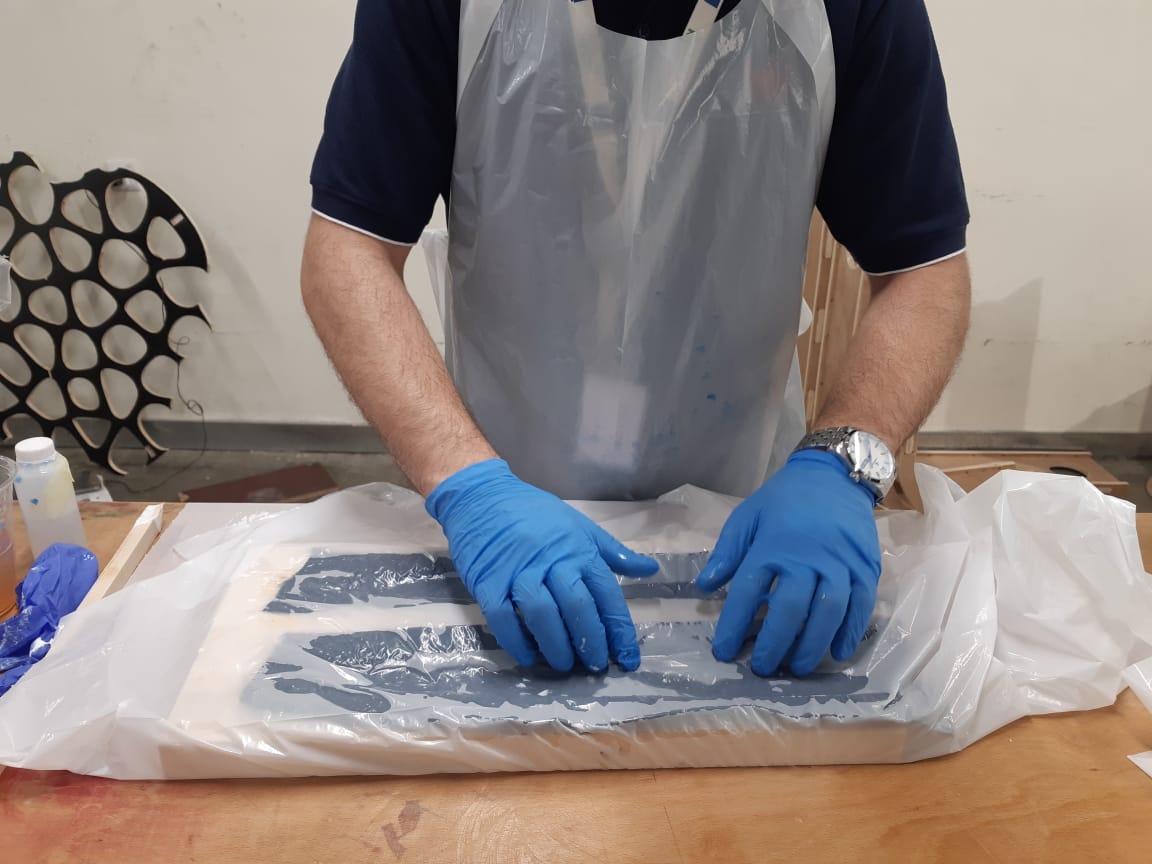
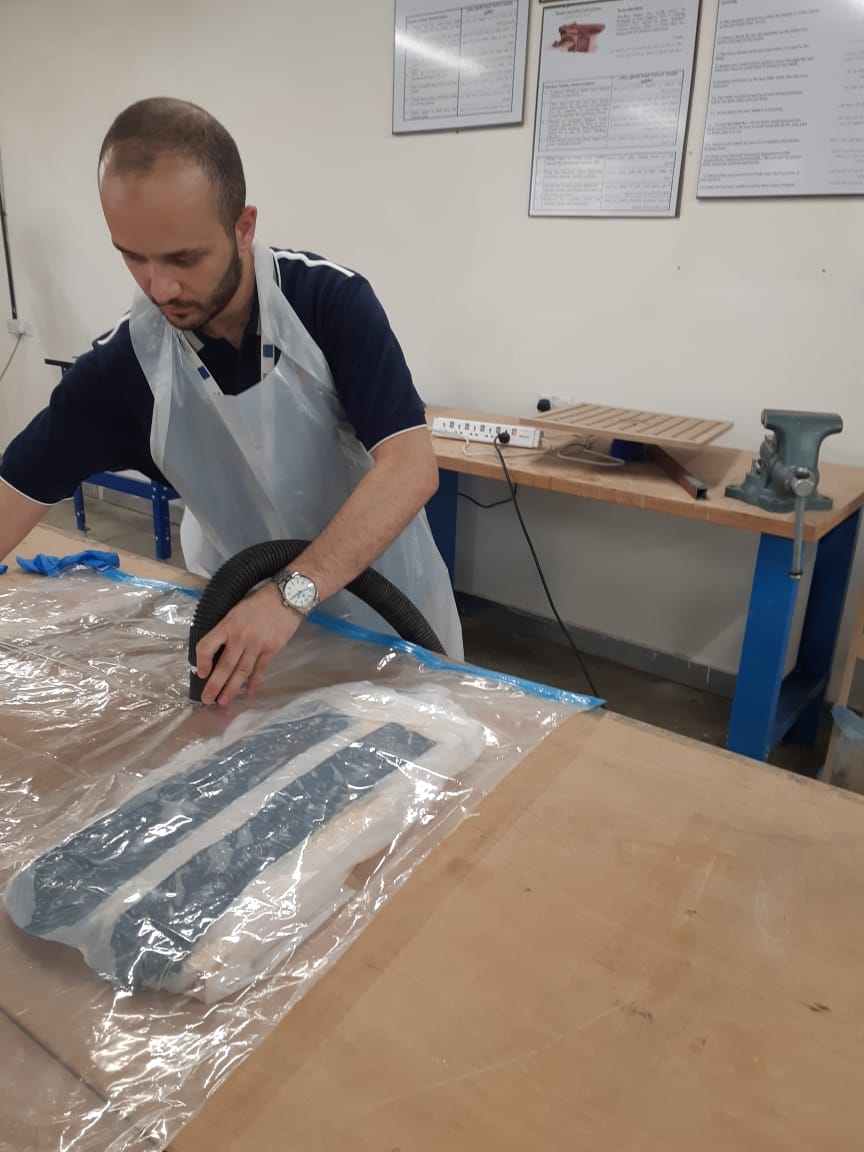
I used a vacuum cleaner to suck the air out of the bag. And you can see now how the bag started to press on the mold.
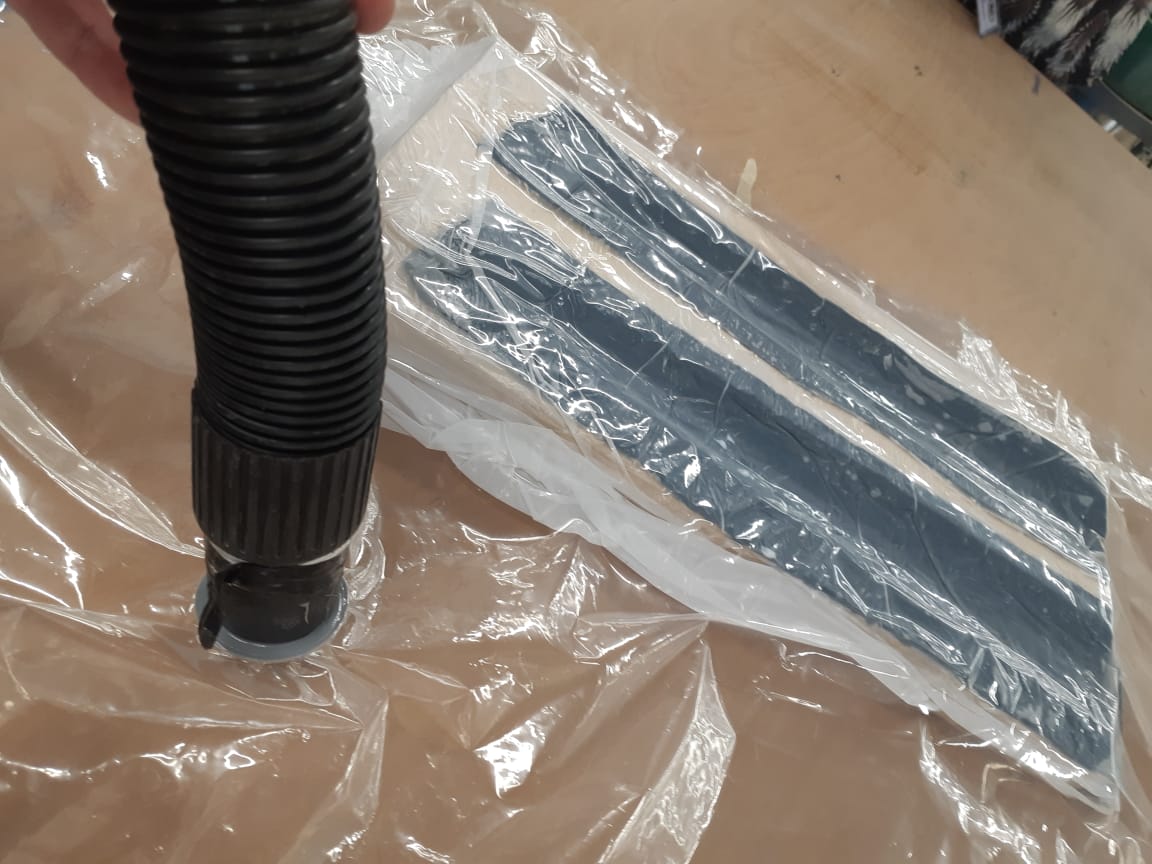
I left them for a day to dry, and the next morning I removed everything to find my composite material hard and tough with a leather texture.
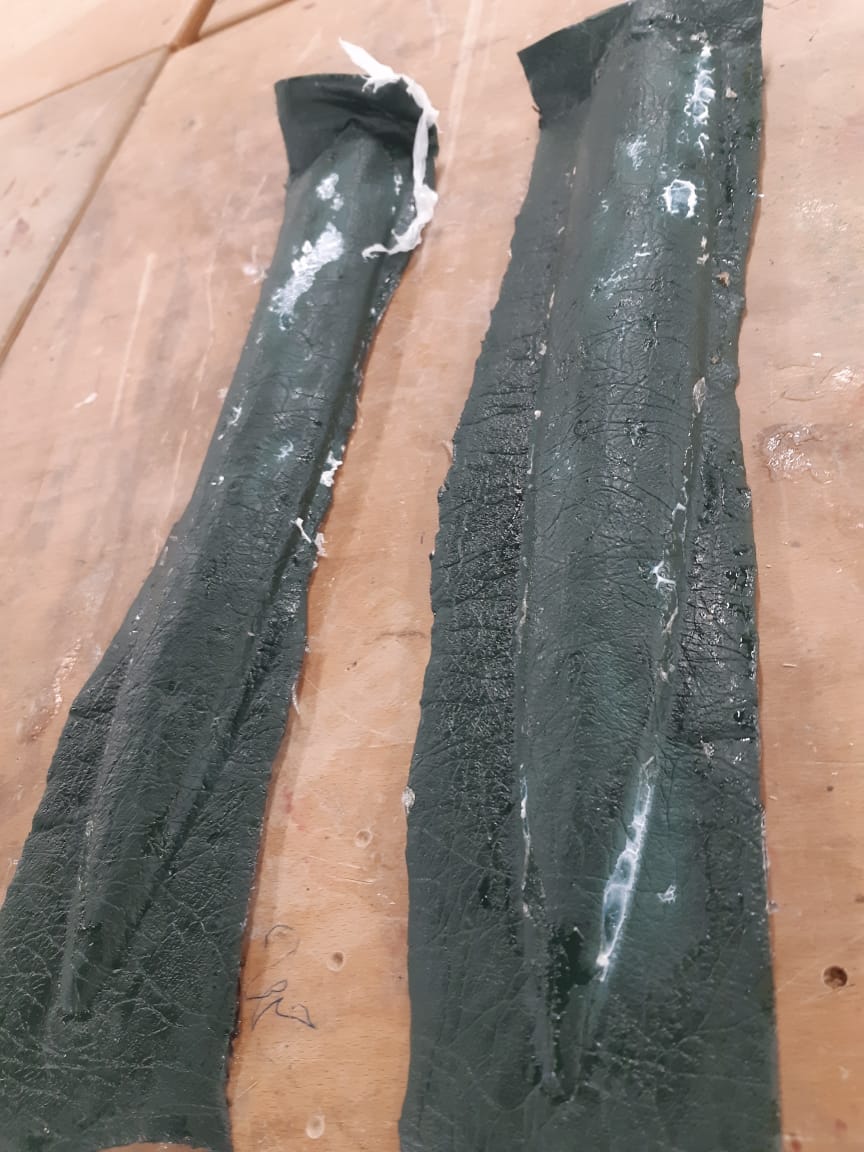
Now to have the scabbard ready, after I removed the extra material and attached the two halves together.