Computer Aided design
This week's assignment is about getting to know some of the software used to create 2d and 3d designs.
To keep it simple, I opted to create the same model in two different packages for 3d and 2d.
First software I used is called "Blender", it is a 3d modeling and animation package with all the features you could ever want. It can also be used as a video editor and numerous other exiting things. And the best part about it is that is is free and even open source!
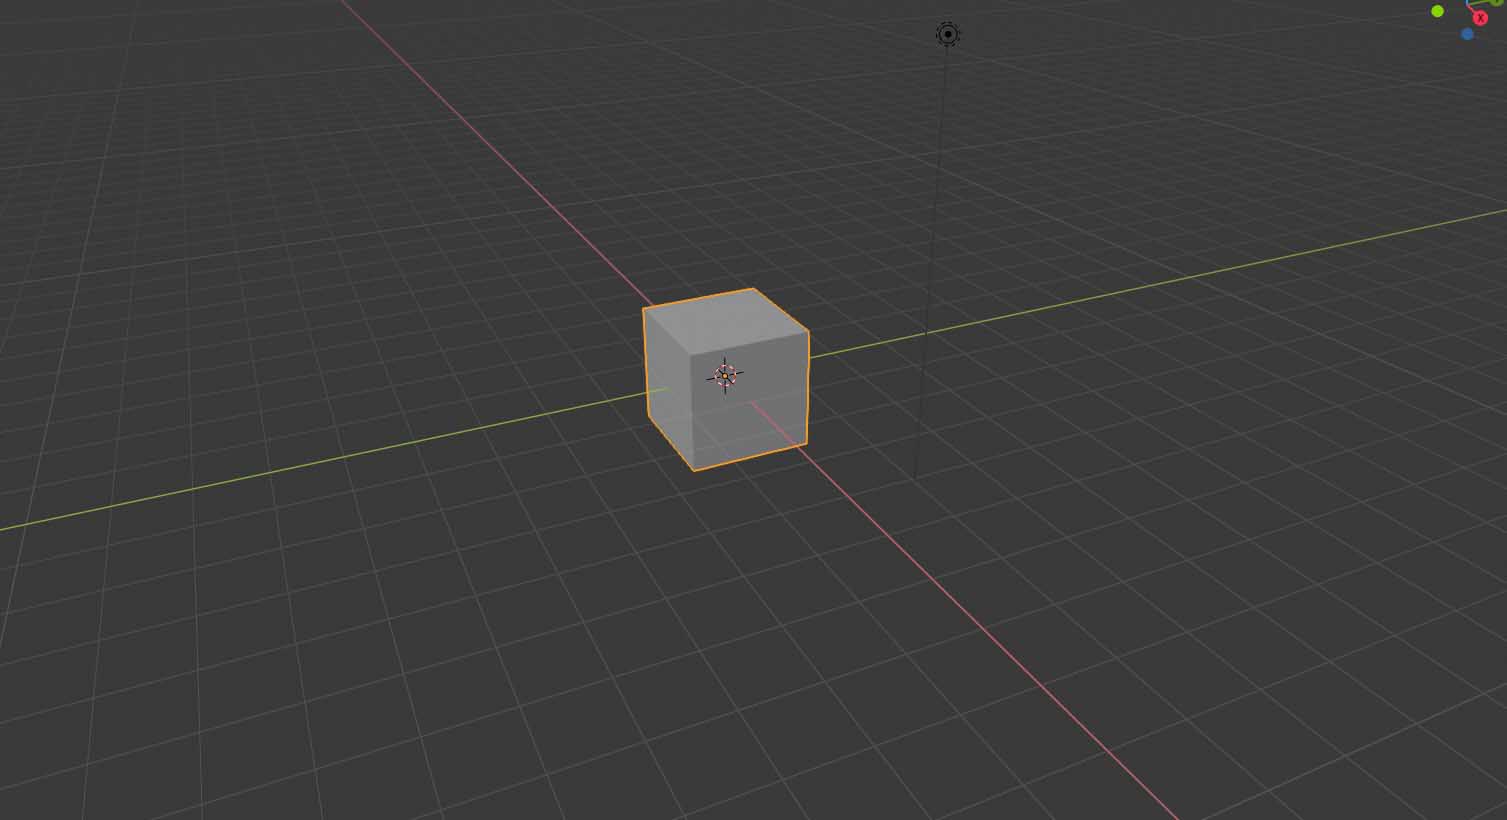
Anyway, first of I created a cube, by pressing crtl + a and selecting mesh - cube.
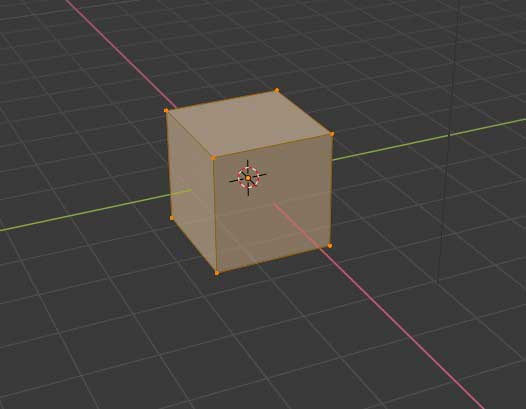
Then I changed into the edit mode, by hitting the tab key on my keyboard. Everything should be selected (as indocated by the orange glow), if it is not press the a key to do so.
After that I press i twice, to inset individual faces, moving the mouse will now change the amount of the inset.
This action is commited by pressing the enter key, which is the case for all functions in blender, so I will not point that out everytime.

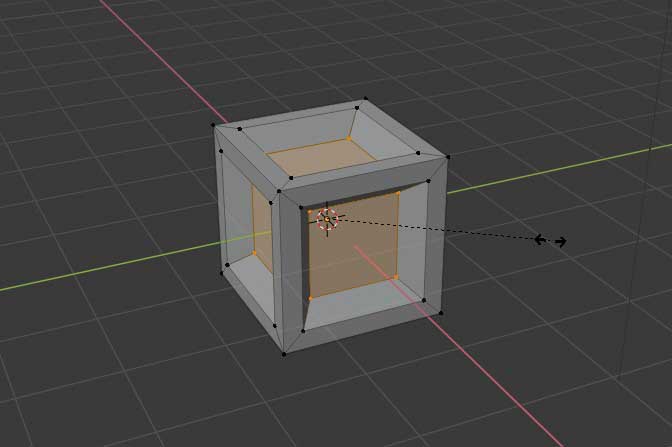
Now I hit e to extrude and right click to make the extrusion stop at the point where I started it.

I then simply hit s to scale on all axis and move the mouse to get my desired amount of scaling, then I commit.
Then I changed to edge-select mode, which is done by clicking the middle button in this menu, which can be found in the top left corner of the interface.

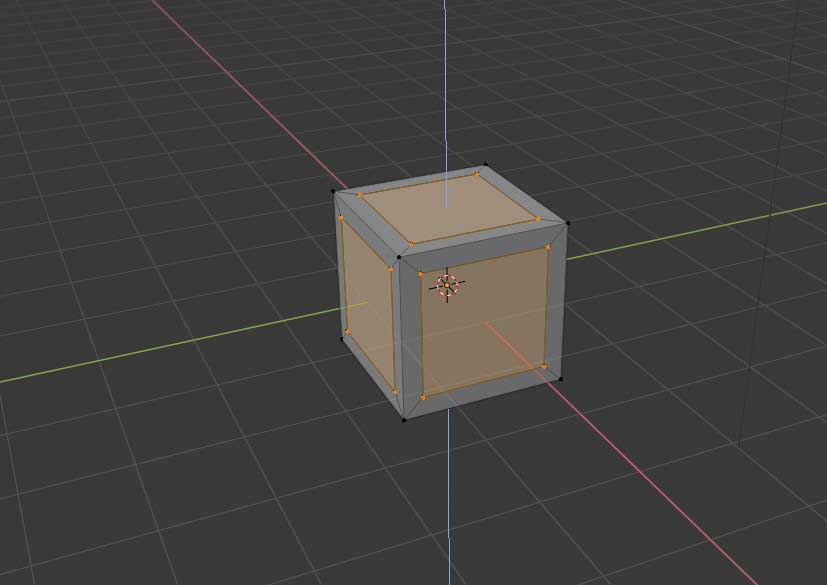
Once in edge-select mode, I selected all of the outer edges and the edges in the middle by shift + right clicking them.
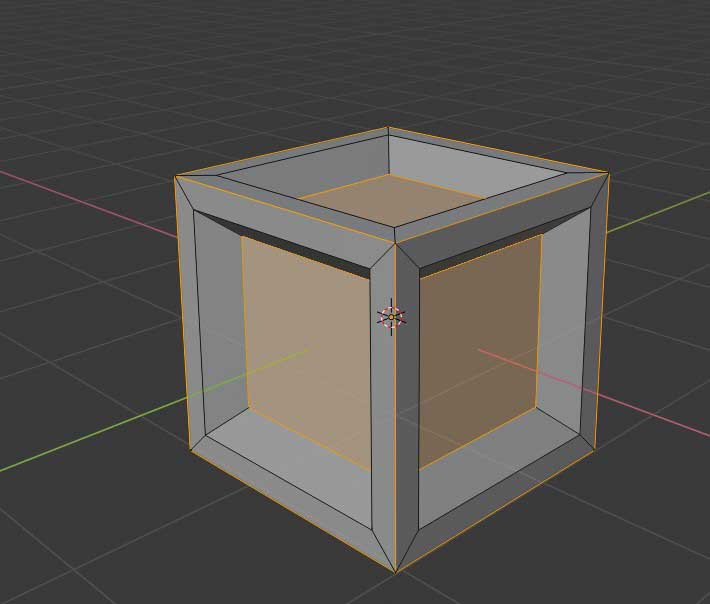
After that I hit the b key to bevel all of the selected edges, the amount of bevel can then be manipulated by moving the mouse, also the resolution of them is changed by scrolling the mousewheel up or down.

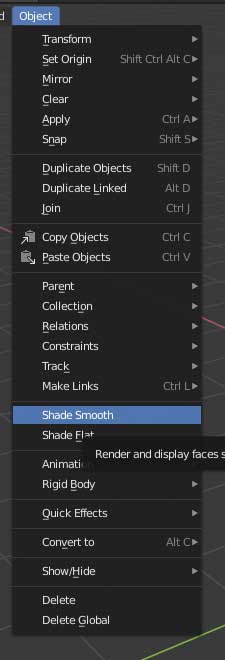
Then I went into the Object menu at the top of the interface and clicked the Shade Smooth button, this makes the rounded bevels actually round instead of facetted.
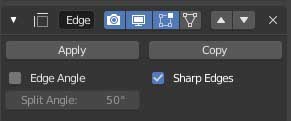
By now the model is actually finished, but I decided to add an Edge-Split modifier to retain some of the sharp edges of the model based on their angle.
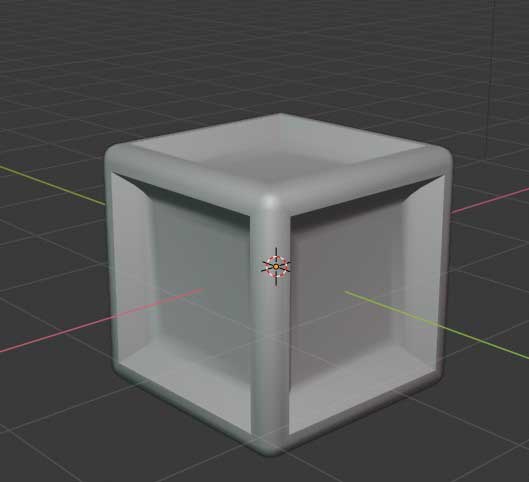
And this is what the final outcome looks like! :
For comparison, I then tried to create the same (or at least a similar) model in the software "Fusion360"
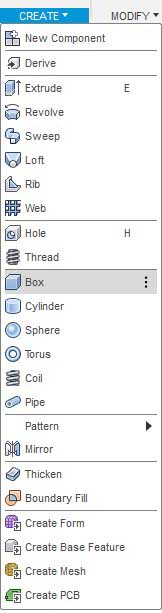
First thing is first under the create toolbar I select the Box.
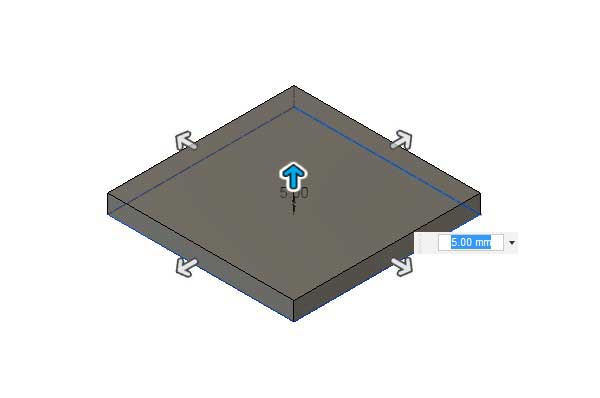
Then I selected a plane for the box to sit on, by left-clicking in the viewport. Then I typed the length and height an the box which was 5mm.
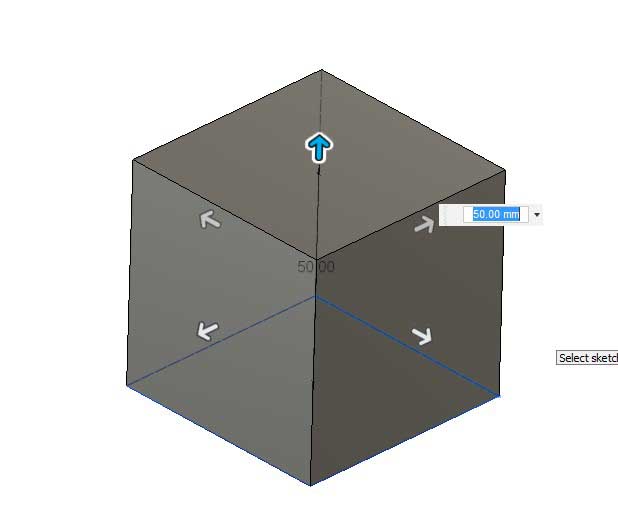
After that I had to set the height of the box, since I wanted it to be a cube I opted for the same 5mm as before.
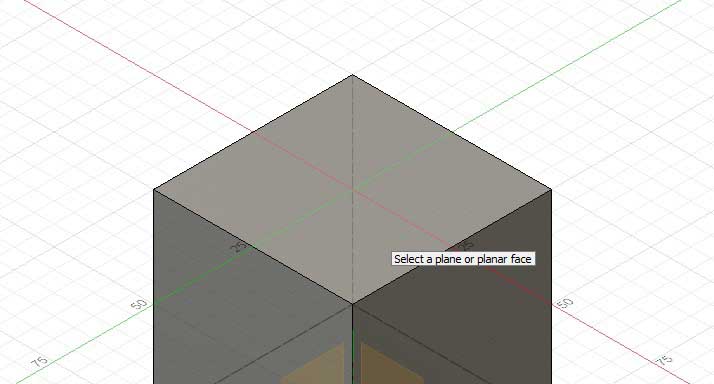
Once that was done, I pressed the r key to create a rectangle sketch and placed it onto one of the cubes sides. Iportant to note is that the rectangle is a bit smaller than the face of the cube.
I then repeated this process for the rest of the cubes faces.
Then I hit the e key to extrude each and every sketch I just created inwards, so they take away from the cube they are on.
Next I selected all of the outer edges of the cube, by shift + right-clicking them and hit the f key to fillet them.

After that I selected all of the inside faces and repeated the previous process.
And then this is the final outcome, as you can see it looks very similar to the one I made in blender.
Now for the 2d-Design as the first software I wanted to use Fusion360 again, because it has a really advanced set of 2d-tools to go along with it's 3d tools.
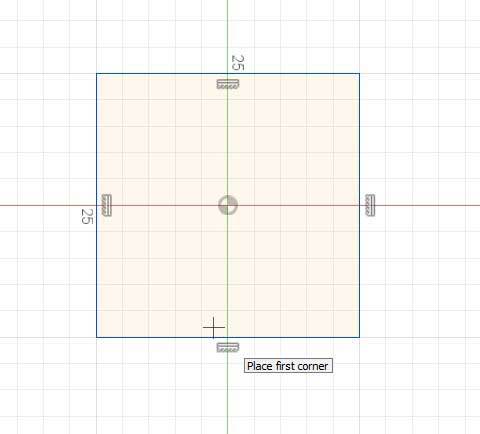
First I selected the rectangle-tool from the sketch toolbar (which as stated earlier can also be accessed by hitting the r key).

With that I then created a 50x50mm rectangle, by left-clicking where I want it's corners to be.
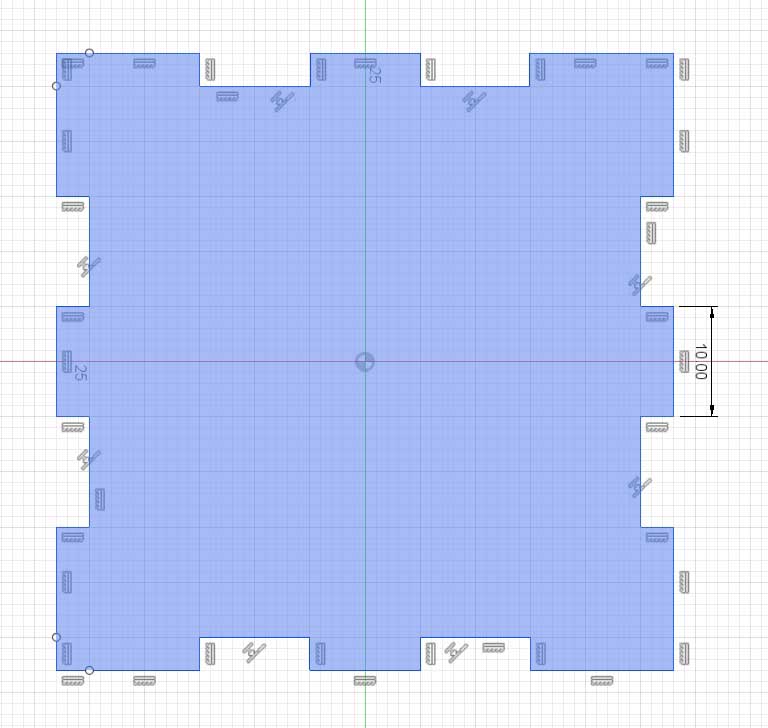
Then I pressed the l key to get into the line drawing mode and started by creating a rectangle that has a length of 10mm and a height of 3mm in the top left corner of the before created rectangle.
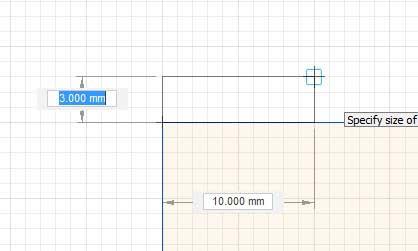
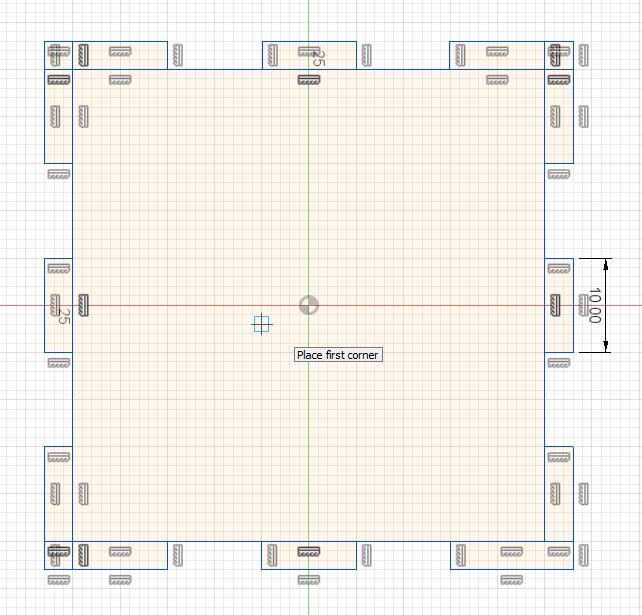
I then repeated that same process to create rectangles around the whole perimeter with a distance of 10mm each.

After that I used the line tool again, to create corner pieces in each of the four corners.
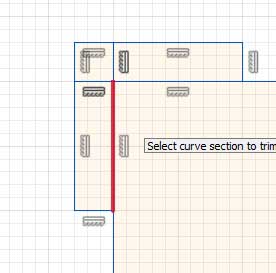
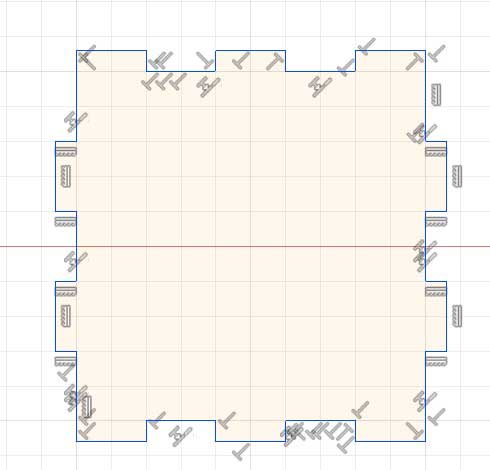
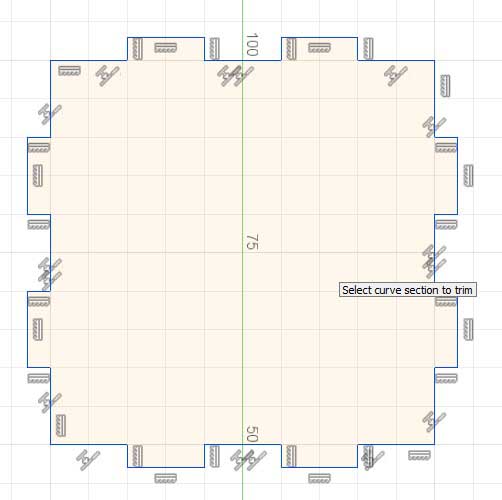
Unfortunately there are many unnecessary lines in the design right now, I fixed this by using the trim-tool, which is accessed by hitting the t key. It works by clicking the line that is supposed to be deleted, it will delete/dissolve the line until the ne´xt intersection with another line.
I repeated that process for all of the lines I didn't want in my design.
After I was done with that, the design looked like this:
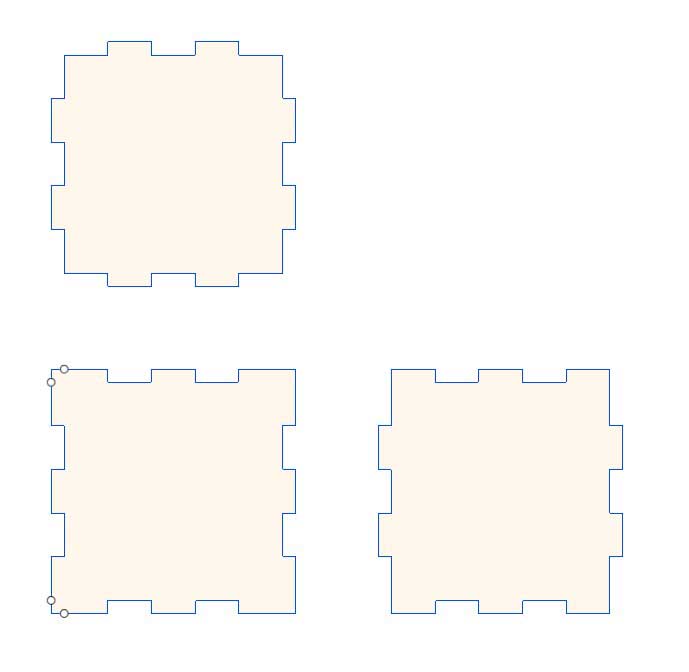
Using the same techniques, I then created two more pieces which can be lasercut in any 3mm material and put together to create a simple jointed box.
The last software I tried was LibreCad, I did the same as with the 3d softwares and created the same (similar) design to have a comparison.
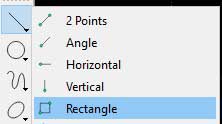
So first I selected the rectangle tool which is located in the top left corner of the interface.
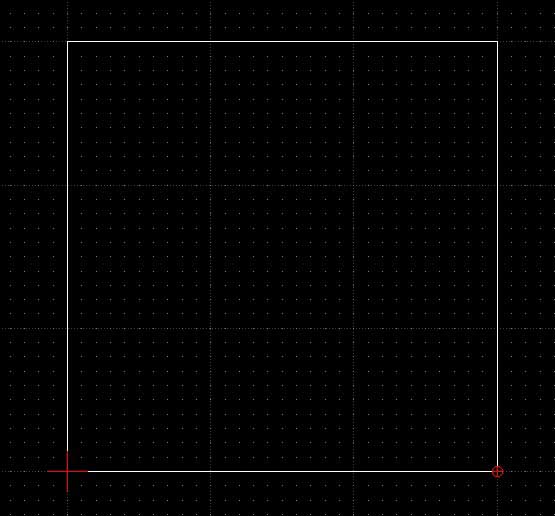
I then dragged out a rectangle with a width and height of 50mm.
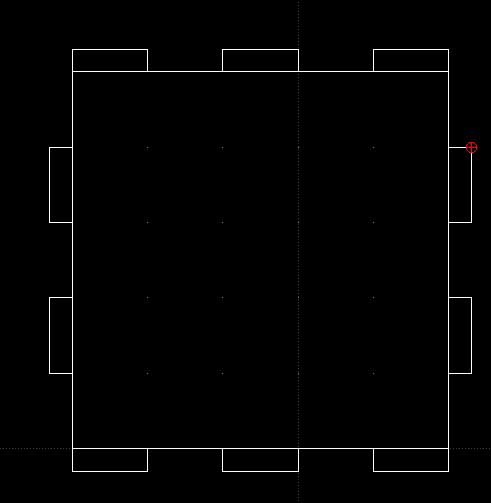
After that I used the same tool to create the joints like in the fusion design. By now I already know how where to put these joints so it takes away from the guesswork.
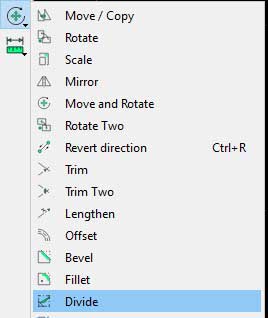
Next I used the divide tool which is also located on the left of the interface to divide all of the overlapping lines that are present in the design.
It works by simply selecting a point on a line which divides the line at this point and creates two adjacent lines.
Now I'm able to select the unnecessary lines by left-clicking + dragging right and simply delete them unsing the delete key.
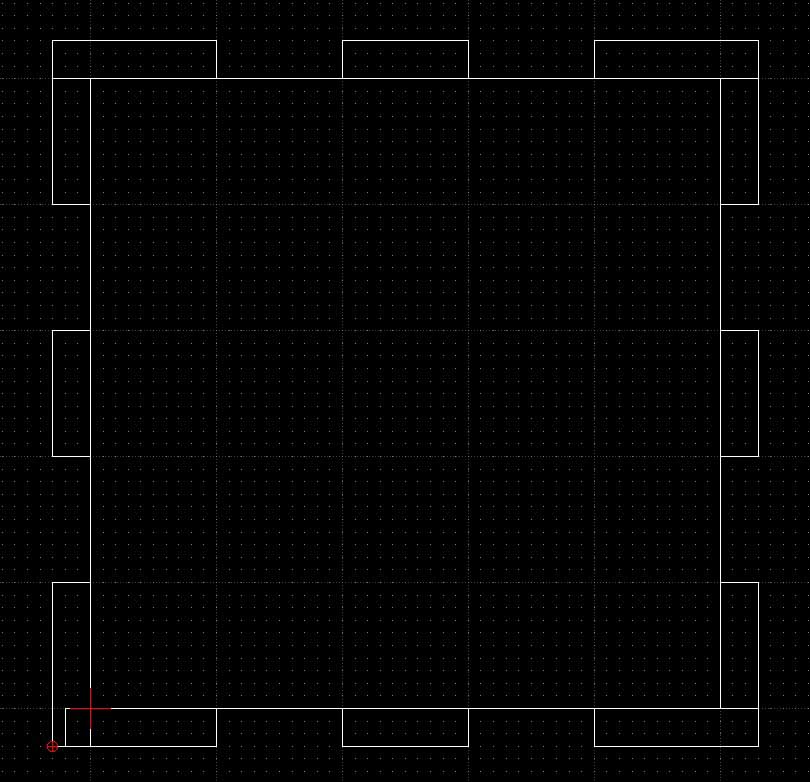
After that the design looked like this:
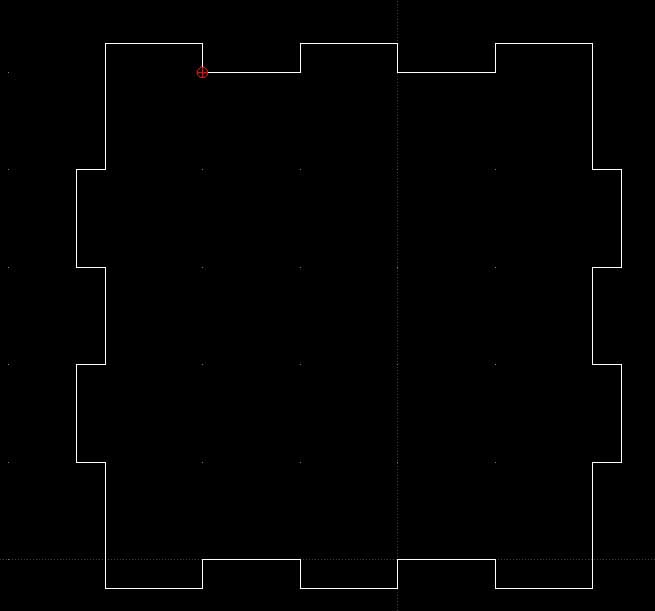
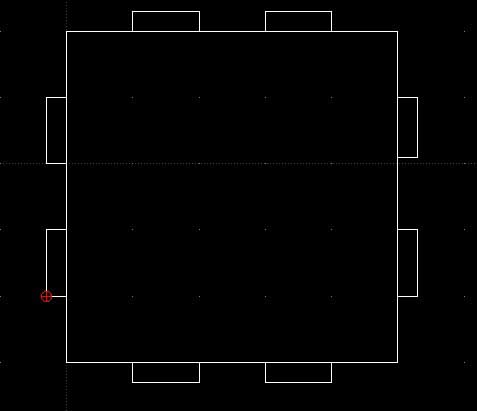
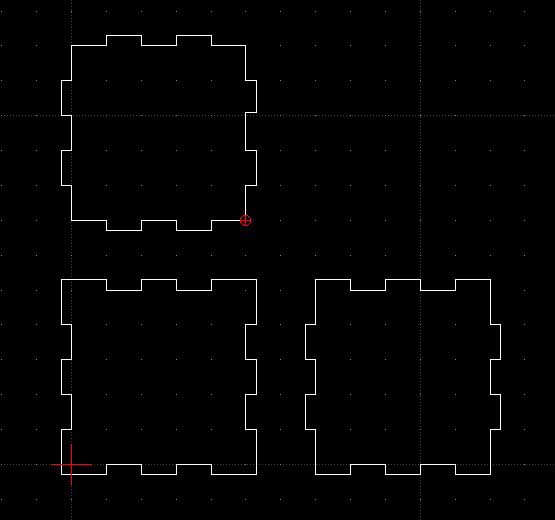
I then repeated these steps for the other parts of the box:
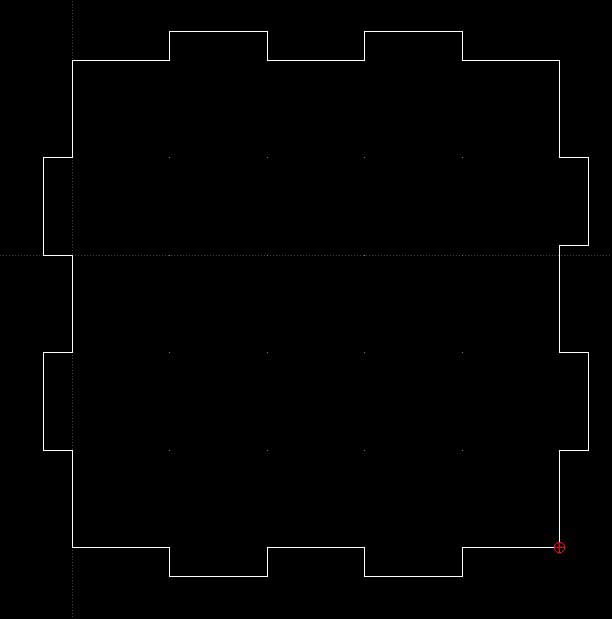
And in the end I had made the exact same design in LibreCad as I had made in Fusion360.
BUT for everything that is not fabrication/CAD related, Blender is the way to go! it's community is Huge and the features it provides are even bigger (also its free and open source). Also there are even plugins to make it behave like Fusion or other CAD apps.
download the files
To keep it simple, I opted to create the same model in two different packages for 3d and 2d.
First software I used is called "Blender", it is a 3d modeling and animation package with all the features you could ever want. It can also be used as a video editor and numerous other exiting things. And the best part about it is that is is free and even open source!
Anyway, first of I created a cube, by pressing crtl + a and selecting mesh - cube.
Then I changed into the edit mode, by hitting the tab key on my keyboard. Everything should be selected (as indocated by the orange glow), if it is not press the a key to do so.
After that I press i twice, to inset individual faces, moving the mouse will now change the amount of the inset.
This action is commited by pressing the enter key, which is the case for all functions in blender, so I will not point that out everytime.
Now I hit e to extrude and right click to make the extrusion stop at the point where I started it.
I then simply hit s to scale on all axis and move the mouse to get my desired amount of scaling, then I commit.
Then I changed to edge-select mode, which is done by clicking the middle button in this menu, which can be found in the top left corner of the interface.
Once in edge-select mode, I selected all of the outer edges and the edges in the middle by shift + right clicking them.
After that I hit the b key to bevel all of the selected edges, the amount of bevel can then be manipulated by moving the mouse, also the resolution of them is changed by scrolling the mousewheel up or down.
Then I went into the Object menu at the top of the interface and clicked the Shade Smooth button, this makes the rounded bevels actually round instead of facetted.
By now the model is actually finished, but I decided to add an Edge-Split modifier to retain some of the sharp edges of the model based on their angle.
And this is what the final outcome looks like! :
For comparison, I then tried to create the same (or at least a similar) model in the software "Fusion360"
First thing is first under the create toolbar I select the Box.
Then I selected a plane for the box to sit on, by left-clicking in the viewport. Then I typed the length and height an the box which was 5mm.
After that I had to set the height of the box, since I wanted it to be a cube I opted for the same 5mm as before.
Once that was done, I pressed the r key to create a rectangle sketch and placed it onto one of the cubes sides. Iportant to note is that the rectangle is a bit smaller than the face of the cube.
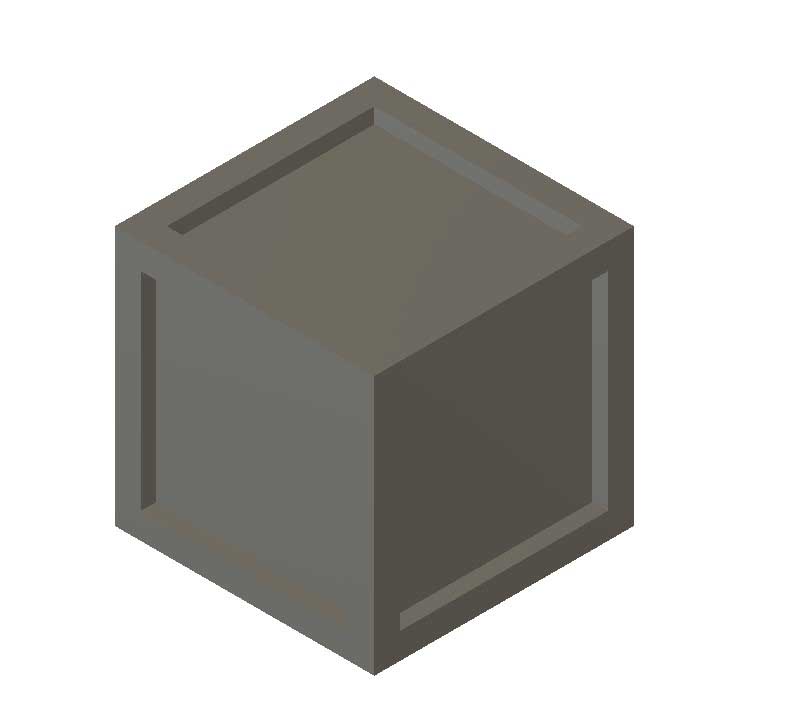
I then repeated this process for the rest of the cubes faces.
Then I hit the e key to extrude each and every sketch I just created inwards, so they take away from the cube they are on.
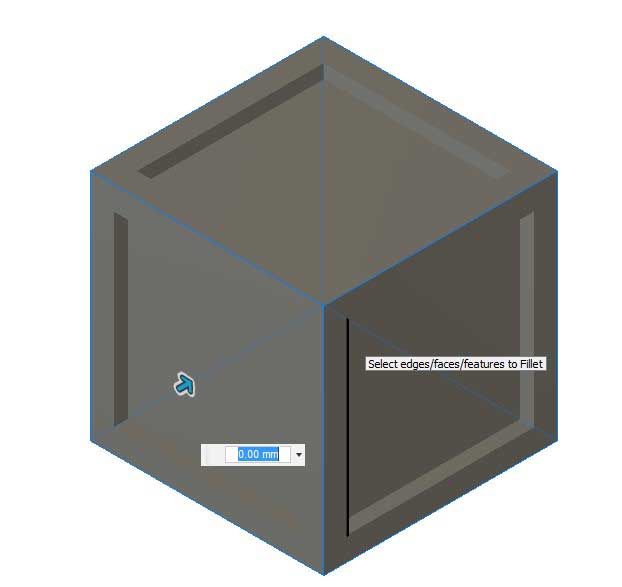
Next I selected all of the outer edges of the cube, by shift + right-clicking them and hit the f key to fillet them.
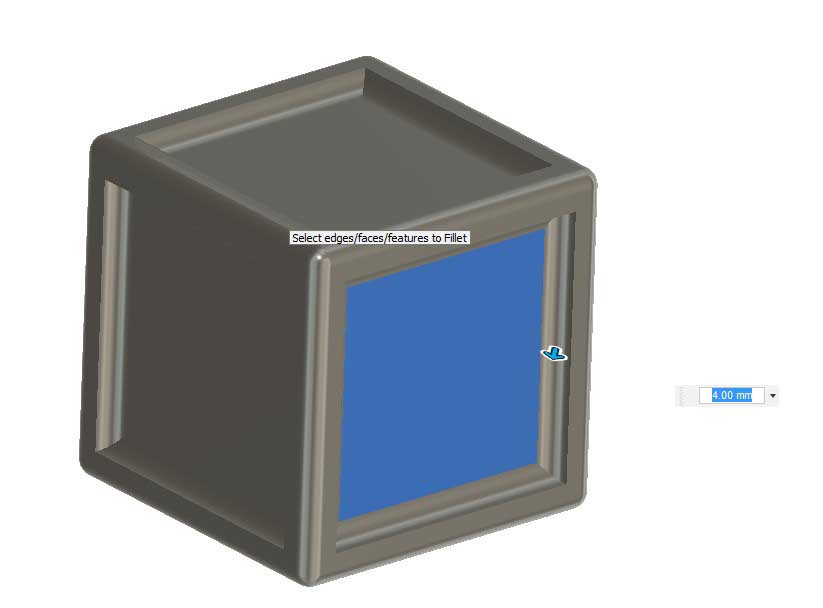
After that I selected all of the inside faces and repeated the previous process.
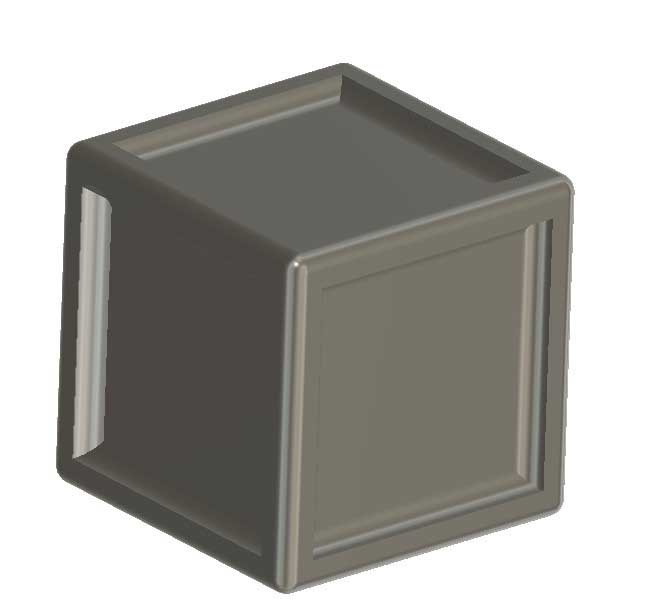
And then this is the final outcome, as you can see it looks very similar to the one I made in blender.
Now for the 2d-Design as the first software I wanted to use Fusion360 again, because it has a really advanced set of 2d-tools to go along with it's 3d tools.
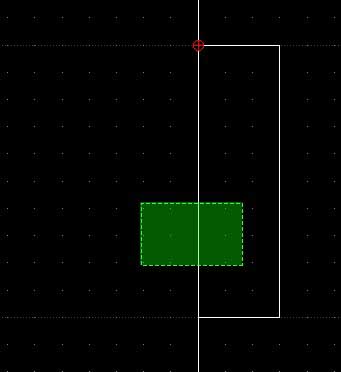
First I selected the rectangle-tool from the sketch toolbar (which as stated earlier can also be accessed by hitting the r key).
With that I then created a 50x50mm rectangle, by left-clicking where I want it's corners to be.
Then I pressed the l key to get into the line drawing mode and started by creating a rectangle that has a length of 10mm and a height of 3mm in the top left corner of the before created rectangle.
I then repeated that same process to create rectangles around the whole perimeter with a distance of 10mm each.
After that I used the line tool again, to create corner pieces in each of the four corners.
Unfortunately there are many unnecessary lines in the design right now, I fixed this by using the trim-tool, which is accessed by hitting the t key. It works by clicking the line that is supposed to be deleted, it will delete/dissolve the line until the ne´xt intersection with another line.
I repeated that process for all of the lines I didn't want in my design.
After I was done with that, the design looked like this:
Using the same techniques, I then created two more pieces which can be lasercut in any 3mm material and put together to create a simple jointed box.
The last software I tried was LibreCad, I did the same as with the 3d softwares and created the same (similar) design to have a comparison.
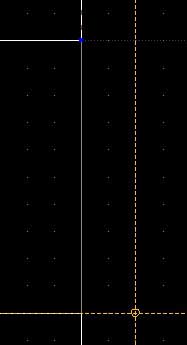
So first I selected the rectangle tool which is located in the top left corner of the interface.
I then dragged out a rectangle with a width and height of 50mm.
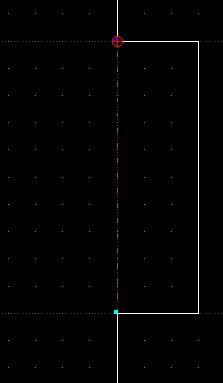
After that I used the same tool to create the joints like in the fusion design. By now I already know how where to put these joints so it takes away from the guesswork.
Next I used the divide tool which is also located on the left of the interface to divide all of the overlapping lines that are present in the design.
It works by simply selecting a point on a line which divides the line at this point and creates two adjacent lines.
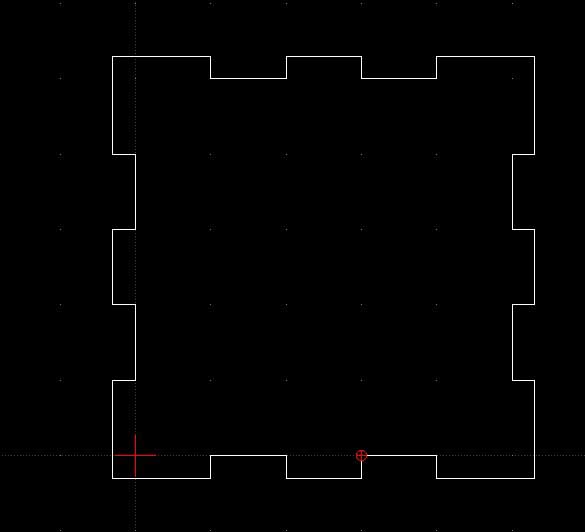
Now I'm able to select the unnecessary lines by left-clicking + dragging right and simply delete them unsing the delete key.
After that the design looked like this:
I then repeated these steps for the other parts of the box:
And in the end I had made the exact same design in LibreCad as I had made in Fusion360.
Conclusion
Each program has it's strengths and weaknesses but there is a clear winner for me which is Fusion360, it is easy to use and and there is almost no learning curve, once you get the basics. It is also very versatile and can do pretty much anything you could ask for in the fabrication environment. It's tools are powerful and there are plenty of them and everything is well documented and there is a big active community posting tutorials and answering forum posts.BUT for everything that is not fabrication/CAD related, Blender is the way to go! it's community is Huge and the features it provides are even bigger (also its free and open source). Also there are even plugins to make it behave like Fusion or other CAD apps.
download the files