16. Interface and application programming
On this week, I learned a lot of useful tools to create User Interface applications. The assignments this week are
- Individual assignment:
write an application that i4nterfaces a user with an input &/or output device that you made
- Group assignment:
compare as many tool options as possible
Group assignment
The summary of the group assignment is described here.
Individual assignment (Smartphone application to control a robot )
For my individual assignment, I decided to make a smartphone application for my final project. As described here, to control my proposed robot, a smartphone application will be used. Then, I would like to create a smartphone application to control the robot through Bluetooth communication.
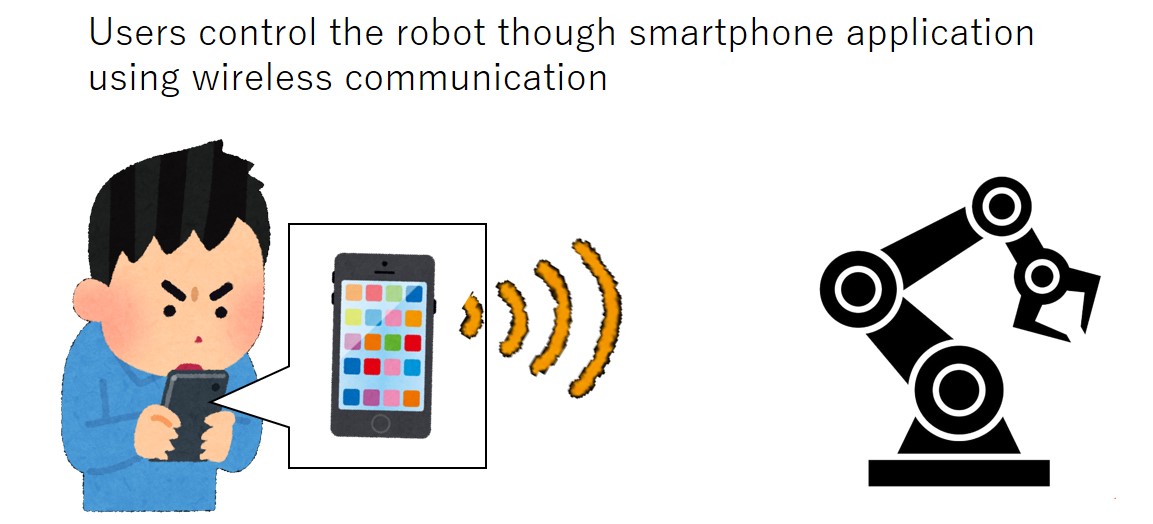
As the above picture shows, the smartphone application will allow users to control intuitively directions of movements for the mobile and the arm robot. For example, when the users touch “forward” button of the mobile robot, the application will send the command to make the mobile robot move straight through Bluetooth.
1. Designing the buttons and icons
I designed the arrangement of buttons and icons for the application like below picture. The images of buttons and icons are drawn as image files(jpg).
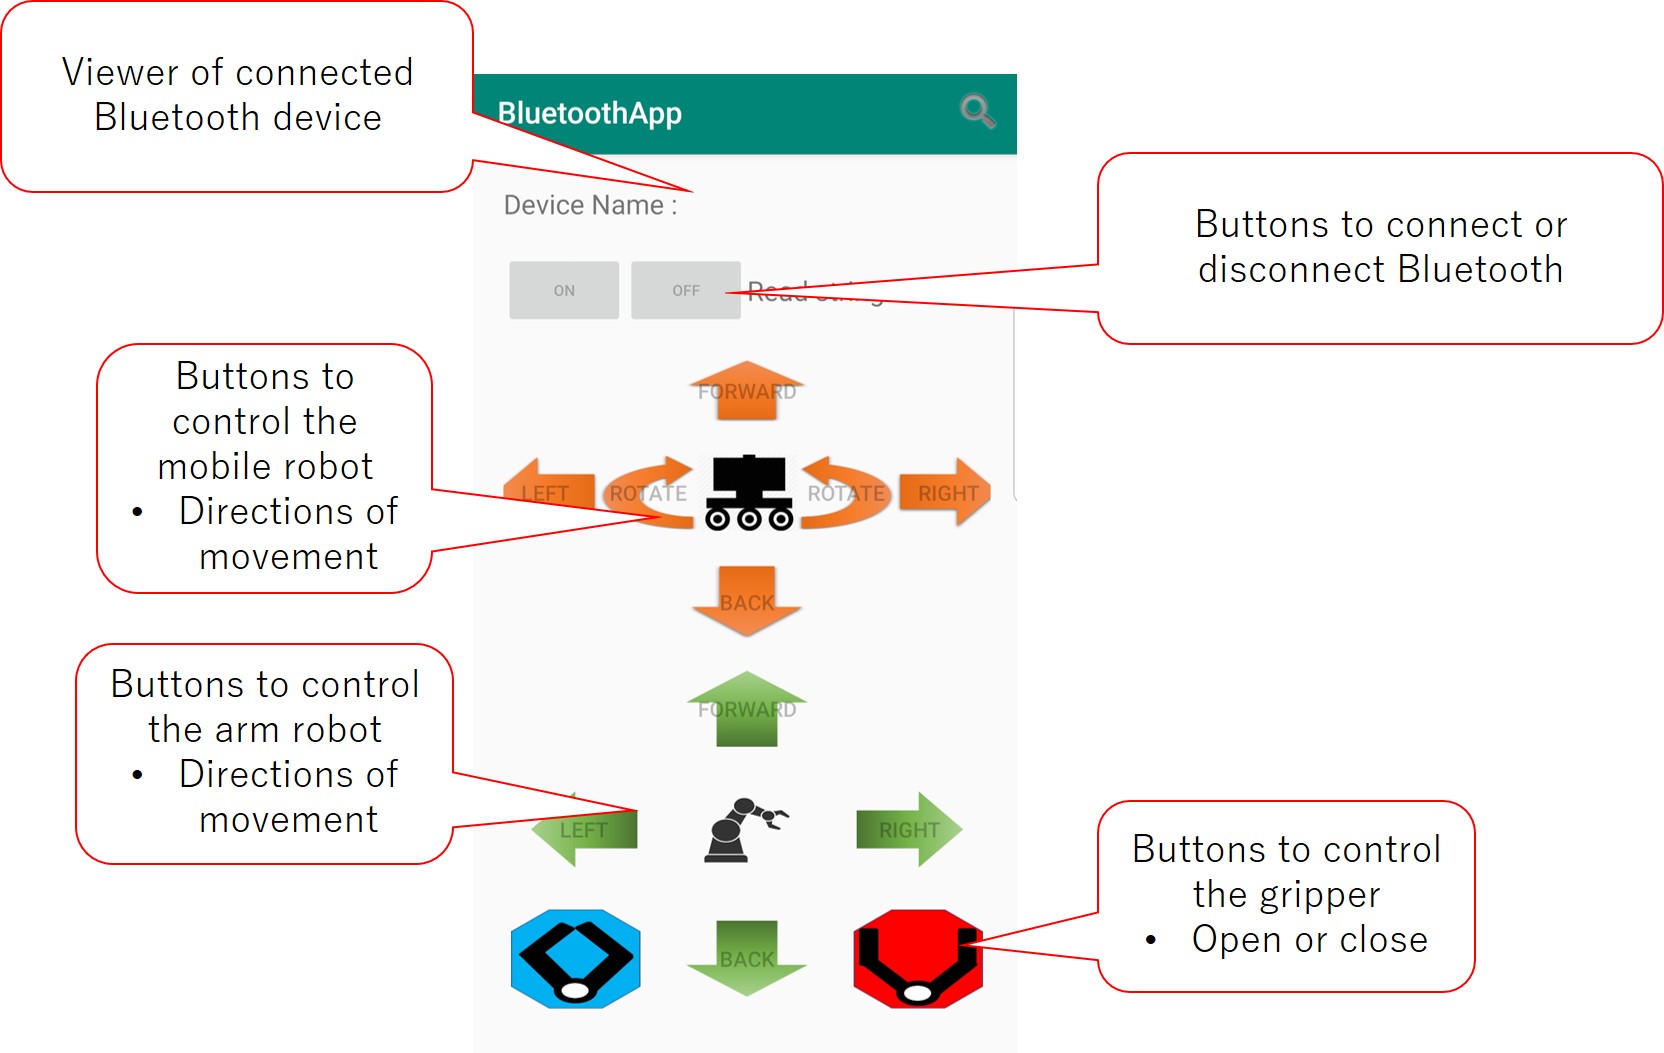
I used Android studio to create my application.
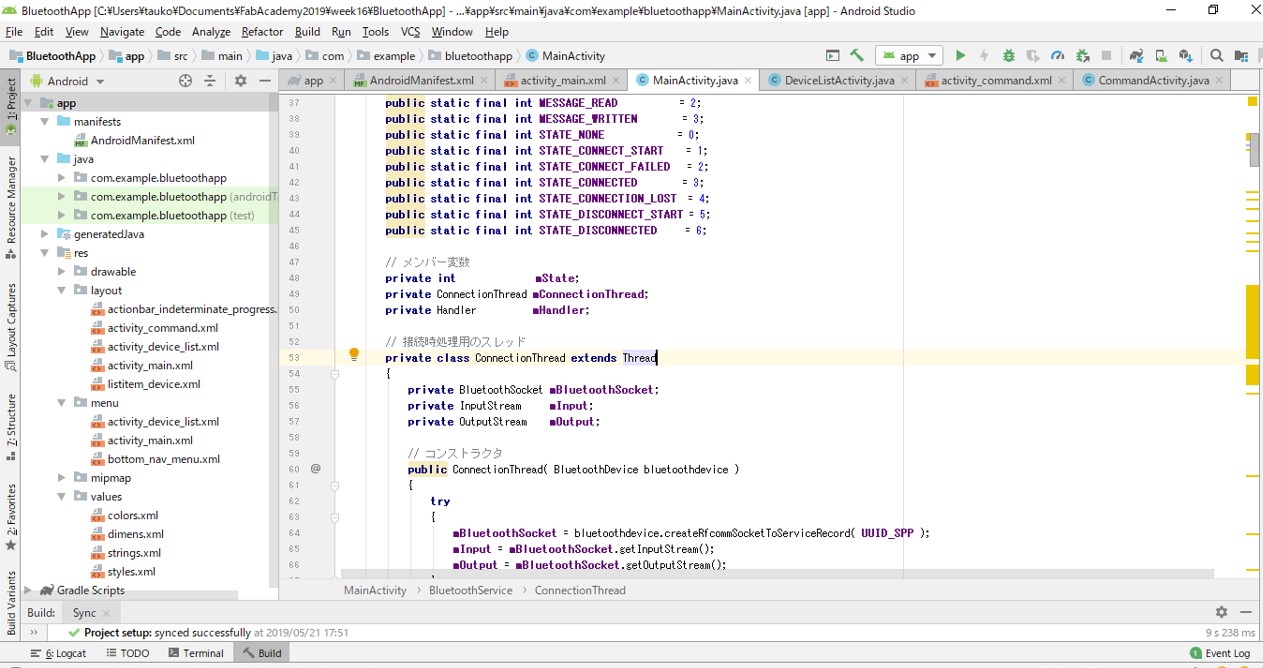
On this platform, arranging buttons and icons can be done by editing activity_main.xml file in the layout folder. Useful tips to edit the file are following.
- Preserving the aspect ratio of images
android:scaleType="fitXY"
android:adjustViewBounds="true"
- Changing the background of images to transparent
#00000000
2. Coding
For my application, I referred this web page to develop basic Bluetooth functions.
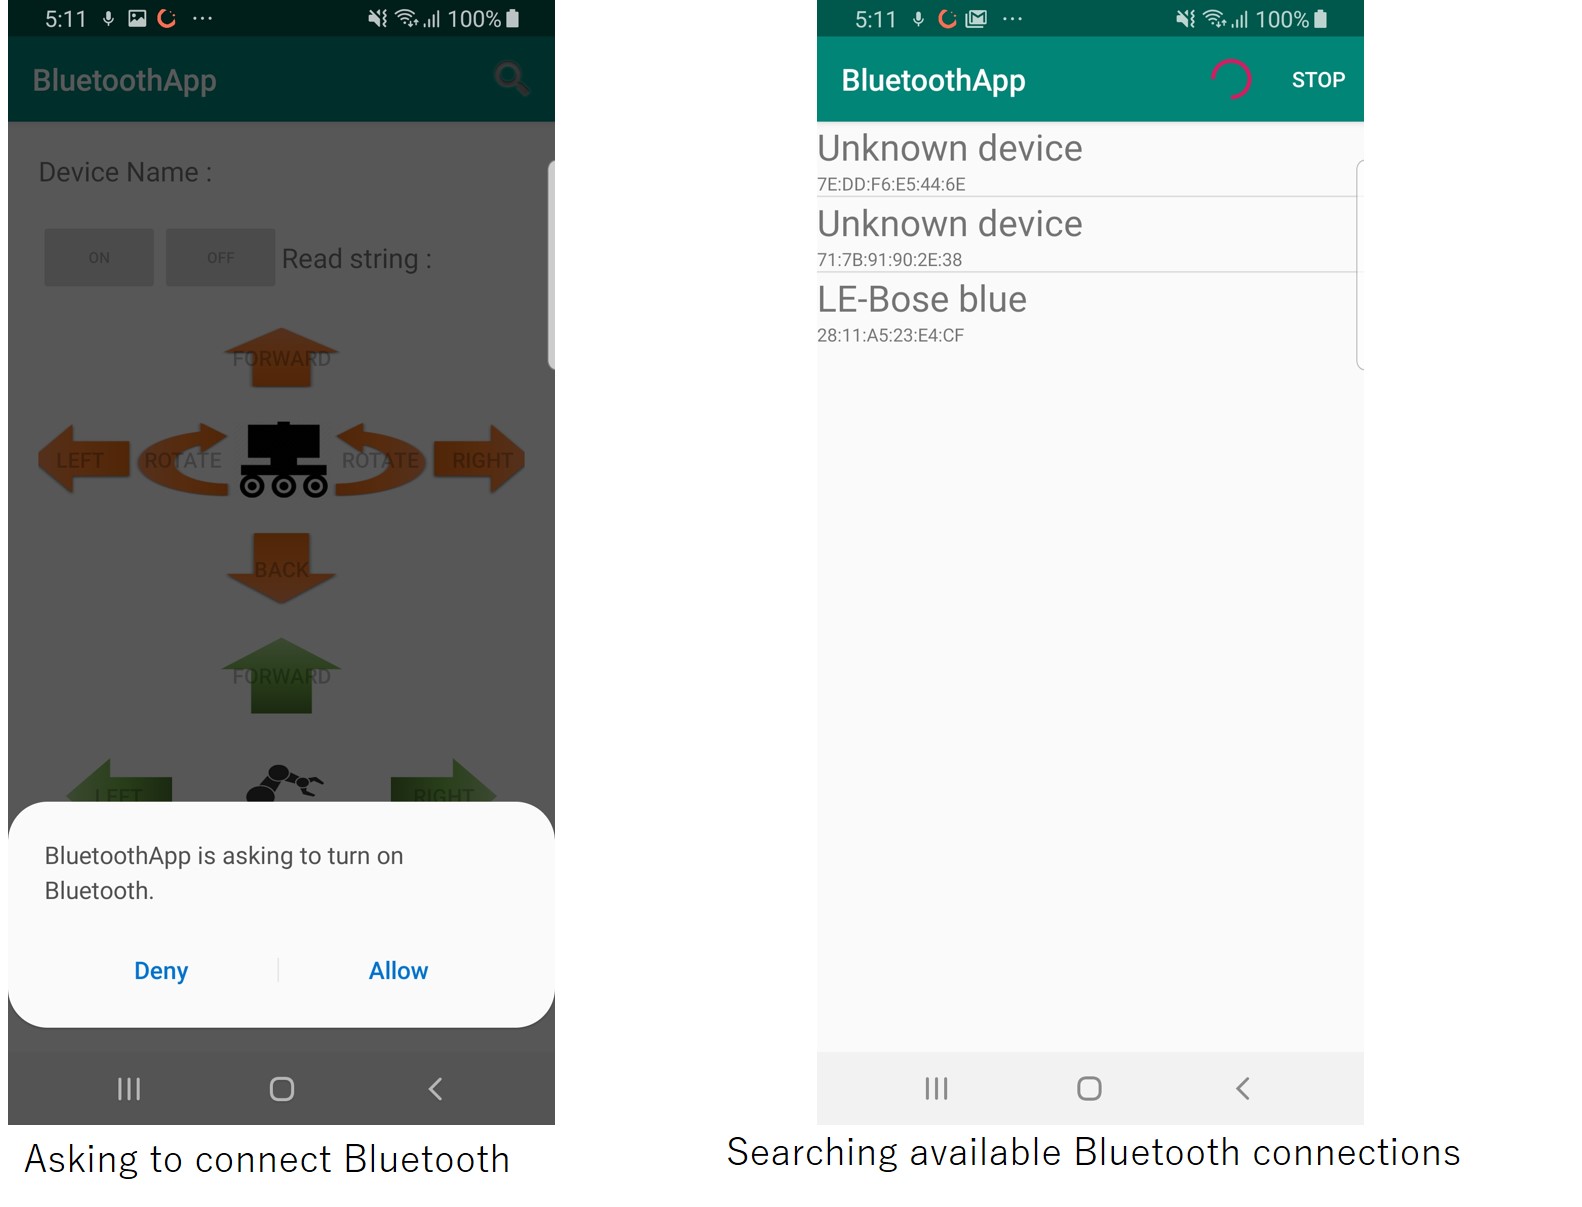
In my application, main functions are
- Asking users to turn Bluetooth function in their smartphone ON
- Searching available Bluetooth devices to conenct
- Send character to conencted Bluetooth device
Note:Code is too long to put on this page, so you can donwload necessary files from below donwload links.
After completing coding, I installed my application to my smartphone. To use the Bluetooth function, I had to turn “Permission of location” ON though App info. Without this setting, all applications using Bluetooth do not work.
3. Experiment
Connecting with my laptop computer
First of all, I tried to connect my application with my laptop computer to check whether the application could work well. I used Teraterm as a user interface on my laptop computer. To connect both the laptop and my smartphone, I should pair the laptop and the phone. After pairing them, I should open and start a connection in Teraterm before using the application. Note: Without opening and starting a connection, my smartphone application could not be connected with the laptop.
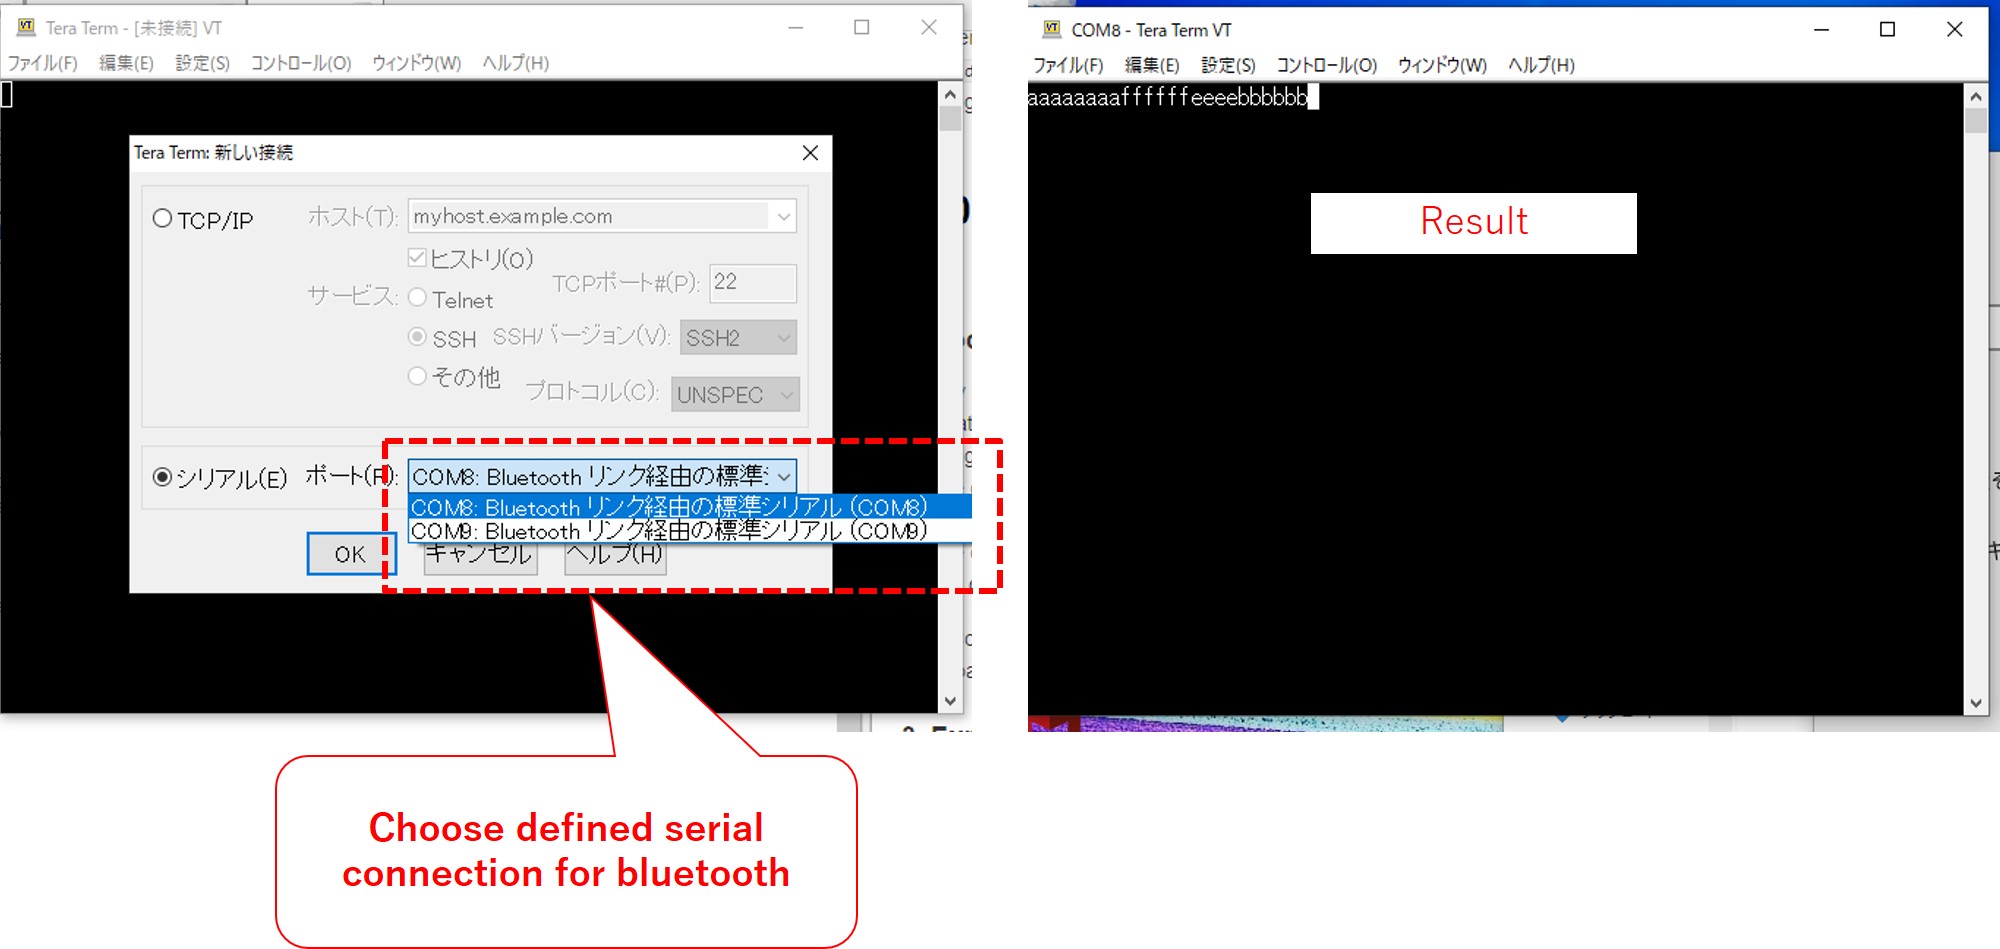
The result of the experiment is shown below. Teraterm could display characters based on the input from my smartphone.
Connecting with Satshakit connecting Bluetooth module
Finally, I tested the connection between my smartphone and Satshakit. To check whether the Satshakit could receive characters from the application, I used LEDs. The combination patterns of LEDs blinking are defined based on the characters from the smartphone application. The code to blink the LEDs are shonw below.
#include <SoftwareSerial.h>

int HC05_RX_PIN=11; //digital pin to receiver
int HC05_TX_PIN=10; //digital pin to transceiver
int forward = 7; // LED on digital pin 7
int back=6;
int left=5;
int right=4;

SoftwareSerial serialBT(HC05_TX_PIN, HC05_RX_PIN); //BLUETOOTH: define pins to Rx and Tx
//SoftwareSerial serialBT(10,11);
boolean NL = true;
char str[20]={'\0'};
int counter=0;
void setup() {
  Serial.begin(9600);
  Serial.println("Sketch HC-05");
  Serial.println("Arduino with HC-05 is ready");
  Serial.println("Make sure Both NL & CR are set");
  Serial.println("");

  //Set to HC-05 default baud rate, found using AT+UART.
  serialBT.begin(9600);
  Serial.println("");

  pinMode(forward, OUTPUT);
  pinMode(back, OUTPUT);
  pinMode(left, OUTPUT);
  pinMode(right, OUTPUT);
}
char a;
void loop()
{
  int i = 0; //index to str
  char c;
  int input;
  // Read from the Bluetooth module and send to the Arduino Serial Monitor
  if (serialBT.available())
  {
    c = (char)serialBT.read(); //get each char and fill string
    if(c=='a'){//forward
      Serial.println("forward");
      digitalWrite(forward, HIGH);
      delay(500);
      digitalWrite(forward, LOW);
      delay(500);
      }
    else if(c=='b'){//back
      Serial.println("back");
      digitalWrite(back, HIGH);
      delay(500);
      digitalWrite(back, LOW);
      delay(500);
      }
    else if(c=='c'){//left
      Serial.println("left");
      digitalWrite(left, HIGH);
      delay(500);
      digitalWrite(left, LOW);
      delay(500);
      }
    else if(c=='d'){//right
      Serial.println("right");
      digitalWrite(right, HIGH);
      delay(500);
      digitalWrite(right, LOW);
      delay(500);
      }
    else if(c=='e'){//rotate_right
      Serial.println("rotate_right");
      digitalWrite(forward, HIGH);
      digitalWrite(back, HIGH);
      delay(500);
      digitalWrite(forward, LOW);
      digitalWrite(back, LOW);
      delay(500);
      }
    else if(c=='f'){//rotate_left
      Serial.println("rotate_left");
      digitalWrite(forward, HIGH);
      digitalWrite(right, HIGH);
      delay(500);
      digitalWrite(forward, LOW);
      digitalWrite(right, LOW);
      delay(500);
      }
    else if(c=='g'){//arm_forward
      Serial.println("ar,_forward");
      digitalWrite(forward, HIGH);
      digitalWrite(left, HIGH);
      delay(500);
      digitalWrite(forward, LOW);
      digitalWrite(left, LOW);
      delay(500);
      }


    Serial.print(" c=:");
    Serial.println(c);
  }

    // Read from the Serial Monitor and send to the Bluetooth module
  if (Serial.available())
  {
    c = Serial.read();
    serialBT.write(c);
    digitalWrite(forward, HIGH); // turns the LED on
    delay(100); // pauses for 1 second
    digitalWrite(forward, LOW);
    // Echo the user input to the main window. The ">" character indicates the user entered text.
    if (NL) {
      Serial.print(">");
      NL = false;
    }
    Serial.write(c);
    if (c == 10) {
      NL = true;
    }
  }

}
The wiring for this experiment is below picture.
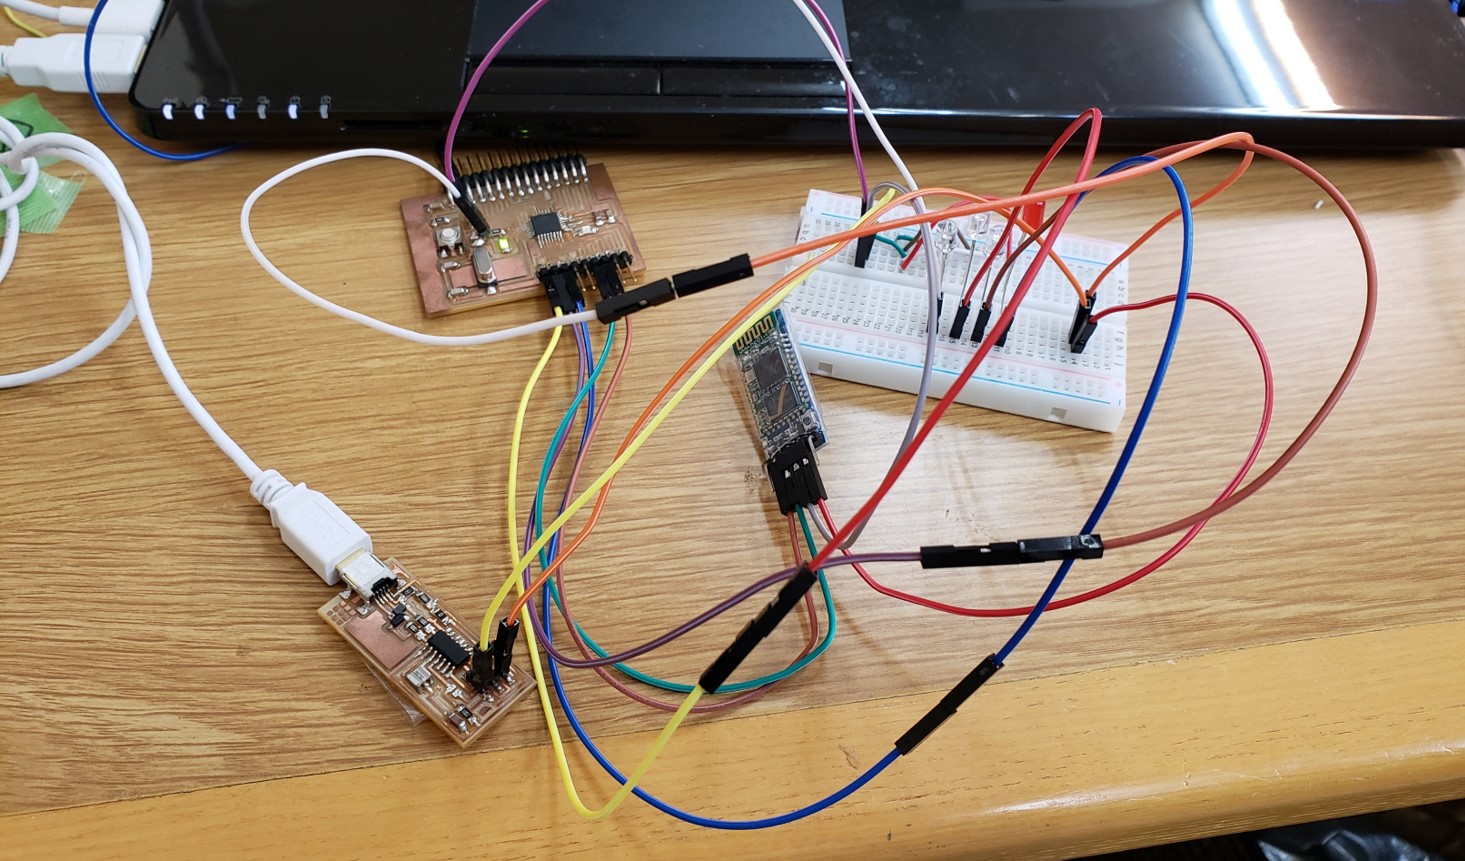
The result is shown below video.