Week 9 Embedded programming
Group assignment
For this weeks group assignment we had to compare the performance and development workflows for other architectures. For more info about our group assignment clickhere
Individual assignment
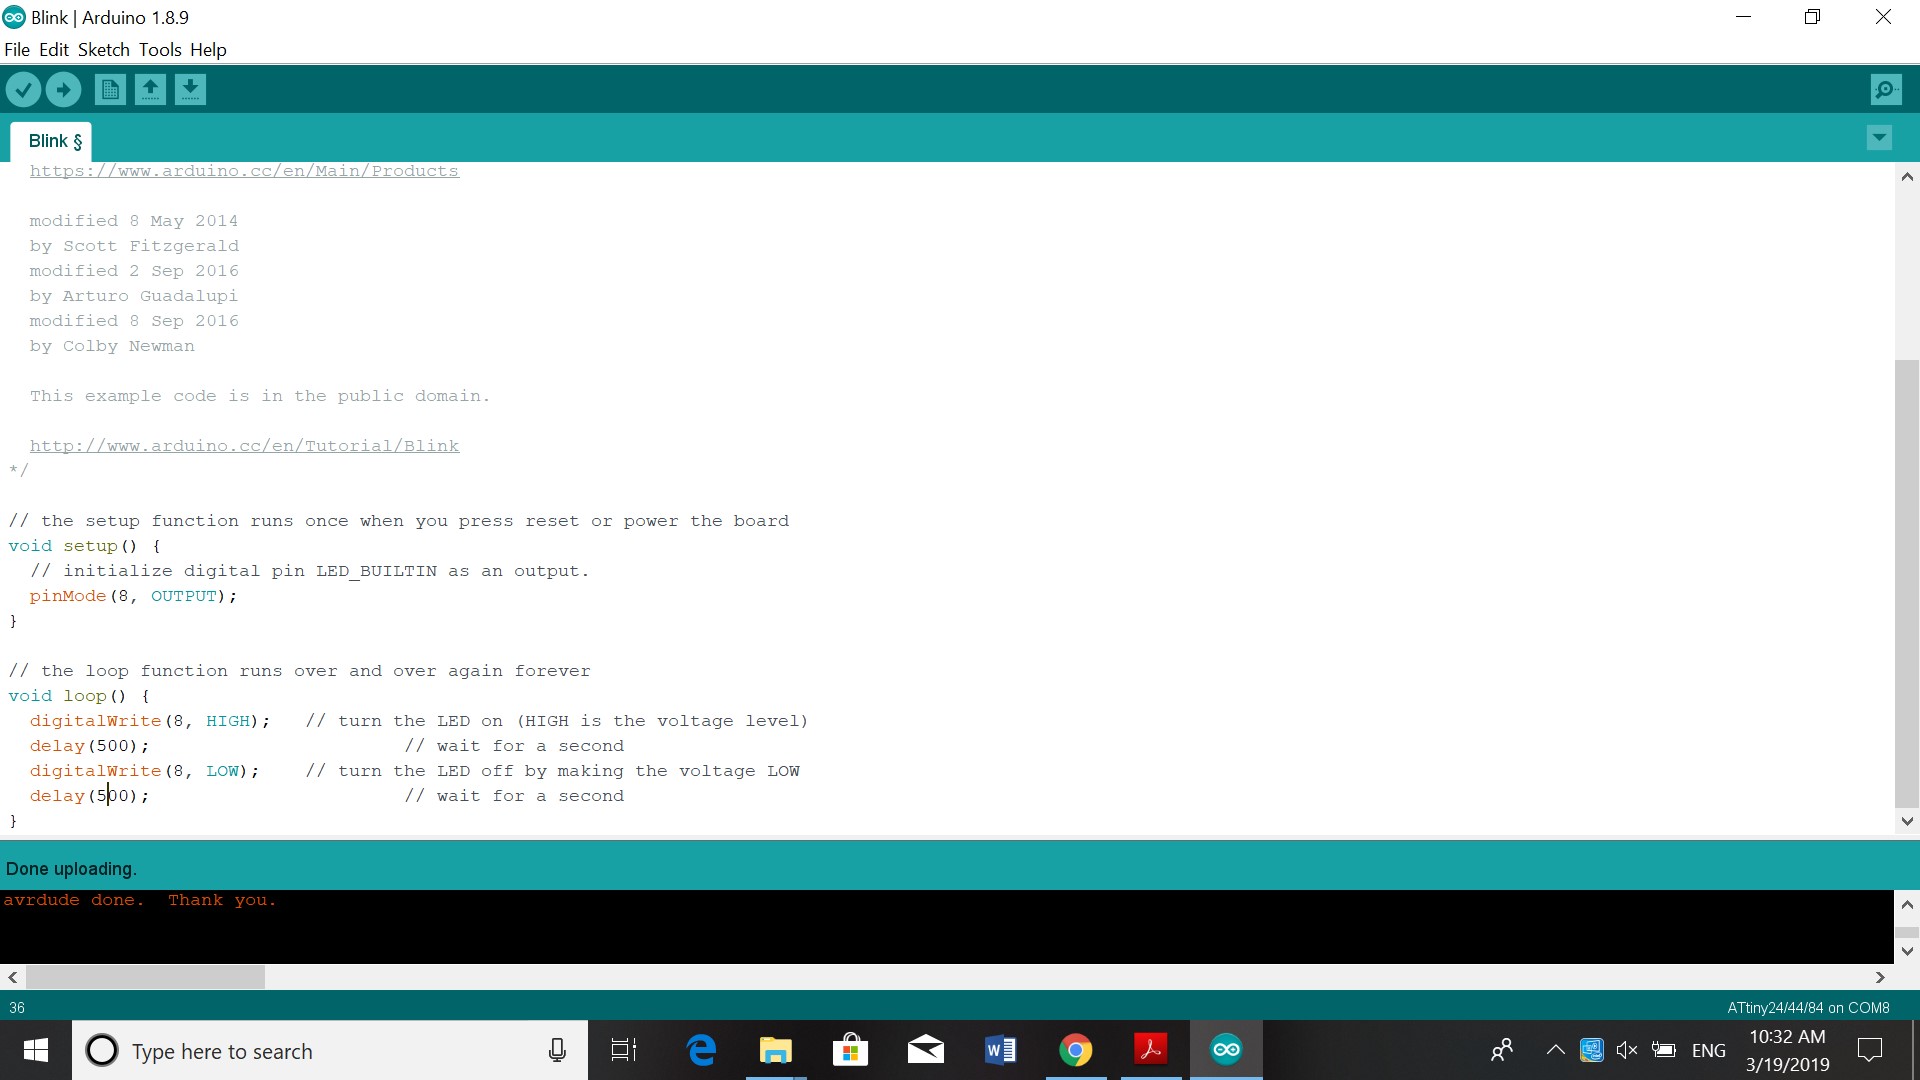
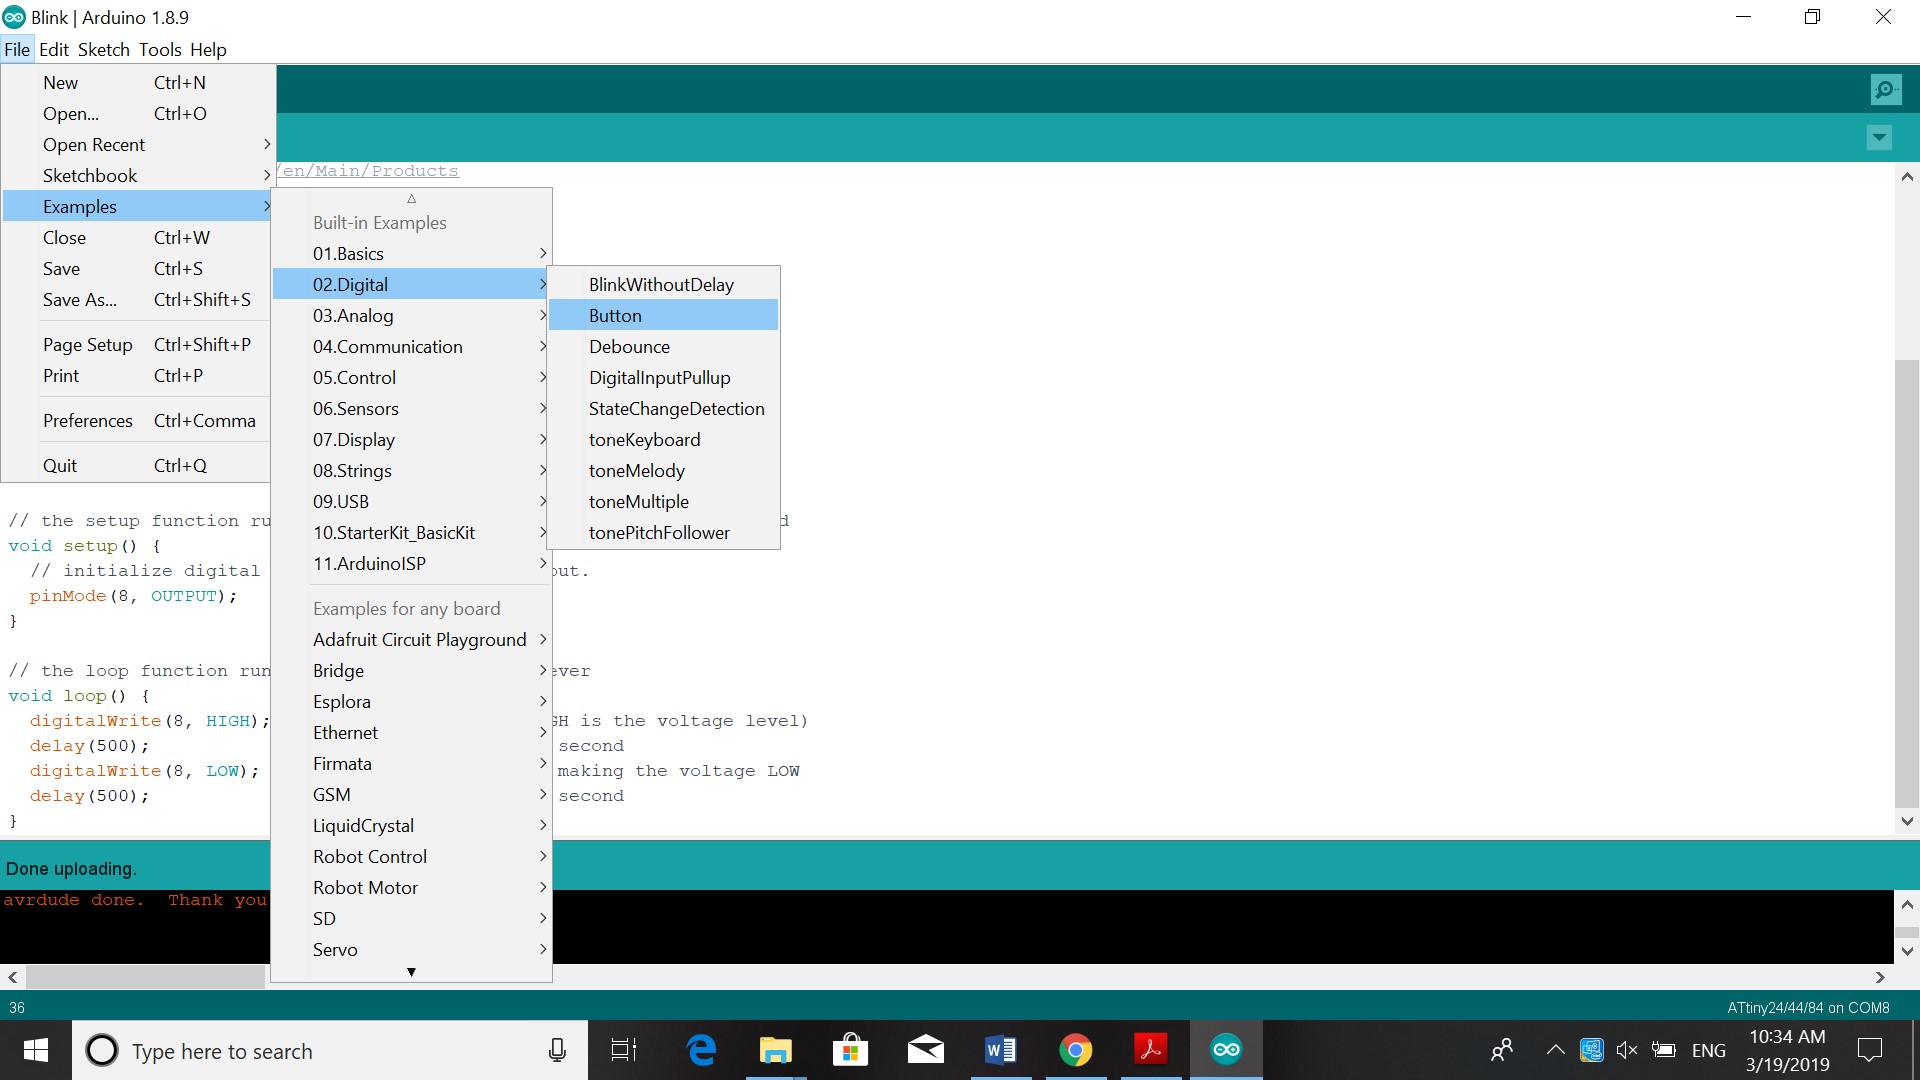
This week we had to work on reading this Data sheet. Program our board to do something, with as many different programming languages and programming environments as possible. So I used the Arduino as in week 7. In Arduino I changed the pin to 8 because the pinout of my board showed that and the delay to from 1000 to 500, so the light would blink. The information I used from the datasheet was the pinout for the Attiny 44. I had to see what pin to use to program the board to blink or use the button.
 .
.
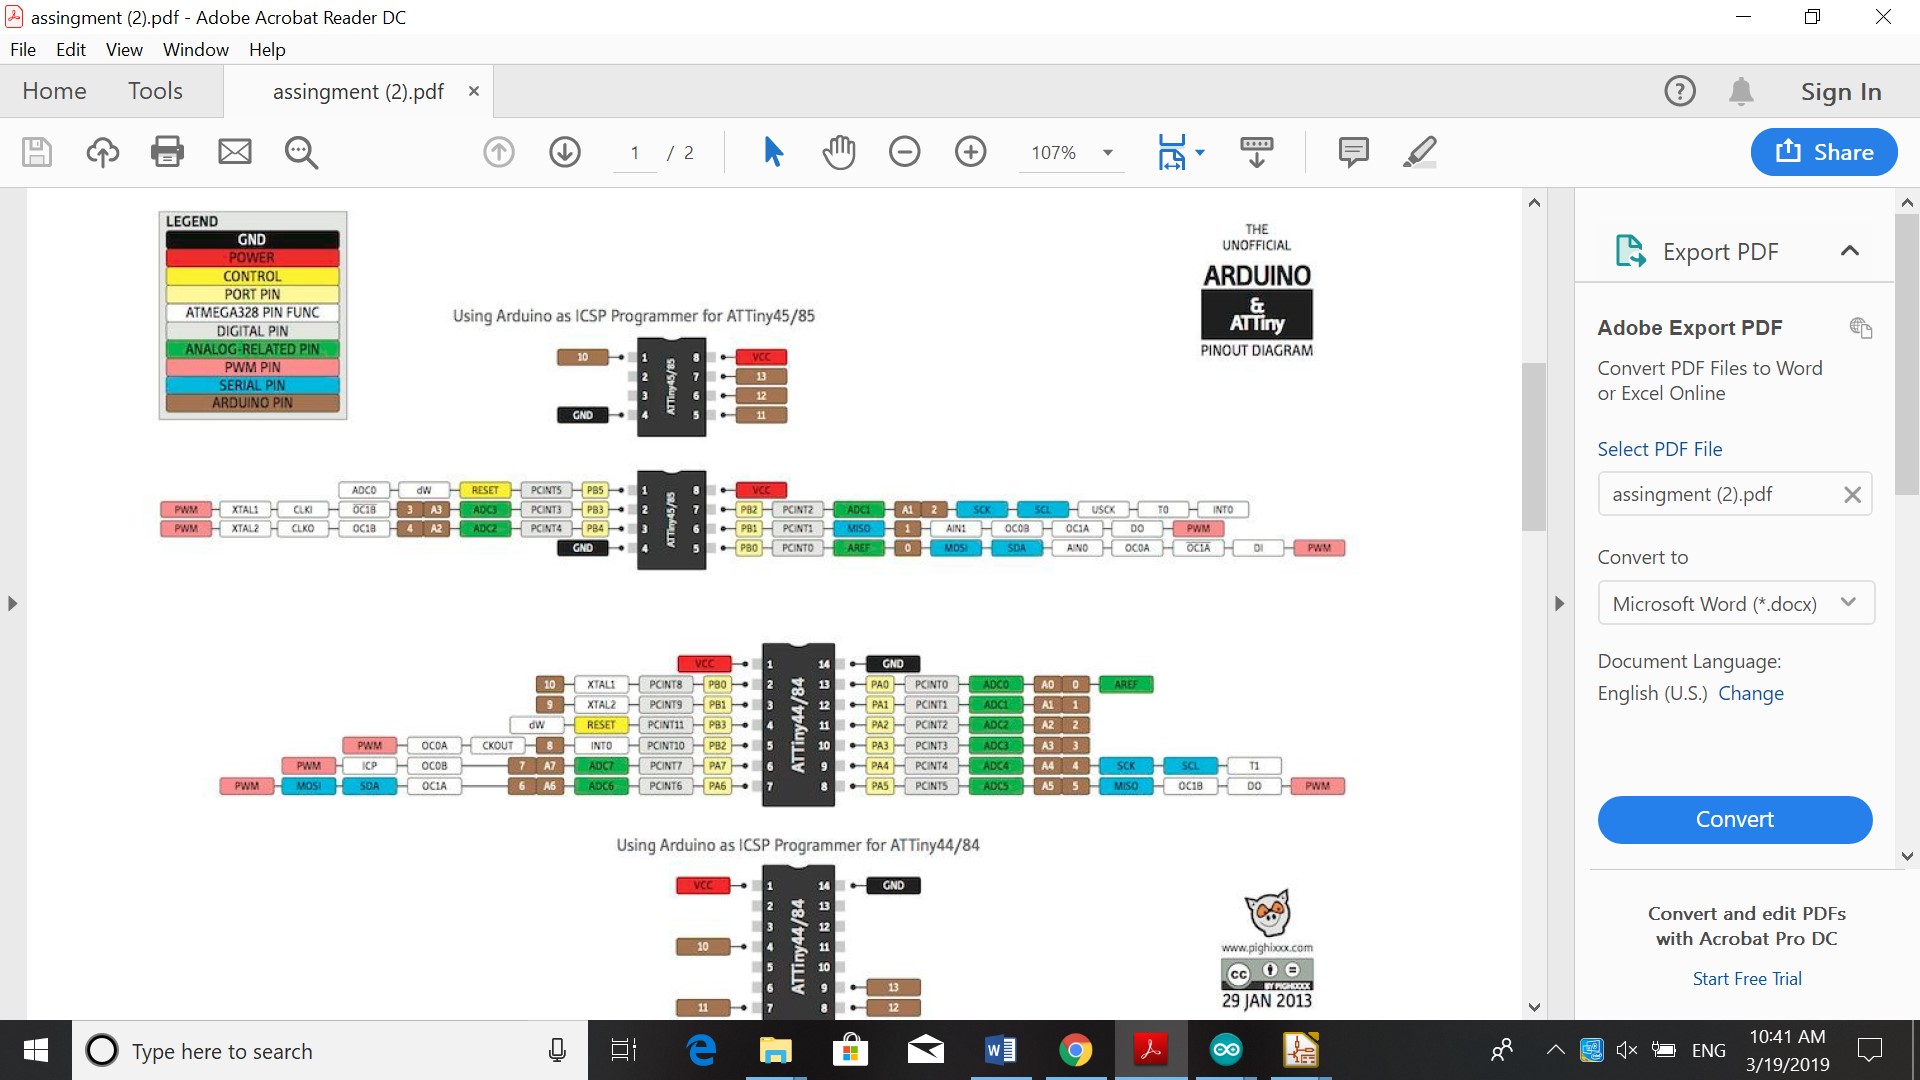
Datasheet info
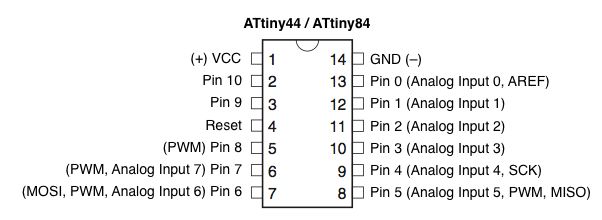
This pinout shows which pins are analog, in this case pin 0- pin 7. Or so to say PA0 till PA7.
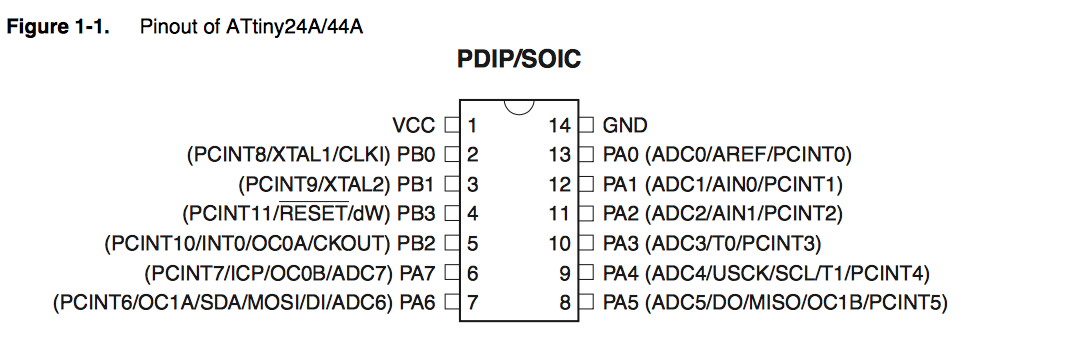
Also the pins that are analog and digital are pin PA5, PA6 and PB3, but the PB3 is only digital write.
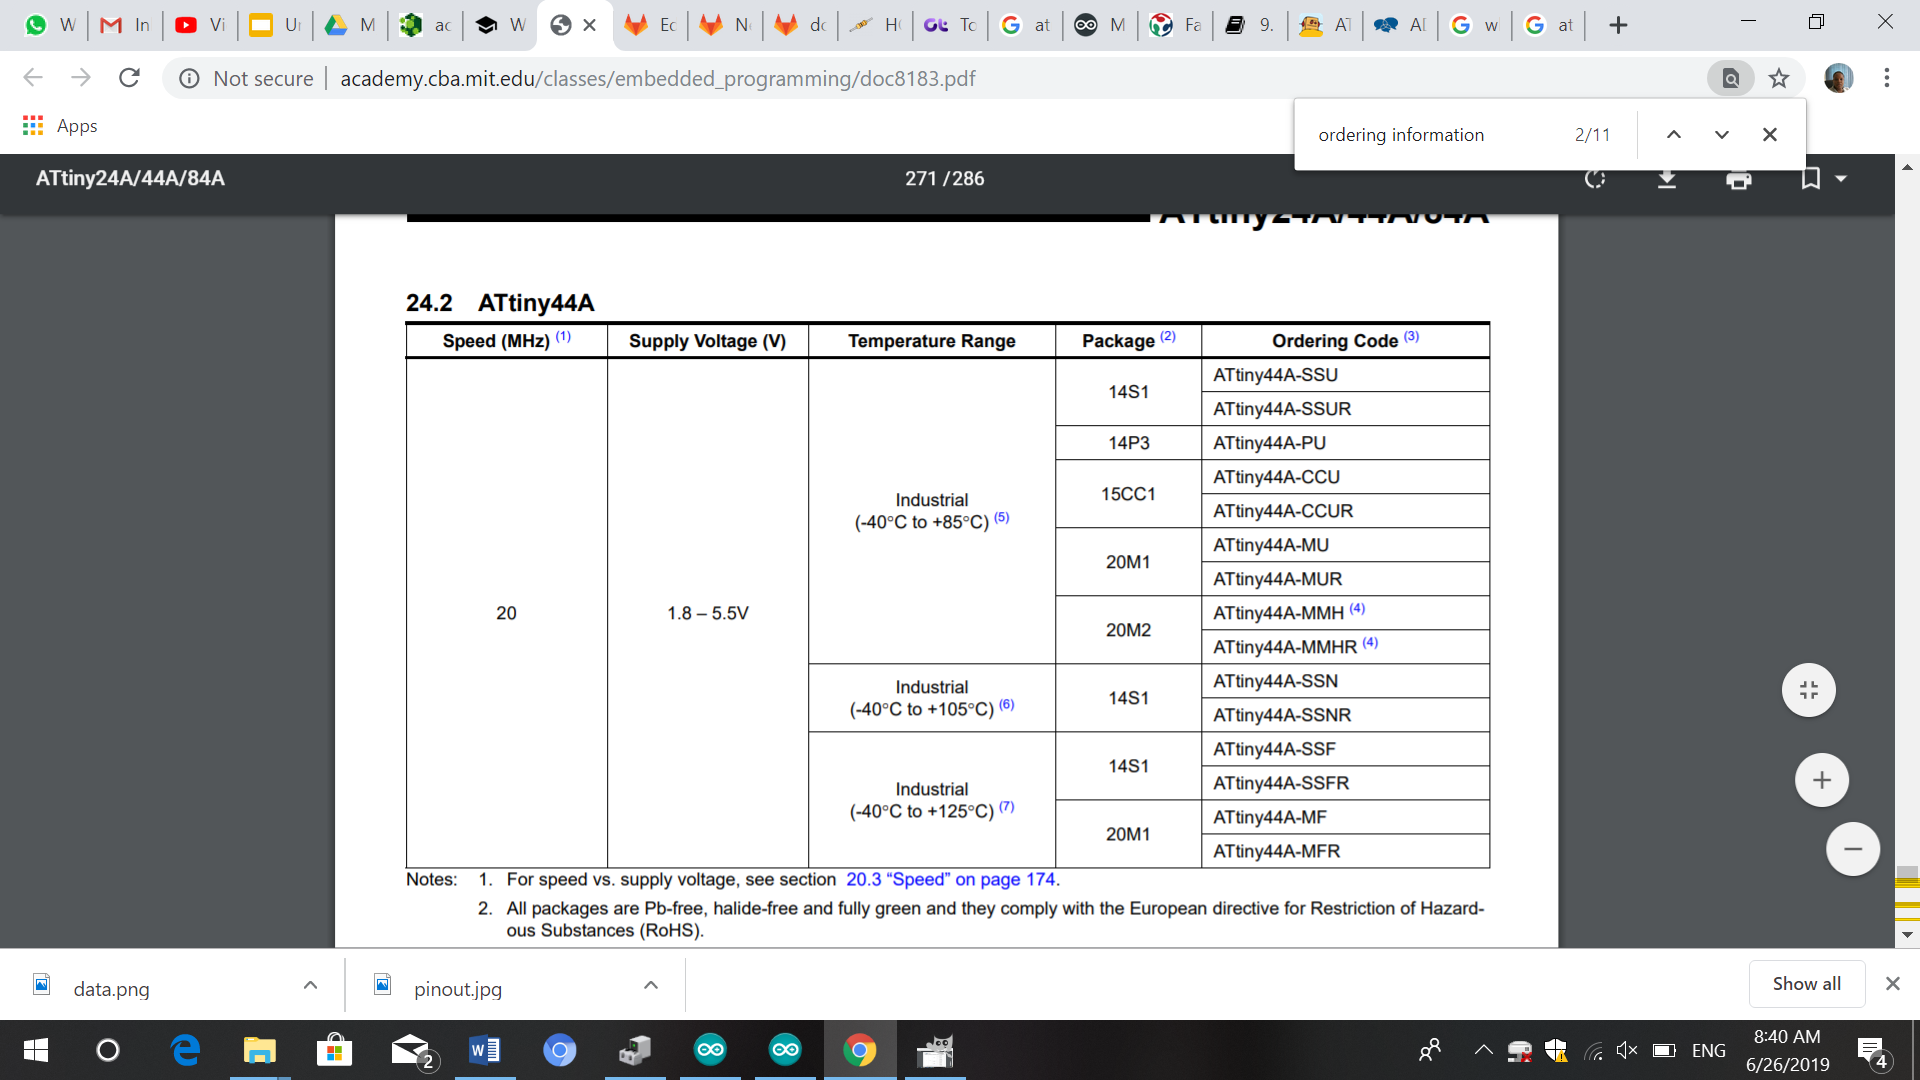
The packaging of the Attiny44 can be different. All of the types though have a maximum speed of 20 MHZ. Can take a maximum voltage of 5.5 V. If you go over this voltage your controller will short cirquit. The Attiny 44 that was used this week has a temperature range between -40°C to +85°C.
Button
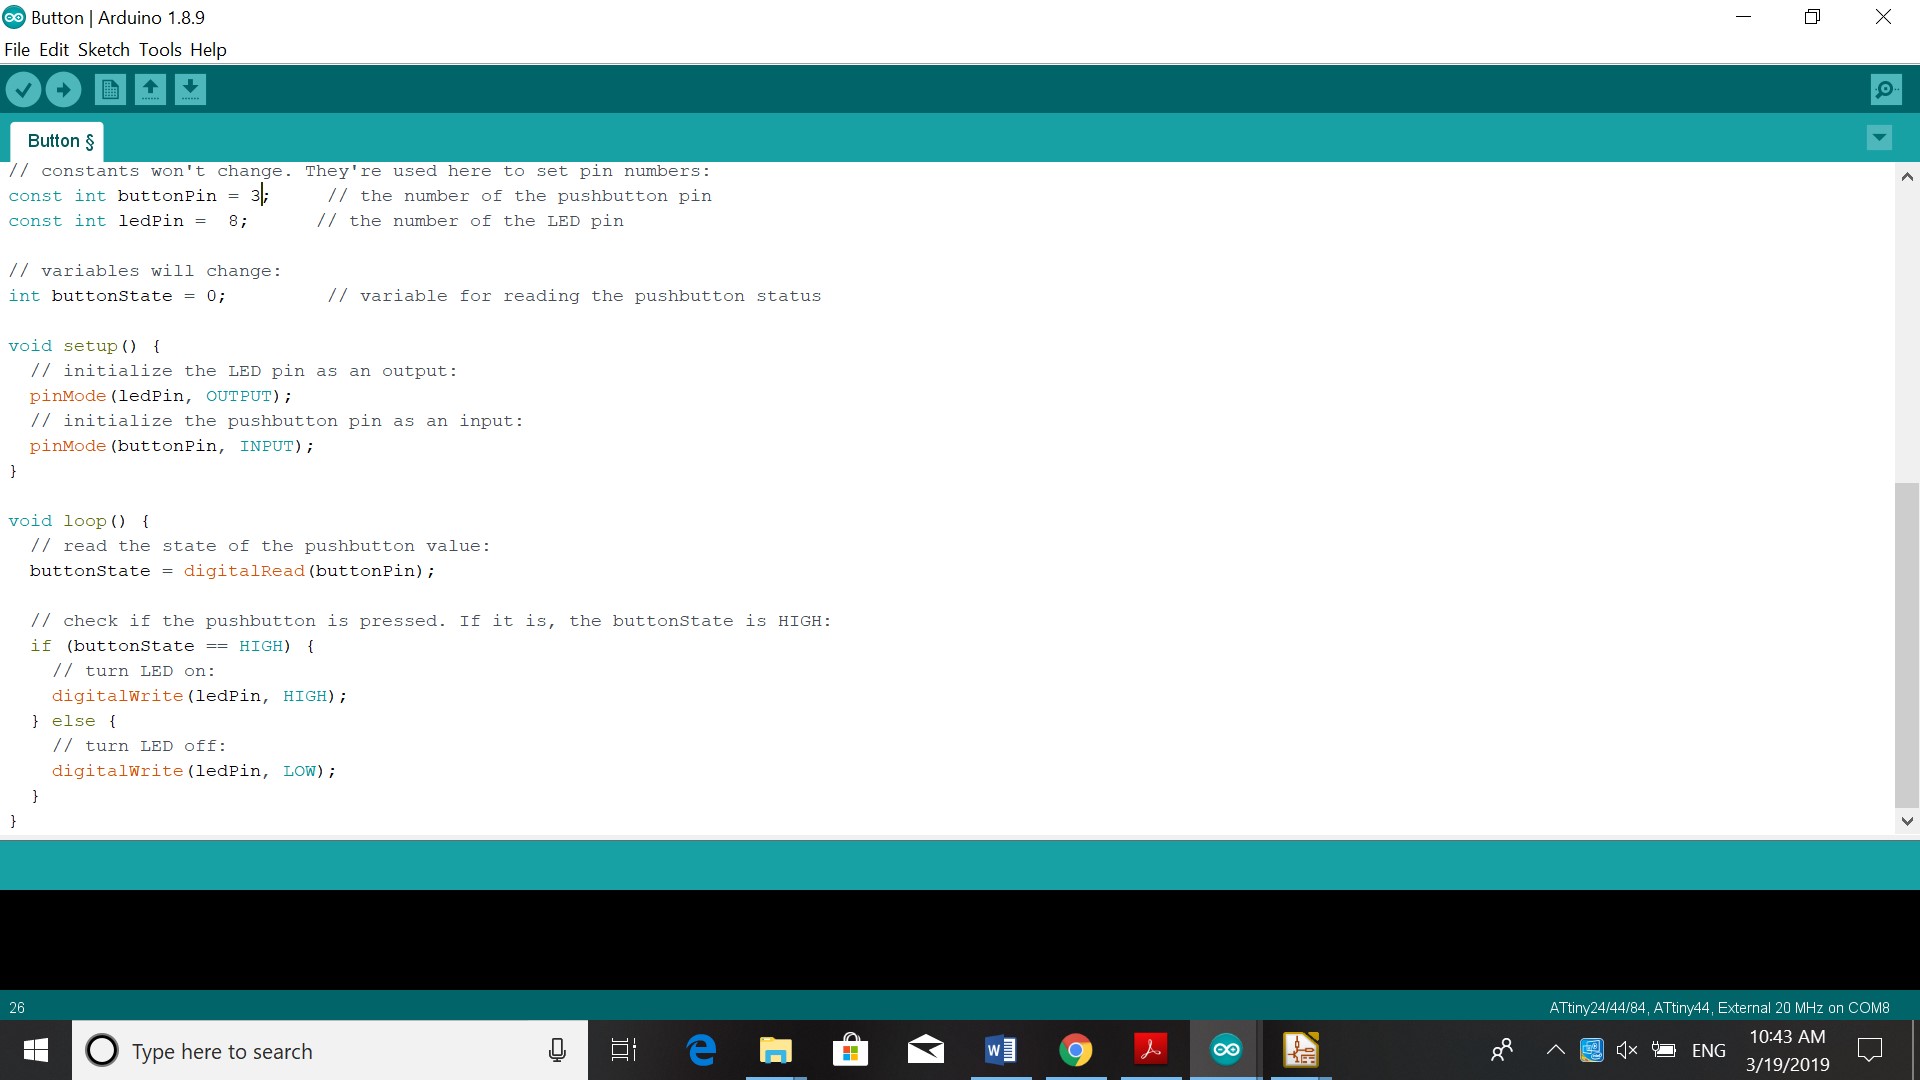
For the button to function I went to File-examples-digital-button.
I then used the pinout to change the button pin to 3.
After I uploaded the information the button could be used to turn on the lamp.

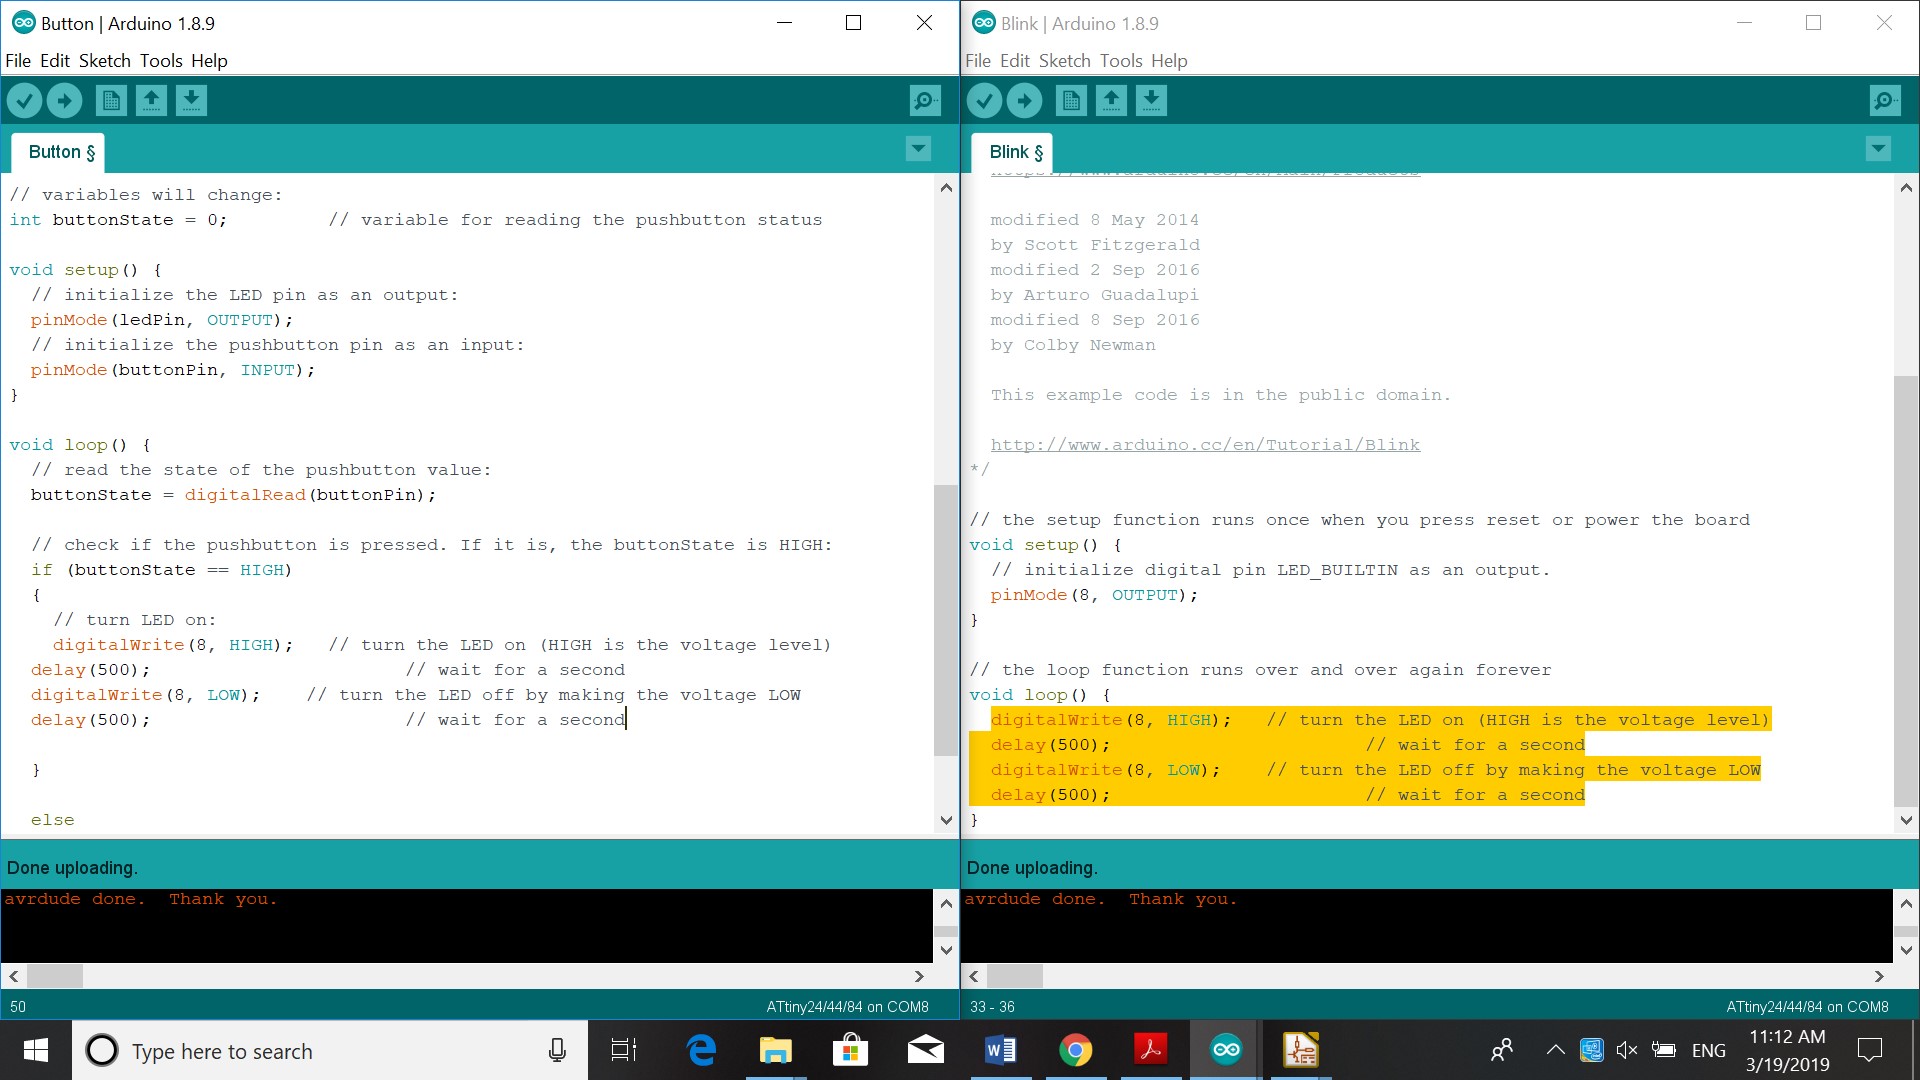
Button + LED delay
Second test was to get the LED to blink when the button is pushed. For that to happen I used this code:
{
    // turn LED on:
    digitalWrite(8, HIGH);   // turn the LED on (HIGH is the voltage level)
  delay(500);                       // wait for a second
  digitalWrite(8, LOW);    // turn the LED off by making the voltage LOW
  delay(500);                       // wait for a second

  }

  else
  {
    // turn LED off:
    digitalWrite(ledPin, LOW);
  }
}
So when the button is pushed the LED will light up, but it will blink because of the delay of 500. The delay tells it to go and off after every half second.
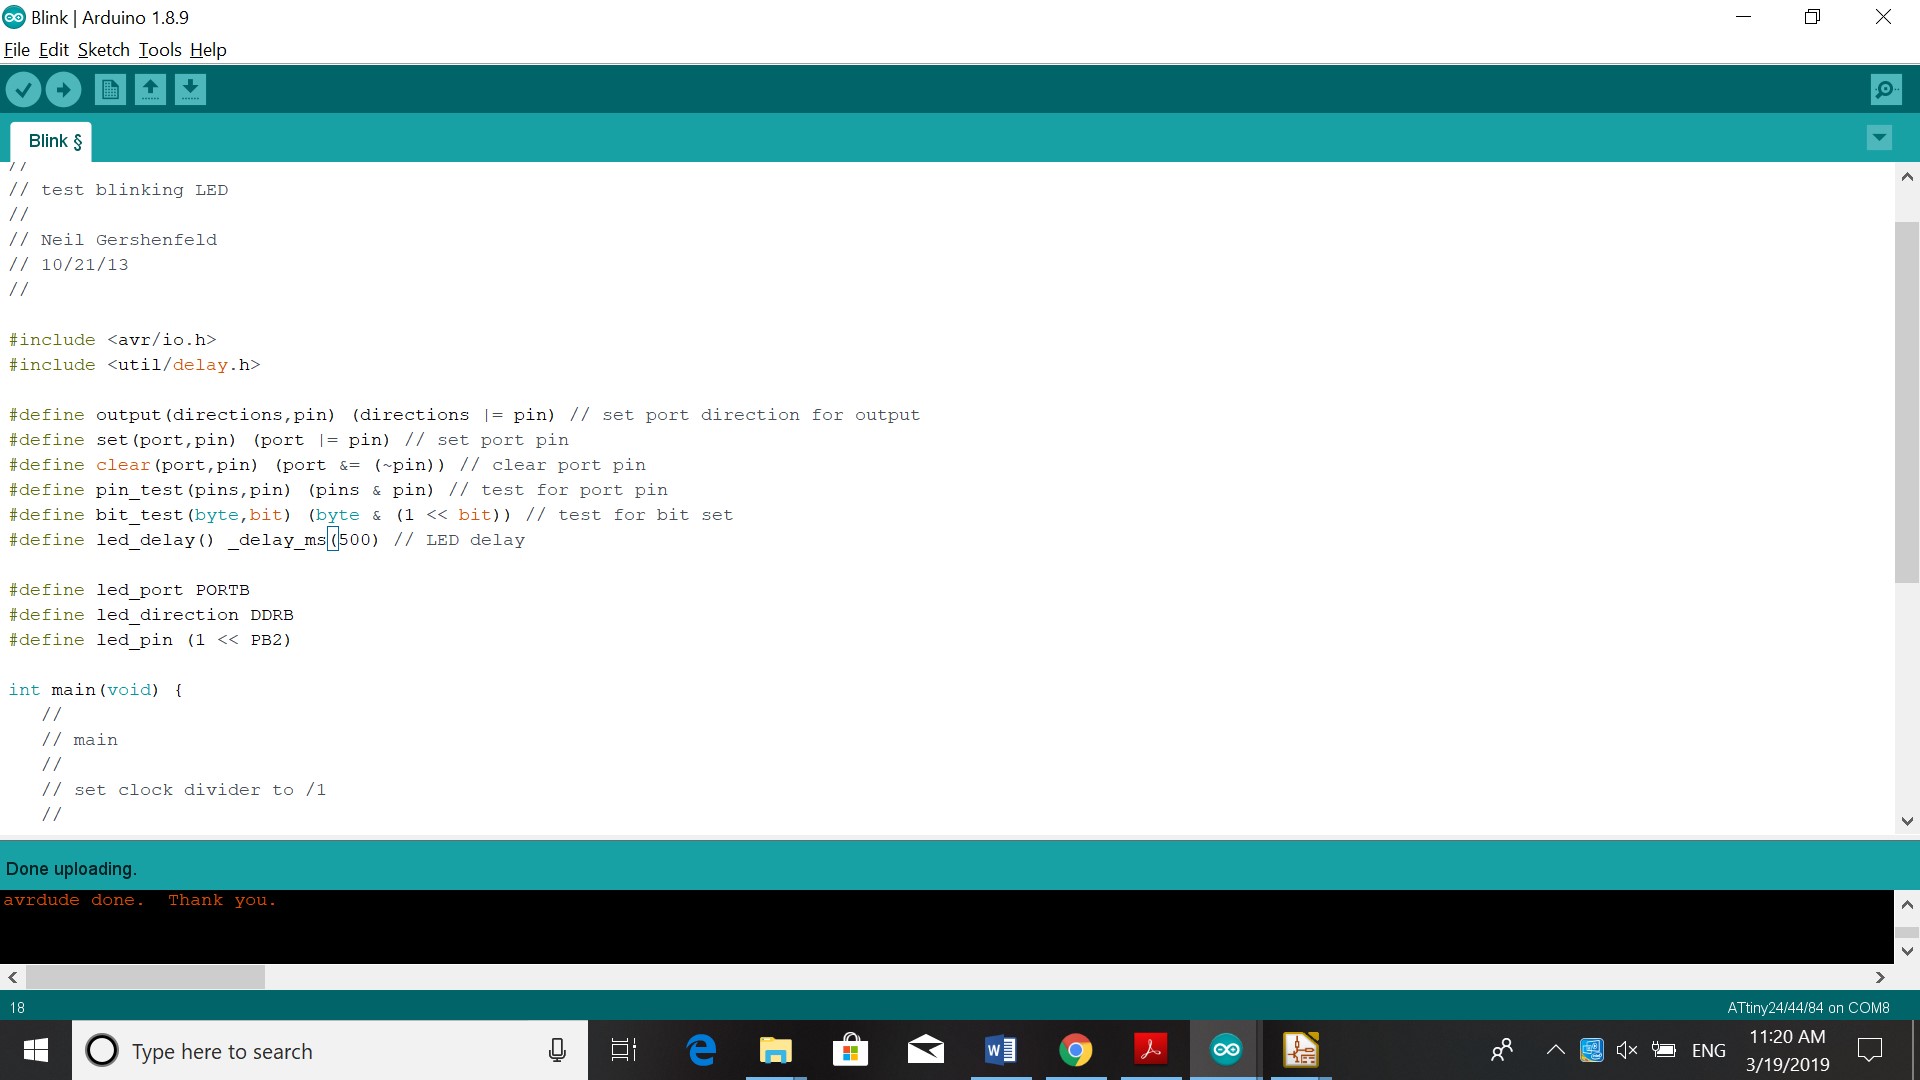
Programming using Neil’s code
Third test was to load Neil’s code to our board and test it. So I copy pasted this link which is a blinking program written in C into Arduino. Using the datasheet, I searched for the pinout of the ATtiny 44 and the name of the pin. This was PB2. I then changed the pin to PB2 and ran the program. I also searched for the delay and changed that from 100 to 500.
Questions
- Which microcontroller can I use to control RGB LED lights
- Will the microcontroller be able to turn all the LED’s
What do I want to learn?
- Which program functions I can use to control my LED’s (apart from blinking)