2. Project management
This week some people presented their idea for the final project, and we talk about project management.
Assignments
For this week we had to :
- Build our Site:
- Edit the template site
- Describe ourself
- Describe our final project
- Document our work using git
I’ve a very few knowledges in developing sites. I know some HTML bases and that’s all. I’m used to develop C++ firmware for embedded system and put my code on GitHub, but I’ve never use GitLab. And I’m used to write my documents in basic markdown.
So all of this is a bit new to me and I think it’s the case of a lot of Fabacademician … So, I decided to present my work like a tutorial.
First introduction
Presentation - GitLab - MKdocs - Atom
What is GitLab ? GitLab is, as mentioned on the website, “A single application for the entire DevOps lifecycle”. It’s closely similar to Github, and it’s used to share code, files or project with other with a system based on Git to propose, share, integrate modifications on a project (often code) and managed version an branch of the project.
For the FabAcademy, we will use GitLab to share our work and also to share documentation using MkDocs. MkDocs is “a fast, simple and downright gorgeous static site generator that’s geared towards building project documentation. Documentation source files are written in Markdown, and configured with a single YAML configuration file” (Mkdoc Site). So, with this solution, we can make a static website directly into a repo GitLab by modifying and adding file code in Markdown.
So … What is MarkDown now ?  “Markdown is a lightweight markup language with plain text formatting syntax.” (Wikipedia). The extension file of Markdown is “.md” and you can use any text editor to edit files. You can find a cheatsheet of all the markdown tool here. But, if you want to have a sort of WYSIWYG editor in markdown if you are a beginner, you can use :
- Directly the WebEditor of gitlab
- Typora
“Markdown is a lightweight markup language with plain text formatting syntax.” (Wikipedia). The extension file of Markdown is “.md” and you can use any text editor to edit files. You can find a cheatsheet of all the markdown tool here. But, if you want to have a sort of WYSIWYG editor in markdown if you are a beginner, you can use :
- Directly the WebEditor of gitlab
- Typora
Personally, I use Typora to have a great view of my Markdown files. But for the Fabacademy, and to correctly see and edit all my projects, I will use the IDE Atom.
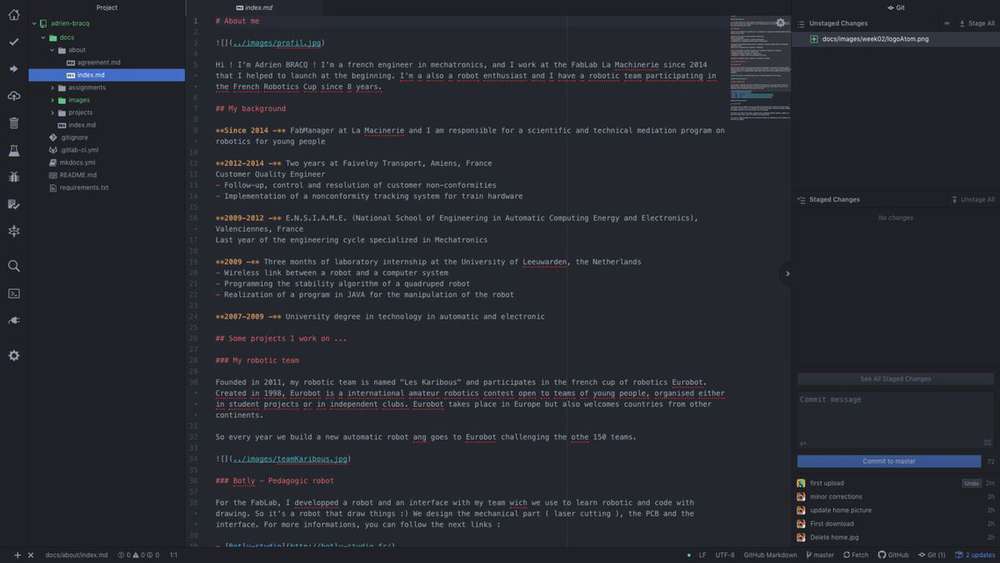
How to use GitLab
I’ve decided to use the command line for git and a local version of the repo instead of editing the files directly on the web using the webEditor of gitLab. I will show you how to do this in command line and after how to do this directly in atom for the commits and push/pull request if you want …
Clone your repo
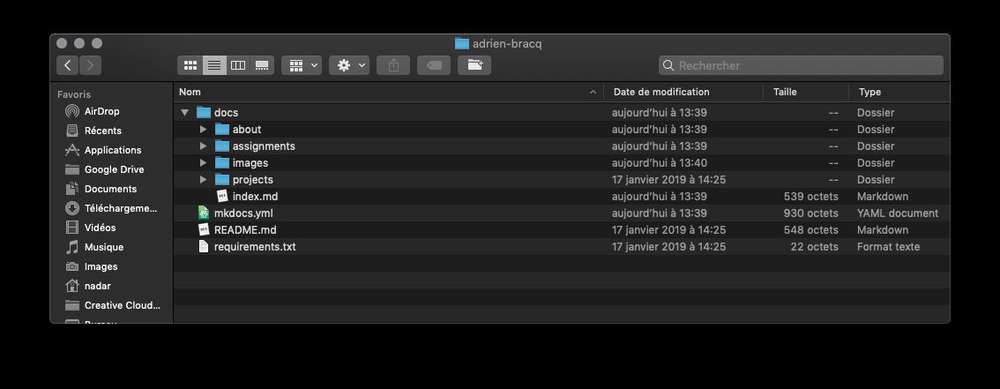
So, first of all, I’ve made a clone of the repo on my computer. To do that, I first created a folder named “GitLab” on my computer. After this:
(On MacOS)
-
Open a terminal
-
Point at the folder you just created with the command “cd”. For example, on my computer :
cd /Users/nadar/Documents/GitLab -
Clone the repo with the command “git clone”. For me :
git clone https://gitlab.fabcloud.org/academany/fabacademy/2019/labs/lamachinerie/students/adrien-bracq.git
So now you should have a folder named “fName.lName” inside your folder GitLab you’ve just created.
Use CL to commit/push/pull
Now you have a clone of your repo inside your computer, we will make a modification on a file, or add pictures, and we want to synchronize them with our GitLab repo. So How to do this ?
(On MacOS)
-
Open a terminal
-
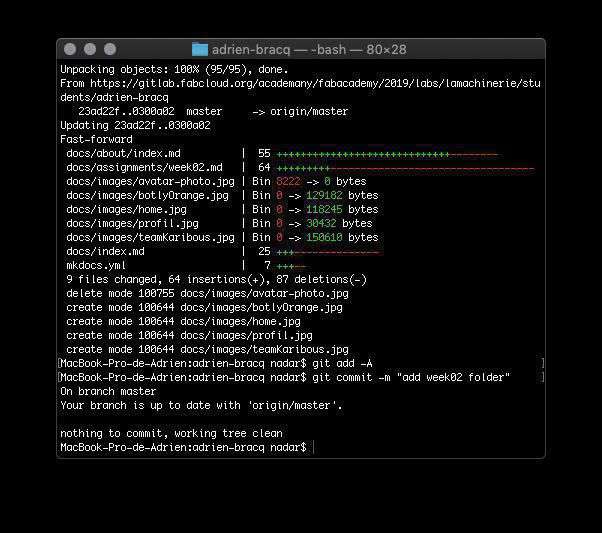
You have to select the files you want to commit. To do that you will use the command
git add -Aand it will select all the modified files to the next commit. -
Next, you have to commit. To do this, the command to use is
git commit -m "message". You can replace the “message” with your commit message. For example :git commit -m "update". -
Now it’s time to push. Use the command
git pushto do this.
And that’s all.
Note : Don’t forget to do a git pull to update your files with the latest version of the repo, especially if you are working on different computer, plateform or with other people.
Use Atom to commit/push/pull
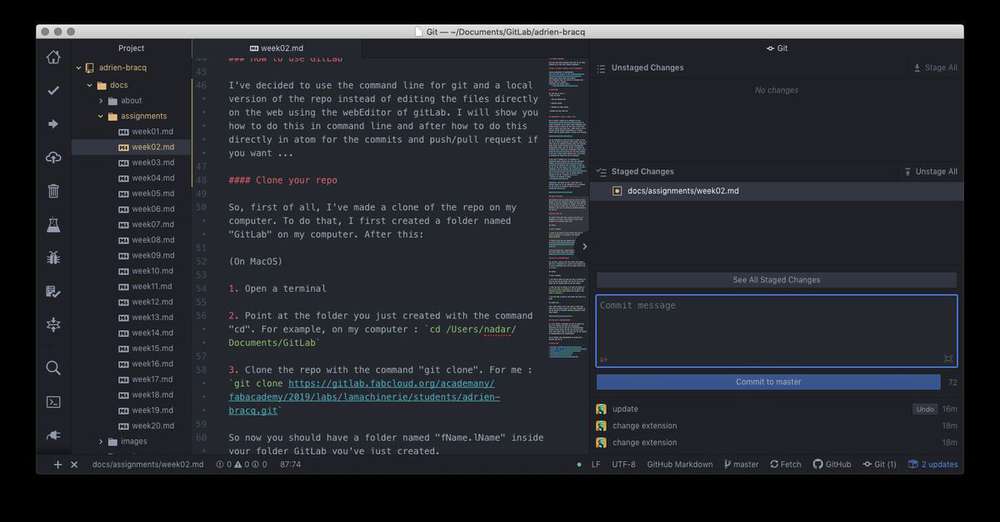
As I said before, I personally use Atom to program and work on my project. Atom have Git possibilities integrated, and you can make all the commit/push/pull command directly inside it. Just open the right panel named “git” inside Atom, and you will find all the command to commit/push/pull your modifications.
Terminal
Be carefull with modifications and always have a terminal open … 
Name your commit
My Friend Alban show me an interesting link on how to correctly write your commit. Slides are in french an I will have to translate them but you can find some interesting idea. I will try to use it now because it seems to be an interesting way to do this.
Go further
Install ImageMagick
For more informations about imageMagick, I’ve made a documentation here during the week 03 of fabAcademy.
Personalize my site
As the site used MKdocs, you can personalize very easily the template by modifying colors or fonts. To do this, you can go to the fil mkdocs.yml and modify some lines. Some modification I’ve done :
- Change the theme of the site :
theme:
  name: material
- Change the color palette :
palette:
  primary: "yellow"
  accent: "lime"
- Add a logo :
logo:
  icon: 'blur_on'
- Change the fonts :
font:
   text: "Roboto Light"
   code: "Ubuntu Mono"
After that, I would like to have more possibilities with markdown, like tasklists, emojis, progressbar, etc … So to do that, I need to install some markdown extensions. I find a great extension for markdown which is pymdown with a lot of possibilities to personalize markdown and add features.
To install it, you will have to execute the following command : pip install pymdown-extensions . And you can do that using directly GitLab ( and that literally blow my mind when I discovered these functionalities of GitLab !  ).
).
You go to the file “requirements.txt” and you simply add what you want to install. For me, I’ve just added the pymdown-extensions line to the end of the file. After that, If you go to the file “gitlab-ci.yml”, you will see the following commands :
before_script:
  - pip install -r requirements.txt
It’s all the commands which will be executed before the script. So we could add after that the command pip install pymdown-extensions , but, by adding the pymdown-extensions to the file “requirements.txt”, all the commands will be executed using pip install -r requirements.txt .
So, you can also install other extensions or theme using the same technics. For example, I tested the theme bootswatch, so I just added the line mkdocs-bootswatch to “requirements.txt”.
So simple, so efficient … Love it !
After that, just add the markdown extensions you want to use inside the “mkdocs.yml” :
markdown_extensions:
- pymdownx.tasklist
- pymdownx.emoji
- pymdownx.progressbar
- pymdownx.details
Work locally
Install MkDocs
To test my site before pushing, I have decided to install all the requirements I need to build a local version of my site :
pip install mkdocs
pip install mkdocs-material
pip install pymdown-extensions
Now, I can build my site locally and make my tests.
Build MKdocs site
To build my site locally, you have to execute the command below where you have clone your repository. To go to you repo, just execute this command cd (your repo/), and after you can build sour site :
sudo mkdocs build
Warning
If you build your site into your repo, when you will do a commit and a push, you will send also all the _site folder on GitLab. and you don’t want that !
Tip
To avoid that, verify that inside the .gitignore you have the following line _site/. If no, add it, so when you will do a commit or a push it will ignore the _site folder.