09/ molding and casting
I had a lot of fun this week :D
1. molding
2. casting
3. making test casts & comparing materials
← previous
→ next
⋯ assignment list
🏁/ final project
Molding
For this week we have to design a 3D mold around the stock and tooling that we have, mill it, and use it to cast parts.
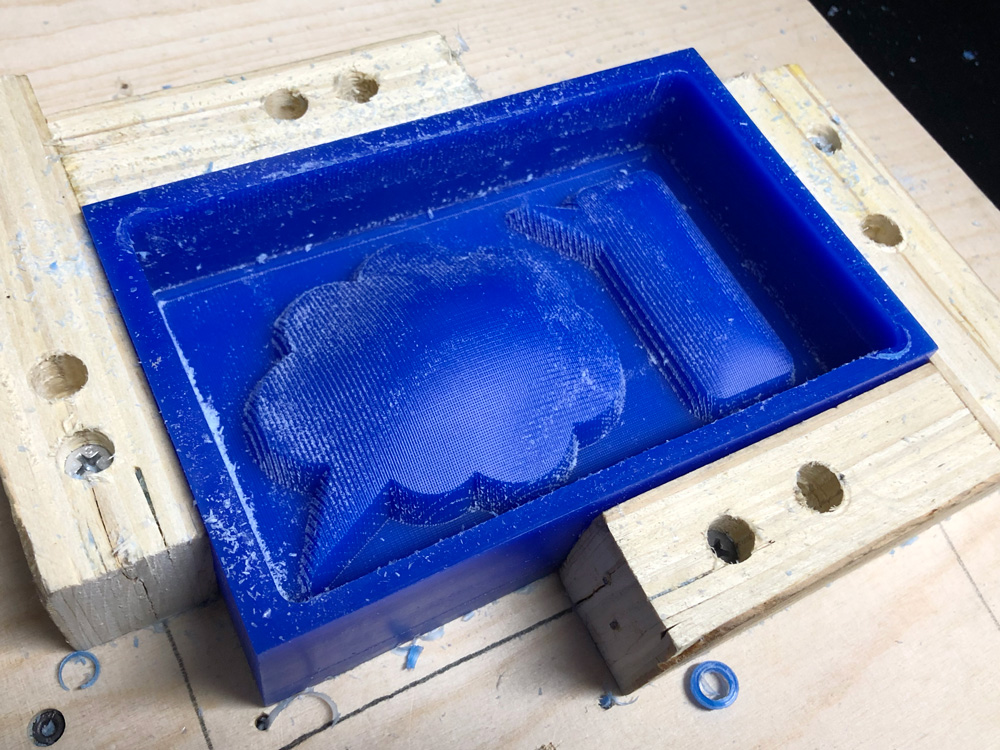
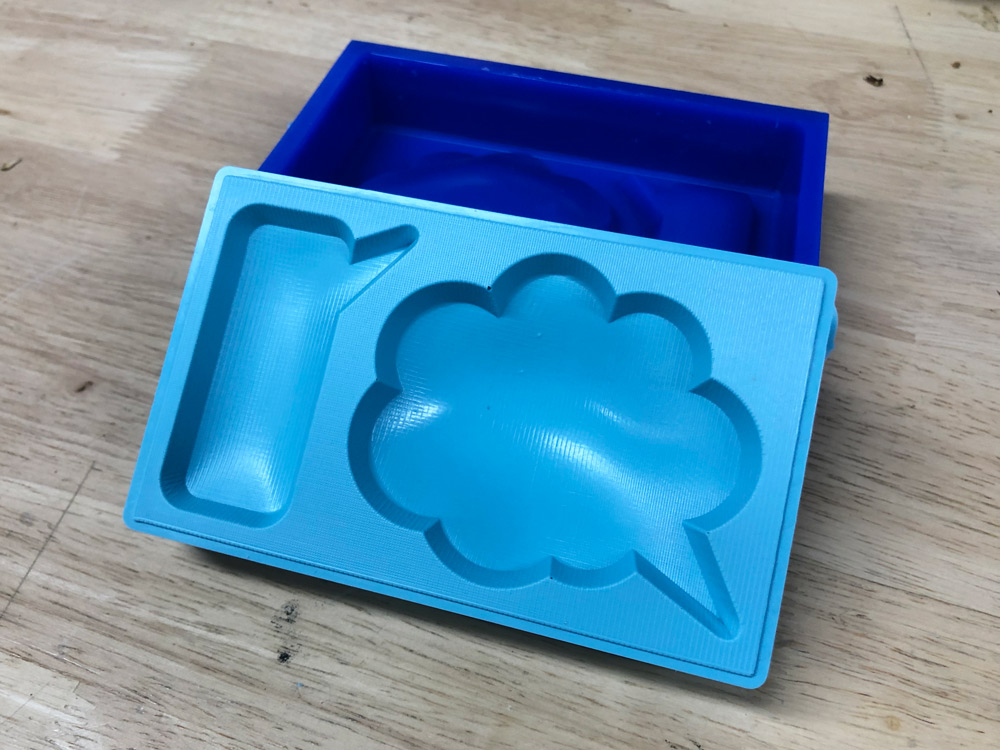
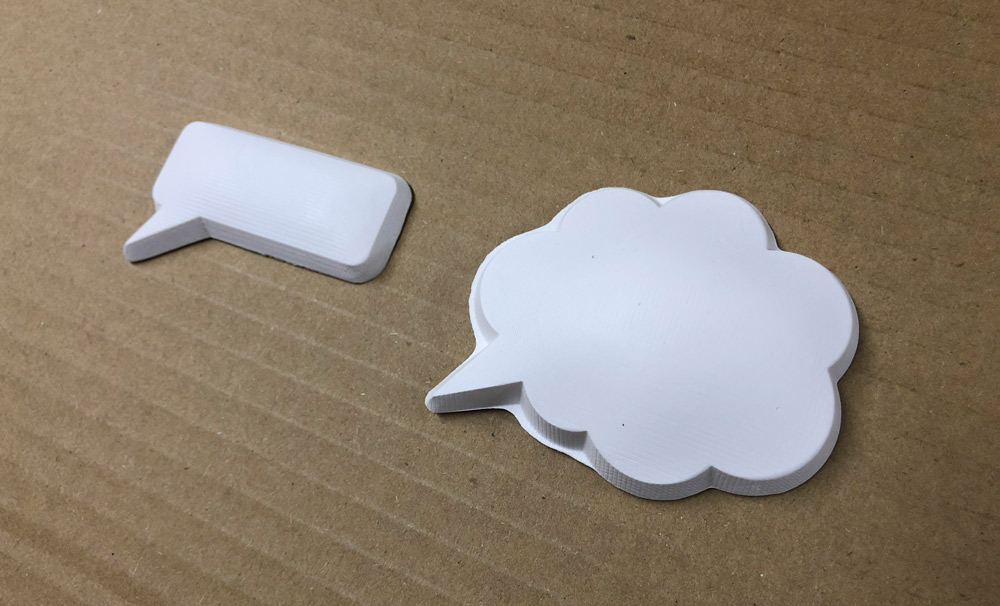
In Rhino I designed a message bubble and a thought bubble, and nested them in the box which was the exact same size as the wax block I would be using to mill the mold. I made the wall of the box thicker than 5mm and the space between bubbles and walls more than 6mm to ensure the 6mm end mill will be able to pass.

After I finished my first model (the left side in the image above), I noticed there would be a problem for milling because the height of the bubble shapes is more than the height of the end mill I would be using, and the end mill might crash the wall while moving close to the bubble edge. The solution was to add slopes to the bubble edges. So I modified the models to the right one in the image above.
↓ download .stl files: two_bubbles.stl
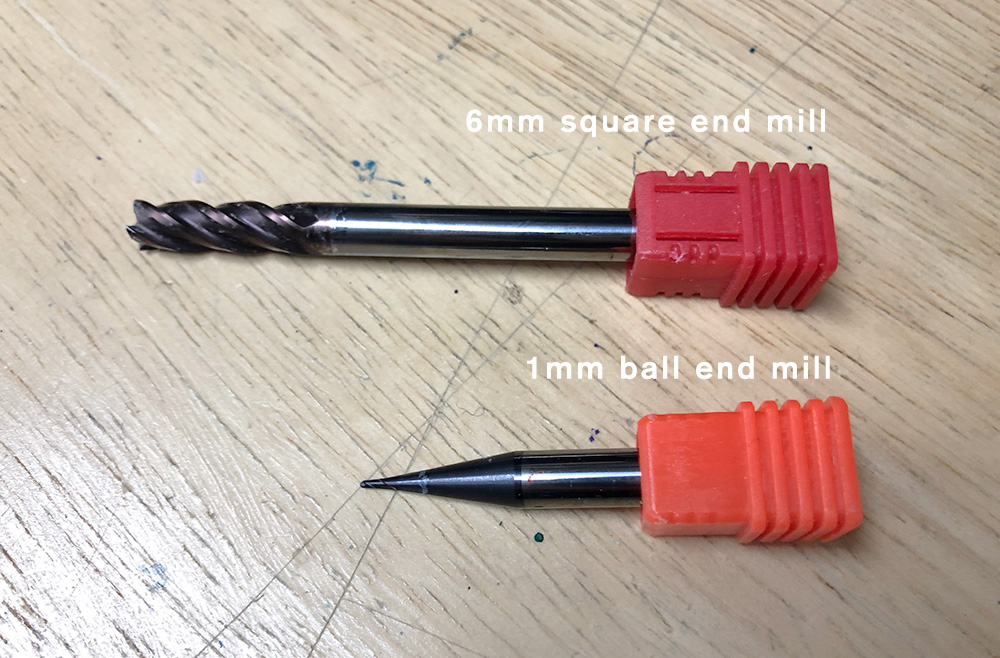
The tools I am using is a 6mm square end mill for roughing and an 1mm ball end mill for finishing.
Here are the tools settings in SRP Player, the software we use to generate tool path. The software generates default speed and path intervals for different tool types. I modified the path interval for both paths according to the sizes of end mills.
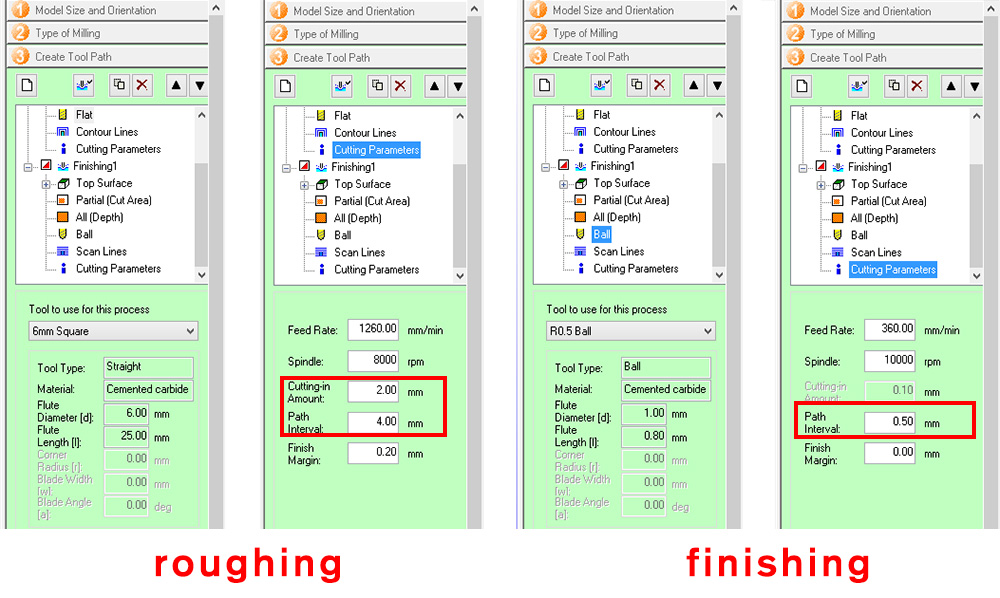
You can save some milling time by reducing the cutting area to be as close as to the object's edges. It also helps prevent the end mill from touching the walls of the wax block.

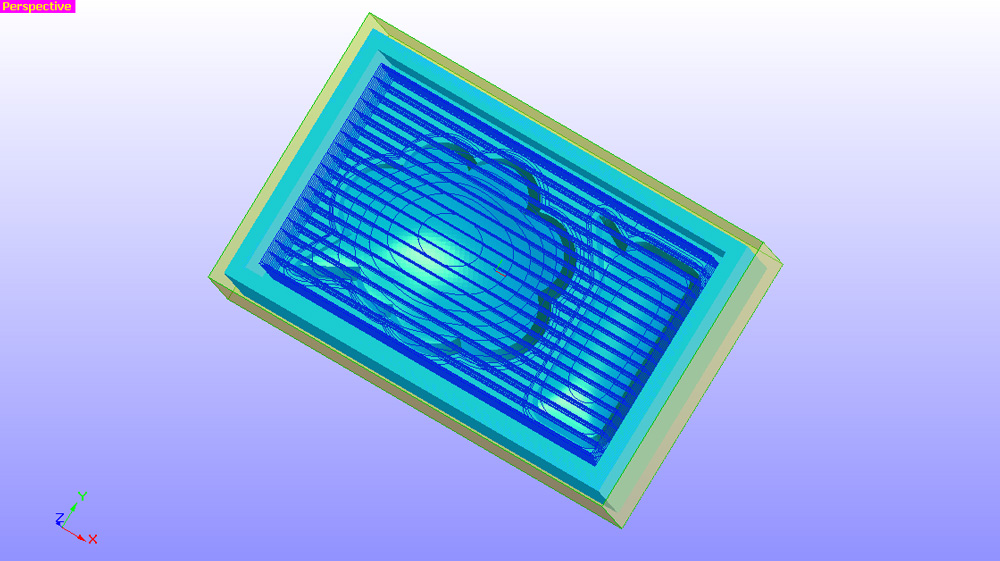
The software simulates milling paths for both roughing and finishing. The last step is to hit start cutting with output file, and save the roughing and finishing files seperately.
↓ download .prn files: Roughing_bubbles.prn, Finishing_bubbles.prn
To control the CNC machine we use Roland VPanel for MDX-40A. It is very similar to the SRM20 we used for PCB milling.
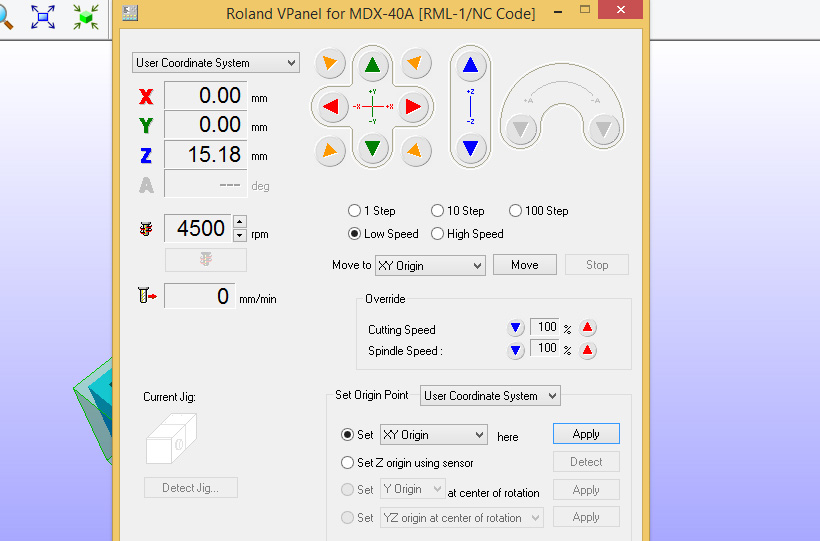
Since the SRP Player defaults to start cutting from the center of the shape, we need to take the XY origin from the center of the wax block. To get the center you can mark two diagnal lines and find the cross point.
To take Z axis you have to pick a place that will not be cut out during the roughing so it can be the same height reference for both milling paths.
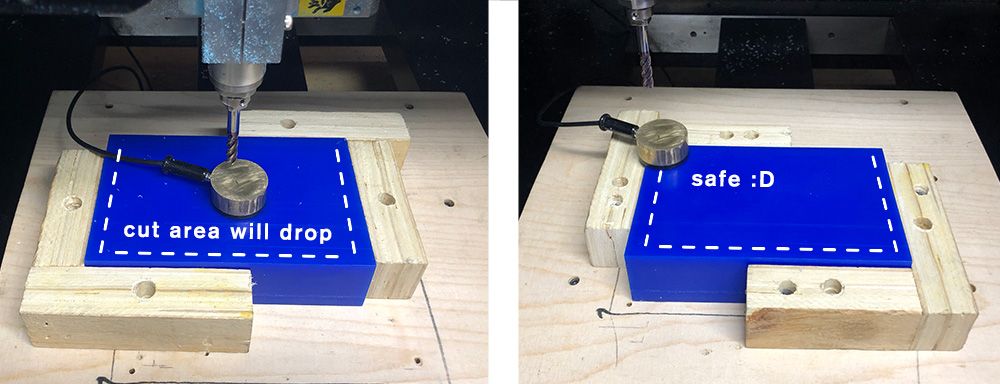
The roughing turned out well. It took about half an hour for the roughing.
Then I switched to the 1mm end mill and took the Z axis again. It is important to make sure the surface below the sensor is flat and does not have any leftover wax on it.
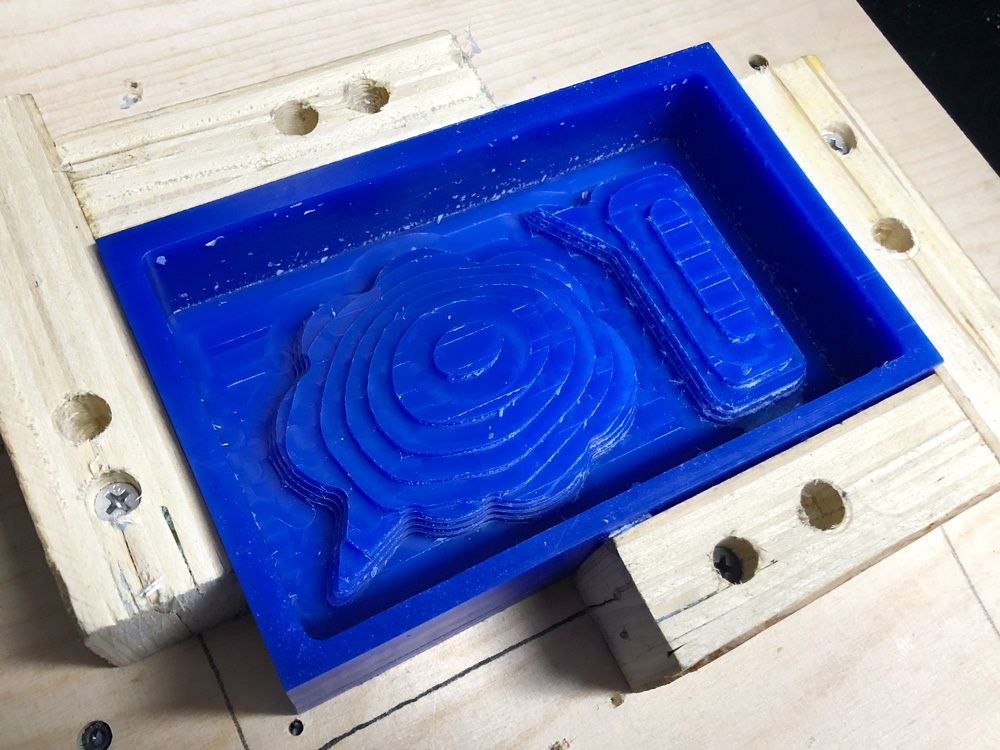
It took 2 hours for finishing. While milling, the 1mm end mill kept hitting the wax block walls whenever it was moving towards the sides. This was because the cutting area I set was still too close to the outter edges.
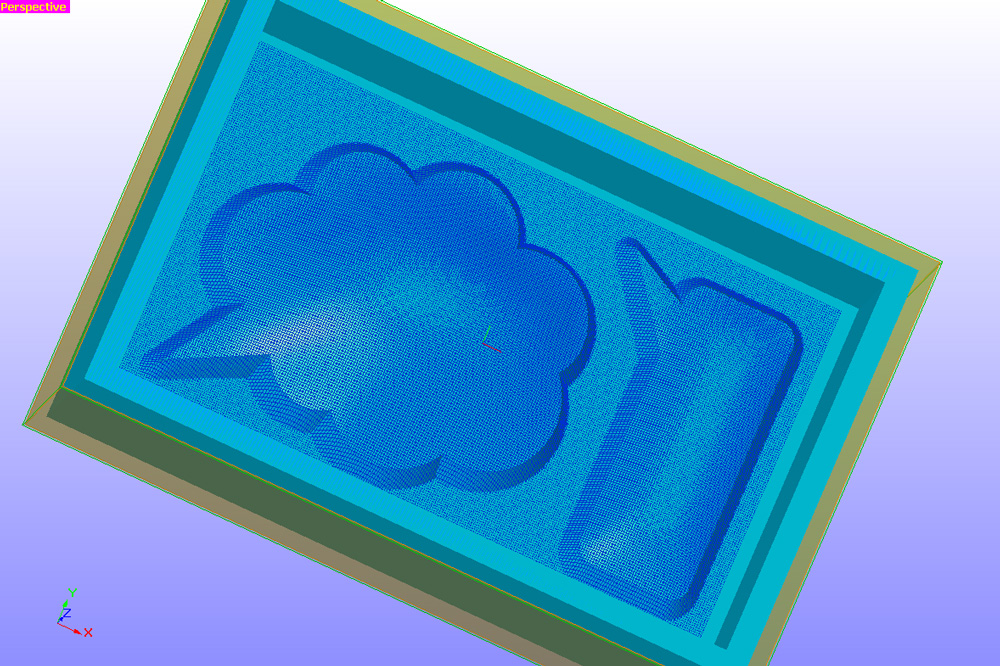
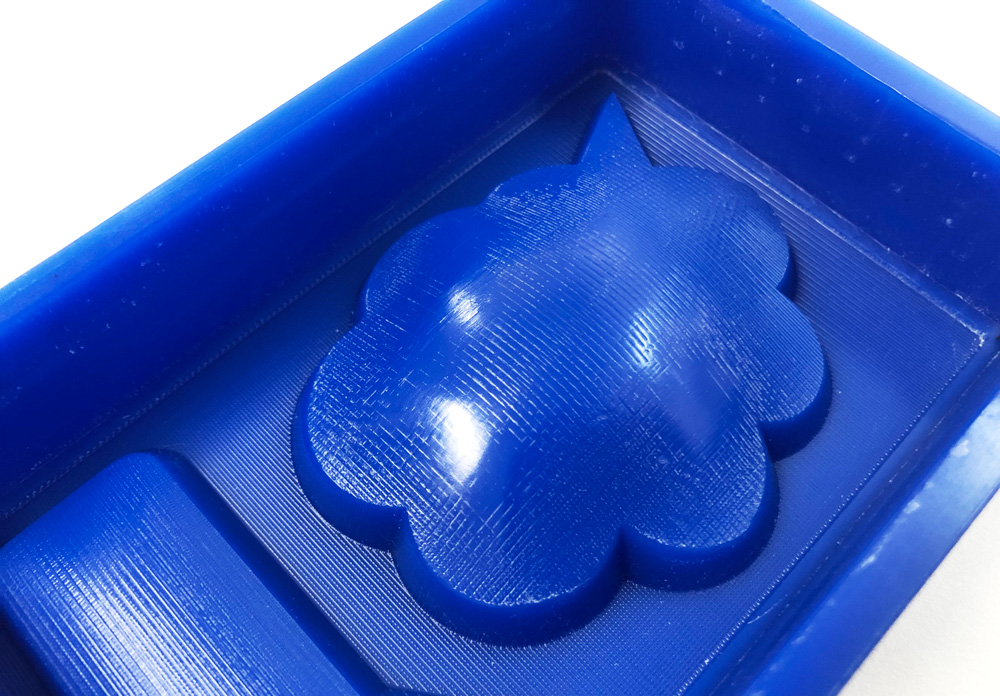
The 1mm end mill made a fine surface. With my 0.5mm step-over setting the surface is still a bit rough for me. I did another round of milling with same end mill, but 0.1mm step-over. This overnight job did not make a big difference (left side of the image below) :(
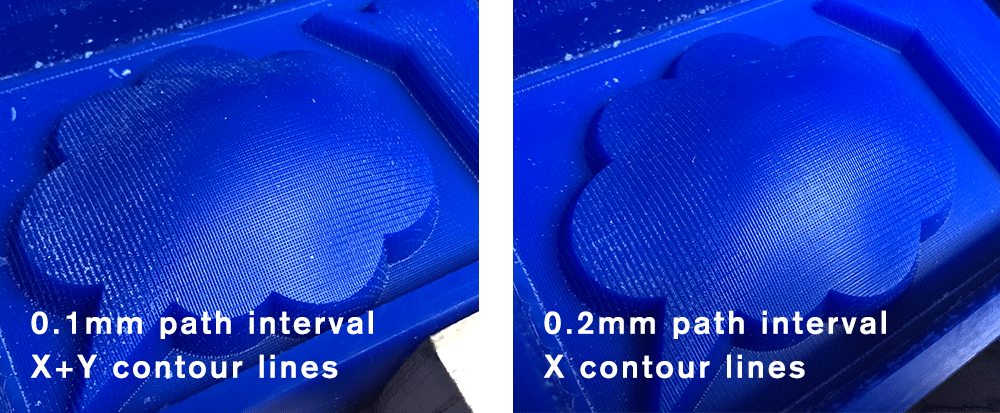
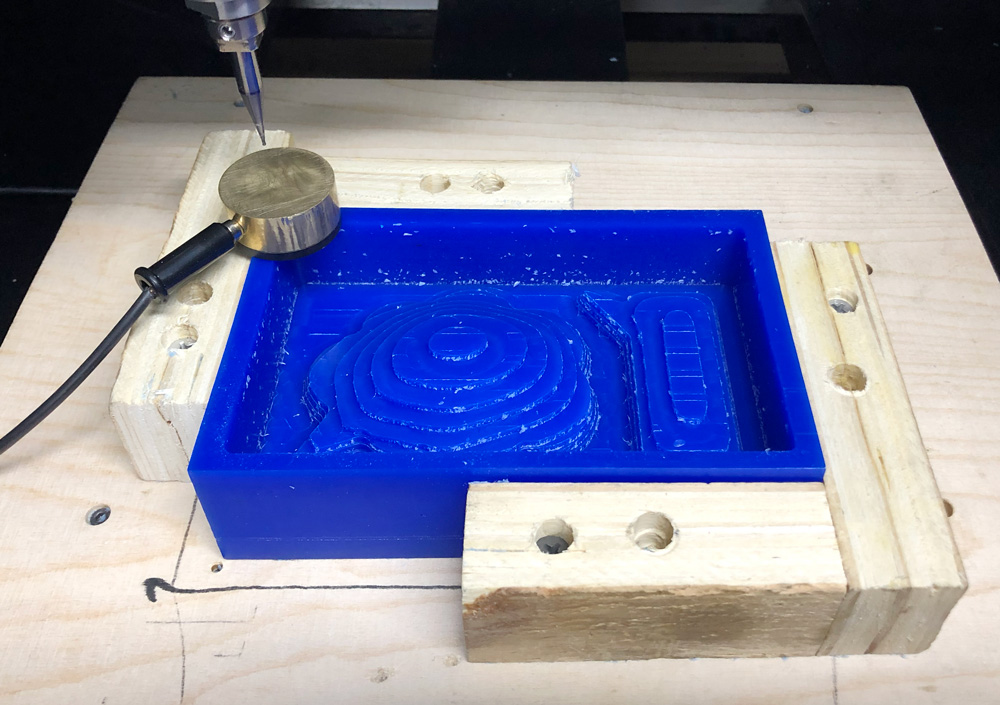
Our local instructor suggested that I probably did not have the Z axis set well. So I tried again with 0.2mm stepover, one direction contour line only, with fast speed (3000mm/min). It took about 40 mins this time (right side of the image above). Guess this is the smoothest surface CNC machine can make :(
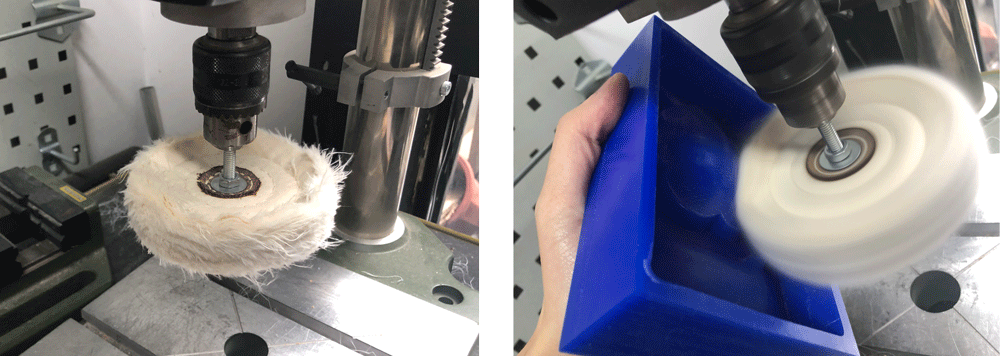
To further polish the surface I tried the spinning cotton in our lab. It generated gentle heat, helped take out some textures and left smooth surface in some parts. But it was too hard to make the whole surface evenly smooth, so I decided to live with the textures.
To make the silicone mold, we used smooth-on OOMOO25. It comes in A and B parts, which can be mixed in 1:1 by volumn. Once you mixed A and B, you have about 15 min to cast and it takes 75 min to dry, according to datasheet.
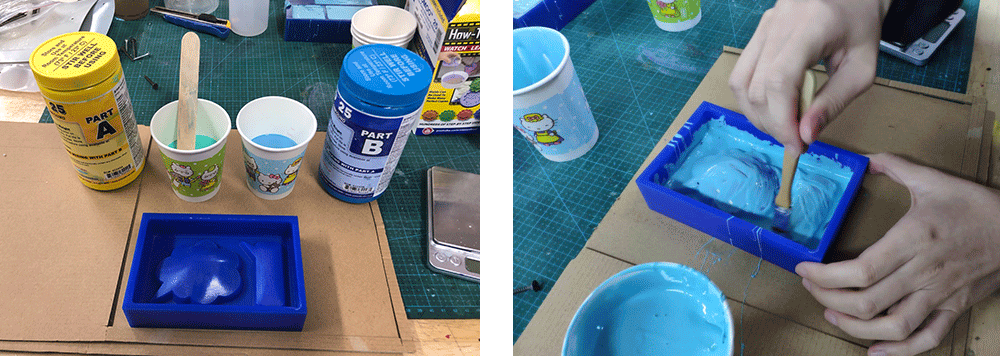
I painted a layer of OOMOO with brush before I pour in the liquid, to git rid of the air bubbles from tiny corners in advance. Then I lift the liquid high and pour starting from the lowest part of my wax mold. After pouring, I knock on the mold for bubbles to come out.
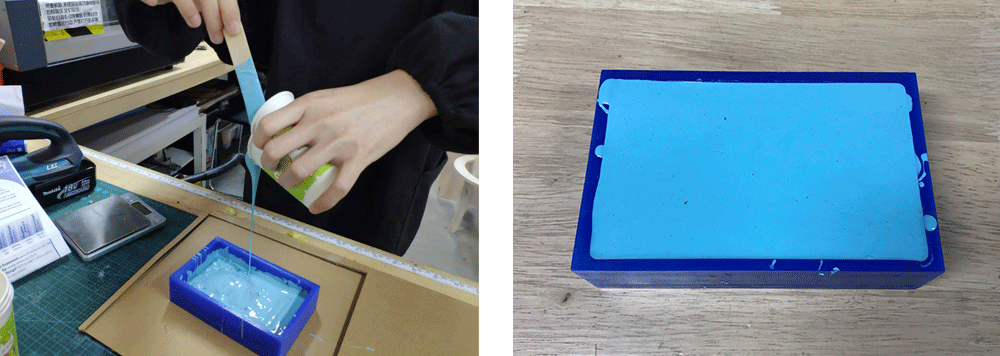
I waited for about 4 hours to let the OOMOO to be completely solid. A very fine silicone mold! :D
Casting
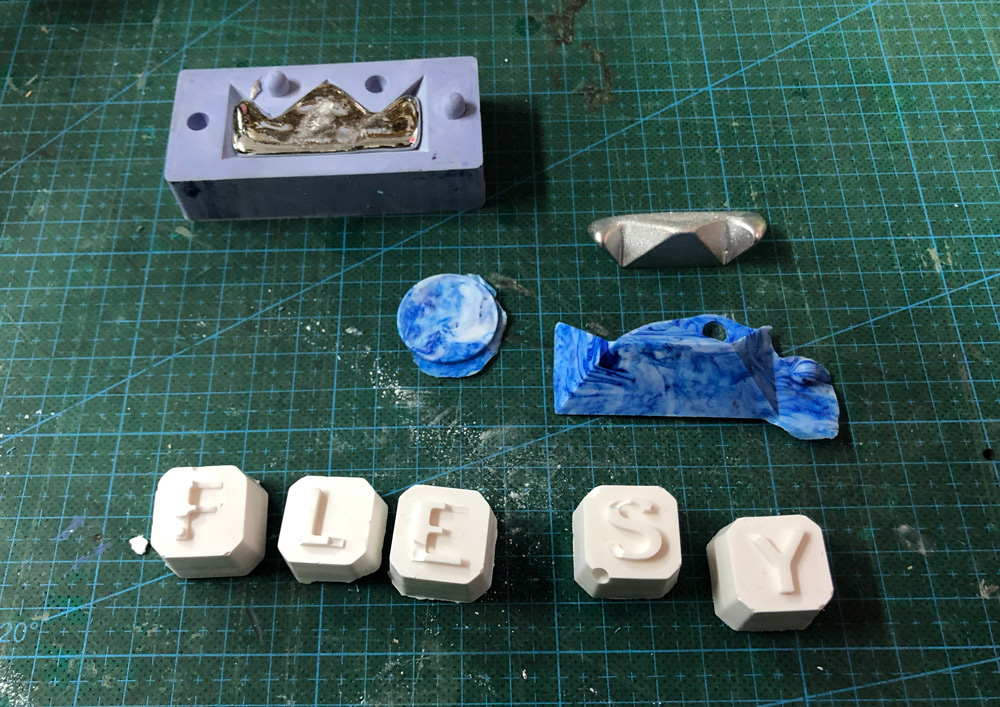
For casting first I tried using plaster powder, a general type sold from a Chinese vendor. The mixing ratio is about 100g powder : 30ml water. The mixed material will get creamy when the ratio is about to be correct. It takes about 5 min or less for it to dry, and you can feel the heat when touching the mold.
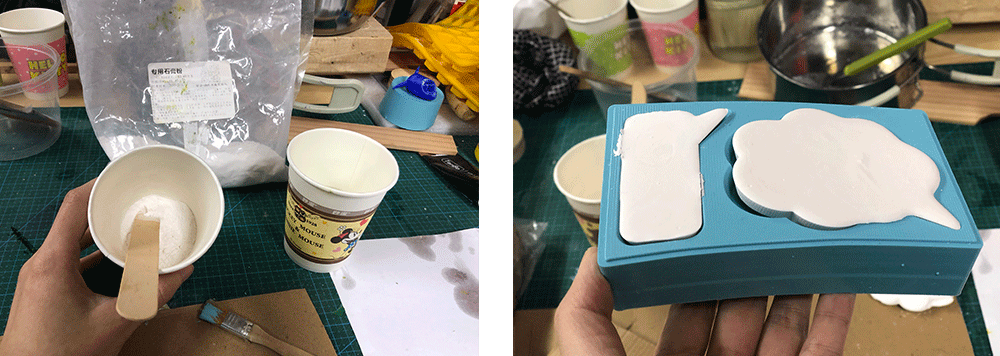
The surface is as smooth as it can be :D The cloud bubble has an extra edge because I I poured too much and too fast into the mold. Will have better control next time.
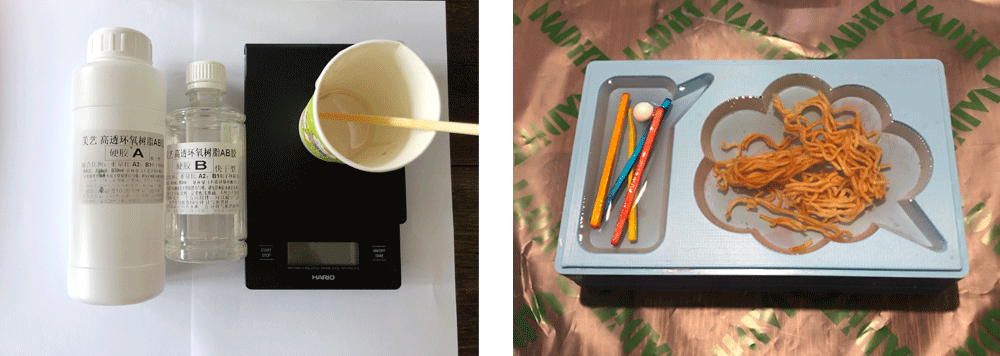
Then I tried resin, with color pigments. It is necessary to wear gloves now because the resin is sticky and colors are hard to wash away. We have Xencast Casting Resin that comes with part A and part B. They need to be mixed 1:1 by weight so it is key to use a table top scale.
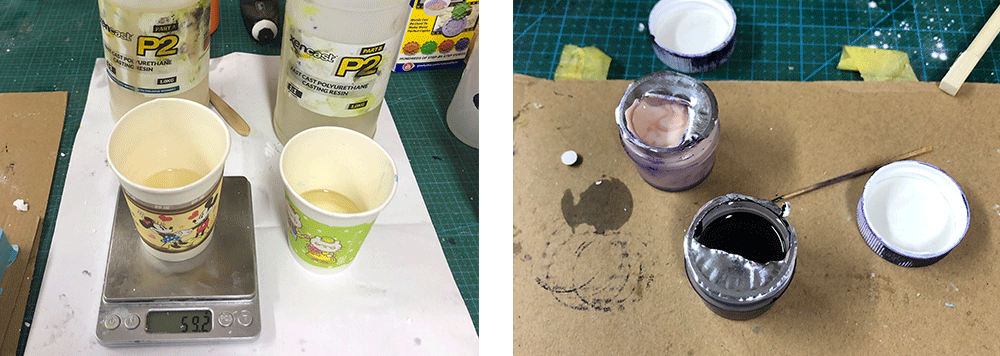
Once mixed together, the resin becomes solid very fast, in about 3 minutes. In that period of time I need to finishing pouring and coloring, which is challenging but fun. Since it is unable to see the bottom face of the cast, you can only guess and stir the color with little tooth stickers.
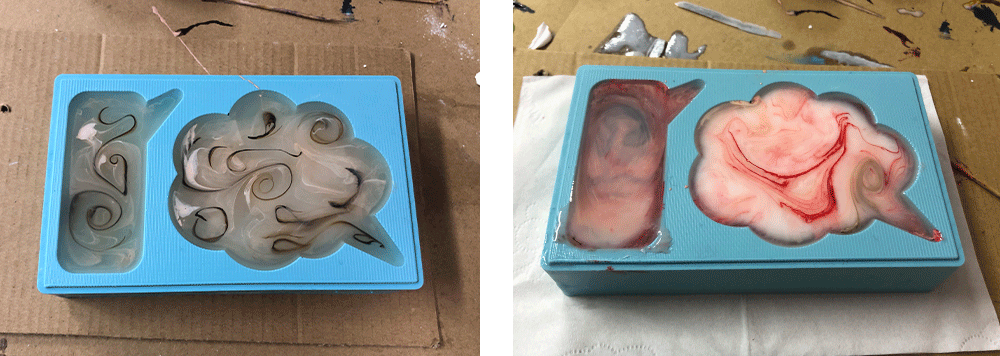
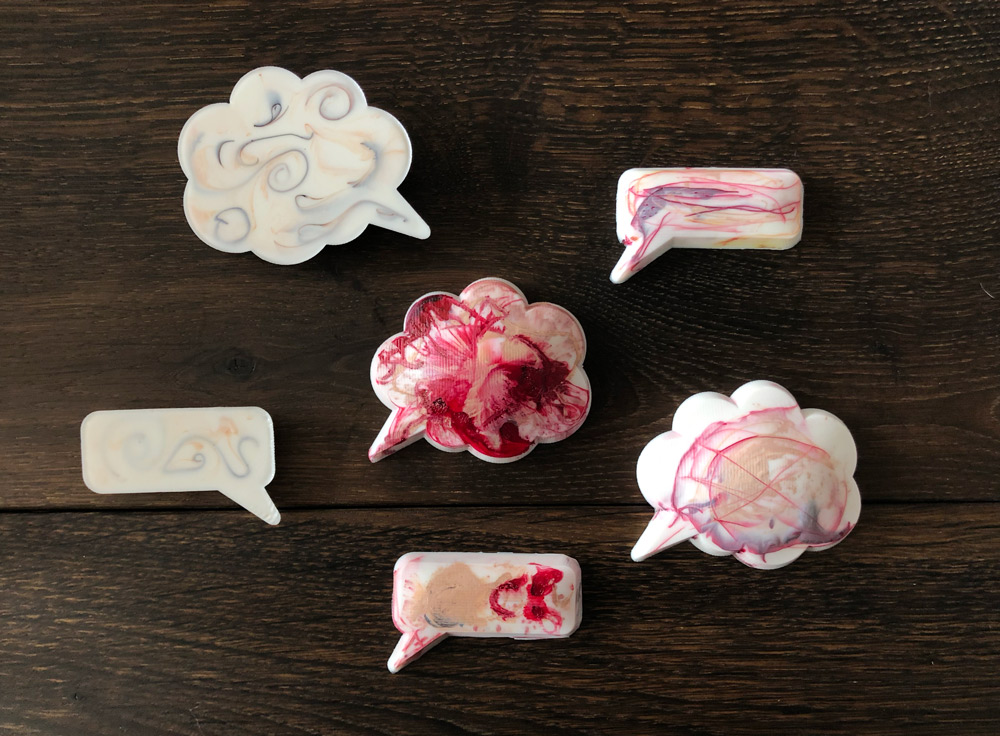
The results of blind color paint are satisfying :D For some cast I like the front better and for some I like the back. I may have dropped too much color pigments in some casts. The pigments sinking at the bottom of the mold are not well dissolved into the resin, they stay as pigments after the casting is done, and leave unflat holes and sticky pigments on the surface, (which I think is interesting :D)
Next I tried clear epoxy, from a Chinese vendor. It is very similar to resin, mixing liquids from bottle A and B. The ratio is 1:2 by weight. Taking advantage of its transparency, I experimented with throwing tiny objects (colorful wood stickers and foam ball) and food (snack noodles) into the cast.
It took at least 8 hours (one night sleep) for the resin to become half solid under 15°C room temperature. Then I speeded the process up by placing the mold on my heating cup matte which keeps the surface temperature at about 70°C. It took 1.5~2 more hours for the cast to dry.
The wood stickers and foam ball had less density and kept floating up. Since my intension was for them to sink, I pushed them down several times which resulted in adding some bubbles in the cast. Due to the silicone mold's surface texture, the upper faces of the bubbles are not completely smooth and shiny, so it is a little difficult to see through. I like the back sides more here :D
I tried another pouring with different materials. I left the mold on my 70°C cup matte for about 3 hours and it is dried completely. It may have got overheaten by the matte causing the yellow shade on the surface of the cloud bubble. I also sadly damaged my silicone mold :'( Because of the heat the silicone starts to soften and melt and grows tiny bubbles on the casting suface. I need to make a new mold now.
Group assignment
As a group for this week we need to make and compare test casts with different molding and casting materials. We tried materials such as styrofoam, smooth-on (silicone), plastic sheet, styrene sheet for making molds, and resin, drystone (plaster) and Bismuth Tin Alloy for casting. For more detailed documentation go to Siyu's page:
group assignment documentation link.
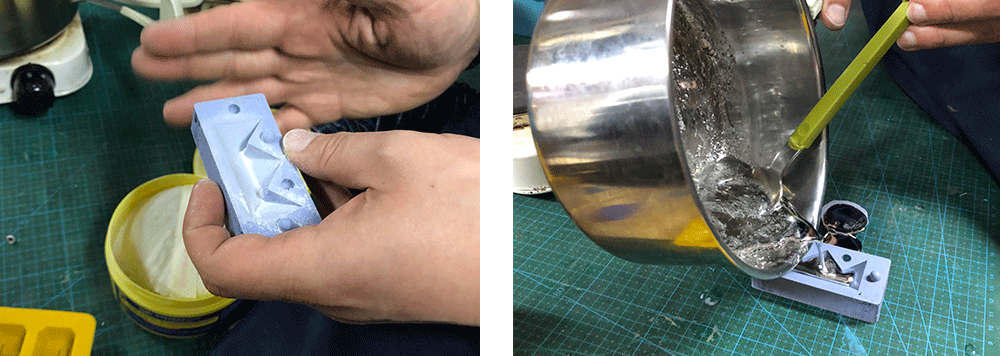
One thing I have not tried so far for my casting is metal. It is amazing to know there is metal of such low melting point and is so easy to cast. Due to its high price I may only use it for small components that do not need to endure strong force.
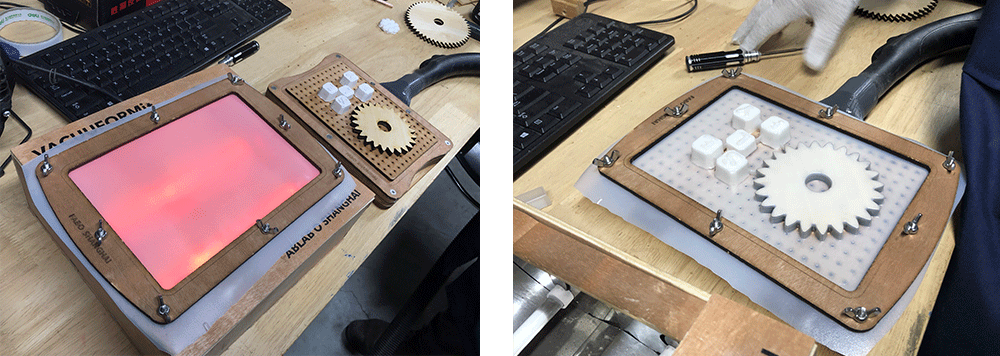
Vacuum-formed mold is another thing I will be interested in trying next. Combining with the pieces made with laser-cutter, vacuum-formed mold may be the best way to help me get a smooth surface mold that I am seeking for.
(Updated 03.27.2019)