Week 18
May 22. Wildcard Week (Jewelry)
Individual Assignment
Design and produce something with a digital fabrication process (incorporating computer-aided design and manufacturing) not covered in another assignment, documenting the requirements that your assignment meets, and including everything necessary to reproduce it. Possibilities include (but are not limited to) composites, textiles, biotechnology, robotics, folding, and cooking.
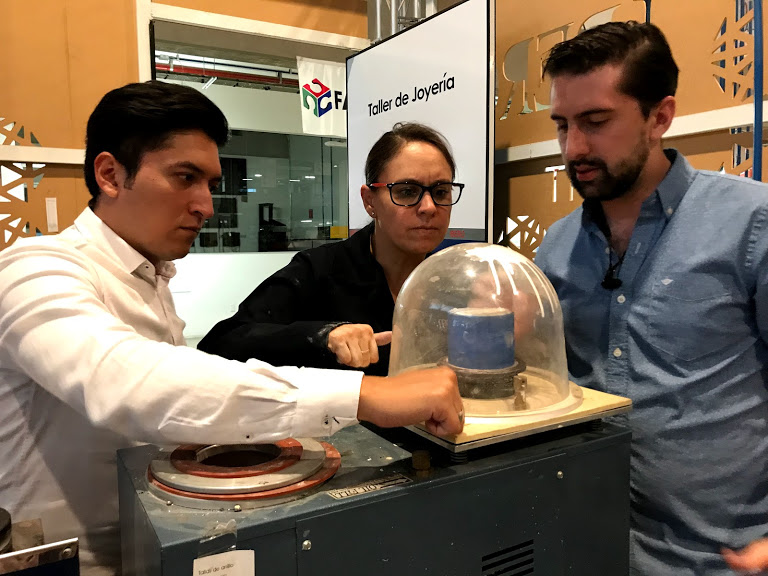
For the Wildcard week it was decided as a group thta we wanted to learn to make jewerly, each of us designed a different ring and we shared the process and experience of making them. The material used was silver.
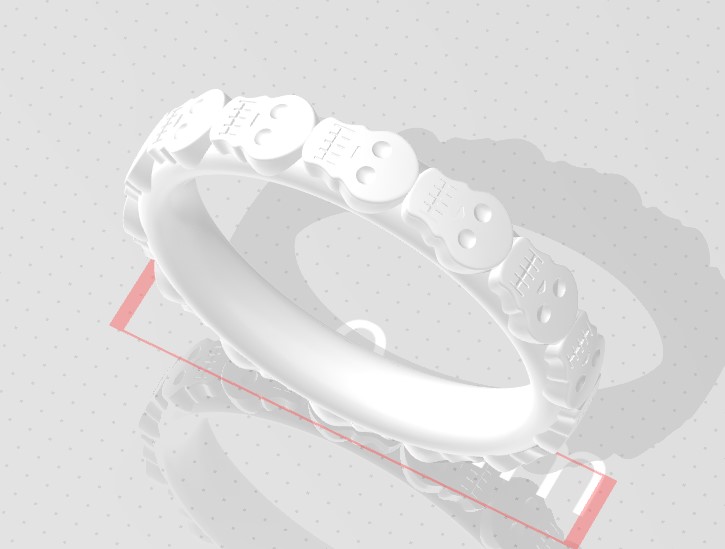
3D Design Skull Ring
I chose a skull theme because its close to my roots and it had detail that could be engraved.
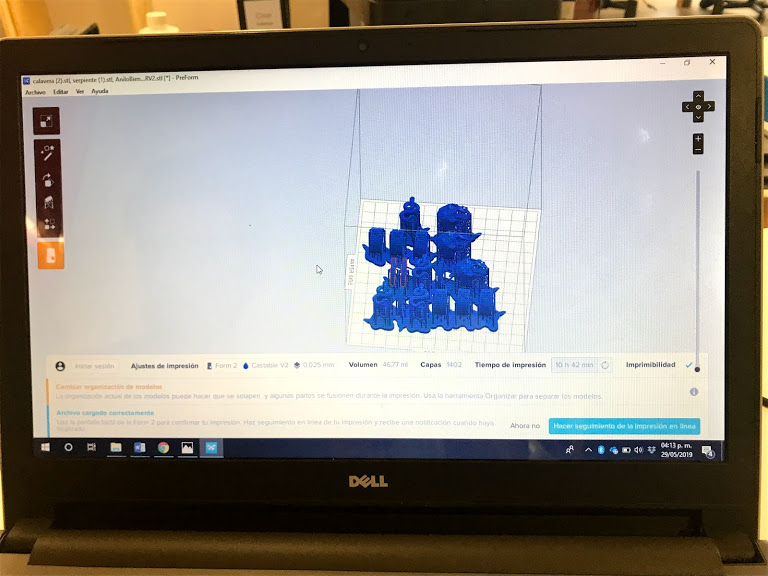
Rings ready to print
We printed on a formlabs Form 2 resin 3D printer.
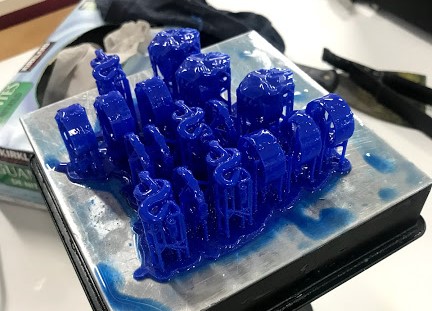
3D Printed rings
Rings printed in castable resin.
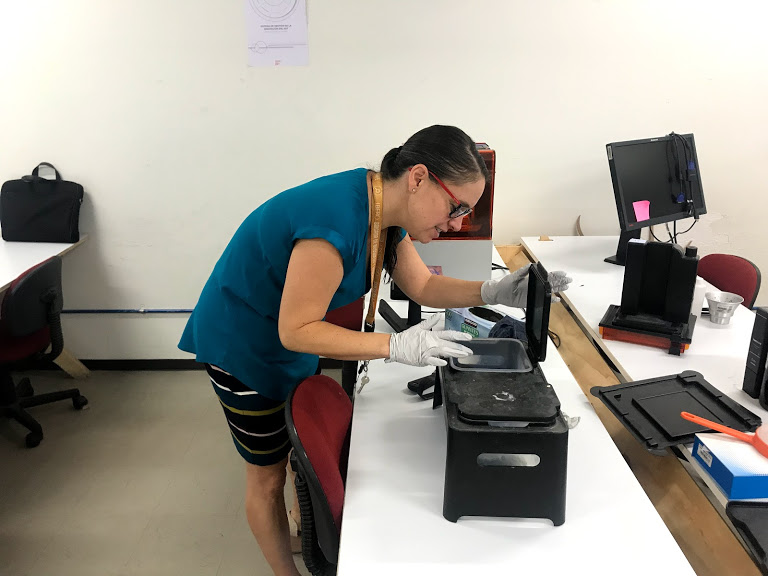
Curation Process
Before you can cast them, you need to curate in alcohol and afterwards dry preferably with sunlight.
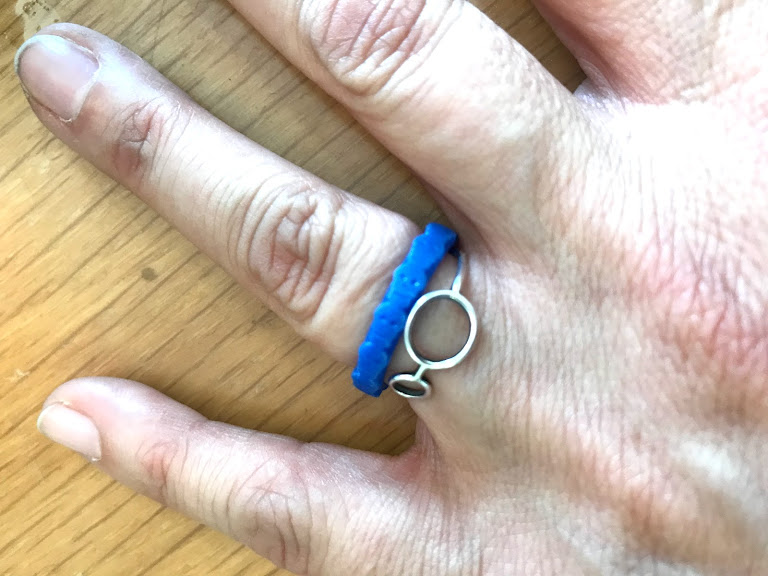
Resin Ring
The first test to see if the ring would actually fit.
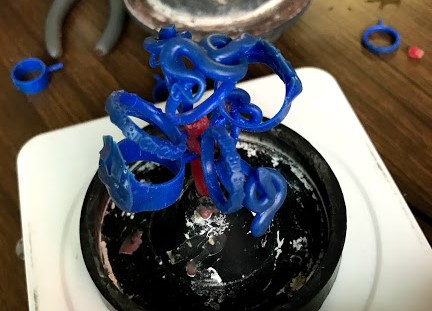
Ring Tree
To make one single process for the three participants, we decided to make a casting tree with our pieces.

First Attempt
Our first attemp was not great, but we learned to measure twice before melting the silver.
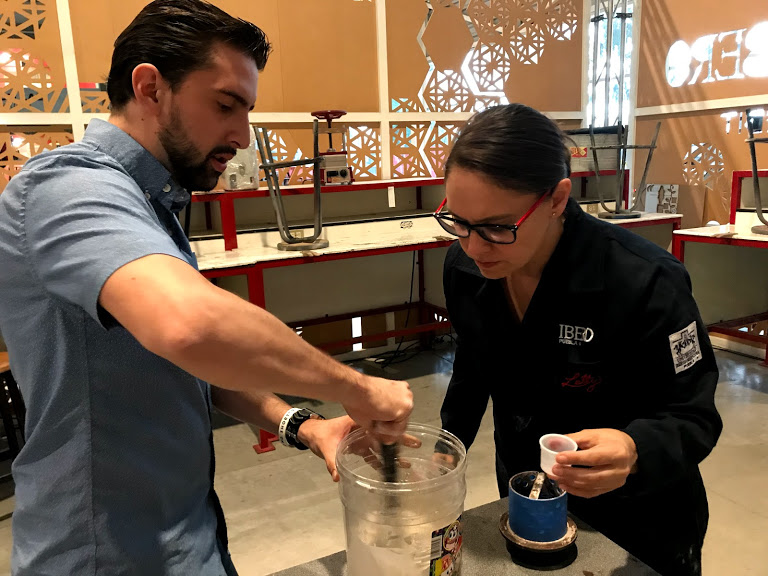
Preparing Plaster
We used jewerly plaster to create the cast.
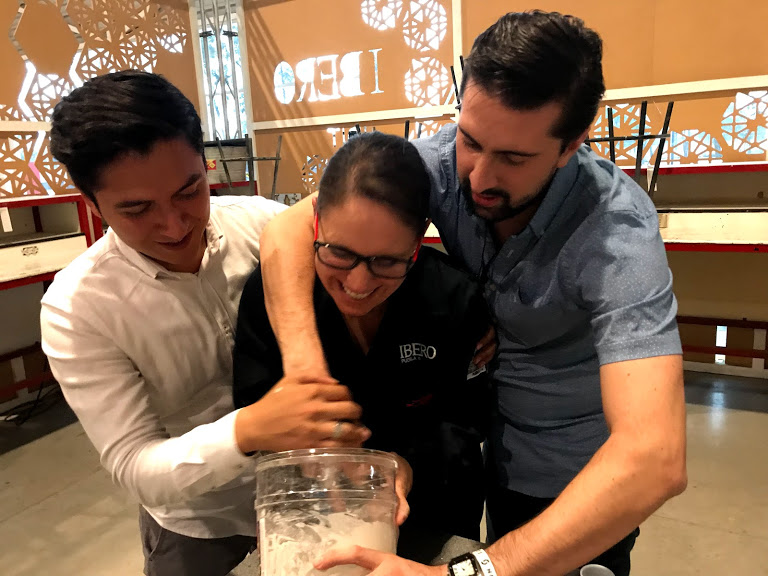
Mix, mix and mix again
To achieve the right consistentcy you have to mix, mix, mix and continue to mix while adding bits of water to obtain a smooth consistency.

Casting
Pour the casting plaster on the mold with the previously prepared casting tree inside.
Bubbles Out
To guarantee a good cast you need to take all of the air bubbles out.
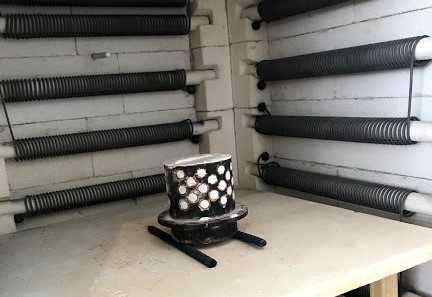
Cooking
To melt the resin and obtain the final cavity that'll be your mold you need to bake the piece.
Melted Silver
We settled on silver, mixed with 5% of copper for the alloy and added a small amount of borax to the mix.
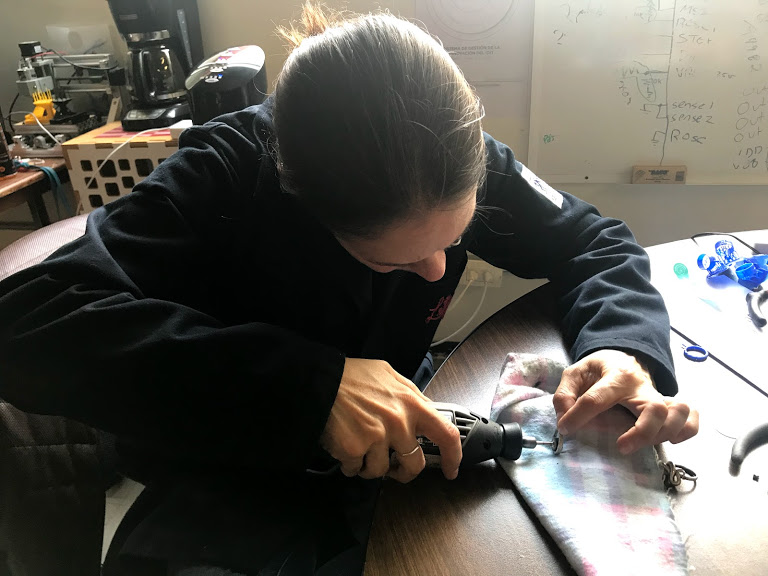
Finishing Touches
Add shine with a small dremel.
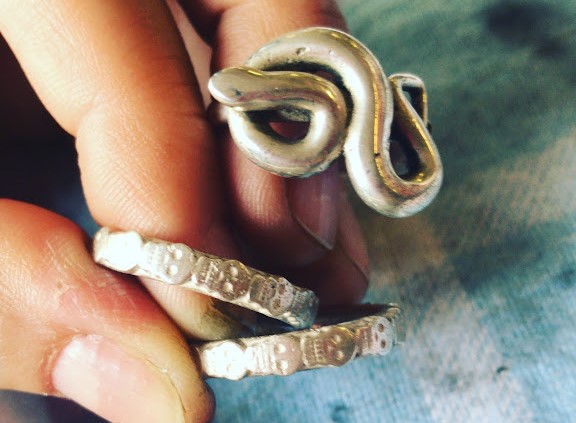
Final Pieces
And now we have several pieces of the rings.
Instructions
- Choose the right piece of jewerly for you, I chose a skull theme because its close to my roots and it had detail that could be engraved. The ring seemed to be the obvious choice for me, since I always were my favorites.
- Define the right CAD software for you, I chose Rhino to make it easier to create an stl for me in the right dimensions.
- Create a circle, create one Skull and paste it around the circle. Remember to extrude all objects, I cannot stress this enoough, if you don't you can't print.
- Save and export to STL and its ready to print
- We printed on a formlabs Form 2 resin 3D printer, using castable resin to make sure the finer details are captured. The printing process took about 7 hours for all of the rings and the curation took a good 24 extra, plan your time ahead.
- After printed, curate the rings in isopropyl alcohol for 15 minutes, and than let dryat sunlight for at least 8 hours, better if it's a whole day. Do not remove the support before this you'll mess your piece and have to print it again.
- Since we were trying to optimize resources we builted a casting tree within a cresol. It includes all of the pieces we were making with a wax stem for support.
- Mix the jewerly plaster or investment really well, until no lumps are found.
- Once your investment is ready pour it onto the cresol with your casting tree inside. Really carefull to avoid creating air bubbles.
- Eliminate the few air bubbles that could be trapped with a vacuum machine.
- Wait 4 hours for the investment to solidify before you bake it to melt the resin out.
- Bake the mold to melt the resin and create the final modl as a cavity within the investment. We used a muffle furnace overnight, incresing the temperature gradually. The correct number of hours and how to incre the temperature should be provided b the manufacturer of the resin, it is very important to follow indications.
- While baking takes place calculate the amount of material you'll need, since we defined silver as our matgerial with a 5% copper in the mix the final amount was calculated as follows:
Ring Number of Pieces Castable Resin (gr per piece) Castabe Resin (total gr) Silver (gr per piece) Total Silver (gr) Skulls 3 0.7 2.1 7.343 22.029 Snake 4 0.9 3.6 9.441 37.764 Helmet 2 1.2 2.4 12.588 25.176 R Ring 2 0.4 0.8 4.196 8.392 Stem 1 2.2 2.2 23.078 23.078 Support Total 1 1.2 1.2 12.588 12.588 TOTAL 13 12.3 129.027 - Melt the silver at 1100 ºC, once it starts to melt add the copper, the alloy we used was 95% silver with 5% ciopper,, you'll need to add borax so thtat the metal will flow freely.
- Pour the meleted metals into your mold, submerge the modl in cold watere for it to brake and obtain the silver pieces.
- Once your tree rings is out, brake each ring free from the stem to obtain individual pieces and place them in acid solution for a few seconds, right after submerge them in water.
- With a small rotor and different metals the rings will lose the rust look and feel to them created by the acid, we used the rotro for an hour.
- Polish each ring, I used a small dremel, it took about 1 hour for each ring to fill finished.
- Enjoy wearing your personlized piece of jewerly daily.