ASSIGNMENTS
- - Work through a git tutorial
- - Build a personal site in the class archive describing you and your final project
TOOLS and SOFTWARE
Git Bash
Brackets
Trello
During this week, we had a global class where we were asked to get familiar with Git and start building our own website. Then, learn how to keep updating the website with the documentation of the weekly assignments. Also, we discussed the different methods and tools that can be used to manage our projects and time.
To be able to understand Git, I attended a local workshop at QBIC Fablab which was led by my Edu-Tech Engineer colleague (Eng. Areej Abu Raed) from ibTECHar Digital Solutions which is a leading Qatari educational services company.
She introduced us to basics of the process of version control, how to make a clone of my repository for me to be able to locally edit it and how to start building my own website.
The agenda of the workshop was as follows:
- - Introduction to HTML and CSS.
- - Practical examples on the formats of HTML and CSS.
- - Finding website templates and using text editors.
- - Image resizing and optimization.
- - Git setup
Build Your Own Website
HTML and CSS
HTML (The Hypertext Markup Language): a commonly used language for developing websites. It provides the structure of the web page and organizing text, images and videos of the page.
CSS (Cascading Style Sheets): the language used to organize and describe the style/presentation of an HTML document by setting file structure and layout.
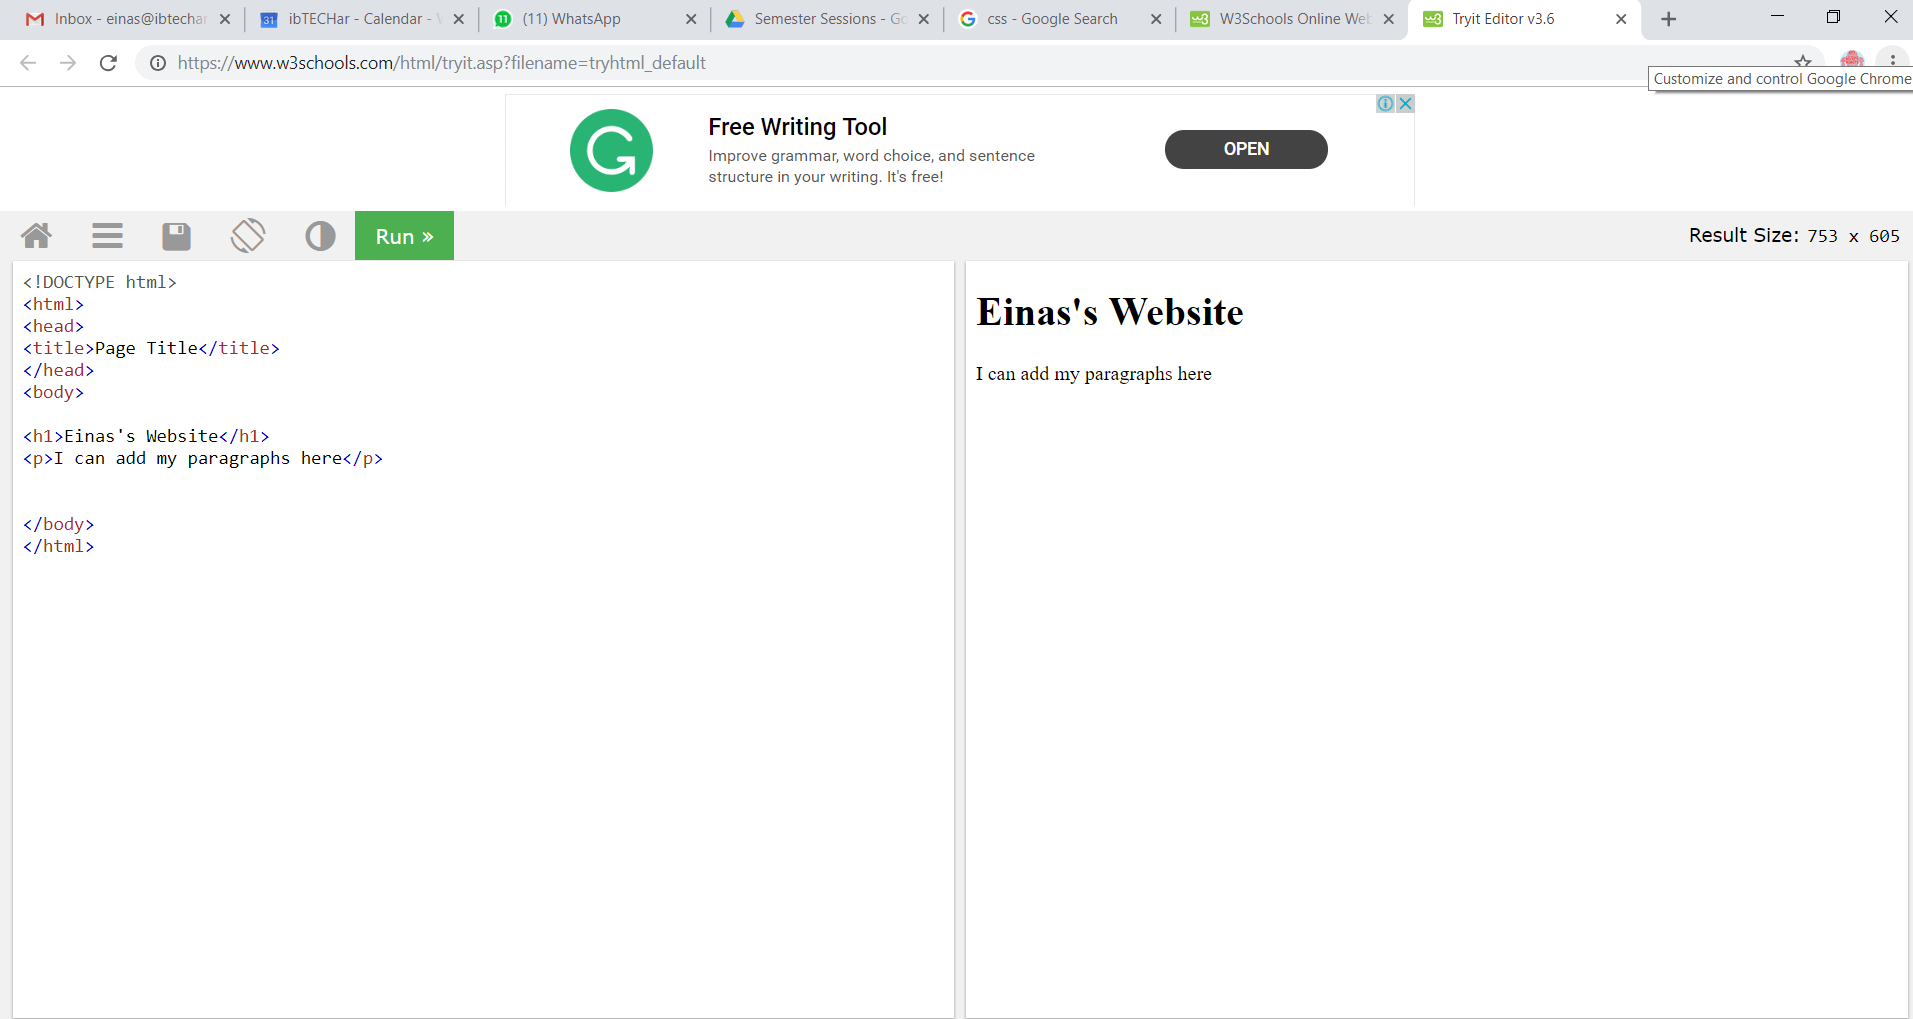
To understand the general format of HTML and adding CSS, I used the website w3schools.com to practice and get familiar with the syntax of HTML
W3schools is an open source web development website which contains lots of tutorials, examples and practices of languages such as HTML and CSS. The advantages of this website are its simplicity, simplified code and an online editor that is used to practice using these languages.
Choosing a Template
During the local session, we realized that a website can either be developed from scratch or through downloading a free template and editing it. Therefore, before making a decision we explored Bootstrap which contains a large collection of free HTML templates with different themes.
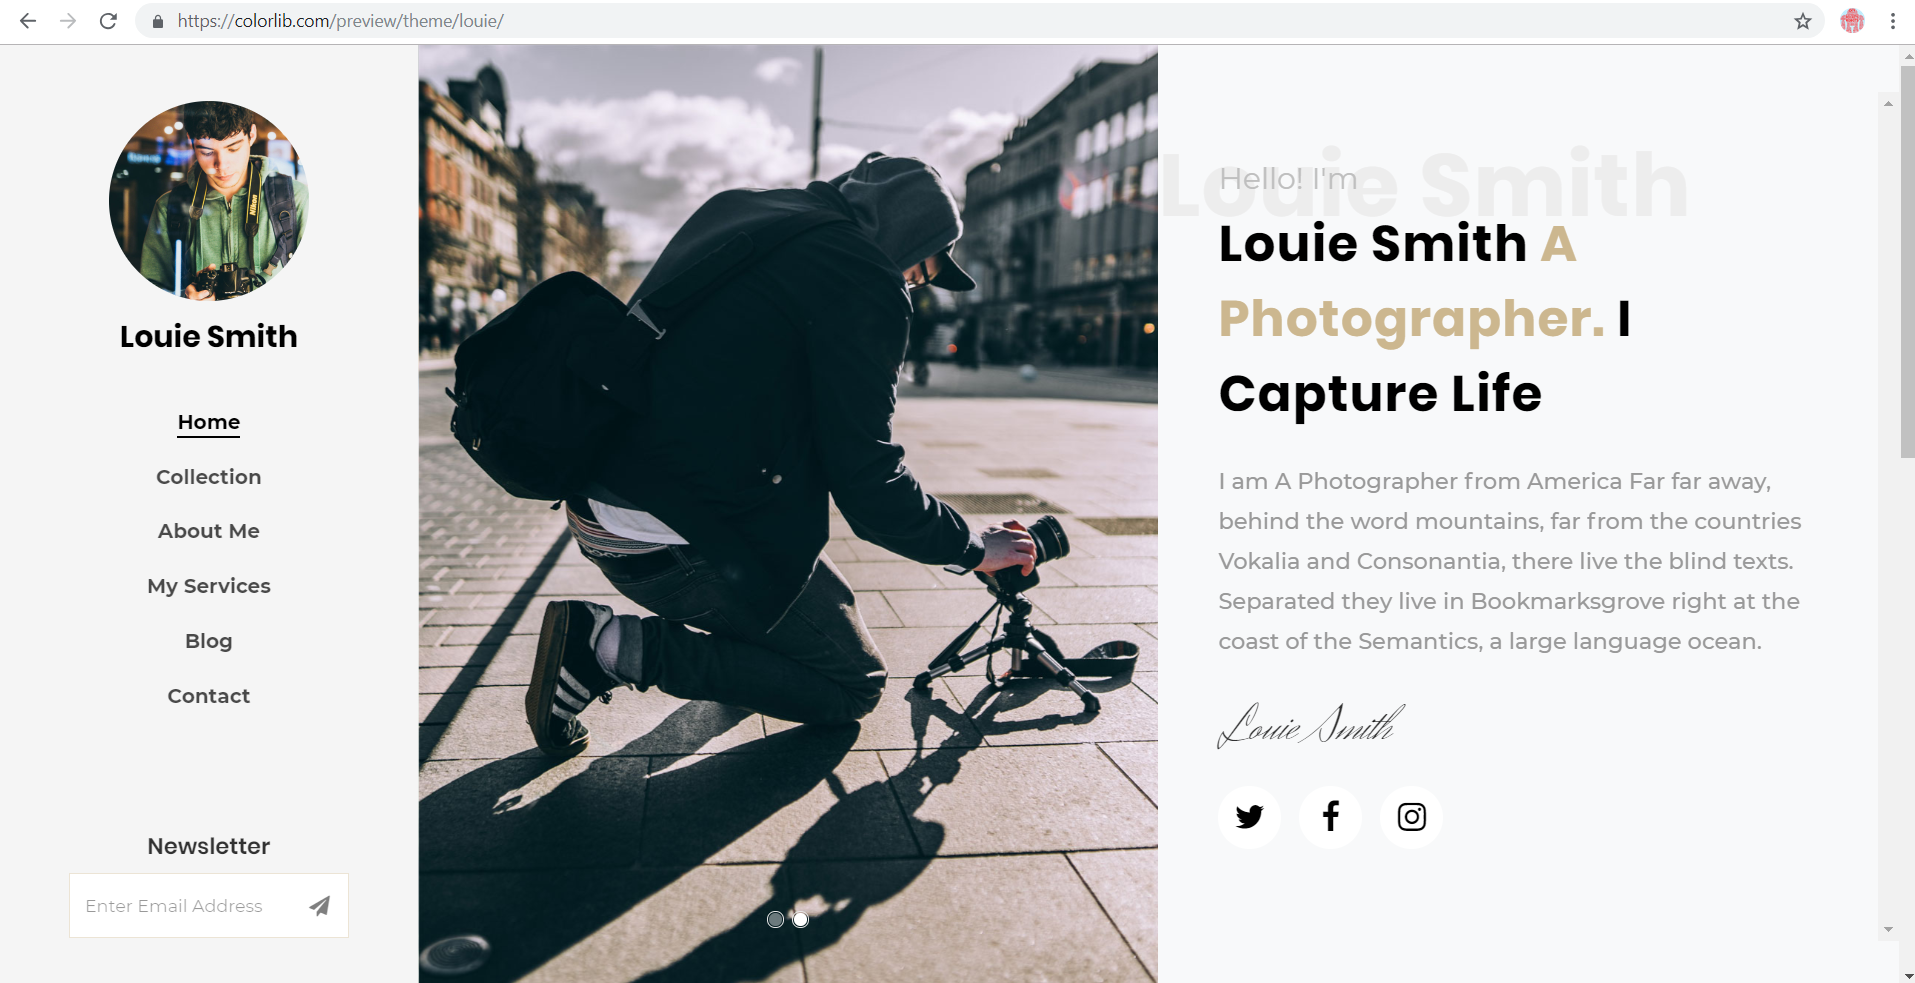
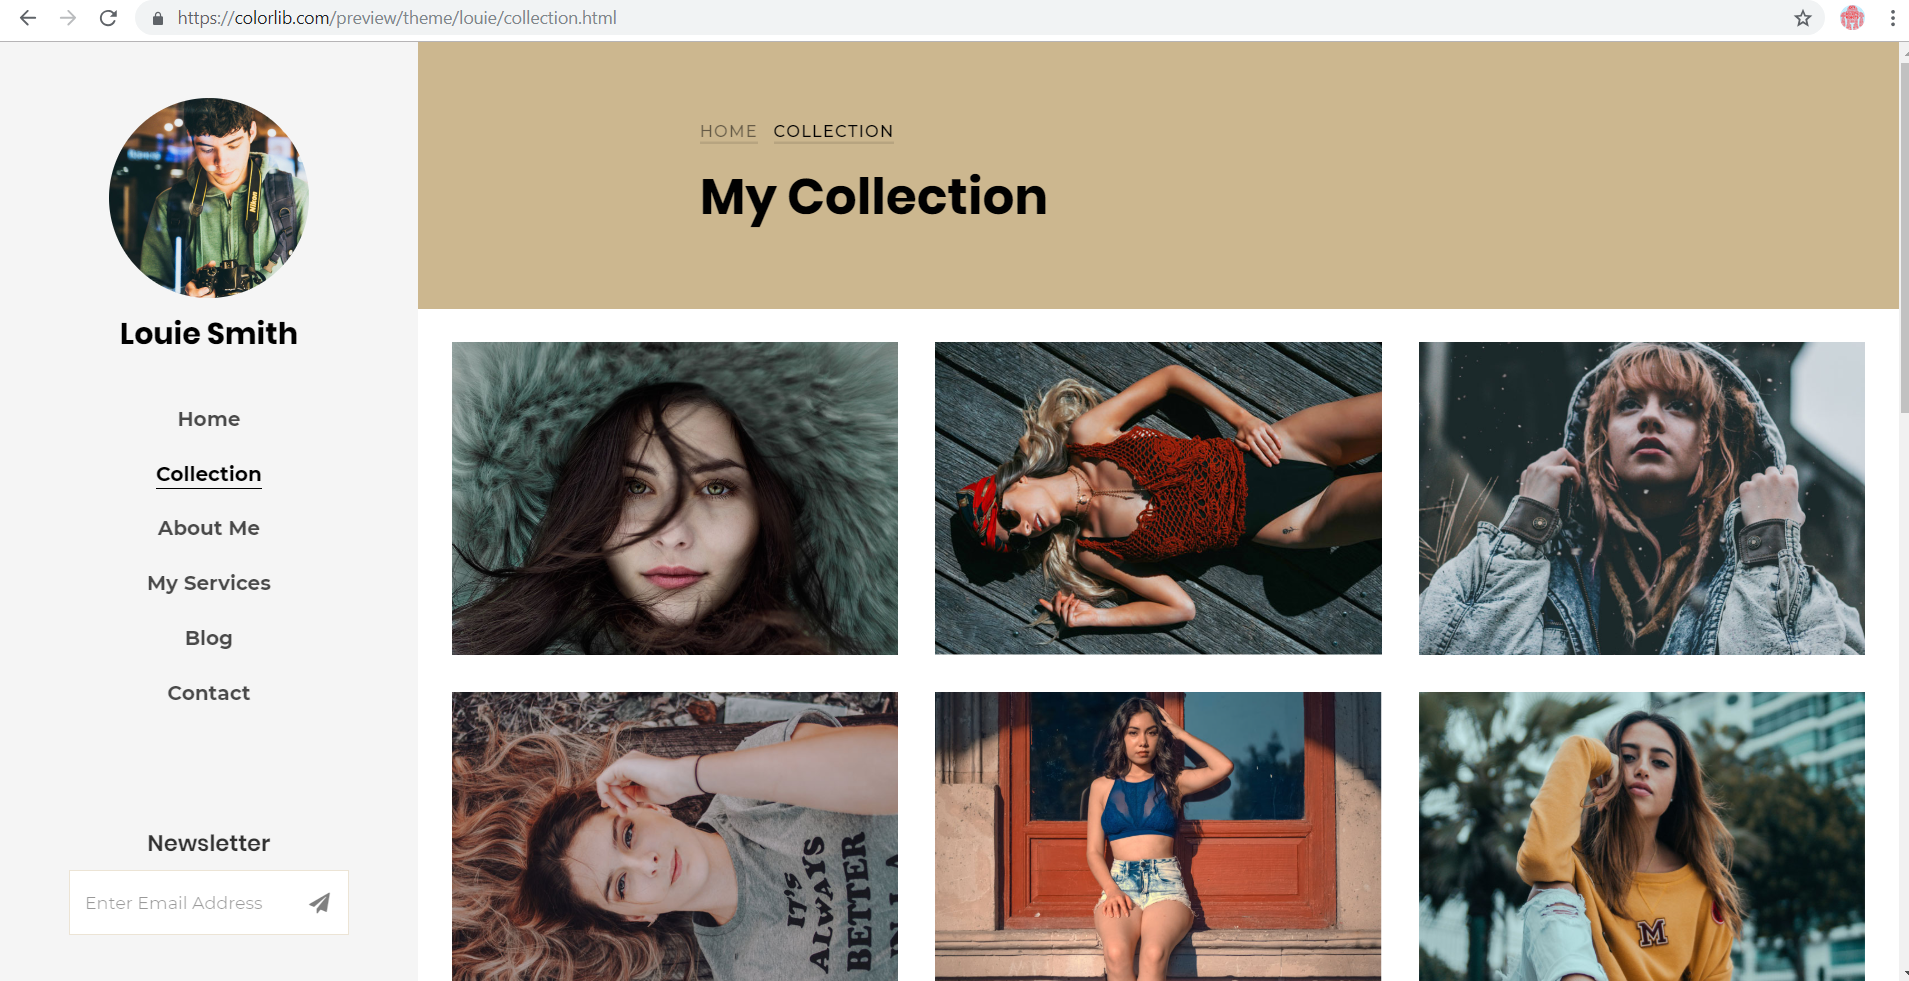
1- To choose a template that suits me, I went through lots of templates in Bootstrap and I didn’t find a template that suits me. Thus, I decided to go for Colorlib because I found some templates that I liked.
The template I chose (Shown in the pictures below) is a photography template which I felt is neat, simple and live. Therefore, I made sure that the website has all the elements I’m looking for in order to optimize the editing process. Finally, I downloaded this template from here.
Editing the Website
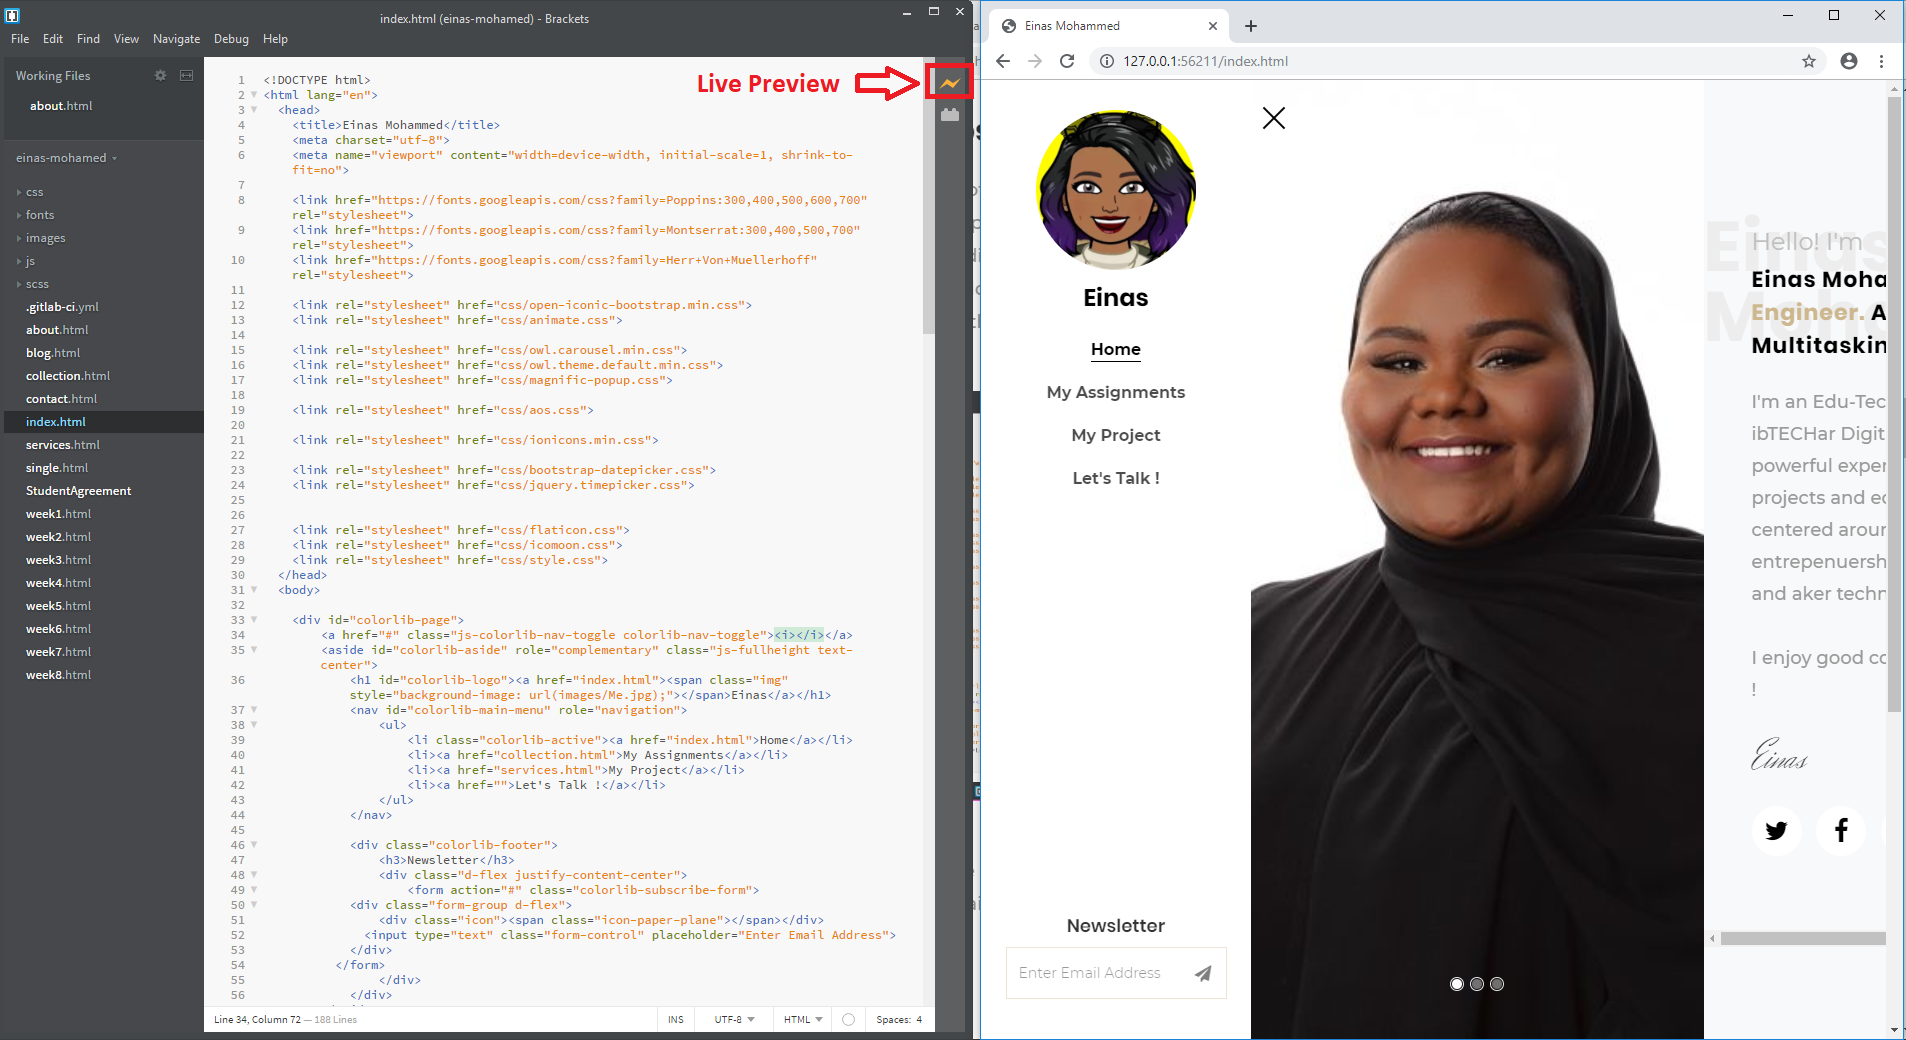
2- To edit the html code of my website, I decided to use Brackets which is a free text editor with an option to live preview the website while you are editing it. After downloading my template, I copied all the files inside the downloaded template folder into Brackets. This allowed me to view the different pages and edit the HTML code of the website template.
3- I started by editing the structure and elements of each page separately. I decided to go for four main pages/tabs in my website. These pages are :
- - Home
- - My Assignments
- - My Project
- - Get in Touch
Image Resizing
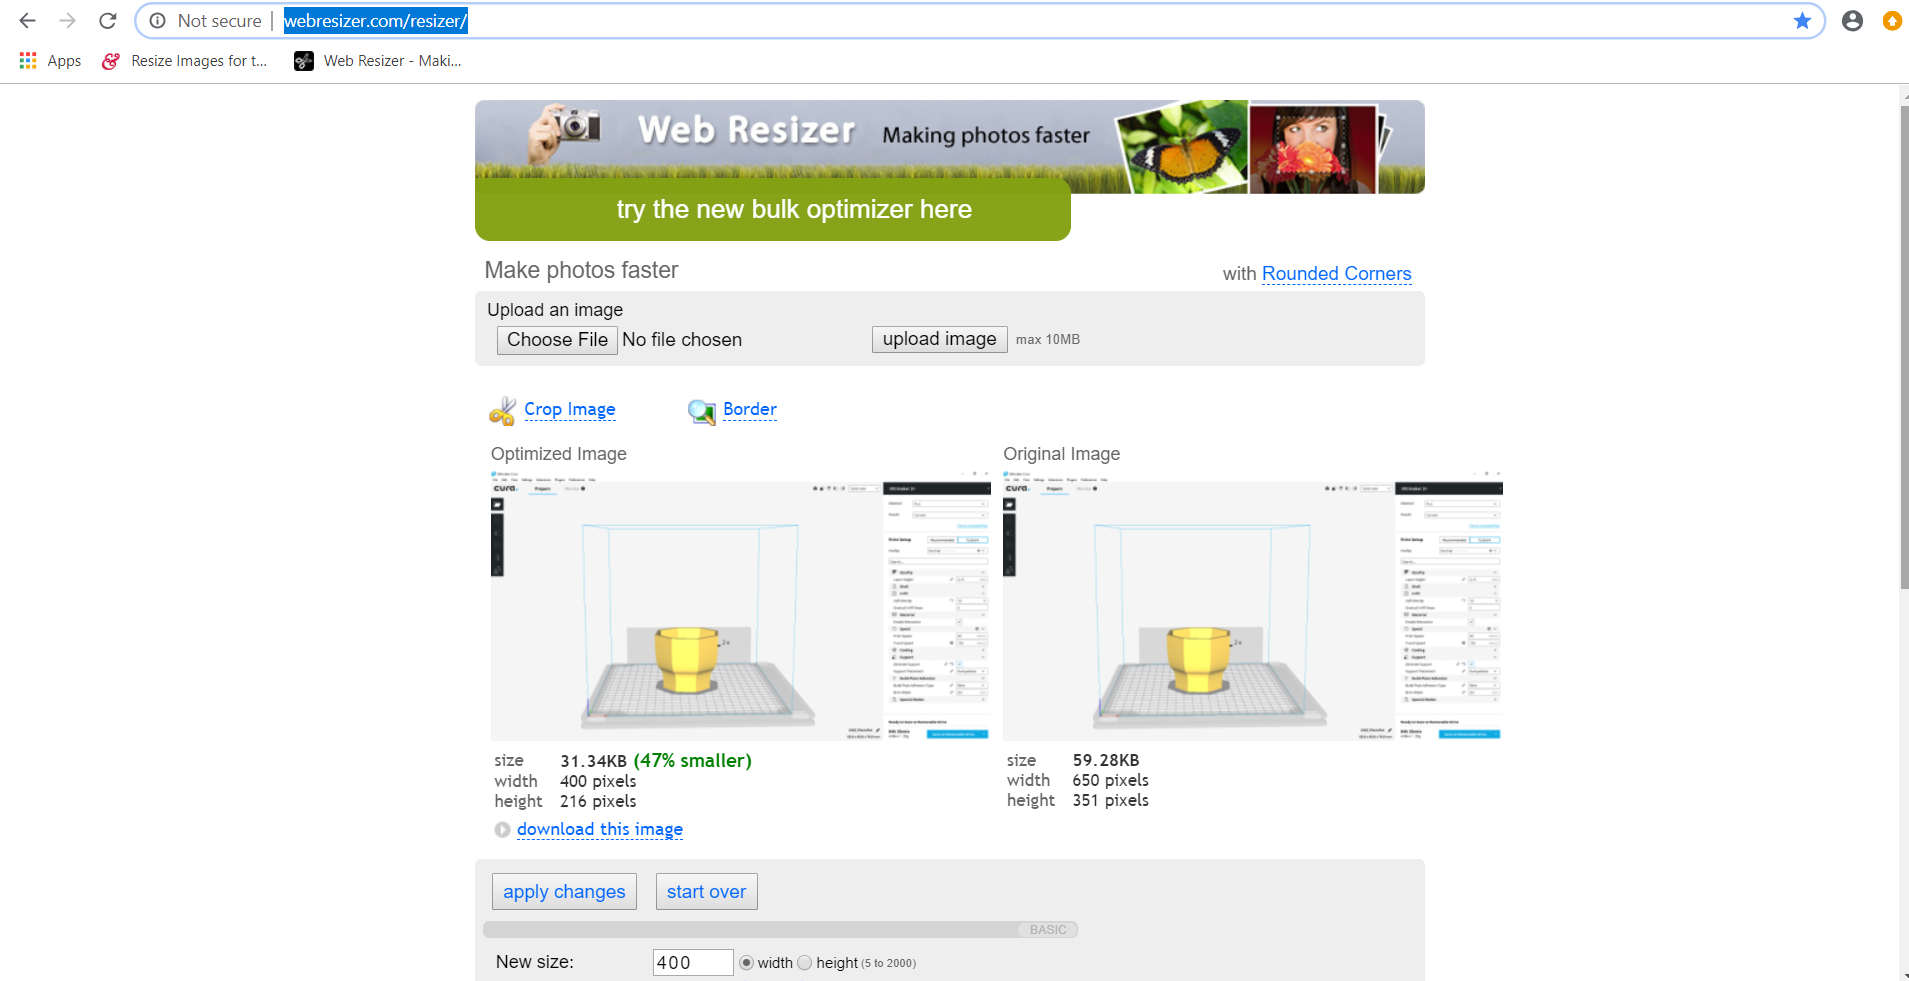
Image resizing means optimizing images to be used for a website because large images can slow down the preformance of the website which reduces the quality of the user experience. It is recommended that simple images should be 100 KB for a better optimiezed performance.
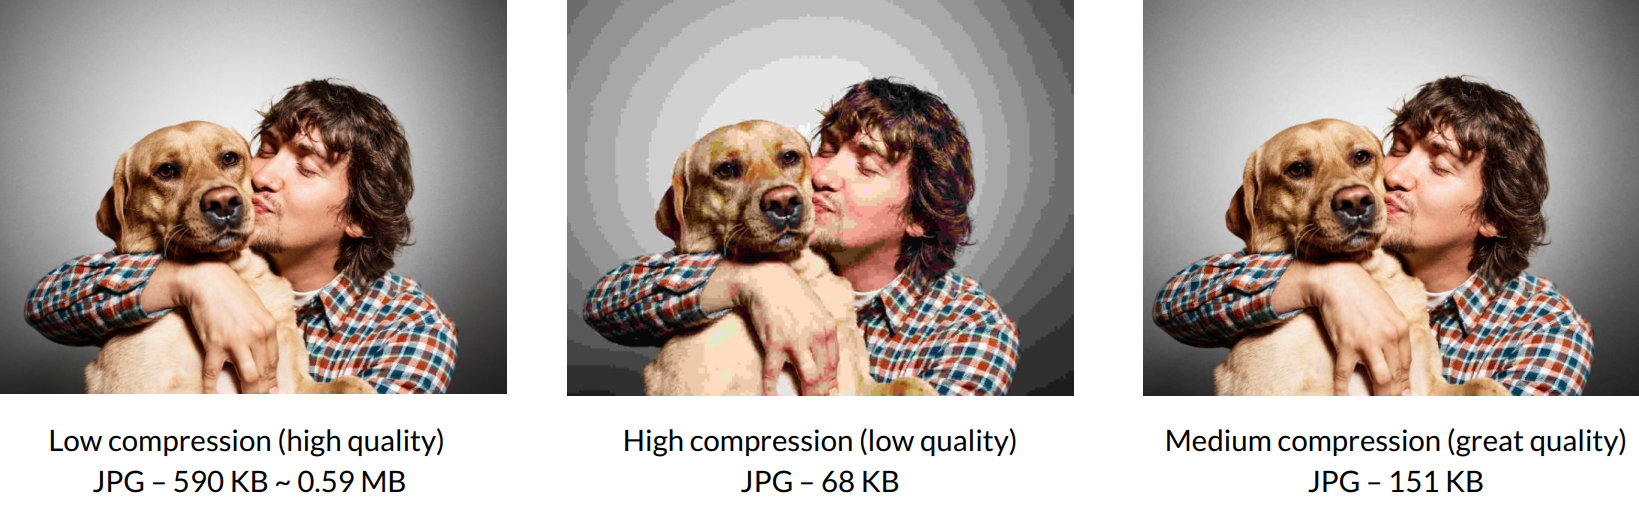
Therefore, I used Webresizer.com which is an online image optimization tool that it is easy to use and there is not need to download it. I mainly used it to resize images and screenshots that are simple and don't have a lot of details.
Working with Git
To understand the idea of version control, git setup and clone my repository, we went through the necessary steps during the local class. These are following steps I followed:
Setting Up Git
- 1- First, I downloaded Git Bash, then I went to Gitlab.fabcloud and logged in to my accout (Provided by Fab Academy) to be able to link my local workspace to GitLab.
- 2- I went to my personal project page and created a new configuration file. I clicked the "+" icon > New file > I chose ".gitlab-ci.yml" as template type and "HTML" as a template > Commit changes.
- 3- I opened Git Bash and typed the follwing lines in order (as shown in the image below):
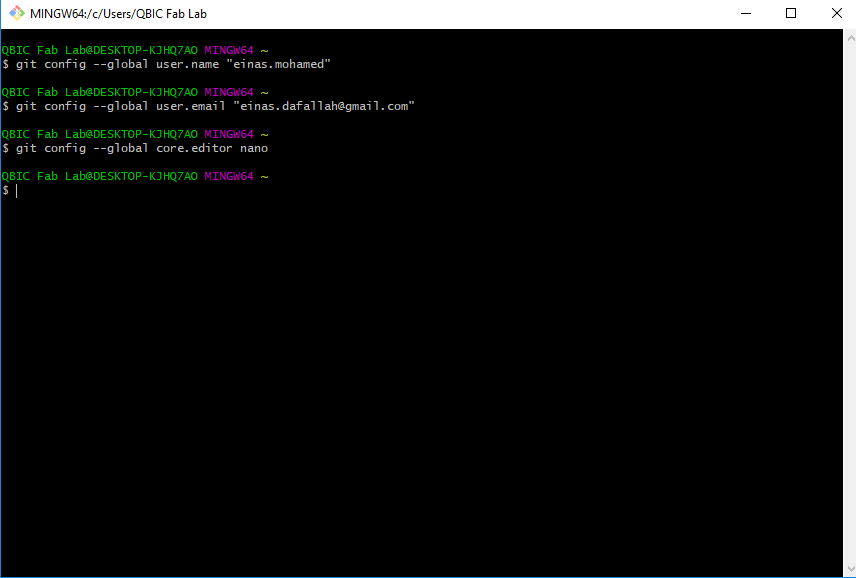
- a- Configured my username
git config --global user.name "your username"
- b- Configured my email
git config --global user.email "your email"
- c- Set my core editor in Git to Nano
git config --global core.editor nano
- 4- Now, I need to generate and configure an SSH key to be able to establish a secure connection in Git operations from my local machine.To do that I followed the following steps:
- a- I typed the following command to generate the SSH key
ssh-keygen -t rsa -C "your email"
- b- Pressed the Enter key to confirm for the file in which to save the key.
- c- Chose yes for the overwite.
- d- Entered and re-entered a passphrase (Make sure you don't forget the passphrase you entered)
- e- Accessed the public part of the key by typing
cat ~/.ssh/id_rsa.pub
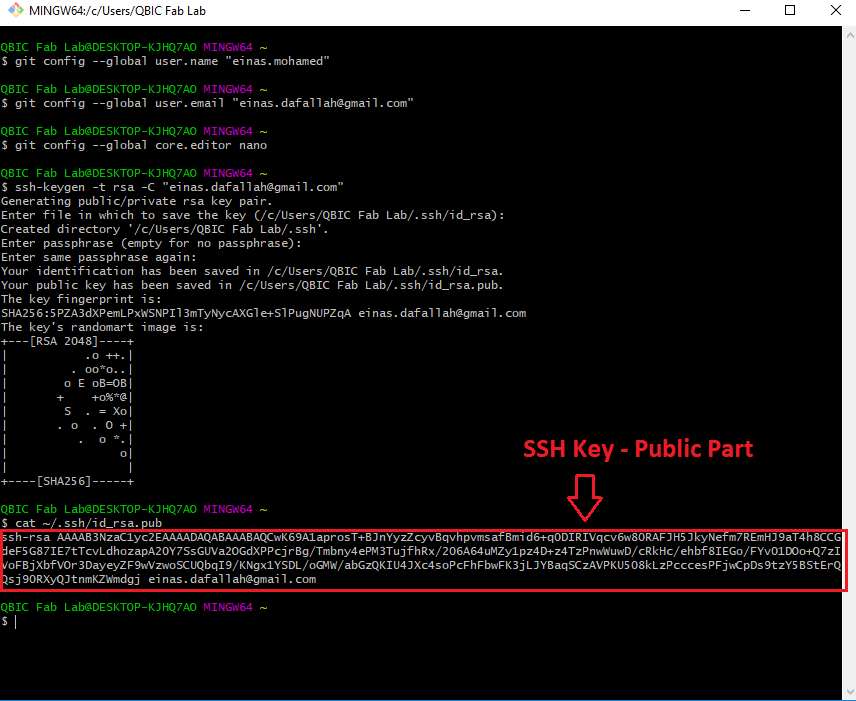
- f- I copied the public SSH key and went to my project page in git and then Profile drop down menu > Settings > SSH Key from left sidebaer.

- Then I pasted it in the "Key" field and pressed "Add Key"
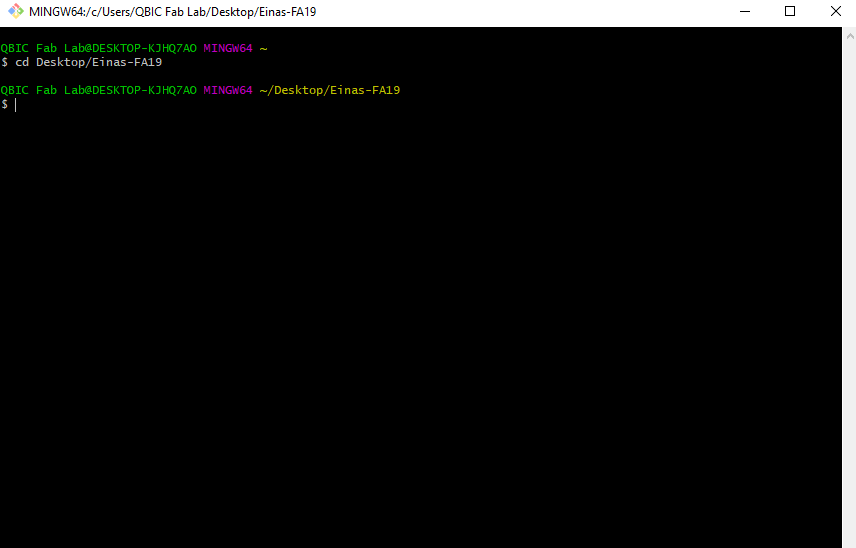
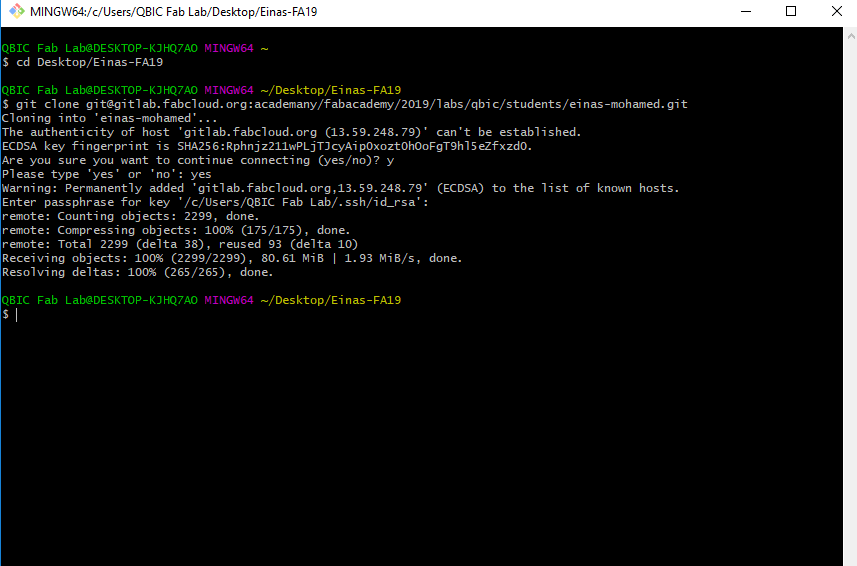
- 4- Now, I started working on cloning my repository to download a clone folder with all my git files on my local workspace, then it will be connected with my remote repository on Git.
To do that, I created a new folder in my desktop and named it "Einas_FA19".
- 5- Then, I opened Git Bash and accessed the folder I created using the command
cd Desktop/Name of the Folder
- 6- I went to my project/repository page in Git and copied the link inside my name branch.
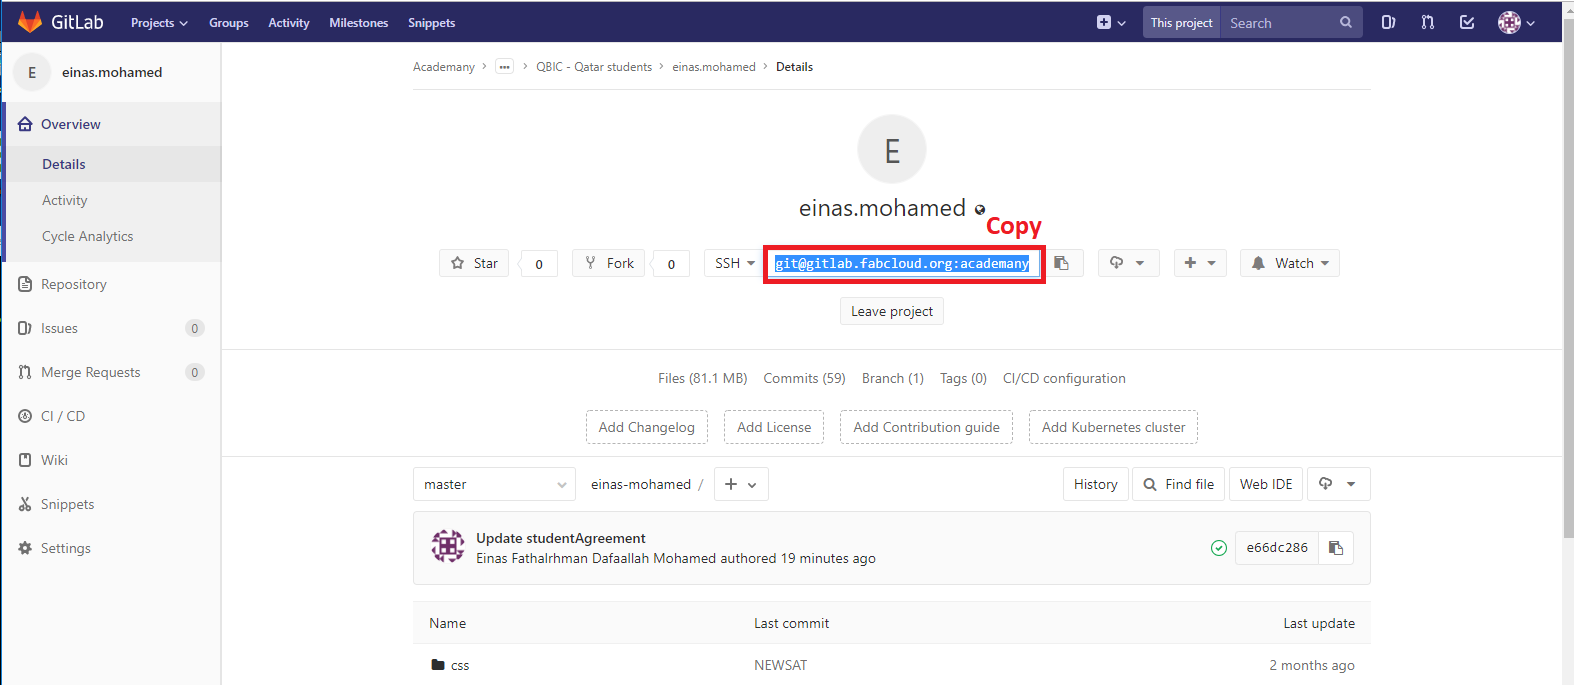
Then, in Git Bash, I typed the following command to create the clone folder.
git clone "Paste the copied link"
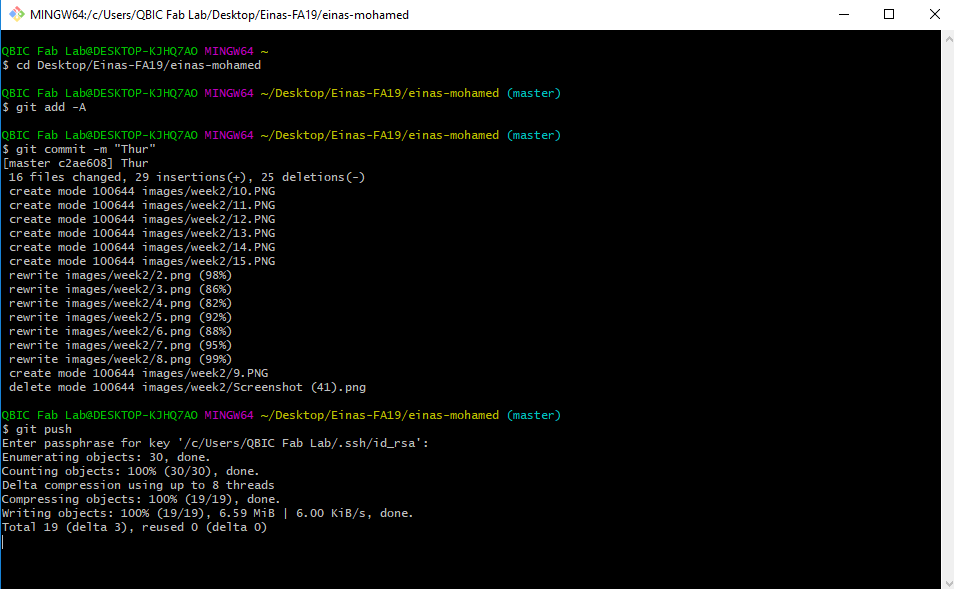
Uploading Files
Now that I was done with setting up a local working directory/workspace, I can copy my template files in the cloned folder and edit my website files in the local workspace using Brackets.
However, I need to do a certain process to upload the files to my remote repository so the website can be published and be available for public.
This process will be repeated (in the same order) everytime I change or add something to my website.
- a- Access you local directory folder:
cd "The path where the folder is saved"
- b- Add all the filed in the local directory:
git add -A
- c- save the files and add a title for the update:
git commit -m "Type any text"
- d- Push all files to Git repository:
git push
Project Managemnt
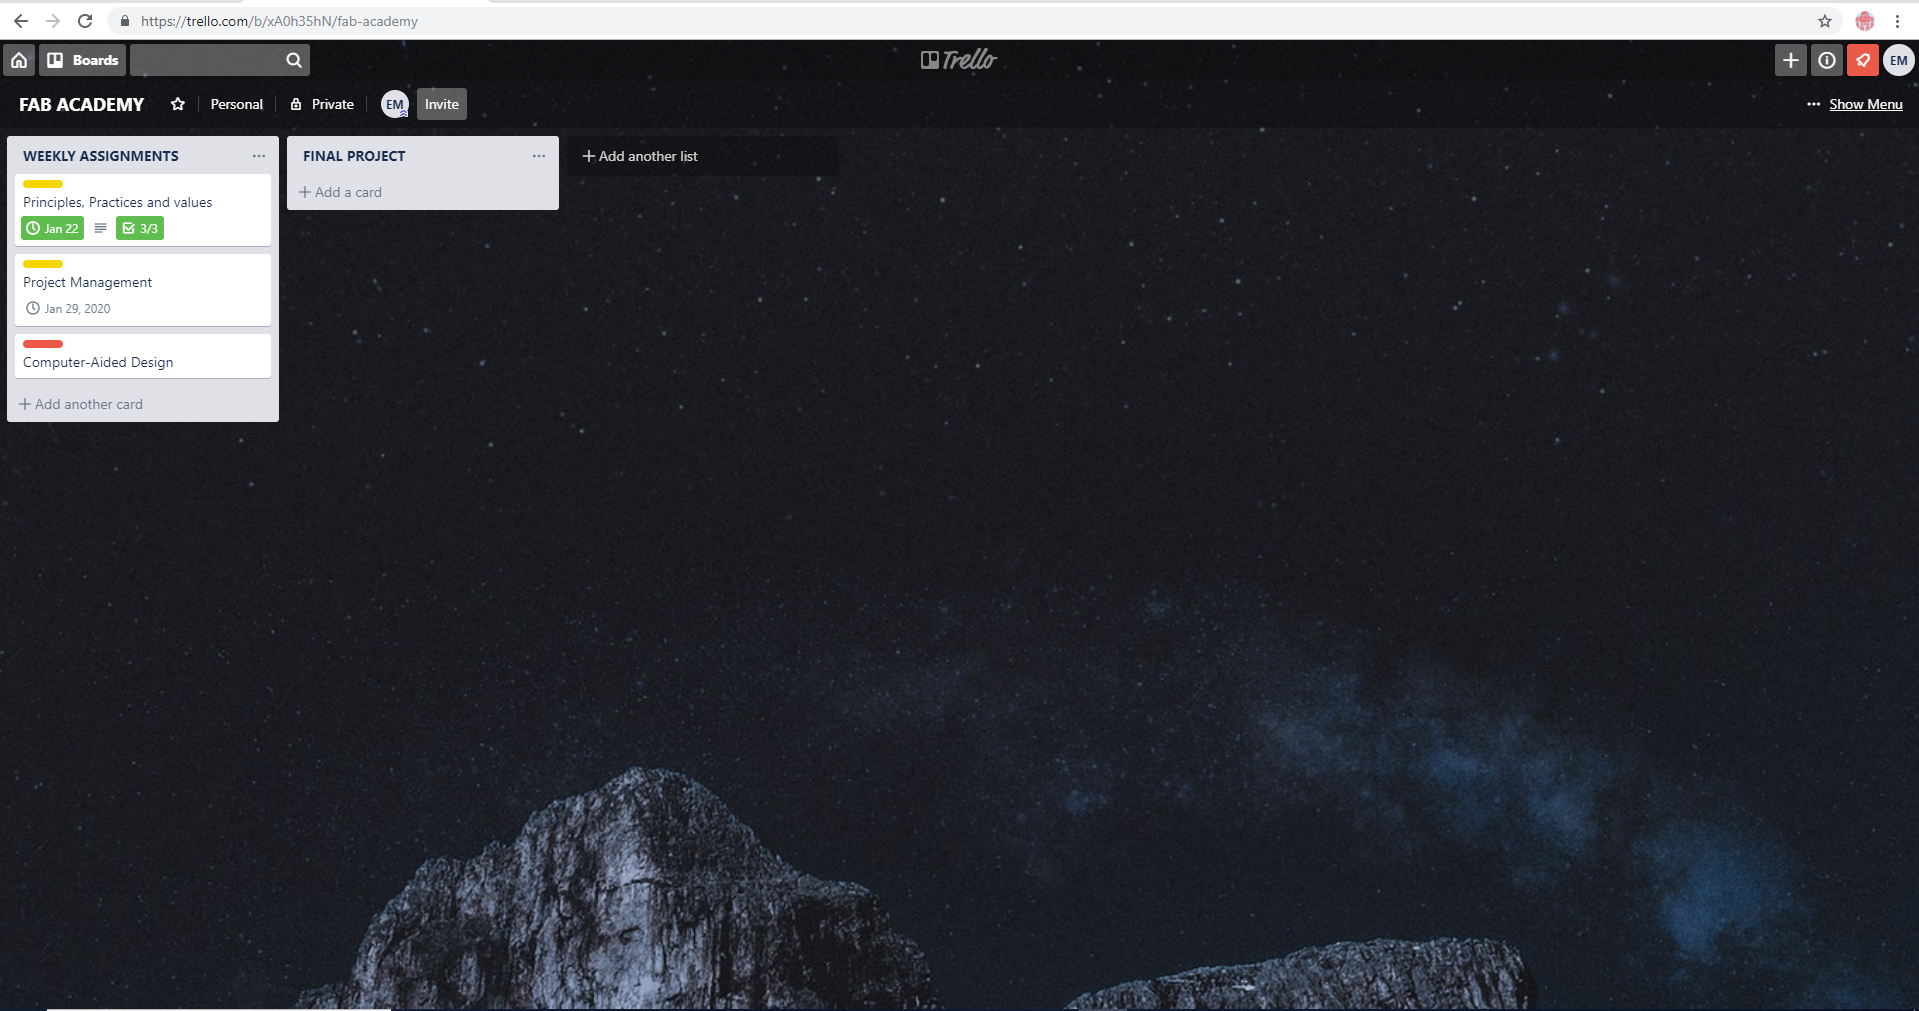
To track my progress in the different assignments of the Fab Academy and my final project, I decided to use Trello because it's simple and I'm familiar with it.
Trello is a software that helps in organzing projects, add tasks, due dates and track progress. It's a very flexible tool.
Therefore, I wend ahead and added a new board for Fab Academy, and inside that board I will keep on adding upcoming assigments and the tasks I need to complete so I can easily track my progress and get notifications whenever I'm falling behind.
The image below is a screenshot of my Fab Academy board.