
Project developement
Design and produce something with a digital fabrication process (incorporating computer-aided design and manufacturing) not covered in another assignment, documenting the requirements that your assignment meets, and including everything necessary to reproduce it. Possibilities include (but are not limited to) composites, textiles, biotechnology, robotics, folding, and cooking.
Okay, this week I want to use the maximum of my time to work on my final project, then I have decided to try something new but that seems not to tricky !
Then I have decided to try something with the thermoforming machine ! In order to use it I need to machine a "mold", that is my digital process for this week.
Basically a thermoforming machine is a machine that will heat a plastic sheet, then with an aspiration and an elevating system the mold will move up to the plastic sheet and the it will take the form of the mold !
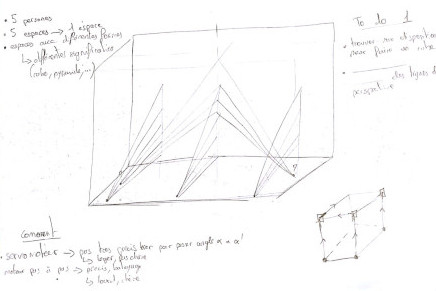
Since the begining of the Fabacademy, we have understand that we will need something to hold the electronics composents before we sold them. Then Adel our instructor had the Idea to create one using plexiglass and 3D print.
I found the idea really nice and I wanted to create my own version ! I wanted to try to mix utility and design ! This is my first sketch of the concept :
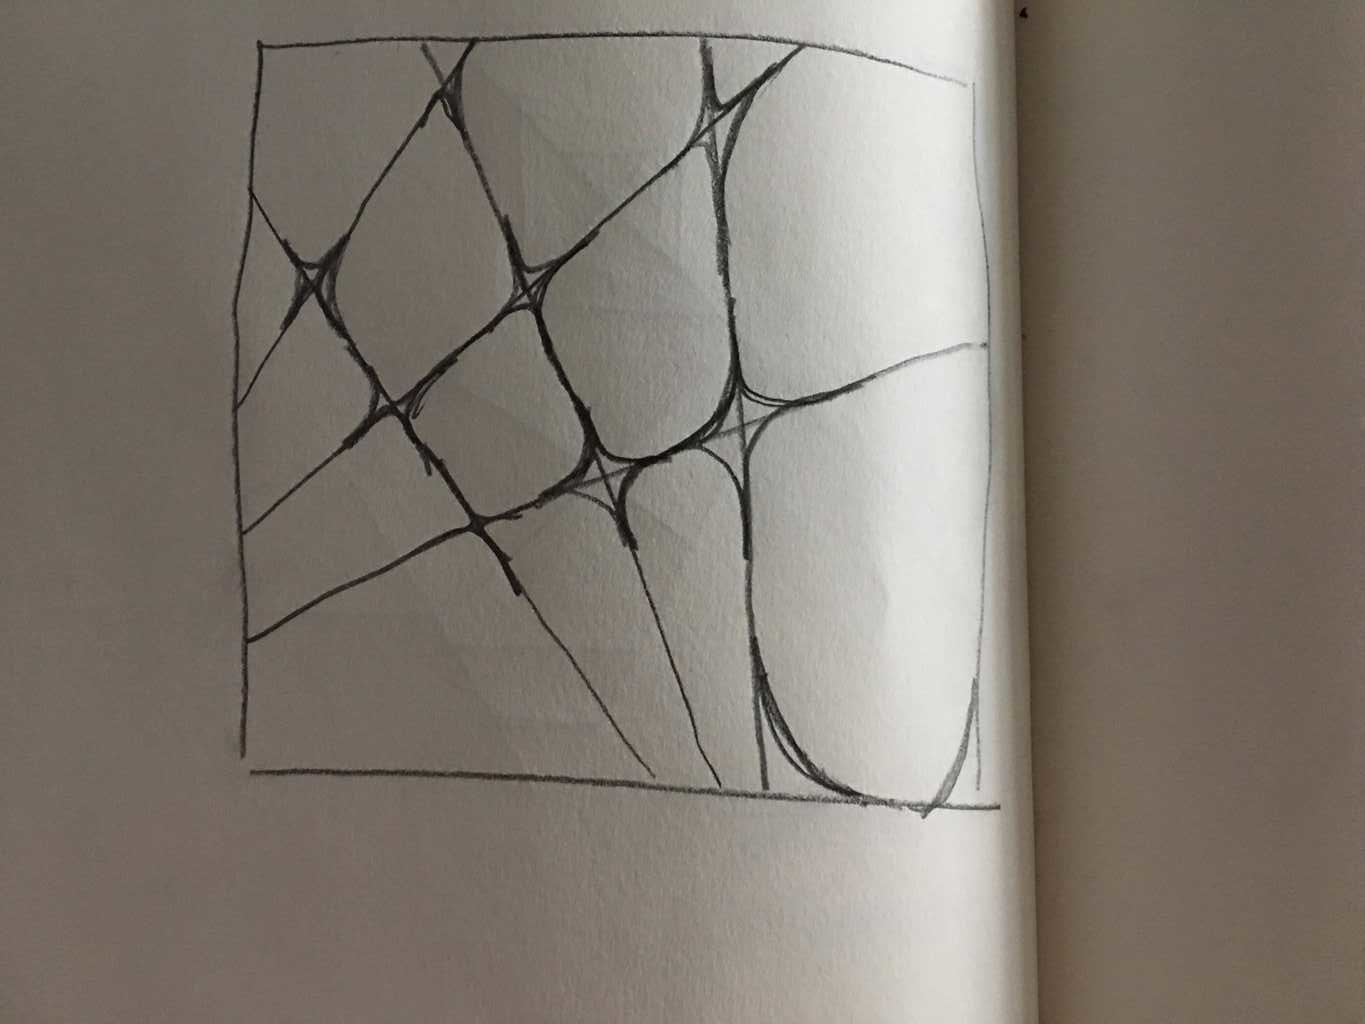
With this type of design I can easely adapt different size in order to put different size of components in it.
Before starting the modelisation I need to know the rules for the thermoforming machine. For exemple I can not have 0° angle with the vertical axis. Here a very good link explaining all of the rules with thermoforming.
Let's start to modelise !
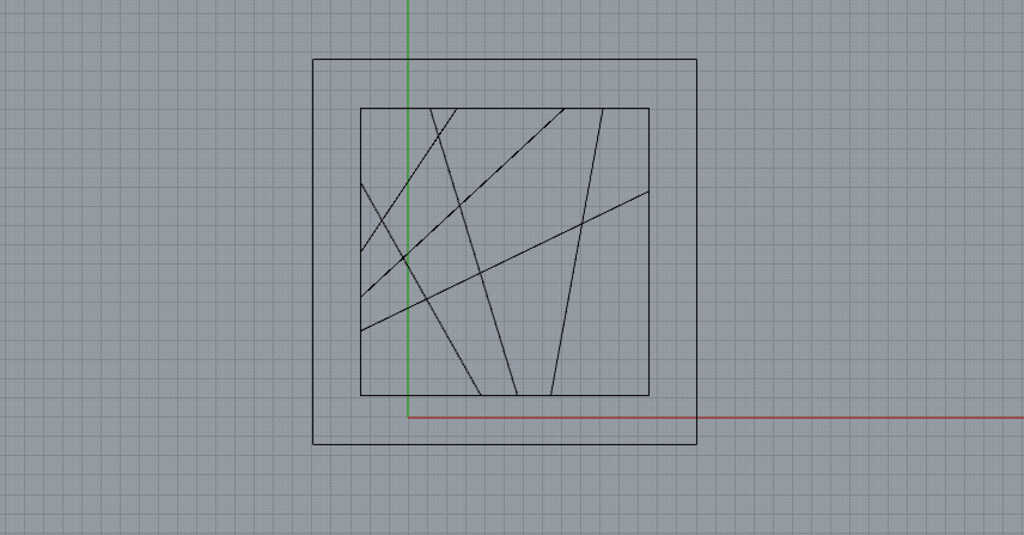
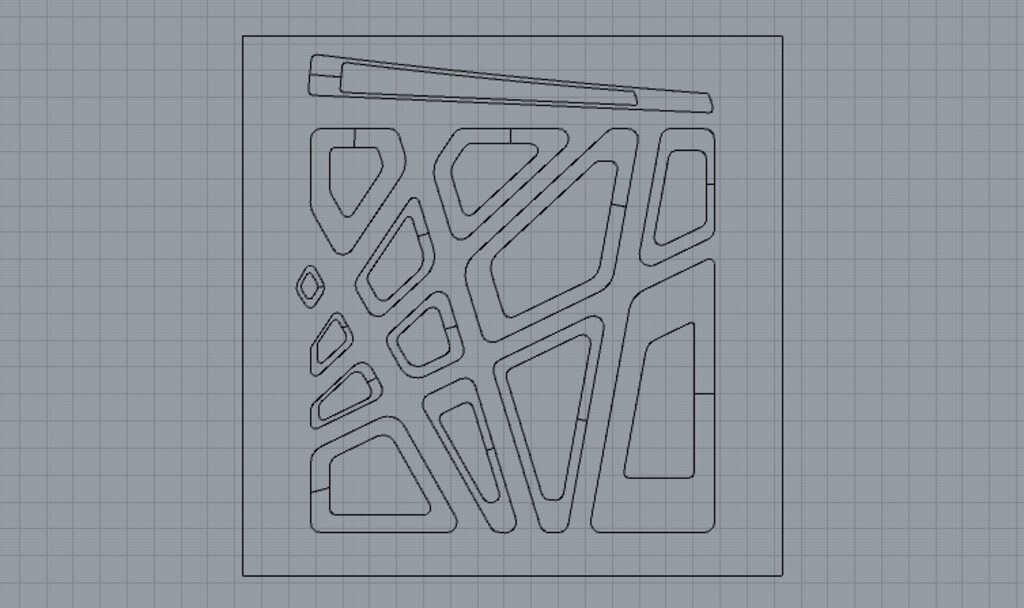
The first thing that I have made is to recreate my sketch into Rhino 6. I have used the rectangle and line function in order to make it.
I have also added another square around my model, that is the limit of the thermoforming machine.
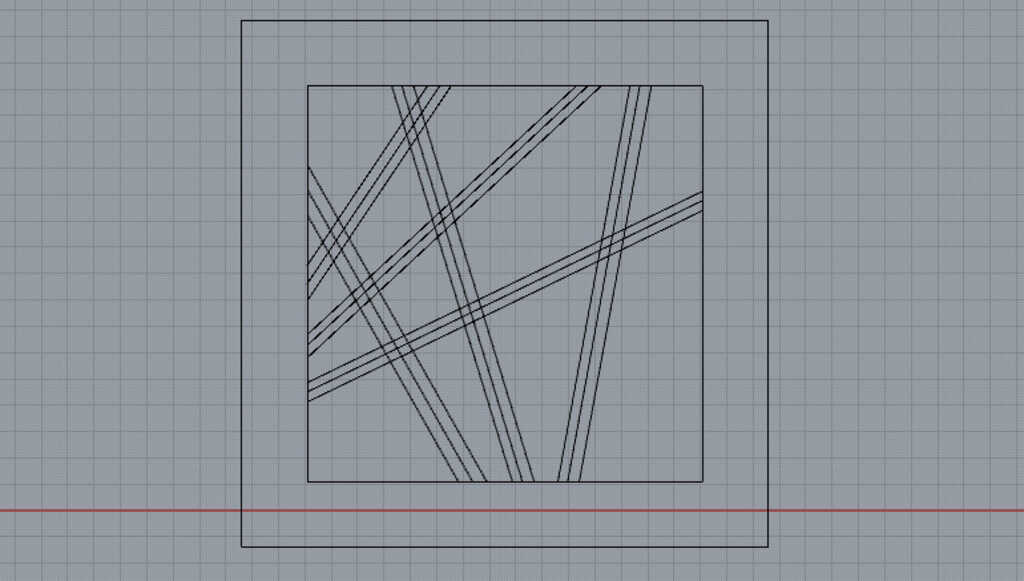
In my final object I want to be able to write some things like the components names or values. Then I need to add an offset beetwen the different compartments.
In order to do this, I have added 2 more lines parallel to every lines that I had made.
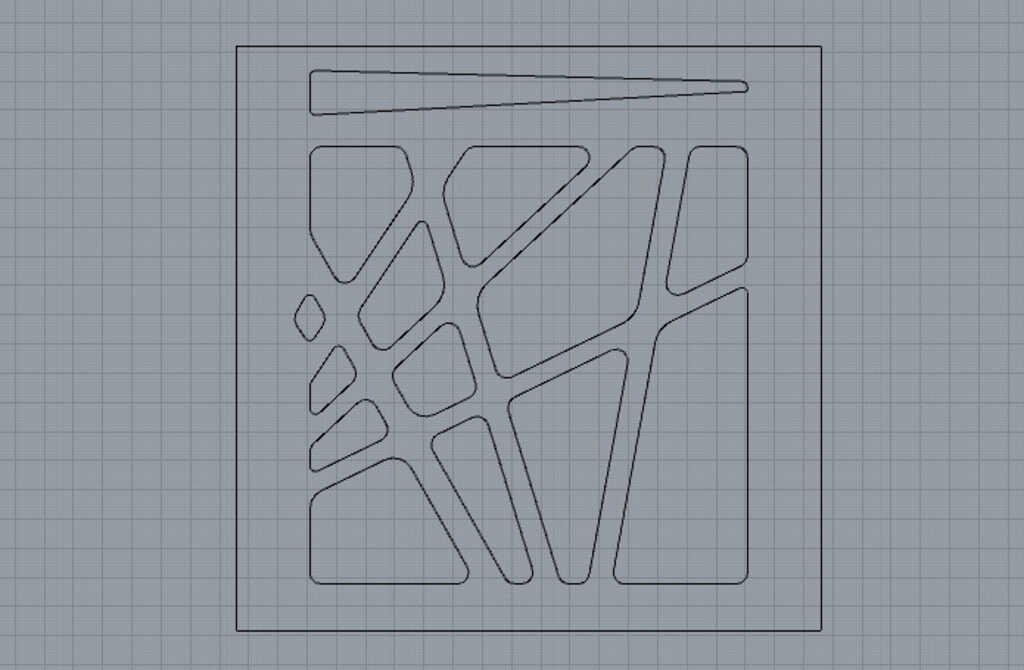
Now I just have to create some fillets beetwen them. And to delete all of the other construction lines that I had made. And this is the result :
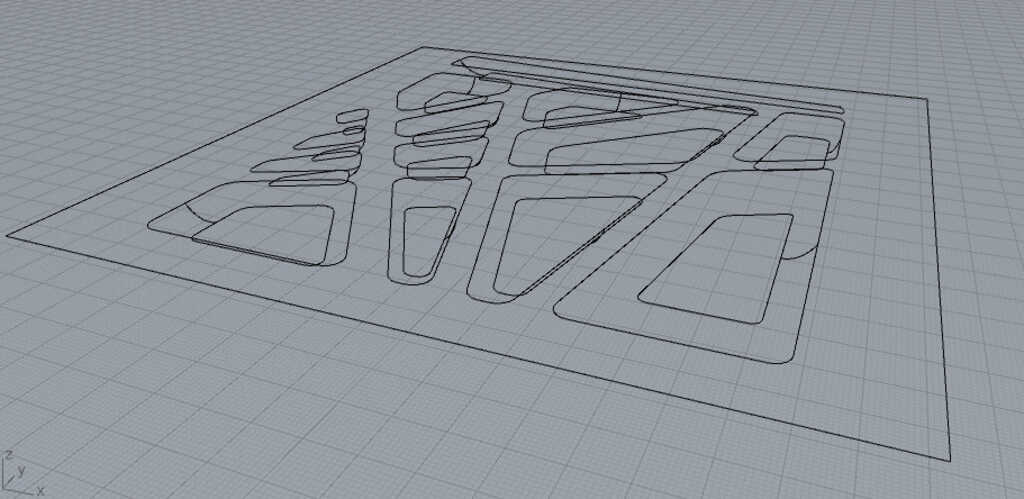
Now I have my 2D model, but what I want is a 3D models, then I will be able to control all of the curvatures.
In order to pass into a 3D models I will use the Sweep2 function. This function will create a surface by taking in paramters two rails and one or more curves of transversale section. My first rails iare all of the closed curves already made. Then I need to create the seconds rails in other plan (deeper).
To do this I used the 2D scale function in order to duplicate smaller compartments. Basically they will be the bottom of my object. And I have moved them by to 5mm under to top of the model.
Then I have added the curves of transversal section.
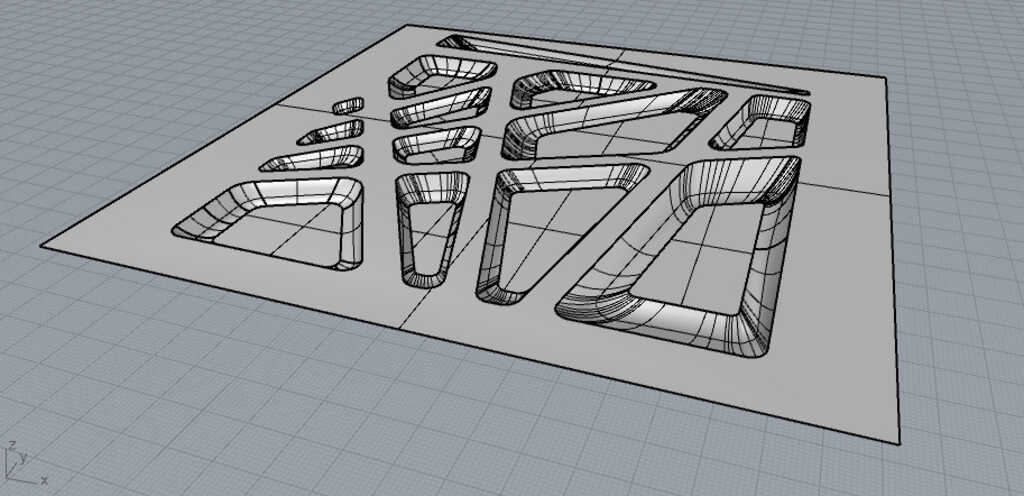
In order to create the surfaces I used two differents functions.
The first one is called planar surface. It take in parameters some closed curves on a same plan. I used this function in order to make all of the planar surfaces of the model.
The second function is Sweep2. I already talk about it but this one of th emost powerful tool of Rhino. It allow you to create any kind of surfaces by taking in parameters 2 rails and some transversales curves. I used this function in order to create the "fillet" beetwen the different planar surfaces.
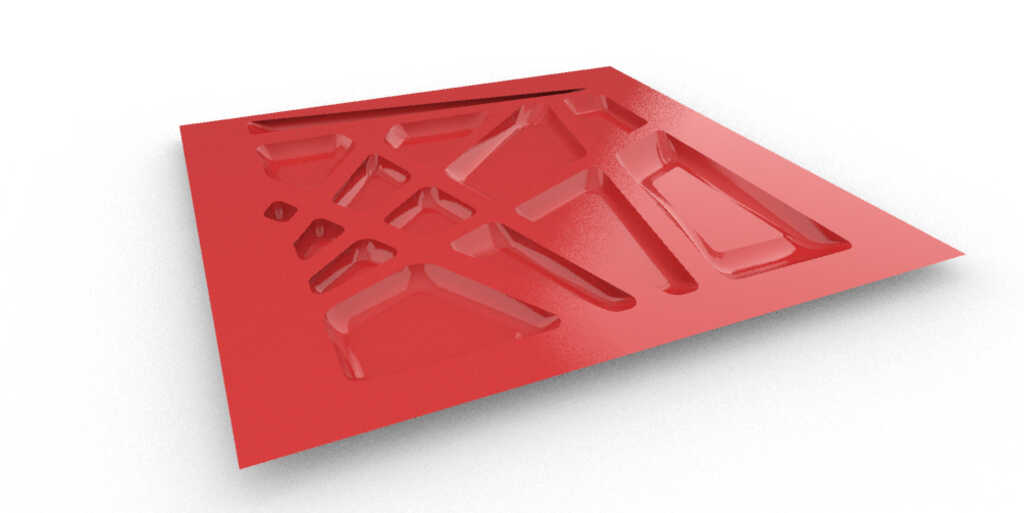
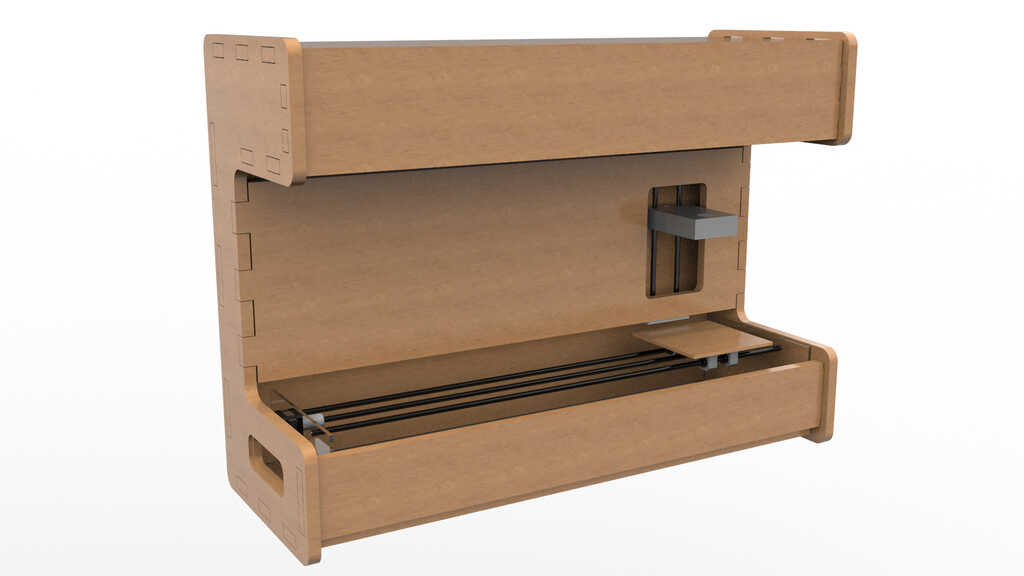
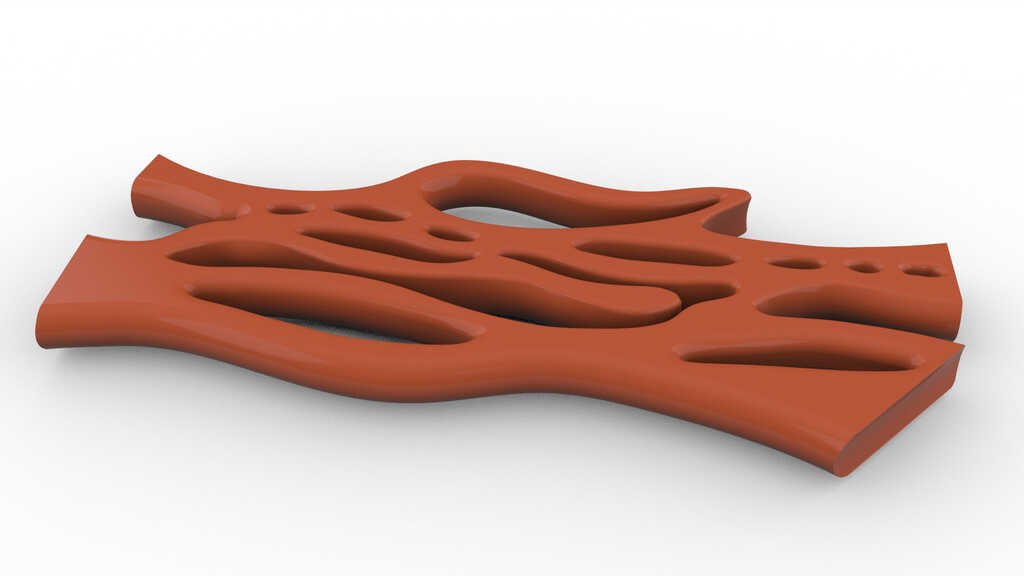
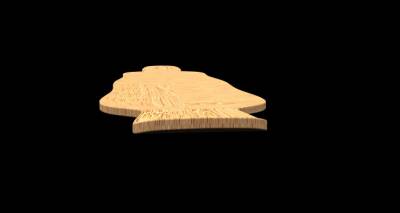
And this is a little render of what it should look at the end of the process.
For this part I will not explain all of the details of how ti setup the machine and how to create the Gcode. The method is exactly the same as the Molding and Casting week.
In order to make the rhough toolpath I used this parameters :
| Diameter | depht | step-over | tool speed | Speed |
|---|---|---|---|---|
| 6.35 mm | 3 mm | 75% | 6009 tr/min | 40 mm/s |
And for the finish toolpath I used this parameters :
| Diameter | depht | step-over | tool speed | Speed |
|---|---|---|---|---|
| 6.35 mm | 3 mm | 15% | 6000 tr/min | 40 mm/s |
I used a straight bit of 1/4" and the I have choose this parameters in function of the materials that I will mill.
In fact, I chose the mill my mold into MDF for 2 reason :
The first one is because the MDF is very easy to mill metarial. Basically, it is made with agglomerate wood dust and some glue. Instead of other kind of wood like plywood, there is no fiber and then no sense of the wood. Then the result will be better with a lot less parameters to setup.
The other reason is because the MDF is a very porous material. The thermoforming machine have vaccum system that will suck the air through the material. If I had not use MDF I should have drilled through the material to let the air through.
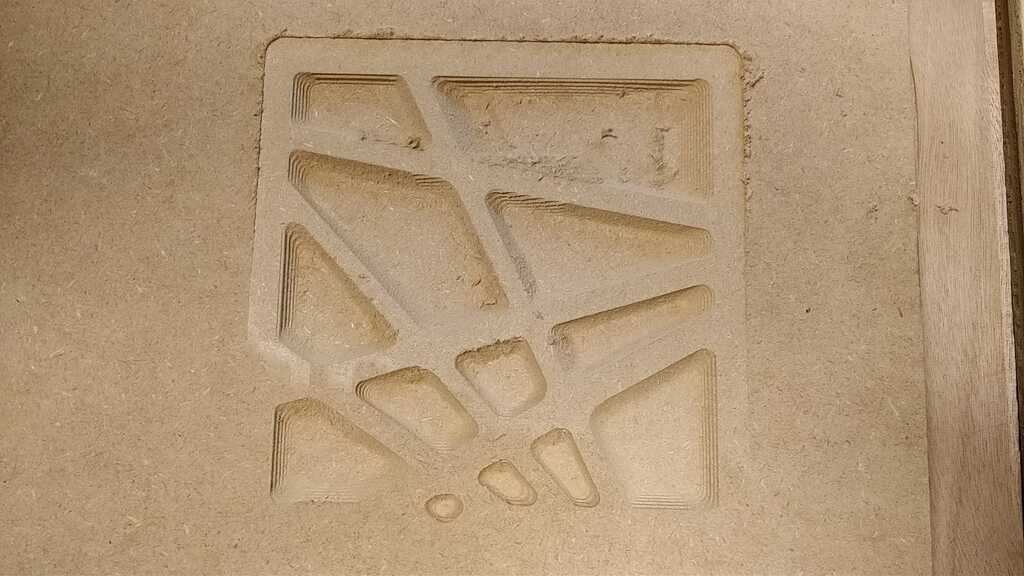
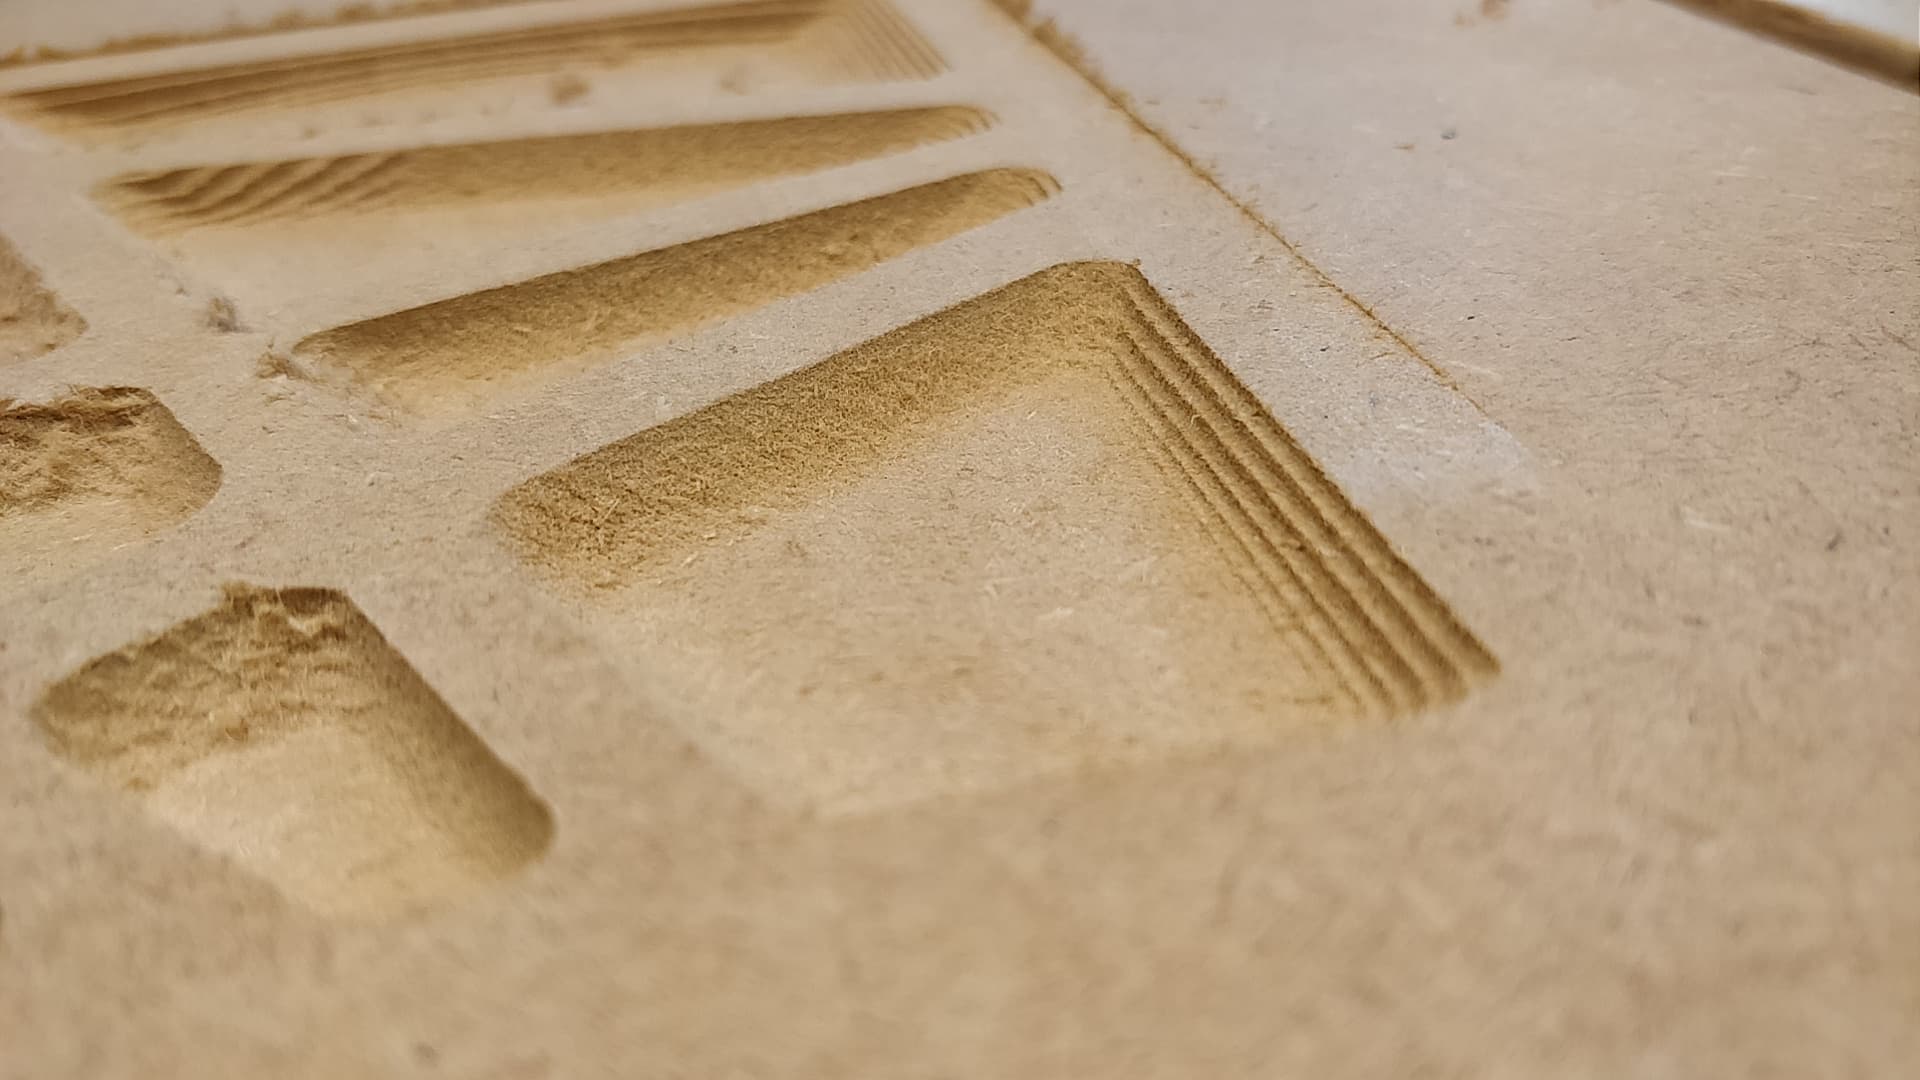
As you can see, the result is not very very good but is not so bad too.
We can clearly see the mark of the bit into the wood. The problem is coming from the fact that there is a lot ot 3D sections that are almost orthogonal to the system of the CNC.
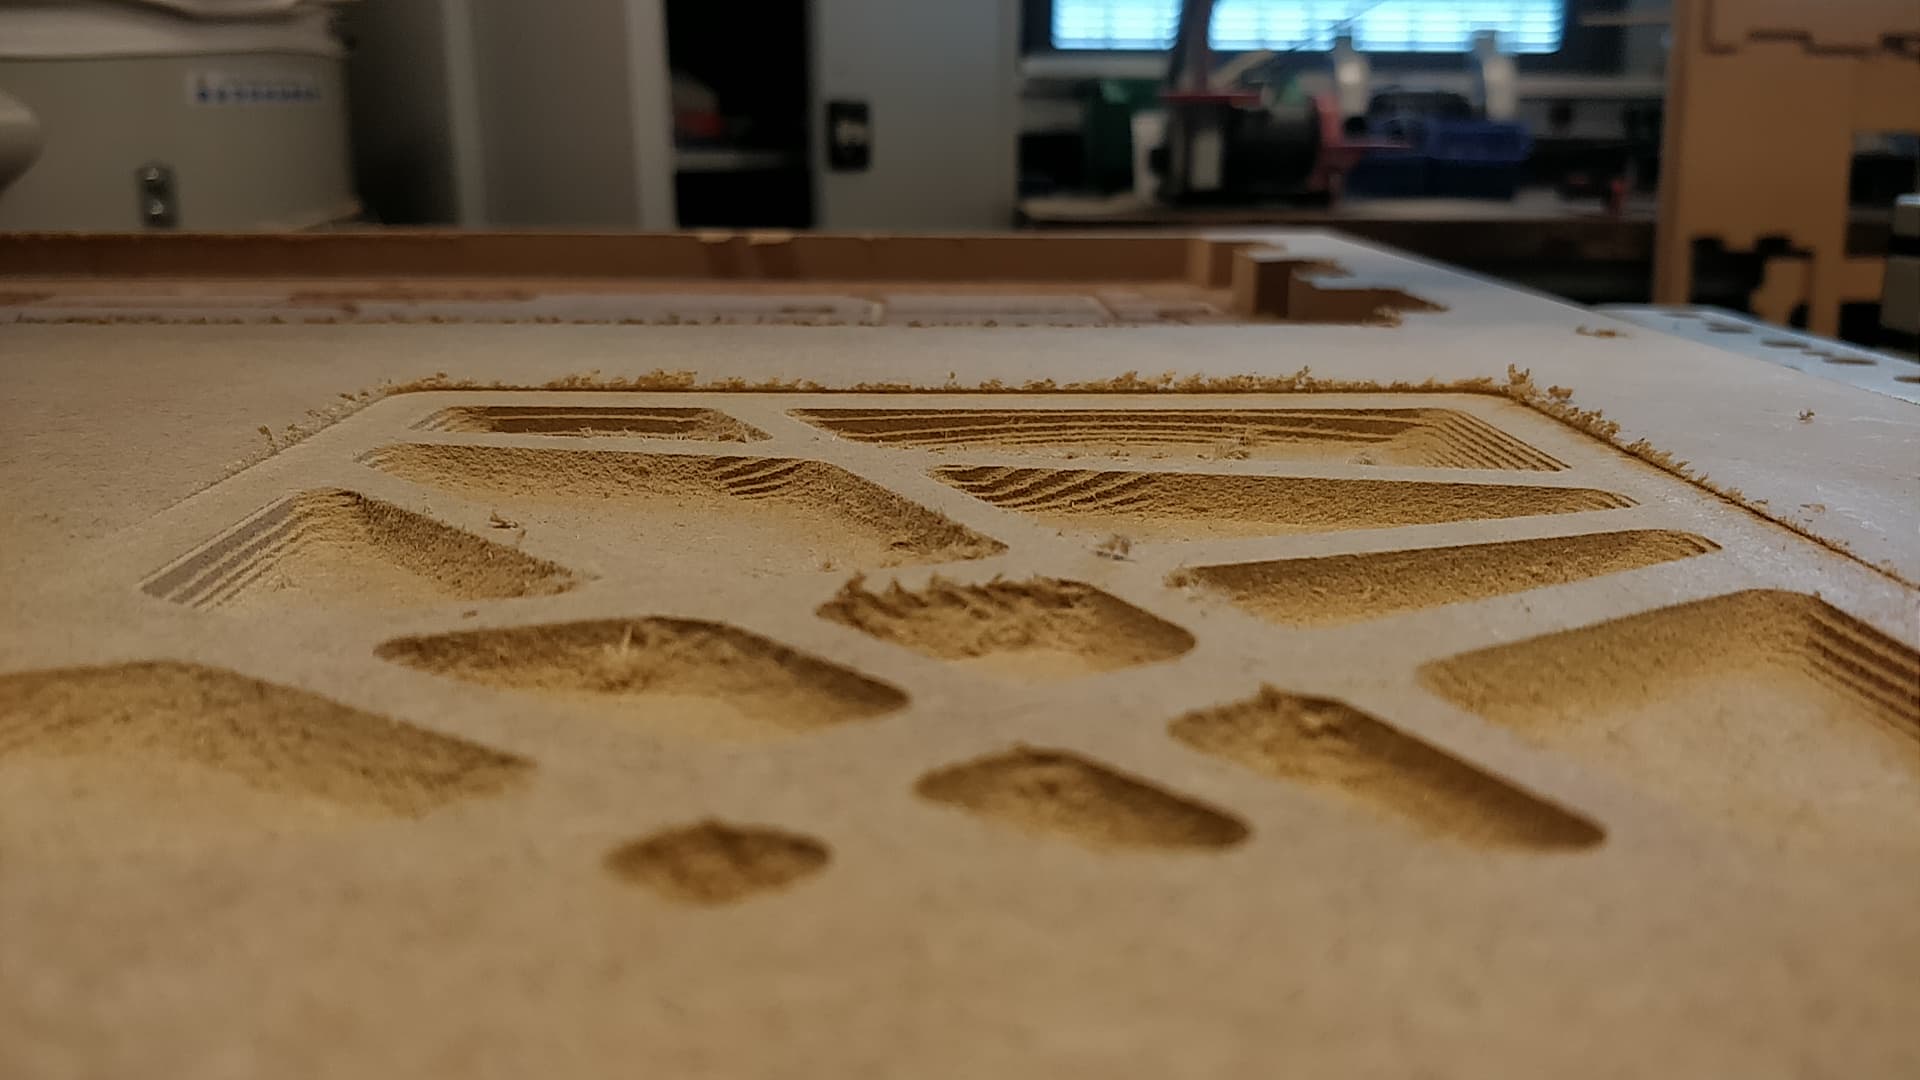
In order to provide this kind of problem, I could add another finishing toolpath perpendicular to the first one. Then I think that the mark will be less visible. But, because of the timing I didn't make it here. Also I'm interesting to see how much the plastic will take the form of the mold.
Okayy, the mold is ready, now let's try to thermoform a sheet of plastic.
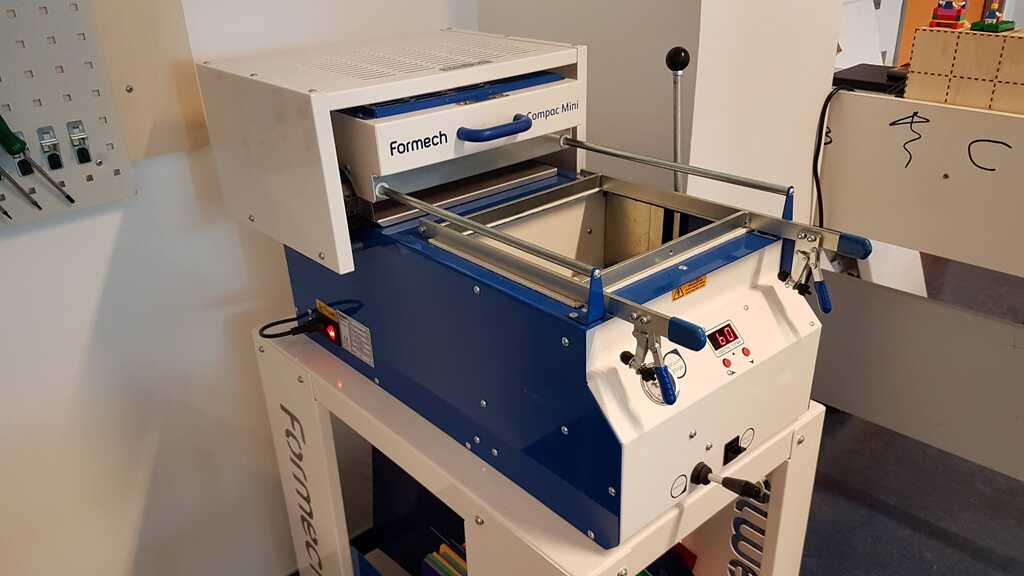
The machine that we have in our lab is the Formec Compac mini. There is in it a forming area of 230mm X 280mm with a max depth of 130mm. The maximum material thickness is about 4mm. But you can read all of the datasheet of the machine Here
Before starting to use the machine need to heat. In order to do this, pull the top part on the hole for 2 minutes. Then the machine will be ready to used.
Then place the mold on the grid at the bottom of the machine :
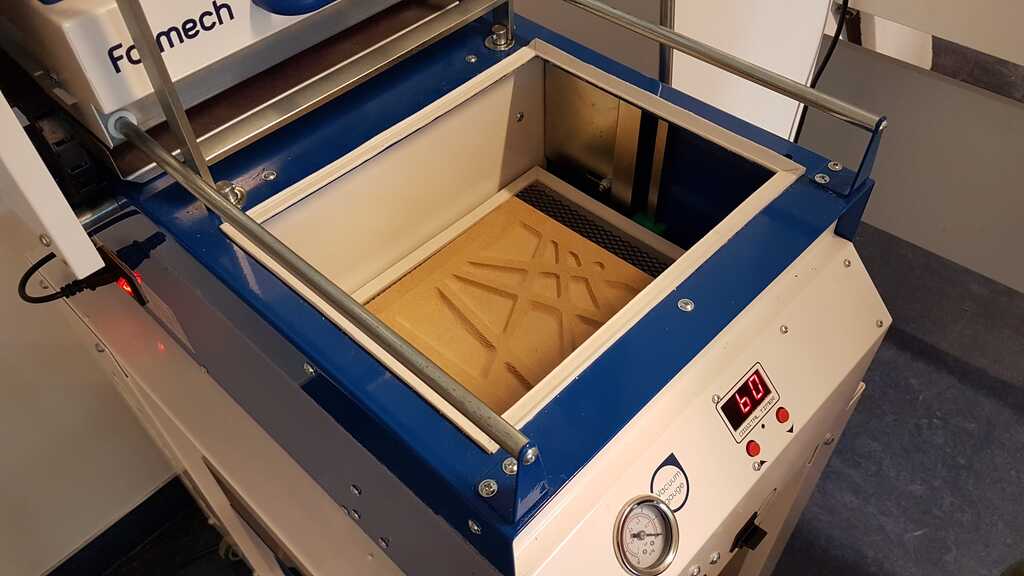
Add the plastic sheet and clips it with the two little claw :
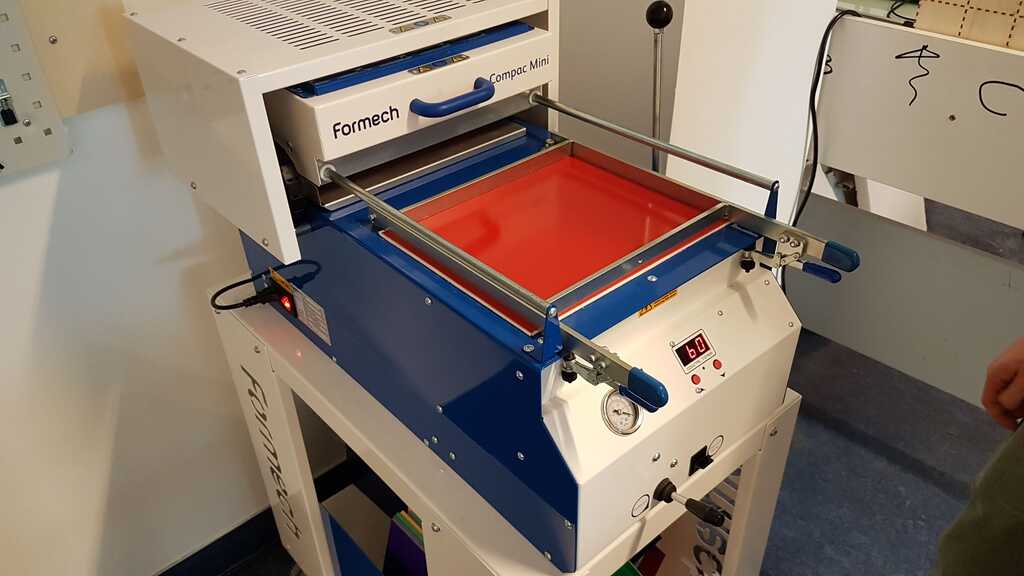
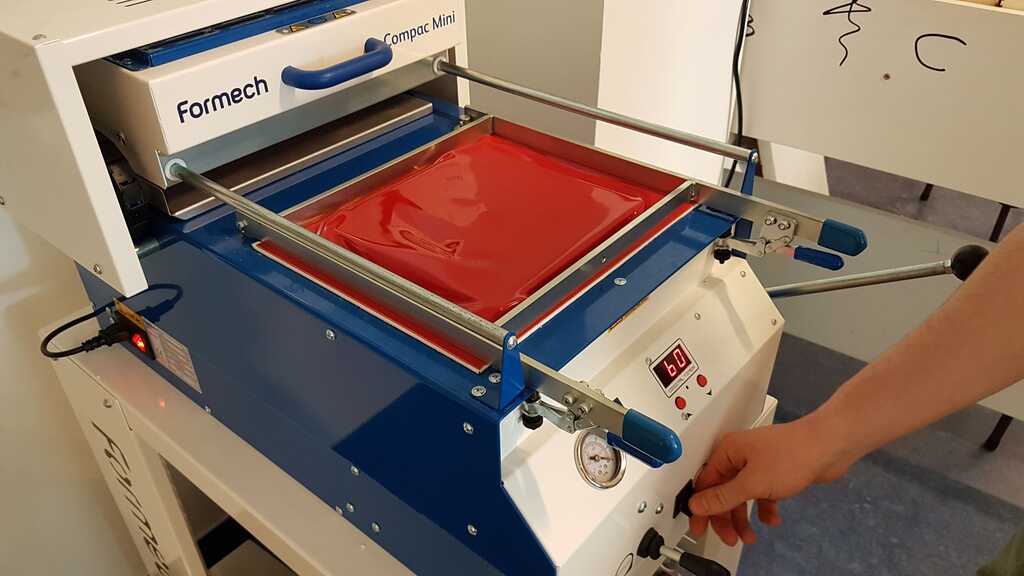
Pull the heating part on the plastic after setted the timer to 60 seconds. Wait :

Now you should see that the plastic start to be a little bi deformed with the gravity :
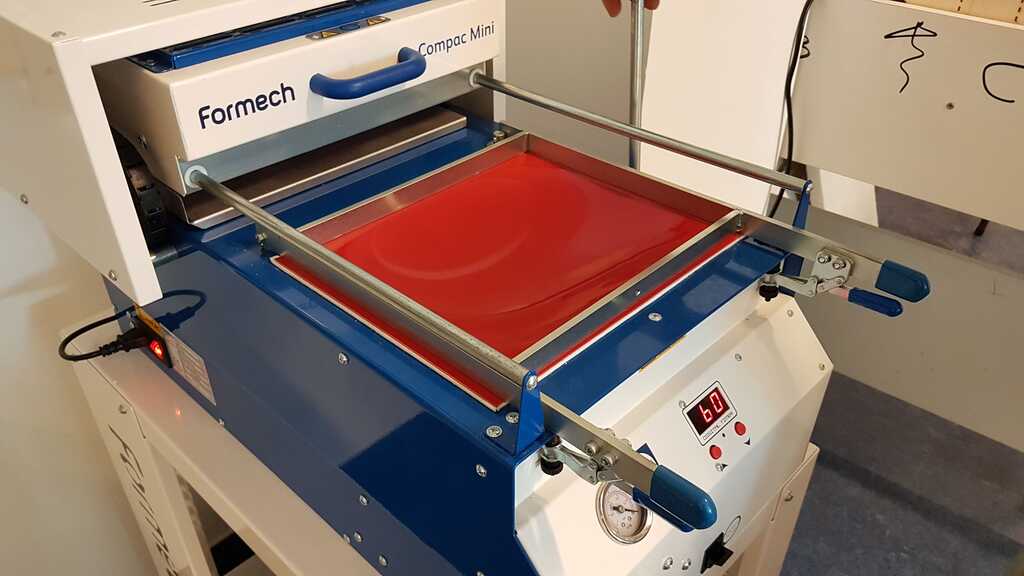
Pull down the lever on the right of the machine, in order to move up the mold :
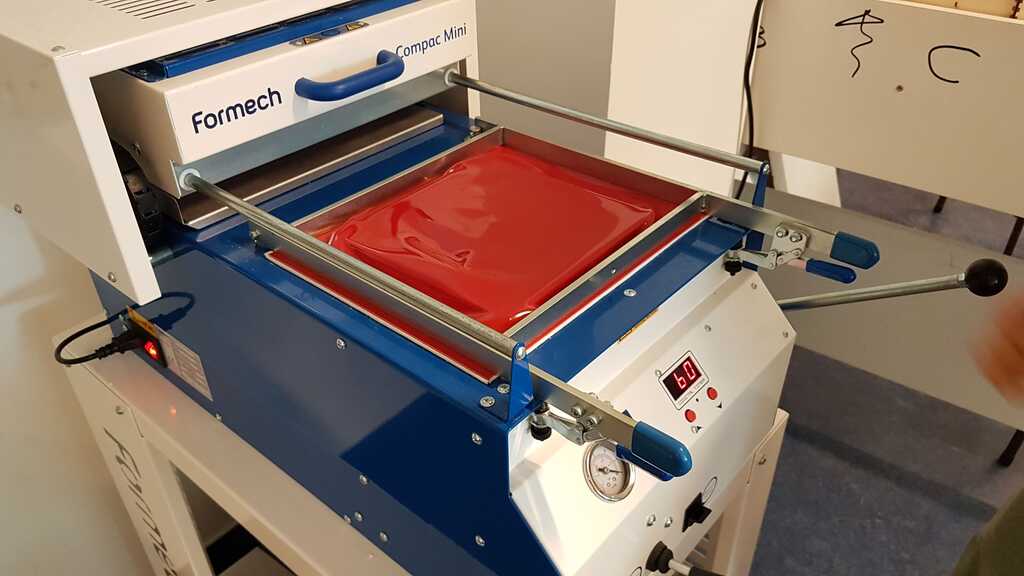
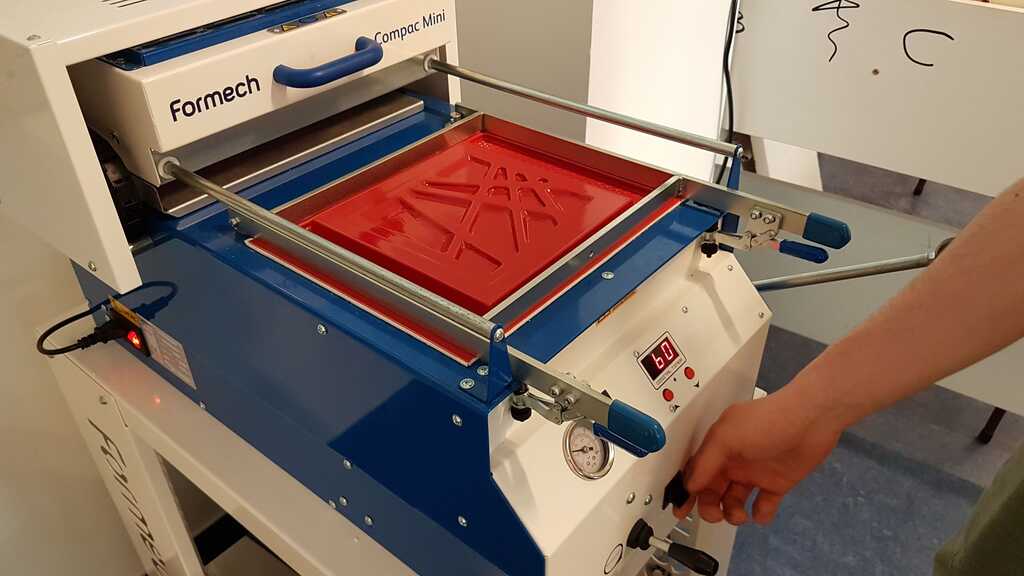
Then start the vaccum pump with the button on the front side of the machine. And wait 5/7 seconds :
Then stop it and realase the pressure with the little lever on the front side of the machine :

And finally, realase the other lever :
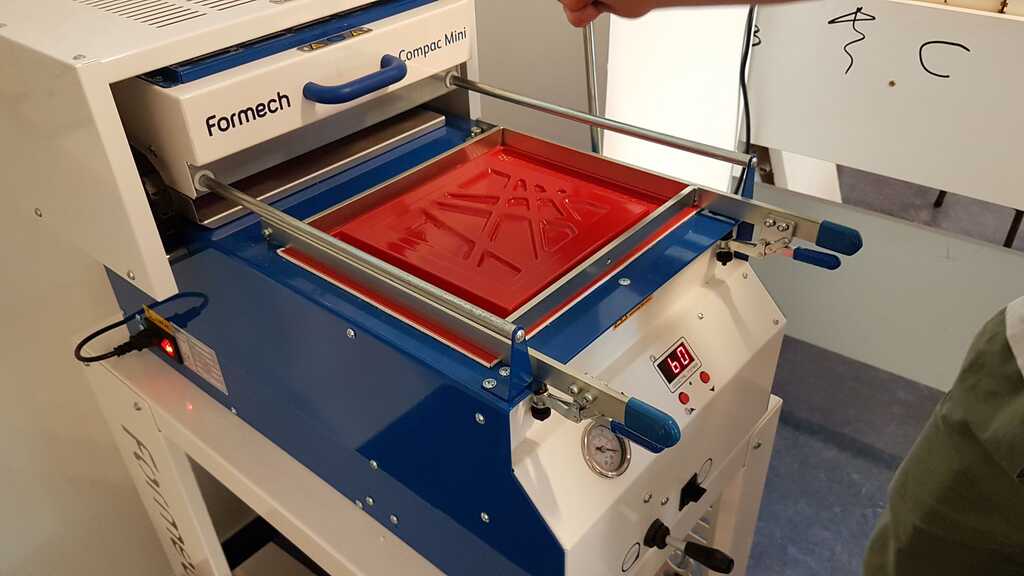
And tadaaaaa, this the result :
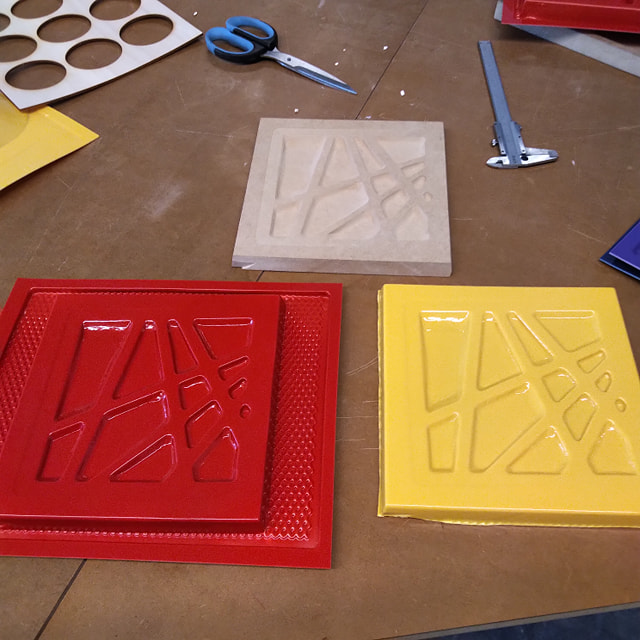
I'm very happy with the result, this almost exactly the same result as expected on the render !
The process is really simple and I think I will try to do more stuff with it in the future !
Project developement
Intelectual property
Wildcard Week
Machine design
Interface
Mechanical Design
Networking and communications

Application and Implication
Output device
Input device
Molding and casting
Embedded programming
Computer-Controlled Machining
Electronics design
3D scanning and printing
Electronic production
Computer controlled cutting
Computer-aided design

Versioning and Website
Idea of my final project
How to modelise a longboard
For any suggestion, help or featured project