
Lingyu Yue @ FAB LAB Szoil · 2019
© 2019 Lingyu Yue · Template by Bootstrapious

This work is licensed under a Creative Commons Attribution-NonCommercial-ShareAlike 4.0 International License.
Assignments
- Review the safety data sheets for each of your molding and casting materials, then make and compare test casts with each of them.
- Design a 3D mould around the stock and tooling that you'll be using, machine it, and use it to cast parts. (Individual Project)
Summary of the week
For this week, the wax miling part took too much time and I didn't finish the final model yet. Now I ran out of time, but hopefully, I could do it later.
Designing a mold with Fusion 360
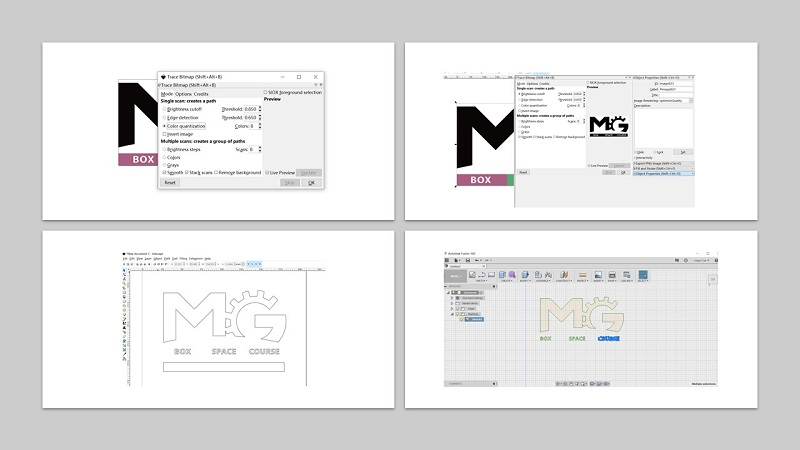
When it comes to the modling , my first thought is to make an MG stamp, so I design several versions in Fusion 360, then I chose one version to milling.
For the first time , I thought if I want a stamp, I need to mill the wax as hollow shape ,so that I could pour resin inside and get my stamp. And instructor Yufei remind me, I took it too simple, soft wax could only use one time, so we need to make the mould of your mould - then make the mould of your part - and then pour the material in the mould to make your ultimate part.
So I change the wax mould into bulge shape with a frame.
Here's the mold I cut.
Milling the wax mold
For milling the machinable wax mold I used Roland SRM-20 Desktop Milling Machine. First, I utilized a 3 mm flat milling bit for doing roughing and 2mm for finishing milling. But it simulated that 3mm bit coudn't cut my whole logo. So I decided to use 2mm bit. So it took me long time to mill this mould.
![]()
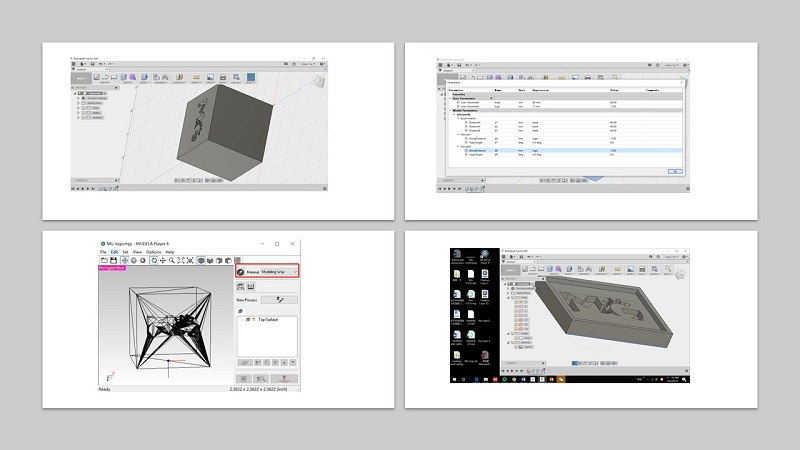
For generating the toolpaths I used MODELA Player 4 and opened the .stl file of my design in the software. Then, I checked the Material selection to be Modelling Wax.
First, I did settings for roughing, which creates the general, rough structure of the 3D design to be milled.
In the top bar, I navigated to Set > Model:
- Size and Orientation // Selected Top Surface (select correct position to be the top surface)
- Origin // Select the front - left - top -corner
- Next, I navigated to Set > Modeling Form > Margin // Set margins to 0 (since I had already counted on the margins in my design)
Furthermore, I navigated to Set > New Process. I utilized the settings and parameters found good last year by our local instructor Iván.
- Type of process // Roughing
- Select the cutting surface // I used the default setting 'Top (+Z)
- Tool // Flat 2 mm
- Cutting area and depth // All
- Type of toolpath to generate // Contour Lines 'Up Cut'
- Cutting Parameters // where:
- XY Speed // 20 mm/ sec - defines the speed of milling bit to move on X-Y -orientation, increased from 10 mm --> 30 mm
- Z Speed // 10 mm/ sec - defines the speed of milling bit to move on Z -orientation
- Cutting-in Amount // 0.5 mm - how deep the milling bit goes on each path = the distance between vertical paths
- Path Interval // 1.2 mm - defines the steps between cutting lines, around 50 % of the diameter of the milling bit has seemed to work fine
- Finish Margin // 0.2 mm - defines un-cut part that will be left at the bottom to make finishing
Lastly, I finished generating the toolpath for roughing and created a toolpath Right Now and hit Finish.
Second, I did settings to generate the toolpaths for finishing, which smoothens the rough surfaces left after roughing, and mills the details of the design.
In the top bar, I navigated to Set > New Process. The settings I utilized were partially same than in roughing with a few differing settings:
- Type of process // Finishing
- Type of toolpath to generate // Scan Lines 'X+Y'
- Cutting Parameters // where:
- XY Speed // 16 mm/ sec - defines the speed of milling bit to move on X-Y -orientation
- Z Speed // 16 mm/ sec - defines the speed of milling bit to move on Z -orientation
- Path Interval // 0.2 mm have seemed to work fine - defines the steps between cutting lines
- Finish Margin // 0 mm - defines un-cut part that will be left at the bottom
Cut the mold
The wax is soft, so it's easy to cut , but the logo is not small, still take time.
Molding silicone
For safety, we wear googles and gloves to stur the silicone.
We use silicone 881# and curing agent , according to the instruction on the material package, the ratio should of the above two materials should be: 100:2~2.5.
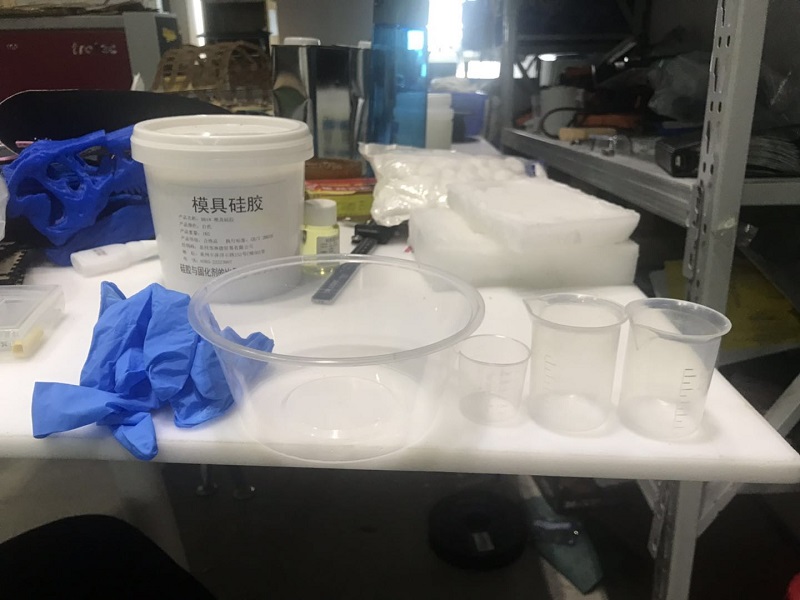
After mixing the silicon 881# with the right ratio of the curing agent, I poured them onto the wax mold I made.
I might put less plasticizer than I need. The silicone still remain as liquid after 2 days past.
Redesign the mold
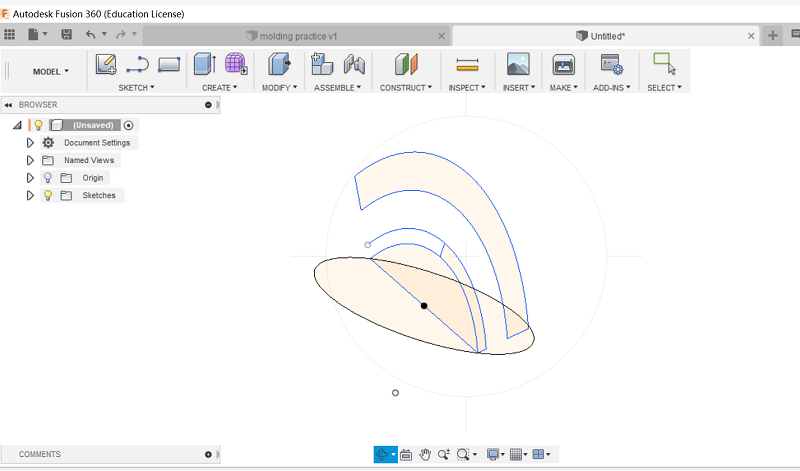
Then I redesigned the mold , I wanted to change the soft wax into the harder wax. I used the file-A-wax in Szoil. And instructor Pablo reminded me that I need to add some chamfer at the bottom of the logo. I decided to make a pattern on a hemispheroid.
I use Fusion 360 to draw my mold.
First, I drew a cirlce on the top view side , then drew a semicircle on the front view side, then I make several offsets of the semicircle.
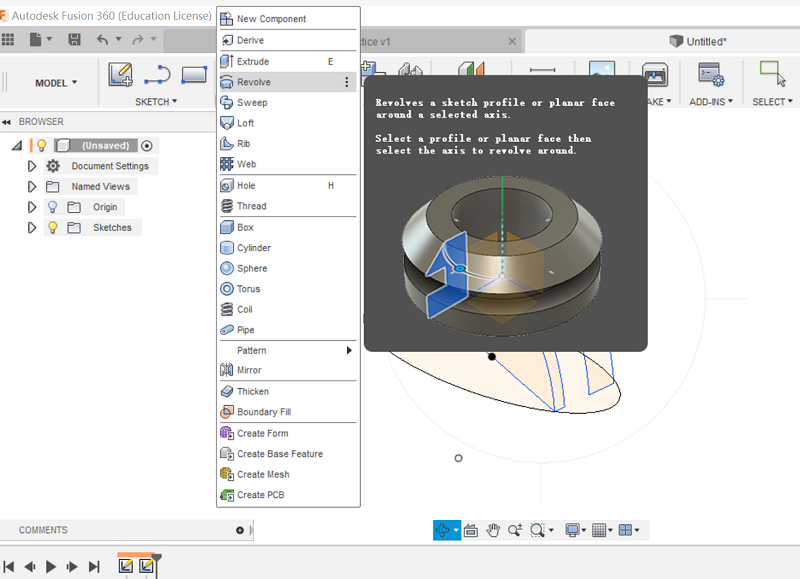
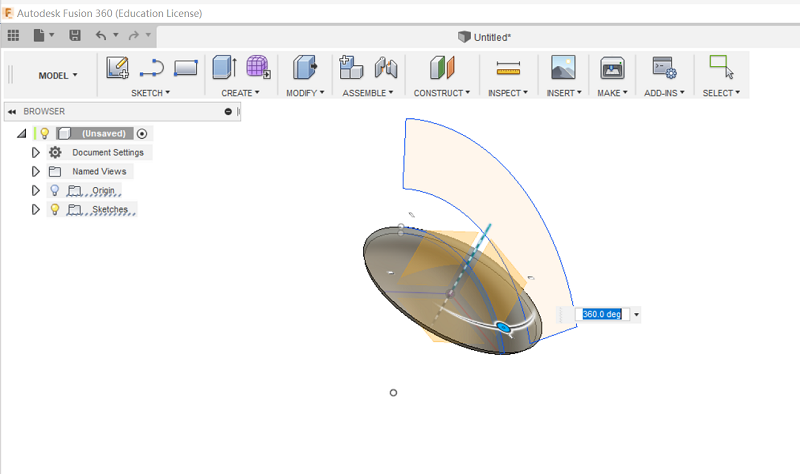
I use create-revolve to form the base.
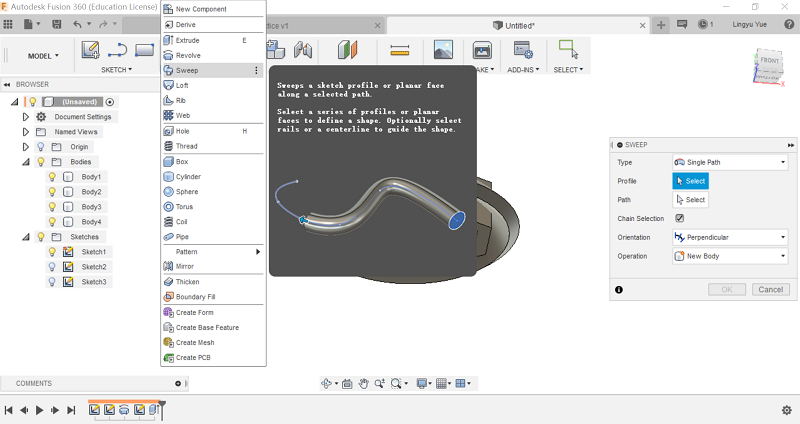
I use create-sweep to cut the unnecessary part.
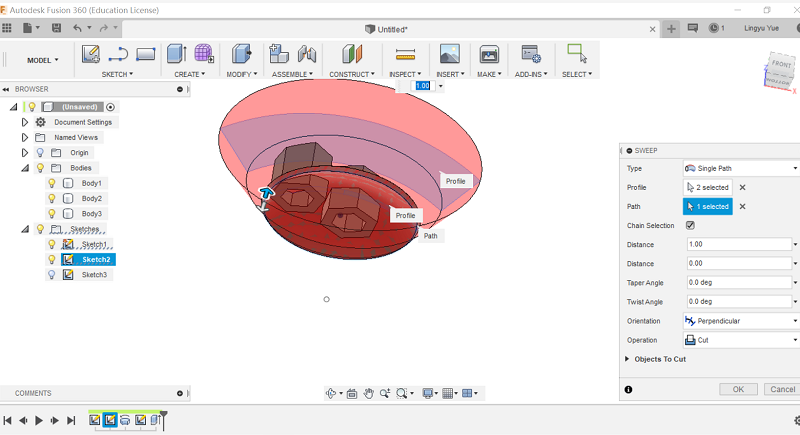
Then I got the mold I am willing to cut.
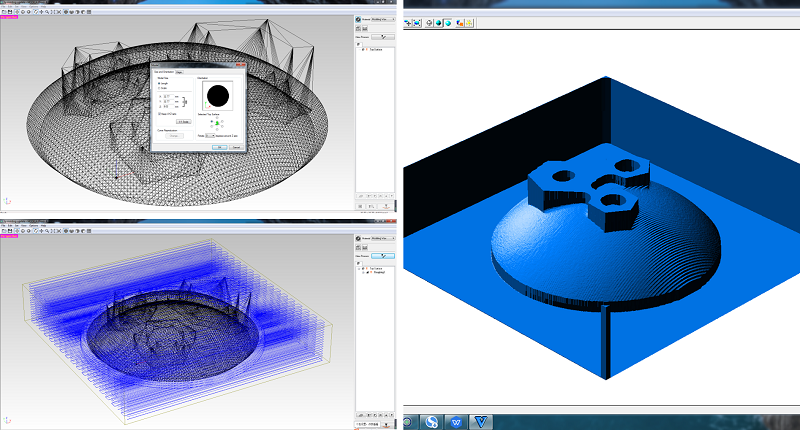
After roughing , I found out that I forgot to consider the space part around the mold , so the wax is not big enough for my file.
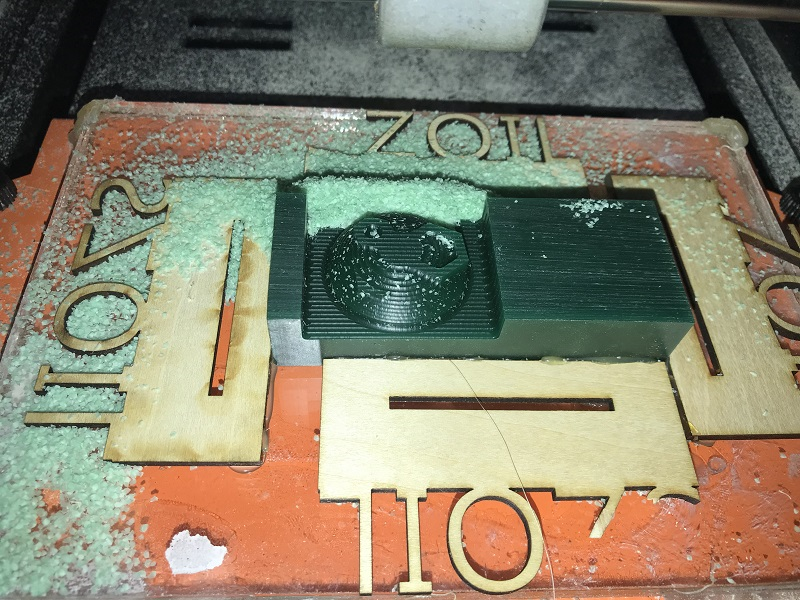
So I redo a smaller version and mill it.
Then I mill more to use.
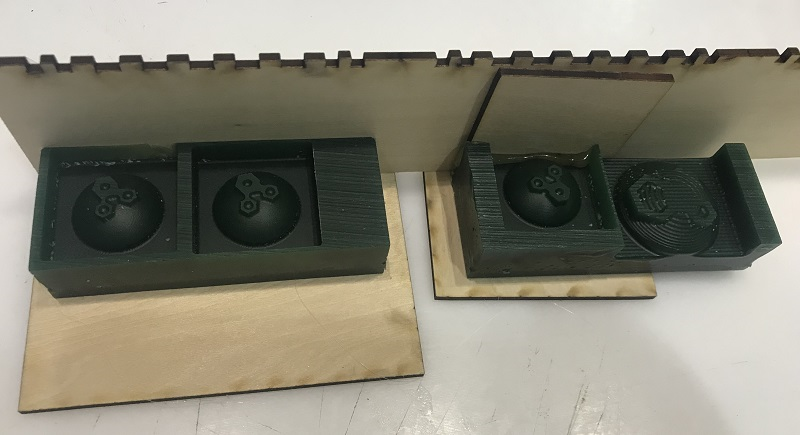
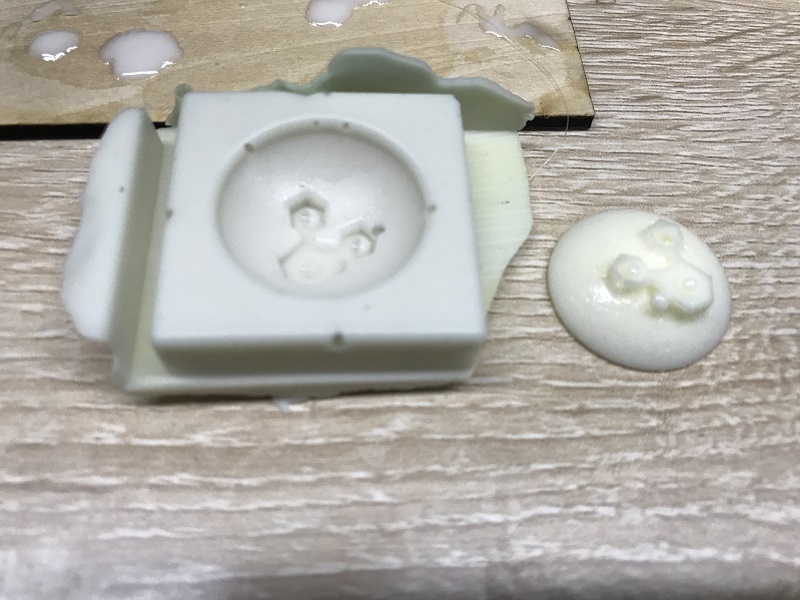
I stick wood boards to prevent them from taking apart.
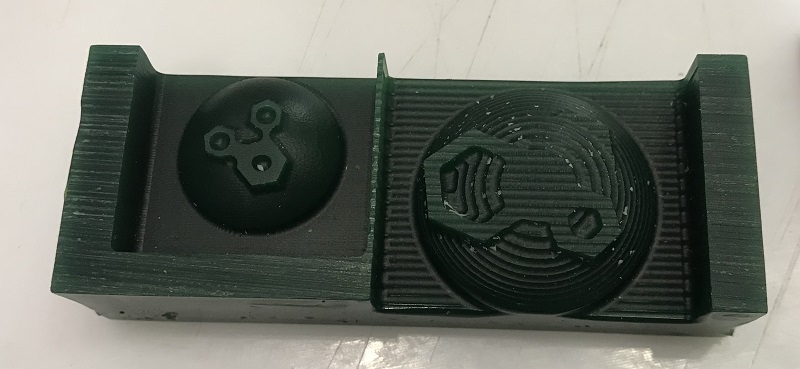
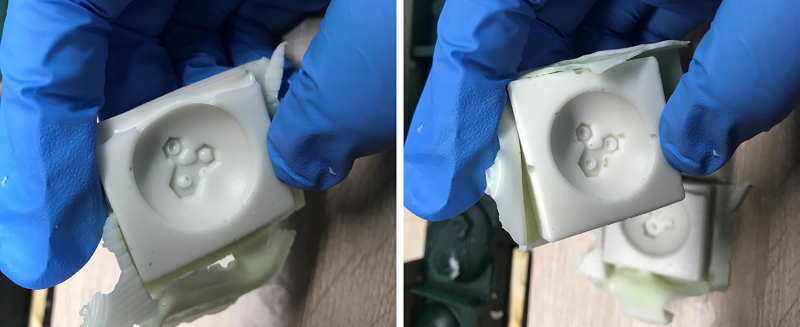
Before casting , I made silicon mold, it take around 10 hours to form.
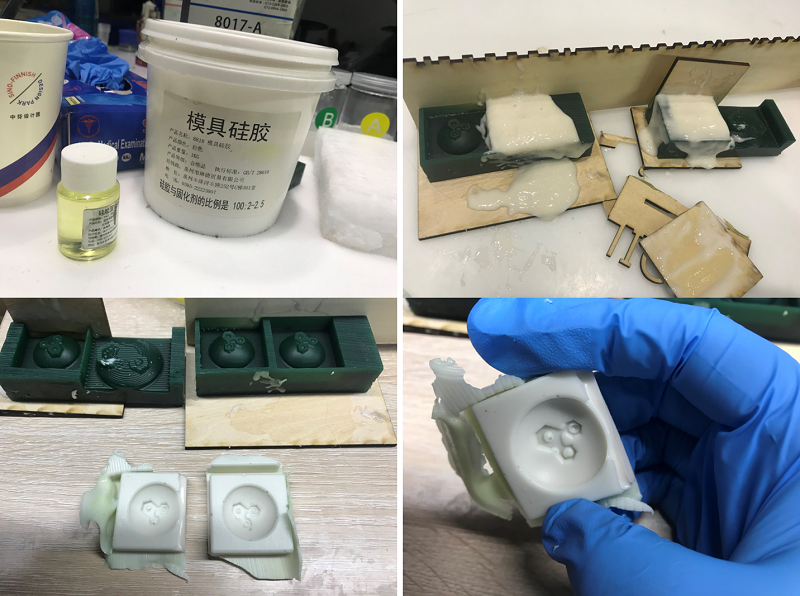
I found that there are some bubbles in the mold.
I use 8017-AB to make the resin, it's fast to form but I feel a little bit unsafe duiring this process.
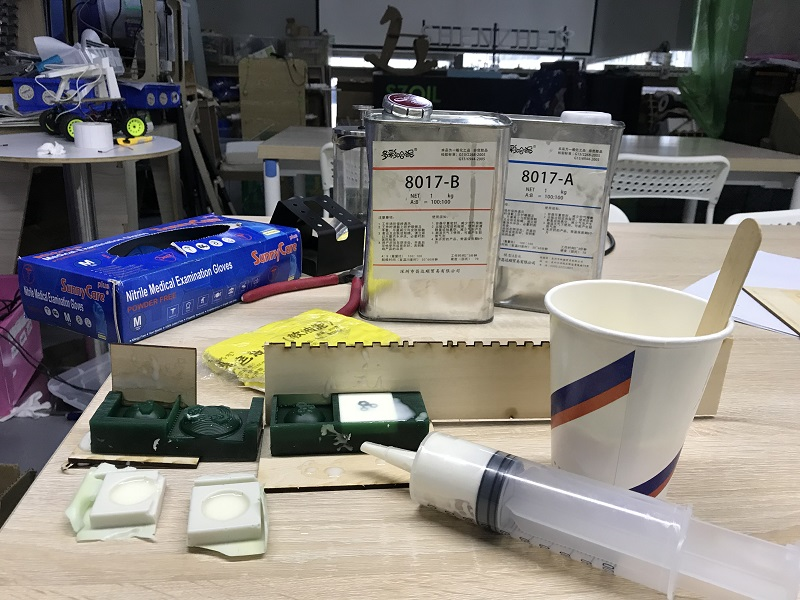
The resin form pretty soon, like within 1 minute, and as I pour aroud 200 ml liquid, the cup went hot quickly, but finaly, I cast somthing with the mold.
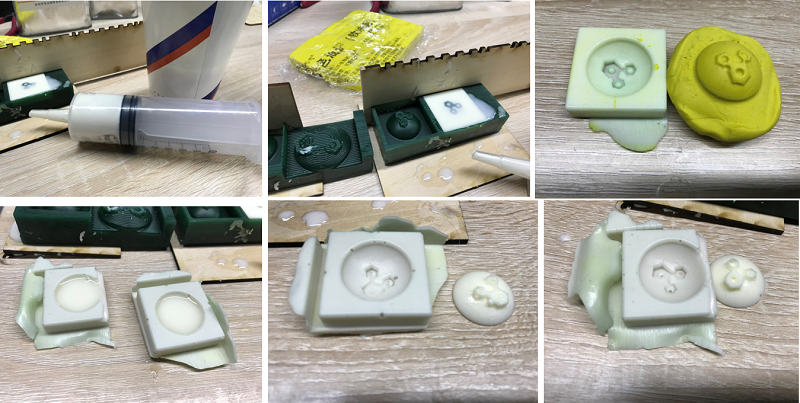
The casting materials we have are PU resin 8017-A and 8017-B.
Safety Tips
Keep the material in locations with good ventilation.
Wear goggles and gloves when working with the materials, keep the materials from touching your skins especially eyes.
Usage
The ratio for mixing 8017-A and 8017-B is 1:1.
Stir the mixed materials and pour it into the mold (need to work quickly, it will get solidified within 2~3 minutes.)
Wait for about 30~60 minutes and you can get the cast.
And we buy the materails from this Taobao online shop 多彩哈泥旗舰店 .
Here are the files of what I mold and casted this week.