
Lingyu Yue @ FAB LAB Szoil · 2019
© 2019 Lingyu Yue · Template by Bootstrapious

This work is licensed under a Creative Commons Attribution-NonCommercial-ShareAlike 4.0 International License.
Embedded Programming
- Read a microcontroller data sheet. (Individual Project)
- Program your board to do something, with as many different programming languages and programming environments as possible. (Individual Project)
- Optionally, experiment with other architectures.
- Compare the performance and development workflows for other architectures.
I tried to read a 229 pages datasheet and totally lost myself ATtiny44A microcontroller datasheet. LOL
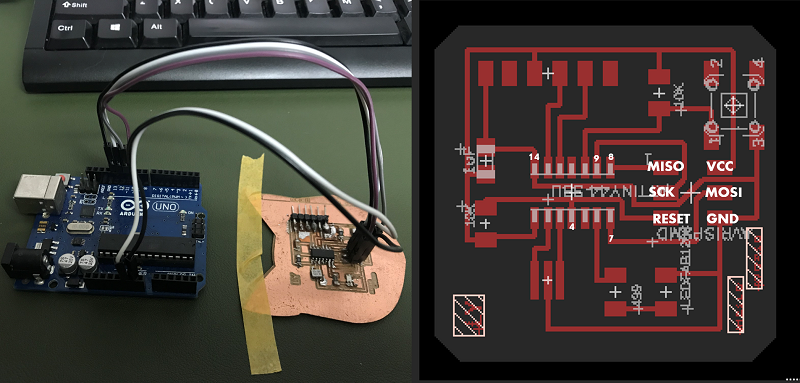
And I programmed my cat shape Hello-world board to light up the LED when press the button. During the process, I met some troubles, and the reason is that I didn't solder the board well.
First trouble is when I connected the board to the arduino ISP, the arduino board go out and the chip went hot. I am scared that there should be shortcircuit. And I unplugged them rapidly to test the circuit board with the multimeter. And it showed that cause I didn't solder the pinhead well, so that part cause the short cut. So I desolder that part.
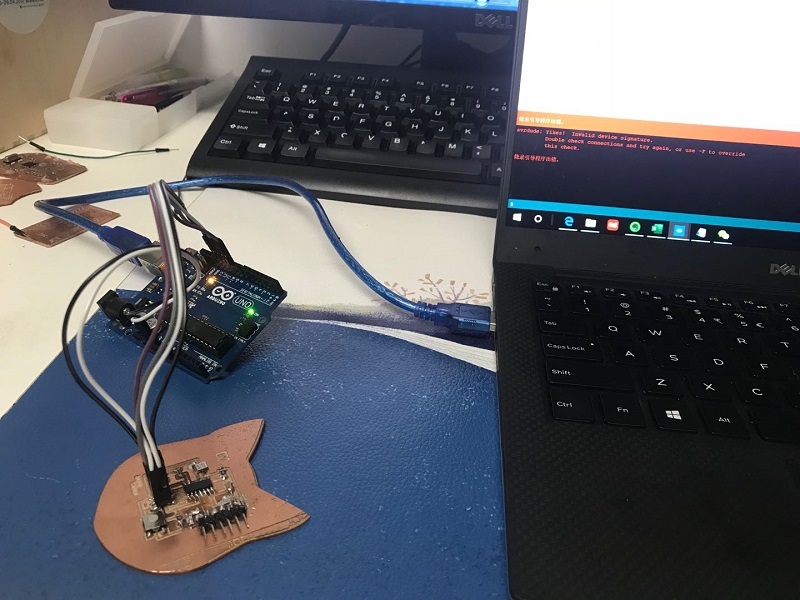
Finally, I finished the bootloader and downloaded the example program, but the LED could'e light up.I realized that I solder the LED in wrong direciton, the cathode connected to VCC. So I resolder the LED and then it worked. So happy!
Unpacking the ATtiny44A Datasheet
The ATtiny44A version 14-pin SOIC has following Pin Configurations:
- VCC // Supply voltage
- GND // Ground
- 8-bit port (PORTA) named PA7-PA0
- bi-directional I/O port with internal pull-up resistors (selected for each bit)
- 4-pin port (PORTB) named PB0-PB3
- bi-directional I/O port with internal pull-up resistors (selected for each bit)
- The direction of a pin is defined by registers (Data Direction register):
- DDRA and
- DDRB
- Data is written to an OUTPUT pin using registers PORTA and PORTB.
For understanding the shorts in datasheet and C -languages bit operations I took a look at [TUT][C] Bit manipulation (AKA "Programming 101"), originally written by By Eric Weddington (Programming 101).
The operators work on bits meaning that when taking two 8 bit bytes, and combining them with any of these operators, I will get another 8-bit byte according to the operator's function, working on the individual bits inside the byte.
-
|// bit OR -
&// bit AND -
~// bit NOT (so it switches 0 --> 1 and 1 --> 0) -
^// bit EXLUSIVE OR (XOR) -
<<// bit LEFT SHIFT -
>>// bit RIGHT SHIFT
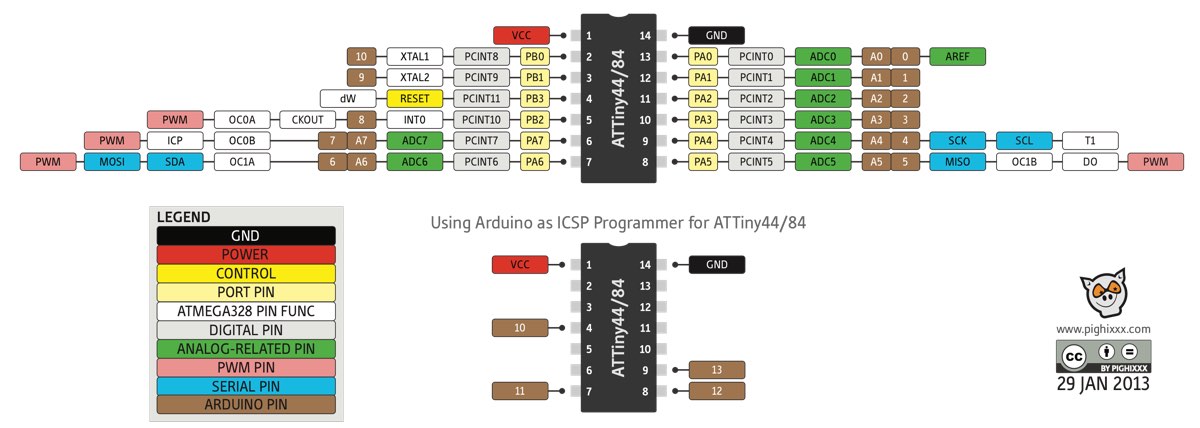
And I found that during programming the most useful data shows in the pinout picture below.
Preparing to program my cat shape Echo Hello-World board
I followed the instruction Arduino as ISP and Arduino Bootloaders and use the pinout picture as reference.
First, I read the datasheet to figure out how to wire the board.
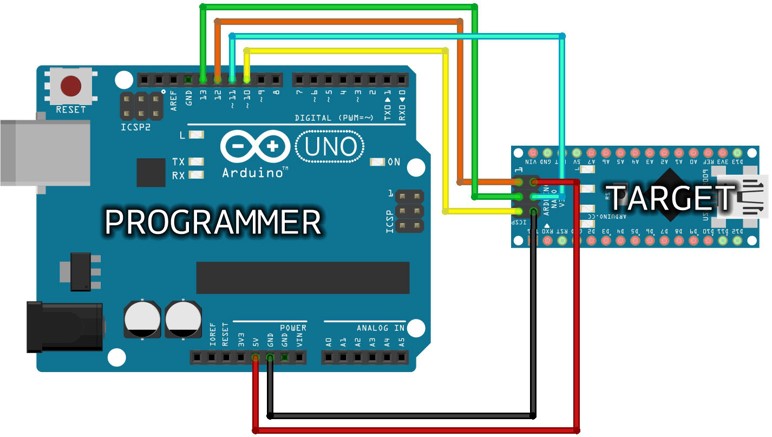
After wiring the board , I connect the arduino Uno and my Hello world board with the laptop.
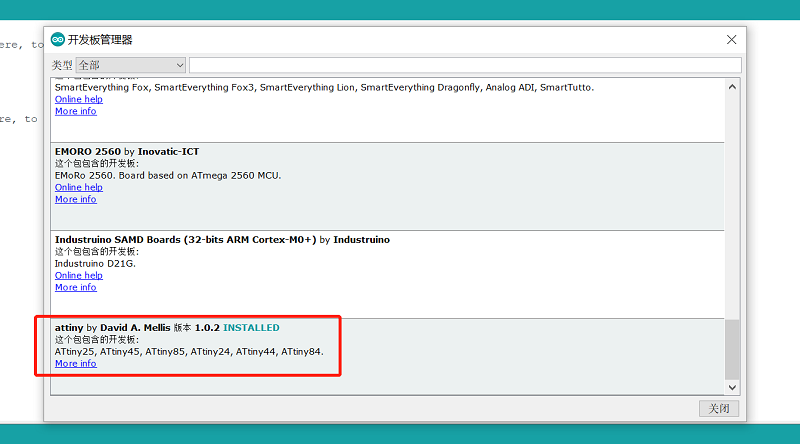
But wait ,before that, you should install the attiny library at boards manager pannel.
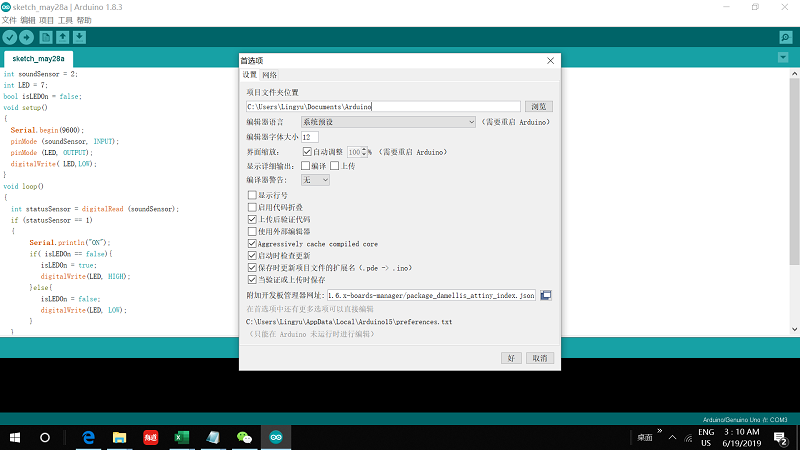
First of all, following the instructions of high-low tech, I installed the ATtiny support by navigating in the top bar File > Settings:
- Additional Boards Manager URLs // Add:
https://raw.githubusercontent.com/damellis/attiny/ide-1.6.x-boards-manager/package_damellis_attiny_index.json
Next, I needed to install attiny library, which the Boards Manager found after installing the the ATtiny support, by navigating in the top bar Tools > Boards > Boards Manager.
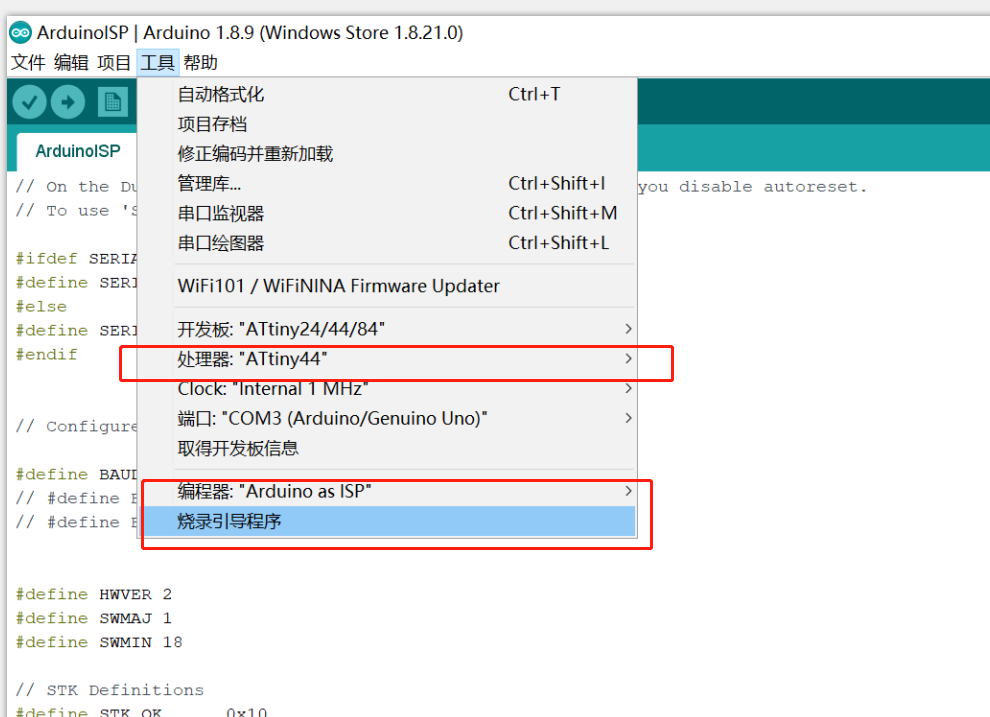
Then, by connecting my Heart board to USB and navigating in the top bar Tools, I selected correct:
- Board // ATtiny24/44/84
- Processor // ATtiny44
- Clock // External 20 MHz
- Serial Port // [Check from Device Manager - in my case COM4]
- Programmer // Arduino as ISP
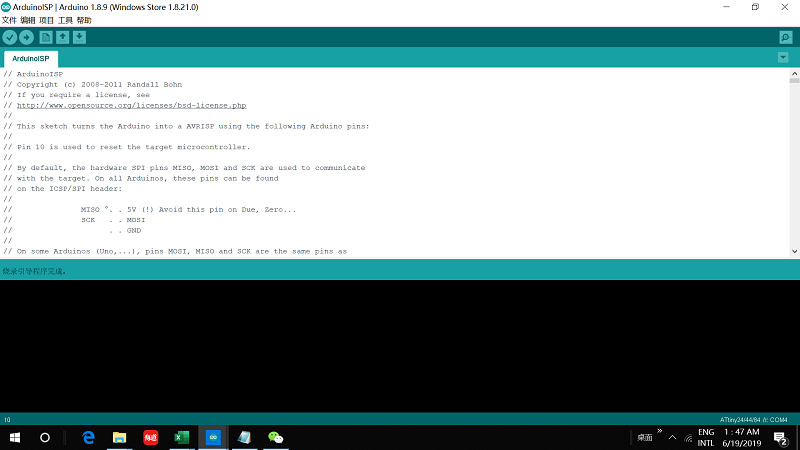
And finally, because I was going to program my board with Arduino IDE for the first time, I downloaded from example that the auduino as ISP programm and burn bootloader.
Blink without delay
          // constants won't change. Used here to set a pin number:
    const int ledPin =  7;// the number of the LED pin

    // Variables will change:
    int ledState = HIGH;             // ledState used to set the LED

    // Generally, you should use "unsigned long" for variables that hold time
    // The value will quickly become too large for an int to store
    unsigned long previousMillis = 0;        // will store last time LED was updated

    // constants won't change:
    const long interval = 1000;           // interval at which to blink (milliseconds)

    void setup() {
      // set the digital pin as output:
      pinMode(ledPin, OUTPUT);
    }

    void loop() {
      // here is where you'd put code that needs to be running all the time.

      // check to see if it's time to blink the LED; that is, if the difference
      // between the current time and last time you blinked the LED is bigger than
      // the interval at which you want to blink the LED.
      unsigned long currentMillis = millis();

      if (currentMillis - previousMillis >= interval) {
        // save the last time you blinked the LED
        previousMillis = currentMillis;

        // if the LED is off turn it on and vice-versa:
        if (ledState == LOW) {
          ledState = HIGH;
        } else {
          ledState = LOW;
        }

        // set the LED with the ledState of the variable:
        digitalWrite(ledPin, ledState);
      }
    }
Button lED
          void setup() {
    // put your setup code here, to run once:
    pinMode (PA7, OUTPUT);
    pinMode (PA3, INPUT);
    digitalWrite(PA7,HIGH);
  }

  void loop() {
    // put your main code here, to run repeatedly:
    int n = 0;
    int i = 0;
    for (; i <= 255; i++)
    { n = i;
      delay(2);
      analogWrite(PA7, n);
    }
    for (; i >= 0; i--)
    { n = i;
      analogWrite(PA7, n);
      delay(2);
    }
  }
          int ledPin =7 ; // choose the pin for the LED
  int inPin = 3;   // choose the input pin (for a pushbutton)
  int val = 0;     // variable for reading the pin status

  void setup() {
    pinMode(ledPin, OUTPUT);  // declare LED as output
    pinMode(inPin, INPUT);    // declare pushbutton as input
  }

  void loop(){
    val = digitalRead(inPin);  // read input value
    if (val == HIGH) {         // check if the input is HIGH (button released)
      digitalWrite(ledPin, LOW);  // turn LED OFF
    } else {
      digitalWrite(ledPin, HIGH);  // turn LED ON
    }
  }
In the nueval, Pablo told me to make a program of my own, for example light the LED 3 times , then off and 5 seconds later turn on. I tried to write and I searched the auduino forum , I found a topic : How to turn on /off an LED 3 times , then stop
The code Botlabgirl wrote is as below:
          int ledPin = 9;   // LED is connected to digital pin 13
          int switchPin = 5;   // switch connected to digital pin 2
          int switchValue;   // a variable to keep track of when switch is pressed
          int counter = 0;

          void setup()
          {
                pinMode(ledPin, OUTPUT);   // sets the ledPin to be an output
                pinMode(switchPin, INPUT);   // sets the switchPin to be an input
                digitalWrite(switchPin, HIGH);   // sets the default (unpressed) state of switchPin to HIGH
          }

          void loop()   // run over and over again
          {

              switchValue = digitalRead(switchPin);   // check to see if the switch is pressed
                if ((switchValue == LOW) && (counter <= 1)) {   // if the switch is pressed then,
                    for(int ii = 0; ii <= 2; ii++)
                {
                    digitalWrite(ledPin, !digitalRead(ledPin));
                    delay(200);
                    counter++;
                }
              }
                if (switchValue == HIGH)
                //if ((switchValue == HIGH) && (counter > 2))
                {
                     counter = 0;
                     delay(100);

                }

          }
And my function to be achieve is similar with hers. So I follow the structure to make my own programm.
  int ledPin = 7; // LED is connected to attiny 44 pin 6 which is digital pin 7
  int btn = 3; // button is connected to attiny 44 pin 10 which is digital pin 3

  void setup()
  {
   pinMode(ledPin, OUTPUT); // set the LEDpin to be an output
   pinMode(btn, INPUT); // set the buttonPin to an an input
   digitalWrite(ledPin, LOW); //sets the default (unpressed) state of button to low
  }

  void loop() // run over and over again
  {
   if(digitalRead(btn)==0){ // or I can write if (!digitalRead (btn) ) which means if the button is pressed
    showLed(); // showled is a new function to be defined below
   }
  }

  void showLed(){
   for(int i=0;i<3;i++){
    digitalWrite(ledPin, HIGH); // led light and off for three times
    delay(500);
    digitalWrite(ledPin, LOW);
    delay(500);
   }
   delay(4500); // then off for 5 seconds
   digitalWrite(ledPin, HIGH); // the led will light until you pressed the button again
  }
Here is the code file:
- Arduino ino files // Button and LED