 FabAcademy 2019
3D SCANNING AND PRITING
The objective of this week is to acquire knowledge about design, printing and scanning in 3D.
1. Group Assignment
Test the design rules for your 3D printer(s)
1.1 3D Characterization
Carlos Nina. - Ivan Callupe.
Diego Santa Cruz.
Team Group
1.1.1 Machine specs
Printer used for this group assignment are Sindoh (
For this assigment we downloaded a model from Thingiverse.(

1.1.2 Main parameters
The main parameters that you must take into account in the 3D printer are:
- Temperature: The temperature of the two main components are; "Hotend" is the temperature of the extruder necessary to be able to work the PLA (
Polylactic Acid ) and "heatbed" is the temperature of the base where the printing of the PLA will take place. The Sindoh uses 200ºC for Hotend and 0º for the Heatbed. - Speed: The printing speed is a parameter that needs to be set. And it depends on the quality of the printing. In our case, the speed was 80mm/s. In most printers, the standard speed is 60mm/s.
- Layer height: It is another parameter that depends a lot on the print quality. This means that the lower the layer, the higher the print quality. We can simplify these parameters; High quality: 0.1mm, Medium quality: 0.2mm and low quality: 0.3mm..
1.1.3 Generation of G code for printing
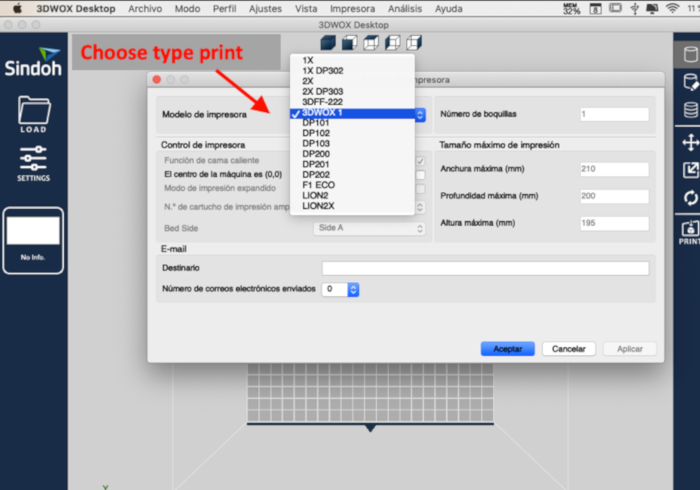
To obtain the G code in the Sindoh printers it is necessary to download the software.(
First you must choose the printer model. For our case it is 3DWOX1.
_
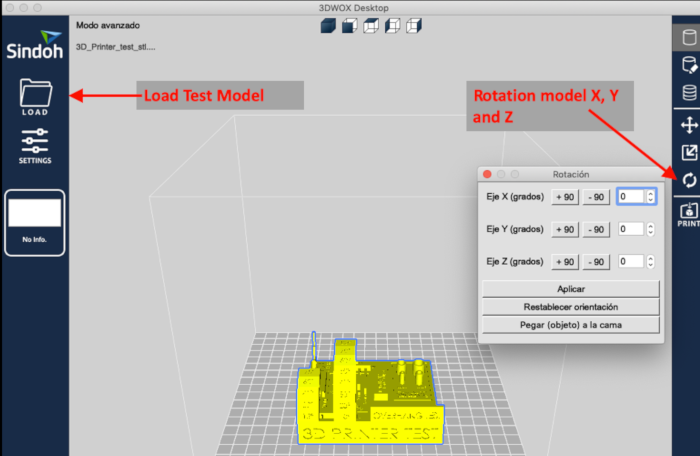
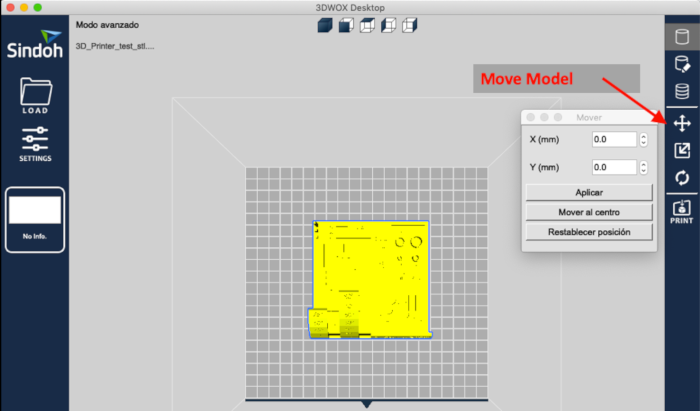
Then you must load the STL file that you want to print. Use the rotation and movement tool to place the model in the position you want.
_
_
Then we can generate the G code for the print (file / load G code).

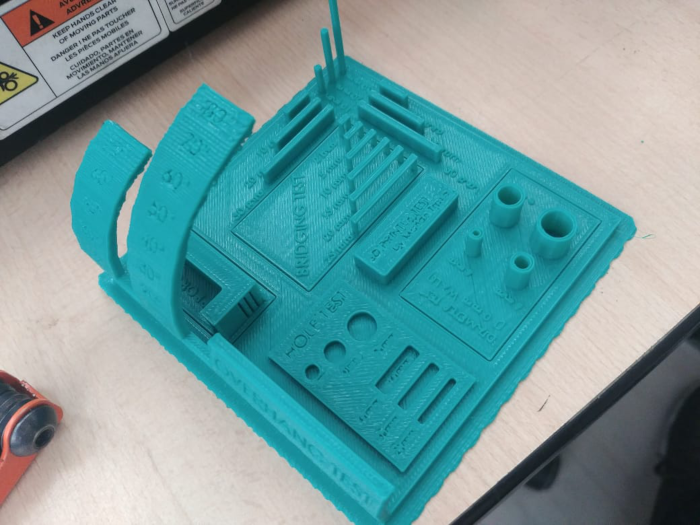
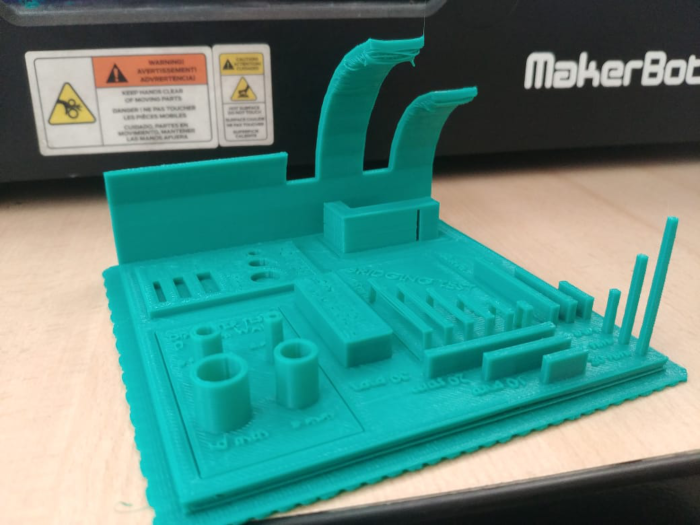
1.1.4 Printing test model
The file G code is copied to a USB memory. Then it is loaded into the printer.
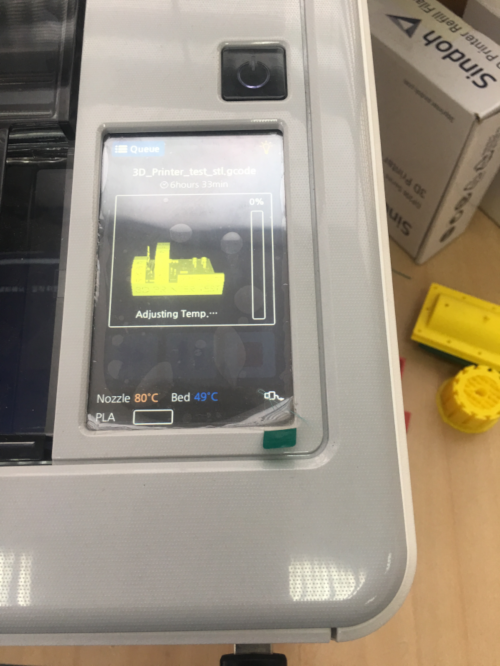
The printer make an amazing work here. Cilinder and vertical bars have great definition. Overhangs looks good and suspended bars doesn´t look messy. Overall it´s a really nice piece.
1. Individual Assignment
- Design and 3D print an object (small, few cm3, limited by printer time) that could not be made subtractively
- 3D scan an object (and optionally print it)
1.1 Design 3D Model
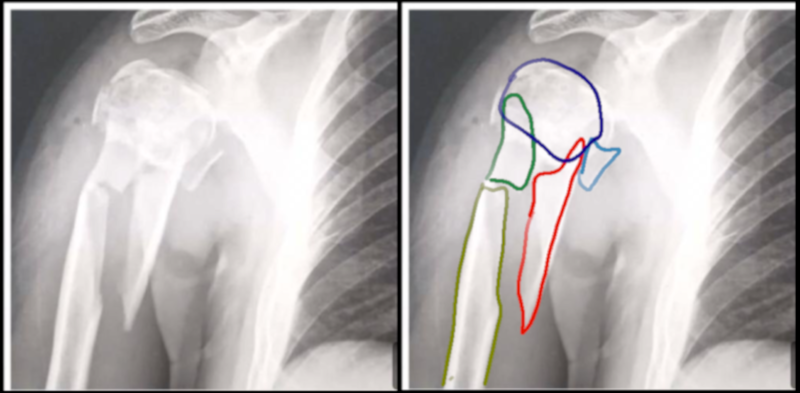
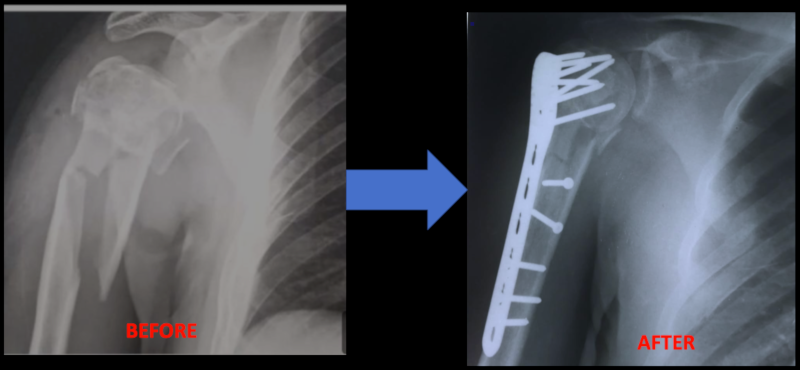
I am a resident of traumatology in a hospital in Peru. And I decided to use 3D printing for the preoperative planning of a patient.
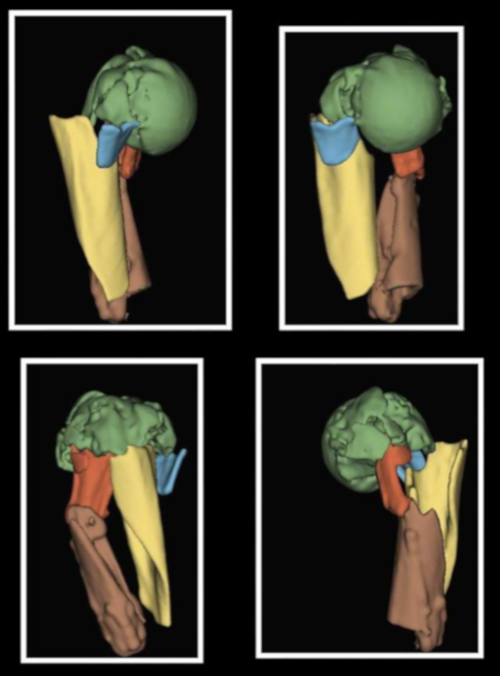
Patient of 34 years, suffers fall from height of approximately 3 meters, hit the right shoulder. When this patient entered my hospital, he had a fracture in the very complex humerus (the bone was in more than 4 fragments) and he needed a surgery.
For the design, I used the FUSION 360 software, where I made changes to the model, until I got what I wanted.

I decided to make a 3D impression from the images of the tomography. For this it was necessary to obtain the DICOM files. DICOM (Digital Imaging and Communications in Medicine) is the international standard to transmit, store, retrieve, print, process, and display medical imaging information (
3D Slicer is an open source software. This program allows editing and rendering of DICOM files (
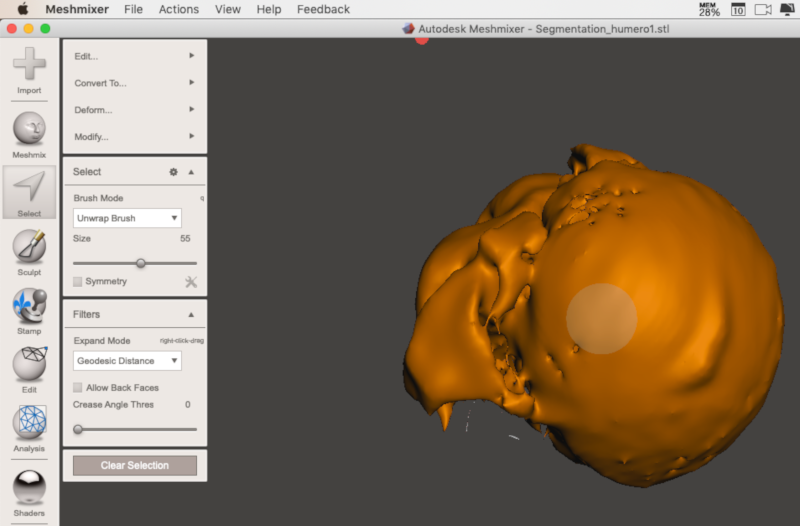
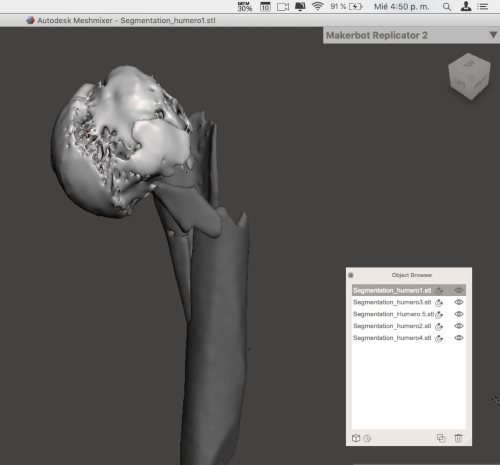
Once we finish getting the 3D reconstruction of the fracture. We export the files in STL. To give a better finish and the position of these files I used the "Meshmixer" program.
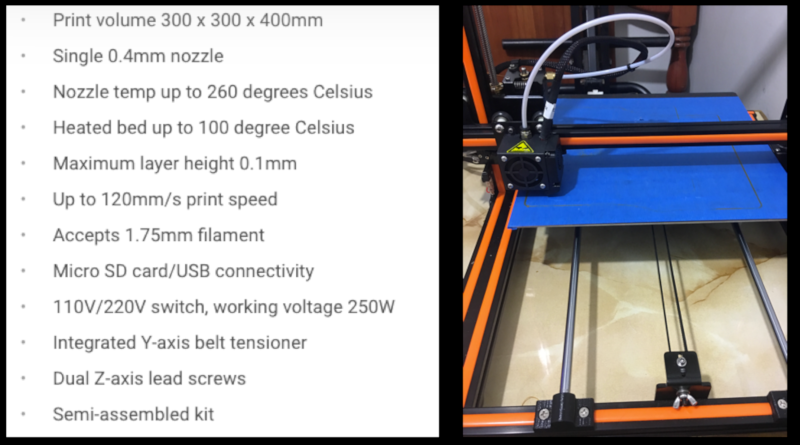
Simplify3D is a software that allows you to place the parameters and generate the g-code to make the printing. In this you must configure the printer type (Anet E12), the type of material (PLA).
1.2 3D Printed
I made the impression of the model in an "
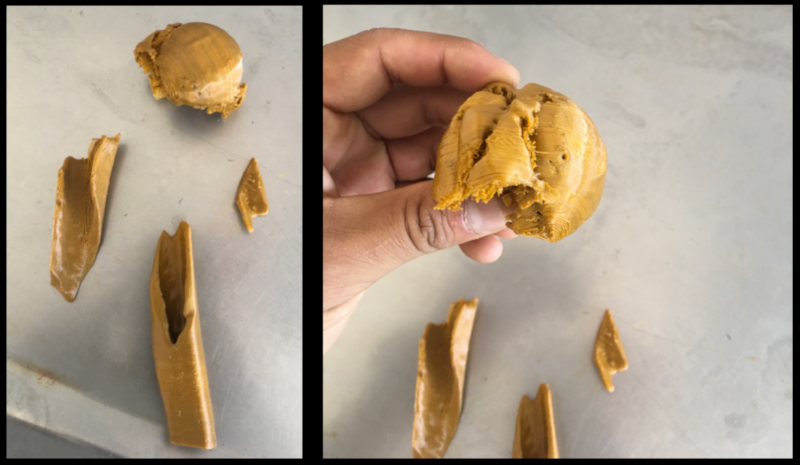
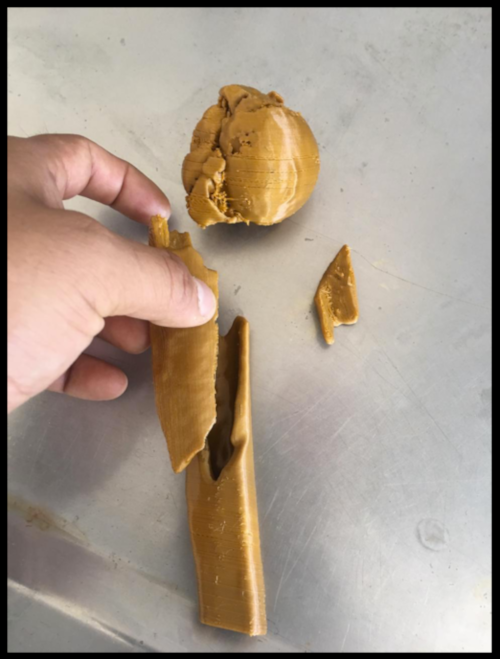
2.3 Results
The mold was delivered to the surgeon, who performed the pre-planning planning for the surgery.
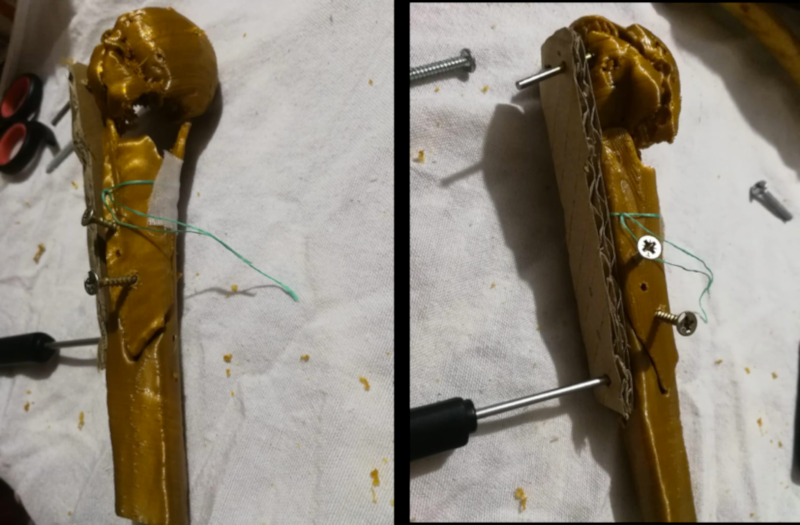
The surgery lasted 2 hours and 30 minutes (with the help of the mold). Normally this surgery lasts around 4 to 5 hours (without using mold).
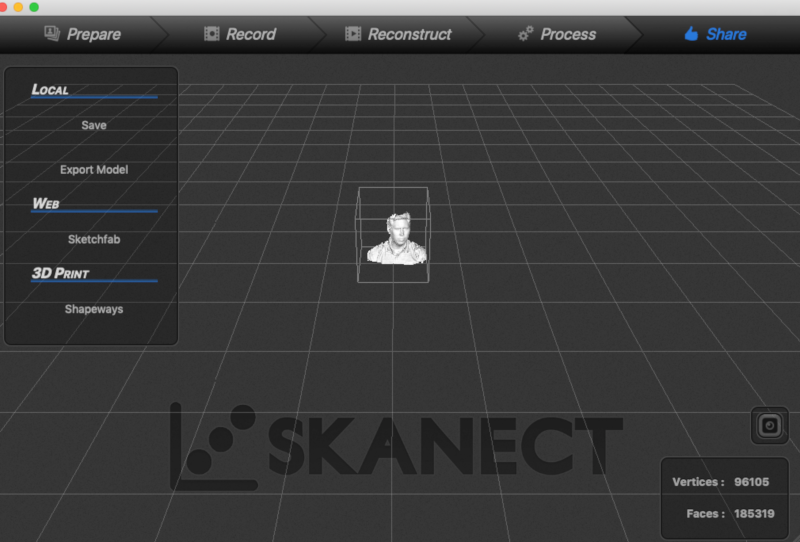
2.4 3D SCANNING
I used the Skanect software; This is a payment software. But you can use the free application, where you can perform 3D scanning. With Skanect, capturing a full-color 3D model of an object, a person or a room has never been so easy and affordable. Skanect transforms its Structure Sensor, Microsoft Kinect or Asus Xtion camera into a low cost 3D scanner capable of creating 3D meshes from real scenes..(
The sensor that I used to perform the scan of the
SELF EVALUATION
WHAT WORKED:
- I was able to edit and render images in DICOM format. And change them to STL formats.
- Perform configuration and generation of g-code of 3D printers.
- Print designs of 3D models.
WHAT DID NOT WORK:
- Use different types of 3D printers
- Use different types of materials for 3D printing.
- Use other types of scaners.
THINGS TO IMPROVE:
- Learn the different tools of 3D software.
Contact Me
Feel free to contact me via email or phone.