7. Electronics design
Assignment
Group project:
  use the test equipment in your lab to observe the operation
     of a microcontroller circuit board
just clic Group assignment is documented here. just clic
Individual project:
  redraw the echo hello-world board,
  add (at least) a button and LED (with current-limiting resistor)
  check the design rules, make it, and test it
  extra credit: simulate its operation
  extra credit: render it
program used
- 1 Kicad
- 2 libraries for kicad
- 3 libraries on github
- 4 install eagle
I also found this Tuto to be able to do a right job.
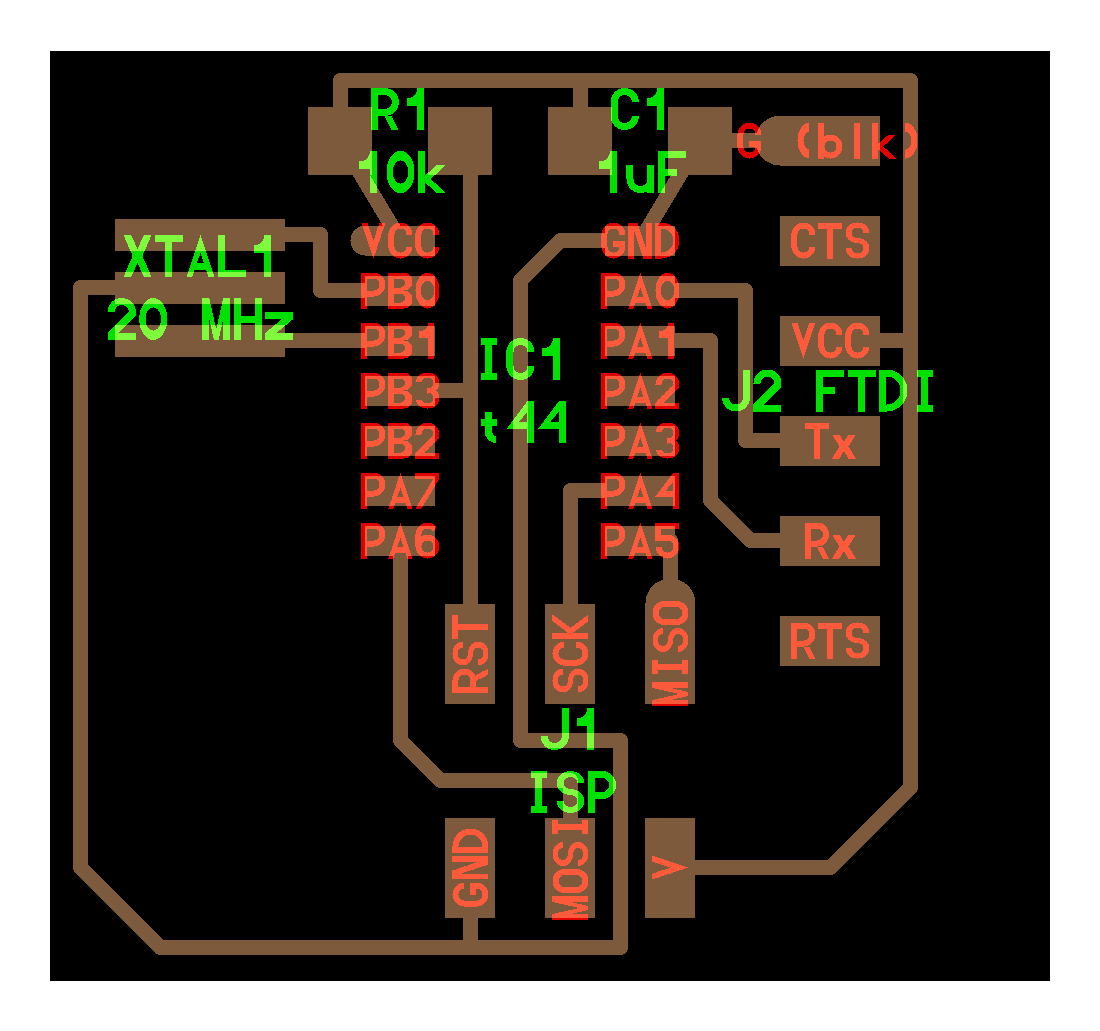
First i have to found the echo hello-world board.
Done
And i have to make a list of all the componnant and see if we have it
normaly yes
componants of the board
1 attiny84
1 6mm switch
2 resistors 10k
1 resistor 220
1 resonator
1 capacitor 1µF
1 led
1 connector 2*3
1connector 1*6
Calculate the resistance v=R*i
After that i have to implemented new componants at lest 2 or more.
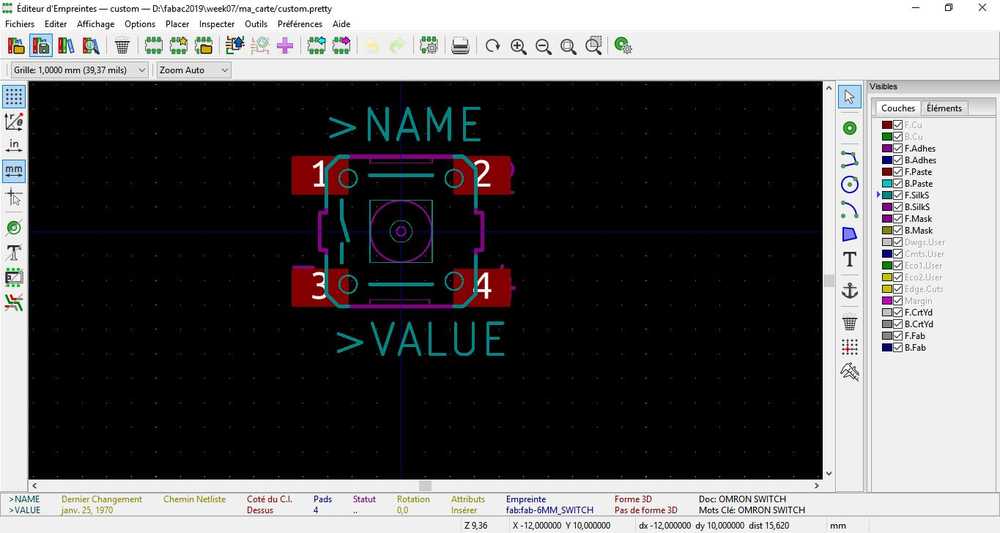
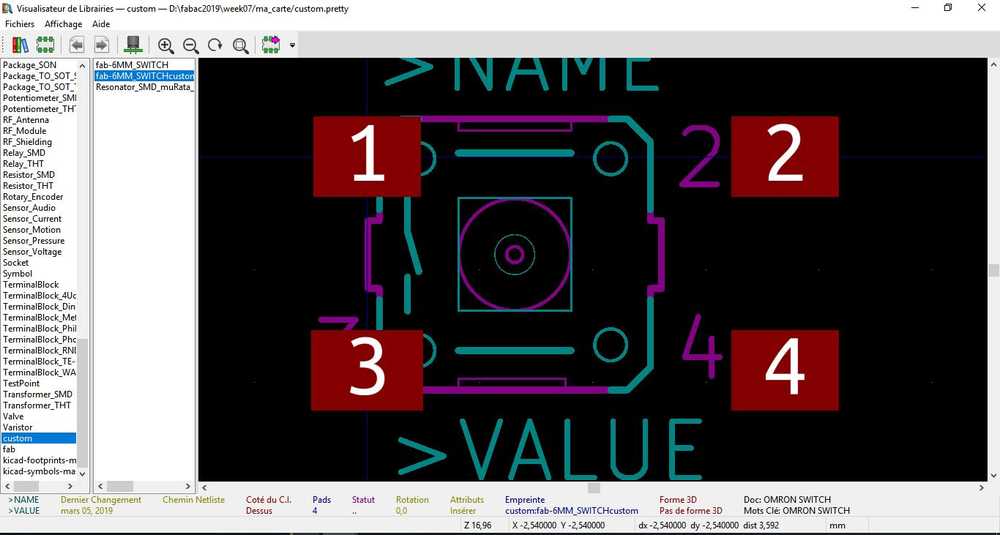
I have to found the footprint of the componants Here because i dont have it in Kidcad.
I also installed the libraries here
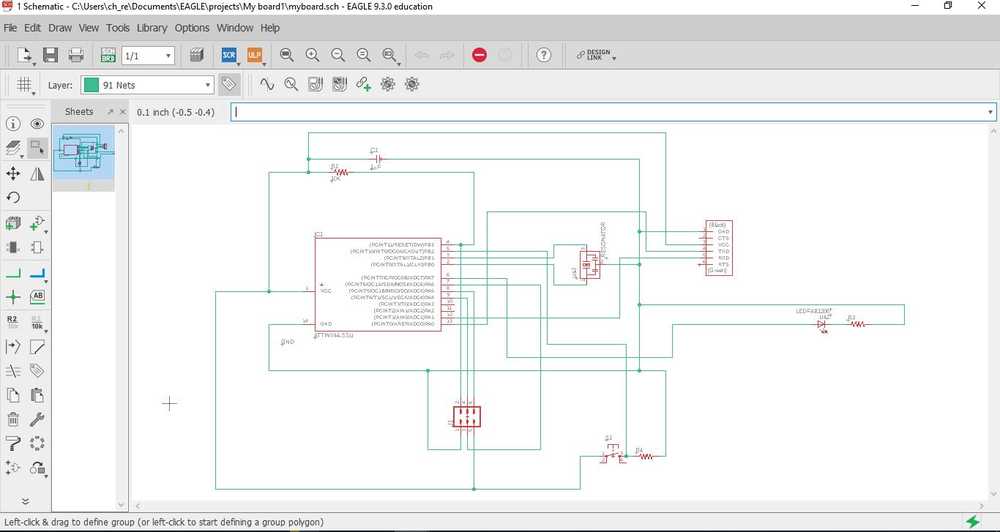
drawing the new schematic of the board
add a led and a switch
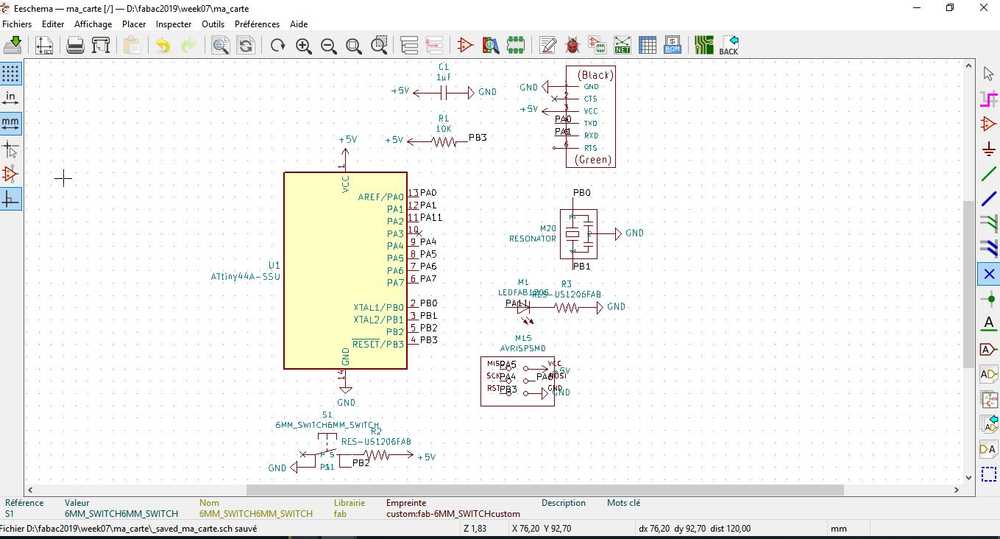
Associate the footprints clic on this icons

I used This Tutorial to do it.
Generate the netlist
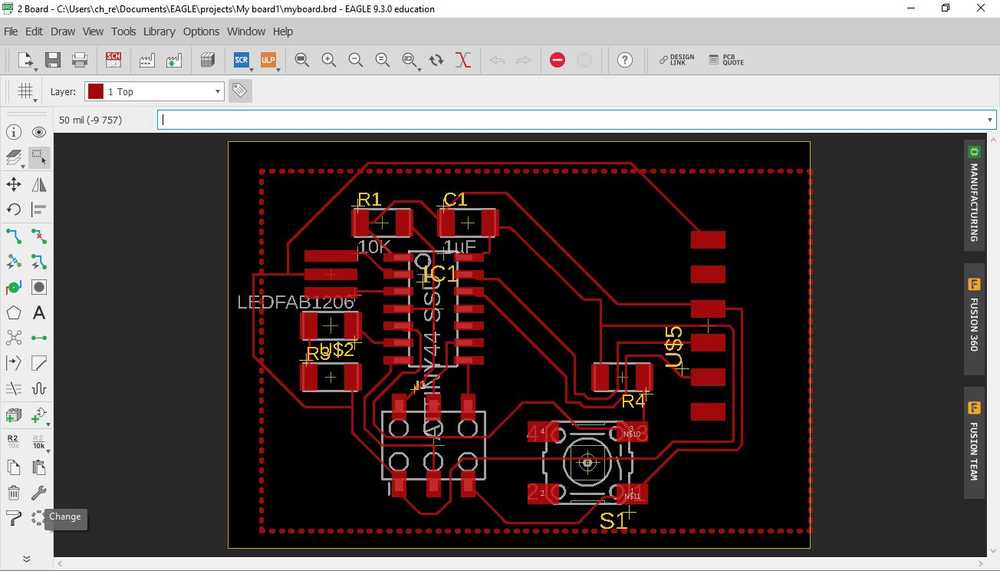
after that making the layout
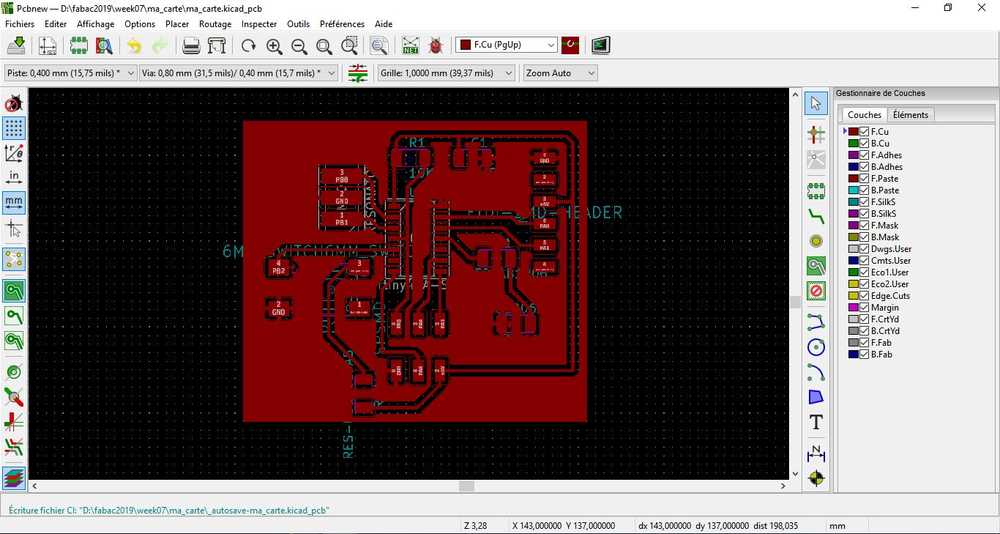
The footprint on the libraries are not exactly the same.
The model for the resonator is not aviable so i have to drawing it.
here is a tutoto do it.
i also tried eagle to make my board
but i have a problem with my screen
the program not fit the screen and exceed the screen i dont no why so i return to kicad
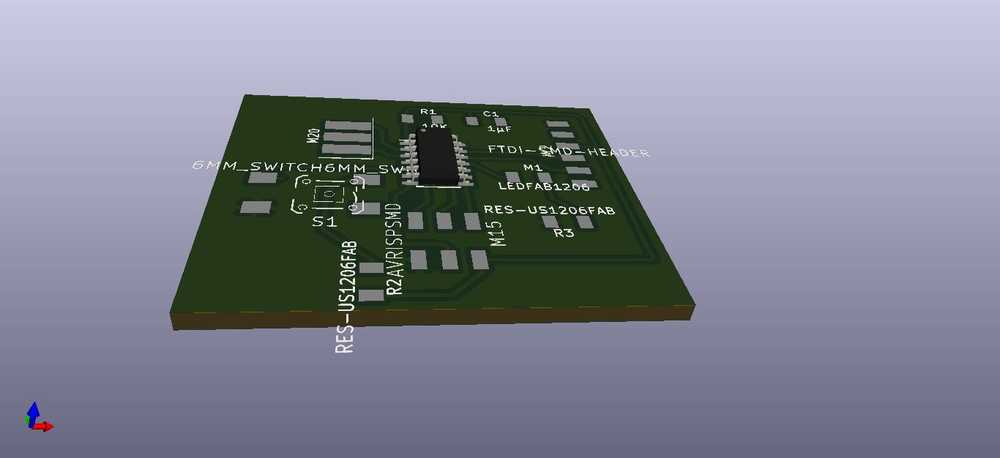
pic of board finished with kicad 3d model
After I have to use the milling machine
to be able to do it you have to trace your board like This
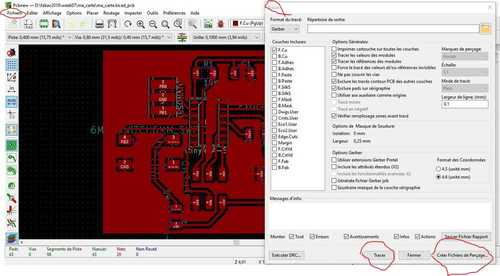
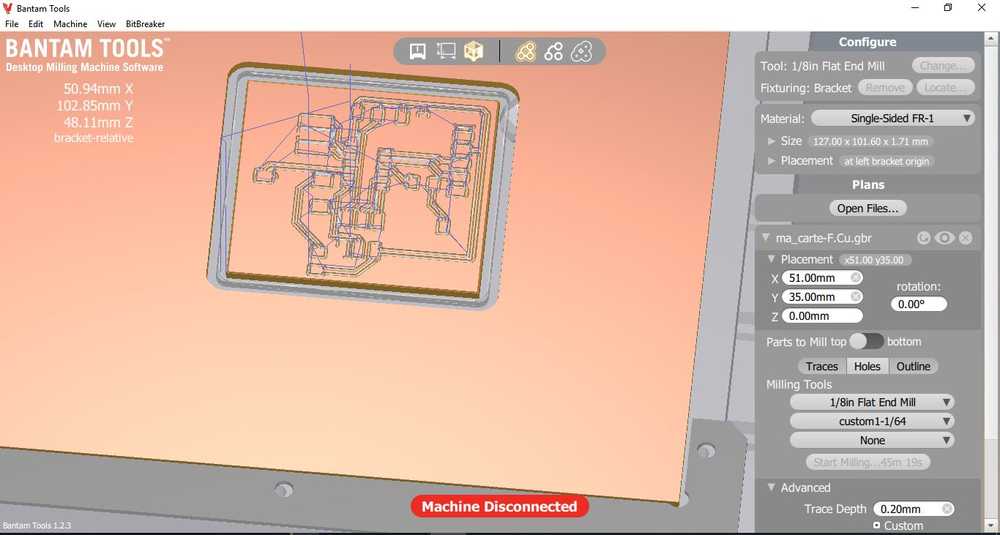
after that you can open bantam tools the program of the milling machine the same as week5
And choose the mill (you can see it on the right of the pictures)
And sold all the componants
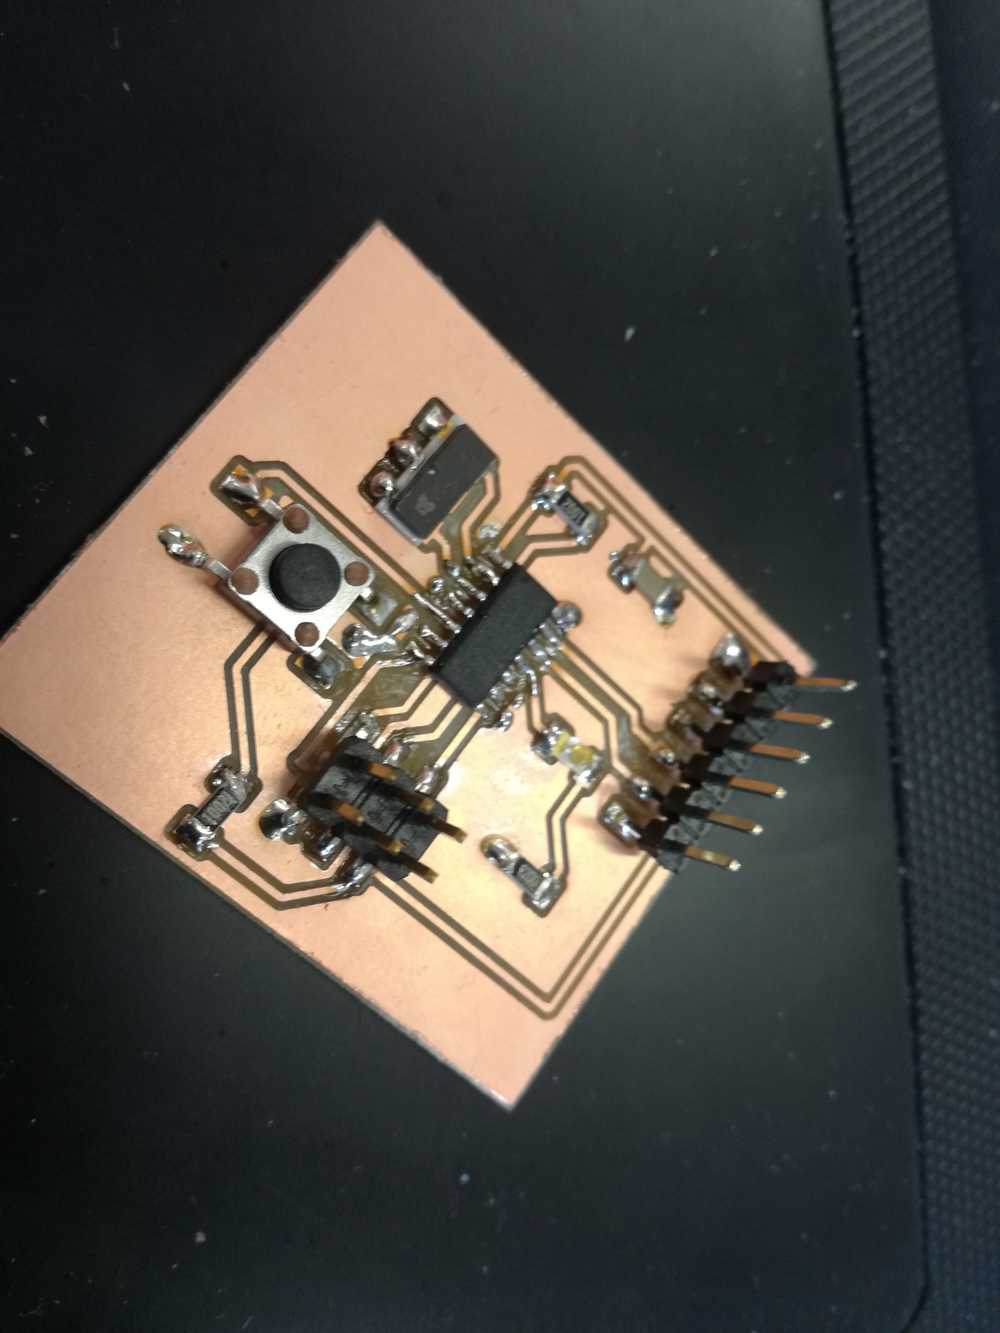
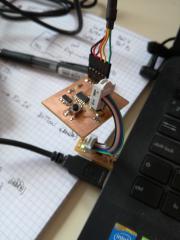
I just have to test it
Unfortunatly the board hs a shortcicuit and the pin of the ftdi broke
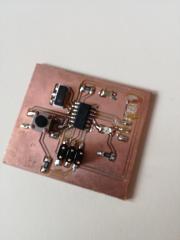
I have tho redo my board with all the same procedure (expliqued above)
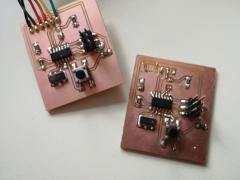
and debug the board
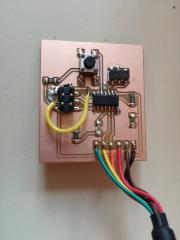
Now its seems to work.
Programming the board
I used the linux pc in the lab
i have to change the make file because we program a attiny 84
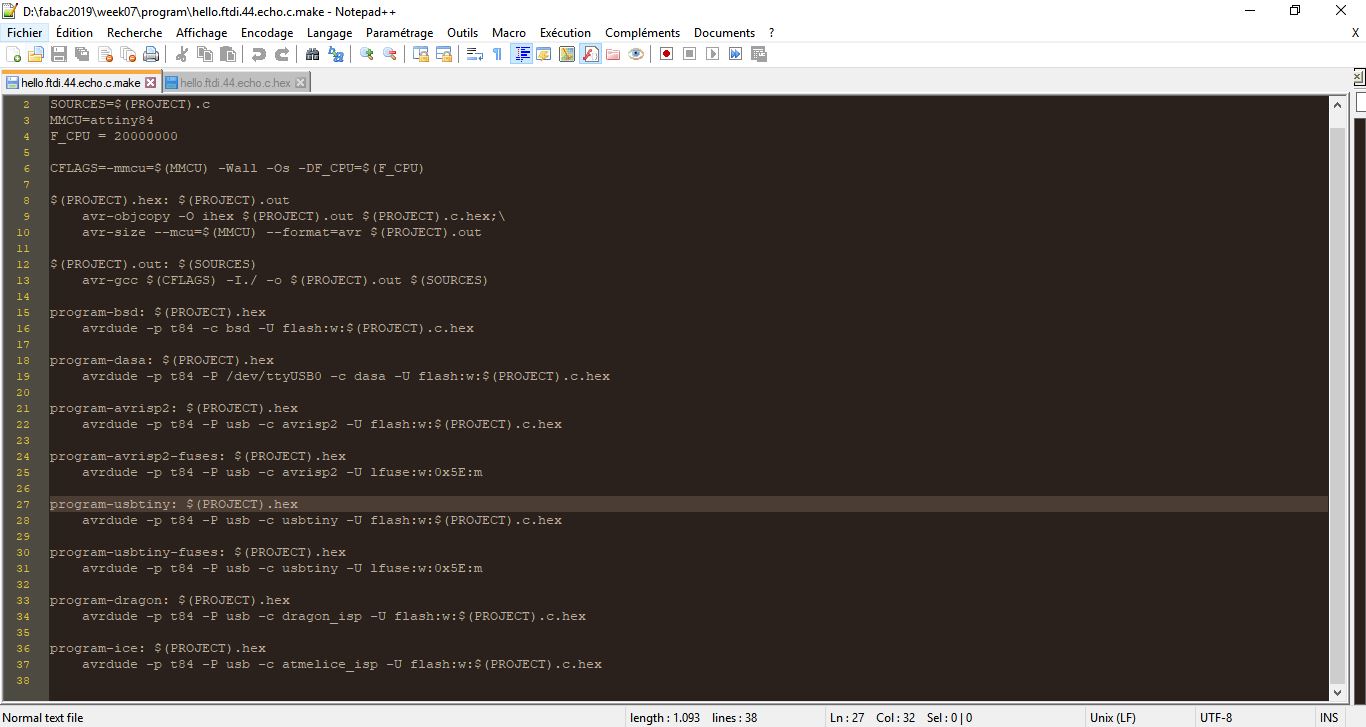
and make the hex file with the command
- make
2$ make -f hello.ftdi.44.echo.c.make
make: Warning: File 'hello.ftdi.44.echo.c' has modification time 33433 s in the future
avr-gcc -mmcu=attiny84 -Wall -Os -DF_CPU=20000000 -I./ -o hello.ftdi.44.echo.out hello.ftdi.44.echo.c
avr-objcopy -O ihex hello.ftdi.44.echo.out hello.ftdi.44.echo.c.hex;\
avr-size --mcu=attiny84 --format=avr hello.ftdi.44.echo.out
AVR Memory Usage
----------------
Device: attiny84

Program:     758 bytes (9.3% Full)
(.text + .data + .bootloader)

Data:         64 bytes (12.5% Full)
(.data + .bss + .noinit)
$ sudo make -f hello.ftdi.44.echo.c.make program-usbtiny-fuses
make: Warning: File 'hello.ftdi.44.echo.c' has modification time 33397 s in the future
avr-gcc -mmcu=attiny84 -Wall -Os -DF_CPU=20000000 -I./ -o hello.ftdi.44.echo.out hello.ftdi.44.echo.c
avr-objcopy -O ihex hello.ftdi.44.echo.out hello.ftdi.44.echo.c.hex;\
avr-size --mcu=attiny84 --format=avr hello.ftdi.44.echo.out
AVR Memory Usage
----------------
Device: attiny84

Program:     758 bytes (9.3% Full)
(.text + .data + .bootloader)

Data:         64 bytes (12.5% Full)
(.data + .bss + .noinit)


avrdude -p t84 -P usb -c usbtiny -U lfuse:w:0x5E:m

avrdude: AVR device initialized and ready to accept instructions

Reading | ################################################## | 100% 0.01s

avrdude: Device signature = 0x1e930c (probably t84)
avrdude: reading input file "0x5E"
avrdude: writing lfuse (1 bytes):

Writing | ################################################## | 100% 0.02s

avrdude: 1 bytes of lfuse written
avrdude: verifying lfuse memory against 0x5E:
avrdude: load data lfuse data from input file 0x5E:
avrdude: input file 0x5E contains 1 bytes
avrdude: reading on-chip lfuse data:

Reading | ################################################## | 100% 0.00s

avrdude: verifying ...
avrdude: 1 bytes of lfuse verified

avrdude: safemode: Fuses OK (E:FF, H:DF, L:5E)

avrdude done.  Thank you.
$ sudo make -f hello.ftdi.44.echo.c.make program-usbtiny
make: Warning: File 'hello.ftdi.44.echo.c' has modification time 33331 s in the future
avr-gcc -mmcu=attiny84 -Wall -Os -DF_CPU=20000000 -I./ -o hello.ftdi.44.echo.out hello.ftdi.44.echo.c
avr-objcopy -O ihex hello.ftdi.44.echo.out hello.ftdi.44.echo.c.hex;\
avr-size --mcu=attiny84 --format=avr hello.ftdi.44.echo.out
AVR Memory Usage
----------------
Device: attiny84

Program:     758 bytes (9.3% Full)
(.text + .data + .bootloader)

Data:         64 bytes (12.5% Full)
(.data + .bss + .noinit)


avrdude -p t84 -P usb -c usbtiny -U flash:w:hello.ftdi.44.echo.c.hex

avrdude: AVR device initialized and ready to accept instructions

Reading | ################################################## | 100% 0.01s

avrdude: Device signature = 0x1e930c (probably t84)
avrdude: NOTE: "flash" memory has been specified, an erase cycle will be performed
         To disable this feature, specify the -D option.
avrdude: erasing chip
avrdude: reading input file "hello.ftdi.44.echo.c.hex"
avrdude: input file hello.ftdi.44.echo.c.hex auto detected as Intel Hex
avrdude: writing flash (758 bytes):

Writing | ################################################## | 100% 0.42s

avrdude: 758 bytes of flash written
avrdude: verifying flash memory against hello.ftdi.44.echo.c.hex:
avrdude: load data flash data from input file hello.ftdi.44.echo.c.hex:
avrdude: input file hello.ftdi.44.echo.c.hex auto detected as Intel Hex
avrdude: input file hello.ftdi.44.echo.c.hex contains 758 bytes
avrdude: reading on-chip flash data:

Reading | ################################################## | 100% 0.61s

avrdude: verifying ...
avrdude: 758 bytes of flash verified

avrdude: safemode: Fuses OK (E:FF, H:DF, L:5E)

avrdude done.  Thank you.
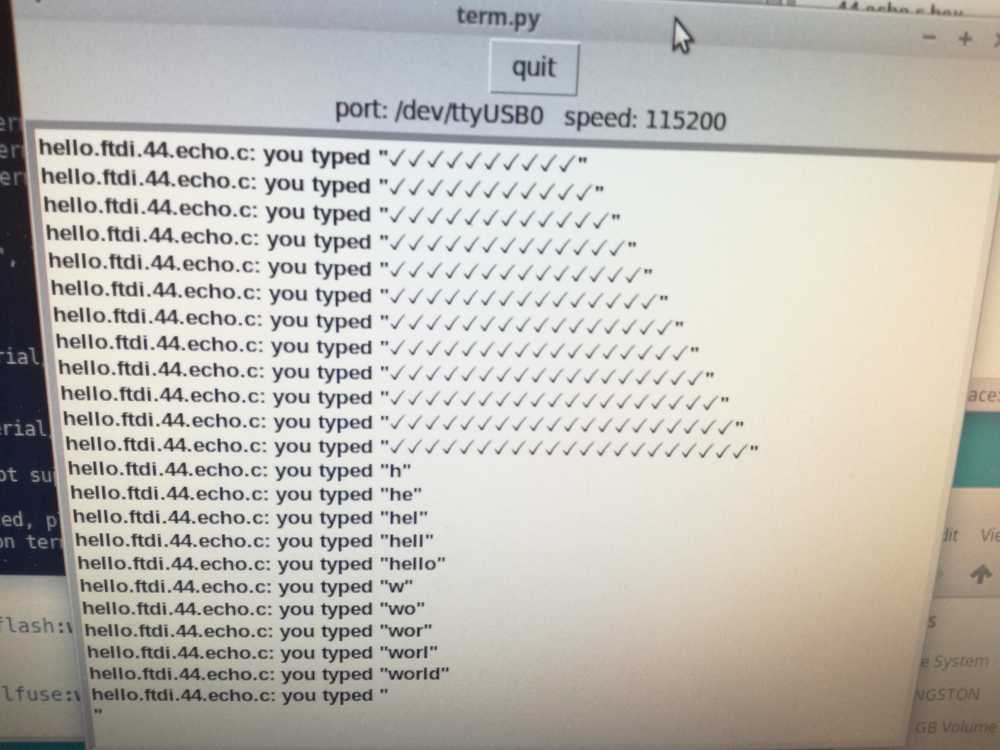
It seems to have worked! Let’s open the terminal with the command:
$ python term.py /dev/ttyUSB0 115200
Tadaa! Here is the result: it is working!
original files
Done For this week07