Weekly Task
Group assignment:
review the safety data sheets for each of your molding and casting materials, then make and compare test casts with each of them
Individual assignment:
design a 3D mold around the stock and tooling that you'll be using, machine it, and use it to cast parts
- InstaMold
- Hydrostone
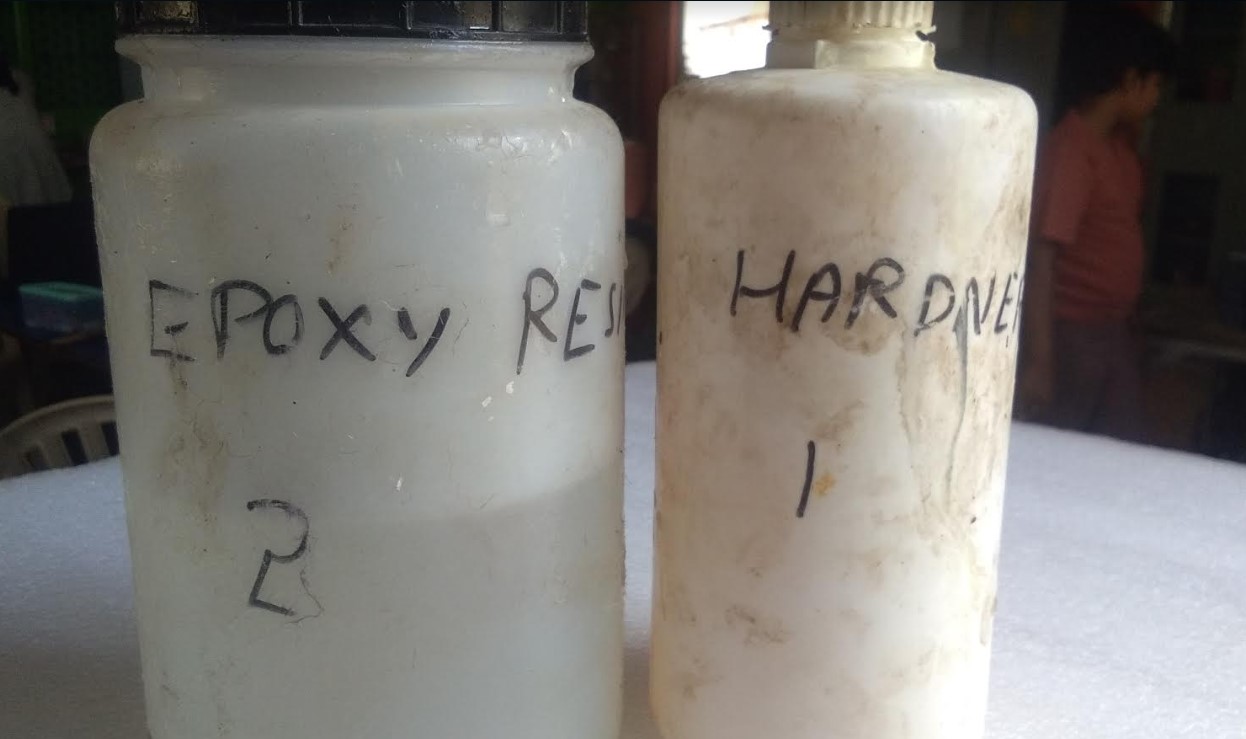
- Epoxy Resin
- Bismuth
- Flex wax
- Machine wax
- POP (paster of paris)
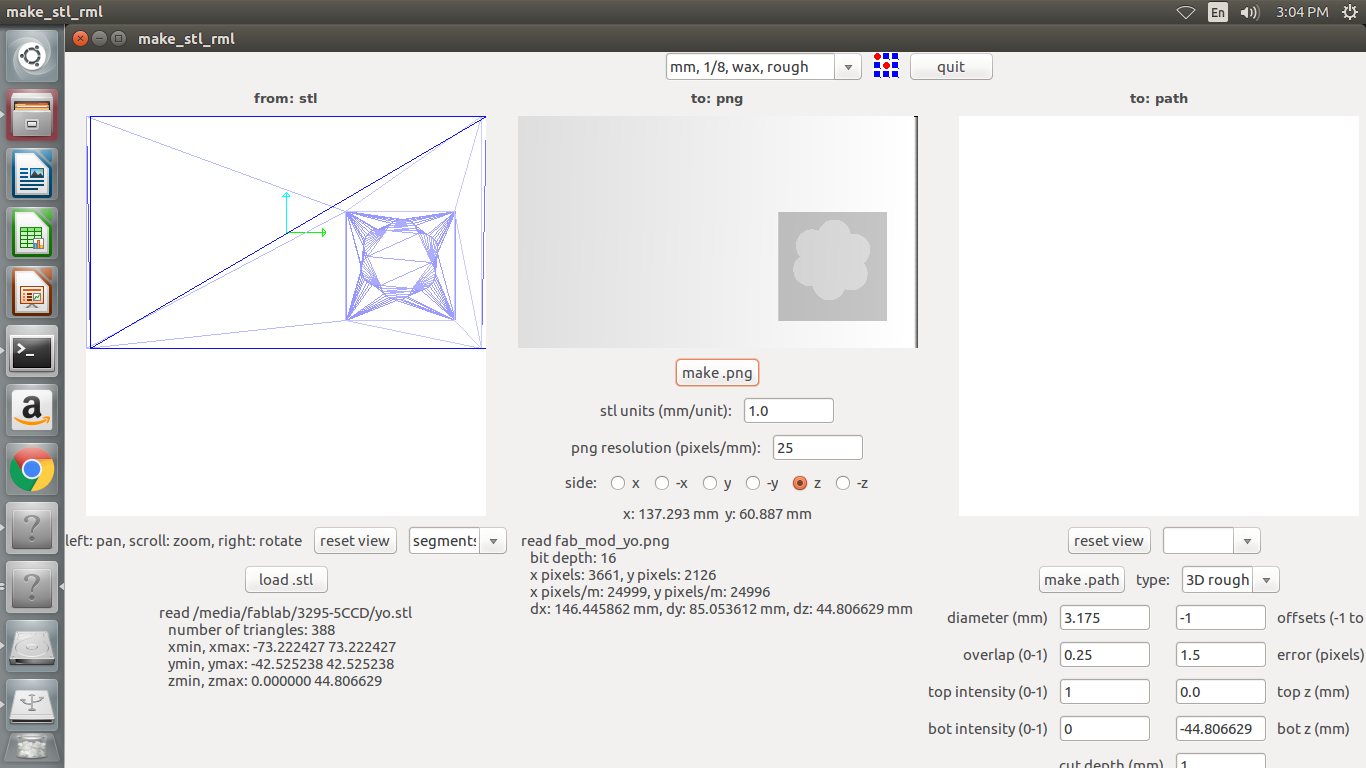
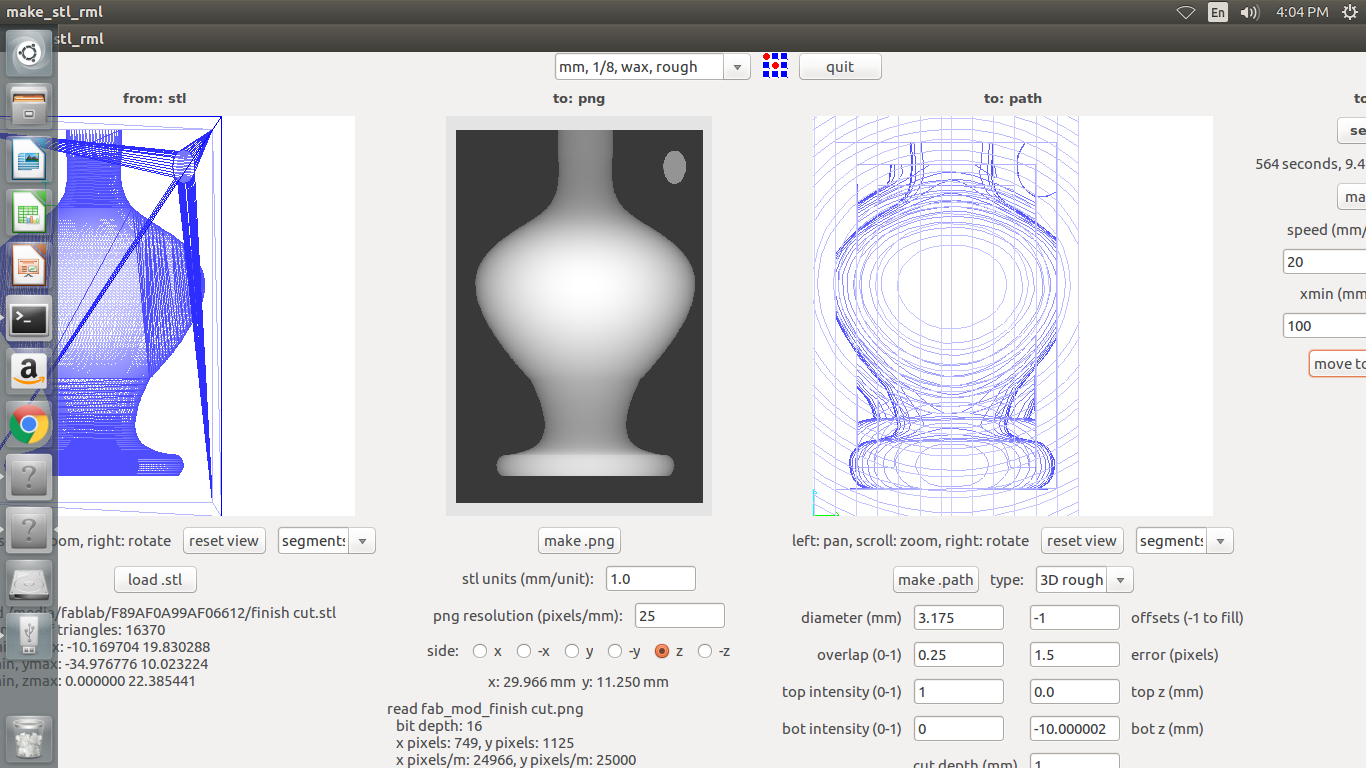
- Open the (.stl) file in the fab modules and check the dimension of image whether it is correct or not.
- Give (.rml) as Output Format.
- Process : wax ⅛ rough cut
- Overlap : 0.25
- Diameter : 1/8 inch(3.175mm)
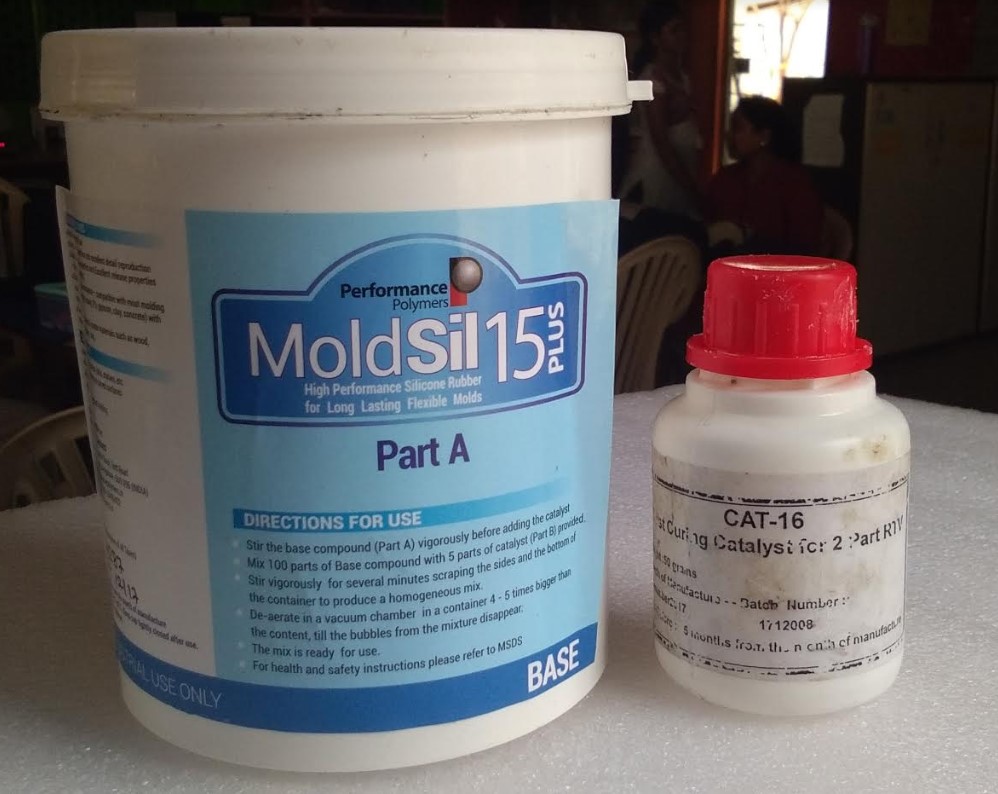
- silicon rubber + harderner = Water
- Silicon rubber = 44.073g
- harderner = 4.8g
- 44.073 + 4.8 = 48.873
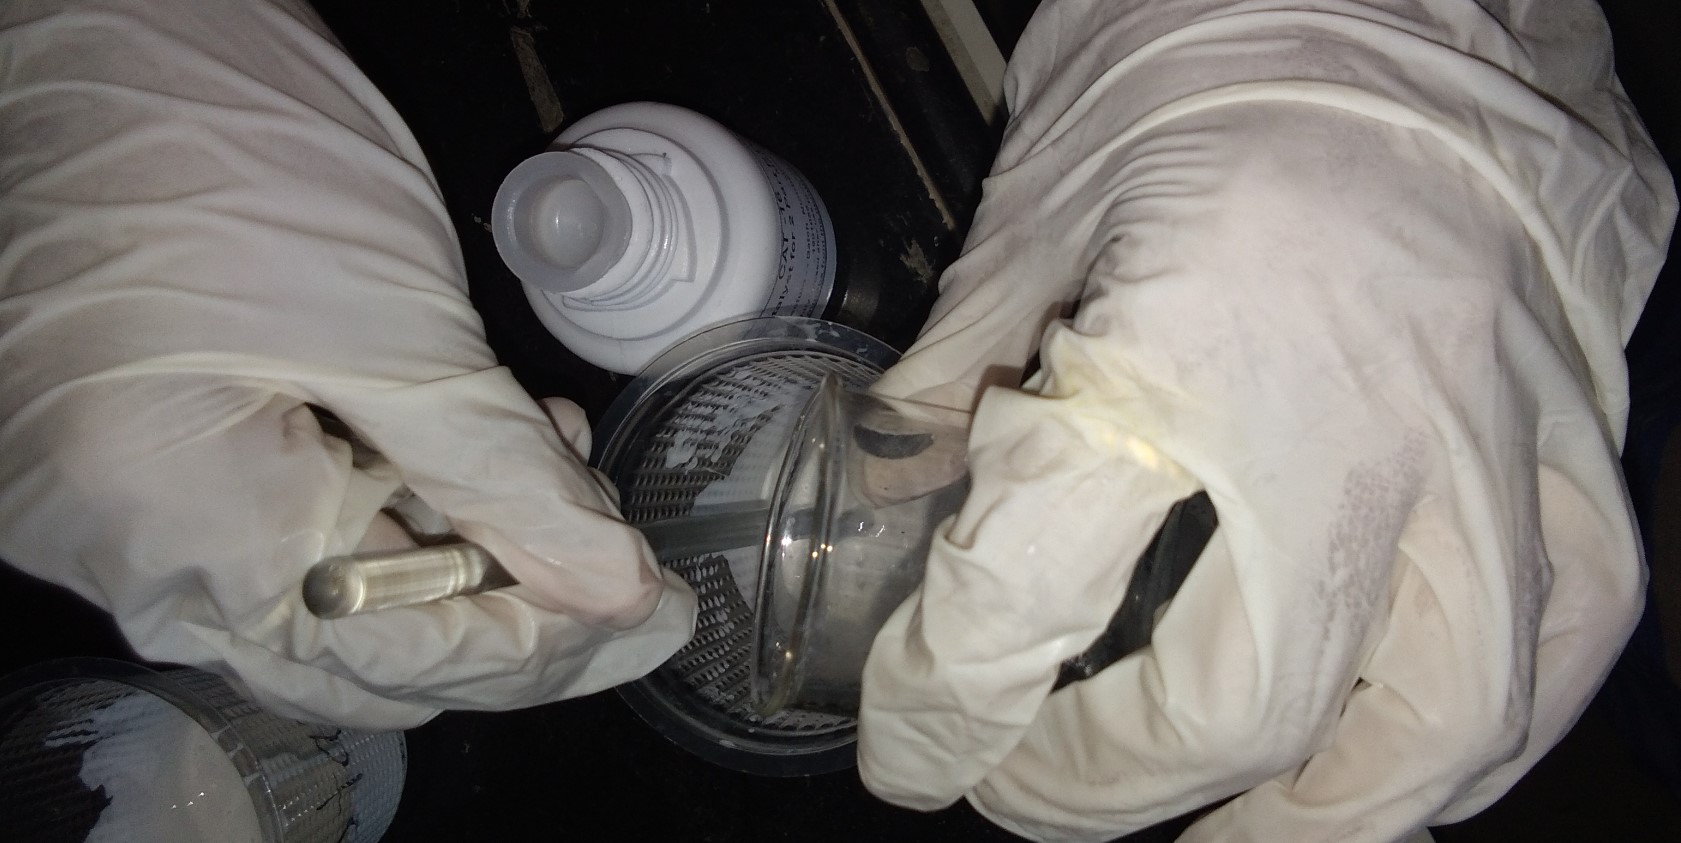
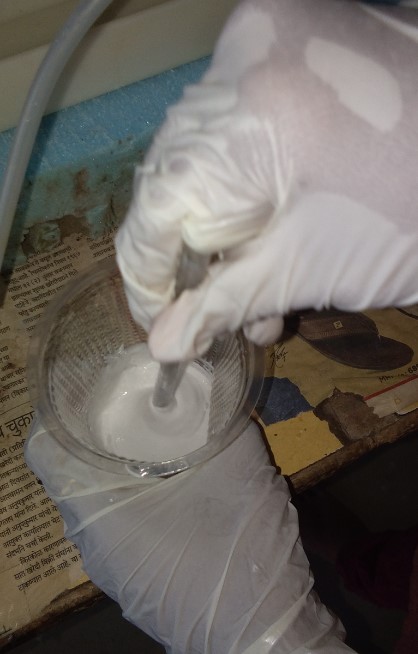
- Weight proper amount of temperature water in clean container
- Weight proper amount of poweder(Sprinkle the powder into water slowly and evenly.) allow to soak for 1-2 min
- Mix with a 1750rpm drill and mixing blade.
- Pouring should be smooth and steady into the center of the base of the mold.
Molding - Molding is the process of manufacturing by shaping liquid or pliable raw material using a rigid frame called a mold. molding is the preferred process for manufacturing plastic parts.
Casting - casting involves pouring liquid metal into a mold, which contains a hollow cavity of the desired shape, and then allowing it to cool and solidify. The solidified part is also known as a casting.
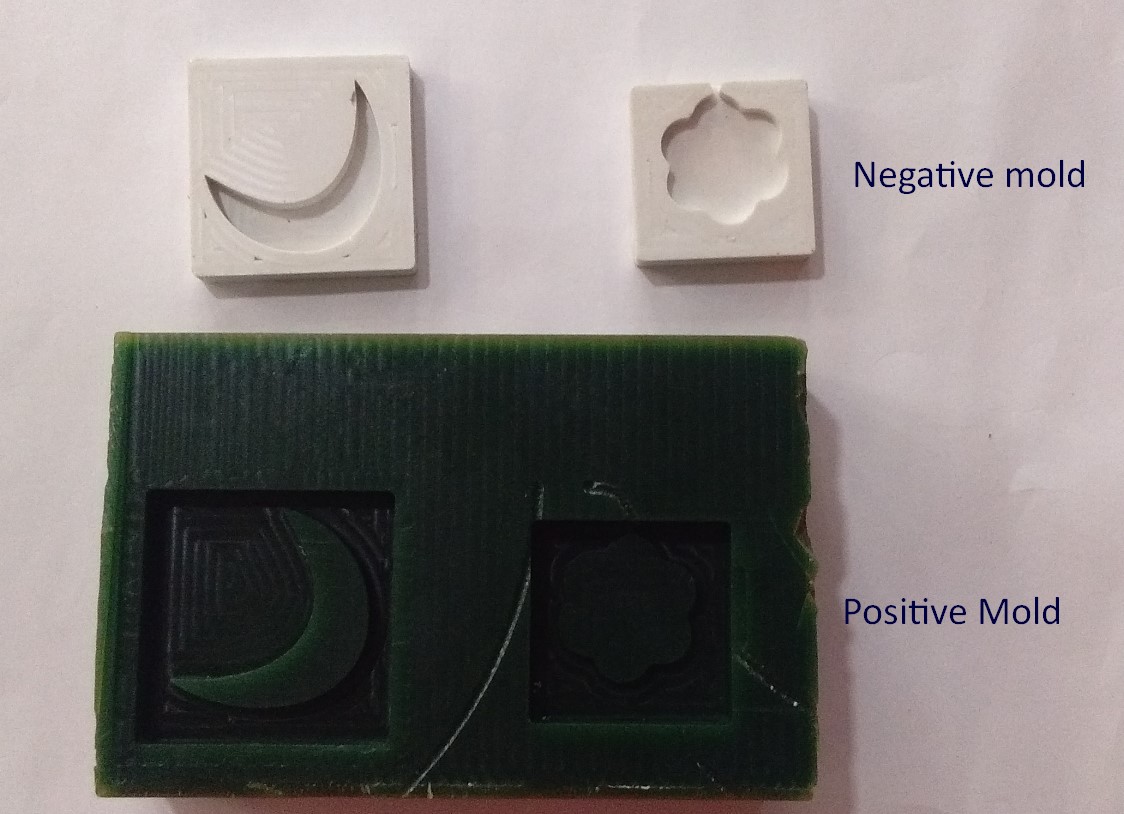
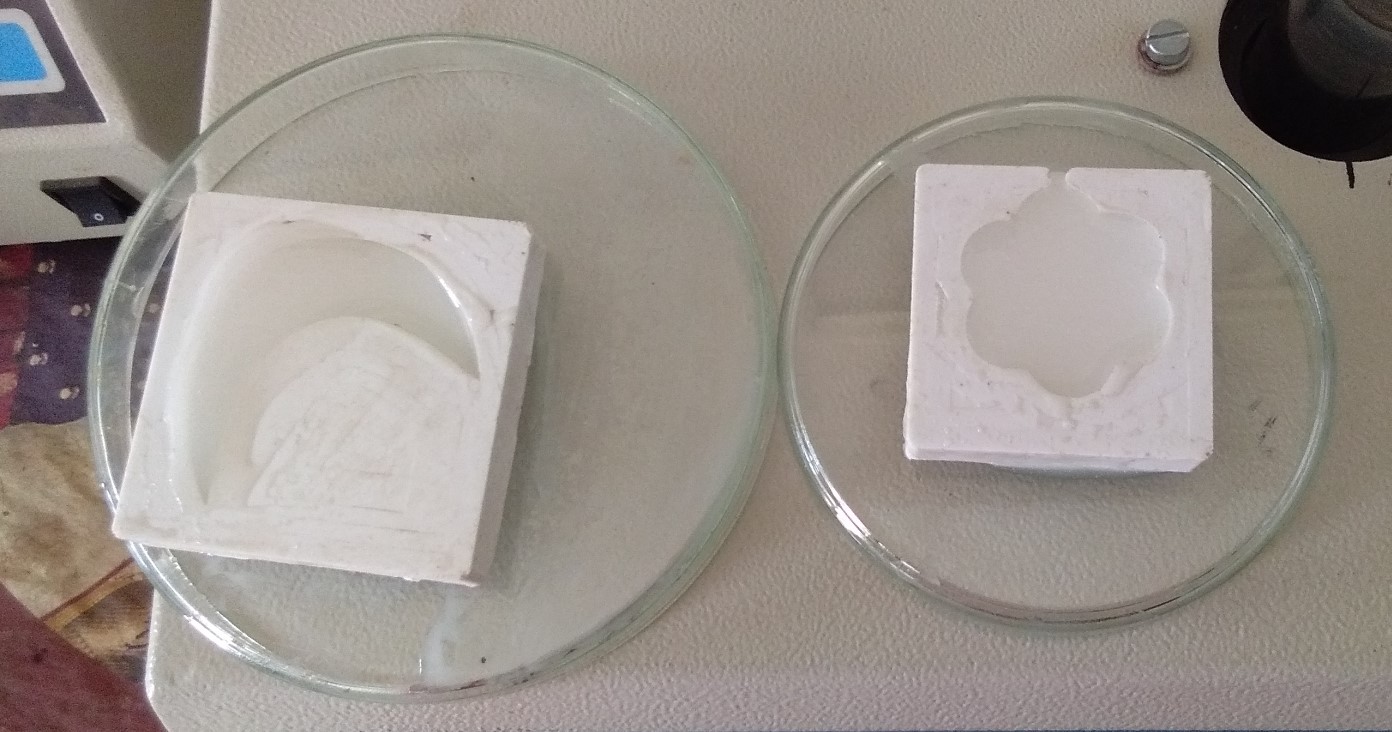
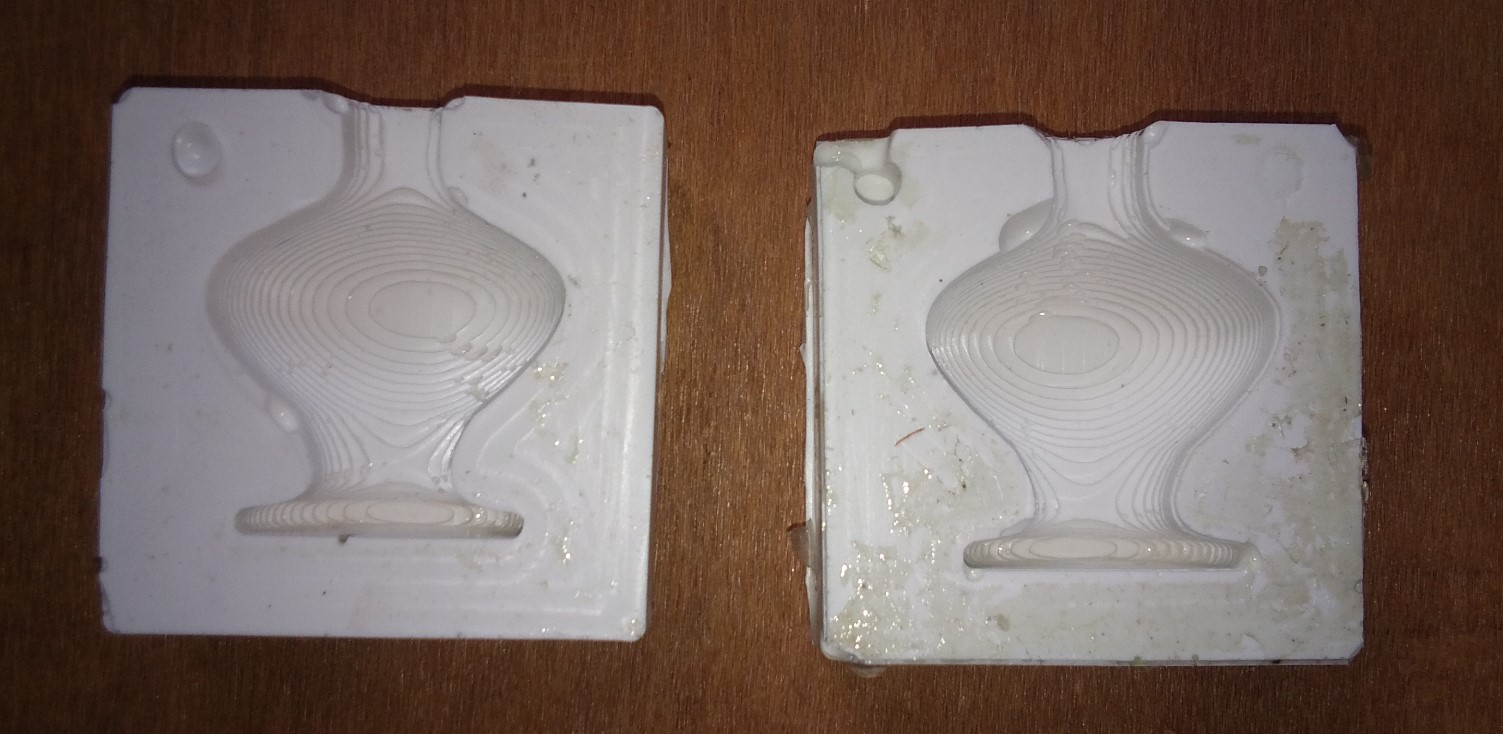
The first step is to make a Positive Mold by using Milling Machine.We have different type of milling materials for making mold negative mold. I used machinable milling wax
We list out the available material. Then we took one of each and decided to discuss the properties of them.
Available Material
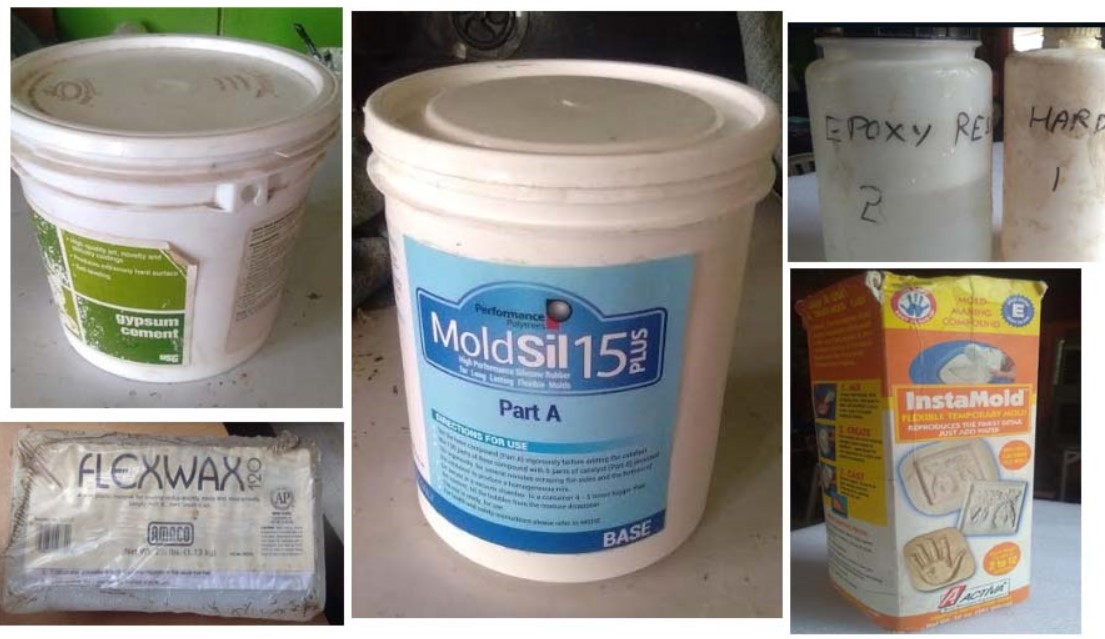
Epoxy - Epoxy is either any of the basic components or the cured end products of epoxy resine, as well as a colloquial name for the epoxide functional group.
Group Assignment
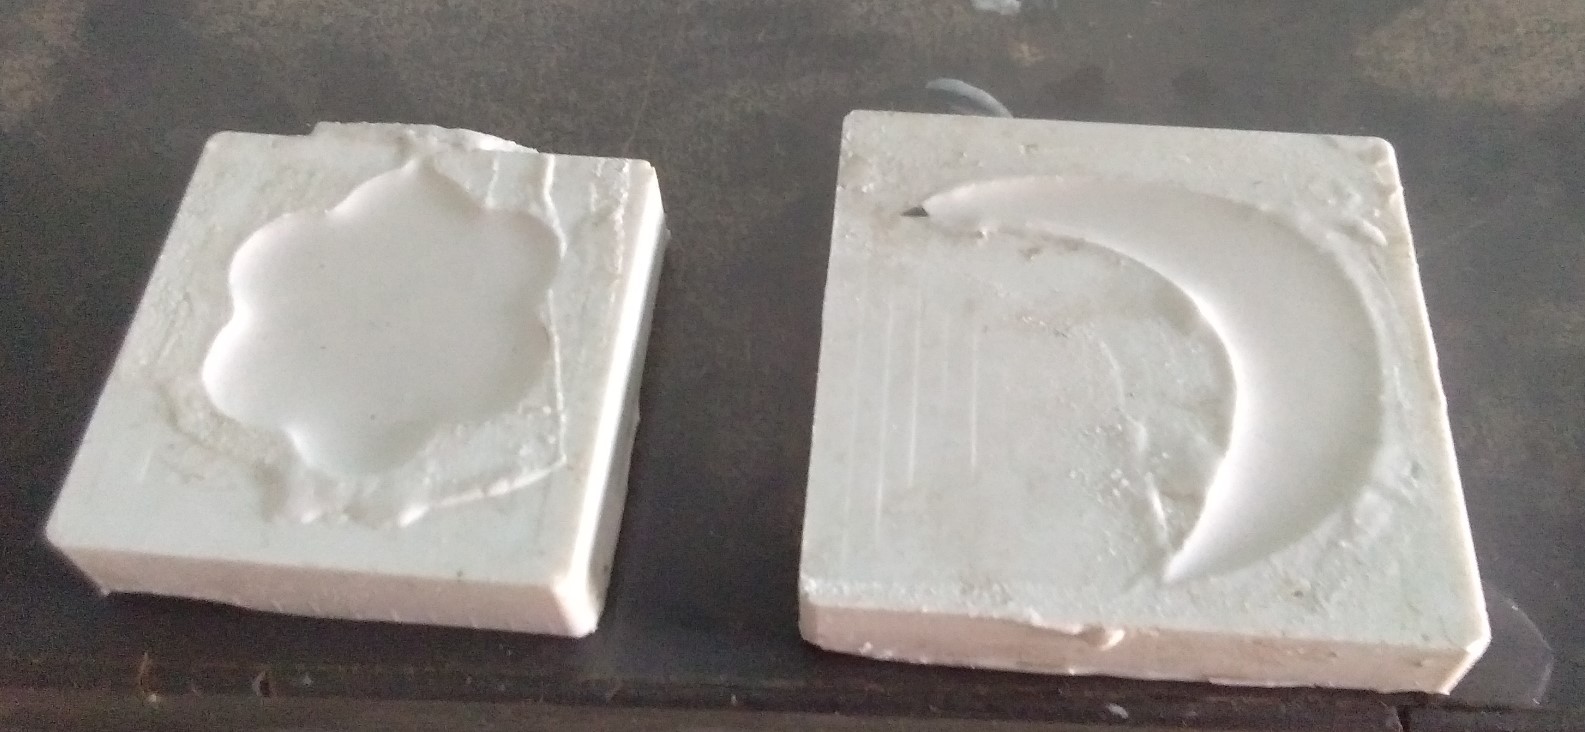
In group Assignment We used Machine Wax,Silicon rubber,Epoxy We made a simple flower design using Fusion 360 and mill on Modela MDX20 machine under prefernce of our Instructor .beacuse all things was new for us.We designed two different shape and tested on Material.
For Milling we used Modela MDX20 milling machine.then we made .rml file using offline fab module.
After Rough cut we got a error.its not cut properly.then we gave finish cut.we made our positive Mold.
|
|
Silicone rubber is an elastomer (rubber-like material) composed of silicone—itself a polymer—containing silicon together with carbon, hydrogen, and oxygen. Silicone rubbers are widely used in industry, and there are multiple formulations. Silicone rubbers are often one- or two-part polymers, and may contain fillers to improve properties or reduce cost.
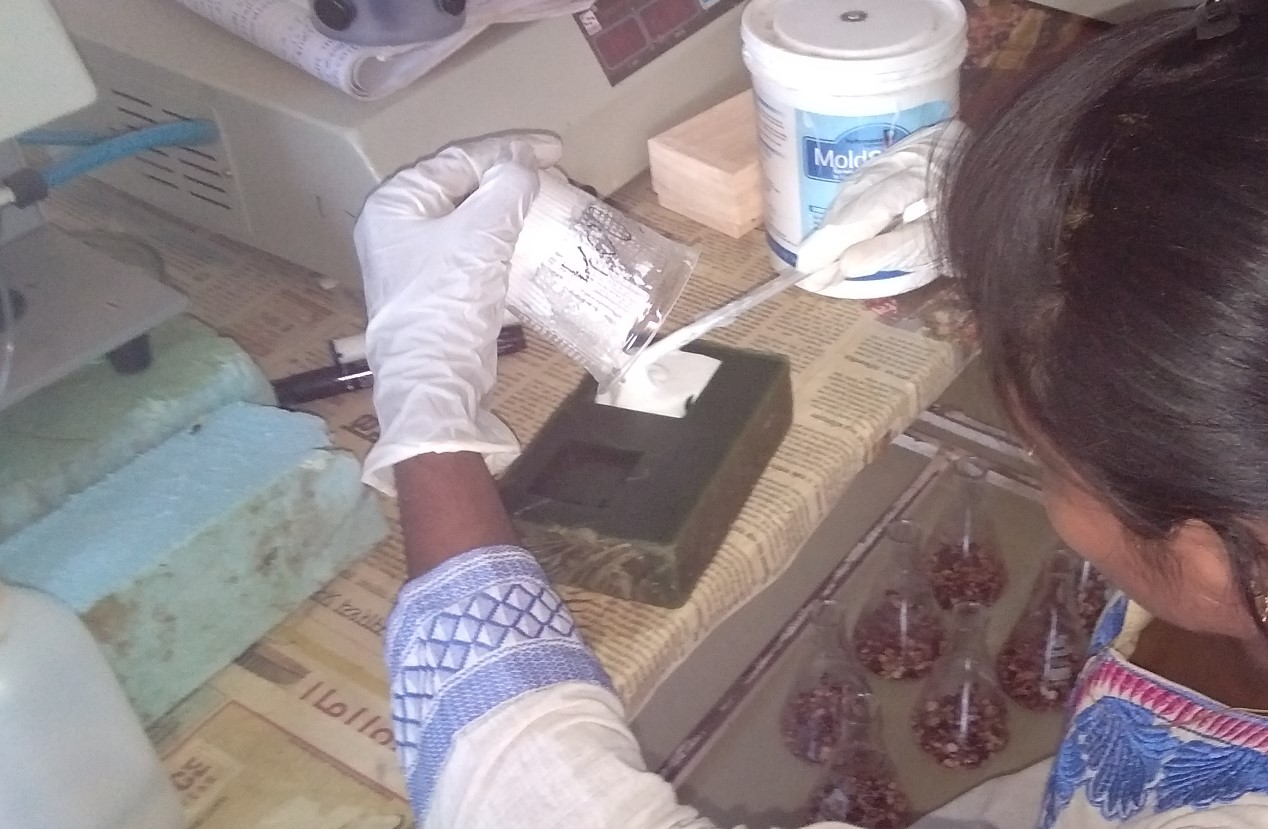
For Negative Mold We used Silicon rubber material with adding Harderner.We measured silicon rubber by volume.firstly we put a water in designed mold and remove in beaker. then measured water and took a same ratio of water for silicon.our silicon rubber is a 20ml.
We tried different ratios to make test casts of silicone.There a few tried and tested ratios. We tried with 1:10 and 1:20.
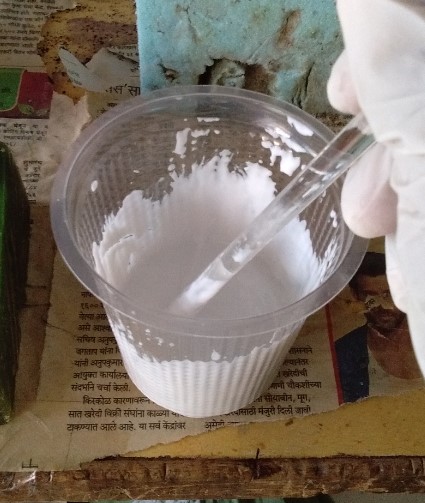
Mixed a Harderner in silicon.and mixed properly for avoiding bubbles.we used glass rod to remove air bubbles but it was very time consuming.
pour the silicone into the mold
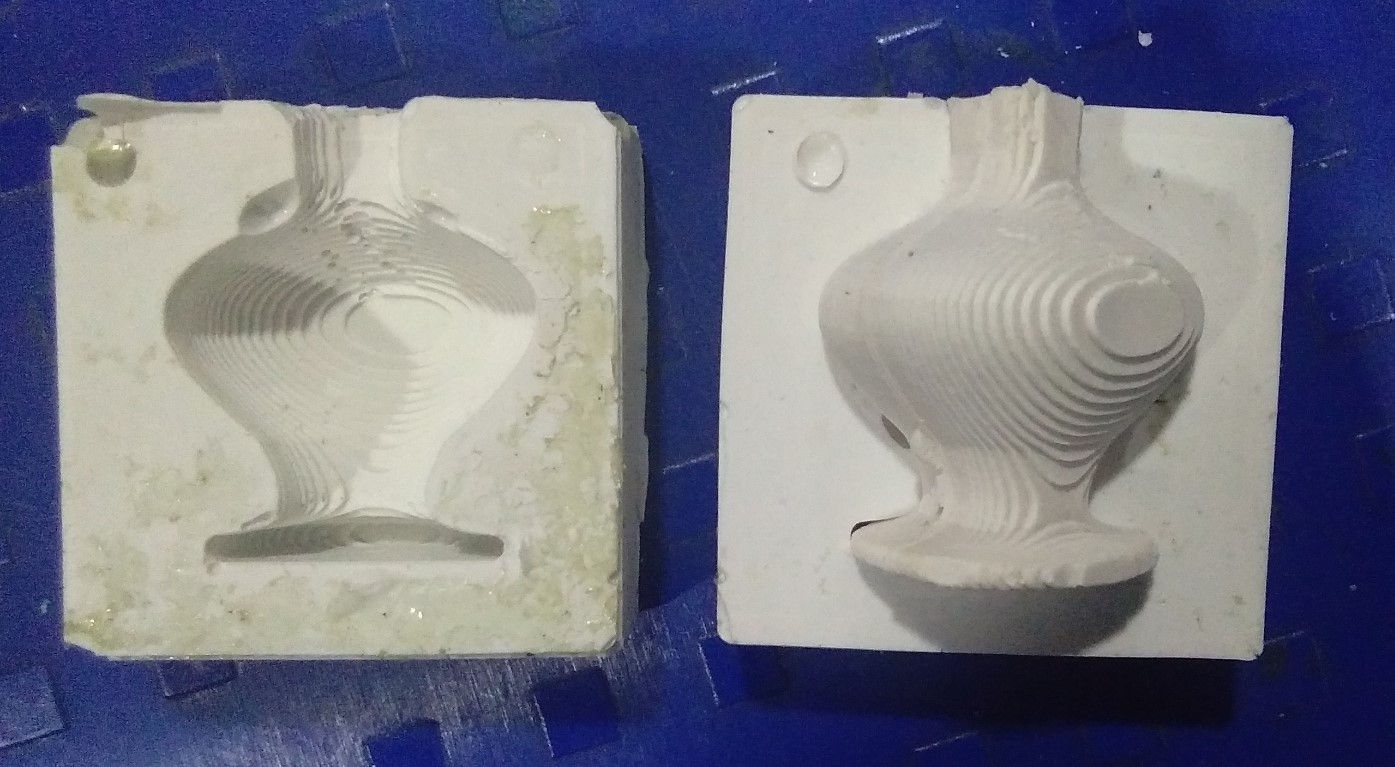
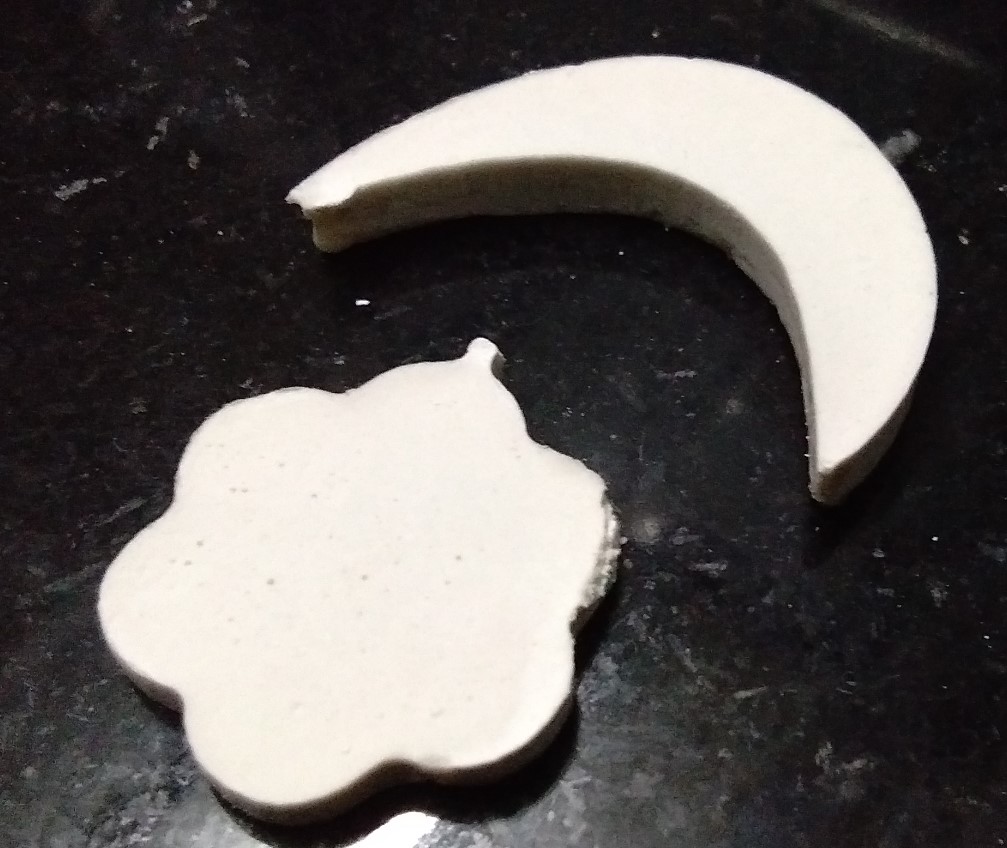
Our positive and negative mold is ready...
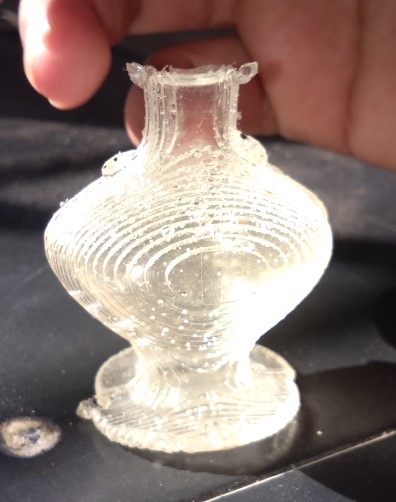
For Casting We took the epoxy and hardener is in ratio 1:2.We checked by volume how much epoxy is required for our mold. I took epoxy resine and hardener and stirred it well. Poured into the silicon rubber mold and waiting.
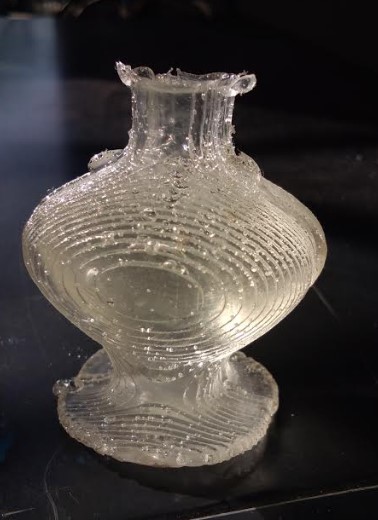
But...here we understood a mistek was Deficiency of hardener our casting was not set in 2 days.after understanding we modify it and put a proper harderner.
Problem I faced?
Epoxy was not set up even after 2 days due to low hardness.I repeate this step again.that time we understood the proper ratio of hardener.

Individual Assignment
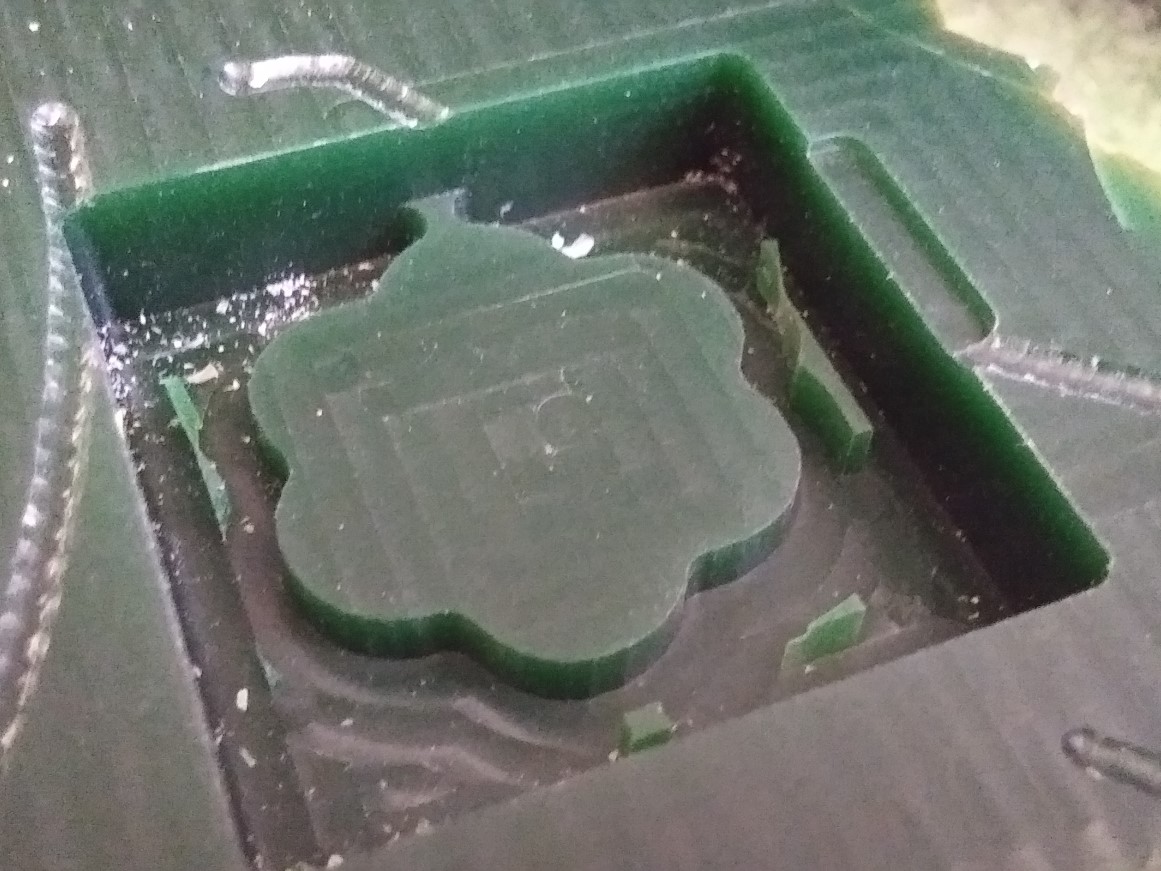
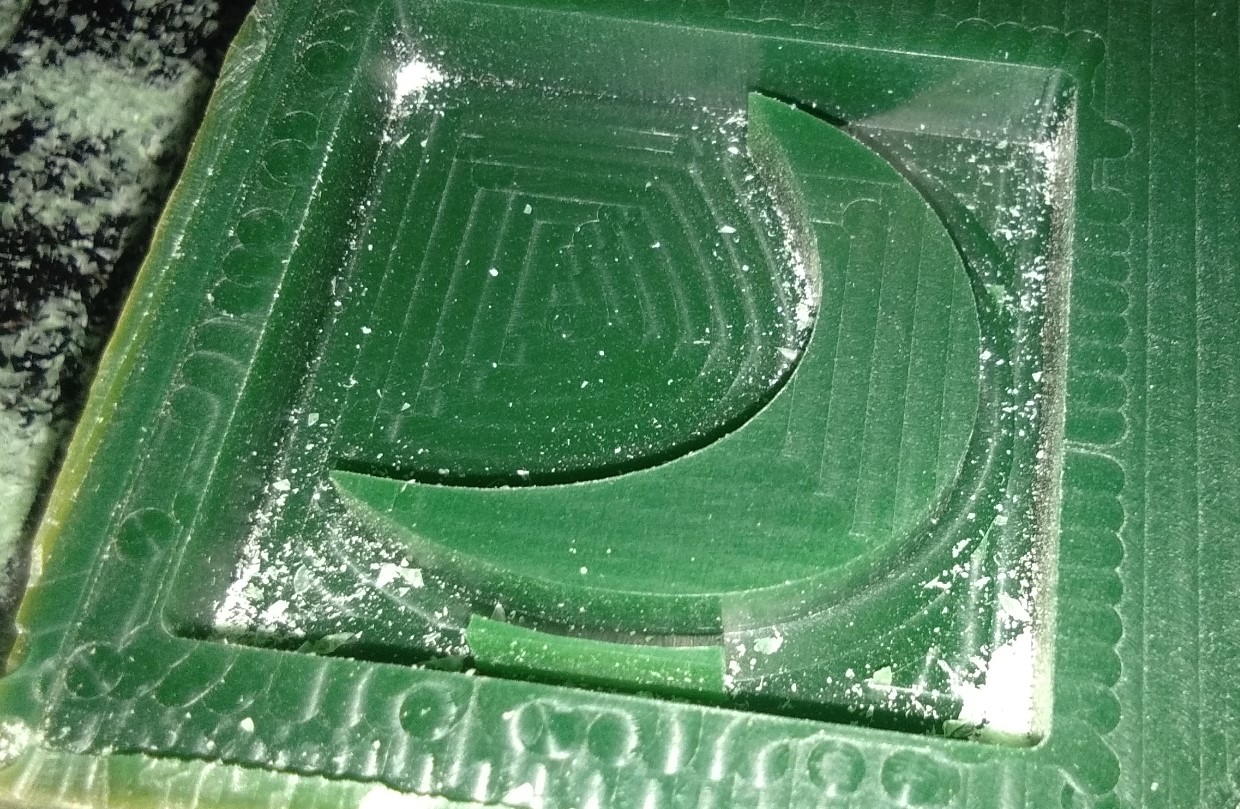
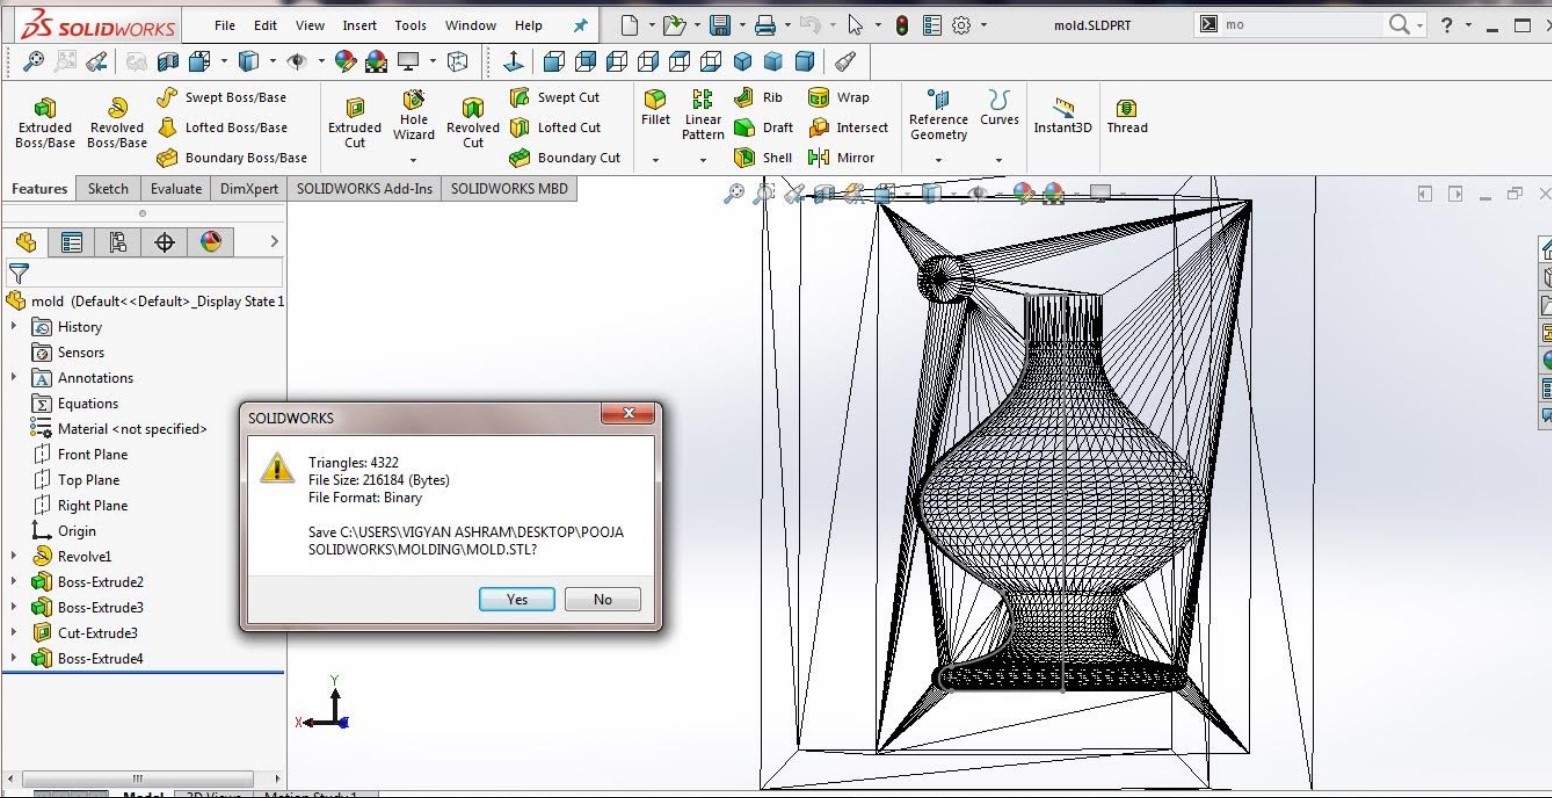
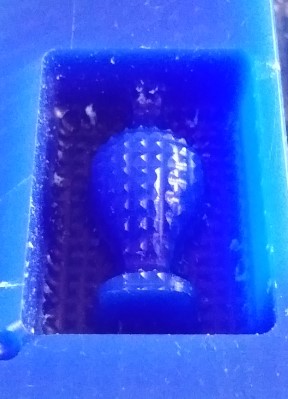
I started with making a design file in solidworks, this file in binary .stl form will be used by the Modella to curve out the shape in a machinable wax.I tried to make 3D simple folwer pot design.It also used for showpiece.In my design I gave 5mm thickness to the edges 10mm depth.
In my design I also gave the dot for registartion.I checked my oriantation in Meshmixer.
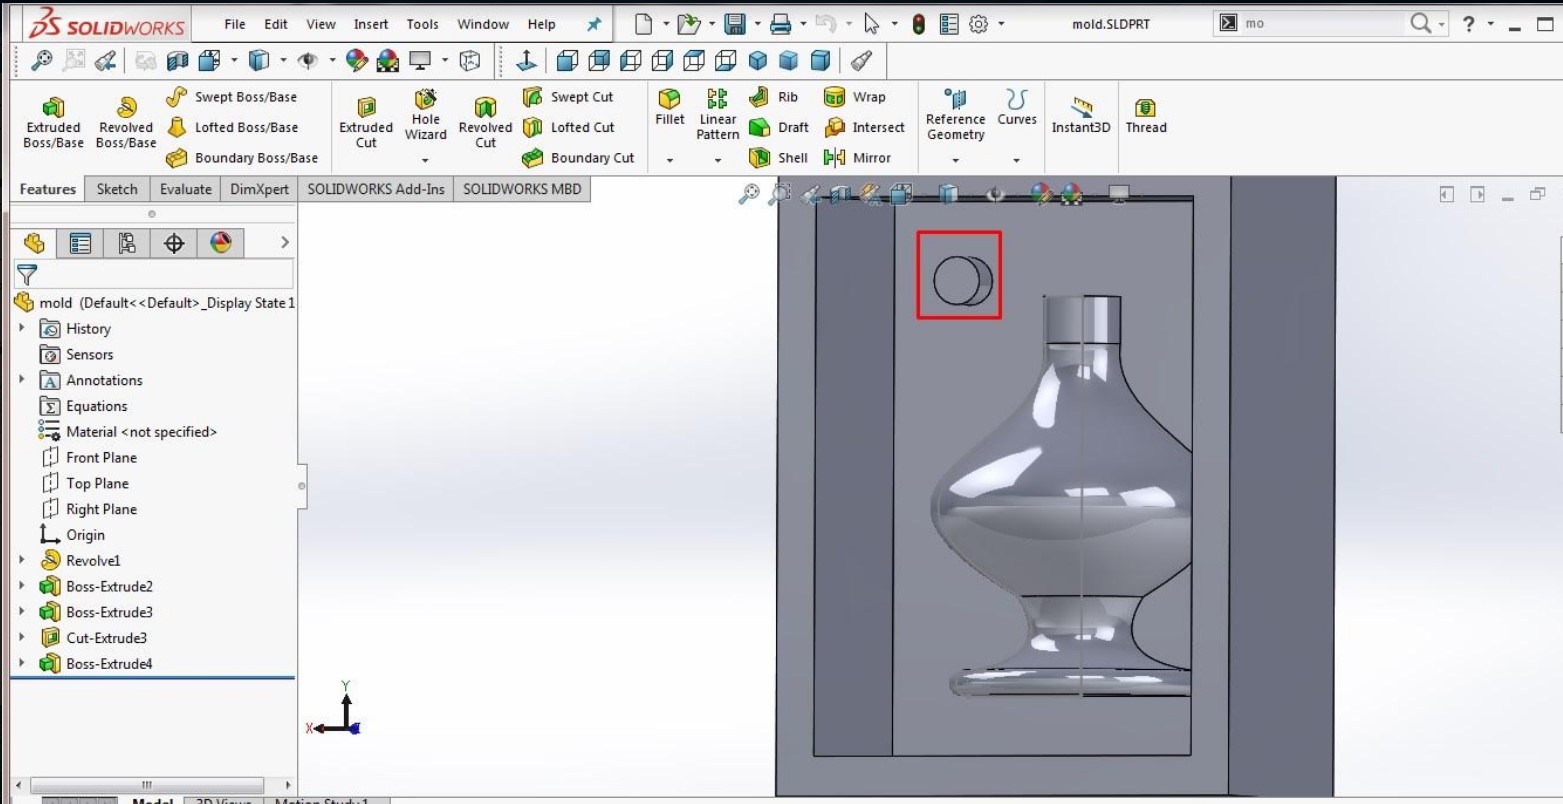
save the file in binary .stl format.
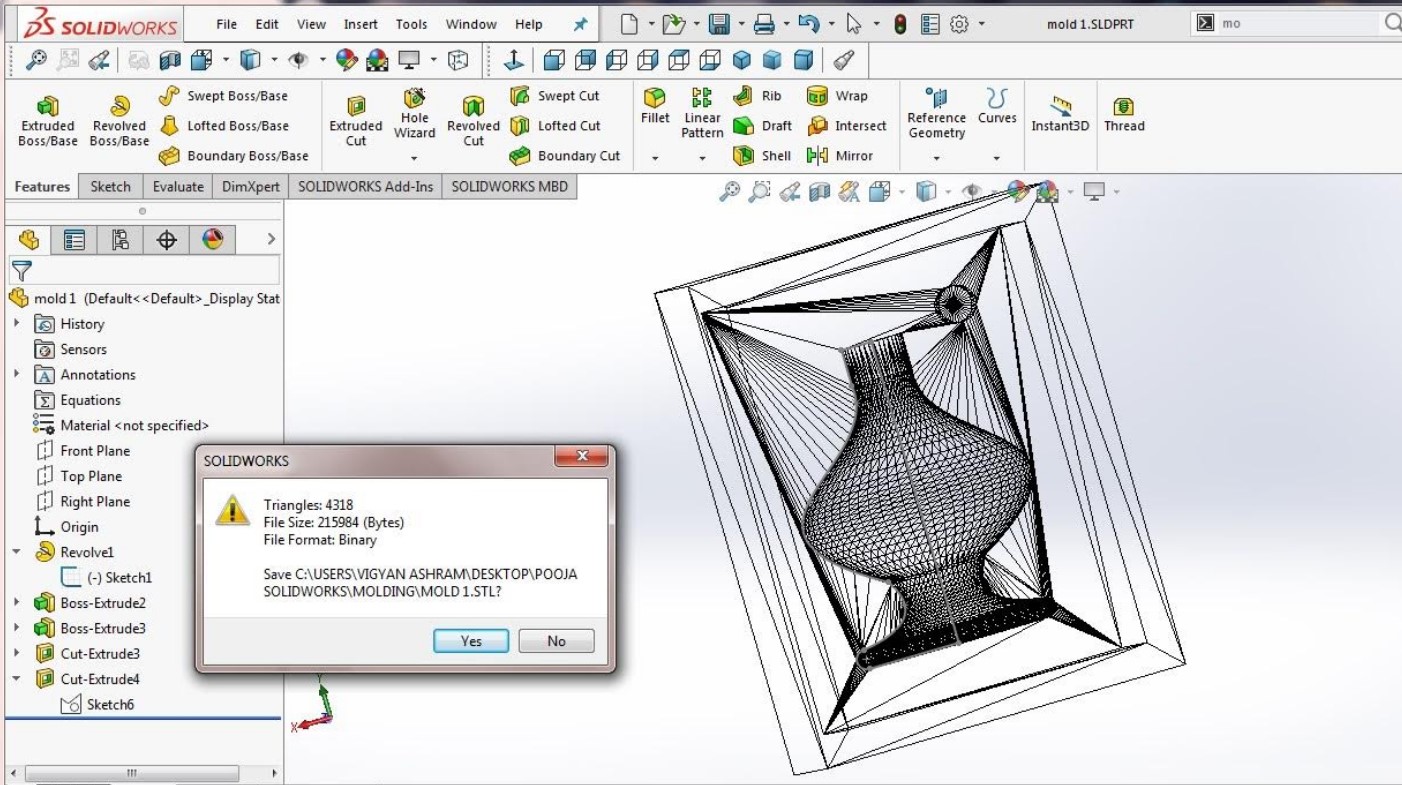
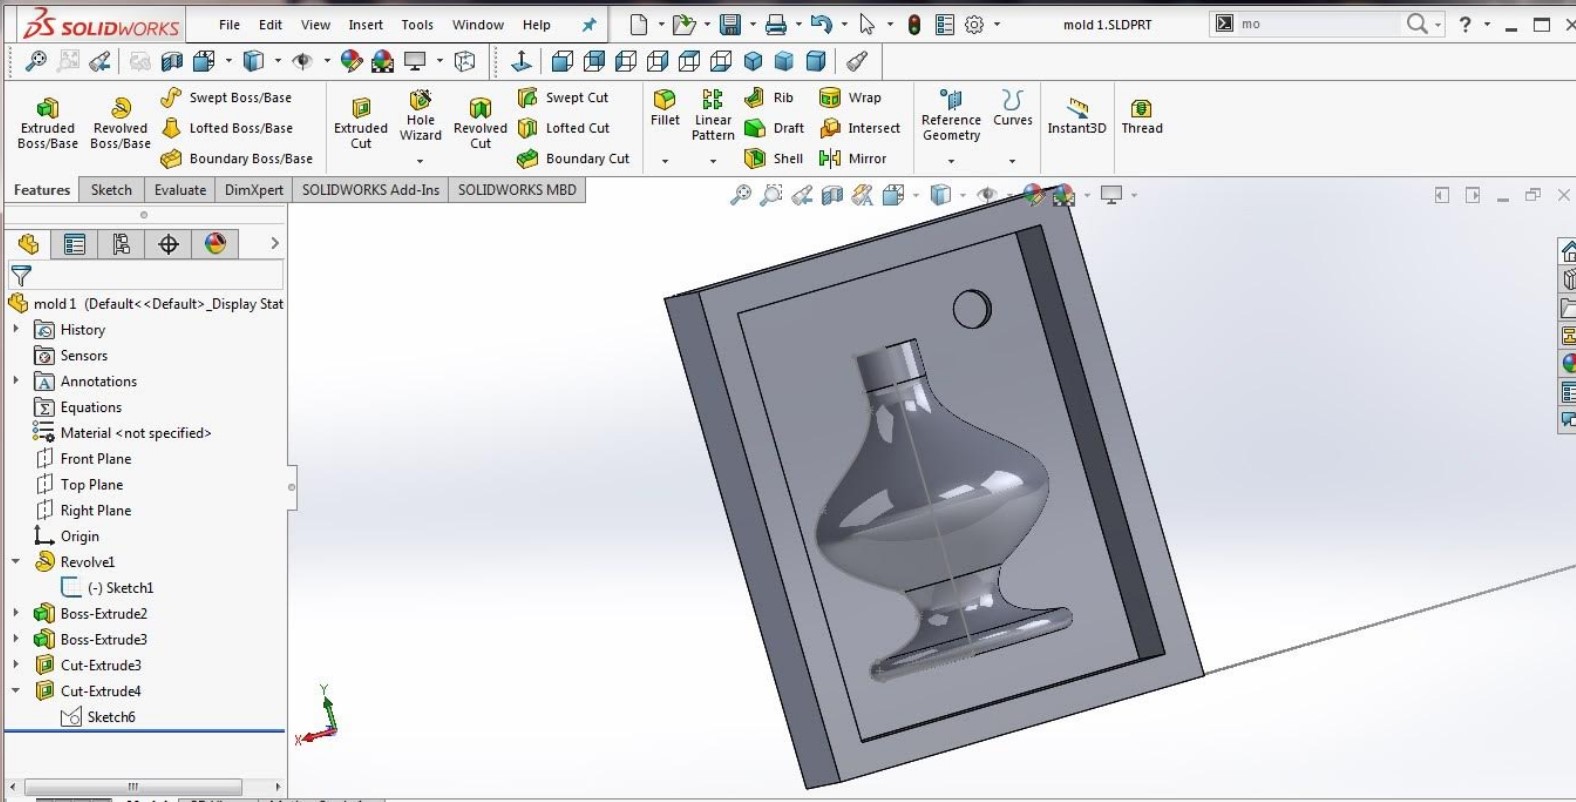
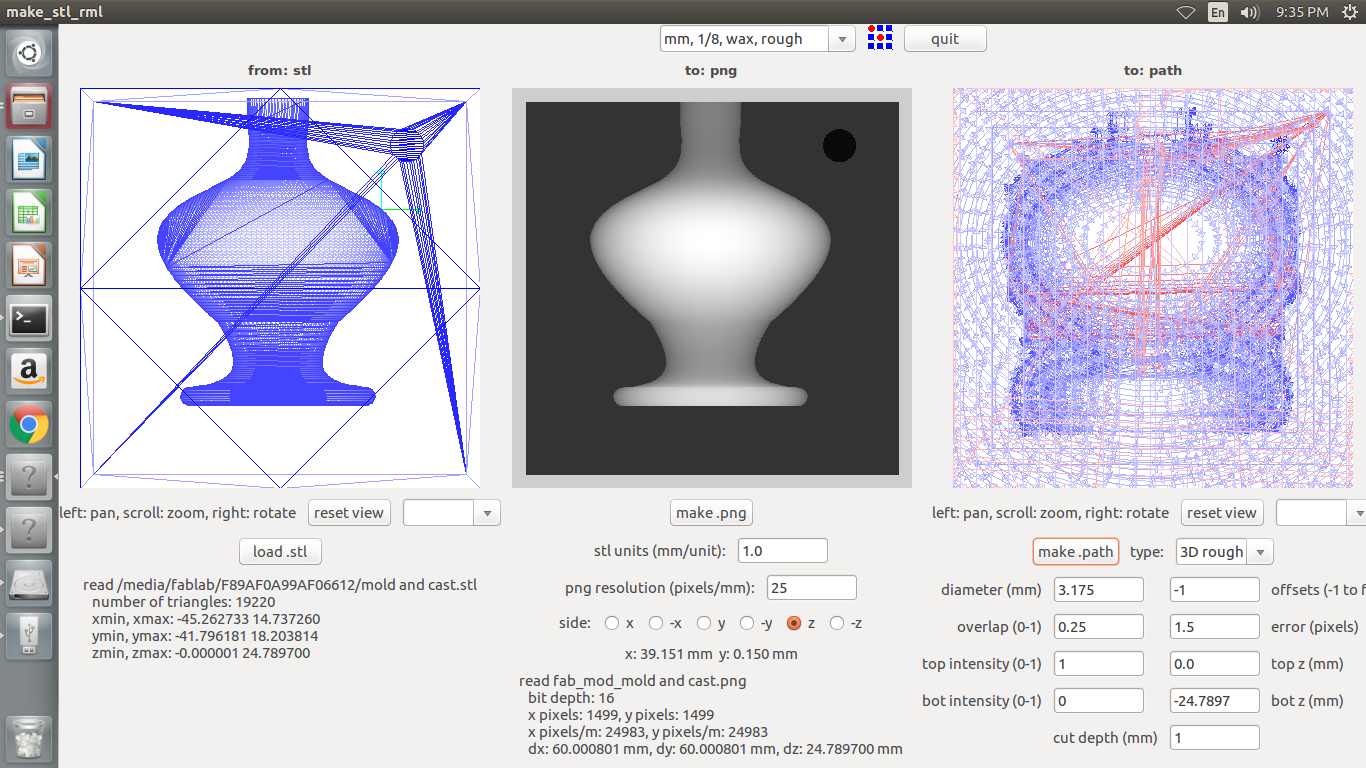
Now I moved to the modella machine, We are using the offline version of mods.I loaded the file in the fab modules and as I started to mill it I found out that the our machinable box was not plane surface.firstly I plan my wax surface with 8mm.
Machine setting:-
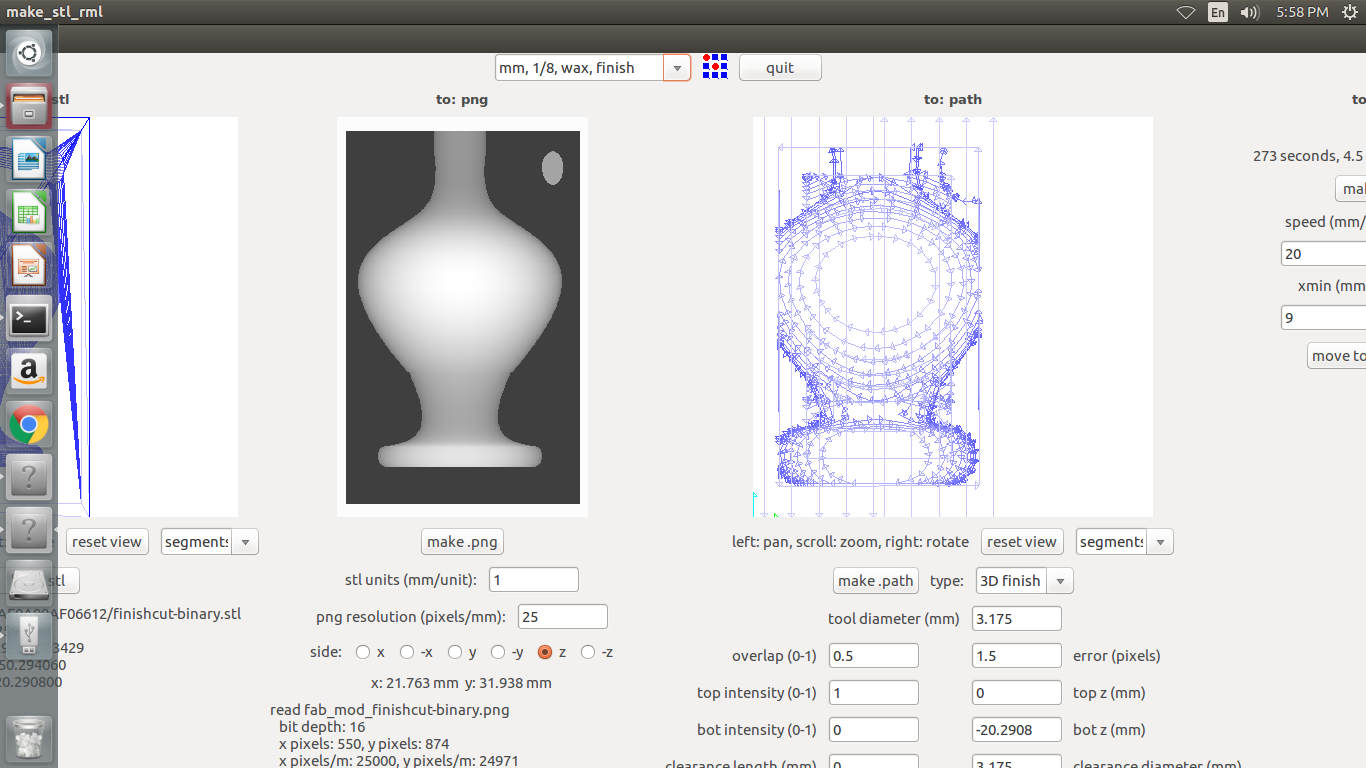
Step 1 - Open Fab Modulemesh(.stl)-->Roland MDX-20mill(.rml)-->make_stl_rml

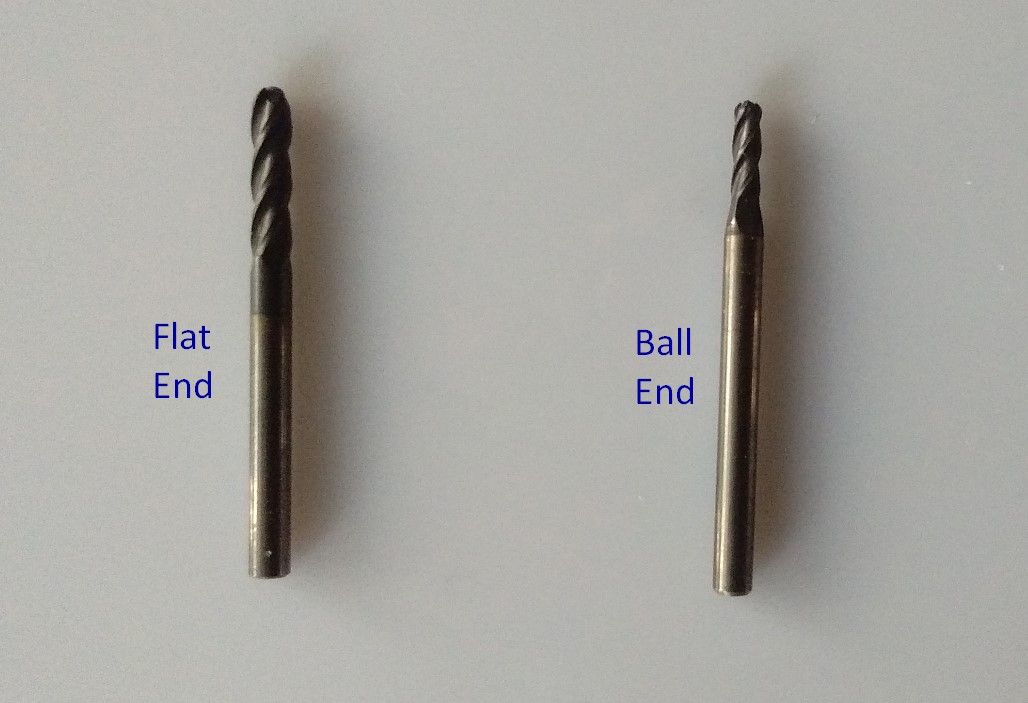
There are two types of end mill first one is Flat end and second isball end.
I used 1/8 inch flat end mill for rough cut.flat end mill mainly used for smooth finish,another type of end mill is ball end which are used for deeper and rough surface cut Engraving.
Steps of giving parameters in fab modules :Overlap is the No. of passes and diameter is tool diameter.
I Undestand from this fab Modules is how to gives cut passes to design.i.e.Overlap.also understand about two end mill.rough cut and finish cut.I changes the setting as per our design.
Step 2 - then I selected the origin which you want to mill
Step 3 - Select the tool(1/8 rough cut) and Make.Path
Milling on Modela...
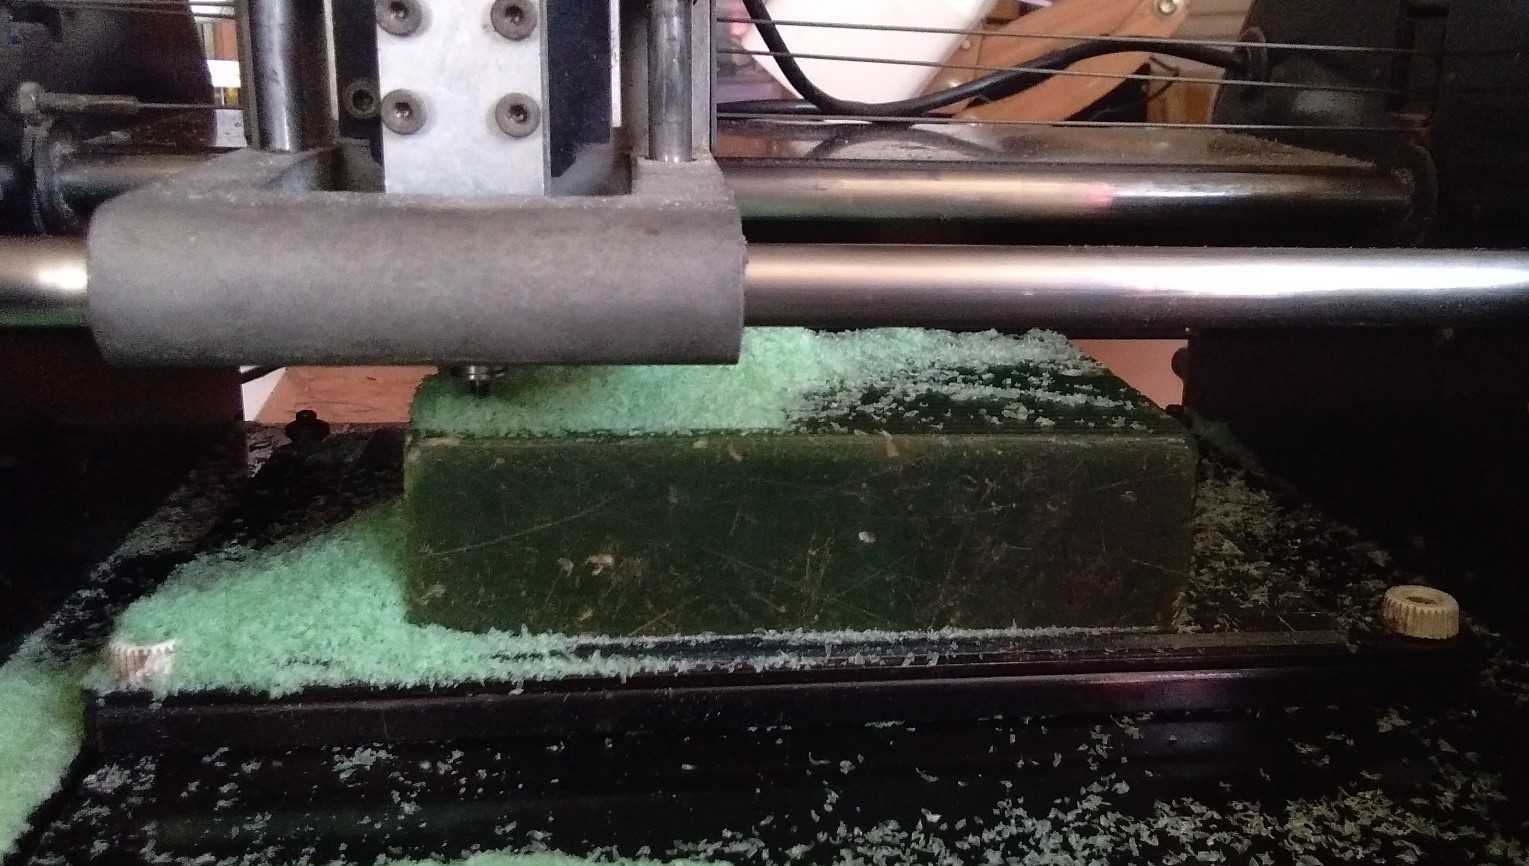
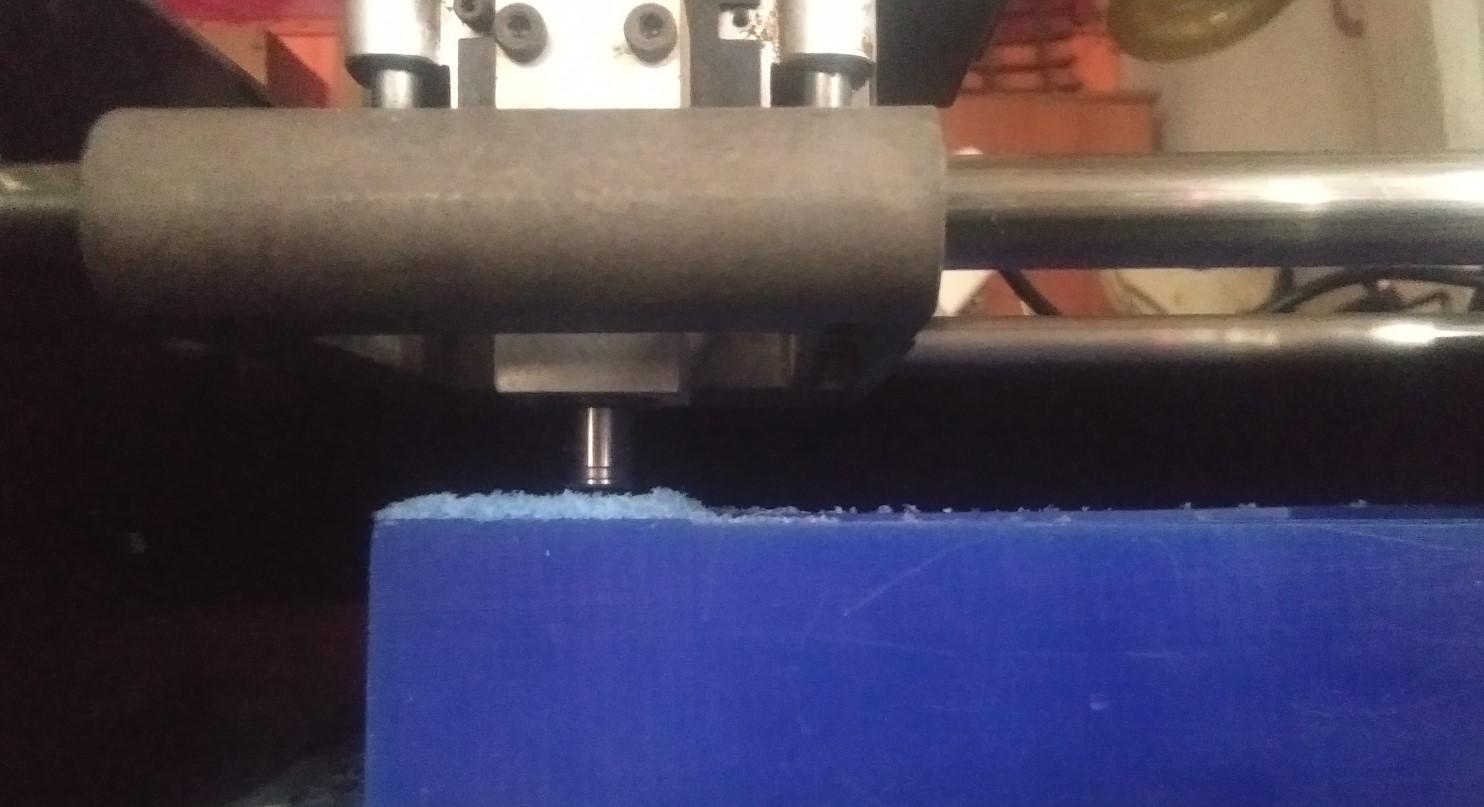
After this I sticked wax block with double sided tape.
Before cutting we need to do "X" and "Y" origin to setup the start point in our piece of wax.Set gravity or Manually zero out the Z axis until the endmill touch the wax smoothly.Then click on make rml and start milling.
Rough cut..The milling process took almost 45 mins.
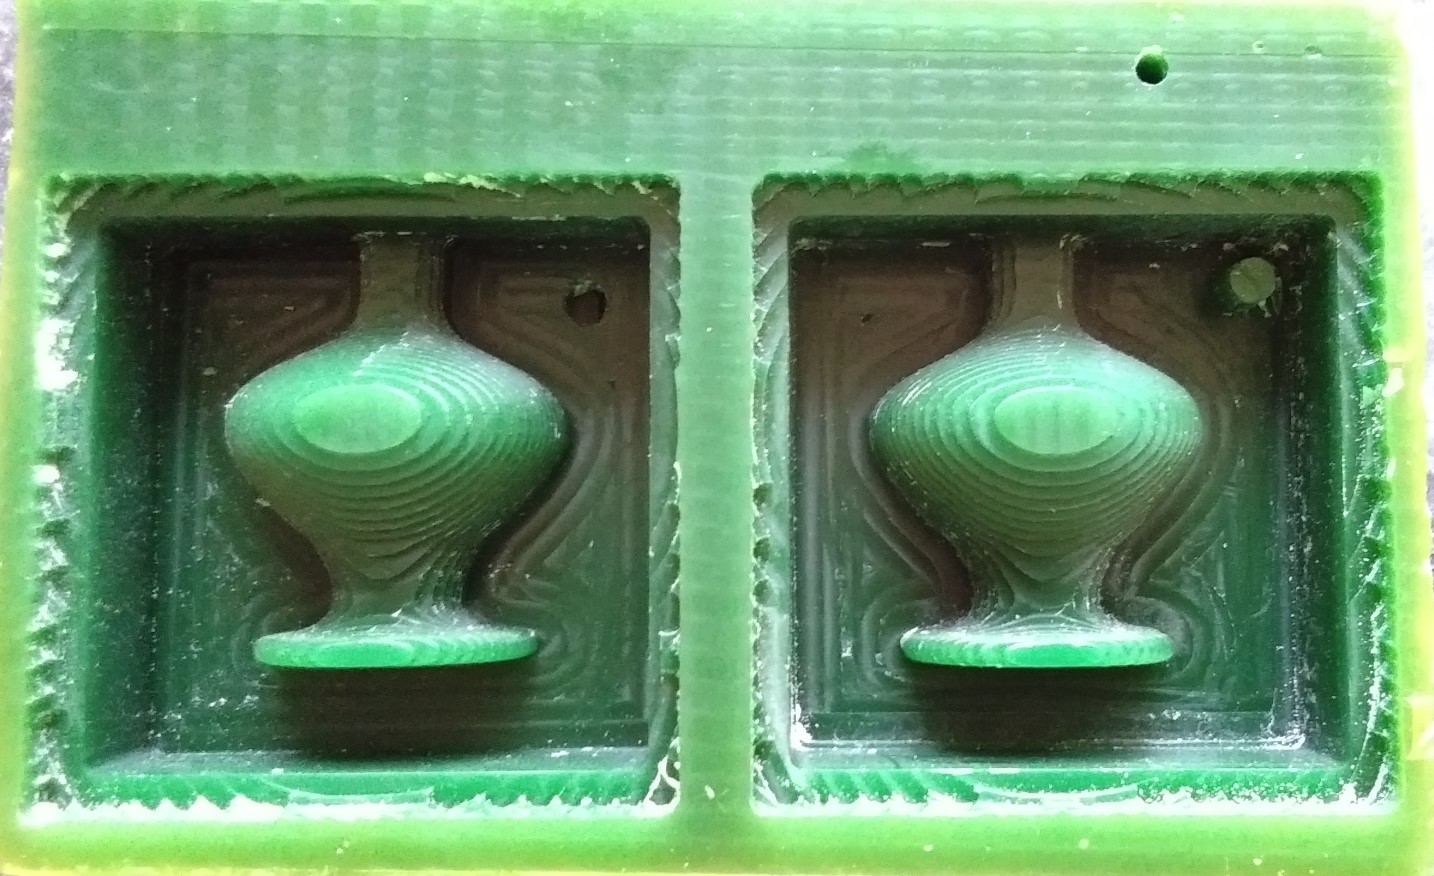
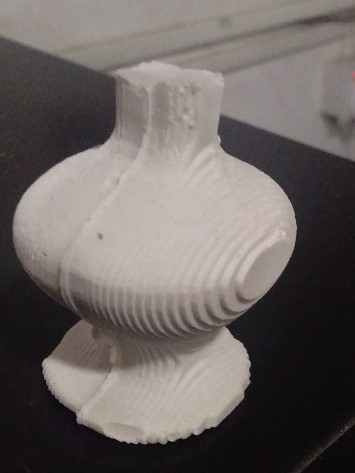
I milled my design by using modella.I ever given finish cut in my design because I like texture I got through rough cut and I am using same mold design for casting Purpose
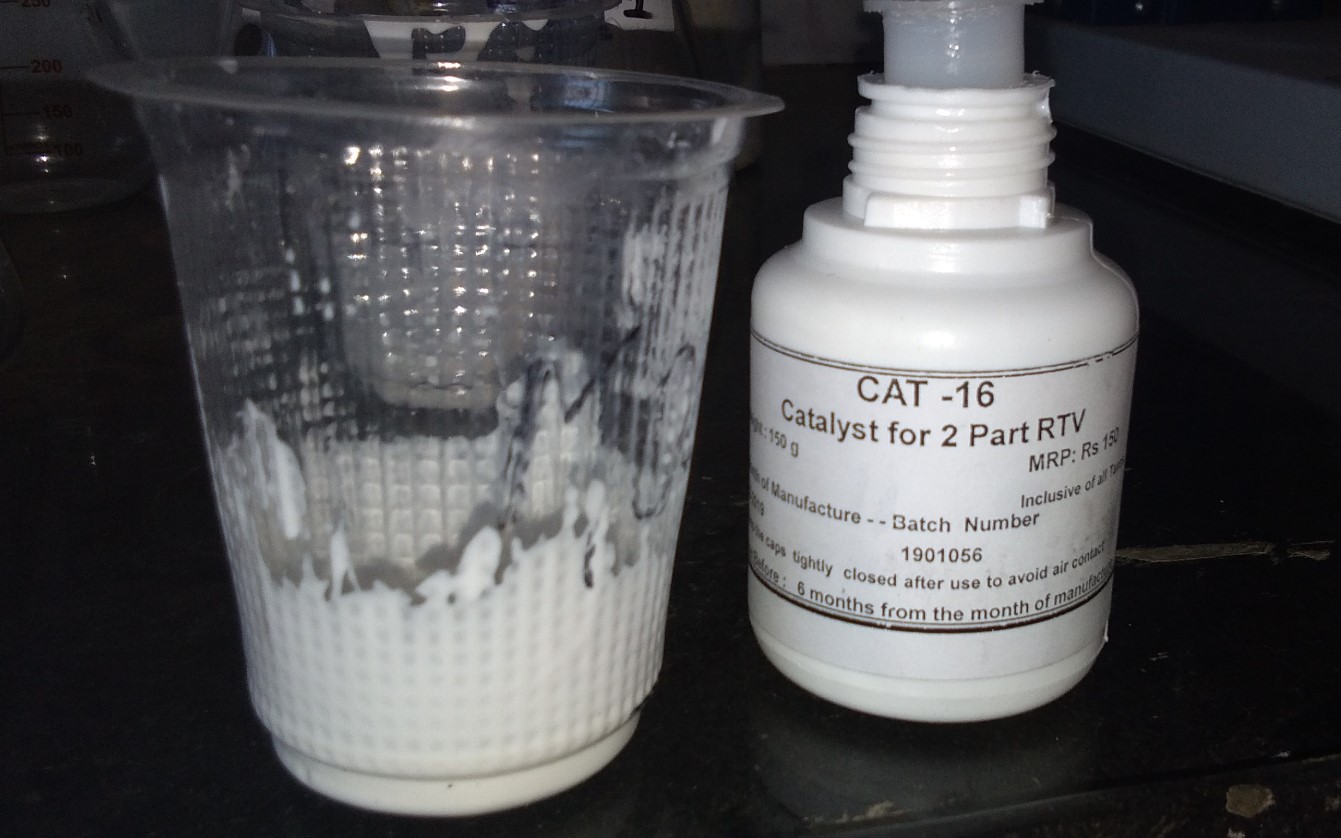
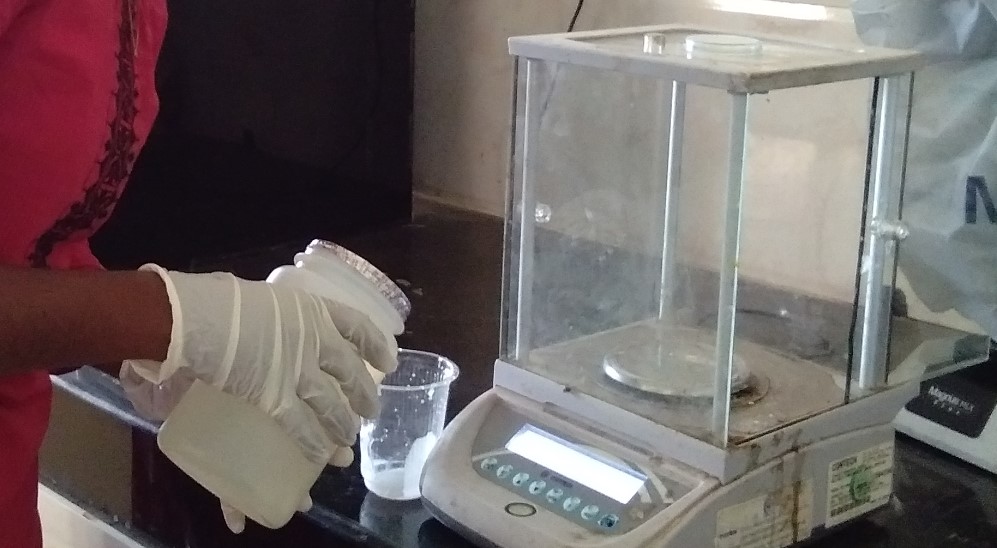
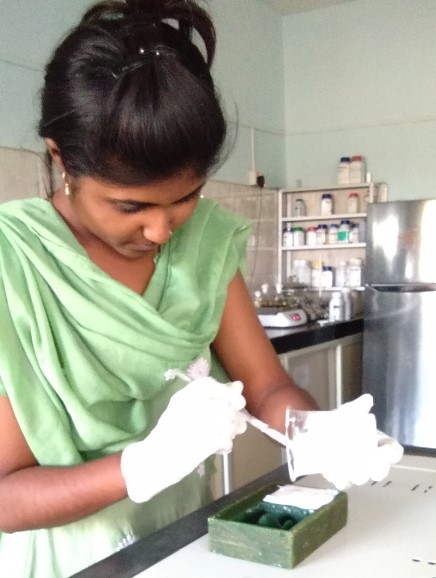
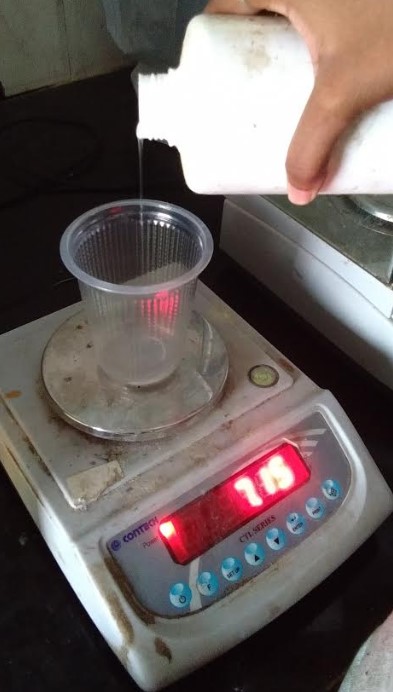
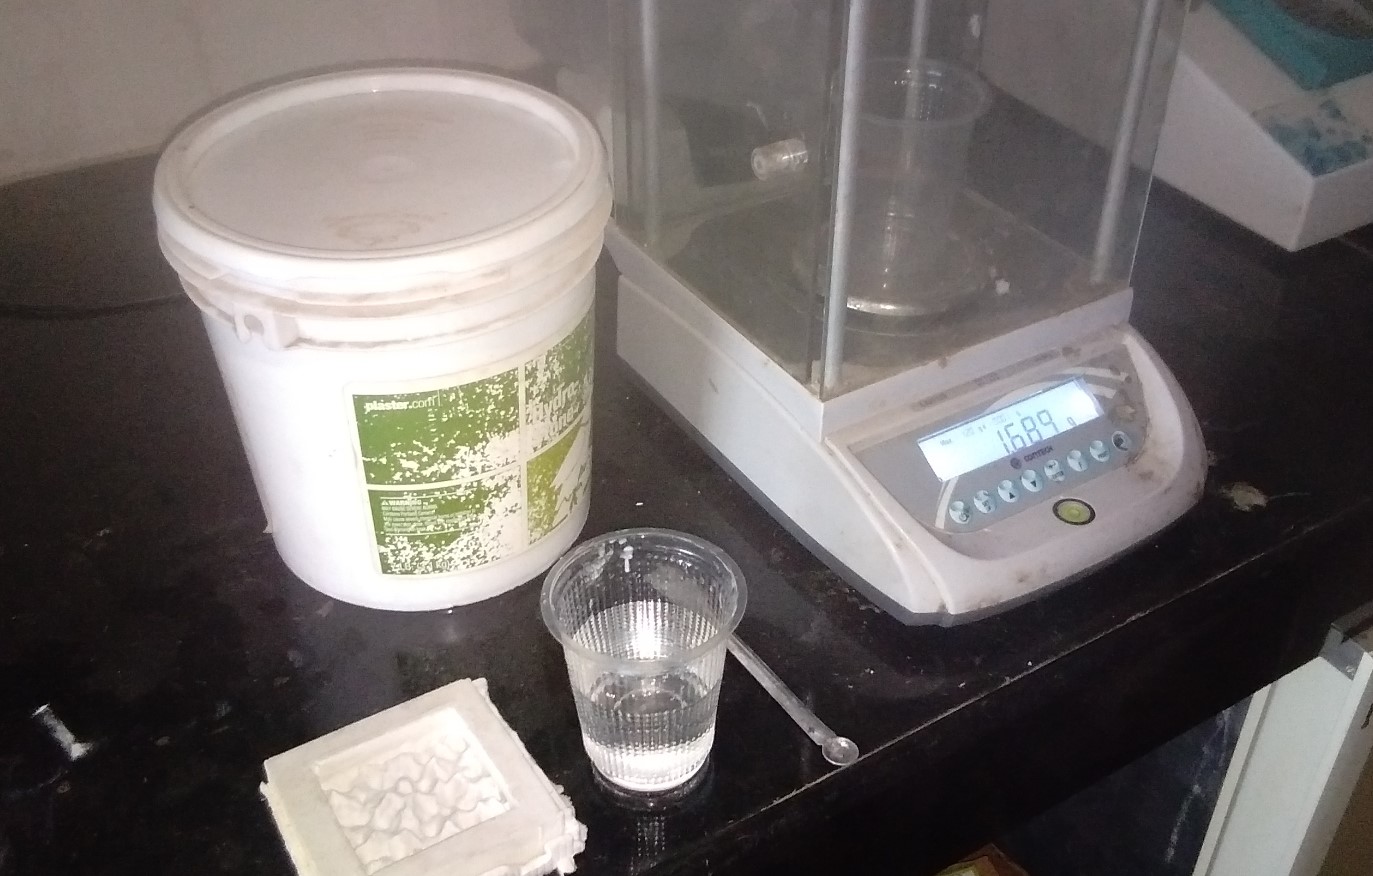
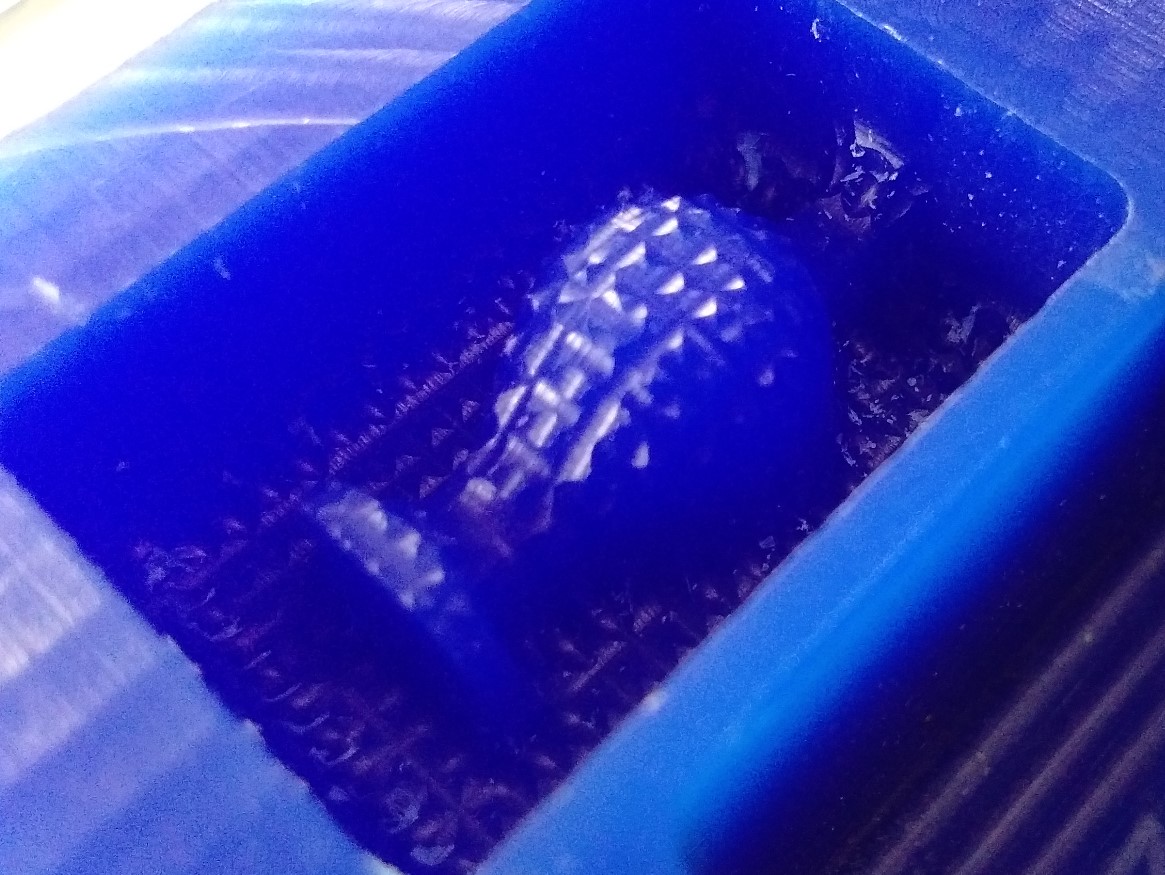
MoldingAfter positive mold I moved on negative mold.for making negative mold I used Silicon rubber with harderner.In group assignment we calculated ratio by Volume.but we got error in epoxy material.that's why Here I calculated ratio by weight.
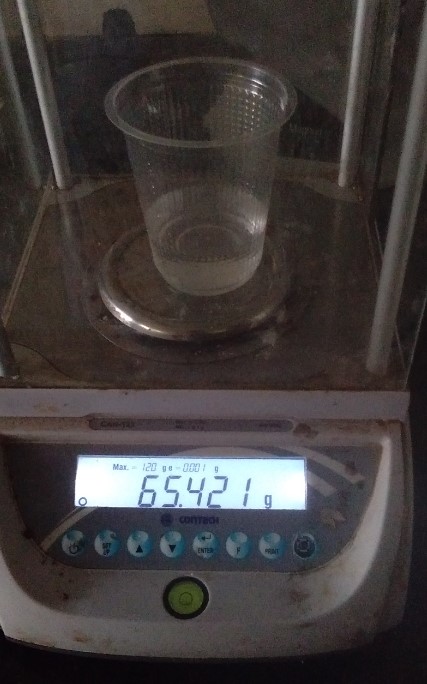
Firstly I put water in mold and weight it.pour the water in a glass. Now remove water and take silicone upto that level.Then add equivalent amount (1:10) of hardner
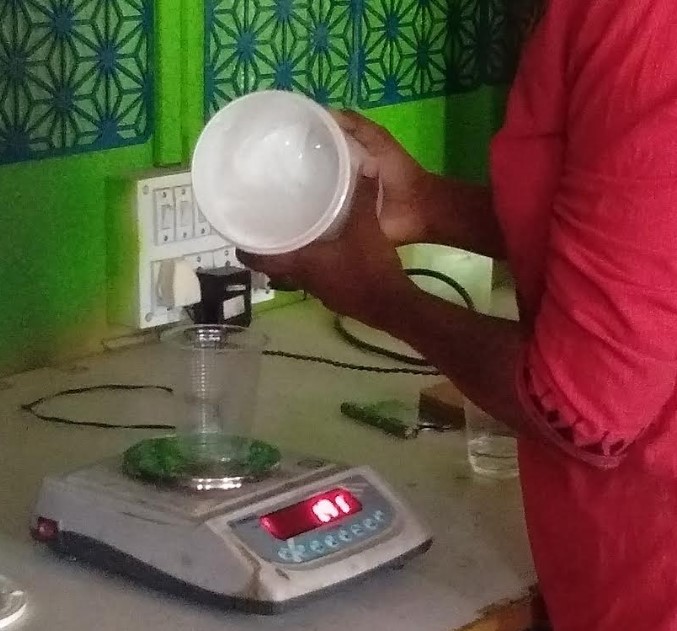
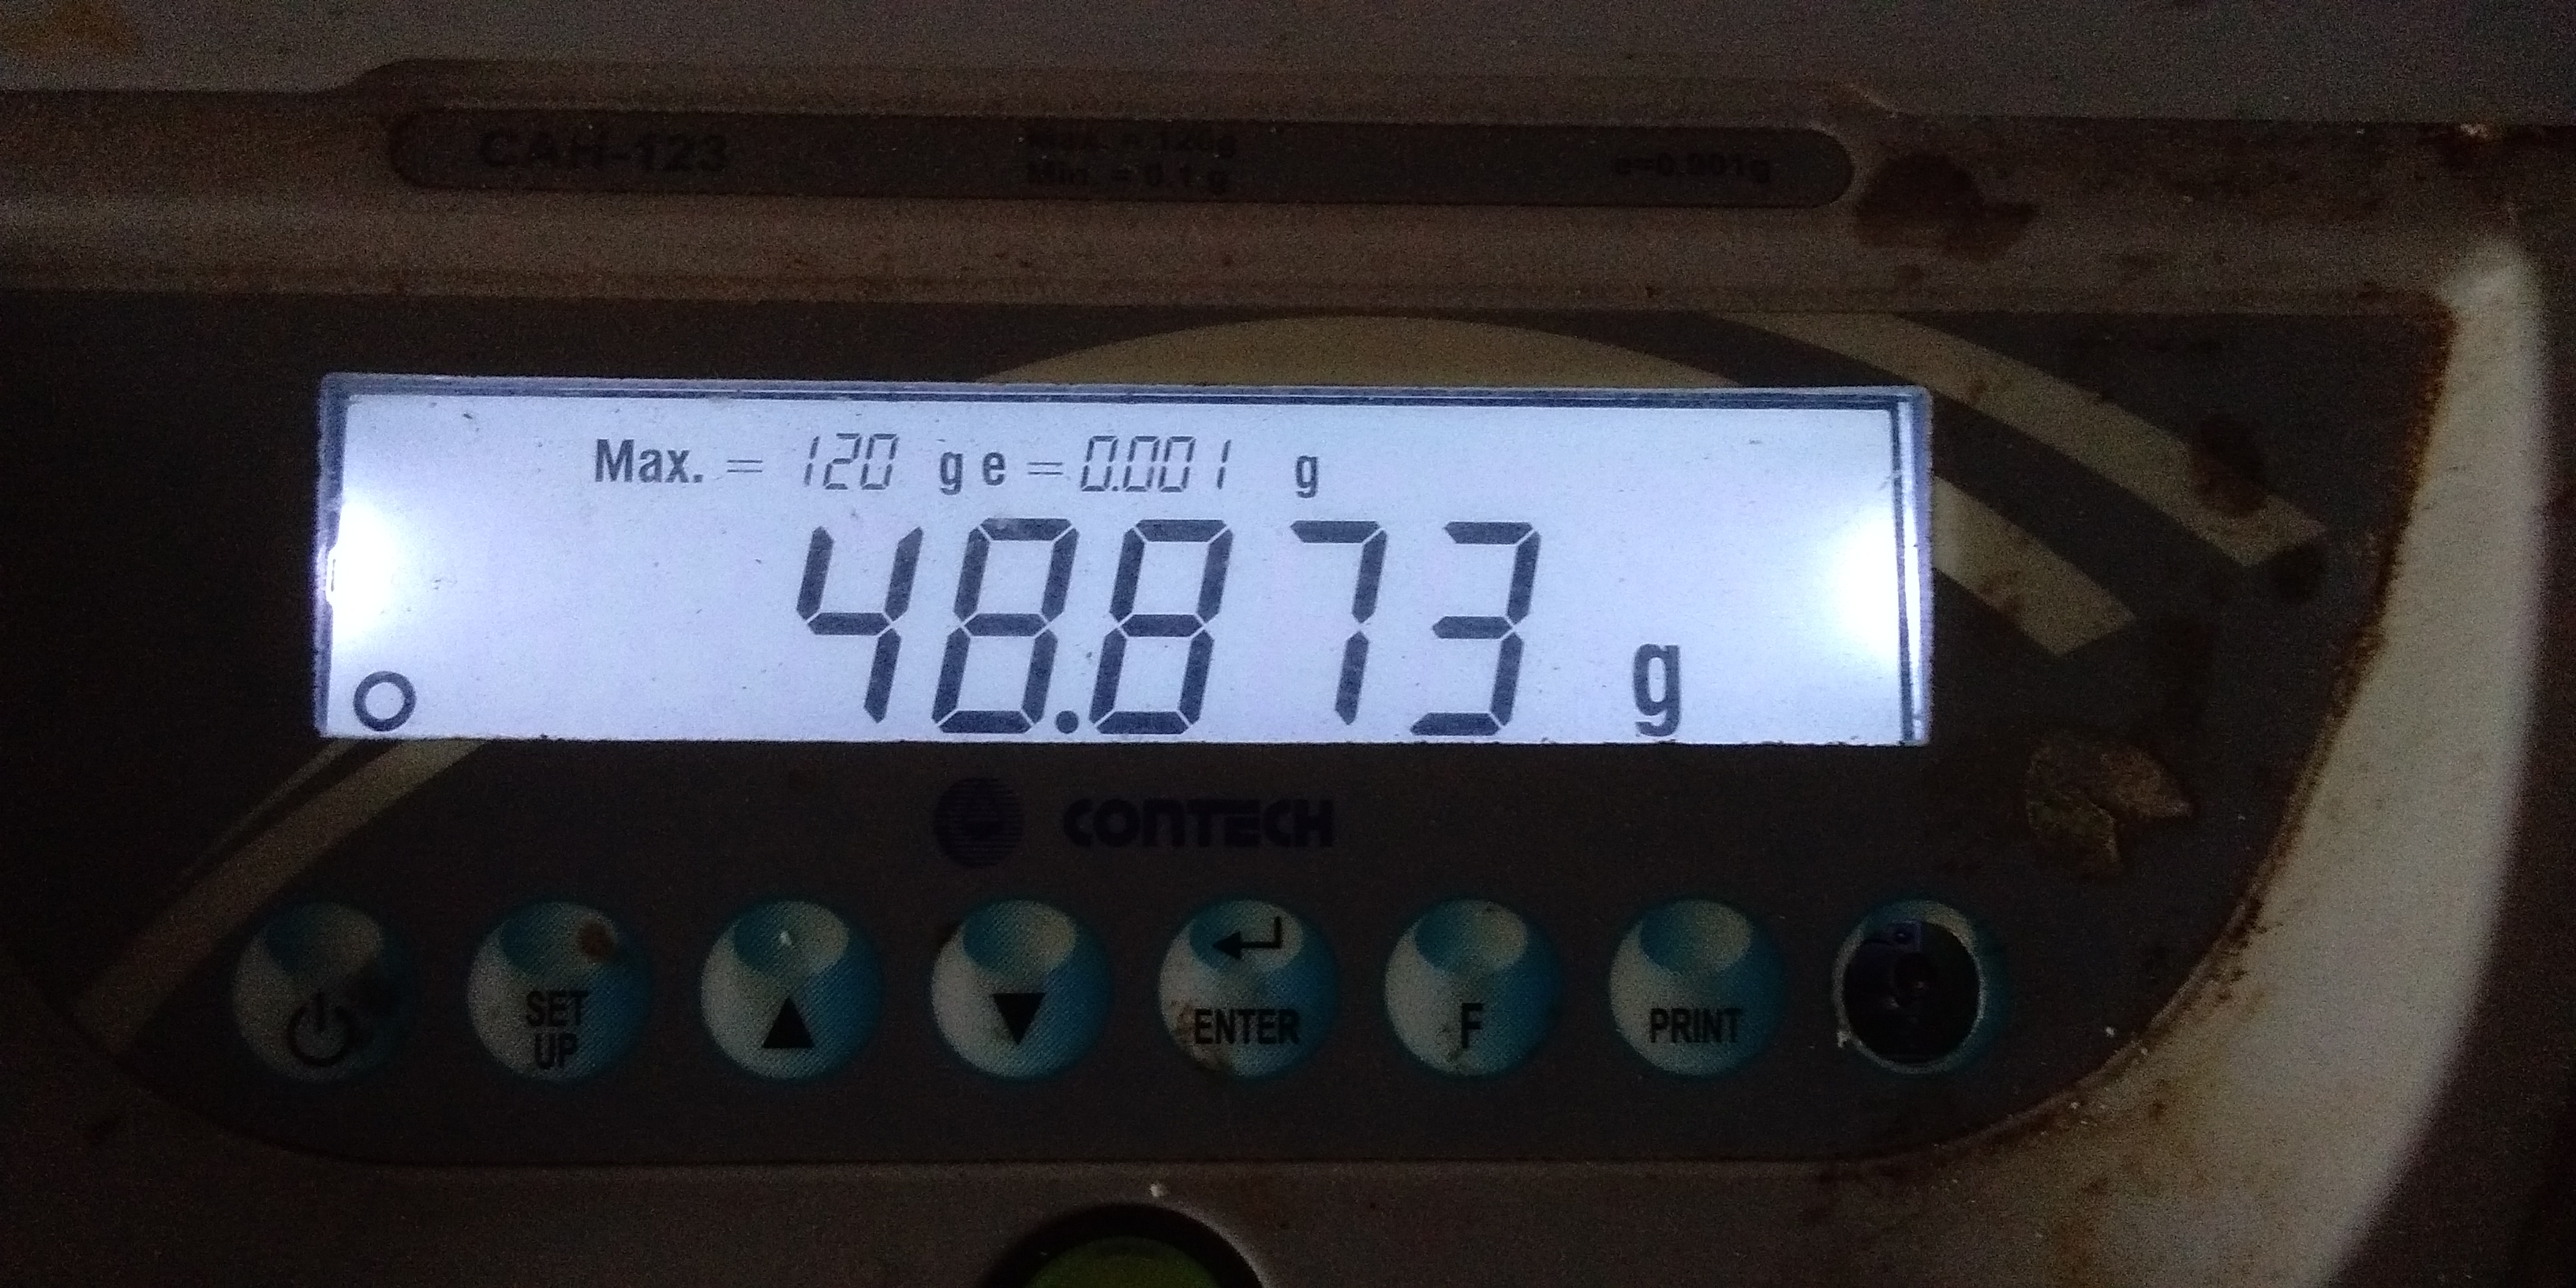
I required 48.873g silicon material with harderner.I follow 1:10 ratio.I took 44.073g silicon rubber.and 4.8g harderner.
I calculated ratio here..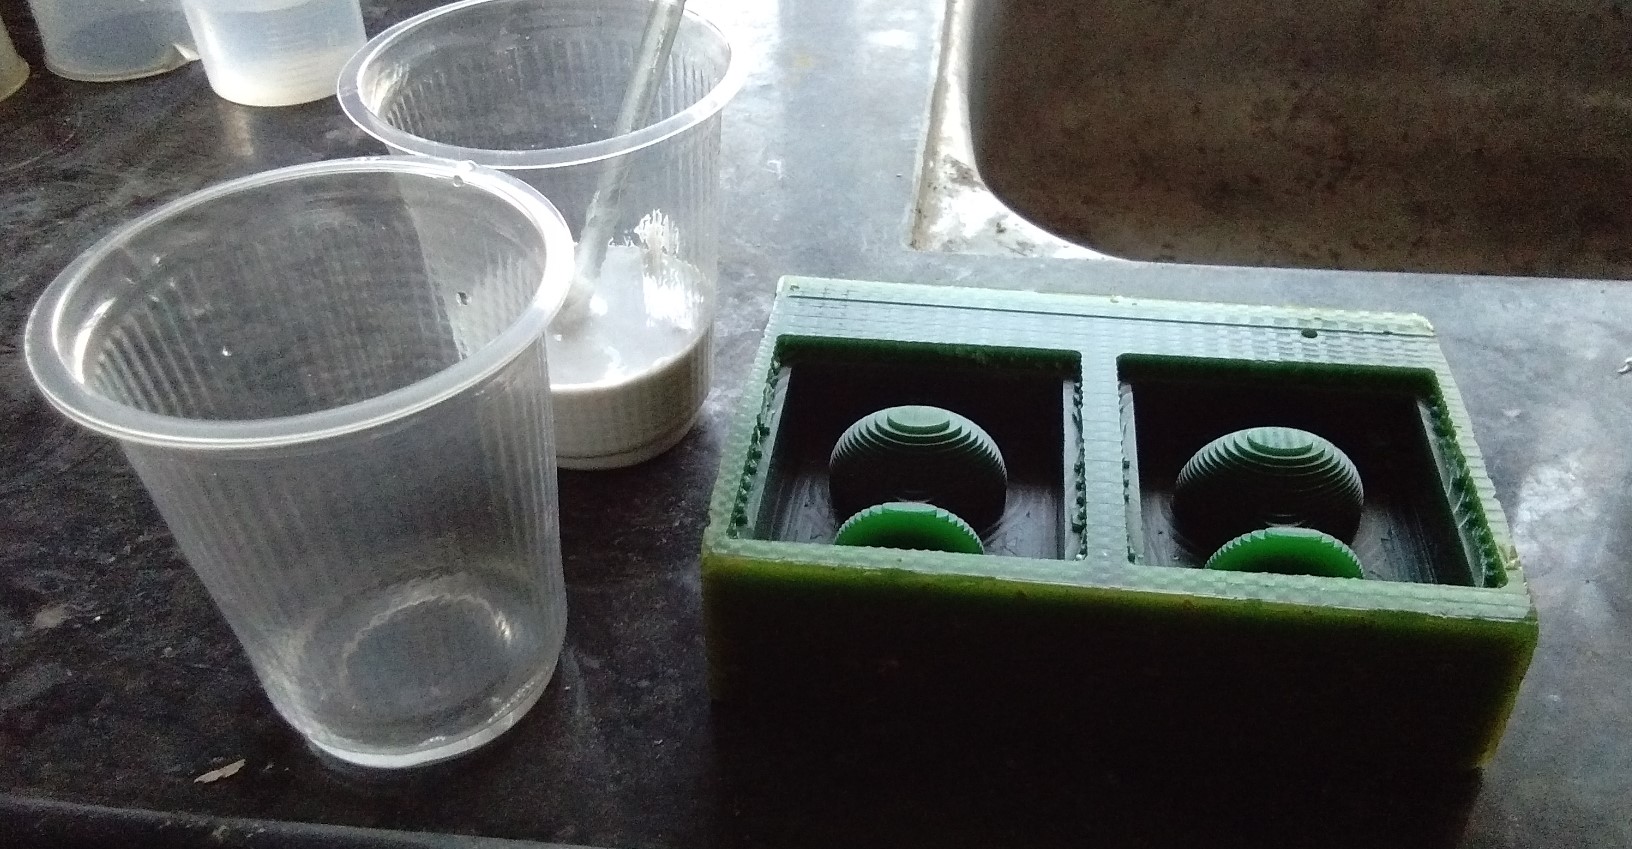
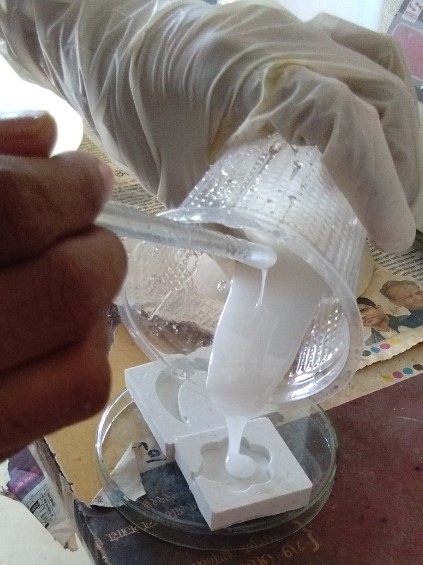
Mixed it properly and well then pour the silicone into the mold
|
|
And put it on Shaker..
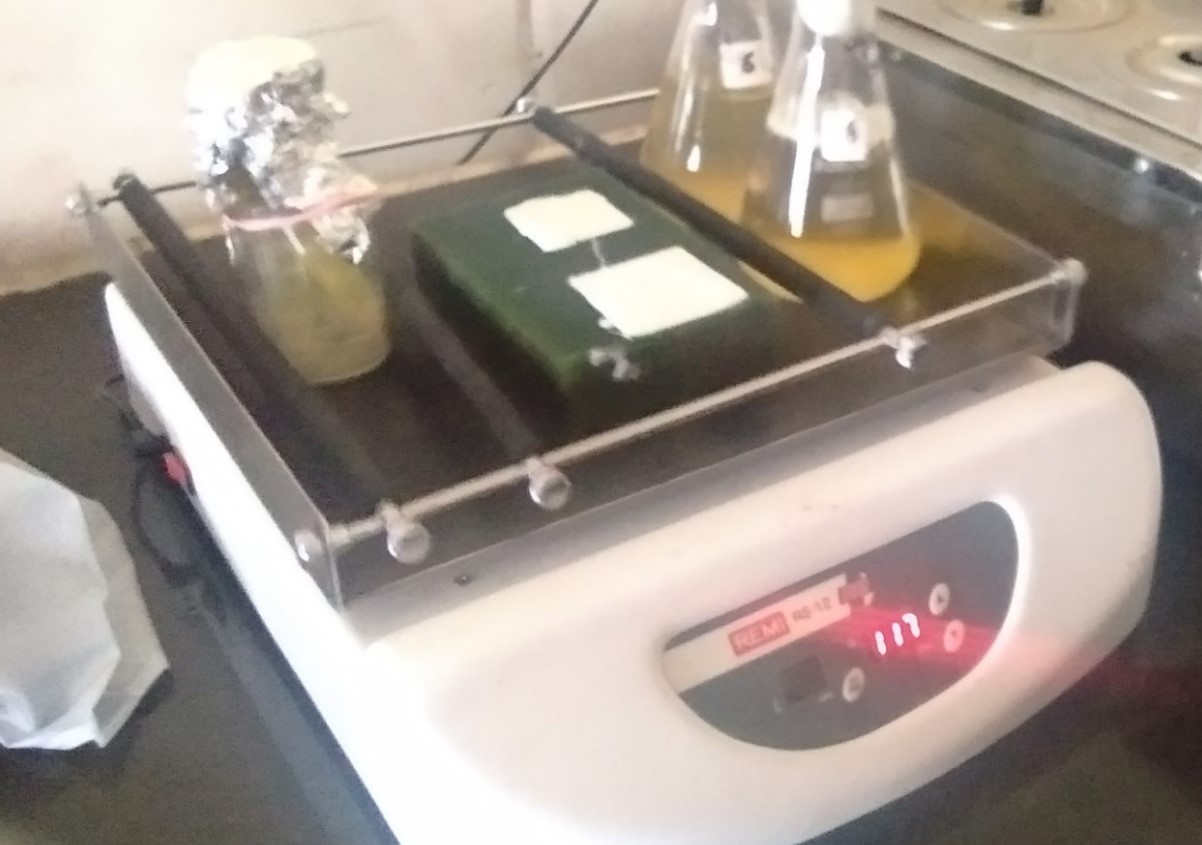
Then leave it for some hours it's depend upon the silicon and hardener ratio. After 5 hrs my mold become hard and removed easily.It is a good result for first attempt, but there are a bubbles seen on the surface.
Casting
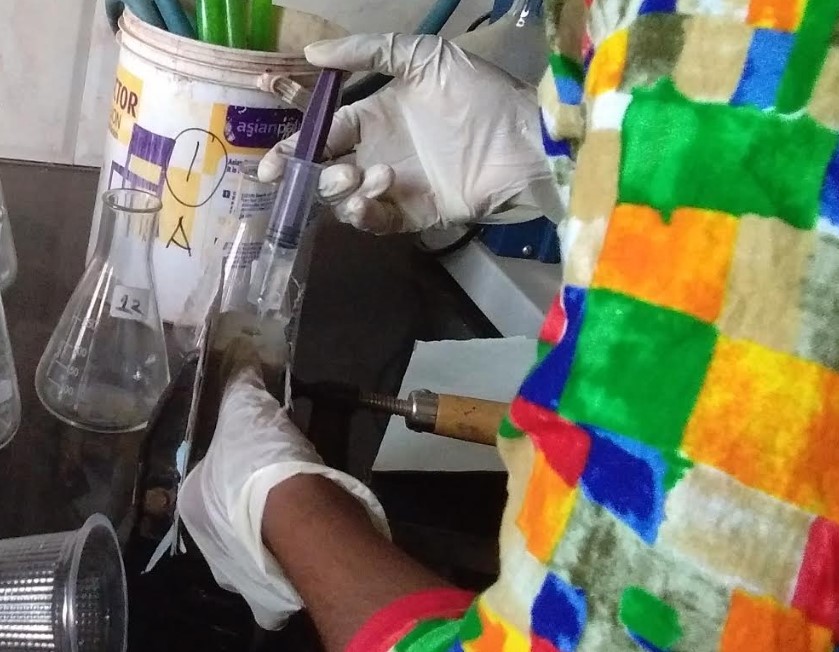
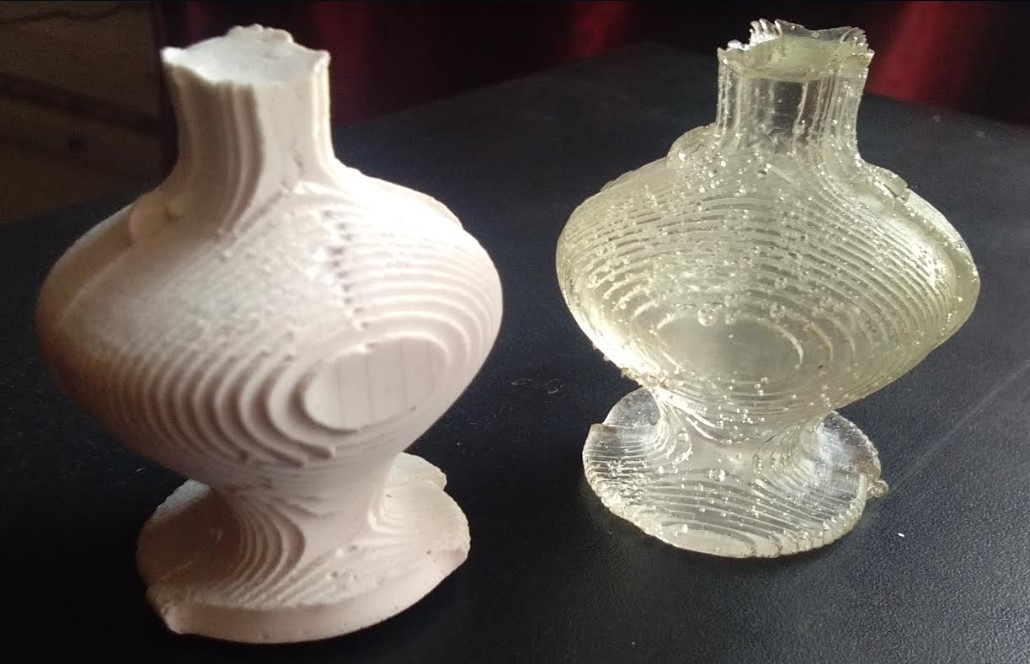
For casting I used Epoxy Resin.Its transparent and looks beautiful. In general, epoxies are known for their excellent adhesion, chemical and heat resistance, good-to-excellent mechanical properties.I took the epoxy and hardener is in ratio 1:2.
Here I follow same condition,I put a water in silicon rubber and weight it.after Weighting I got value was 20g.then I took a Epoxy is 20g and harderner is 10g
I set my negative mould in clamps.I used a notebook cover to secure the moulds, I took care that the shape of the mould has not changed with applying pressure.
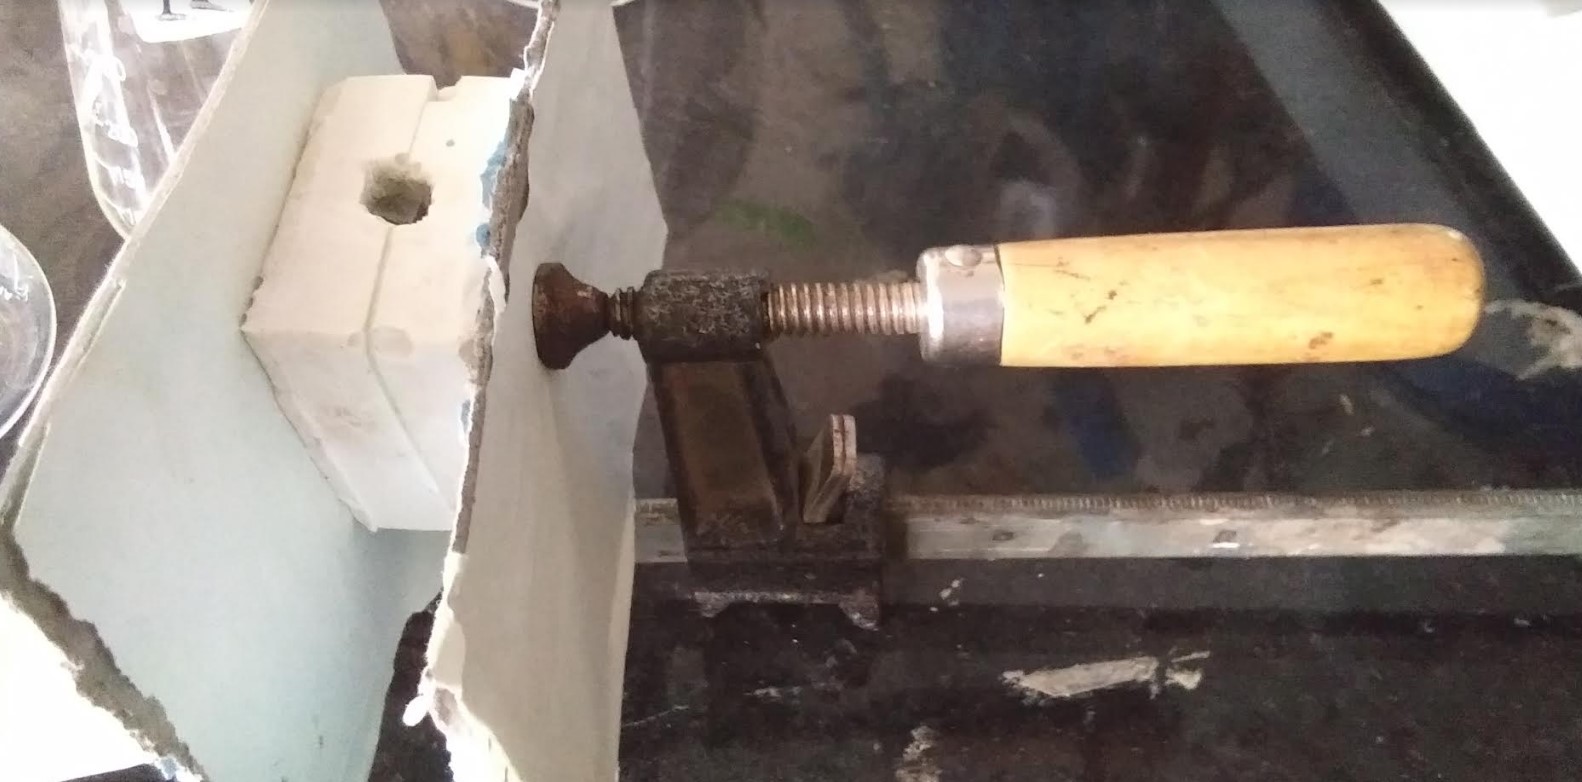
For applying epoxy material I used Injection molding.pour material under silicon material using injection.
|
|
Hydrostone
I decided study on Hydrostone As I read on google hydrostone is Hydro-Stoneb Gypsum Cement is especially suitable where high strength and resistance to water absorption are necessary. It is ideal for applications in both the tooling and prototyping and art and statuary categories.Hydro-stone is one of the hardest and strongest gypsum-cement. We are using for casting which produces extremely hard surface.
Mixing Instruction
We are not using this material but I study on hydrostone and other stuff.
As I followed instructions which is given by hydrostone manual.Firstly I took a Hydrostone poweder 100g and took water 65g.

|
|
then I sprinkle poweder into water slowly and evenly.then pour it on silicon.after 2hr.I saw the result like this.
WOWWW......
Final casting
In the group assignment we tested a one material.we decieded test using hydrostone.I pour hystone material in our test parts.
After 2hr We got the result.
Flexible Wax
Flexible wax is a wax plastic material for making molds quickly,easily and inexpensively.
Simply melt it....then brush it on.
For melting flex wax I heated it on low flame for 5min.
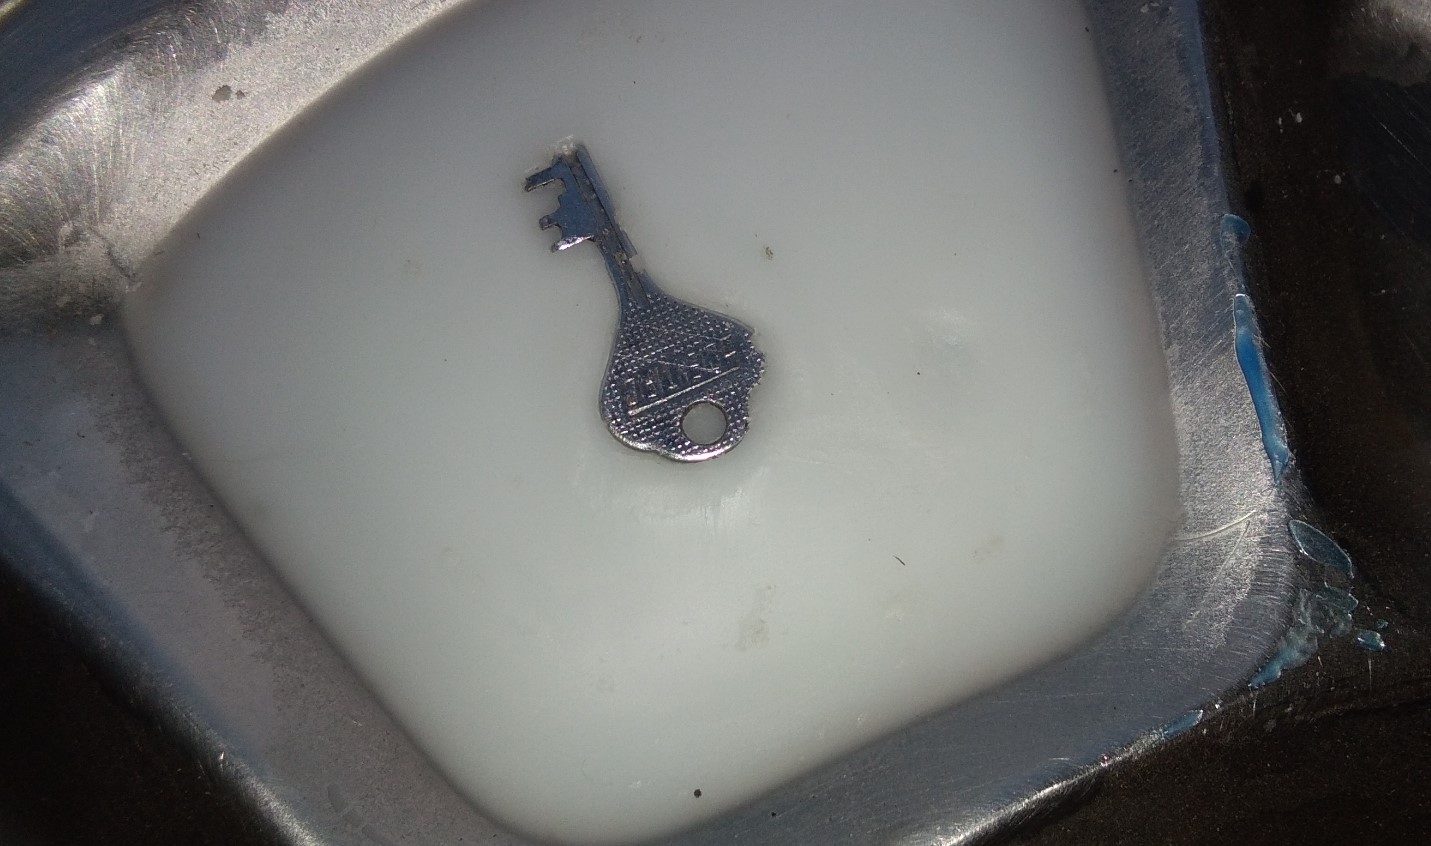
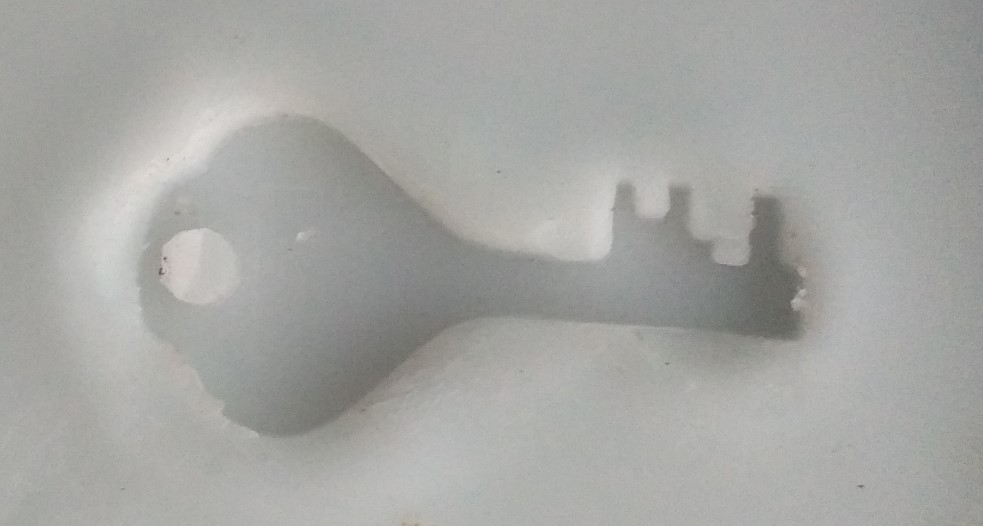
pour melting wax in plate.for making mold I used key.Put the key and press it.
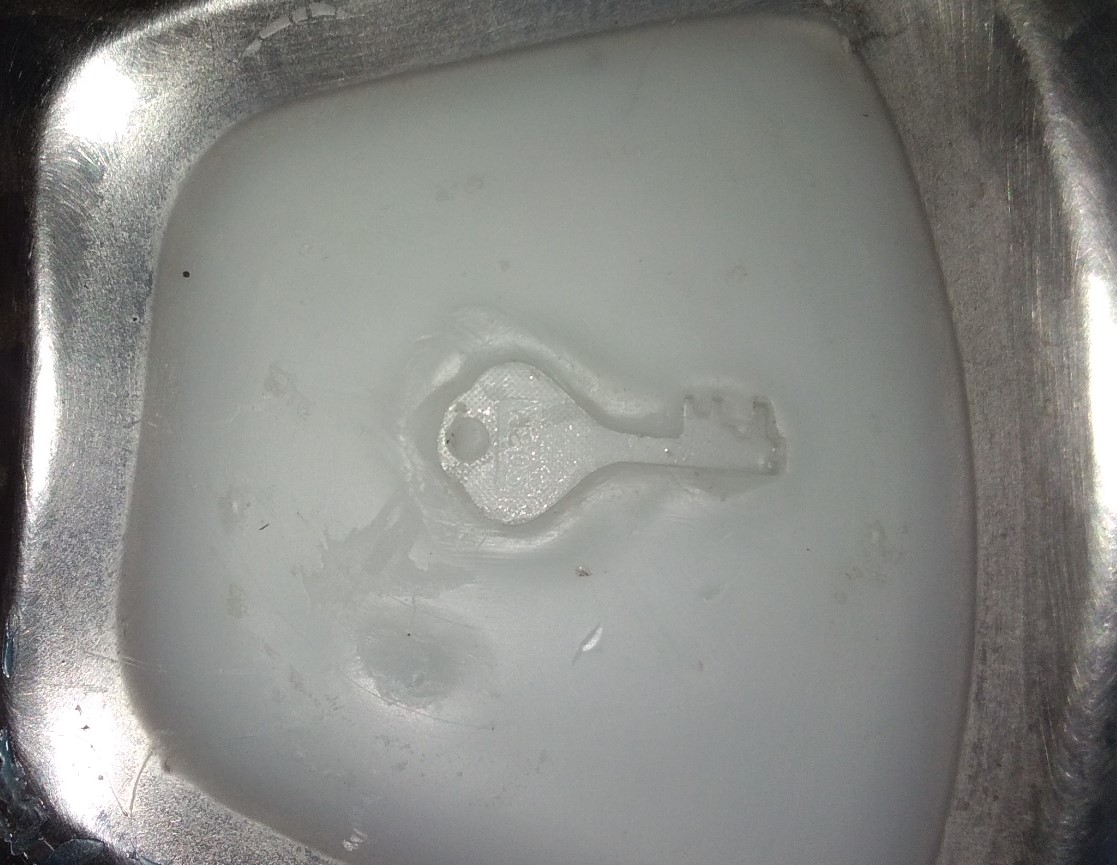
Then I removed key from flex wax.got Results...
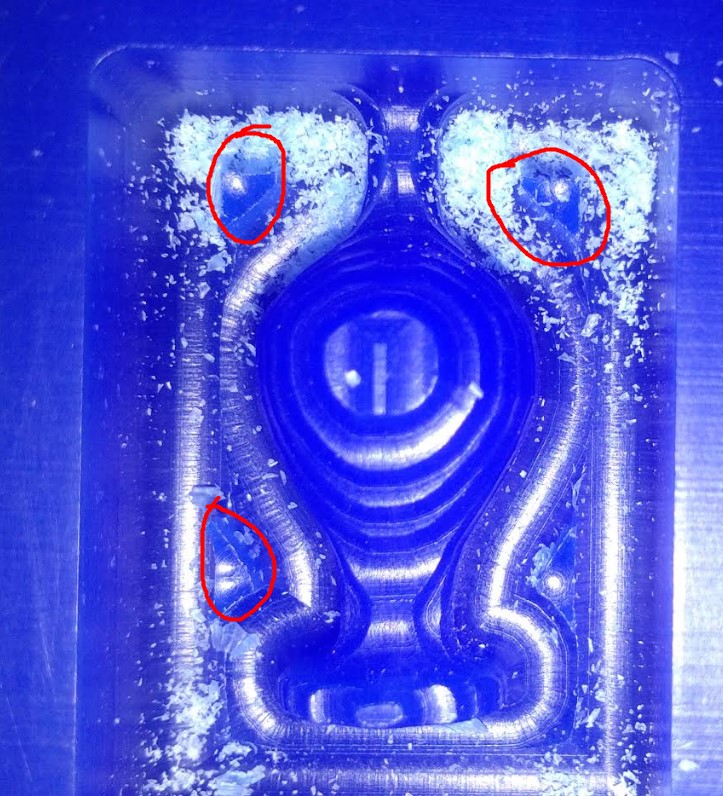
During my evalutation Period,I do not gave finish cut beacause I like the texture. but my Global Instructor said it is manditory to give Finish cut.
After saw comment I started work on this things.
I don't make a new design.I took a same design which I used before. Just only I resized it.I have reduced the size as much as I have on the molding wax.
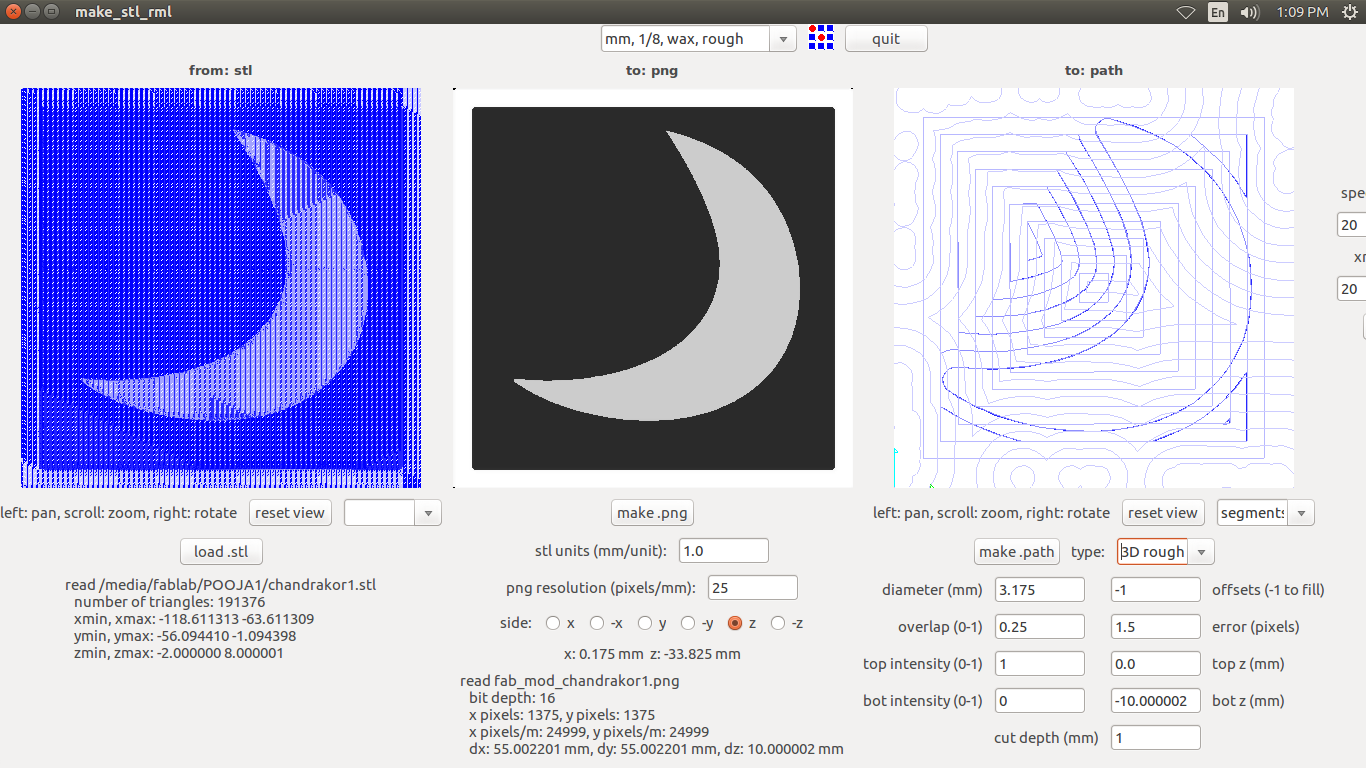
After resizeing design. I saved it in .STL format. Then I open Fab modules and did same process which I used in previous design. Firstly selected the rough cut
this image shown rough cut
|
|
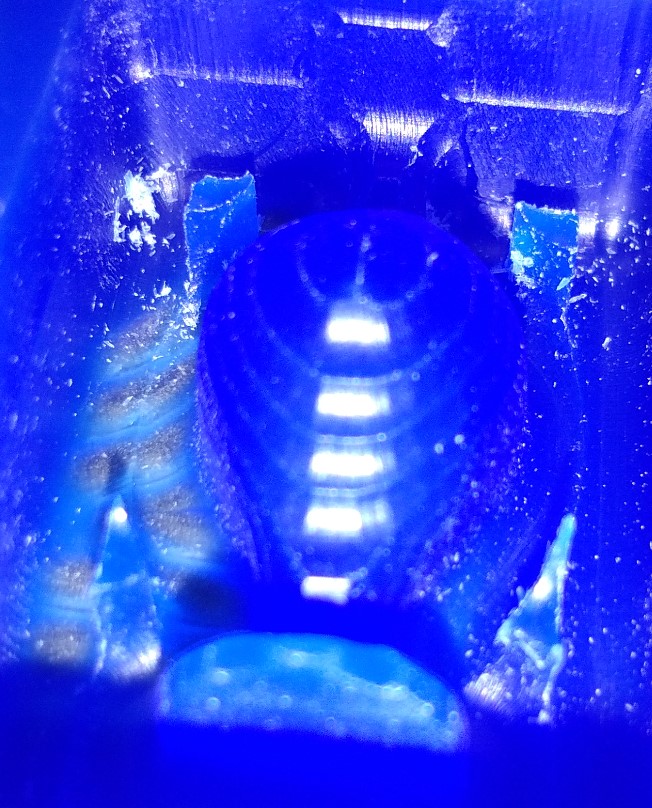
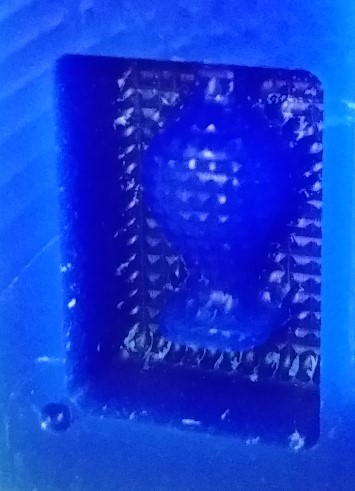
After rough cut I go to Finish cut I did same thing.I changed rough to finish cut.
mm,1/8,wax,finish-->make path-->set origin-->make rml-->send it.
For milling I used this milling end mill.
this image shown Finish cut
|
|
Learning Outcomes
I learned about how to make negative and positive mold. Traditional method of the molding and casting is good but it takes too much time.I learnt how the moalding and casting can be done nicely. got the chance to play with silicone rubber and epoxy.I also learn how to make 3d design without 3d printer.
You can Download Original Files HERE.