Model (raster, vector, 2D, 3D, render, animate, simulate, ...) a possible final project, and post it on your class page.
Weekly Task
What I used software
learn New Software
2D Design
What is Raster
Raster is a computer program that allows users to create and edit images interactively on the computer screen and save them in one of many "bitmap" or "raster" formats such as JPEG, PNG, GIF and TIFF.(from wikipedia)
For Raster Designing I used GIMP and PHOTOSHOP. In past I was an Instructor of computer lab where I taught Photoshop to students. So I already has prior experience with it.
I started with Gimp. Gimp is an open source software. While working with Gimp I found it is almost similar to Photoshop. That made it easy to learn.
GIMP
GIMP is easy to use than photoshop. so firstly I worked on this software.
The size of Image on my homepage was 2mb, To compress it I use Gimp. Steps followed:
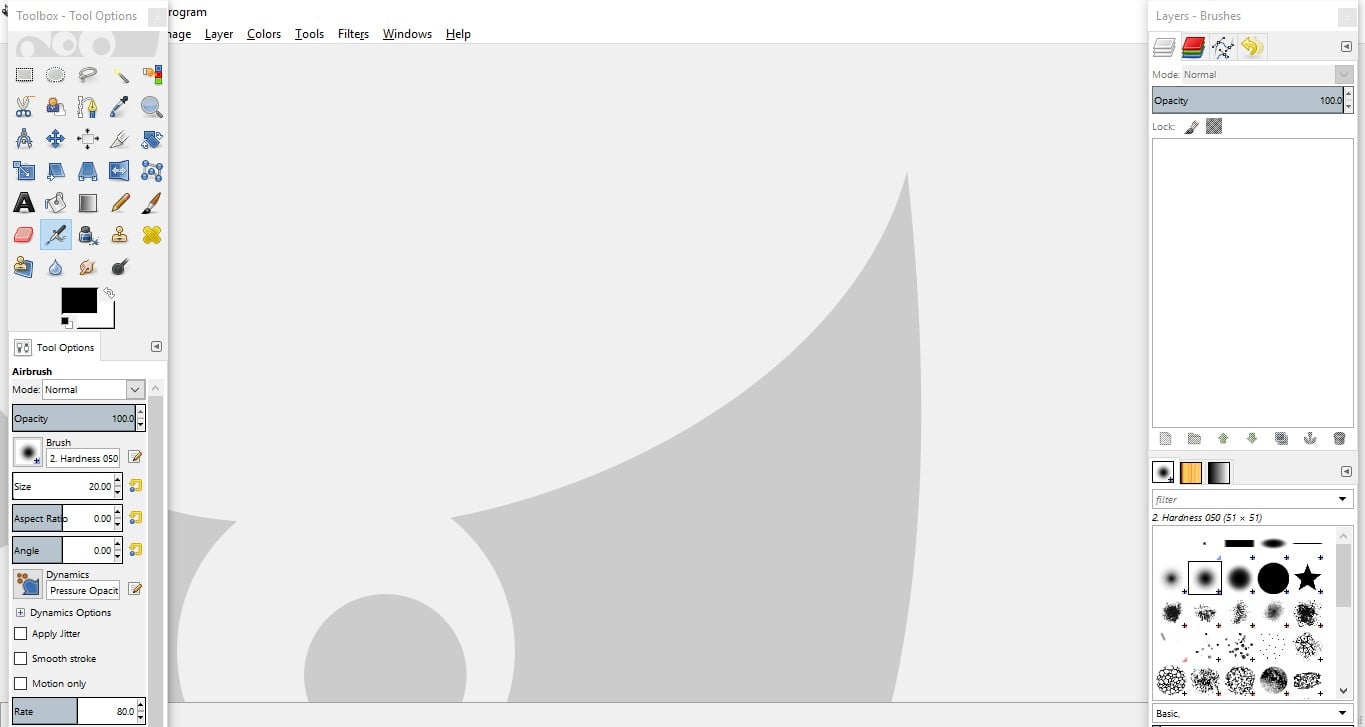
A.open GIMP. This is how its Homescreen look.
B.Next Go to the file menu and open image which we want to compress.

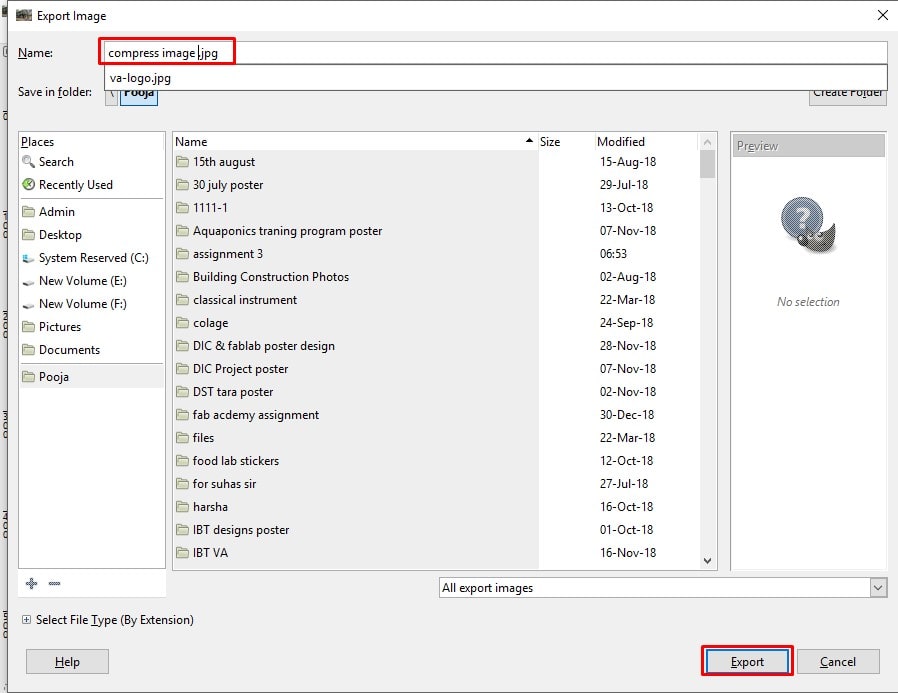
C. After loading image, once again go to File menu and select “Export As” option

D.Then give a name to file and click on export button.
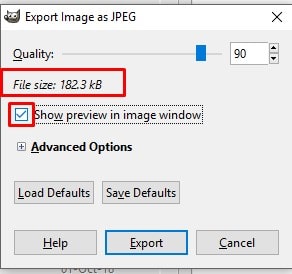
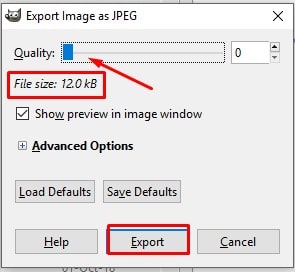
E.To reduce size of image changes it quality by dragging. Then press export.
|
|
You can Download Original Files HERE.
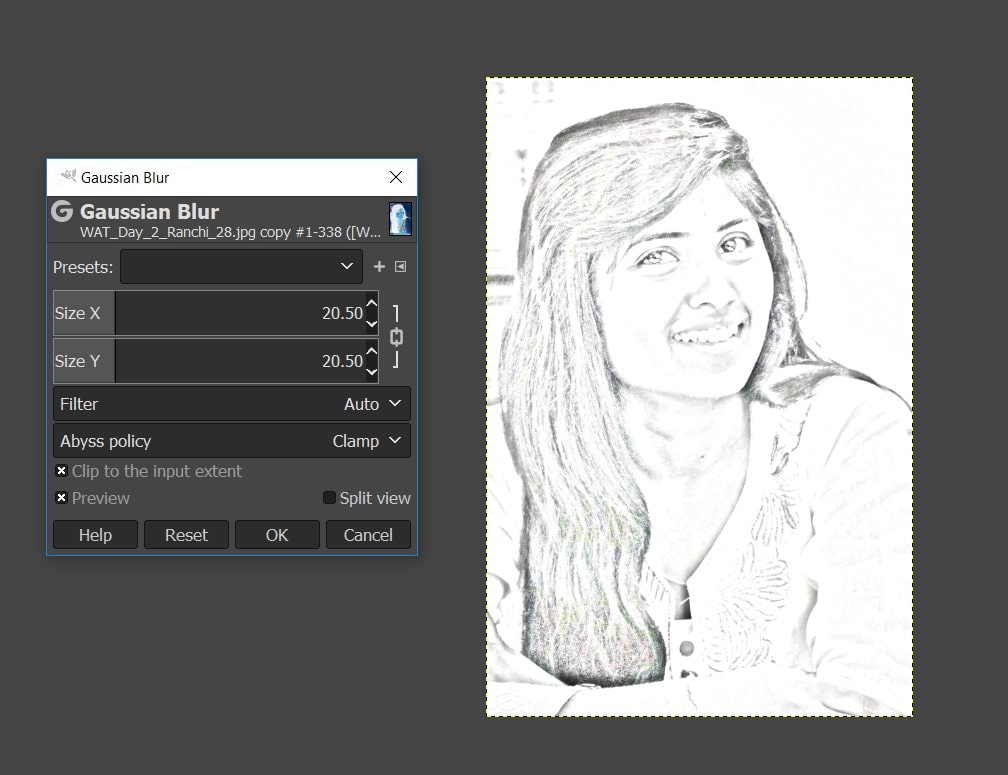
I practices more hands-on with GIMP like I creating Pencil Draw Effect. For that:
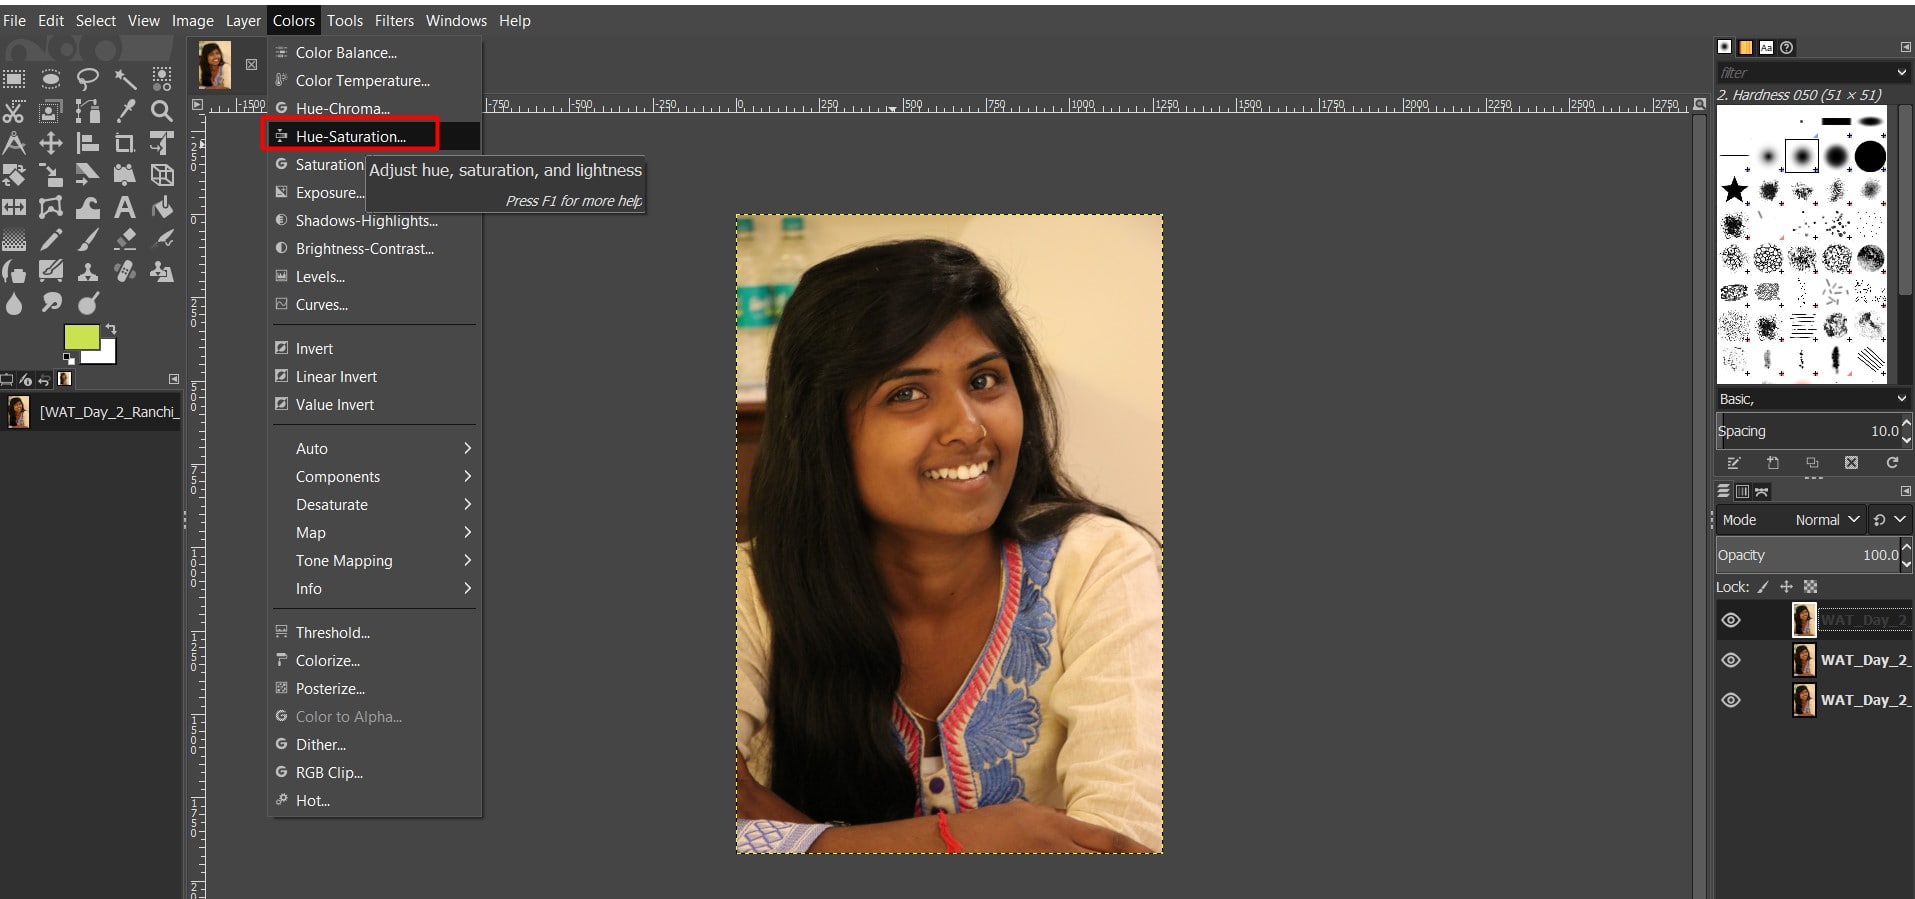
A. Open an image want to work with.create Duplicate layer twice. Then go to colors in menu bar and Selected Hue-Saturation cammand.
B.Small window pop-up. In that click on Saturation and reduce it, press OK.
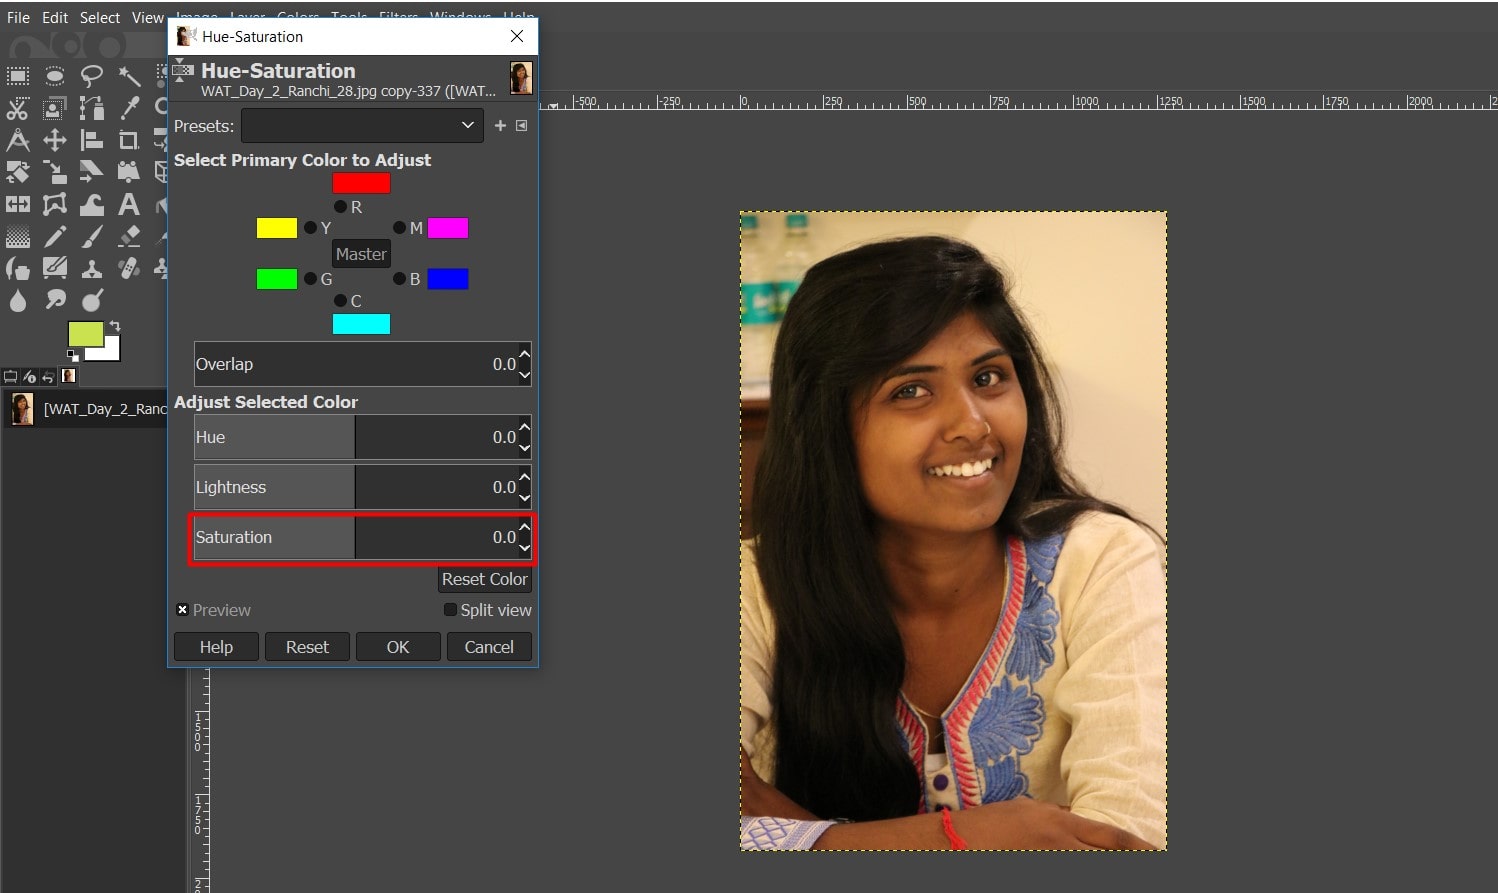
C. Then I was going to Normal and clicked on small arrow and selected saturation

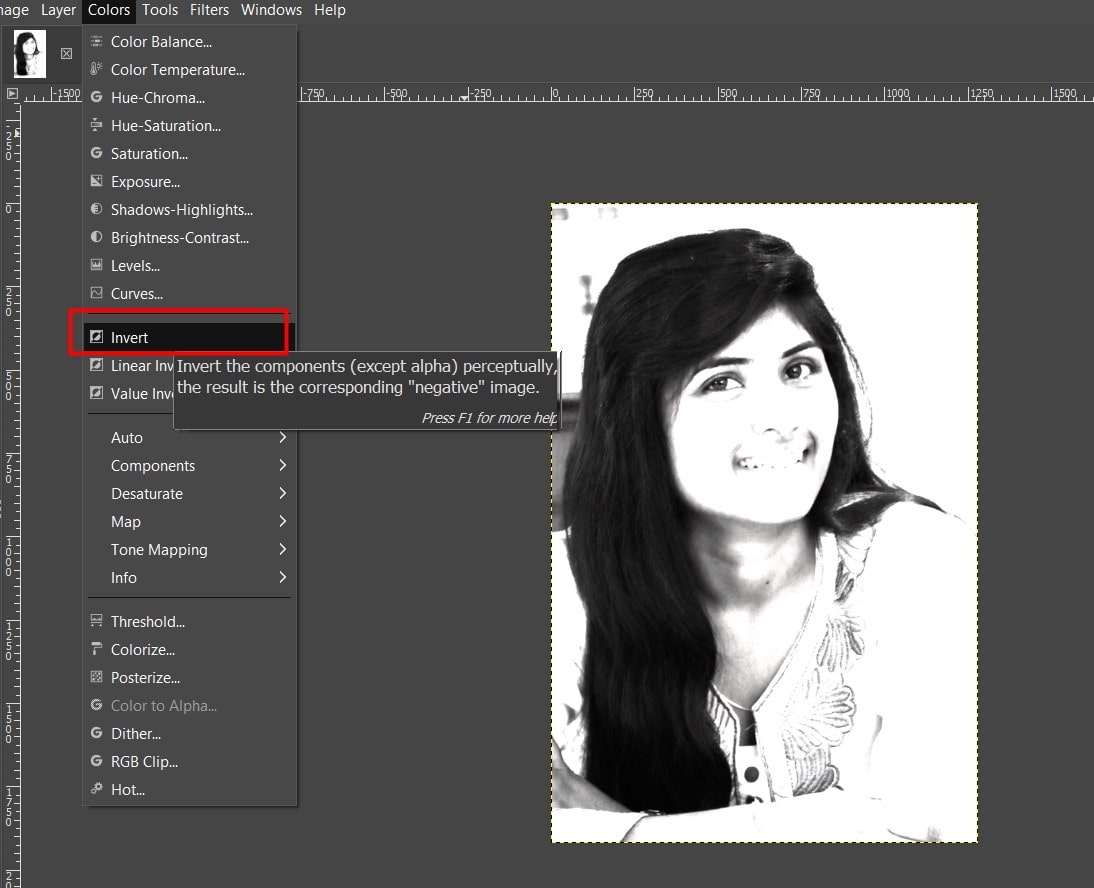
D.Once again go to Colors tool and Selected Invert Cammand.
E.Then go to Filter and selected Blur In Blur select Gaussain Blur cammand.
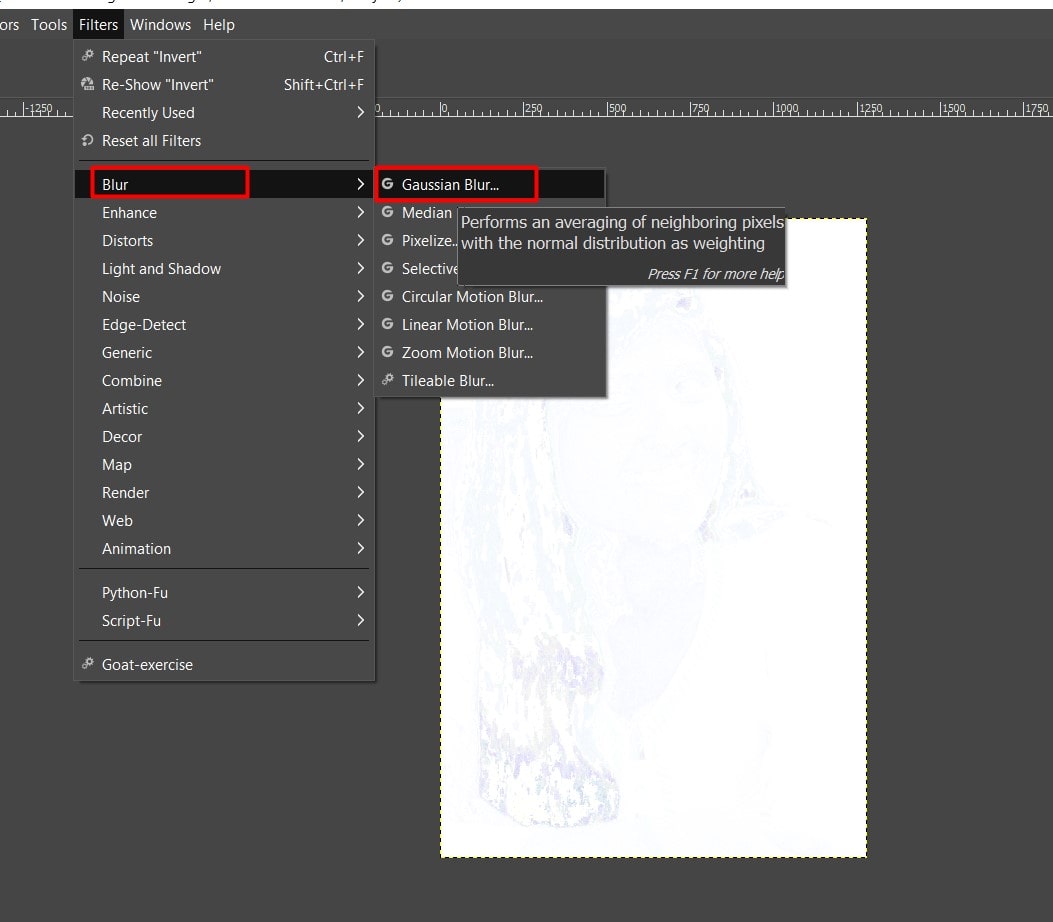
Adjust size of X and Y till it look like Pencil drawn Effect.
You can Download Original Files HERE.
Adobe Photoshop
I am Familier with ADOBE PHOTOSHOP .For a stretch I decide to do something new with Photoshop.
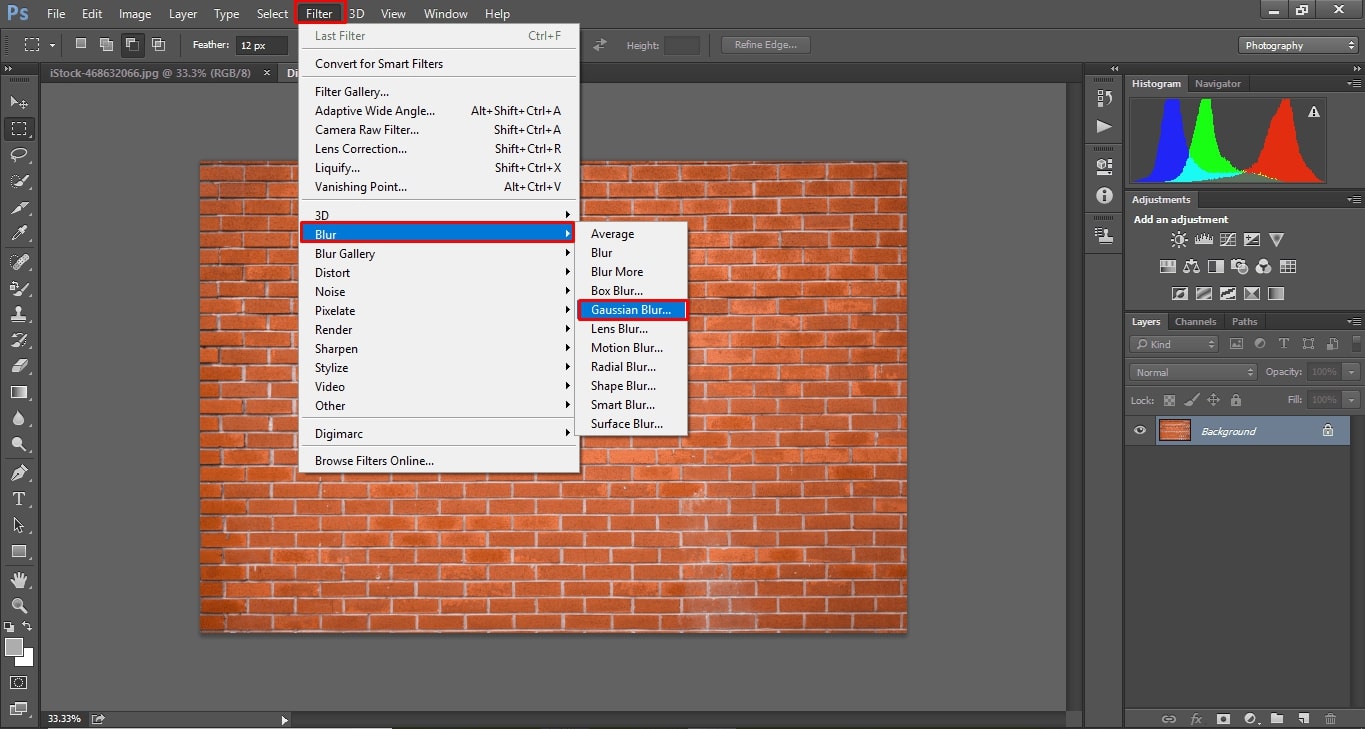
A.I download a brick photo and open with Photoshop. I duplicate the layer. Then In document select New option, give a name to a layer and press OK. Next In Filter select Blur and Apply Gaussian Blur on brick image, blur radius is set on 3.0. last click OK.
B.If you want to black and White the image you can press shortcut key Ctrl+Shift+U. I Save file in computer.
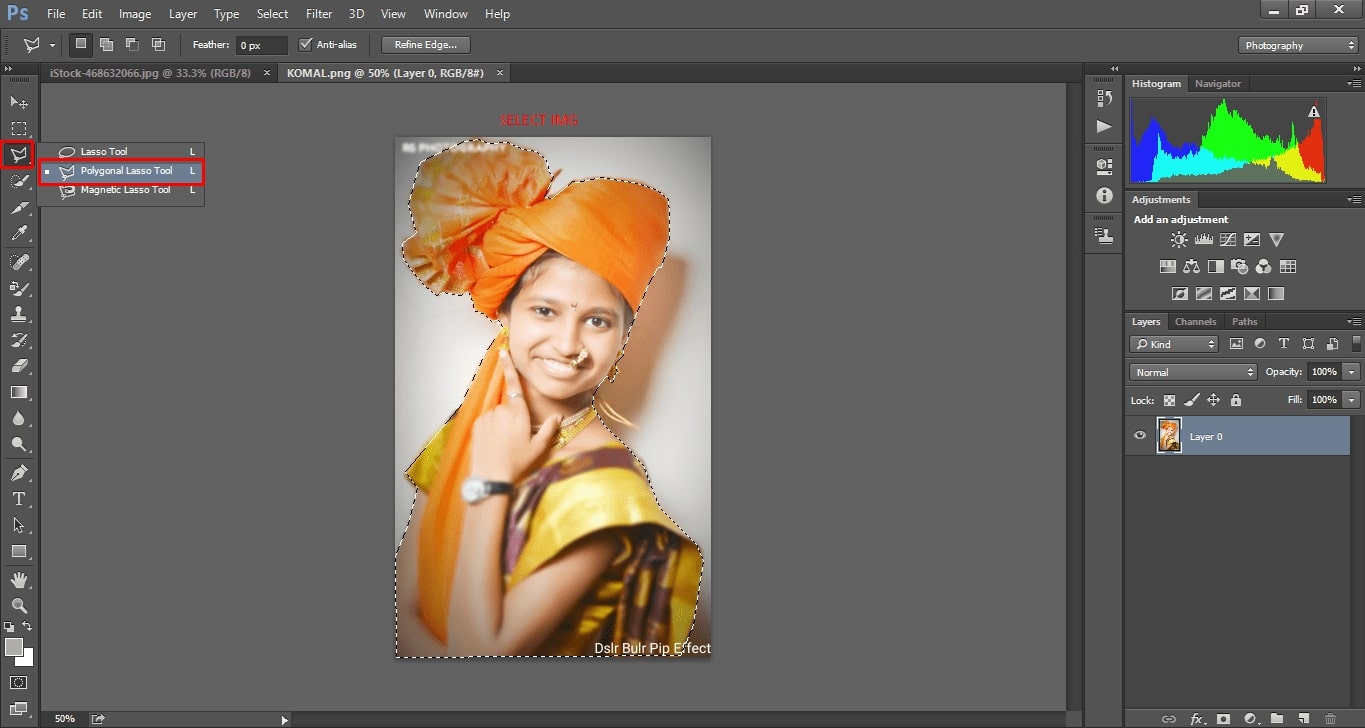
C.I took my colleague photo for further work with her permission. I use Polygonal Lasso tool to trim photo. To move on Layer1, I use shortcut key Ctrl+J. I Cut Selection area and Paste it on brick image.
D.After I was going Layer1.you are also going shortcut key withCtrl+J.then I CUTSelection area on my colleague photo.and Paste it on brick image.
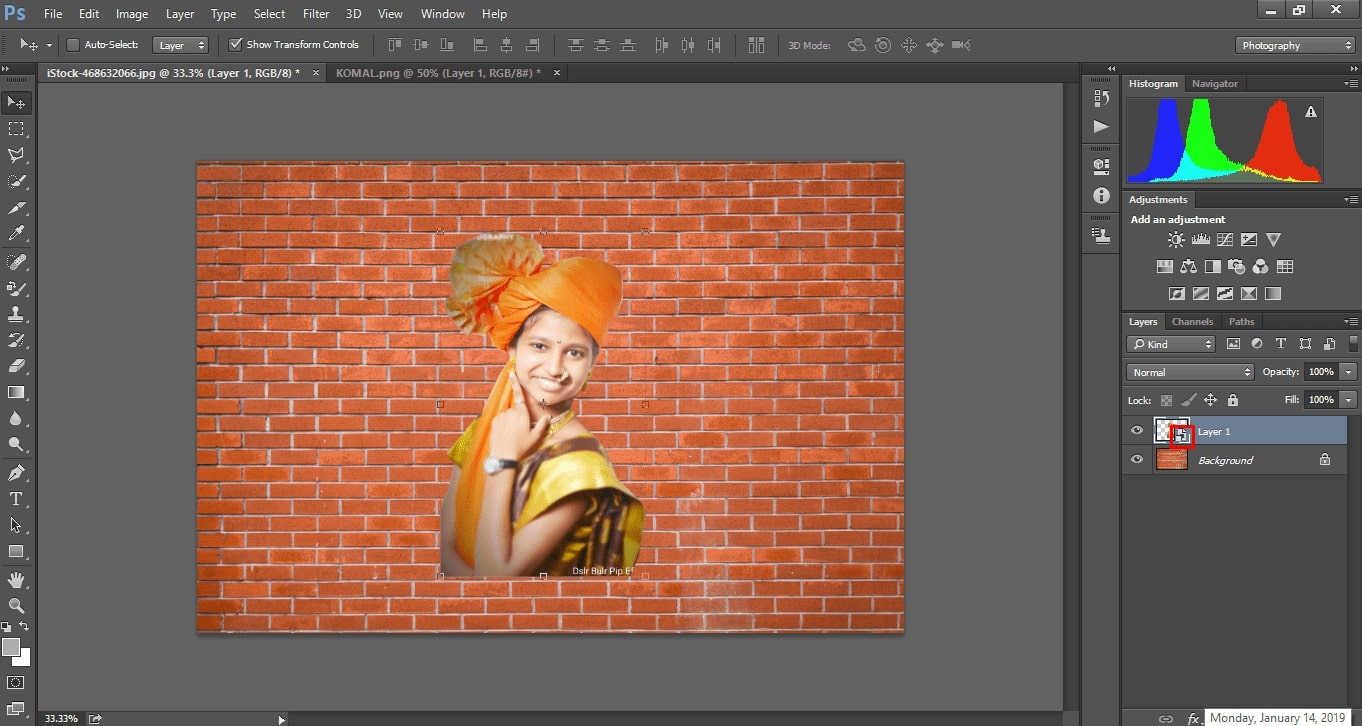
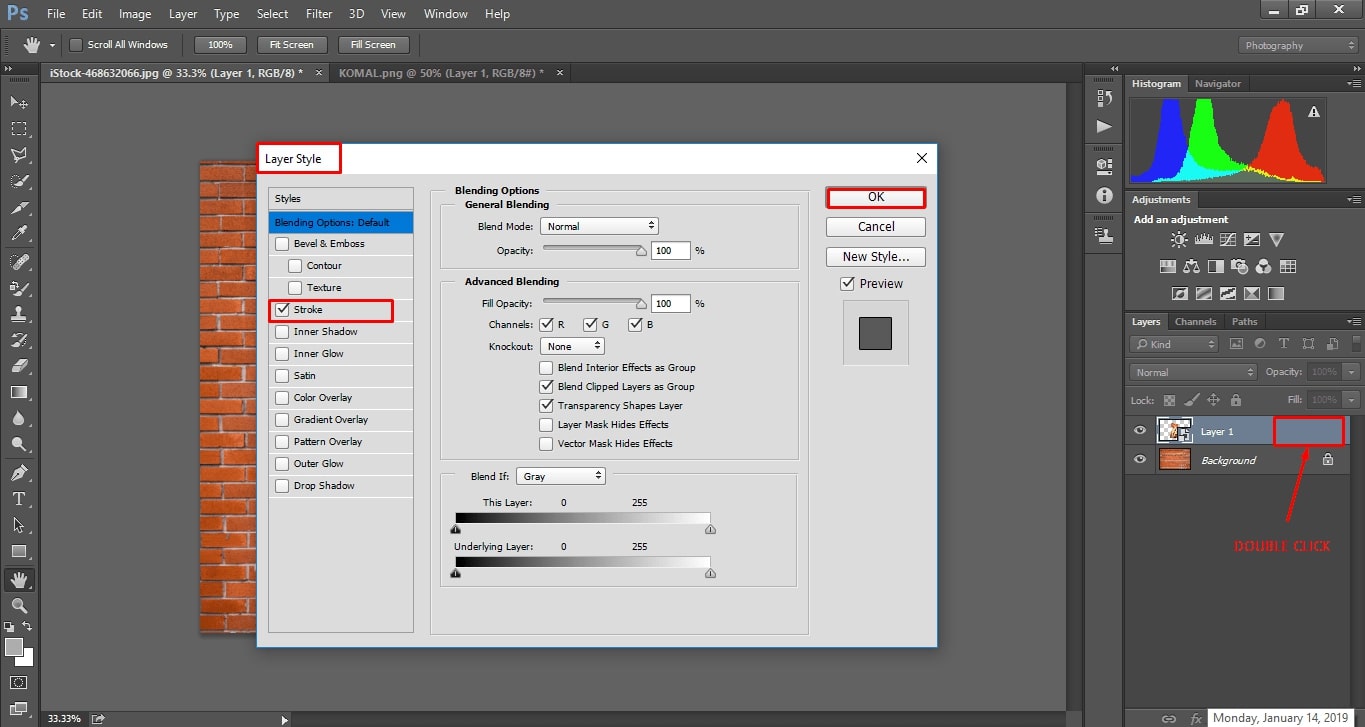
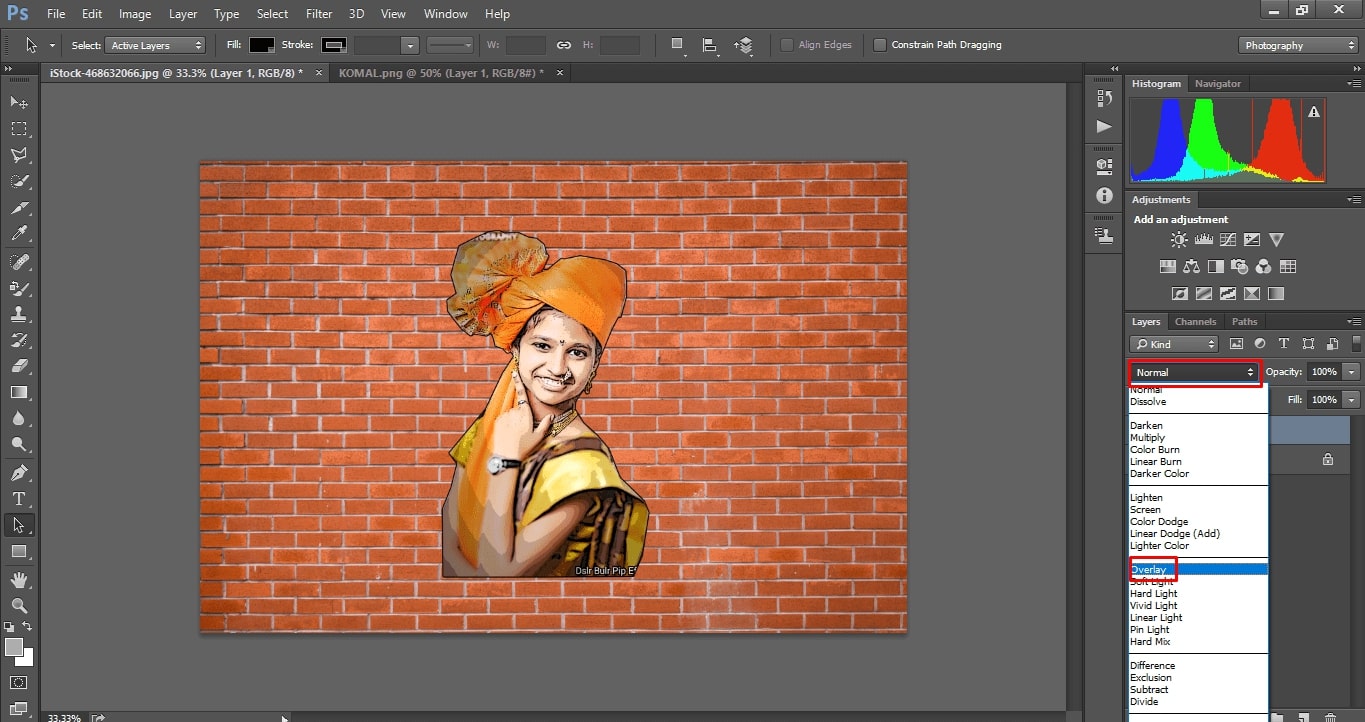
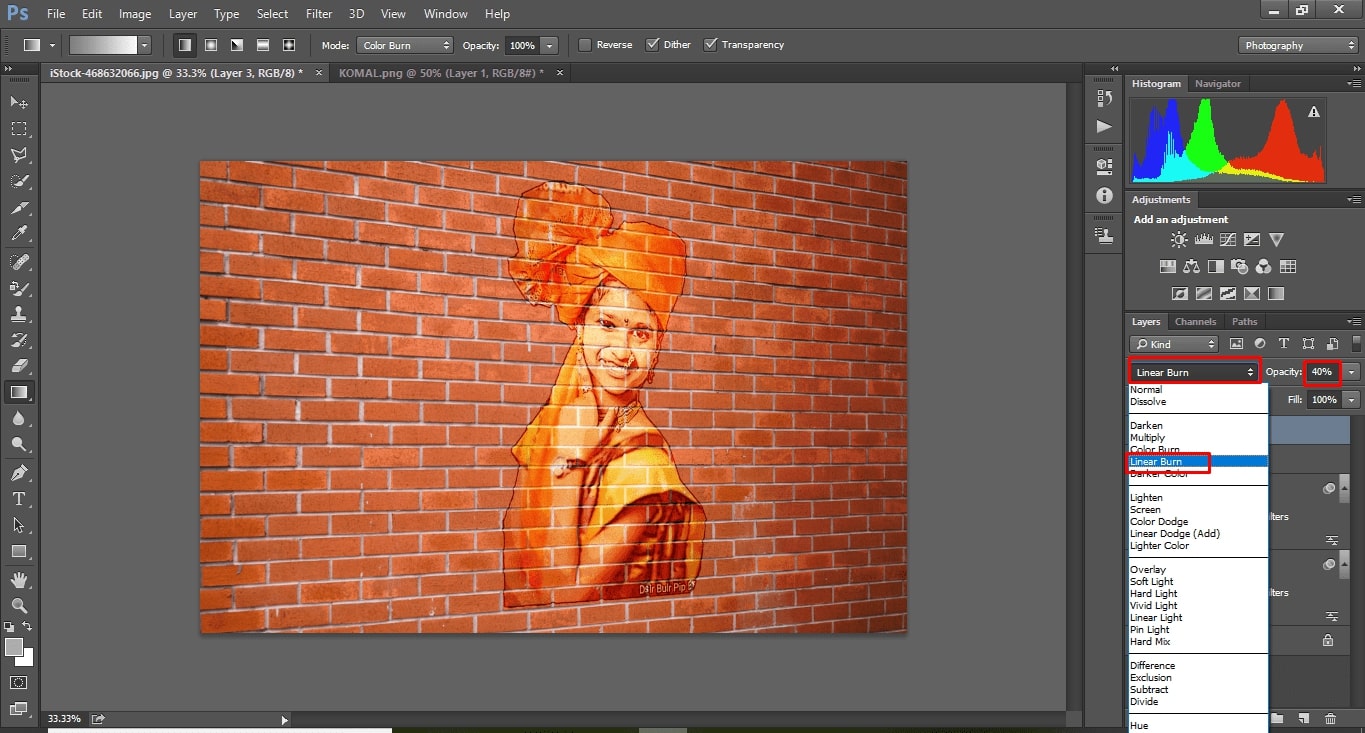
E. Now in Layer Setting, I Select Convert to Smart Object. Then Double clicks on layer to open layer style window, click on Stroke and OK it. I open Filter Gallery filter and selected one theme. For overlapping images on bricks I go to normal, which is in layer setting and change it in Overlay.
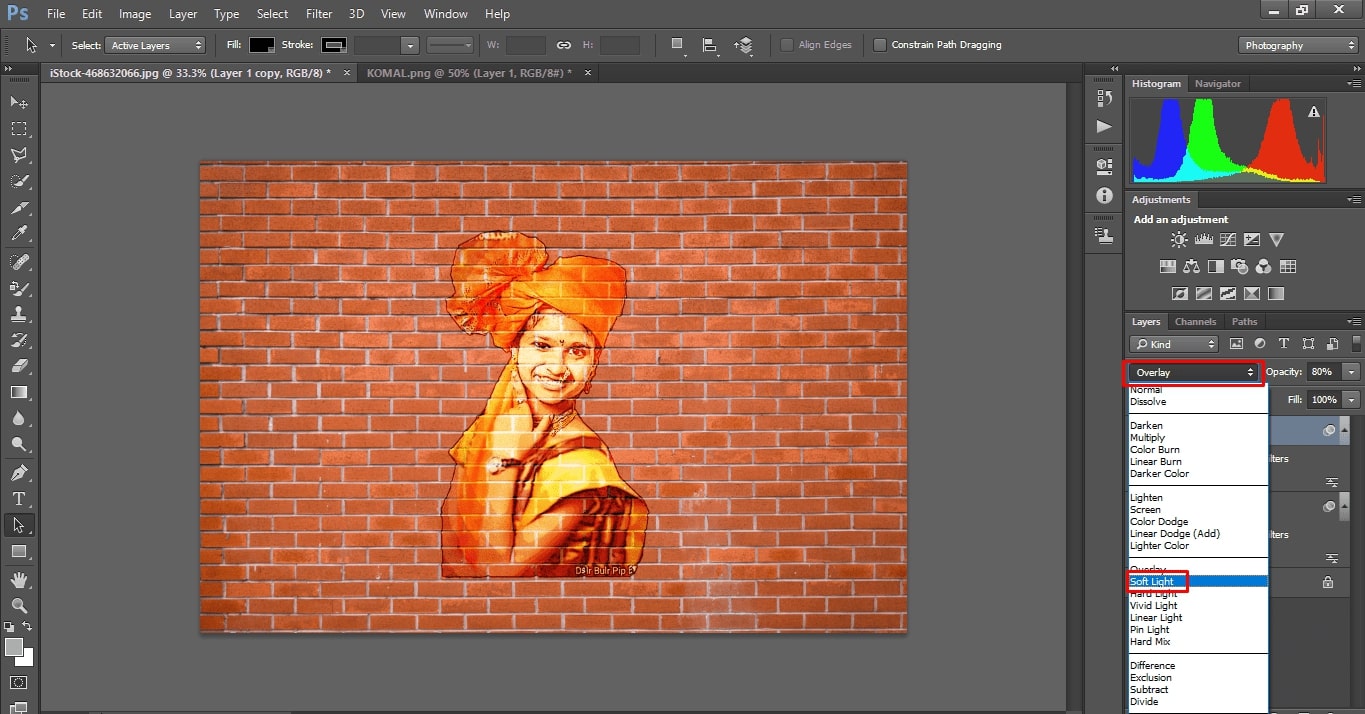
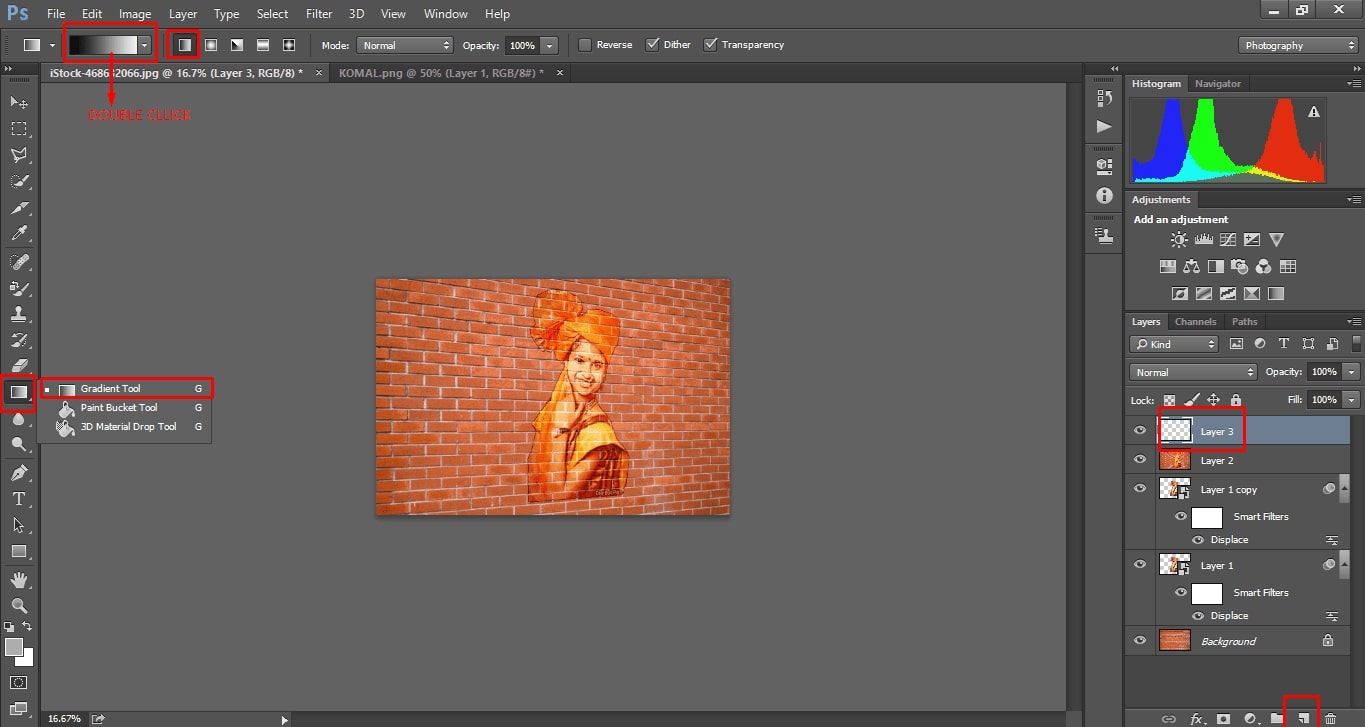
After that I keep on doing following steps shown in image as it is.


You can Download Original Files HERE.
GIMP and Photoshop are both programs that are meant to open and edit images. The major difference between these two is that Photoshop is proprietary and would cost a lot of money to purchase while GIMP is open source software and is therefore free for anyone to download and use
I used Photoshop beacuse In photoshop are much more powerful than the equivalent tools in GIMP.And Personally I liked Photoshop and many time I used Photoshop.
What is Vector
Vector graphics are computer graphics images that are defined in terms of 2D points, which are connected by lines and curves to form polygons and other shapes. Each of these points has a definite position on the x- and y-axis of the work plane and determines the direction of the path; further, each path may have various properties including values for stroke color, shape, curve, thickness, and fill. Vector graphics are commonly found today in the SVG, EPS and PDF graphic file formats. ---(wikipedia)
Inkscape
For vector graphic design here I use INKSCAPE software. Inkscape is a Open Source 2D graphic designing software.
In Inskscape, I began with making simple parametric. Start from drawing simple box to parametric.
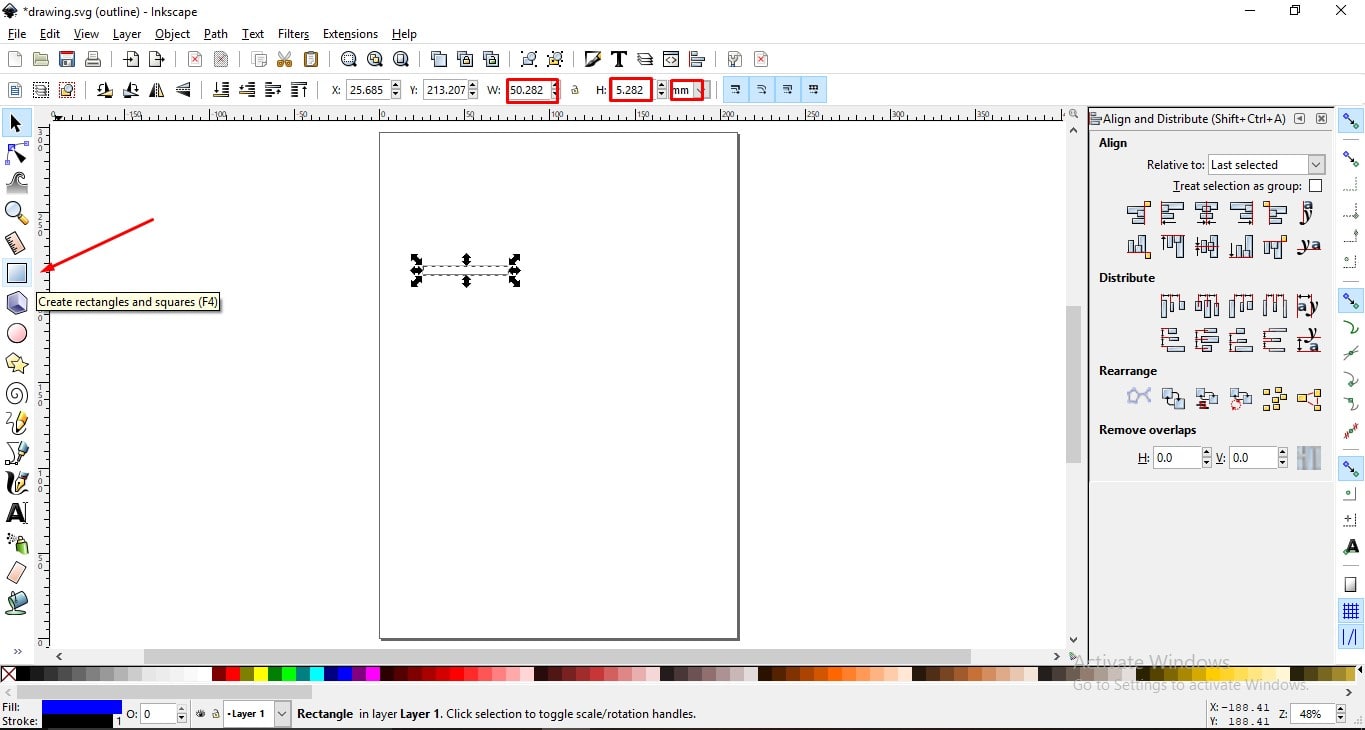
A.Draw one simple box and set dimension of box, unit is in mm.
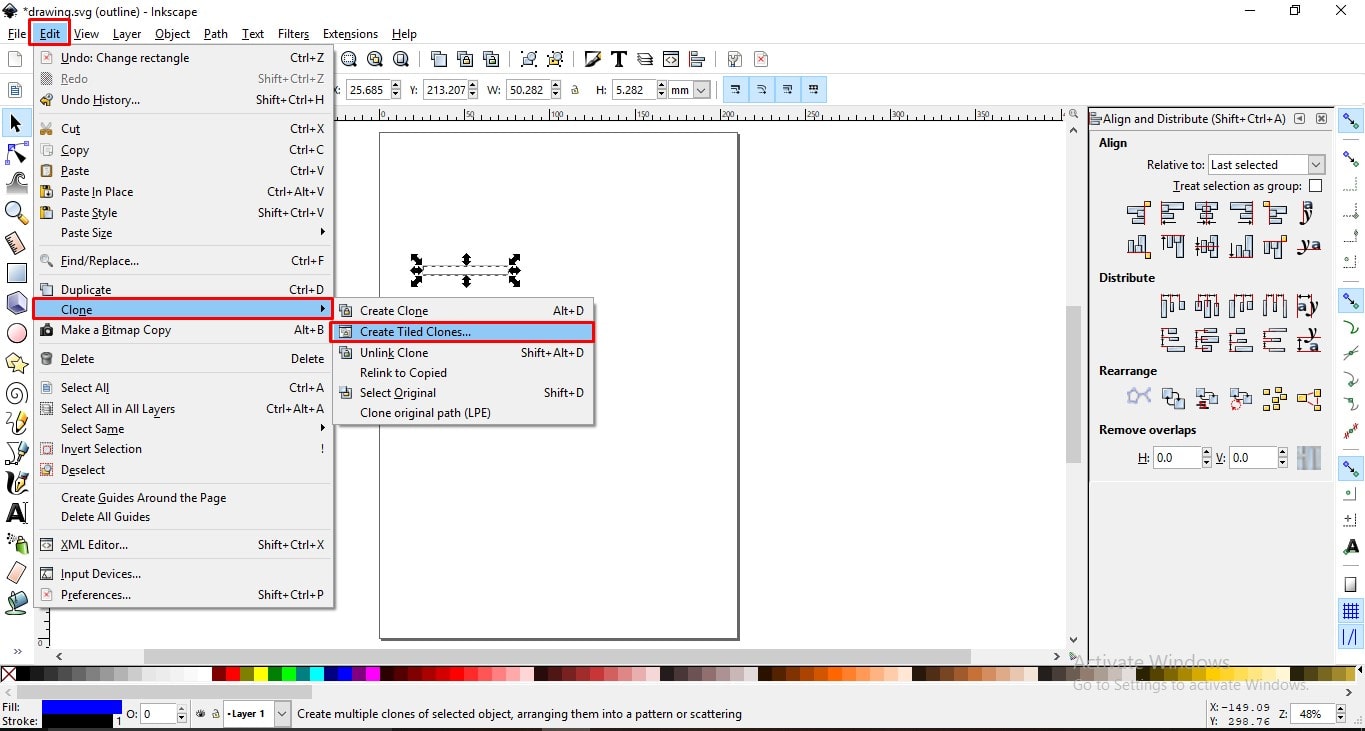
B.In Edit select Clone— Create Tiled Clones.
C.Click on create Button
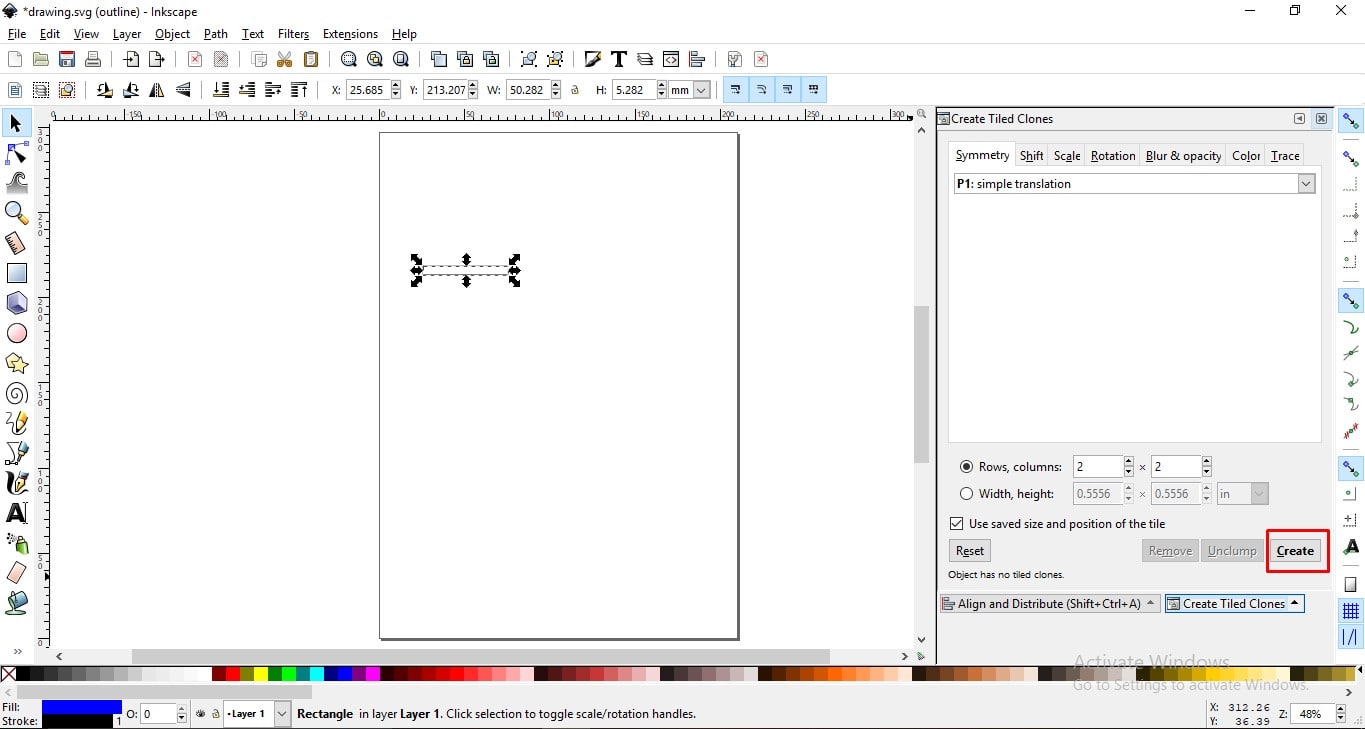
D. It create four more clones. and real one is a key of other four clones.

E.When I change the size of real key, other four clones sizes change too.

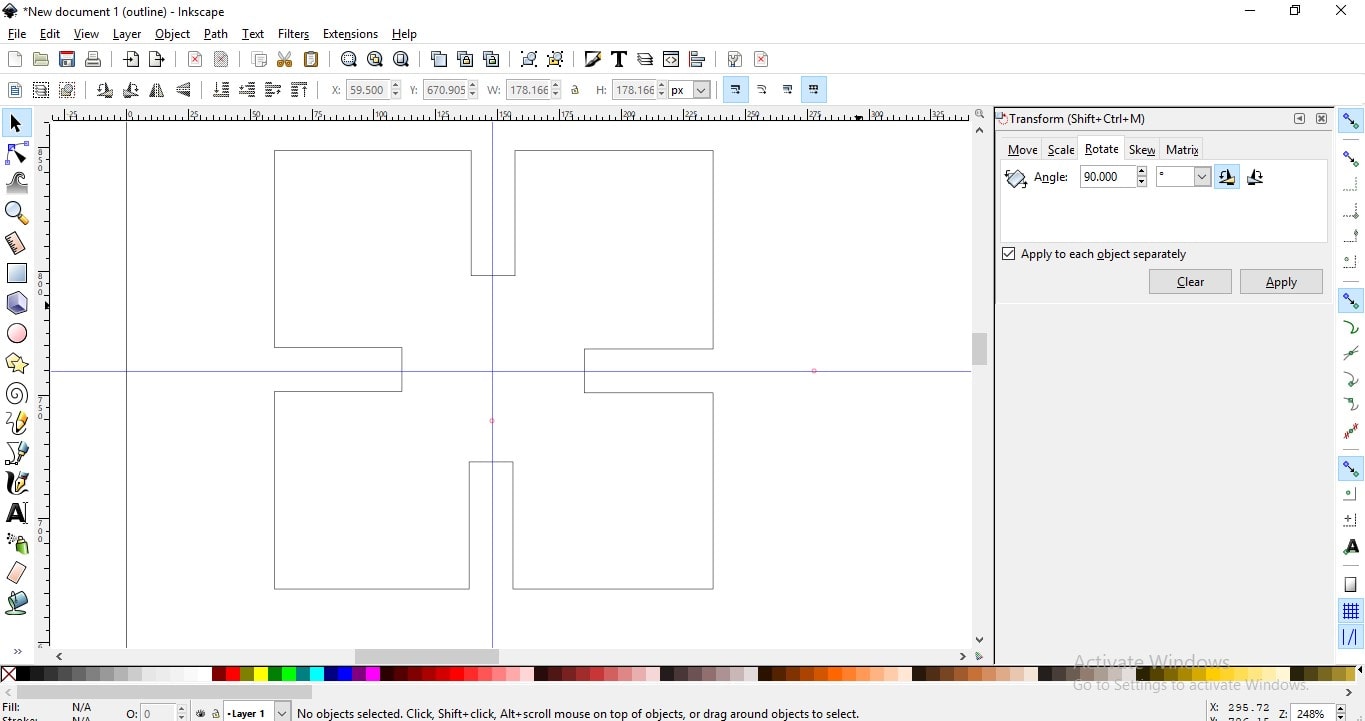
F.After resizing , create one box for parametric design.
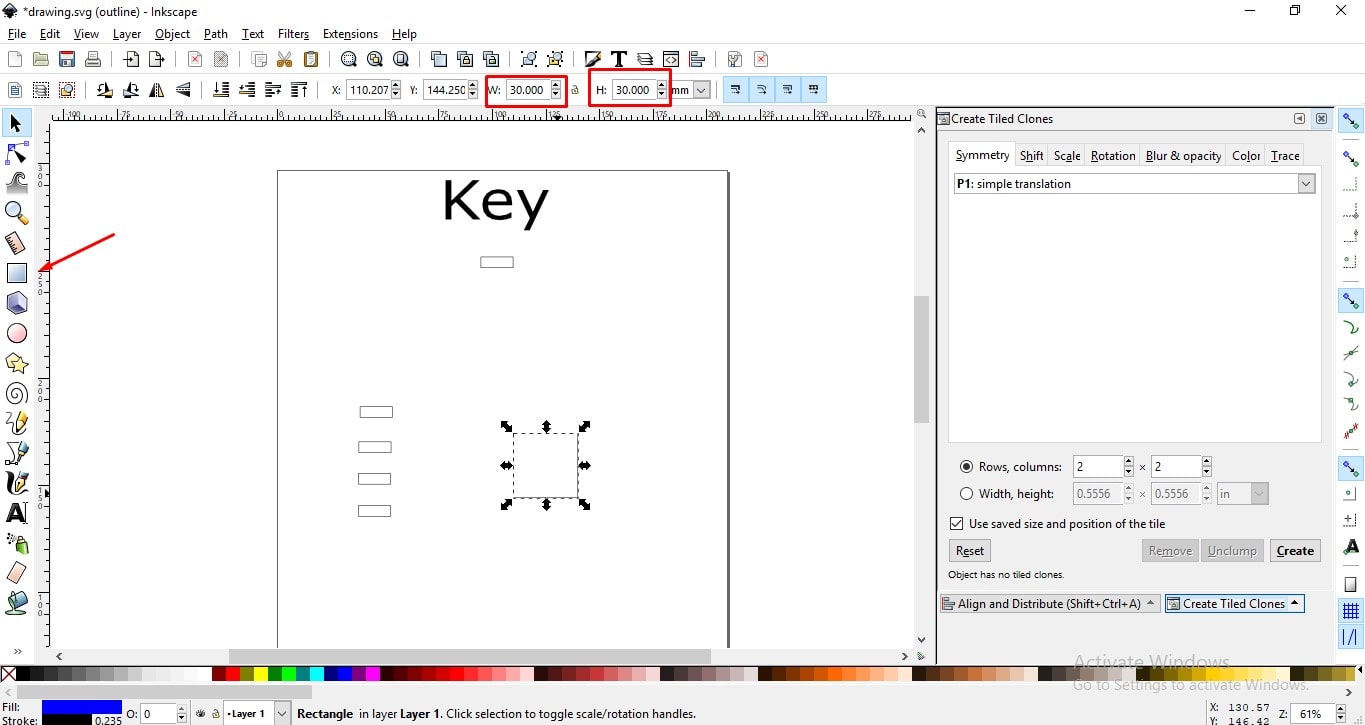
To Align clones go in Object, select Align and Distribute then align all clones in a big box.
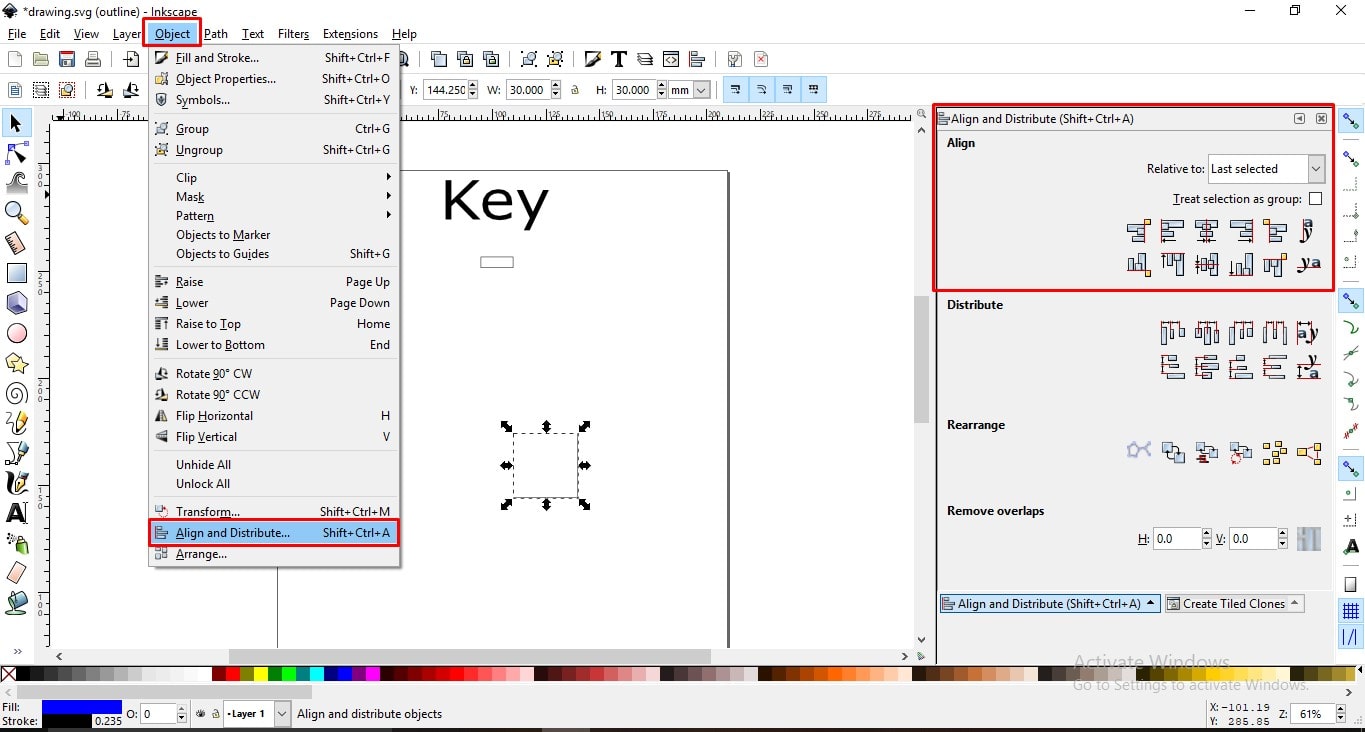

This is simple paramatric design using Inskscape
You can Download Original Files HERE.
Corel Draw
COREL DRAW is a vector graphics editor developed and marketed by Corel Corporation.CorelDraw is designed to edit two-dimensional images such as logos and posters.
In Vector design, I used graphics design software is Corel Draw. I have worked on this software since last 1.5 years. so, I comfort of this software. I am familiar with this Software
Here, I made logo of my final project.

A.First step is to shape water drop using shape tool.
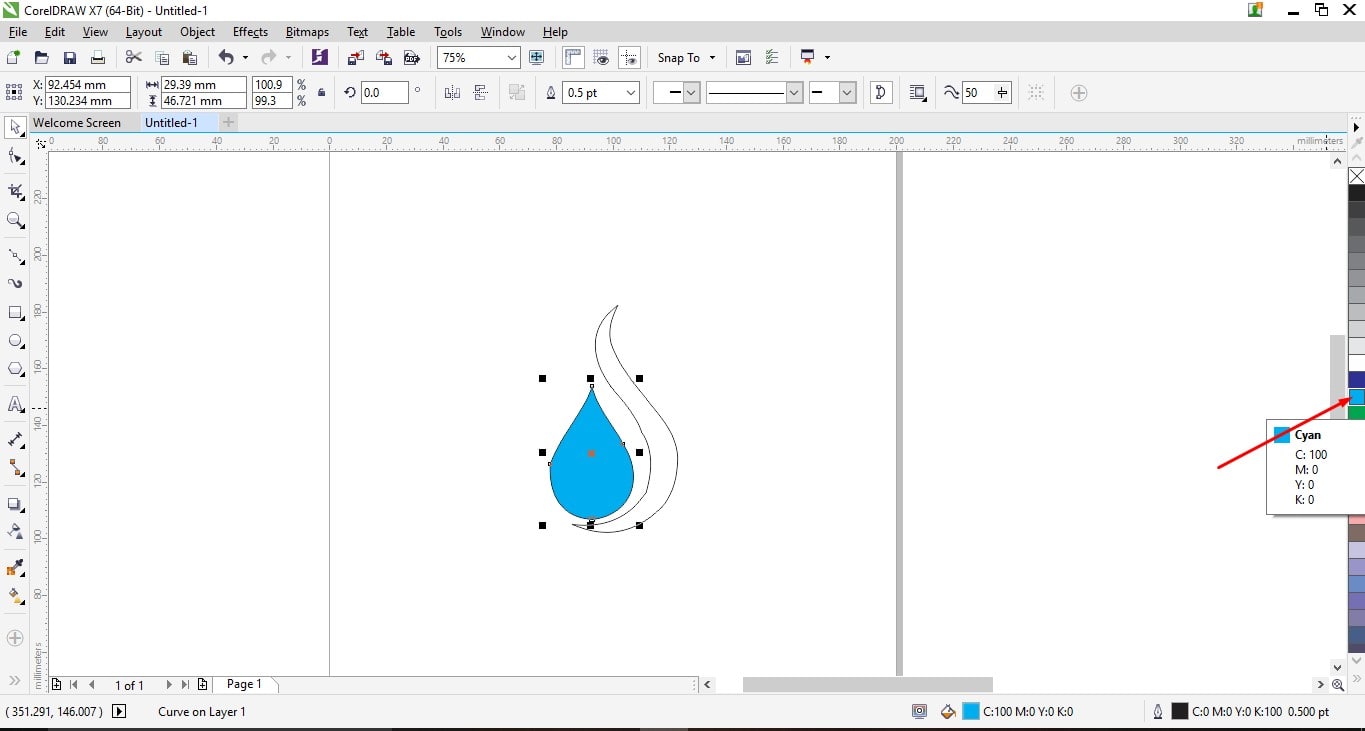
B. I color that shape in blue.
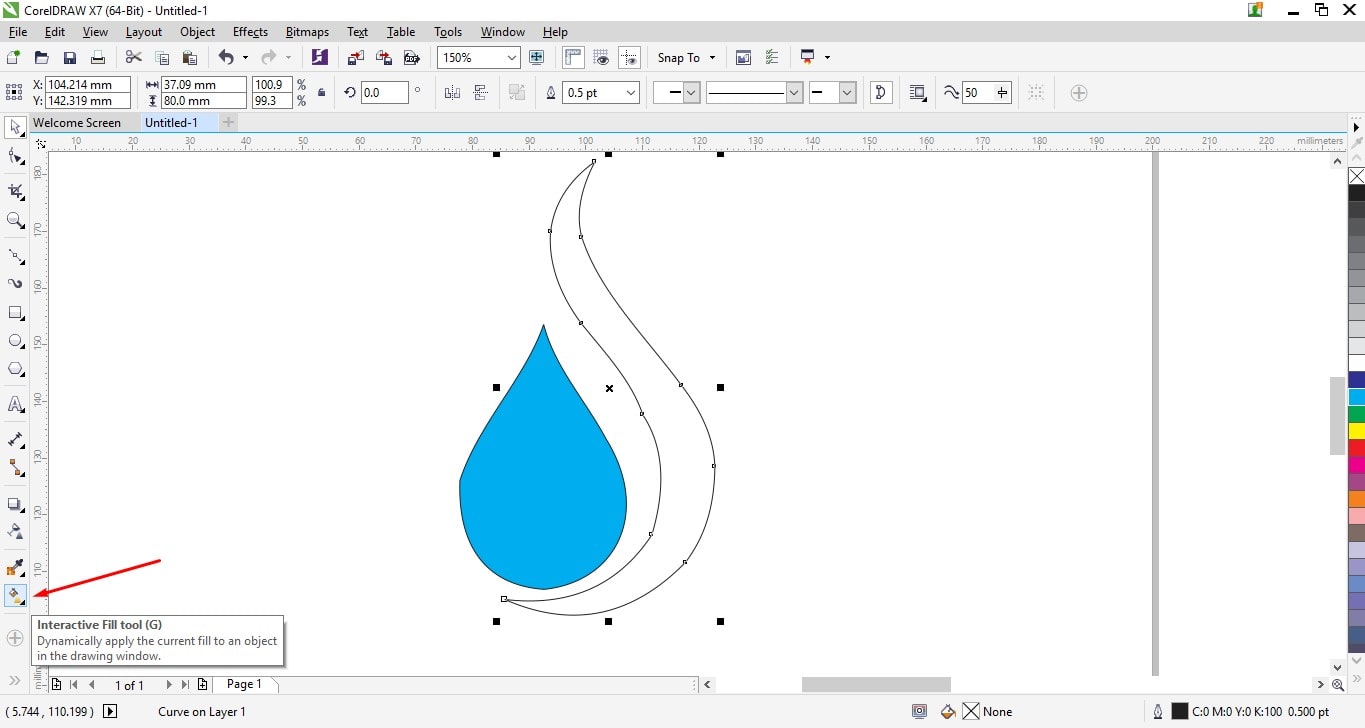
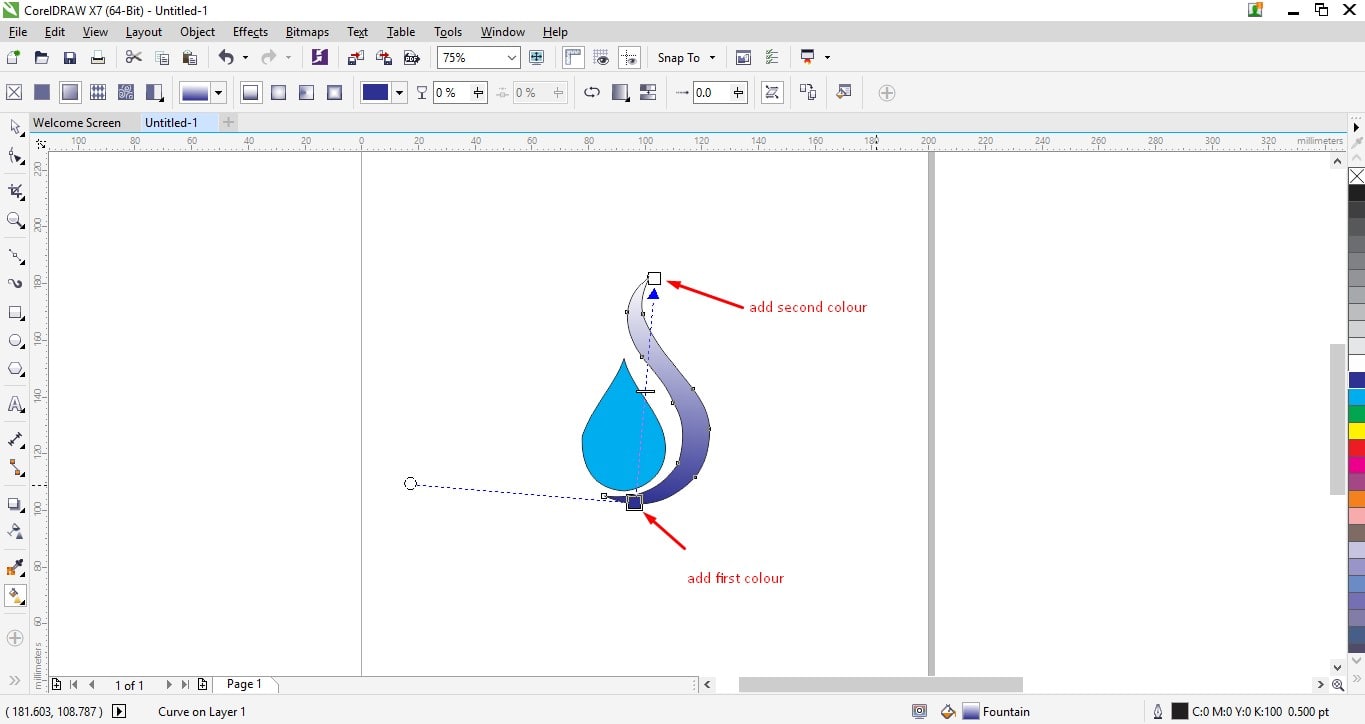
C.Then drawn another S-like shape by drawing a plane line and converting it to curves. To color this shape here I use Interactive Fill Tool from Tool Bar. and I color it with two colors black and blue.

D.I remove Border from shape.
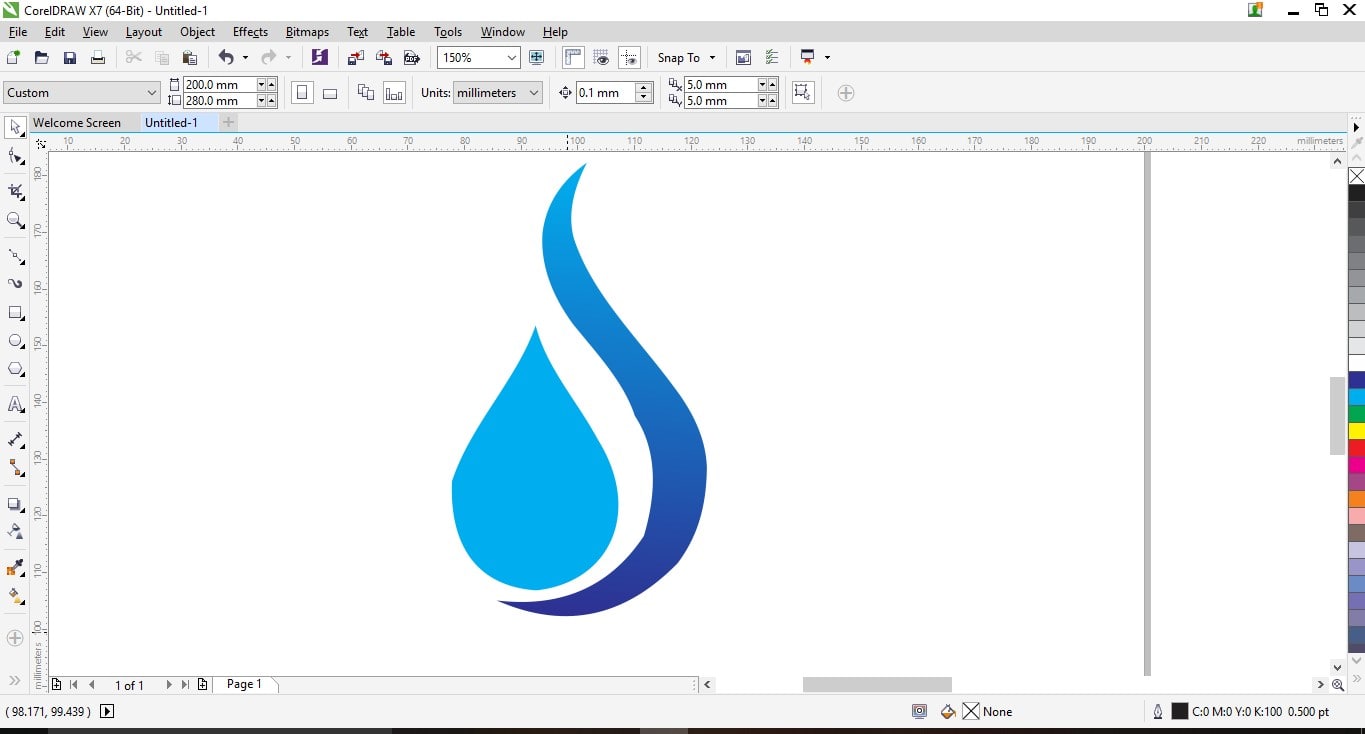
E.Took text tool from tool bar and wrote name of my project. Edited and position it.

Logo of my Project is ready

for more hands-on with CorelDraw I made two more logos
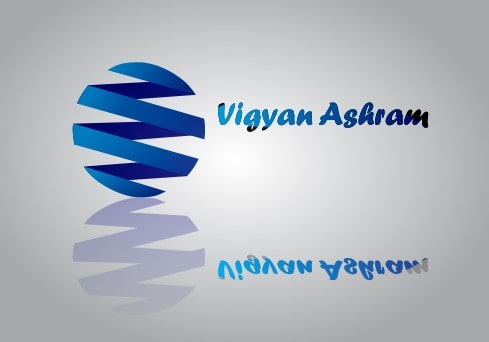
|

|
Visit site:Graphics designs-Made by me
I used both 2D design software.but I mostly work on corel beacause their are more tools than Inkscape.corel also have typographics designs.corel have many extension format for saving file.
You can Download Original Files HERE.
3D Design
Google Sketchup
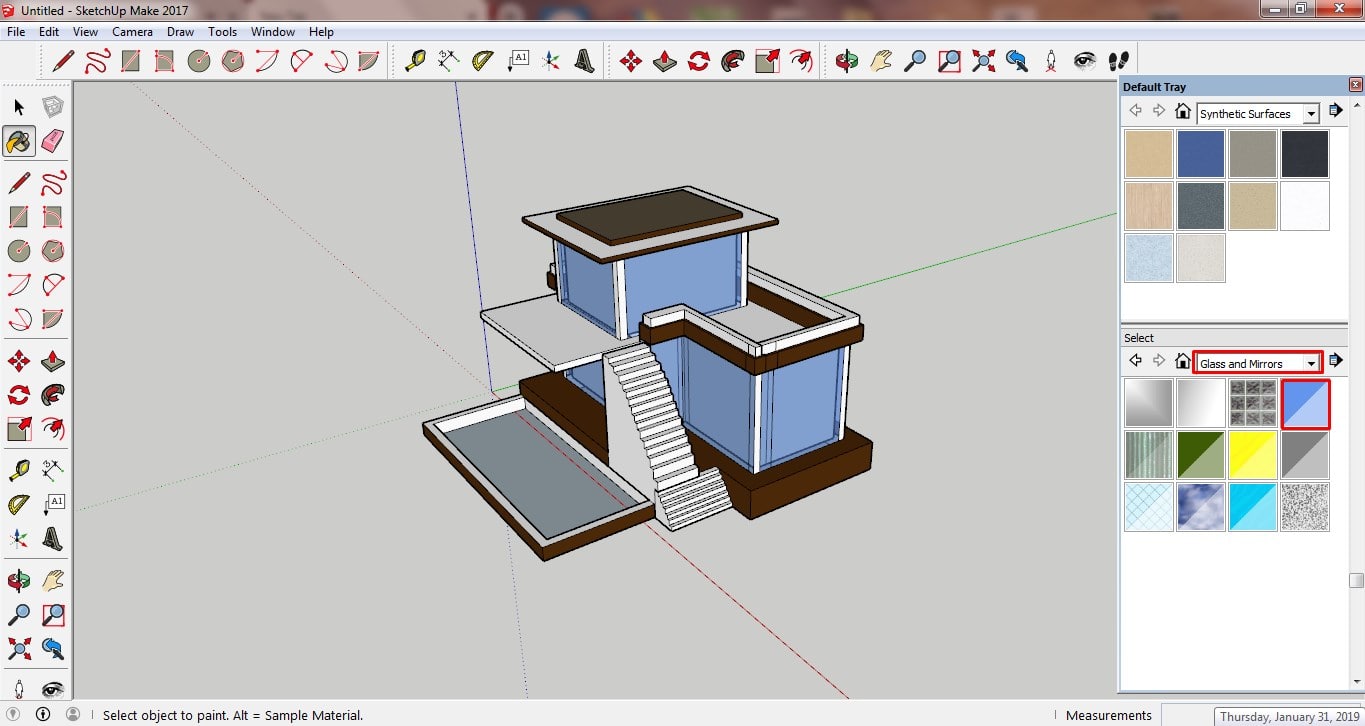
In vector design, firstly I was using GOOGLE SKETCHUP . Beginning with 3D design, I started with learning Google Sketchup. Google Sketchup is a freemiun (free and also premium) 3D designing software and it is easy to understand. With this I made bangalow design. Steps are follow:.
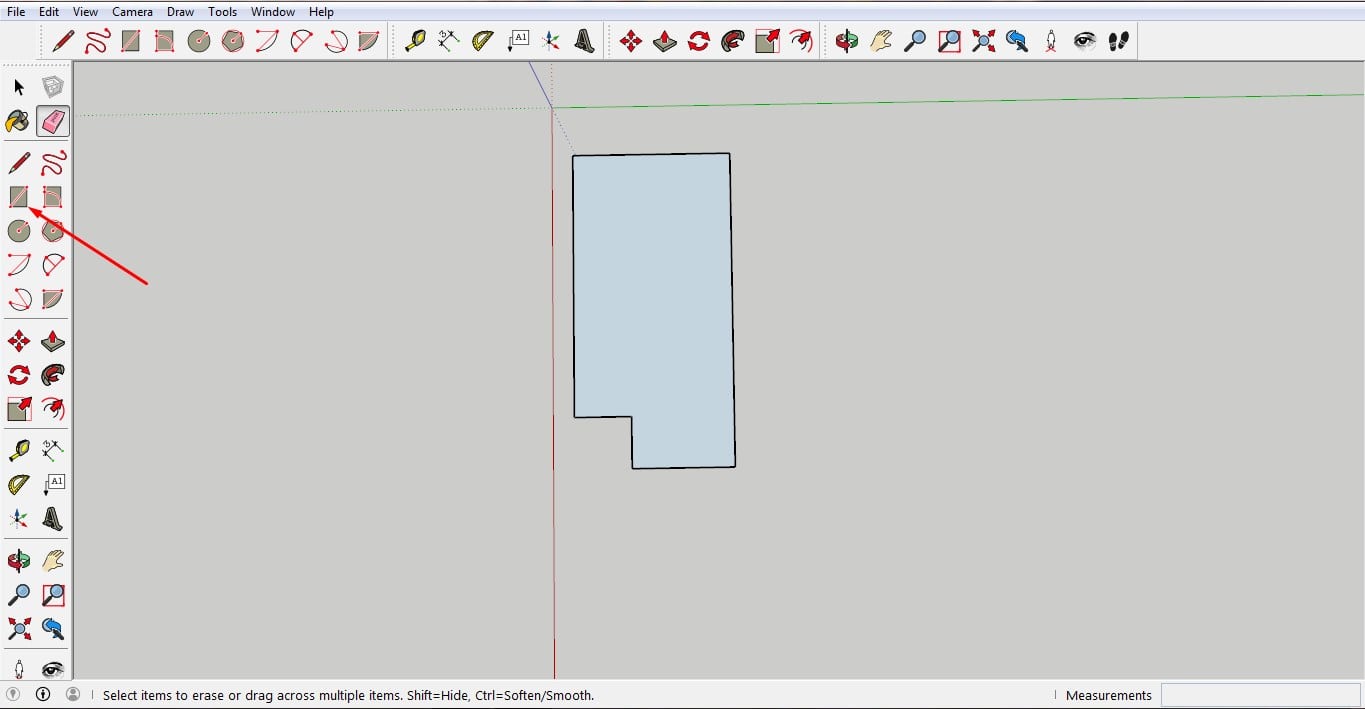
A. First I took regular rectangle shape, drawn right angle triangle on it and remove unwanted part by Erasor tool.
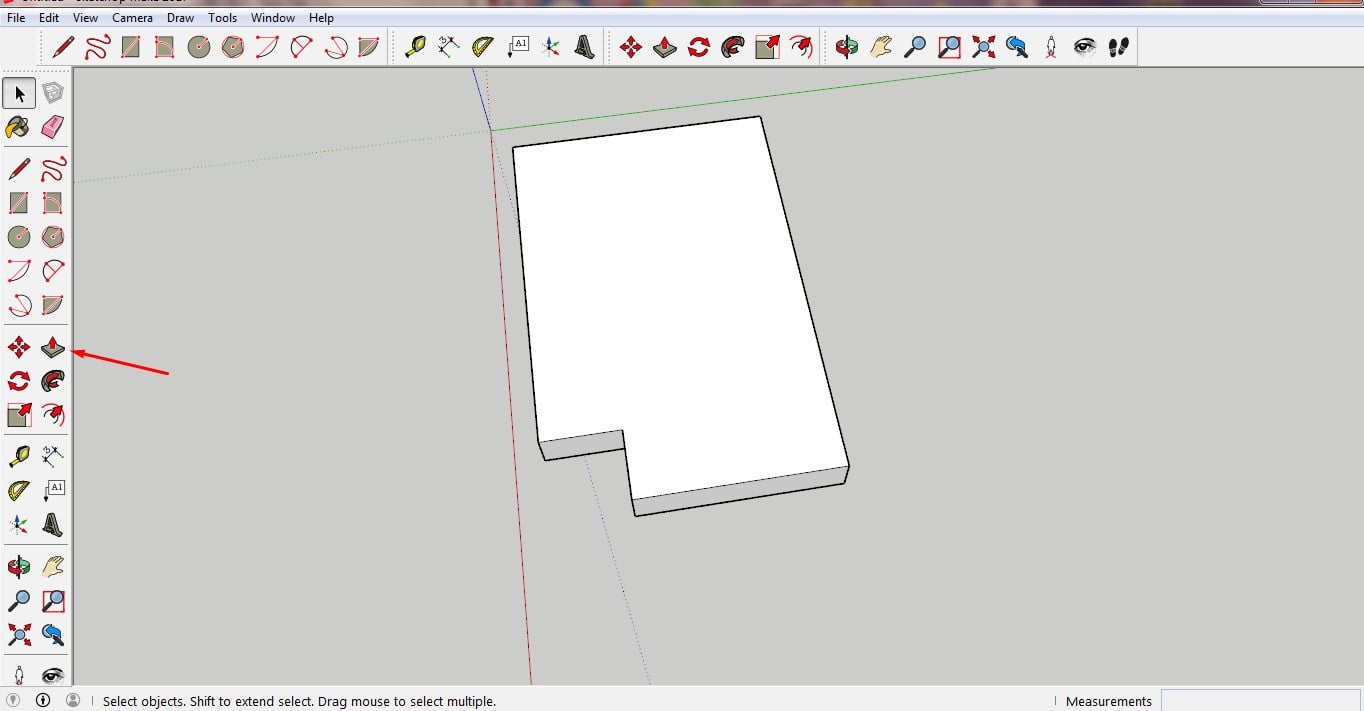
B.with PUSH/PULL tool convert it into 3D shape.
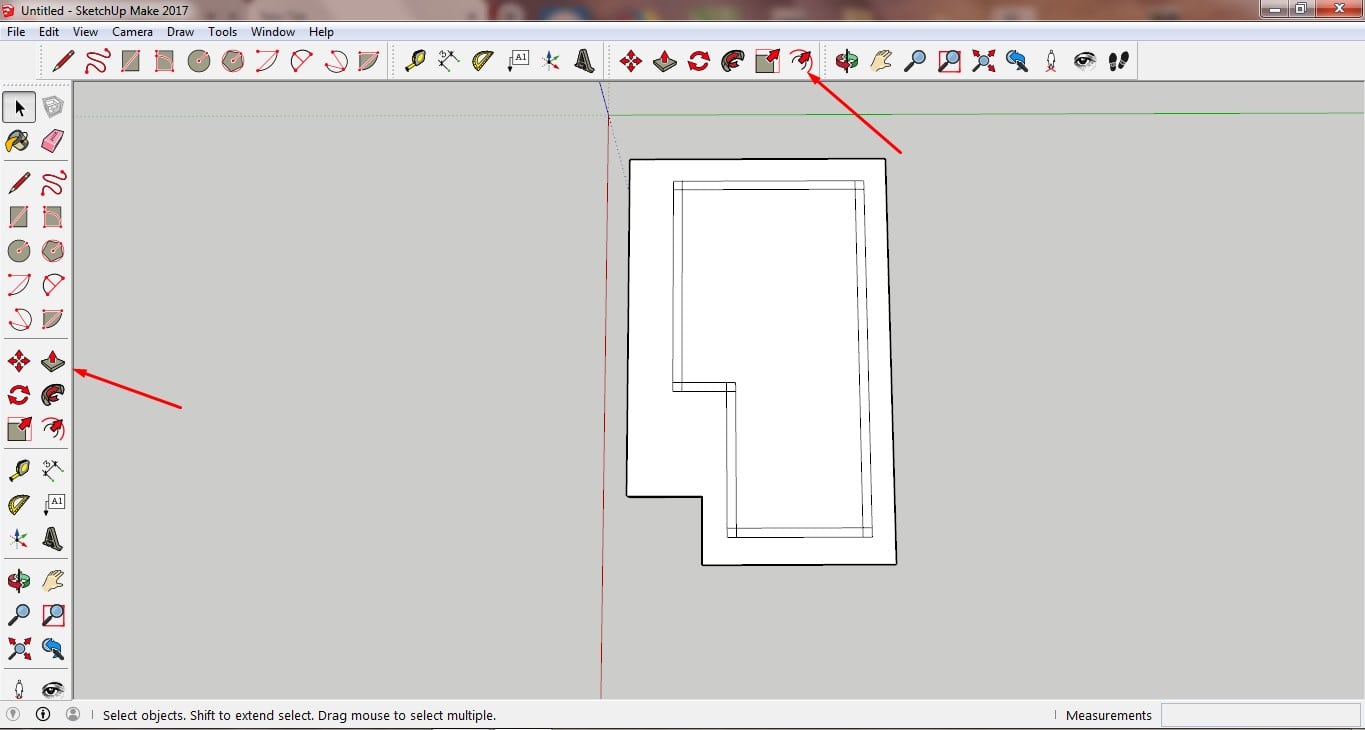
C.use OFFSET tool to draw offset inside and use PUSH/PULL for extruding it.
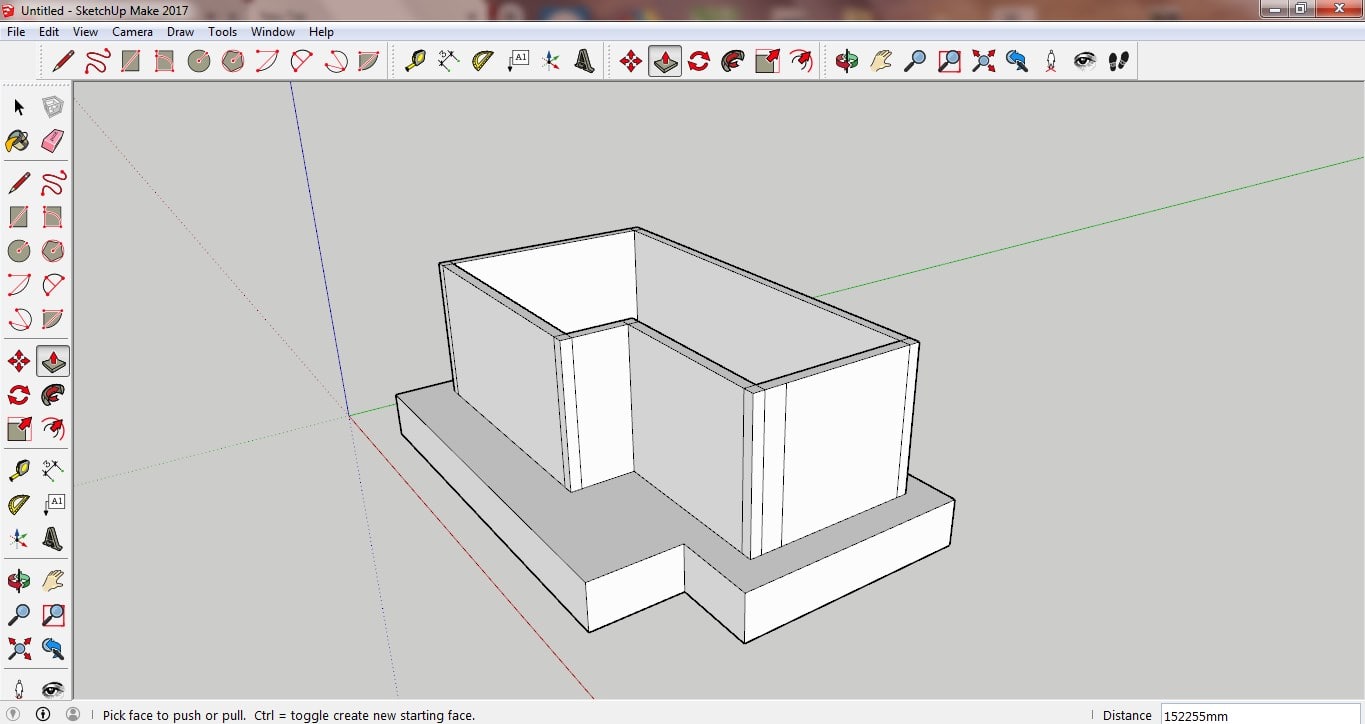
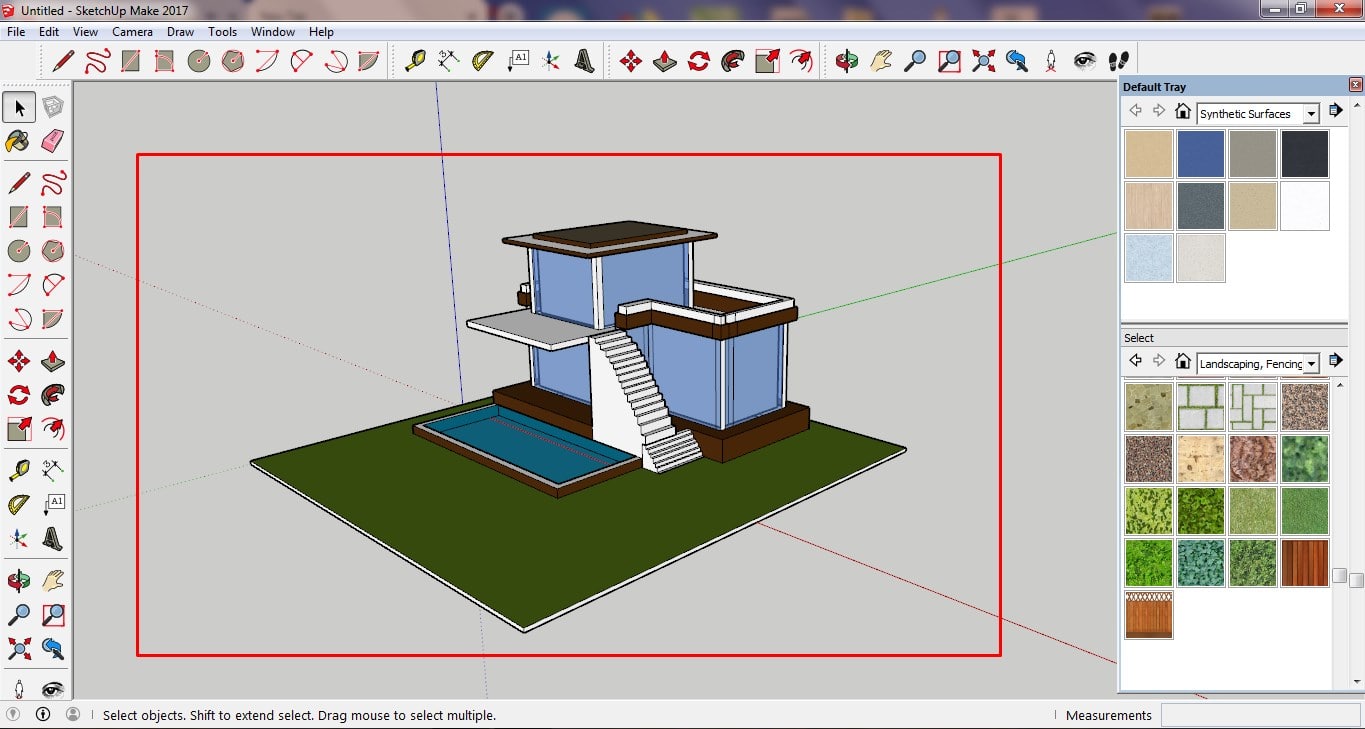
D.Follow same method to draw other shapes and structure like stairs, swimming pool etc.
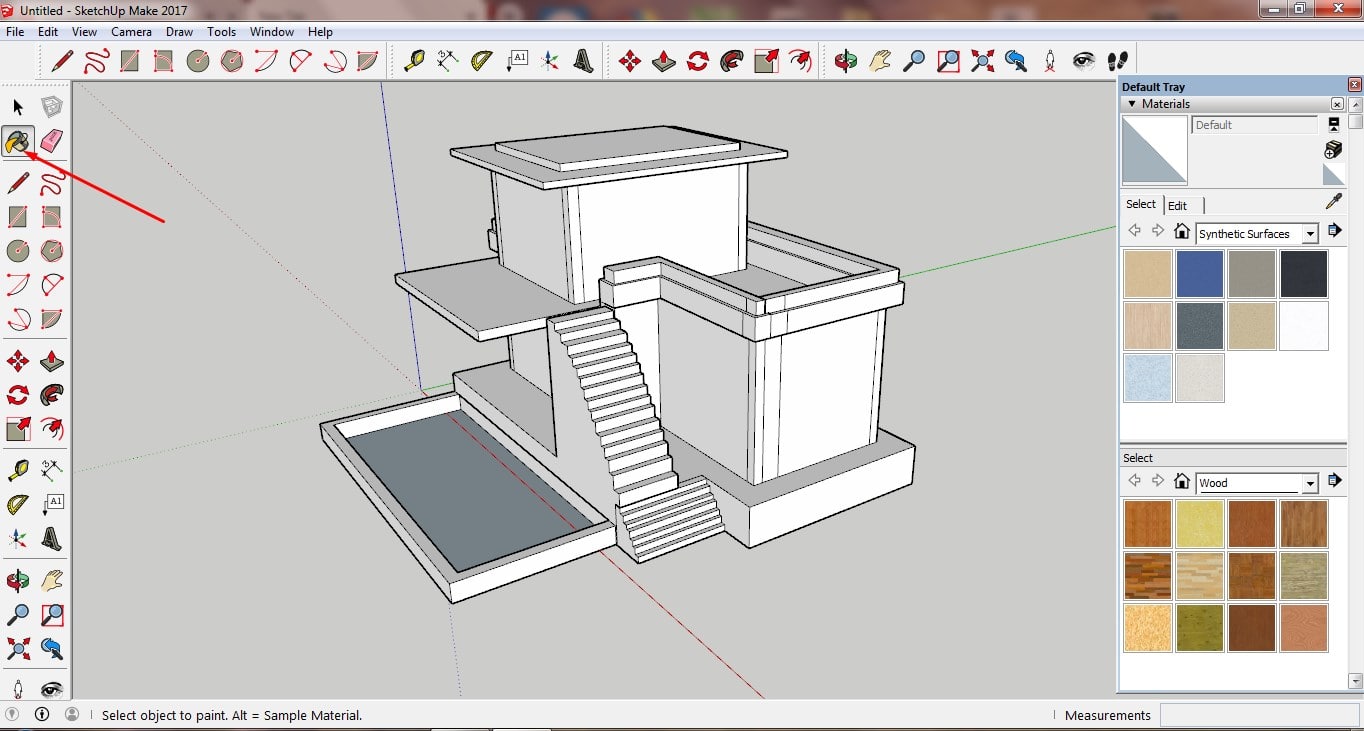
E.To color bangalow use Paint bucket.

You can Download Original Files HERE.
FreeCAD
FreeCAD is a open-source parametric 3D modeler made primarily to design real-life objects of any size. I never used FreeCAD before, So Interested to learn it.
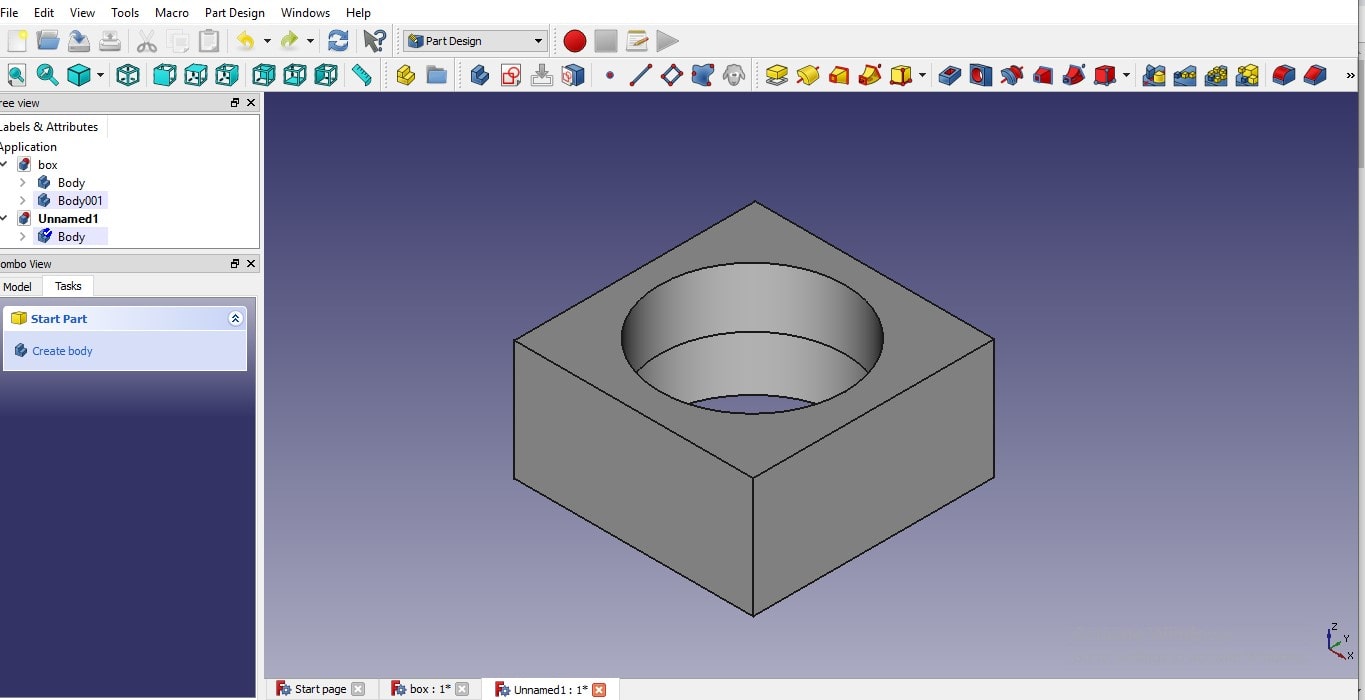
I started with Basic tools and made a simple box with circle inside it and extrude it .Step followed:
A. Select rectangle shape tools and drag it graph page to draw it. then make edge Constraint using Symmetric tool.
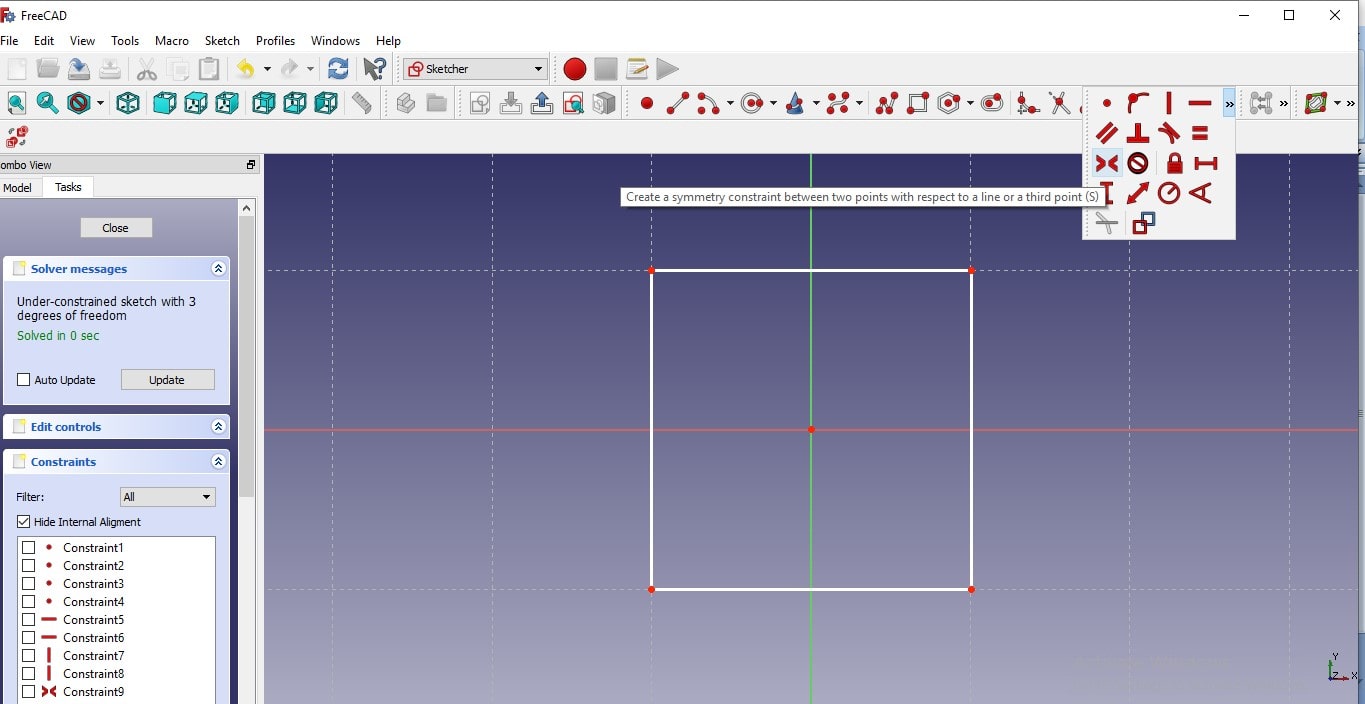
B.Select shape and use PAD tool for extruding.
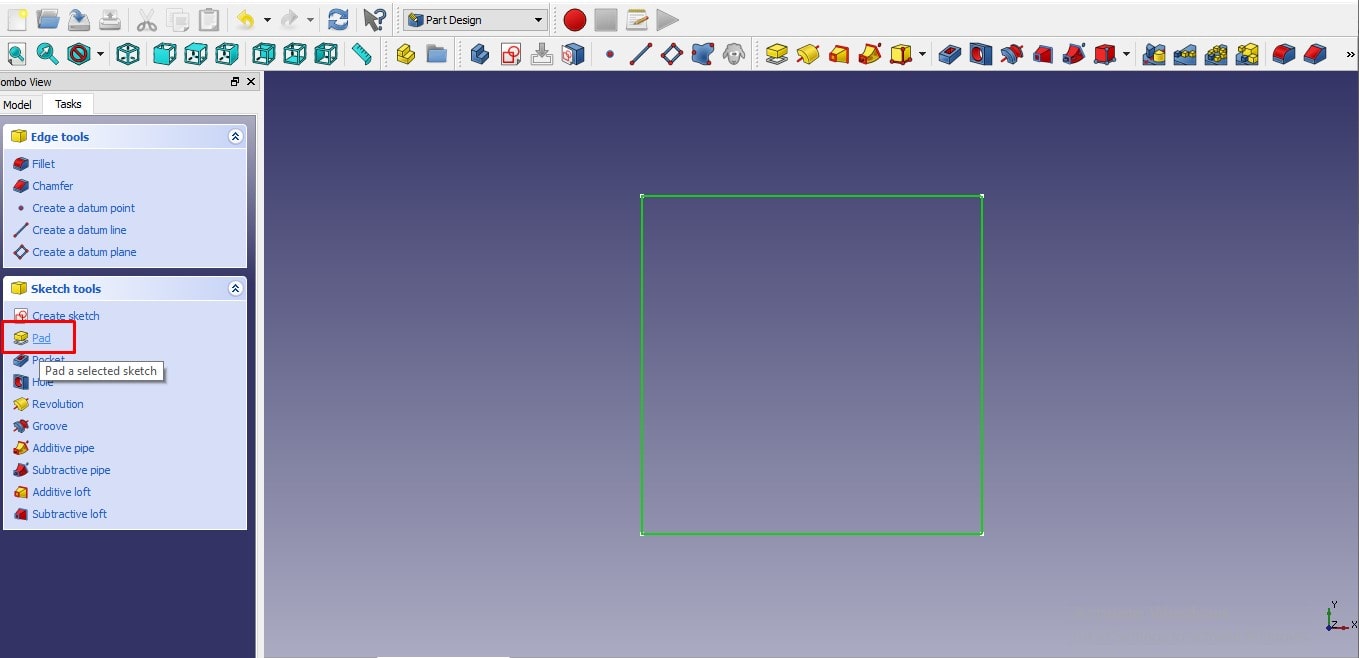
C.On Top View of box draw circle.
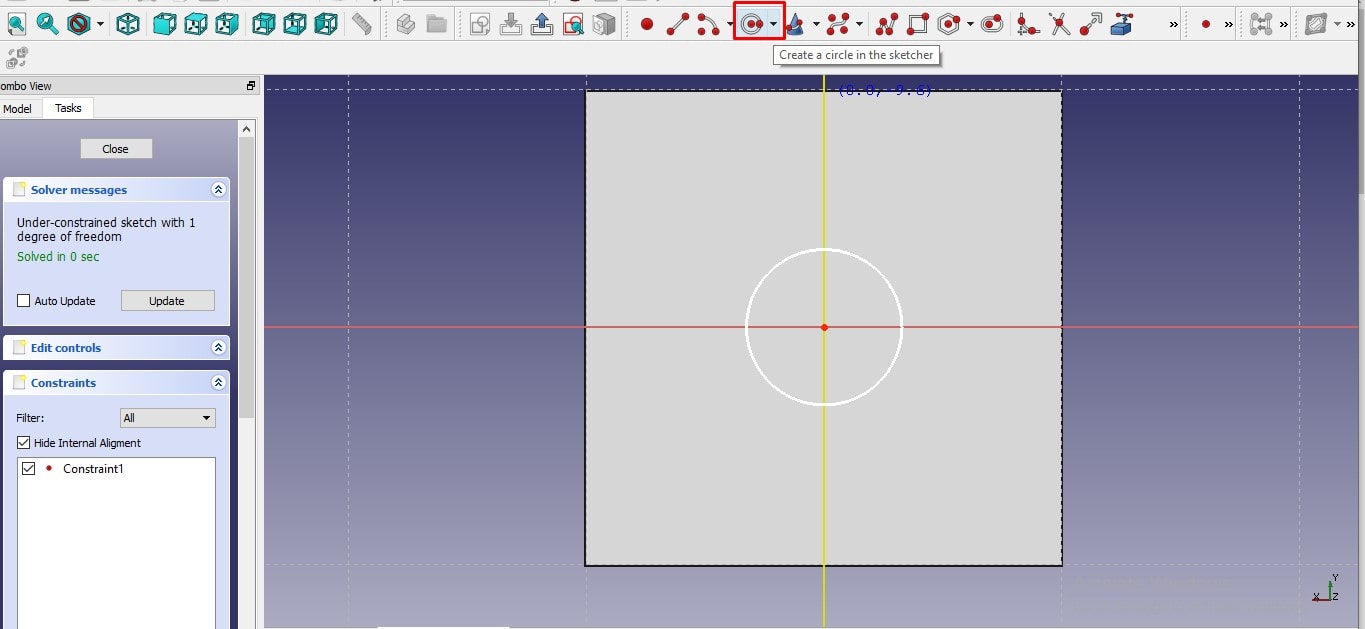
D.Select the circle, then use POCKET tool to Extrude Cut.

You can Download Original Files HERE.
Fusion 360
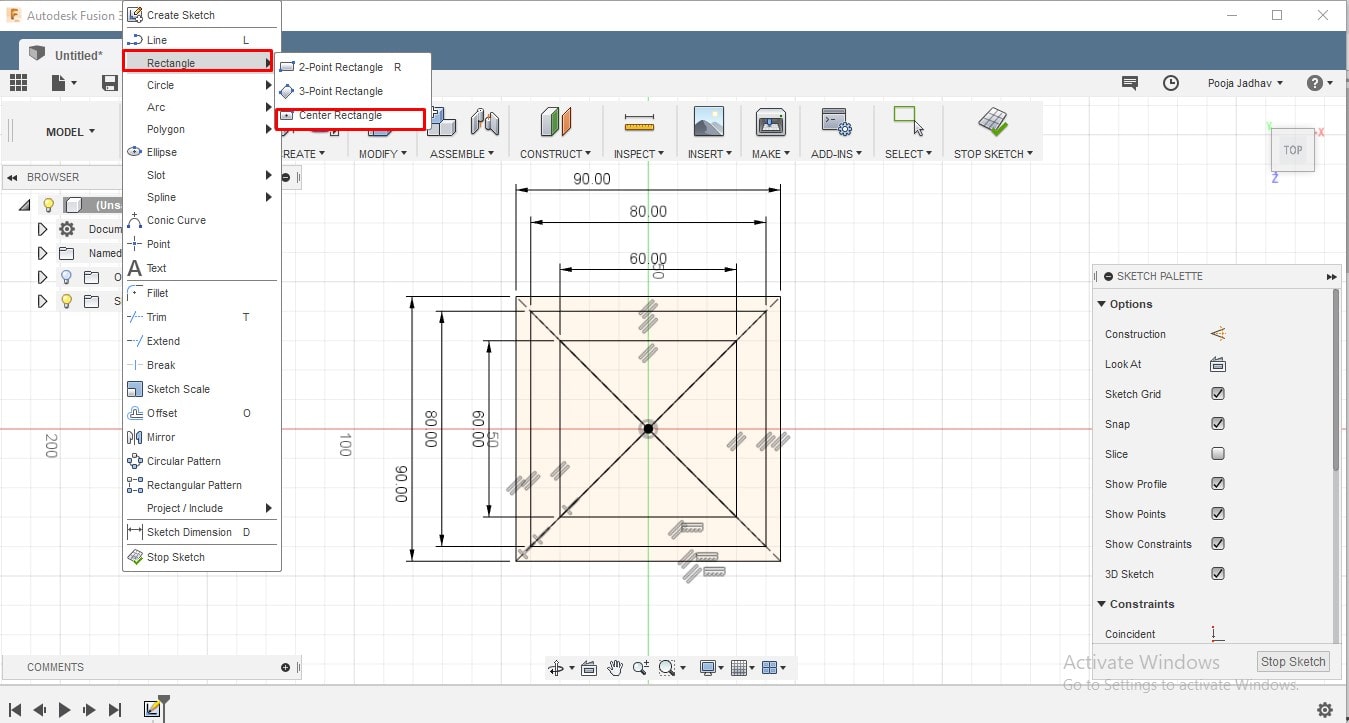
For the first time I used FUSION 360 I am new in fusion 360, want to use it for creating 3d design for visualization, cutting, and printing purpose. So I began with making a design using parameter tools. It is wonderful tools for making a parametric design. I designed simple rectangular shape flower pot.
Steps followed:
A.Pick centre rectangle tool from create sketch and draw three rectangle differ in size.
B.Select one rectangle, then right click select MOVE/COPY tool.
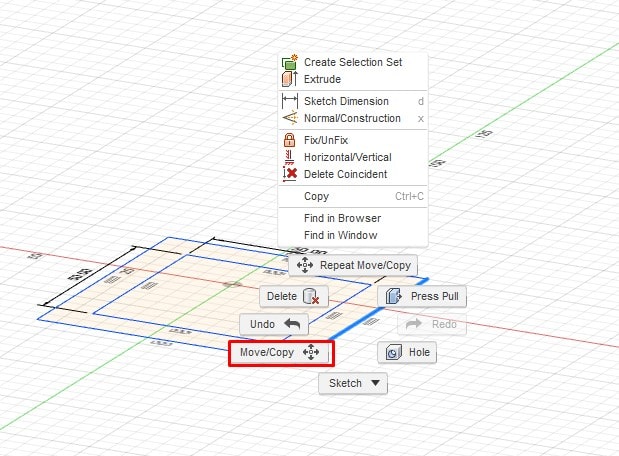
C.change dimensions to move Object
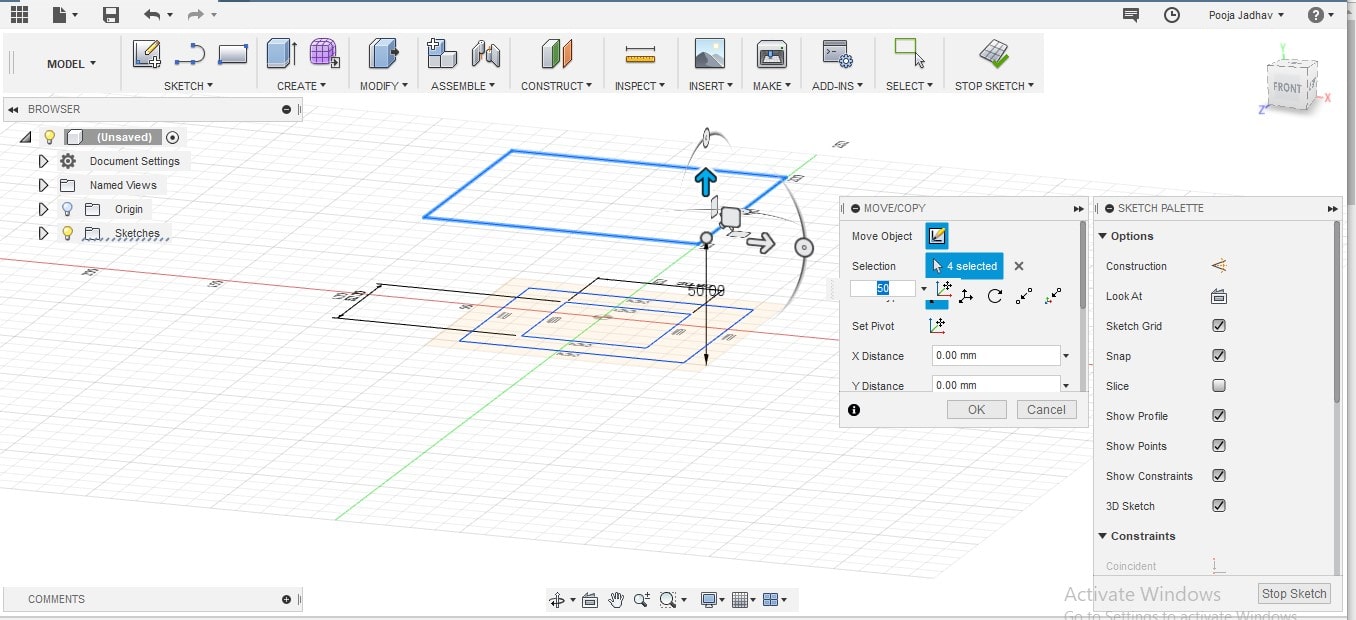
D.Align all shapes as shown in Below Image

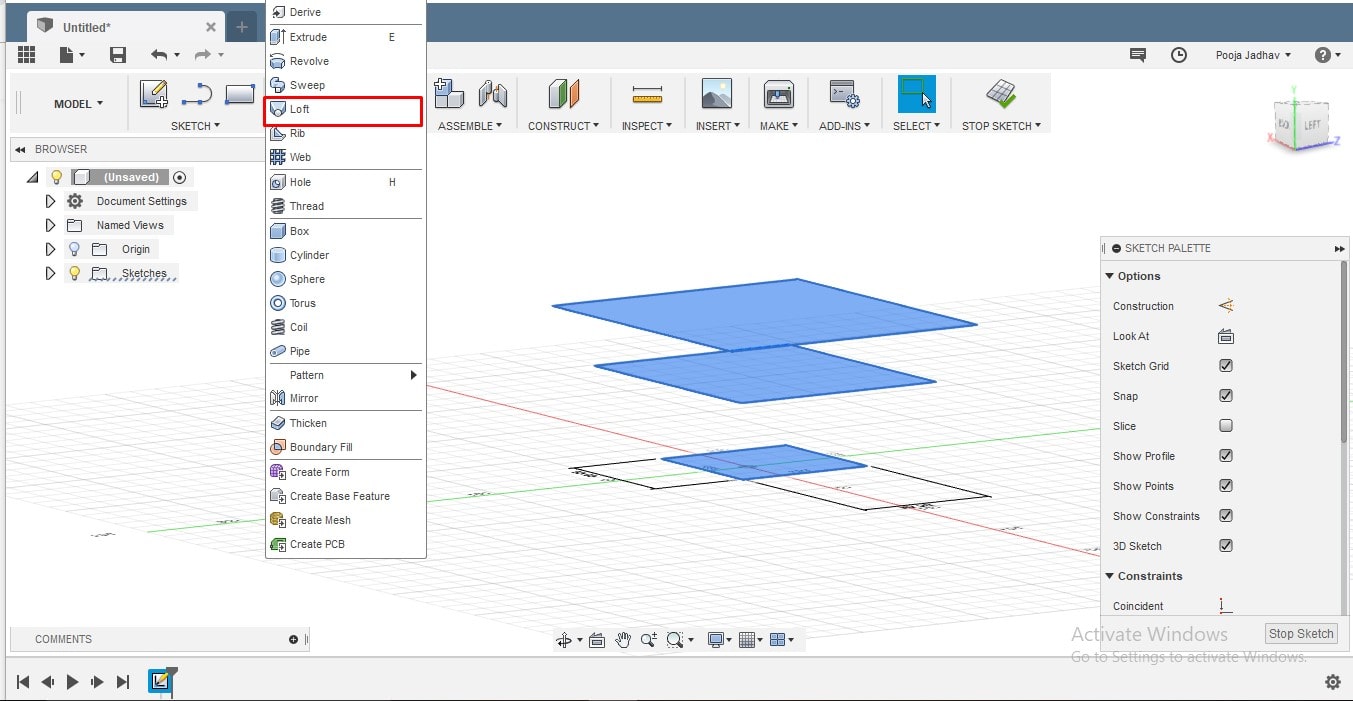
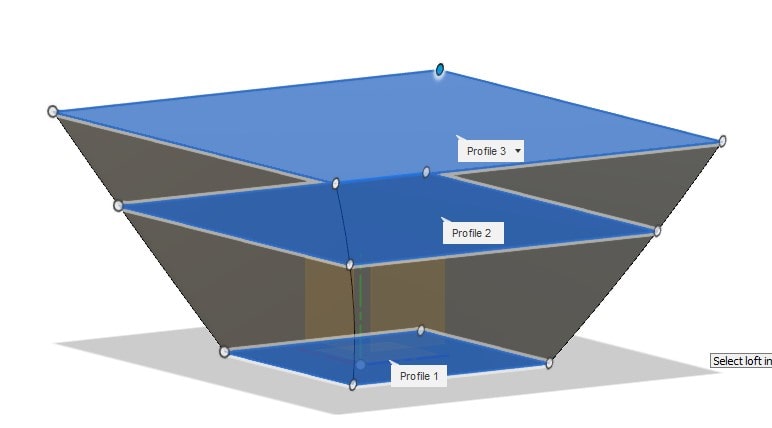
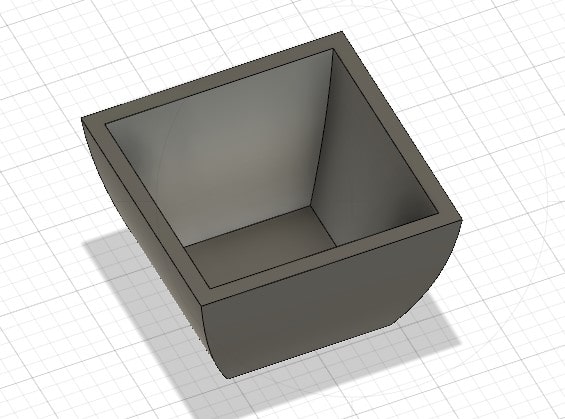
D.Now select shapes using Ctrl Button orderly and apply LOFT.
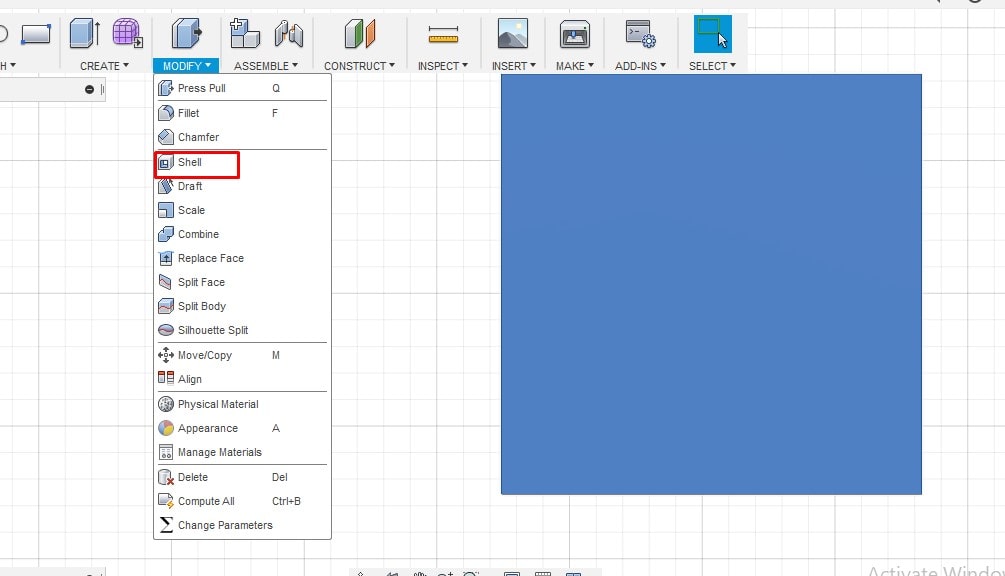
E.switch to TOP View of Object and use SHELL command to make Hole in that Object.
You can Download Original Files HERE.
Solidworks
SolidWorks is a solid modeling computer-aided design (CAD) and computer-aided engineering (CAE) computer program that runs on Microsoft Windows.
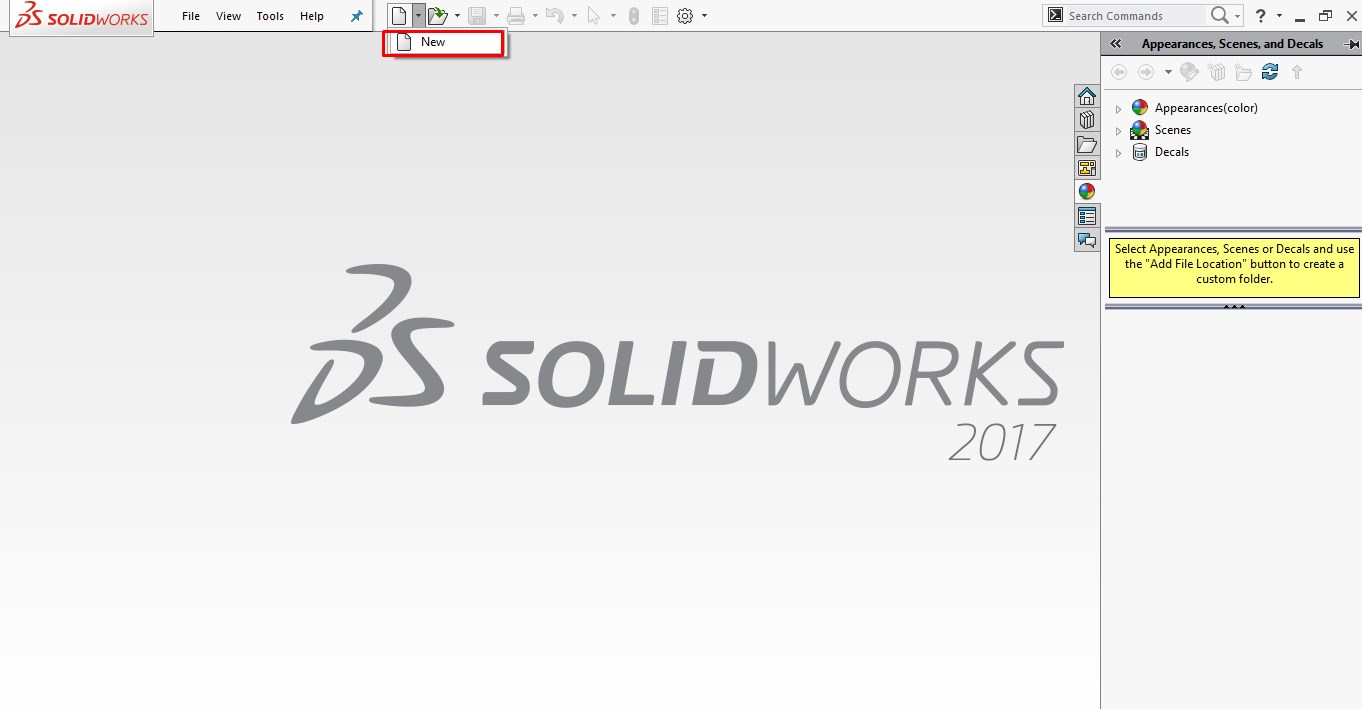
Solidwork window -->New
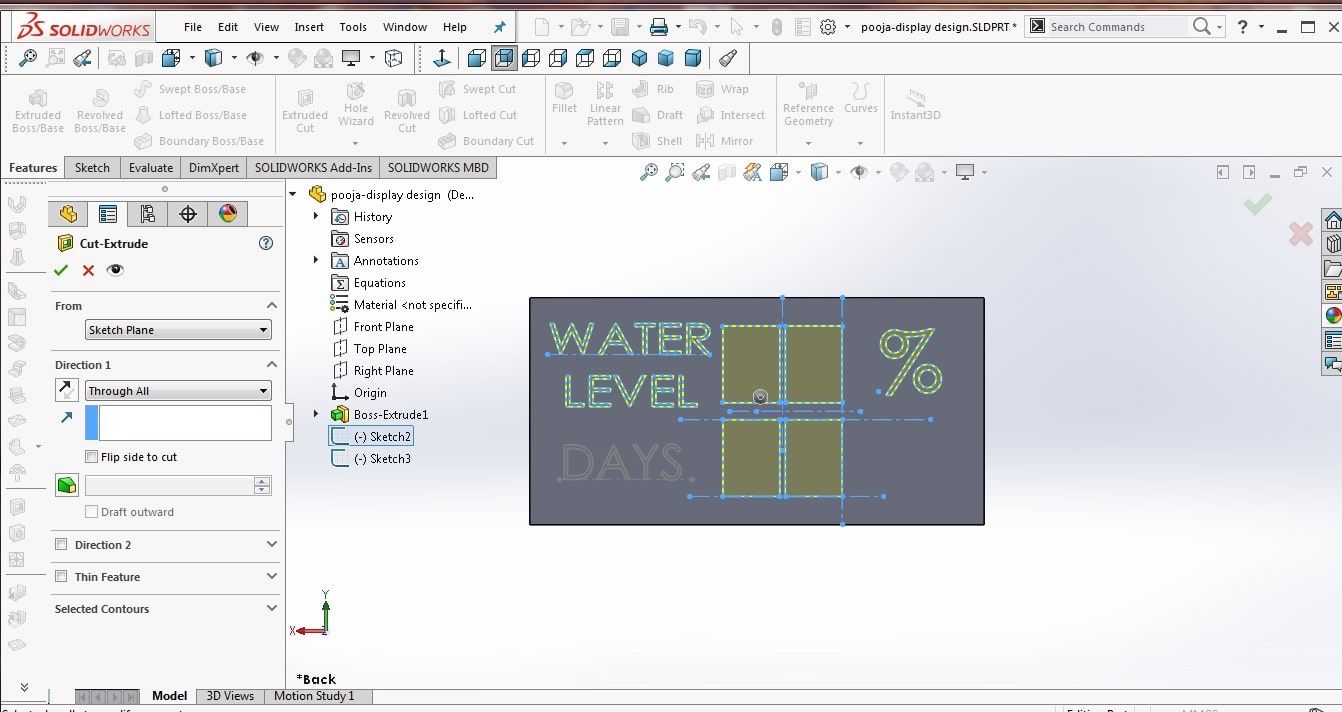
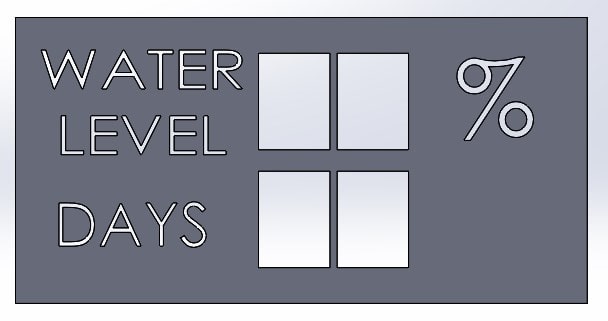
I don't use Solidwork much but I know most of it tools and commands. For 3d designing I prefer Solidworks. I designed my final project display in it. Steps followed:
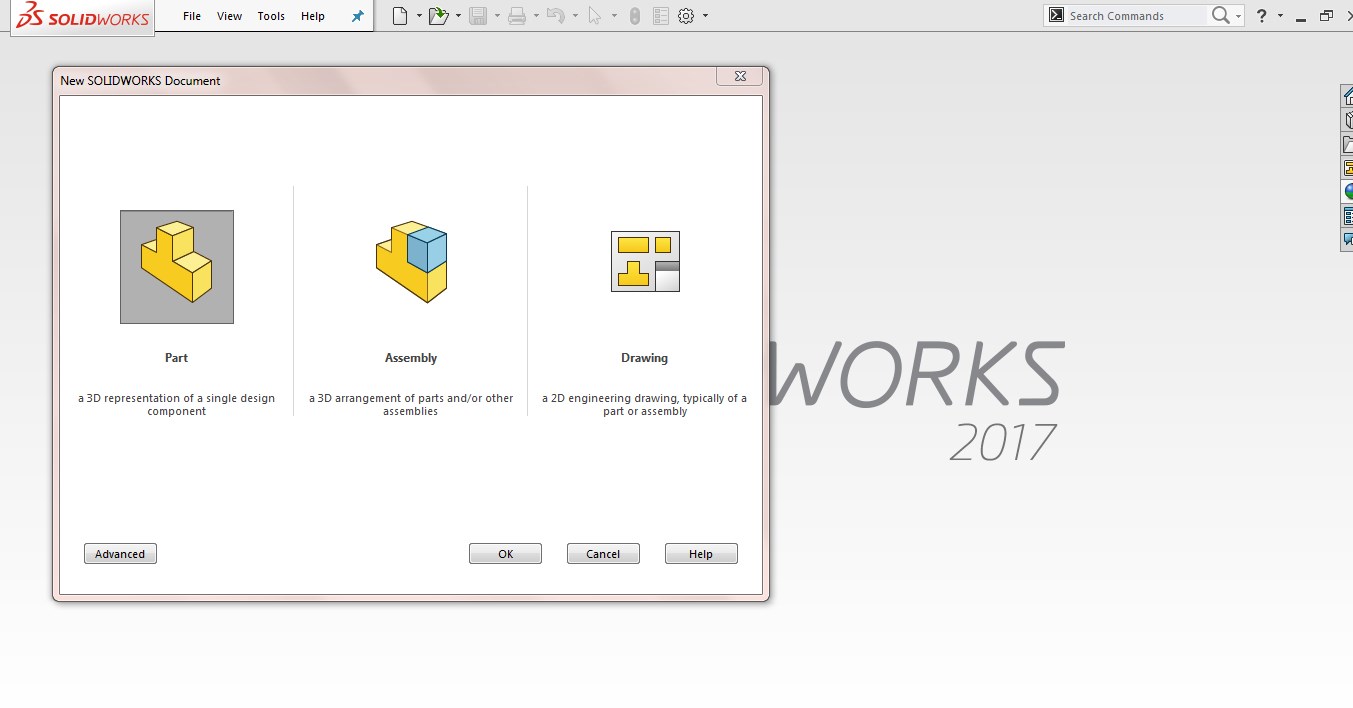
There is a three things Part , Assembly , drawing. I choosed Part.beacause my design in different parts.
In left side,there is a plane.Front,Top,Right
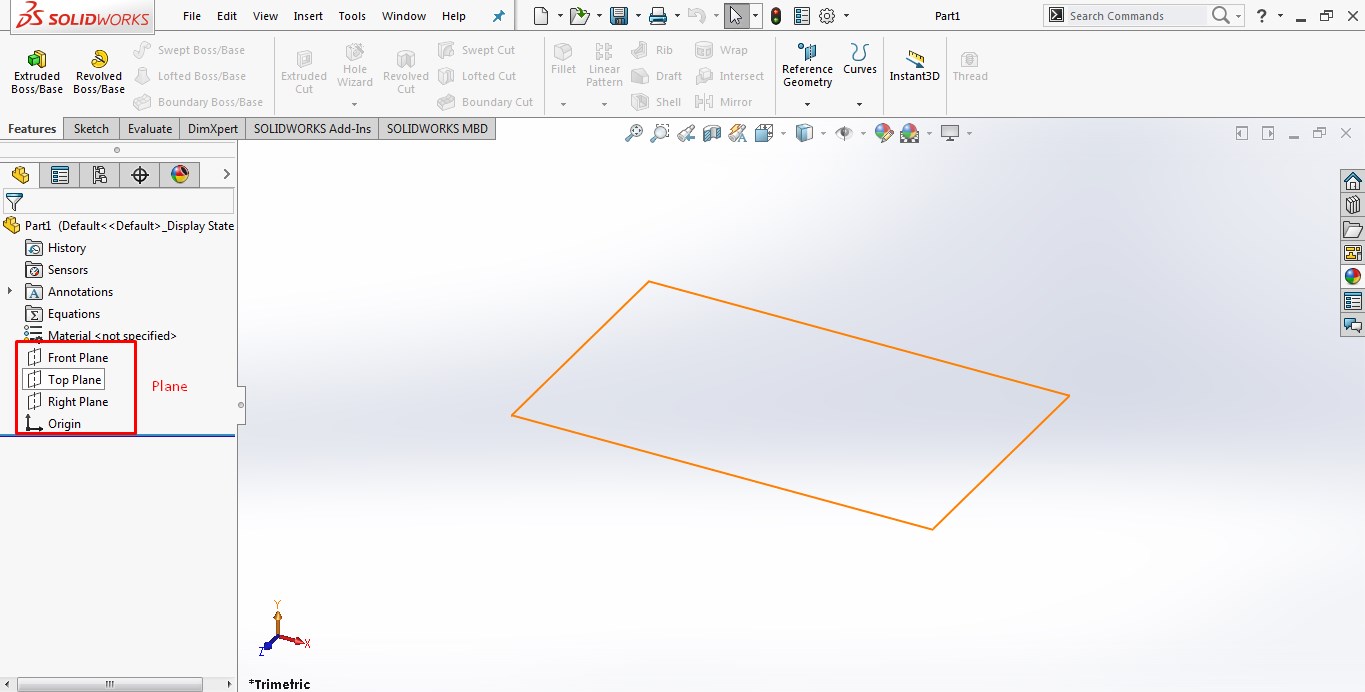
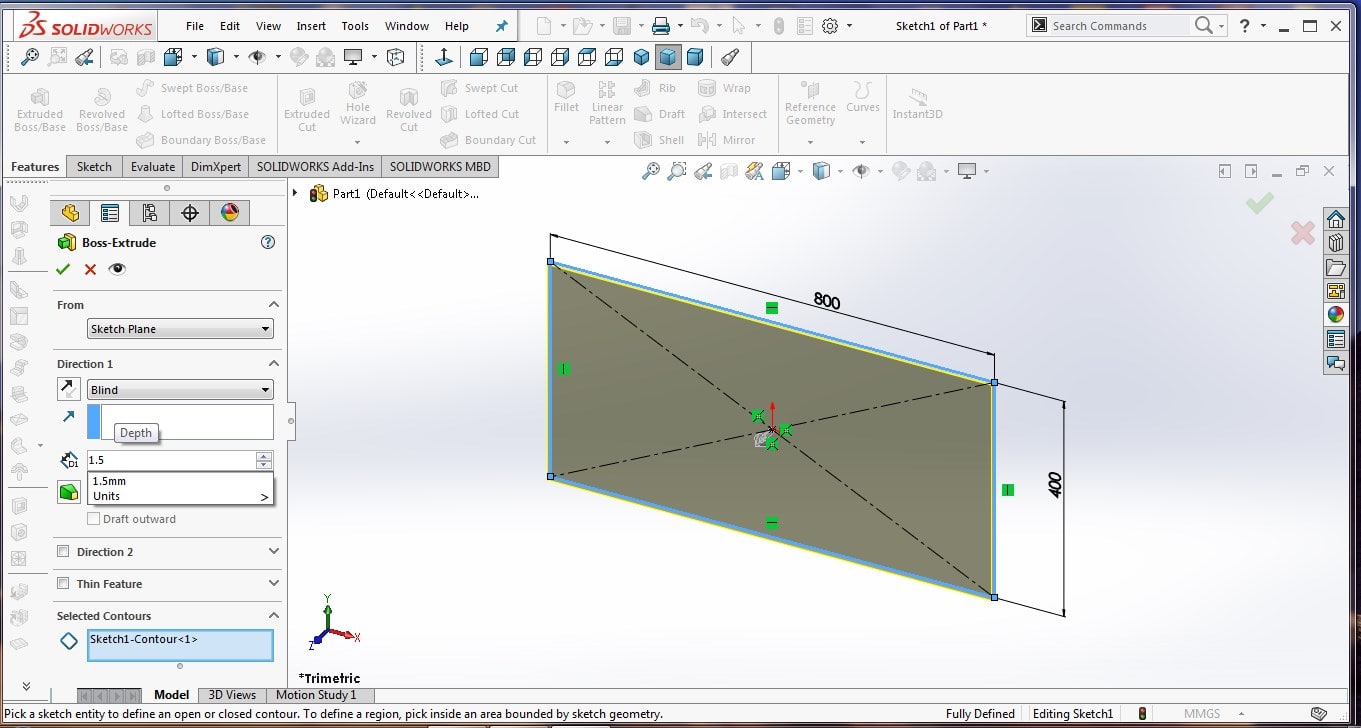
A.open Solidworks, click on file menu and create new part. Once home screen open select Front plane by pressing Spacebar Button. Go to Sketch tool, draw a rectangle on front Plane of dimension 800 X 400 mm. Then extrude it 1.5mm
B.Select a Text tool and draw ‘% ‘symbol and change its size. Also draw one more rectangle for 7 segment.
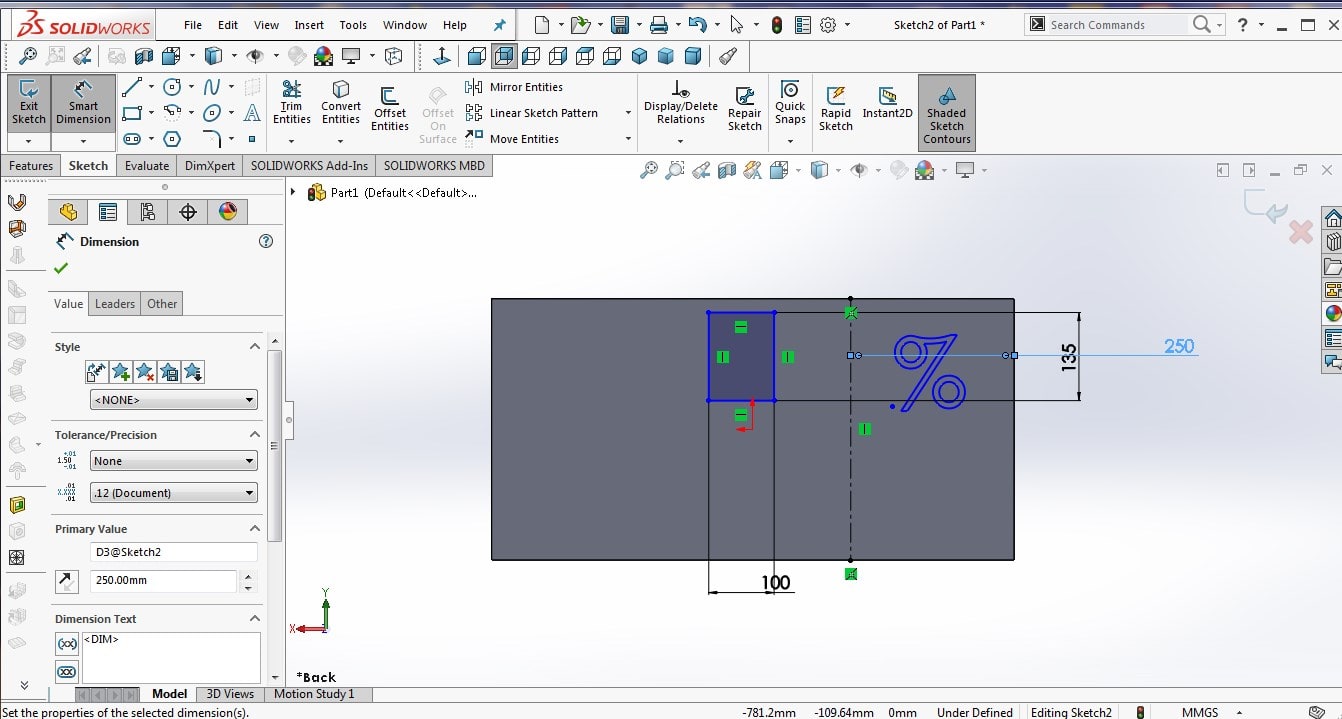
C.Use Mirror Entities command to create three more same shapes.once more use text tool and write Water Level and days on front plane box


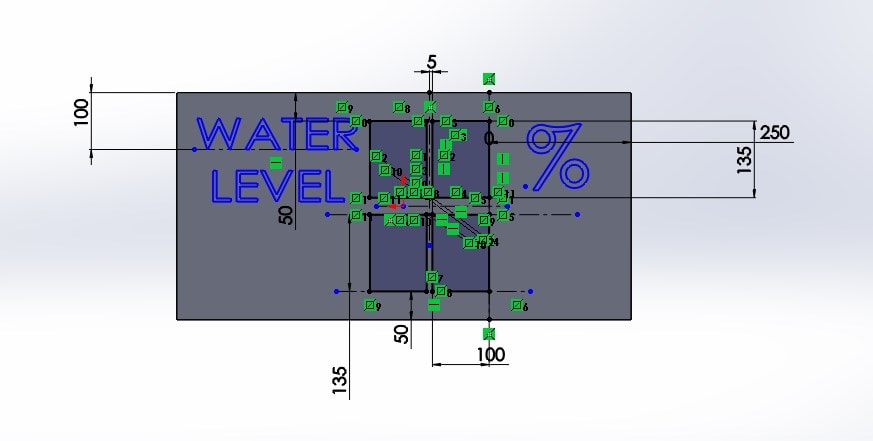
Here is bottom and side view of design
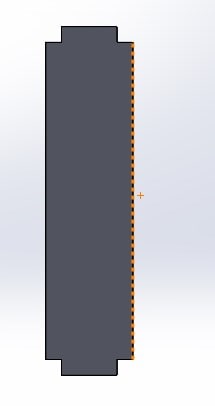
|
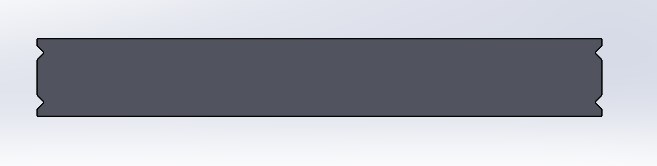
|
You can Download Original Files HERE.
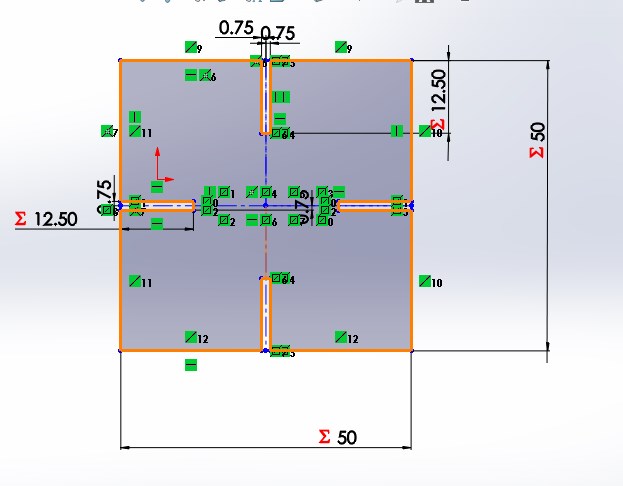
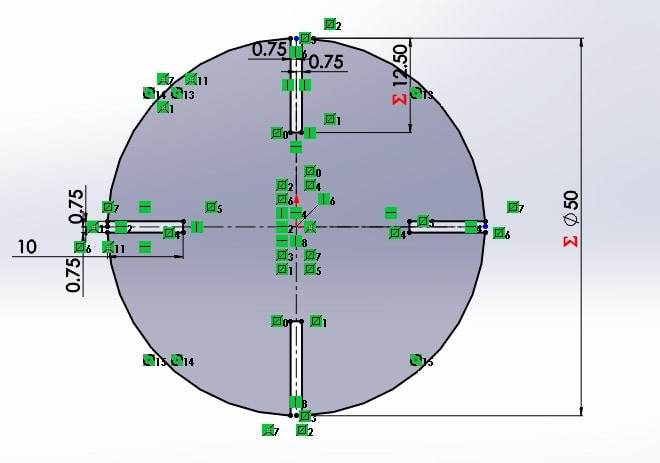
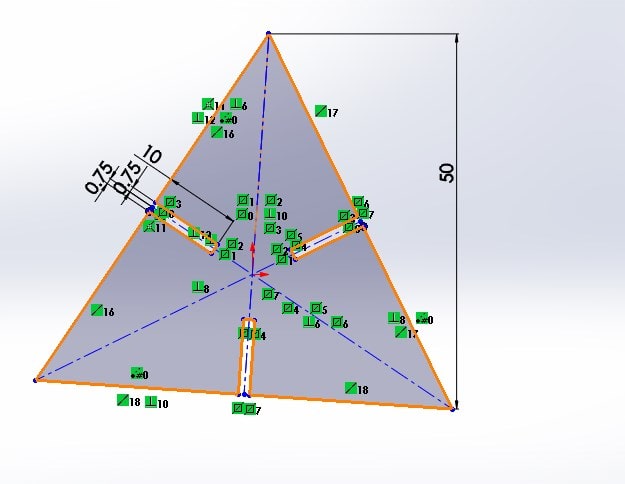
I made Paramatric designs
What is Paramatric Design
“Parametric design is a process based on algorithmic thinking that enables the expression of parameters and rules that, together, define, encode and clarify the relationship between design intent and response.”
What are the advantages of using parametric design ?I selected three different shapes Circle, triangle, and square to show parametric designs
I have more explain about Paramatric design in Computer-Controlled Cutting
You can Download Original Files HERE.
Last In solidworks I Animated an Assembly
Steps Followed:
A.select front plan, Draw a rectangle of dimension 70 X 70 X 100mm. Now select side plane and draw a circle of radius 22mm. Next go to search bar and search for Thread command and select two edges of circle, click OK. It will look like fit for Skew.
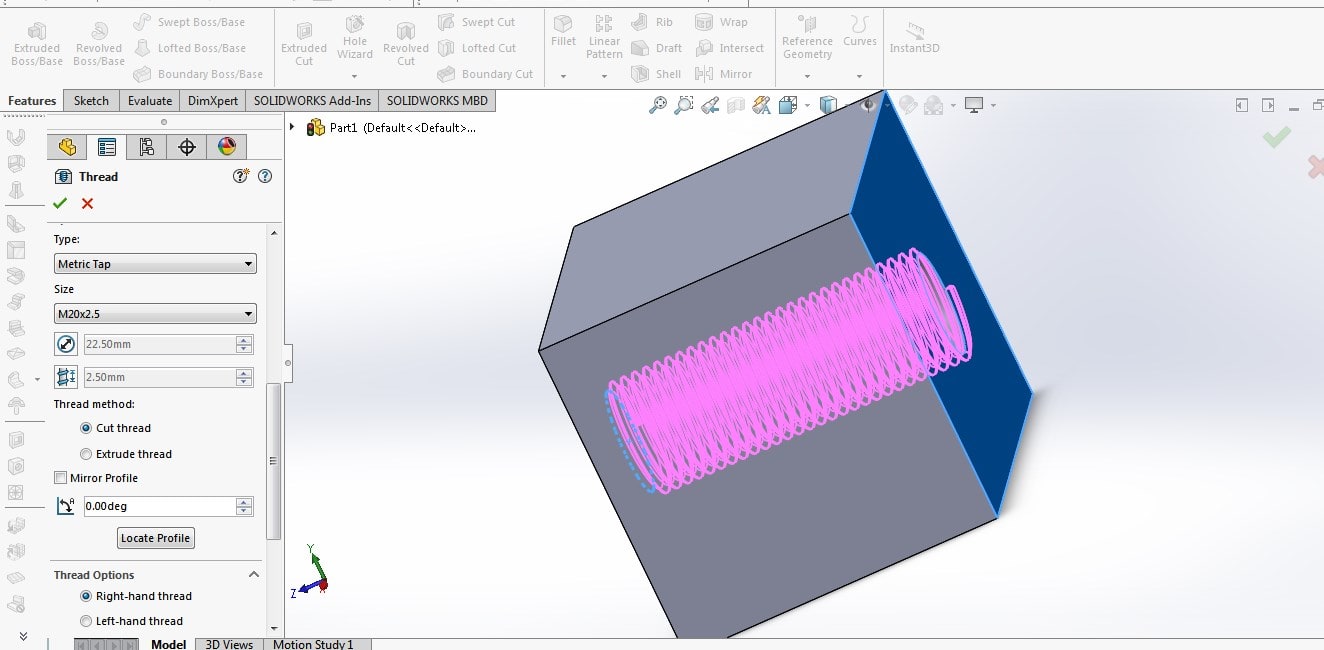
B.For second part create new part. Draw a Polygon. Extrude it 50mm. On Top, draw a circle, extrude it 70mm. Once again go to Thread option and make it like screw using it.
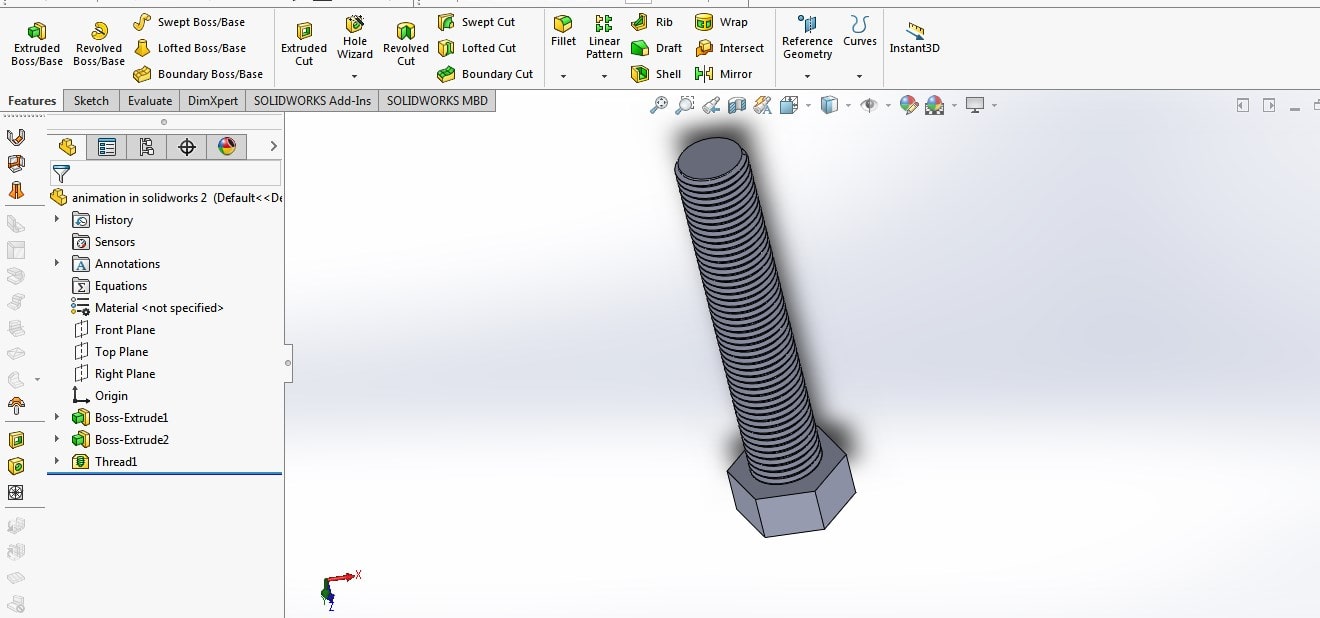
C.then Assemble it.

D.give Animation and save it in Video format

I uploaded it on YouTube. link is here
You can Download Original Files HERE.
Learning Outcomes
In 2d designing, I learnt Photoshop advance tools. I successfully edited the image and reduced the file size in GIMP. SolidWorks has great features like if I modify scale of object in a Parts it will automatically update it in assembly file. I am using Inkscape for simple parametric design. I made different logos in CorelDraw. Got introduce with tools like Freecad and Fusion 360. I really enjoyed doing designing assignment.