Week 16. Interface and Application programming
16. Interface and Application programming
Software
Arduino IDE
NodeJS
NodeJS Serialport library
Android Studio
Files
NodeJS Serial monitor chatroom
The new and improved Serial Communication code for the micricontroller
The Processing ASCII sender code
The AndroidBLE project
Serial communication with processing
From Processing to the Arduino
Processing has a Serial class you can use, the details of the class are documented at: https://www.processing.org/reference/libraries/serial/Serial.html
Before you can communicate you need to create a new Serial object and define over which serial port you want to communicate.
This port is defined in a list of devices you can use to communicate with.
But how do you know the content of the list and what device you need to select from your list?
You can ask the list of devices using using the Serial.list() statement.
If you print the statement in your terminal you will see all connected devices.
Place the following code in your setup:
  //find out which port your microcontroller is connected using the printArray statement
  // List all the available serial ports:
  printArray(Serial.list());
Output in the log:
[0] "/dev/cu.Bluetooth-Incoming-Port"
[1] "/dev/cu.SLAB_USBtoUART"
[2] "/dev/tty.Bluetooth-Incoming-Port"
[3] "/dev/tty.SLAB_USBtoUART"
Now we know we can select our microcontroller by selecting the device in position 1 in the list.
Initiating a new Serial object with the code:
int deviceNr = 1;
Serial port = new Serial(this, Serial.list()[deviceNr], 9600);
In the create statement we define a deviceNr this tells what device you want to select from the list. We know have created a Serial object named port that allows us to communicate with our microcontroller.
Receiving data
Lets confirm we receive the data from our microcontroller. Place the following code in your sketch:
int receivedValue = 0;

void draw()
{
  if(port.available() > 0 ){
    receivedValue = port.read();
    println(receivedValue);
  }
}
With the if statement we look if the Serial object has received a or multible bytes.
When we received it we read the value and store it in a int.
Next we print the value.
If we use our basic microcontroller Serial test sketch, we will send the values back we receive on our line, but also send a 0 every second.
We are currently not sending any data, so we should only receive a 0.
When we look in our log we see the following values repeat every second:
48
13
10
This is ASCII.
We are receving the character “0”, followed by a line ending and a break line.
Sending data
Next we want to send data.
We can use the function write() resulting in the code:
port.write("1");
To make it more interesting I extended the code to send the mouse position in our sketch. This is based on a mouse sender example code I found online a few years ago and on the SerialWrite example in processing.
  if (pmouseX != mouseX)
  {
    port.write(mouseX);
  }
Define the size of our sketch to 255 by 255 to limit the position of the mouseX to 0 and 255, the range of our ASCII characters.
Now when we start the processing sketch and move our mouse we are sending the mouseX position, which is a number between 0 and 255.
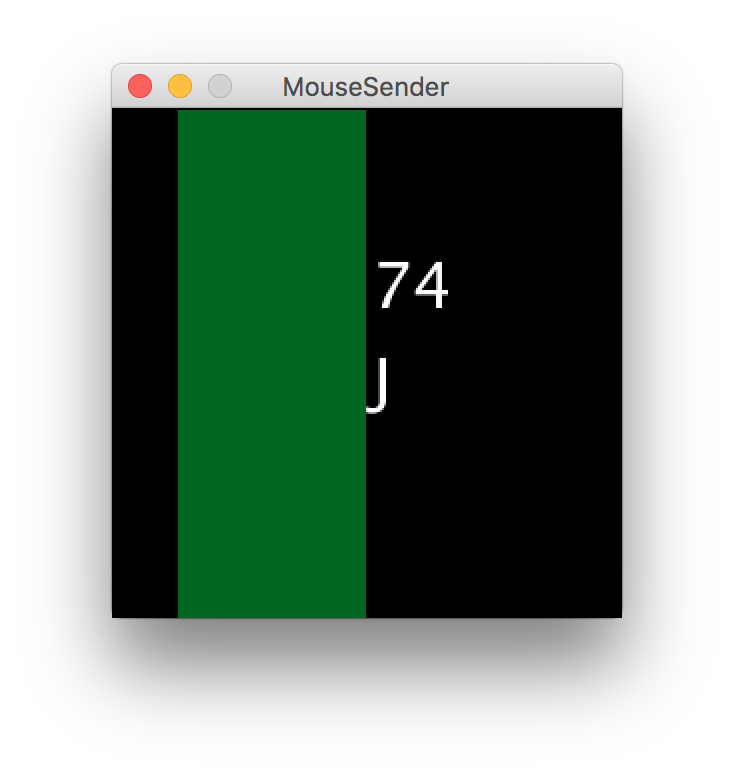
To make everything pretty add the following code before the if:
  background(0);
  fill(#006622);
  rect(32, 0, 95, height);
  fill(#FFFFFF);
  text(mouseX + "\n" + char(mouseX), 130, 100);
This will display a rectangle indicating the position of the alphabetic ASCII characters. with rect(32, 0, 95, height);
And display the mouseX position and the character the position represents on the screen, with text(mouseX + “\n” + char(mouseX), 130, 100);
Serial via NodeJS (server side JavaScript)
NodeJS is a server side JavaScript environment that allows you to write JavaScript for the server.
It is widely used, has many libraries and is easy to use and extend.
It also has support for Serial communication using the library Serialport.
First you need to install NodeJS. Find the installer on the NodeJS website for your computer.
After you installed NodeJS you can test if it works by typing in the terminal npm.
You should get something like this:
C02KR0SBFFRP:~ biejh$ npm

Usage: npm <command>

where <command> is one of:
    access, adduser, audit, bin, bugs, c, cache, ci, cit,
    completion, config, create, ddp, dedupe, deprecate,
    dist-tag, docs, doctor, edit, explore, get, help,
    help-search, hook, i, init, install, install-test, it, link,
    list, ln, login, logout, ls, outdated, owner, pack, ping,
    prefix, profile, prune, publish, rb, rebuild, repo, restart,
    root, run, run-script, s, se, search, set, shrinkwrap, star,
    stars, start, stop, t, team, test, token, tst, un,
    uninstall, unpublish, unstar, up, update, v, version, view,
    whoami

npm <command> -h  quick help on <command>
npm -l            display full usage info
npm help <term>   search for help on <term>
npm help npm      involved overview

Specify configs in the ini-formatted file:
    /Users/biejh/.npmrc
or on the command line via: npm <command> --key value
Config info can be viewed via: npm help config

npm@6.4.1 /usr/local/lib/node_modules/npm
Next go to a location where you want to create your project code and create a folder for your project.
I created “NodeJSSerialportExample”.
Create a file named “app.js” and paste the following code from the getting started example:
const http = require('http');

const hostname = '127.0.0.1';
const port = 3000;

const server = http.createServer((req, res) => {
  res.statusCode = 200;
  res.setHeader('Content-Type', 'text/plain');
  res.end('Hello World\n');
});

server.listen(port, hostname, () => {
  console.log(`Server running at http://${hostname}:${port}/`);
});
Now run your NodeJS app with the terminal command:
node app.js
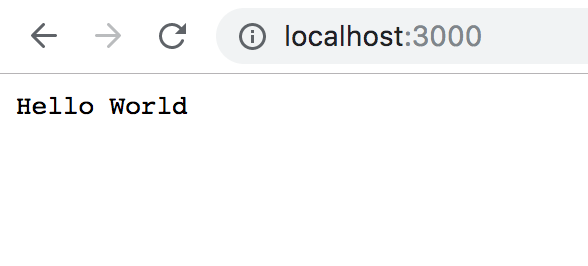
Go in your browser to the url that is provided in your terminal, mine was: http://127.0.0.1:3000/.
And If you see the following text appear in your browser screen you have succefully installed NodeJS.
After installing NodeJS install the NodeJS Serialport library by typing the following command in your terminal:
npm i serialport
If your isntall is succesful you have a positive output like this without any errors:
> @serialport/bindings@2.0.8 install /Users/biejh/node_modules/@serialport/bindings
> prebuild-install --tag-prefix @serialport/bindings@ || node-gyp rebuild

npm WARN saveError ENOENT: no such file or directory, open '/Users/biejh/package.json'
npm notice created a lockfile as package-lock.json. You should commit this file.
npm WARN enoent ENOENT: no such file or directory, open '/Users/biejh/package.json'
npm WARN biejh No description
npm WARN biejh No repository field.
npm WARN biejh No README data
npm WARN biejh No license field.

+ serialport@7.1.5
added 78 packages from 45 contributors and audited 143 packages in 7.992s
found 0 vulnerabilities
Now we can extend the Serialport library to work with our terminal using the command:
npm install -g @serialport/terminal
From here on we can test if our Serialport library works using terminal command, speeding up our development.
First list the available serial devices that are connected to our computer using the command:
serialport-terminal -l
You receive a result like this:
/dev/tty.Bluetooth-Incoming-Port
/dev/tty.SLAB_USBtoUART		Silicon Labs
We can try to communicate with a serial device by selecting the device either by the given path or the name. I tried:
C02KR0SBFFRP:NodeJSSerialportExample biejh$ serialport-terminal -p /dev/tty.SLAB_USBtoUART
And similar to our Processing example I used the basic microcontroller Serial test sketch,that send the back values it receives, but also send a 0 every second.. When listening to the port I received every second the value:
0
Now when you typ in the terminal you directly send the character to your device.
Our sketch send back what it receives, so this is also displayed in our terminal.
For example, if I type the text: Fabacademy. I get the following result in my teriminal:
709798979997100101109121
To display each number on each line I wrote a new Serial communication test code for our microcontroller.
Like the previous code it sends the received data back, but now it sends each character with a new line and and line.
Also I placed a small delay in the sending and introduced only a large delay of 1 second when we are not receiving something.
This way our response of your microcontroller is way faster.
The new and improved Serial Communication code can be found here
Our new output now looks like this:
90
97
98
97
99
97
100
101
121
Each character is still represented by a value as defined by ASCII, we do not send a line anding or new line, therefor all the values are directly paste next to each other.
Still we can confirm everything works looking at our ASCII table:
F: 90
a: 97
b: 98
a: 97
c: 99
a: 97
d: 100
e: 101
m: 109
y: 121
Now lets create an application. Make a new .js file and paste the following code:
//basic NodeJS Serialport example
//using the readline parser

const SerialPort = require('serialport')
const port = new SerialPort('/dev/tty.SLAB_USBtoUART')
const Readline = require('@serialport/parser-readline')

const parser = port.pipe(new Readline({ delimiter: '\r\n' }))
parser.on('data', console.log)
parser.write('Fabacademy');
This code mimics the behaviour of the terminal commandline we just installed, but it only reads data and displays it when it receives a ‘\r\n’.
And it sends the text “Fabacademy” like we did earlier.
Now we have an application but not a GUI.
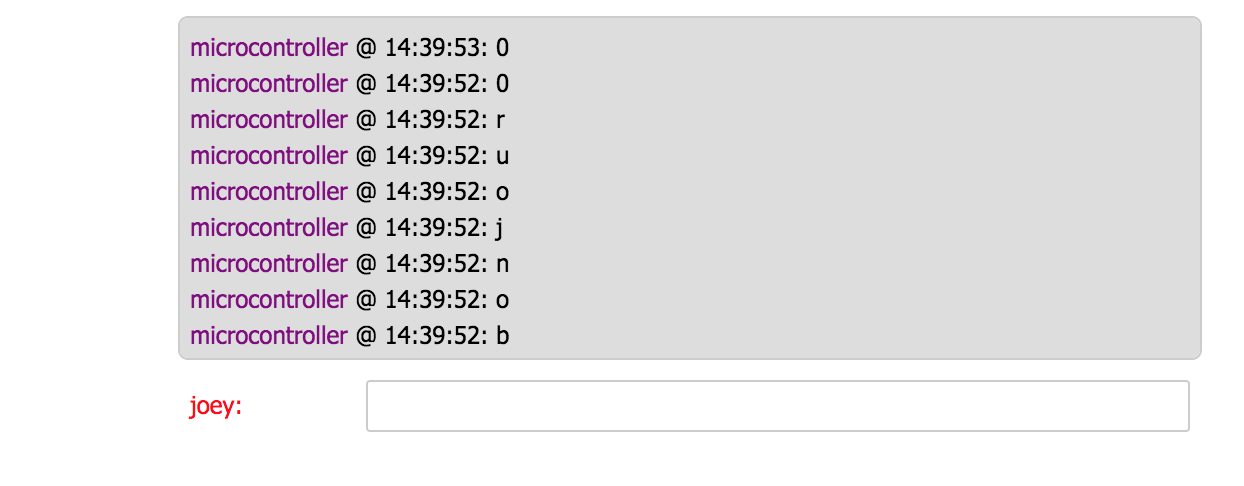
I extended a chat server web example with the code with we just wrote to have a GUI with our Serial communicator.
Like a real chat application it allows for multiple people to connect to the webserver and chat.
Only once one person is connected to the server the microcontroller also connects to the chatroom and starts chatting with everybody.
If only one person connects you basically have an online Serial monitor.
Download the package containing the HTML, client side JavaScript and server side Javascript from here.
The most important changes I made were extending the websocketServer class with a function that processes messages received from the microncontroller:
    webSocketServer.prototype.sendMessage = function(message){
//        console.log(message);
      if(message != 0){
        message = String.fromCharCode(message)
        }
        var obj = {
                        time: (new Date()).getTime(),
                        text: htmlEntities(message),
                        author: "microcontroller",
                        color: "purple"
                    };
             var json = JSON.stringify({ type:'message', data: obj });

         for (var i=0; i < clients.length; i++) {
                        clients[i].sendUTF(json);
            }
    }
When the first user connects, it connects the microcontroller to the chatroom, and adds a listener to the microcontroller that refers to the sendMessage function:
        if(clients.length == 1){
            const parser = sPort.pipe(new Readline({ delimiter: '\r\n' }))
            parser.on('data',  wsServer.sendMessage);
      }
Last, when all users are disconnected, it also removes the microcontroller form the chatroom:
 // user disconnected
        connection.on('close', function(connection) {
            if (userName !== false && userColor !== false) {
                console.log((new Date()) + " Peer "
                    + connection.remoteAddress + " disconnected.");
                // remove user from the list of connected clients
                clients.splice(index, 1);
                // push back user's color to be reused by another user
                colors.push(userColor);

                //remove parser
                if(clients.length == 0){
                  parser = null;
                  }
            }
        });

Android BLE app for serial communication with HM10 module
The aim is to have an Android app to talk/controll our microcontroller.
We allready have a microcontroller with a BLE module (HM-10), this module communicated via Serial with our microcontroller.
If we can create an app that connects to the BLE module and sends and receives messages with the module, we can communicate with our microcontroller using our Android smartphone.
There are allready many apps that make this possible. The terminal app I used in Week 14 is one example of this.
Still we want to create a custom interface and custom messages.
In searchin on Github I found the following projects:
- Android-BluetoothSPPLibrary
This code base is over 4 years old, but forked many times. After cloning the code and updating the cradle version from version 1 to 2 I was able to build and run the app on my Android 5.0 smartphone. However I was unable to pair the device using the app.
I did not receive any errors, and decided to leave this app for now. - Blue2Serial
Moving on to Blue2Serial, this code base is much simpler, and requires you to pair your smartphone with the BLE device using the OS instead of the app. My Android 5.0 device was not able to pair using the default OS dialog.
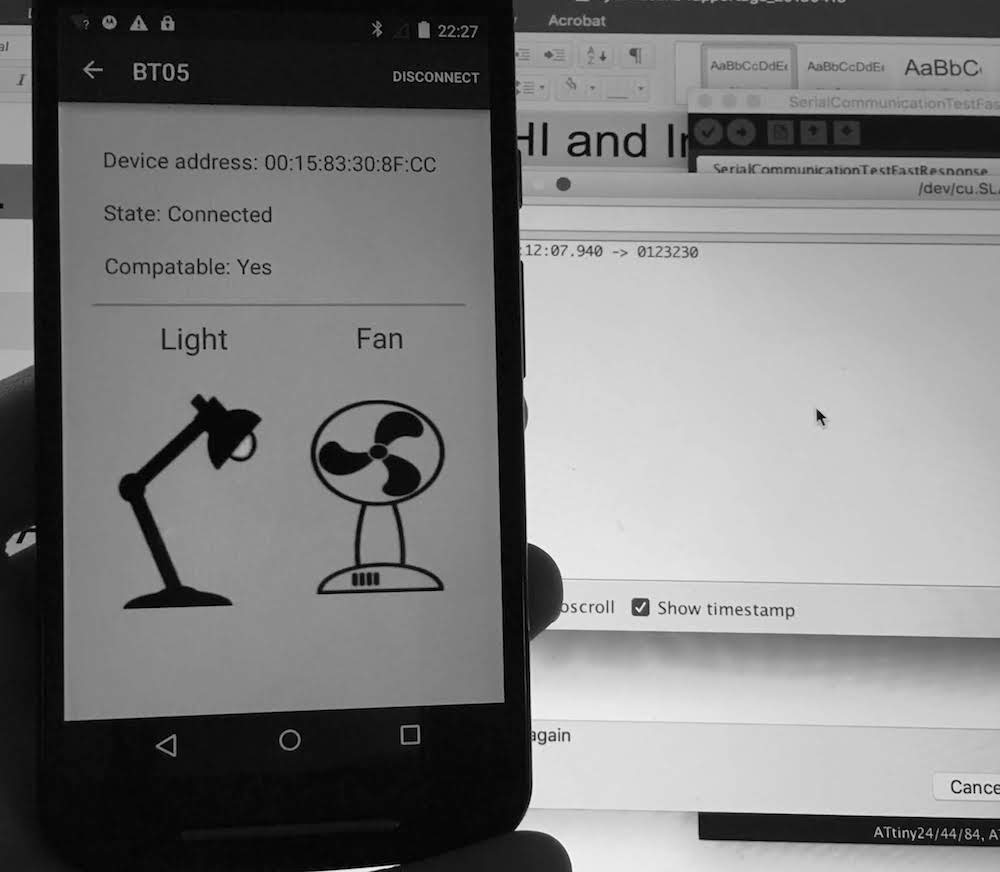
I again moved on to a new app. - BLEArduino
The BLEArduino app worked out of the box, I was directly able to pair my smartphone to the BLE device and send data (0, 1, 2 or 3) from my app to the device.
Looking at the code for BLEArduino, we see it uses the default classes most Android apps use: “BluetoothLeService”, “DeviceControlActivity”, “DeviceScanActivity” and “SampleGattAtributes”. The default files can be found in the (for tech standards ancient) Google sample respository https://github.com/googlesamples/android-BluetoothLeGatt.
Fortunately arpith20 did not stop at using the example. He integrated the RX,TX support from BLE devices. As I explained in the communication Week Bluetooth 4.0 used Gatt attributes to define available services. There is a special Serial communication service available. arpith20 implemented support for this service, saving me the trouble.
The most important definitions for our device are the following lines of code:
public static String HM_RX_TX = "0000ffe1-0000-1000-8000-00805f9b34fb";
    private BluetoothGattCharacteristic characteristicTX;
    private BluetoothGattCharacteristic characteristicRX;


    public final static UUID HM_RX_TX =
            UUID.fromString(SampleGattAttributes.HM_RX_TX);
Looking at the codebase, I saw arpith20 also implemented receiving the messages form the BLE device in the BluetoothLeService class. The received messages are broadcasted to all classed that are listening.
I extended the Broadcastreceiver of the DeviceControlActivity class to listen to the received data intent.
To make a fast proof, I displayed the received data in the connection state lable. Not so pretty, but it works!
            }else if (BluetoothLeService.ACTION_DATA_AVAILABLE.equals(action)){
                 Bundle extras = intent.getExtras();
                final String data = extras.getString(BluetoothLeService.EXTRA_DATA, "empty");
                runOnUiThread(new Runnable() {
                    @Override
                    public void run() {
                        mConnectionState.setText(data);
                    }
                });
            }
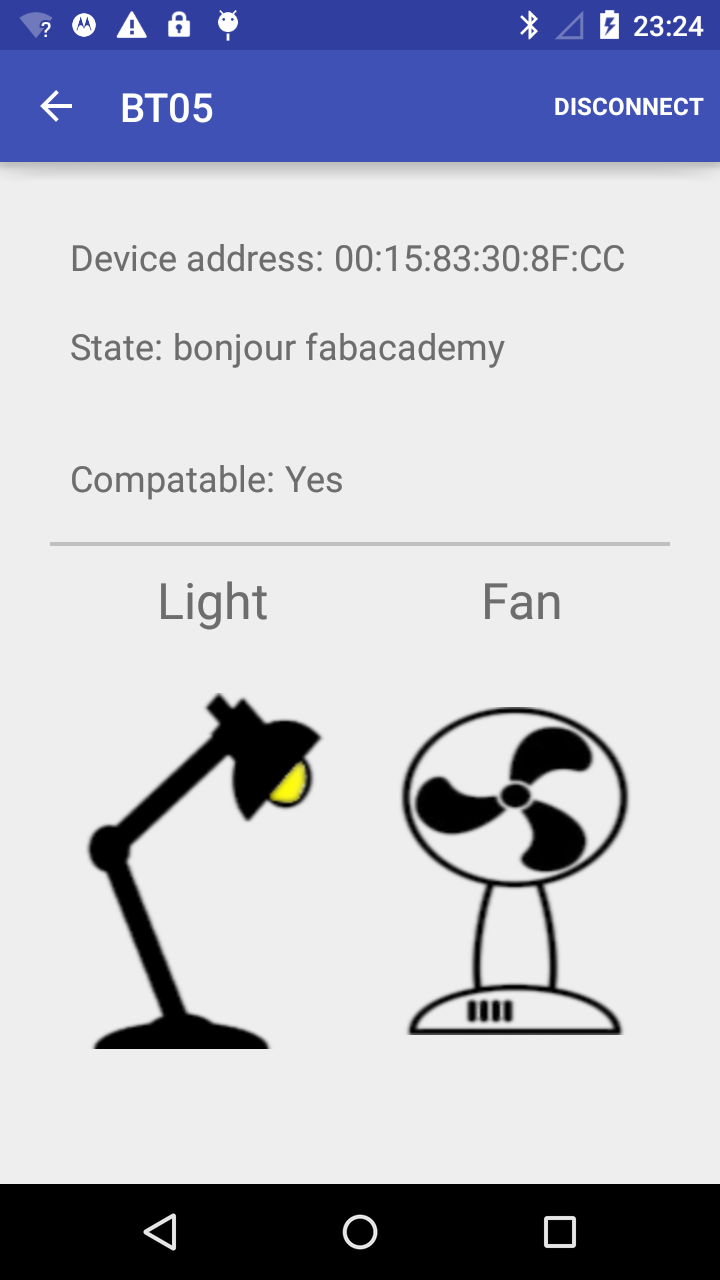
I further extended the code to process the received messages.
For example: When we receive a DEVICE1_ON message, the character “0”, we turn the lamp ON with the function call “toggle1.setChecked(true)”.
We do simular actions for the 1,2 and 3.
Further I ignore the last end line and new line characters in the string to make it easier to process with the if statement at the start of the function.
    void handleReceivedDataFromBLE(String str) {
        if(str.endsWith("\r\n")){
            str = str.substring(0, str.length()-2);
        }
        final String data = str;
        runOnUiThread(new Runnable() {
            @Override
            public void run() {
                if (DEVICE1_ON.equals(data)) {
                    toggle1.setChecked(true);
                } else if (DEVICE1_OFF.equals(data)) {
                    toggle1.setChecked(false);
                } else if (DEVICE2_ON.equals(data)) {
                    toggle2.setChecked(true);
                } else if (DEVICE2_OFF.equals(data)) {
                    toggle2.setChecked(false);
                }
            }
        });
    }
And there we are, it may not be really sexy, but we have an Android app that can send data (0,1,2 and 3) and receive data (0, 1, 2 and 3) and act on this data.
Final project, Communicate with microcontroller over Bluetooth using an onboard Bluetooth module
here comes the part that I am currently working on in week 20.
Fails
Only Numbers not ASCII
In my NodeJS application it displayed only the number representing ASCII, I had some difficulties in displaying the numbers so I modified my microcontroller sketch to make things easier.
The new and improved Serial Communication code now always sends a character with a line ending and new line.
In the Nodejs code I can listen for these characters and cut the received data in parts based on these delimiters.
const parser = sPort.pipe(new Readline({ delimiter: '\r\n' }))
Next I can try to convert each separate character using the line
message = String.fromCharCode(message)
Here the message is the received message that is separated by the line ending and new line delimiters.
Android git code never works
As described in my Android adventure, I had to try several different Android apps to find a working app for my phone.
This almost always the case, since there are now many versions of Android in the wild (ranging from Android 4.4 to Android 10), it is almost impossible to support all apps with one specific implementation. Especially with something as Bluetooth. The Android Bluetooth stack has a history of being very buggy. It improved in Android 4.4, and probably is more stable in the latest versions of Android, but I wanted it to run on my specific test device Android 5.0.
This meant I had to look at old code from about 3 years old to make sure I had something that was compatible.
And still I had problems building the code, or to get it running on my device.
In the end I spend almost al my time in getting an example app to work, leaving me almost no time to customize it before it was wednesday again.
Reflection
The group assignment to try out multiple ways of creating an app to talk with your microcontroller gave me the opportunity to dive into Processing and NodeJS. Both are environments I was familier with, but had not used for a while (years). I was again impressed by the speed of development of both platforms.
For the individual part I looked at creating an Android application, also something I had not done in a few years.
While there are many many many example apps available for Bluetooth devices, I found it difficult to find a working and properly maintained app.
Fortunate after 3 tries I found one that I was able to compile and get running on my smartphone.
After that things became more easy for me, since I had experience with creating Android apps in the past.
I know at what specific code structures I had to look and how I could modify them to create an app that allowed for 2 way communication via Bluetooth.
.